What Do You Need to Start Shooting a Bow? Beginner Gear and Safety Basics

Table of Contents
Start with a safe place to shoot
Use a range when you can
The first thing a new archer needs is not a fancy bow. It is a place where an arrow can stop every time. A real archery range is the easiest answer because the lanes, target line, and downrange area are already set up for the job. If you shoot at home, treat the setup with the same care: you need clear lanes, a solid backstop, a target that stays put, and a space where no one can wander behind it. A backyard can work only when the overshoot area is controlled and the backstop is large enough for the worst shot, not the best one. If you are still comparing bow styles, read our traditional vs compound bow guide before buying.
Judge the miss, not the perfect shot
Pick a spot with good light, level footing, and enough room to stand and draw without bumping fences, trees, walls, cars, pets, or people. Never shoot toward hard surfaces that can send an arrow back at you. A target on a shed wall, garage door, or random dirt bank sounds convenient until a miss turns into a ricochet or a lost arrow. If the safe space feels small, it probably is. Start where the consequences of a miss are still under control.
Choose a bow that fits a beginner
Start lighter than your ego wants
For most new shooters, a light recurve or a light compound bow is the sensible start. A recurve is simple, direct, and easy to understand. A compound gives more let-off and can hold steadier at full draw, but it also brings more parts, more adjustment, and usually more need for setup help. Either can be right. The better question is which one fits your hands, your goals, and the kind of coaching you can get nearby.
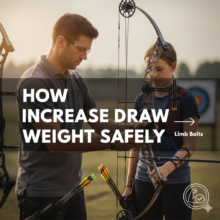
Do not chase draw weight. Many beginners buy a bow that looks manageable in the shop and then struggle to draw it ten times in a row with good form. A bow that is too heavy teaches bad habits fast. Start light enough that you can hold the bow shoulder level, draw smoothly, anchor the same way each time, and let down without panic. If the string pulls your shoulder out of line or your sight picture breaks down after a few shots, the bow is too much for day one.
Choose around your first year
If you are choosing between styles, think about the first year, not just the first afternoon. A recurve is often easier to learn with bare basics and a coach beside you. A compound may suit a shooter who wants to grow into target rounds, hunting practice, or steadier aiming sooner. What matters most is fit. The grip should sit naturally in the hand, the draw length should feel honest, and the bow should let you repeat your shot without fighting it.
Match the arrows to the bow
Arrow fit is a safety issue
Arrows are not universal. They need to match the bow’s draw weight, your draw length, and the way you plan to shoot. That means spine, length, and point weight all matter. A shaft that is too stiff or too weak will not fly well, and poor arrow match makes every other part of learning harder. A pro shop or coach can help you get close, and the maker’s chart should be your starting point, not a guess.
Keep the first setup simple
For beginners, it is usually smart to keep the arrow setup simple. Use arrows that are long enough for safe clearance at full draw. Choose field points for practice rather than broadheads. Keep the nocks, points, and fletching matched across the set so each arrow feels the same in the hand and behaves the same in the air. Consistency beats cleverness at this stage.
It also helps to label arrows and inspect them every session. Look for cracks, bent inserts, loose points, missing vanes, or damaged nocks. A bad arrow can fail on the string or fly in a way that does not belong in beginner practice. A small habit of checking gear before shooting saves a lot of grief later.
Use arm and hand protection
Protect the forearm and fingers
Protection is not optional just because the shot is short. A bow can slap the inside of the forearm, pinch fingers, or scrape skin in a way that ruins a session. An arm guard helps keep the string from biting your forearm when form is still rough. It is cheap, light, and worth wearing from the start, especially with recurve bows and other finger-shot setups.
Match the release method to the bow
For finger protection, use a glove or tab with a recurve or longbow. It makes the draw smoother and keeps the string from chewing up your fingertips as you learn. With a compound, most beginners use a mechanical release aid because it helps with consistency and keeps the shot simple once the bow is set up correctly. Do not improvise with random accessories. Use the right tool for the bow you are actually shooting.
Even with protection, the shot should feel calm and controlled. If your bow hand twists, your fingers clamp down, or the string leaves a sting on your arm every time, stop and fix the setup or your form. Gear should reduce friction, not cover up a problem you need to solve.
Set up a target and backstop
Start close and make misses boring
A beginner target does not need to be fancy. It does need to stop arrows cleanly and repeatedly. A bag target, layered foam block, or quality 3D target can all work, as long as the face is large enough for your current skill level. Start close. Ten to fifteen yards is plenty for the first sessions. That distance gives you room to learn the shot without asking for a long-range miracle.
Use a real backstop
The backstop matters as much as the target. Use a net, a purpose-built wall, or a thick backstop that can handle misses. A target alone is not enough if an arrow can sail past it into open space. Keep the target at a height that makes sense for the lane, and make sure the ground in front of and behind it is free of clutter. The setup should make arrow retrieval simple, not dramatic.
Keep the target face fresh enough that you can read your hits. A torn or collapsed face hides feedback and makes it harder to learn. Beginners improve faster when they can see where the arrows land and adjust one thing at a time. Clean feedback is part of safe shooting because it keeps you from guessing.
Learn the range rules before you shoot
Follow the line commands
Range rules are not decoration. They are the structure that keeps a line of archers safe and organized. At a range, wait for the all-clear before stepping forward. Keep arrows pointed downrange. Never nock an arrow until the lane is clear. If someone calls a ceasefire, stop immediately and let the line settle before doing anything else. Those habits should feel automatic.
Use the same rules at home
On a private setup, use the same discipline. Shoot only when everyone knows the line is hot. No side conversations, no surprise walks downrange, and no one crossing in front of a shooter who is at full draw. If you are teaching a new archer, make them repeat the rules out loud before the first arrow. Clear expectations prevent dumb moments.
Good range habits also include how you retrieve arrows. Walk together. Count the arrows before and after. Pull arrows only when no one is on the line. Stand to the side of the target when pulling, and make sure your hand stays clear of the arrow tips. Small routines keep the day smooth and reduce careless mistakes.
Take lessons early
Let a coach catch form problems
A single lesson can save weeks of trial and error. A coach can spot a grip problem, a draw-length issue, a crooked anchor, or a posture mistake that a beginner often cannot feel. Archery looks simple from a distance, but the first few shots teach patterns that are hard to unlearn later. Good instruction shortens that learning curve.
Know what a beginner lesson should cover
Look for a club, range, or shop with a coach who teaches beginners regularly. A proper lesson should cover range safety, stance, nocking, drawing, anchor, release, follow-through, and arrow inspection. If you are shooting a compound, the coach should also help with basic setup, peep alignment, and release handling. If you are shooting a recurve, they should help you keep the bow shoulder relaxed and the string path clean.
Lessons are also useful because they help you set realistic expectations. The first goal is not a tight group. The first goal is a safe, repeatable shot. Once the shot is repeatable, the groups start to shrink.
Build good practice habits
Practice one thing at a time
Practice should be short enough that you stay focused and long enough that you finish with useful notes. Ten clean shots with attention are better than fifty tired ones. Start close to the target and work on one detail at a time. That may be stance on one day, anchor on another, and follow-through on the next. Beginners improve faster when they stop trying to fix everything at once.
Stop before tired shots become habits
Use a blank bale or a large target face when you need to work on form without chasing score. This lets you learn what a steady draw feels like and what a clean release feels like. When the shot starts to fall apart, stop. Bad reps are expensive because they get practiced too. Quality counts more than volume in the beginning.
Keep a simple log of bow settings, arrow type, distance, and what felt off. That record helps you see patterns. Maybe the groups open up when you rush the anchor, or maybe a certain arrow weight feels cleaner. Notes are boring in the best way. They turn guesswork into progress.
Finally, leave room for patience. The best beginner archers are not the ones who force faster distance or heavier gear. They are the ones who respect the setup, take coaching, and keep the same little rituals every time they step to the line. Archery rewards calm hands and repeatable habits.
Source links
Official references used for safety and rules context: