Primitive Survival Shelters: Safe Emergency Options and When to Use Them

Primitive Survival Shelters: Safe Emergency Options and When to Use Them
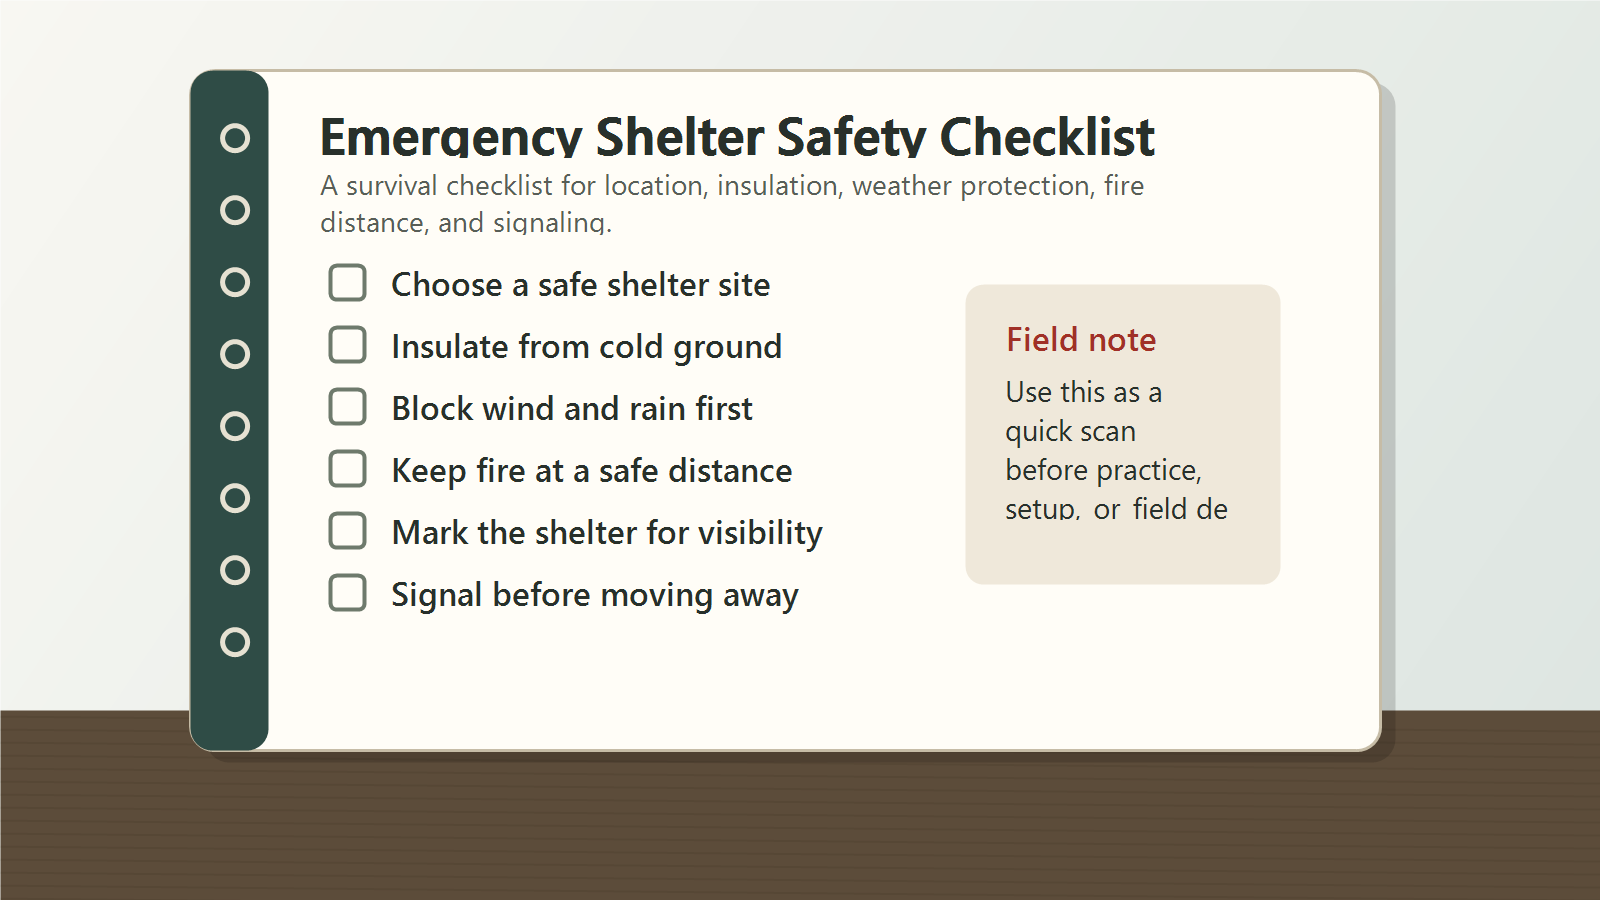
When weather turns bad and a safe exit is not immediate, a shelter is not a badge of toughness. It is a short-term risk control measure. The goal is simple: reduce exposure, conserve heat, stay visible enough to be found, and avoid making a bad situation worse. That means choosing the least risky shelter you can build, in the least risky place, with the least effort needed to get through the next hours.
This article is written for emergency use, not for fantasy survival contests. It favors practical shelter choices, weather awareness, insulation, fire caution, and a quick return to a safer plan when rescue or evacuation is possible. For broader emergency planning, see Ready.gov emergency preparedness. For cold-weather safety guidance, see the National Weather Service cold weather safety page and the National Park Service’s cold-weather and wilderness safety materials.
Table of Contents
Why Shelter Matters Fast
Stopping exposure is often the first win
In a true emergency, a shelter buys time. It can slow heat loss, cut wind, reduce rain or snow contact, and create a place to rest while you assess the next move. That matters because cold stress can build quietly. NOAA notes that extreme cold can become dangerous fast, and the National Weather Service warns that people exposed to extreme cold can develop frostbite and hypothermia in minutes. A shelter does not solve the problem by itself, but it can slow the clock enough to make better decisions.
Shelter is not camp comfort
Primitive shelters are not a reason to stay put when leaving is safer. They are a temporary answer for weather, fatigue, injury, darkness, or distance. If you can reach a road, a maintained structure, or a trailhead before dark and without risking injury, that is often the better choice. The point is not to prove endurance. The point is to keep the body functional until help arrives or until you can move safely.
Match the shelter to the risk
A windbreak may be enough in cool rain. A debris shelter may be more appropriate in steady cold. A tarp rig can work if you have one, but this article focuses on primitive options that use natural materials and simple tools. The right choice depends on location, weather, available insulation, and how much energy you can safely spend. If a shelter plan leaves you exhausted, soaked, or exposed for too long, it is the wrong plan.
First Decisions Before You Build
Check weather, light, and time
Before you cut a branch or gather leaves, ask three questions: what is the weather doing now, what will it do in the next few hours, and how much daylight do you have left. If heavy rain, strong wind, lightning, flash flooding, or fast temperature drop are on the way, the shelter needs to be fast and conservative. If you have only a short window of daylight, choose a simpler build that can be finished correctly instead of an elaborate design that leaves you half protected.
Read the terrain first
Good shelter sites are dry, sheltered, and out of obvious hazard paths. Look for slight high ground, natural wind breaks, and ground that drains rather than pools. Avoid gullies, dry stream beds, and low spots that can channel cold air or water. In mountain or coastal settings, even a short walk to a safer spot can be worth the effort if it reduces flood, rockfall, or wind risk. The safest shelter is often the one that starts with the safest site.
Budget your energy
A tired, cold person can make poor shelter choices. If you are wet, shivering, injured, or running low on daylight, keep the build small and efficient. Save energy for insulation, a signal fire if conditions allow, and navigation or rescue steps. A shelter that consumes every remaining ounce of strength can become a trap. The work should leave you warmer and more stable, not broken down and unable to move if the situation changes.
Basic Primitive Shelter Types
Lean-to shelter
The lean-to is one of the simplest emergency shelters. It uses a ridge pole or support frame and an angled roof of branches, bark, brush, or other natural material. It sheds some wind and rain and can be built quickly. The open side should face away from the worst weather, and the rear should be low enough to block wind. For emergency use, a lean-to is best when you need speed and partial cover, not perfect warmth.
Debris hut
A debris hut is usually the better cold-weather primitive option because it focuses on insulation. The frame is small, low, and covered with thick layers of leaves, grass, pine needles, or other dry material. A well-built debris shelter can hold body heat better than a larger open structure because smaller volume is easier to warm. The tradeoff is labor. If you are already wet, weak, or racing weather, the debris hut may still be worth the effort, but only if you can finish it before exposure gets worse.
Snow shelter
In deep snow, snow can become an insulating material instead of a threat, but only if conditions and skill are right. A snow trench, snow cave, or quinzhee can offer strong wind protection and surprisingly good warmth. These shelters require stable snowpack and careful construction. They are not casual projects. If the snow is unstable, the slope is risky, or the weather is warming and collapsing snow, choose a different option. Snow shelter failure can be deadly.
Windbreak and open shelter
Sometimes the right answer is not a full shelter at all. A wall of logs, brush, rock, or snow can block the wind enough to make a sleep system or rest plan workable. This is common when the main problem is wind chill rather than deep cold. A windbreak should be paired with ground insulation and a plan to keep your core dry. By itself, it is not much against rain, sleet, or prolonged freezing weather.
Insulation, Weather, and Body Heat
Start with the ground
Ground contact drains heat fast. Before you worry about walls, build a barrier between your body and the earth. Dry leaves, pine boughs, grass, bark, a pack, a folded jacket, or a pile of natural bedding can all help. The goal is to create a thick, dry layer under and around the sleeping area. If the ground is cold and wet, a decent roof may still leave you losing heat from below. That is one of the most common shelter mistakes.
Use trapped air, not just bulk
Insulation works because it holds air in place. That is why a pile of dry debris can work better than a thin mat of leaves spread flat. Build enough depth to trap air, and protect that layer from being crushed by your body weight or flattened by rain. Keep the shelter low enough that your body can warm the space around you. Bigger is not better when you are trying to hold heat in a small emergency shelter.
Wet cold is a different problem
Cold rain, sleet, wet snow, and saturated ground are more dangerous than dry cold at the same temperature. Once clothing and bedding are wet, heat loss accelerates. In that case, the shelter must prioritize cover, drainage, and separation from wet soil. If you can, remove soaked layers only if you have dry replacements or enough cover to manage the transition safely. A dry shelter with a wet person is better than a dry person exposed to driving rain, but the best outcome is a dry person inside a dry shelter.
Ventilation matters even in cold weather
Closed shelters can trap smoke, damp air, or condensation. If you are using any fire nearby, or if the shelter is very tight, leave a route for air exchange. The balance is delicate: too much airflow and you lose heat, too little and you risk smoke buildup or poor air quality. That is one reason primitive shelters need simple, careful layouts. They should keep weather out without turning the space into a sealed hazard.
Fire, Light, and Tool Safety
Use fire only if conditions support it
A fire can help with warmth, drying, morale, and signaling, but it also adds risk. Pair that caution with basic survival knife skills so tool use stays controlled instead of careless. Dry wind can spread embers. Low overhead brush can catch. Wet ground can hide root fires. If you are considering fire near a shelter, keep it small, contained, and well away from flammable walls or bedding. Never build a fire so close that it weakens the shelter or fills it with smoke. If you cannot control the burn area, skip the fire.
Tool discipline prevents avoidable injuries
Knives, saws, hatchets, and improvised cutting tools can create shelter fast, but they also create blood fast if you are tired or cold. Work slowly enough to keep your grip, especially when your hands are numb. Cut away from your body, keep bystanders or helpers clear, and stop if you are losing coordination. A minor cut in warm daylight can become a serious problem if it happens when you are cold, wet, and alone.
Use light to see, not to burn power
If you have a headlamp or flashlight, save battery by using low settings when you can. Light helps with safe movement, knot work, and fire management. It also helps rescuers notice your position if used wisely. But a shelter plan should not depend on keeping bright lights on all night. Batteries fail, weather drains them, and constant light can reduce your ability to rest. Keep your lighting simple and intentional.
Site Hazards to Avoid
Do not build where water wants to go
Flash flooding can turn a safe-looking site into a trap. Avoid stream channels, low saddles, and flat depressions that collect runoff. If the ground is already damp, check for signs that water has recently moved through the area: scoured soil, trash lines, driftwood, or bent grass. If there is any doubt, move higher. A shelter that survives the night is useful. A shelter in a flood path is not.
Watch for falling hazards and unstable ground
Rock ledges, dead trees, loose slopes, and snow cornices all deserve respect. Do not park yourself under a dead limb because it happens to be convenient. Do not dig into snow or soil that may collapse. Do not wedge a shelter into a place where rock, ice, or timber can roll downhill into you. The safest shelter location is usually the boring one: stable, simple, and away from the obvious hazards.
Respect wildlife and insect activity
An emergency shelter should not be placed over nests, dens, anthills, or thick brush that you cannot inspect. Food scraps, fish remains, and strong scents can draw attention from animals. If possible, keep the sleeping area clean and store food or bait away from the shelter. In warm months, insect pressure can become a serious comfort and safety issue, especially near stagnant water. Choose a site that lets you stay alert and unbothered.
Check legal and land-use limits
On public land, in parks, or on private property, there may be rules about camping, collecting dead wood, cutting live vegetation, or using fires. Emergency use is not a blank check to ignore land management or safety rules. If you are in a park, preserve, refuge, or other managed area, use the least damaging option possible and leave the site as intact as you can. If the area has strict fire or shelter restrictions, those rules still matter unless an immediate life-threatening situation forces a different decision.
When Not to Build a Shelter
Keep moving if movement is clearly safer
If the route to a building, vehicle, trailhead, ranger station, road, or other safe location is short and realistic, moving may be better than building. That is especially true if you are dry, daylight remains, and the terrain is manageable. A shelter is a stopgap, not a life goal. When the better choice is to shorten exposure by getting out, do that instead of spending time on a structure you may not need.
Injury changes the plan
If you are injured, hypothermic, or too weak to build properly, simplify hard. The shelter should not require risky climbing, repeated bending, or heavy lifting. A small windbreak, insulated hollow, or protected resting place may be enough while you wait for rescue. The safer route may be to stay put and make yourself easier to find rather than burn energy on a complex shelter you cannot maintain.
Some weather says “do not wait”
Lightning, rising water, avalanche risk, severe wind, or rapidly dropping temperatures can make an exposed site dangerous even if a shelter is nearby. NOAA and the National Weather Service both stress paying attention to weather warnings and changing conditions. If the situation is escalating fast, shelter and movement have to be judged together. When the next hour looks worse than the last, do not cling to a build just because you already started it.
Rescue, Signaling, and Staying Found
Make yourself easier to find
Once you have basic protection, think about visibility. Bright clothing, contrast against snow or brush, open sightlines, and deliberate signal markers all help. If you have a whistle, mirror, flashlight, or phone, use them in a way that matches the weather and terrain. A shelter that hides you too well can slow rescue. The safest shelter is one that protects you without making you invisible to searchers.
Use any communication option you have
If your phone works, use it early. Share location if possible, conserve battery, and keep messages short and useful. If you have satellite communication or a beacon, follow the device’s instructions and keep it accessible. Do not bury your only communication device under bedding or gear. Rescue is easier when you stay organized and available to communicate the moment a signal returns.
Decide whether to stay put or move
In many cases, staying near a known point is better for rescue than wandering. If you are lost, injured, or in poor visibility, a stationary shelter may make you easier to locate. If you have a definite route to safety and the terrain is good, movement can still make sense. The choice depends on risk, weather, and your ability to navigate without getting more lost. There is no heroic answer worth more than a clear-eyed one.
When to call for rescue
Call for help as soon as the situation crosses from inconvenience into real danger: injury, inability to warm up, loss of daylight with no safe route, exposure to extreme cold or flooding, or getting lost beyond a reasonable self-rescue window. You do not need to wait until you are collapsing. The point of a shelter is to keep you stable while help is organized. Asking early is often the smartest move.
Practice, Planning, and Leave No Trace
Practice before the emergency
Primitive shelters are much easier to understand before your hands are cold and your judgment is slipping. Practice in safe conditions, on legal land, with daylight and a backup plan. Learn how long it takes to build a lean-to, how much insulation you really need, and how local materials behave when wet. A practice run reveals what your gear and body can do without forcing you to learn the hard way during an actual incident.
Pack for emergency, not for ego
A small emergency kit can reduce the need for improvised shelter in the first place. A lighter, cordage, insulating layer, compact tarp or bivy, and a way to signal for help can change the entire problem. Ready.gov’s emergency preparedness guidance is a useful reminder to plan for weather, communication, and basic survival needs before trouble starts. The less you depend on perfect natural materials, the more options you keep open.
Leave the site as intact as possible
Emergency use does not erase responsibility. Avoid cutting live trees unless there is no better option for safety. Use fallen material first. Do not scar trunks, trench the ground without need, or leave fires burning. When you depart, dismantle what you can and remove obvious litter or cordage. A lean emergency shelter can be built with care and still leave a light footprint.
A simple rule set helps
Use the smallest safe shelter, in the safest site, for the shortest necessary time. Keep insulation dry. Keep fire small or skip it. Keep rescue in mind from the start. If a choice makes you colder, more exhausted, or harder to find, it is probably the wrong choice. That rule is plain, but it is also a good way to avoid the romance that gets people hurt.
Sources
Primary safety references used for this article:
- Ready.gov emergency preparedness
- National Weather Service Cold Weather Safety
- National Park Service wilderness and cold-weather safety
The article content is written as general safety guidance. Local rules, trail conditions, park regulations, and emergency instructions from responders always take priority over any generic shelter advice.