Reflex Sight vs Red Dot: What Is the Difference?

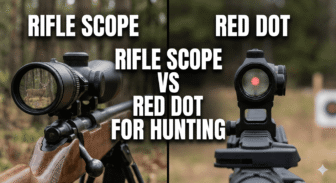
A reflex sight and a red dot sight are closely related, but the words are not always used the same way. In everyday shooting language, “red dot” often means any non-magnified optic with an illuminated aiming dot. Technically, many red dots are reflex sights, while prism sights and holographic sights use different optical designs.
Table of Contents
- Quick Answer
- What the Terms Mean
- Plain-English Difference
- What Is a Reflex Sight?
- Open Reflex Sight Traits
- What Is a Red Dot Sight?
- Tube Red Dot Traits
- Reflex Sight vs Red Dot: Main Differences
- Comparison Points
- Which One Fits Your Use?
- Better Fit by Scenario
- Mounting, Zeroing, and Safety
- Zeroing Checks
- Common Mistakes
- FAQ
- Is a reflex sight the same as a red dot?
- Is an open reflex sight better than a tube red dot?
- Do red dots have eye relief?
- Can you use a red dot with both eyes open?
- Which sight is best for beginners?
- Sources
- Optic Choice Checklist
Quick Answer
Most reflex sights are red dot sights, but not every optic sold as a red dot is an open reflex sight. Open reflex sights are compact and fast, tube-style red dots are more enclosed and often tougher against weather, prism sights use an etched reticle and magnification options, and holographic sights use a different projection system.
Open reflex: light, fast, wide window, more exposed.
Tube red dot: enclosed body, simple aiming dot, often durable.
Prism sight: etched reticle, eye relief matters more, may have magnification.
Holographic sight: different reticle projection design, usually larger and battery-dependent.
One Sentence to Remember
“Reflex” describes how the optic works; “red dot” describes what you see through it. That is why a sales page can honestly call the same optic both things, and why two shooters can argue about the difference without either being wrong. When you are comparing two products, ignore the label on the box and compare the four things that actually change your experience behind the gun: housing style (open vs enclosed), reticle type (projected dot vs etched glass), window size, and mounting footprint.
What the Terms Mean
The confusion comes from marketing and casual use. Shooters often call any unmagnified illuminated optic a red dot. Reflex sight is a more specific optical idea: the aiming point is reflected back to the shooter’s eye by the sight’s lens system.
Plain-English Difference
If someone says “red dot,” ask what style they mean: open reflex, tube red dot, prism, or holographic. The housing, reticle, battery life, durability, eye relief, and mounting height can matter more than the label.
How a Reflex Sight Actually Projects the Dot
Inside a reflex sight, a small LED emitter sits at the bottom (or occasionally the top) of the housing and fires light forward onto the rear surface of the front lens. That lens carries a coating that reflects the LED’s specific wavelength back to your eye while letting almost all other light pass through, which is why the glass often looks faintly blue, bronze, or green from the front. The lens is slightly concave, so the reflected light is collimated — the rays leave the lens roughly parallel. That is the whole trick behind “parallax-free” marketing claims: because the light is near-collimated, the dot stays close to your point of impact even when your eye is not perfectly centered in the window.
In practice, no consumer reflex sight is perfectly parallax-free at every distance. Move your head far off-axis and you will usually see a small amount of dot shift, most noticeably on very compact pistol optics with tiny windows. It is rarely enough to matter at defensive or brush-hunting distances, but it is worth knowing before you chase a “zero shift” that is really just head position. Optic makers such as Aimpoint publish plain-language explanations of collimated reticles for anyone who wants the deeper optical background.
What Is a Reflex Sight?
A reflex sight reflects an illuminated aiming point toward the shooter so the dot appears on the target. The sight can be open, with a single exposed viewing window, or enclosed in a tube-like housing. Reflex sights are popular because they are quick to acquire and can be used with both eyes open.
Open Reflex Sight Traits
Very fast sight picture at close range.
Compact and light for pistols, shotguns, and carbines.
Large visual window for the size.
Lens and emitter may be more exposed to rain, mud, dust, or lint.
Often relies heavily on battery and brightness settings.
Enclosed Emitter Reflex Sights
The biggest change in the red dot market over the past few years has been the rise of the enclosed emitter reflex sight — a compact optic that keeps the fast, single-window reflex layout but seals the LED behind glass on both ends. Aimpoint’s ACRO pattern and the wave of similar closed-emitter pistol optics that followed it gave shooters a way to get open-reflex speed without the classic open-reflex failure mode: a raindrop, snowflake, or bit of pocket lint sitting directly on the emitter and smearing or blanking the dot.
The trade-offs are honest ones. Enclosed emitter optics are heavier and taller than the smallest open reflex sights, they usually cost more, and the deeper housing can make the window feel like you are looking down a short hallway compared with a wide-open pistol reflex. If you hunt in rain, snow, or salt spray — think waterfowl blinds and coastal work — the sealed design earns its weight quickly. If you carry concealed in dry country and want the lowest profile possible, an open reflex is still a defensible choice as long as you wipe the lens before you need it.
What Is a Red Dot Sight?
A red dot sight uses an illuminated aiming point, usually red but sometimes green or another color. Many red dots are reflex sights, but some optics grouped under “red dot” use prism or holographic designs. That is why comparing “reflex vs red dot” can be messy unless you name the exact sight type.
Tube Red Dot Traits
More enclosed than open reflex sights.
Often easier to protect with lens caps.
Works well on rifles, shotguns, and some hunting setups.
May feel slower than a large open window for some shooters.
Usually simple: dot, brightness control, battery, and mount.
Where Prism and Holographic Sights Fit In
Two other optic families get swept into the “red dot” bucket, and both behave differently enough that it is worth separating them out before you spend money.
Prism Sights
A prism sight uses a glass prism instead of a series of lenses to fold the light path, which lets the manufacturer build a short, stubby optic with 1x to about 5x magnification. The critical difference is that the reticle is etched into the glass, then optionally illuminated from behind. Because the reticle physically exists on the glass, it stays usable if the battery dies, and it appears as a crisp shape rather than a projected point of light. That etched reticle is the reason prism sights are the standard recommendation for shooters whose eyes turn a projected dot into a starburst or comet.
The cost is eye relief and eye box. A prism sight demands a fairly repeatable head position, so mount height and stock length matter more than they do with a reflex. If you shoot from awkward or braced positions, work through your steady body positions with the optic mounted before you commit to a base height.
Holographic Sights
A holographic sight uses a laser diode to illuminate a recorded holographic image of the reticle, which is reconstructed on the viewing window. Practically speaking, that produces a very fine center dot inside a larger ring, excellent behavior behind a magnifier, and a reticle that still works even if the front window is cracked or partly obscured. The downsides are real: holographic sights draw far more current than LED reflex sights, so runtimes are measured in hundreds or low thousands of hours instead of tens of thousands, and the housings are bigger and heavier. They are a strong fit for a carbine you will pair with a 3x magnifier, and a poor fit for a lightweight woods gun you want to carry all day.
Reflex Sight vs Red Dot: Main Differences
The better comparison is usually open reflex sight vs tube red dot. Both can be fast, but they solve slightly different problems. Open reflex sights favor compact speed. Tube red dots favor protection, simple mounting, and all-weather coverage.
Comparison Points
Window: open reflex sights often feel wider and less boxed-in.
Protection: tube red dots better protect the emitter and lenses.
Weight: open reflex sights are often lighter.
Weather: enclosed optics usually handle debris and rain better.
Mounting: pistol slides, shotgun receivers, and rifle rails may favor different footprints.
Eye relief: most non-magnified red dots are forgiving, while prism sights need more exact eye position.
Side-by-Side Comparison Table
| Feature | Open reflex | Enclosed reflex | Tube red dot | Prism sight | Holographic |
|---|---|---|---|---|---|
| Reticle source | Projected LED | Projected LED | Projected LED | Etched glass, optional illumination | Laser-lit hologram |
| Typical magnification | 1x | 1x | 1x | 1x–5x | 1x |
| Eye relief / eye box | Very forgiving | Very forgiving | Forgiving | Restricted, must be repeatable | Very forgiving |
| Works with dead battery | No | No | No | Yes (etched reticle) | No |
| Weather and debris resistance | Weakest (exposed emitter) | Strong | Strong | Strong | Strong |
| Typical weight | Lightest | Light–medium | Medium | Medium–heavy | Heaviest |
| Typical battery life | Very long (years on low settings) | Very long | Very long | Moderate | Shortest |
| Best-fit platform | Pistols, turkey guns, lightweight carbines | Duty pistols, foul-weather guns | Carbines, slug guns, rimfires | Astigmatism, mixed-distance rifles | Carbines paired with a magnifier |
| Common weak point | Lens/emitter fouling | Bulk and cost | Tunnel feel, height | Head position discipline | Battery drain, size |
Use the table as a shortlist tool, not a scorecard. Two optics in the same column can perform very differently depending on glass quality, coating, dot roundness, and how well the adjustment turrets hold zero under recoil.
Dot Size: What MOA Actually Means for You
Dot size is measured in MOA (minute of angle), and one MOA covers roughly one inch at 100 yards, two inches at 200 yards, and so on. A 6 MOA dot therefore blankets about six inches of a target at 100 yards — plenty precise for a shotgun or a close-range pistol, and too coarse for threading a shot between branches at distance.
- 2–3 MOA: the general-purpose choice for carbines and rifles. Precise enough for small targets, still fast enough for close work.
- 3.25–5 MOA: the sweet spot for most pistols and defensive carbines. Easier to find during a fast presentation.
- 6–8 MOA: shotguns, turkey guns, and close-cover hunting where speed beats precision.
- Circle-dot reticles: a big outer ring for fast acquisition with a small center dot for precision, at the cost of slightly higher battery draw.
A common mistake is buying the smallest dot available because it sounds more accurate. In practice, a tiny dot is harder to pick up under stress, harder to see against a cluttered background, and more likely to be washed out by bright sun. Match the dot to the job, not to the spec sheet. If your intended shots regularly stretch past 150 yards, you are usually better served by picking a magnified optic than by squinting through a 1 MOA dot.
Astigmatism, Green Dots, and Dot Clarity
If your dot looks like a starburst, comma, or cluster of smaller dots rather than a clean circle, the optic is probably fine — your eye is bending the collimated light. This is extremely common and does not mean you cannot shoot a dot well. A few practical adjustments help:
- Turn the brightness down. Over-driving the LED is the single biggest cause of dot bloom, and most shooters run three or four settings hotter than they need.
- Try a green emitter. Many eyes resolve green more cleanly than red, and green reticles often appear brighter at the same power draw.
- Consider a larger dot with a defined edge, or a circle-dot reticle, so the shape is easier for your brain to center.
- Test an etched-reticle prism sight, which sidesteps the problem entirely because there is no projected light to distort.
Before you spend money, work through the practical fixes and eyewear considerations covered in our breakdown on dealing with a blurry aiming point. Where possible, look through the exact model in person — astigmatism is individual, and two shooters can see the same optic completely differently.
Battery Life, Shake-Awake, and Power
Modern LED red dots are remarkably efficient, and most quality units on the market now advertise runtimes measured in years on a mid brightness setting from a single CR2032 or CR1632 cell. Treat those numbers as ideal-condition estimates: cold weather, high brightness settings, and cheap batteries all shorten real-world runtime, sometimes dramatically. Lithium coin cells hold up far better than alkaline in freezing conditions, which matters a great deal on a cold-weather deer stand where the optic sits exposed for hours.
A few habits that keep the dot on when you need it:
- Use motion activation, but verify it. Shake-awake is now standard on most mid-tier and better optics. Set the gun down for the full timeout period and confirm the dot returns instantly when you pick it up.
- Change the battery on a schedule. Pick a date you will remember — the start of your season, or a birthday — and replace the cell whether or not it is dead.
- Check the battery tray gasket. A pinched or dried-out O-ring is a more common cause of water intrusion than a failed housing seal.
- Carry a spare in the mount or grip. Some optics store a spare cell under the mounting plate; if yours does not, tape one inside the stock or in your kit.
- Confirm zero after a battery change on optics where the tray sits under the mount or the emitter housing, since removing screws can shift point of impact.
If you build a habitual pre-trip check, fold battery status into the same run-through you use for the rest of your field packing list.
Which One Fits Your Use?
Choose based on the firearm, distance, environment, and how you actually shoot. A compact open reflex sight may be excellent on a handgun or turkey shotgun. A tube red dot may make more sense on a carbine, slug gun, or rough-weather setup. A prism sight can help if you want an etched reticle or slight magnification.
Better Fit by Scenario
Pistol: compact reflex sight, if the slide and holster support it.
Home/range carbine: tube red dot or enclosed reflex sight.
Turkey or slug shotgun: open or enclosed reflex, depending on weather and recoil rating.
Astigmatism concerns: test prism, etched reticle, or different dot designs before buying.
Longer distance: consider magnifier compatibility, prism sights, or a low-power variable optic.
If you are also comparing magnified optics, read our guide on eye relief for scopes and rangefinders.
Scenario Notes From the Field
A few refinements that only show up once you have used these optics across different conditions:
- Turkey shotguns benefit from a large dot and a low mount. A tall optic forces you to lift your head off the stock, and a head-up position is exactly what causes high misses on a tucked-in gobbler’s head.
- Slug and brush guns take a beating from recoil. Confirm the optic’s stated recoil rating covers 12-gauge slugs or heavy magnum loads, not just 5.56.
- Deer rifles in thick cover are one of the strongest arguments for a 1x optic, especially if you still-hunt or shoot from a stand where a snap shot is likely. Match the choice to the country you hunt — the considerations shift noticeably across different types of terrain.
- Wingshooting is a special case. A dot can help on a dedicated turkey or waterfowl gun shot like a rifle, but for swing-through shooting on flying birds most shooters are better served by a bead and the fundamentals covered in our notes on breaking more birds cleanly.
- Rimfires and trainers are where a cheap red dot causes the most frustration. Low recoil hides mount problems until you try to zero and discover the adjustments are not tracking.
Mounting, Zeroing, and Safety
A good sight still needs a secure mount and a confirmed zero. Use the correct footprint, base, screws, torque guidance, and thread-locking method if recommended by the manufacturer. After mounting, confirm zero with live fire in a safe range setting.
Zeroing Checks
Unload and verify the firearm before mounting work.
Use the correct mount height for your cheek weld or presentation.
Confirm the dot is visible in normal lighting and bright sunlight.
Zero at a distance that matches your firearm and use case.
Recheck zero after recoil, travel, or battery/mount changes.
Understanding Optic Footprints
“Footprint” means the pattern of screw holes and recoil lugs on the bottom of the optic, and it is the number one source of buyer’s remorse in the pistol optic world. A few patterns dominate the market:
- Trijicon RMR pattern: the long-standing full-size standard, widely supported by adapter plates.
- Shield RMSc pattern: the compact/micro pattern used on most slim, single-stack-sized carry optics.
- Aimpoint ACRO pattern: a dovetail-style enclosed-emitter interface, distinct from the screw-hole patterns above.
- Docter / Noblex pattern: common on European optics and some older adapter plates.
- Picatinny / rail mounts: the simple answer for rifles and shotguns, where absolute co-witness or lower-third co-witness height is the real decision.
Before you buy, confirm three things in this order: does the optic’s footprint match your slide cut or plate, does a holster exist that clears the optic, and do the screws that ship in the box fit your specific plate. A common mistake is reusing screws that are slightly too long, which bottoms them out against the slide and leaves the optic loose no matter how much you torque them. Use a torque driver at the manufacturer’s stated value — usually in the 12–20 in-lb range for optic screws — and follow their thread-locker guidance rather than guessing.
Zeroing Distances Worth Knowing
There is no single right answer, but these are sensible starting points:
- Pistol red dot: 15 or 25 yards, depending on your realistic distances.
- 5.56 carbine: 50 yards, giving a near-identical impact at 200 with a manageable arc between.
- Shotgun with slugs: 50 yards.
- Turkey gun with a patterning load: 25 or 30 yards, verified on paper with the exact shell you will hunt with.
- Rimfire: 25 or 50 yards.
Shoot at least three to five round groups before you chase adjustments, and let the barrel cool between groups on a light-profile rifle. If your groups are wandering rather than grouping tight and off-center, the problem is usually position or mount, not the optic. New shooters setting up a first zeroing session will find the necessary support gear covered in our range day essentials rundown — a stable rest and a proper target frame remove most of the variables.
Care, Cleaning, and Field Maintenance
Red dots and reflex sights are low-maintenance, but they are not maintenance-free.
- Clean the lenses with a blower or lens pen first, then a microfiber cloth. Grit dragged across a coated lens leaves permanent scratches.
- Avoid ammonia-based glass cleaners. They can attack lens coatings and housing seals.
- Keep flip-up covers or a bikini cover on enclosed optics during transport, not while hunting where you may need a fast shot.
- Wipe an open reflex’s emitter well before a hunt and again after rain. A single drop sitting in that recess can double or triple the apparent dot size.
- Check mount screws periodically with a torque driver, especially after a season of hard recoil or travel.
- Store the firearm with the optic switched off if it lacks motion activation, and pull the battery for long-term storage to prevent corrosion in the tray.
Salt air deserves special mention. Coastal and sea-duck environments corrode screws, springs, and battery contacts far faster than inland use, so rinse, dry, and re-oil hardware after those trips — a habit worth building into any saltwater waterfowl outing.
Legal and Regulatory Notes
Optic rules are set at the state level in the United States, and they change more often than most hunters expect. Some states restrict or prohibit illuminated reticles or magnified optics during specific muzzleloader or primitive-weapons seasons; others regulate optics on crossbows or during archery seasons. Non-magnified red dots are broadly permitted for general firearms seasons, but never assume — check your state wildlife agency’s current regulations booklet each year before you mount an optic on a season-specific gun. Federal migratory bird rules published by the U.S. Fish and Wildlife Service govern waterfowl seasons and equipment, while state agencies handle big game specifics.
Separately, if you plan to carry a pistol with a mounted optic, confirm that your holster fully covers the trigger guard with the optic installed. An optic-cut holster is not optional equipment; a slide-mounted sight changes the draw stroke and the holster fit at the same time.
Budget Tiers: What You Actually Get
Price differences in red dots are not marketing noise, though the returns do flatten out.
- Entry level: usable on rimfires, low-recoil guns, and range toys. Expect dimmer daylight settings, shorter battery life, coarser adjustments, and a real chance the optic loses zero under heavy recoil.
- Mid-tier: where most hunters and recreational shooters should land. Reliable shake-awake, genuinely daylight-visible brightness, honest waterproof ratings, and adjustments that track.
- Duty and premium tier: proven recoil survivability, multi-year battery life, tight quality control on dot roundness, and manufacturer support and warranty that actually mean something.
A useful rule of thumb: do not spend more on the gun than you are willing to trust to the optic on top of it. If a missed opportunity would cost you a season, buy the optic that has been proven on that platform rather than the one with the best spec sheet. The same logic applies across your whole setup, as covered in our look at how equipment quality changes outcomes.
Common Mistakes
Buying by the words “red dot” without checking the actual optic type.
Ignoring mount footprint and firearm compatibility.
Choosing the smallest open reflex for harsh weather without considering emitter exposure.
Turning brightness too high and making the dot bloom.
Forgetting spare batteries or not checking battery life before the season.
Assuming a dot replaces safe target identification and backstop awareness.
A Few More Worth Avoiding
- Mounting the optic too high on a rifle and losing a consistent cheek weld, which makes the dot disappear whenever you rush the mount.
- Zeroing at a distance that has nothing to do with how you actually shoot, then being surprised by holdover in the field.
- Skipping a live-fire confirmation after a bore-sight. Bore-sighting gets you on paper; it does not zero the gun.
- Buying an optic-ready pistol without checking which adapter plate you need — and whether that plate stacks the optic high enough to lose your iron sights.
- Neglecting to practice the presentation. Finding the dot quickly is a trained skill, not a feature of the optic.
FAQ
Is a reflex sight the same as a red dot?
Often, but not always. Many red dot sights are reflex sights, but the red dot category can also include prism or holographic-style optics depending on how people use the term.
Is an open reflex sight better than a tube red dot?
It depends on the firearm and environment. Open reflex sights are fast and compact. Tube red dots are more enclosed and can be easier to protect from weather, dust, and debris.
Do red dots have eye relief?
Most non-magnified red dots are very forgiving about eye position. Prism sights and magnified optics usually need more exact eye relief.
Can you use a red dot with both eyes open?
Yes, many shooters use non-magnified red dots with both eyes open. Training still matters because presentation, target focus, and safe background awareness are separate skills.
Which sight is best for beginners?
A simple, durable red dot with clear controls and a secure mount is often easiest to learn. The best choice depends on the firearm, recoil, weather, budget, and intended distance.
Sources
Reflector Sight Reference – optical background for reflex-style sights.
Red Dot Sight Reference – general red-dot sight background.
NSSF Firearm Safety Rules – safe firearm handling context.
Nikon Understanding Riflescopes – optics terminology background.
Related reading: rifle scope magnification guide and spotting scope vs binoculars guide.
More Frequently Asked Questions
Why does my red dot look blurry or smeared?
Most of the time it is astigmatism in your eye rather than a defect in the optic, especially if the smear rotates when you tilt your head. Turn the brightness down first, then try a green dot or an etched-reticle prism sight. If the blur appears only in low light or only after a rain shower, check the lens and emitter for moisture or fingerprints before blaming your eyes.
Do red dots work at night or in low light?
Yes, and low light is where they shine compared with iron sights, since the illuminated dot is visible long after a front bead disappears. The key is dialing brightness down — a dot set for midday sun will flare badly at dusk and destroy your night vision. Practice adjusting brightness by feel so you are not fumbling with buttons in the last ten minutes of legal shooting light.
Can you add a magnifier to any red dot?
Physically, most 1x optics will work behind a flip-to-side magnifier, but the results vary. Magnifiers enlarge the dot along with the image, so a 6 MOA dot behind a 3x magnifier still covers 6 MOA of target — it just looks bigger. Fine dots and holographic reticles hold up best. You also need matching optical heights on the rail, or the dot will sit off-center in the magnified view.
Should I keep iron sights if I mount a red dot?
On a defensive or hunting gun, backup irons are cheap insurance against a dead battery, a fogged lens, or a cracked window. Absolute co-witness puts the irons through the middle of the dot window; lower-third co-witness parks them at the bottom for a cleaner view. On a range gun or a rimfire, backups are optional.
How long does it take to get fast with a red dot?
Most shooters find the dot slower than iron sights for the first few hundred presentations, then noticeably faster once the index is trained. The fix is dry practice on presentation, not more time behind the trigger — you are teaching your body to bring the gun to the same place every time so the dot is already there when the window arrives.
Are green dots better than red dots?
Neither is universally better. Green tends to appear brighter to the human eye at the same power draw and often looks cleaner to shooters with astigmatism, which is why green options have become common across most product lines. Red usually offers slightly longer battery life and contrasts better against green foliage. If you hunt in heavy timber, red is worth a look; on a range or defensive gun, pick whichever your eye resolves more cleanly.
Will a red dot hold zero on a hard-recoiling gun?
A quality optic with a correct footprint, correctly torqued screws, and the right thread locker will. Failures on magnum rifles and slug guns almost always trace back to the mount, the screws, or an optic that was never rated for that recoil impulse in the first place. Check the manufacturer’s recoil rating before you buy, and re-verify zero after the first box of heavy loads.
Conclusion
The short version: nearly every red dot you will handle is a reflex sight, so the real decision is not “reflex or red dot” but rather open emitter versus enclosed, projected dot versus etched reticle, and which footprint and dot size fit the gun and the conditions you actually shoot in. Open reflex sights win on weight and window size; enclosed reflex and tube red dots win on weather and durability; prism sights win on reticle clarity and dead-battery reliability; holographic sights win behind a magnifier. Match the optic to the job, mount it correctly, confirm zero with live fire, and the label on the box stops mattering.
Your next step: write down your platform, your realistic maximum distance, and your worst expected weather, then shortlist optics using the comparison table above before you shop. Then take the new setup out and confirm zero for real — start with our range day essentials rundown so nothing derails your first session, and put the off-season to work with a few rounds of preseason ground truthing once the optic is dialed.
Optic Choice Checklist
Reflex sight and red dot are often used casually, but the buying decision should focus on use case, mounting footprint, brightness control, battery access, and whether the optic can handle the firearm or platform where it will be mounted.
- Confirm mount/footprint compatibility before buying.
- Check brightness settings for indoor and outdoor use.
- Look at battery access and expected runtime.
- Verify recoil rating for the intended platform.
- Keep iron-sight or backup plans in mind where appropriate.
For general firearm safety habits while mounting or checking optics, use the NSSF safety resources.