Do You Need a Tactical-Style Scope for Hunting? Features Compared
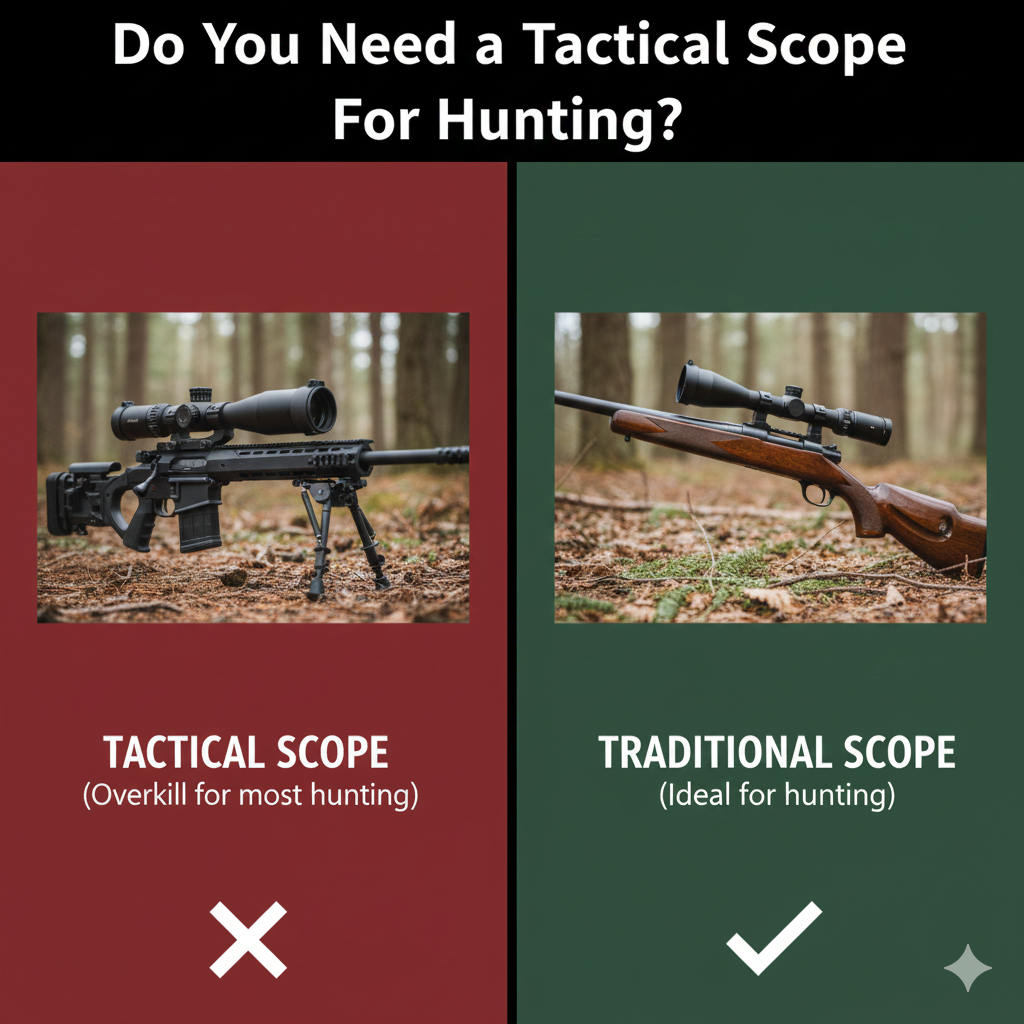
Most hunters do not need a tactical-style scope, but some scope features marketed under that label, such as exposed dialing turrets and detailed holdover reticles, can genuinely help a hunter who shoots at varied or longer known distances. The label matters less than the features. This guide reframes the question toward lawful hunting and walks through which heavier, more adjustable scope features earn their place in the field, which ones add weight and complexity you may never use, and how to match a scope to how you actually hunt.
Table of contents
What Tactical-Style Scope Features Actually Are
Exposed Turrets vs Capped Turrets for Hunting
The accidental-movement tradeoff
Reticles, Holdovers, and Dialing
Weight, Tube Size, and Durability
When Tactical-Style Features Help a Hunter
When They Hurt More Than They Help
Matching a Scope to Your Hunt
Frequently Asked Questions
Do you need a tactical scope for hunting?
Are exposed turrets a problem for hunting?
Is dialing or holding over better for hunting?
Table of contents
What Tactical-Style Scope Features Actually Are
Exposed Turrets vs Capped Turrets for Hunting
Reticles, Holdovers, and Dialing
Weight, Tube Size, and Durability
When Tactical-Style Features Help a Hunter
When They Hurt More Than They Help
Matching a Scope to Your Hunt
Frequently Asked Questions
Final Takeaway
What Tactical-Style Scope Features Actually Are
The phrase tactical-style scope usually describes a set of features rather than a single product type: exposed adjustment turrets you can dial by hand, a detailed reticle with holdover and ranging marks, a larger main tube, a wider elevation adjustment range, and rugged construction. None of these features is exclusive to any one use. They are simply tools, and each one has a clear tradeoff for a hunter who carries a rifle long distances and needs to make an ethical, well-placed shot.
Before comparing features, it helps to be clear about the goal in hunting: a clean, accurate, humane shot within your skill and equipment limits. The features below should be judged against that goal, not against marketing language. For broader firearm safety context, the NSSF firearm safety rules are a solid reference, and a hunter education course covers shot selection and field judgment.
In practice, the industry has blurred these categories so thoroughly that the "tactical vs hunting" split barely survives a look at current catalogs. Plenty of scopes sold as hunting optics now ship with locking exposed elevation turrets, zero stops, and mil-based reticles, while several so-called tactical models have slimmed down to weights a mountain hunter would accept. That is why buying by category name is the least reliable way to shop. Build a short list of the four or five features you will actually use — turret style, reticle detail, focal plane, magnification range, and weight — and then ignore whatever the box calls it. The same discipline applies when you are matching glass to a rifle for any purpose: the spec sheet tells the truth, the marketing copy does not.
A Quick Glossary: MOA, MIL, FFP, and SFP
Most confusion about "tactical" features is really confusion about vocabulary. Four terms cover nearly all of it:
MOA (minute of angle): an angular unit roughly equal to 1 inch at 100 yards, 2 inches at 200 yards, and so on. Most hunting turrets adjust in 1/4 MOA clicks.
MIL (milliradian): an angular unit equal to 3.6 inches at 100 yards, or 10 centimeters at 100 meters. Most mil turrets adjust in 0.1 mil clicks. Mils are not more accurate than MOA — they are just a different ruler.
FFP (first focal plane): the reticle grows and shrinks with magnification, so holdover marks stay correct at every power setting.
SFP (second focal plane): the reticle stays the same visual size, so holdover marks are only correct at one stated magnification, usually maximum power.
The single most important rule here is matching units: if your reticle is in mils, your turrets should be in mils. Mixing a mil reticle with MOA turrets is a genuine field mistake that costs hunters shots every season, because the correction you see in the glass no longer translates cleanly into clicks on the dial.
Exposed Turrets vs Capped Turrets for Hunting
Exposed turrets let you dial elevation and windage adjustments by hand without removing a cap, which is useful if you regularly correct for distance by turning the turret to a known setting. Capped turrets cover the adjustments and protect them from accidental movement, which is why many traditional hunting scopes use them. The right choice depends on whether you dial or hold over.
There is also a middle option many hunters overlook: a capped windage turret paired with an exposed, locking elevation turret. Wind is almost always better handled by holding off in the reticle, because it changes second to second and you rarely have time to dial it. Elevation, by contrast, is a known quantity once you have a range. That "dial elevation, hold wind" setup gives you the speed of a dial where it counts and removes half the bump risk. Look also for a turret with tactile, audible clicks and clear numbering you can read in low light — a mushy turret that you cannot count by feel is worse than no turret at all when your hands are cold.
The accidental-movement tradeoff
The main risk with exposed turrets in the field is bumping a turret while moving through brush or stowing the rifle, which can shift your zero without you noticing. Some exposed turrets include a locking feature or a zero stop that reduces this risk. If you choose an exposed-turret scope for hunting, look for a locking turret or develop a habit of checking your setting before a shot. That one habit can prevent a bumped turret from turning a good opportunity into a bad hit.
A zero stop deserves a fuller explanation, because it is the single feature that makes an exposed turret trustworthy for hunting. It is a mechanical floor set at your zero: no matter how far you dialed up, you can spin the turret back down until it physically stops, and you are back on zero without reading a number. Combine that with a locking collar you must lift or press to turn, and the practical risk of a bumped dial drops close to zero. A common mistake is trusting a scope that has a zero stop you never actually set during mounting — check it at the range by dialing up 5 mils, spinning back down to the stop, and firing a confirmation group. If it does not return to the same point of impact, the mechanism is not doing its job.
Reticles, Holdovers, and Dialing
A detailed reticle with holdover marks lets you aim above the center point for longer shots without touching a turret, which is fast and keeps both hands on the rifle. Dialing, by contrast, means turning the elevation turret to a calculated value so you can hold center. Both methods can work for hunting, and many hunters use a simple duplex reticle and a single zero for the ranges they actually shoot.
The key honest point is that more reticle detail and more adjustment options only help if you have practiced with them and know your rifle and load. A cluttered reticle you do not understand is slower than a simple one you do. No scope feature can promise accuracy on its own; placement comes from practice, a confirmed zero, and honest range estimation.
First Focal Plane vs Second Focal Plane for Hunting
This choice matters more to hunters than most people realize. An FFP reticle keeps every holdover and ranging mark valid at any magnification, which is exactly what you want if you spot an animal at 400 yards on 6x, dial the power up, and need to hold two mils high right now. The downside is real: at the bottom of the magnification range, an FFP reticle can shrink to a hairline that disappears against a dark timber background at last light.
An SFP reticle is bolder and easier to see at low power, but its subtensions are only true at one magnification — usually the top end. If you use an SFP scope with holdovers, tape or paint a mark at that power setting so you can find it by feel. In practice, FFP suits open-country hunters who work across a wide power band, while SFP suits timber and stand hunters who spend most of their time near the low end. If you spend your season in mixed cover, think honestly about where your magnification ring actually lives; the answer usually decides it for you.
Illuminated Reticles and Low Light
Legal shooting light at both ends of the day is when a large share of game is taken, and a fine black reticle against a black animal is a genuine problem. A center-dot illumination setting solves it without washing out the target, provided the lowest brightness setting is genuinely dim — some scopes bottom out far too bright and blow out your night-adapted vision. Test this in a dark room before the season, not on the stand.
Illumination also helps shooters whose eyes struggle to resolve a crisp aiming point. If you have noticed that dots and reticles look smeared or comet-shaped, that is worth understanding; the same optical issue that affects eye conditions and reticle blur in red dots can make an illuminated scope reticle look fuzzy at high brightness. Dialing the intensity down usually sharpens it considerably.
Weight, Tube Size, and Durability
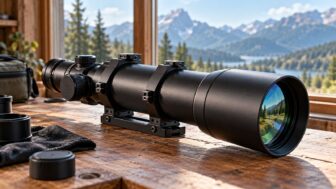
Tactical-style scopes often use a larger 30mm or 34mm tube and heavier construction to support a wider adjustment range and rugged use. That durability is real, but so is the weight. A heavier scope on a rifle you carry for miles adds up, and for many hunters a lighter, simpler scope is the better all-day choice. Decide how much you value the wider adjustment range and toughness against the weight you will carry.
Put numbers on it before you decide. A compact 3-9×40 hunting scope typically runs around 12 to 16 ounces; a 34mm 5-25×56 with a big erector assembly can push 30 to 40 ounces, and heavy rings add another 4 to 6. That difference — often two full pounds once mounted — sits high on the rifle, raising the center of gravity and making offhand shots wobble more. It also changes how the rifle carries on a sling all day. Hunters who count ounces elsewhere in their kit sometimes ignore the optic, which is odd, because it is frequently the heaviest single accessory on the gun. If you are already trimming pack weight elsewhere, the scope is the first place to look.
The larger tube itself is widely misunderstood. A 34mm tube does not gather more light — objective lens diameter and glass quality do that. What the bigger tube buys you is internal room for a wider elevation travel range, which matters only if you dial a long way. If your farthest realistic shot is 400 yards, you likely need well under 10 mils of travel, and a 1-inch or 30mm tube handles that comfortably.
Glass Quality, Coatings, and Twilight Performance
If you spend money anywhere, spend it on glass and coatings rather than on features you will not use. Fully multi-coated lenses, good edge-to-edge resolution, and low chromatic aberration determine whether you can tell a spike from a doe in the last ten minutes of legal light. Exit pupil is the practical number here: divide objective diameter by magnification. A 50mm objective at 10x gives a 5mm exit pupil, which is workable at dusk; at 20x it drops to 2.5mm and the image goes dim fast. That is why experienced hunters dial magnification down as light fades rather than up.
Also check that the scope is genuinely nitrogen or argon purged and O-ring sealed for fogproofing, and that the manufacturer stands behind it with a transferable lifetime warranty. Reputable optics makers publish these specifications plainly on their own product pages, and it is always worth reading them at the source rather than trusting a retailer's bullet list. If low-light identification is your real bottleneck rather than raw accuracy, thermal or digital devices are a separate conversation entirely — our notes on handheld thermal monoculars cover where those tools fit and where they are legally restricted.
When Tactical-Style Features Help a Hunter
You hunt open country where shots happen at varied, sometimes longer, known distances.
You have practiced dialing or holding over and confirmed your come-ups at the range.
You want a locking exposed turret and zero stop to dial confidently and return to zero.
You value a wider elevation range for a flatter setup across distances.
When They Hurt More Than They Help
You hunt thick cover or timber where shots are close and fast, where a simple reticle is quicker.
You carry your rifle long distances and the extra weight is a burden.
You have not practiced with turrets or a busy reticle, so the added complexity slows you down.
Exposed turrets risk being bumped during your style of hunting and you have no locking feature.
Feature-by-Feature Comparison Table
Here is the same trade-off analysis in one view. Read each row against your own terrain and shot distances rather than looking for an overall "winner."
| Feature | Tactical-style approach | Traditional hunting approach | Best for |
|---|---|---|---|
| Turrets | Exposed, often locking, with zero stop | Capped, set-and-forget | Exposed if you dial known distances; capped if you hold over |
| Reticle | Mil or MOA grid with holdover and wind marks | Duplex or simple BDC | Grid for open country; duplex for timber and fast shots |
| Focal plane | Usually FFP | Usually SFP | FFP for wide power swings; SFP for low-light low-power work |
| Main tube | 30mm or 34mm | 1 inch or 30mm | Larger only if you need lots of elevation travel |
| Magnification | 4-16x, 5-25x and similar wide ranges | 2-7x, 3-9x, 2.5-10x | Wide range for varied terrain; low range for close cover |
| Objective | 50-56mm | 32-44mm | Big glass for dusk; smaller for a low mount and less weight |
| Weight (mounted) | Roughly 30-45 oz | Roughly 16-24 oz | Light for backpack hunts; heavy tolerable from a stand or truck |
| Parallax | Side-focus adjustable | Fixed at 100-150 yards | Adjustable for long or precise shots; fixed for simplicity |
| Eye relief | Often 3.5 in or less at high power | Commonly 3.5-4 in | Longer relief on hard-recoiling rifles and awkward positions |
| Typical price band | Mid to premium | Entry to premium | Buy the best glass your budget allows, then features |
Scope Choices by Hunting Style
Rather than asking "is tactical better," ask what your season actually looks like. These pairings reflect what tends to work in the field:
| Hunting situation | Sensible scope profile | Turret and reticle |
|---|---|---|
| Eastern timber whitetail, shots under 150 yards | 1-6x or 2-7x, light, big eye box | Capped turrets, duplex or simple illuminated dot |
| Mixed farmland and field edges, 50-300 yards | 3-9x or 2.5-10x, 40-44mm | Capped or locking elevation, simple BDC |
| Western open country, 200-600 yards | 4-16x or 5-25x, 50-56mm, FFP | Locking exposed elevation with zero stop, mil grid |
| Backpack and mountain hunts | 2.5-10x or 3-15x, lightest available | Capped windage, low-profile locking elevation |
| Predator and varmint at night (where legal) | Dedicated digital or thermal device | Device-specific reticle, no dialing needed |
| Dangerous game or heavy recoil | 1-4x or fixed low power, long eye relief | Capped turrets, heavy duplex |
Note how often the answer is "less scope than you think." A common mistake is buying magnification for the one theoretical 600-yard shot instead of the fifty realistic 120-yard shots you will actually take. Your terrain should set the ceiling, and thinking through hunting varied country is a better starting point than any spec comparison.
Matching a Scope to Your Hunt
Start with your typical shot distance and terrain, then pick the simplest scope that covers it well. A hunter taking close shots in timber is well served by a low magnification scope with capped turrets and a simple reticle. A hunter making longer shots in open country may benefit from a holdover reticle or a locking dialing turret, provided they have practiced. Magnification matters too; for a primer, see our guide on rifle scope magnification for beginners. Whatever you choose, confirm your zero and practice before the season. If you cannot use the reticle or turrets calmly at the range, they do not belong in your hunting decision under pressure.
Mounting, Rings, and Eye Relief: Where Most Setups Fail
More hunting scopes are let down by their mounts than by their optics. Three things go wrong repeatedly, and all three are fixable in an afternoon:
Mounted too high. Big 56mm objectives force tall rings, which lifts your cheek off the stock. If you have to float your head to see a full sighting picture, your position will not repeat and your point of impact will wander. Use the lowest rings that clear the objective bell by a credit-card thickness.
Eye relief set on a bench, used in the field. Set eye relief while shooting from your steepest realistic field position, not from a comfortable bench. Uphill and prone shots push your head forward; a scope set perfectly at the bench can then bite your brow under recoil.
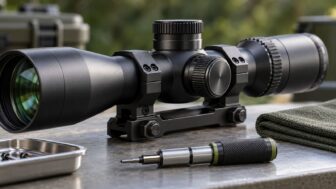
Screws torqued by feel. Ring and base screws have manufacturer torque specs, usually in the 15-25 in-lb range for rings and 25-35 in-lb for bases. Use an inch-pound torque driver and a thread locker where the maker recommends it. Overtightened rings can dent a tube and pinch the erector, producing tracking errors people wrongly blame on the scope.
Level the reticle to the rifle, not to the horizon of the room, and check it with a plumb line at 100 yards. A canted reticle is invisible at 100 yards and costly at 500. Practicing from steady field positions will also tell you quickly whether your mount height and eye relief actually work for the way you shoot, and adding a quick-deploy shooting support does more for real-world hit probability than upgrading from a good scope to a great one.
How to Zero, Verify Tracking, and Build a Dope Card
Any scope with dialing or holdover features is only as good as the data behind it. This is the pre-season sequence that separates a usable system from a guess:
Bore sight, then zero at 100 yards with the ammunition you will actually hunt with. Different loads, even from the same box lot, print differently.
Set your zero stop according to the manufacturer's instructions and confirm it returns to the same point of impact.
Run a box test. Fire a group, dial 4 mils (or 10 MOA) up, fire, dial the same amount right, fire, then down, then left, returning to the start. The shots should form a square and the last group should land on the first. If it does not track, no amount of good data will fix it.
Chronograph or true your velocity and enter it into a ballistic solver with your actual scope height above bore, temperature, and elevation.
Verify at distance. Shoot at 300, 400, and 500 yards if you have the range, and correct your solver's numbers to match reality. Predictions are a starting point; impacts are the truth.
Write a dope card with come-ups and wind holds for your realistic distances, laminate it, and tape it to the stock or inside the scope cap.
Then re-confirm zero after travel, after a hard fall, and at the start of every season. A quiet morning at the range with a solid rest, a good spotting setup, and the right gear for range days is worth more than any feature upgrade you can buy.
Parallax, Ranging, and Wind: The Skills That Actually Matter
Adjustable parallax (side focus) is one tactical-style feature that quietly earns its keep on any rifle used past 250 yards. Parallax error appears when the target image and reticle are not on the same optical plane; move your head and the reticle appears to shift on the target. At high magnification that shift can be several inches of error at distance. Fixed-parallax hunting scopes are usually set at 100 or 150 yards, which is fine for their intended envelope but not for long shots.
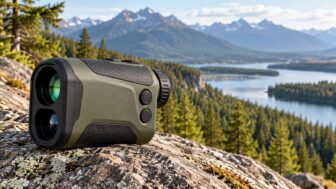
The bigger point is that no scope feature substitutes for the two skills that decide long shots: honest ranging and honest wind reading. A laser rangefinder removes the first problem almost entirely and is a better first purchase than a more expensive scope. Wind is harder and never fully solvable, which is why an ethical maximum range should be the distance at which you can keep every shot in the vitals including a wind call you got half wrong. Weather and light also shape those decisions in ways worth planning for, whether you are working through cold-weather deer strategies or simply choosing where to sit.
Legal and Ethical Considerations
Optics rules vary by state, by season, and sometimes by weapon type. Restrictions commonly cover night vision and thermal devices, illuminated or projected aiming devices, and magnified optics on muzzleloaders or during specific primitive-weapon seasons. Some states also regulate laser rangefinders in limited circumstances. Because these rules change, always read the current-year regulations published by your state wildlife agency before the season rather than relying on last year's booklet or a forum post; the U.S. Fish and Wildlife Service is a useful starting point for federal land and migratory-bird rules that sit on top of state regulations.
The ethical layer sits above the legal one. A scope that lets you dial to 800 yards does not mean you should; wind, animal movement, and your own field position all shrink the honest number. Set a personal maximum range in practice conditions, then subtract from it in the field. Where you choose to sit matters just as much — thinking carefully about setting up a stand location often does more to shorten the shot than any optic can do to extend it.
Common Mistakes Hunters Make with Tactical-Style Scopes
Buying magnification instead of glass. A clear 3-15x beats a murky 6-24x at every distance that matters.
Leaving the scope dialed up after a shot. Build the habit of returning to zero immediately, every time, before the rifle goes back on your shoulder.
Mixing mil reticles with MOA turrets. Match your units or accept guaranteed confusion under pressure.
Ignoring scope height in the ballistic solver. A half-inch error in height over bore produces meaningful vertical error at distance.
Never practicing on the clock. Game does not stand still. Practice finding the animal, ranging, dialing or holding, and breaking the shot inside a realistic time window.
Skipping the post-travel zero check. Airline baggage, ATV racks, and truck beds are hard on rifles.
Assuming a heavy scope excuses a shaky position. Weight damps wobble slightly; a good rest, sling, or bipod damps it enormously.
Frequently Asked Questions
Do you need a tactical scope for hunting?
Most hunters do not. A simple scope with a clear reticle and a confirmed zero covers typical hunting distances. Tactical-style features like exposed turrets or holdover reticles help only if you hunt varied or longer distances and have practiced with them.
Are exposed turrets a problem for hunting?
They can be, because a turret bumped in the field can shift your zero unnoticed. Choosing a scope with a locking turret or a zero stop, and checking your setting before a shot, reduces that risk.
Is dialing or holding over better for hunting?
Neither is universally better. Holding over keeps both hands on the rifle and is fast, while dialing lets you hold center at known distances. Use whichever you have practiced and trust, and confirm your data at the range first. Write down your zero, common distances, and any turret or holdover references so you are not trying to remember them when an animal is in front of you.
Does a heavier tactical-style scope improve accuracy?
No scope guarantees accuracy. A rugged scope holds zero well and offers more adjustment, but shot placement comes from practice, a confirmed zero, and honest range estimation. The extra weight is a real tradeoff for hunters who carry far.
Is first or second focal plane better for hunting?
It depends on how you use magnification. First focal plane keeps holdover marks accurate at every power, which suits hunters who swing across a wide magnification range in open country. Second focal plane gives a bolder, easier-to-see reticle at low power, which suits timber and stand hunting. If you rarely leave one or two power settings, second focal plane is perfectly adequate.
What magnification do I actually need for deer hunting?
For most whitetail hunting, 3-9x is plenty and 2-7x is often better in thick cover. Open-country hunters shooting past 300 yards benefit from a top end around 12-18x. Beyond that, mirage, a shrinking exit pupil, and exaggerated wobble usually cost you more than the extra magnification gains.
How many mils or MOA of elevation travel do I need?
Work backward from your realistic maximum range and cartridge. A typical modern hunting cartridge zeroed at 100 yards needs roughly 8-12 mils to reach 800 yards, and far less inside 400. Remember that usable travel is about half the advertised total range because you start centered, which is why a canted 20 MOA base helps only shooters who genuinely dial a long way.
Should I buy a mil or MOA scope?
Pick the system you can do mental arithmetic in and stick with it across all your rifles. Mils use a base-ten structure that many find simpler for corrections; MOA feels more intuitive to shooters who think in inches. What matters far more is that your reticle and turrets speak the same language, and that your hunting partners can call corrections in the same units.
Do I need a zero stop, or is a locking turret enough?
A locking turret prevents accidental movement; a zero stop guarantees you can return to zero by feel in the dark. They solve different problems, and having both is ideal on a hunting rifle. If you can only have one, choose the lock if you rarely dial and the zero stop if you dial often.
Will a tactical-style scope work on a hard-kicking rifle?
Usually yes, but check eye relief carefully. Many high-magnification scopes give up eye relief at the top of the power band, and a magnum rifle shot uphill from an awkward position is exactly where scope bite happens. Mount for your worst-case position, not your best one.
Can I use a rifle scope for crossbow or bow hunting?
Not interchangeably. Crossbows use dedicated scopes with speed-calibrated multi-reticle holdovers and durability rated for reverse-shock recoil, and the ballistics are nothing like a centerfire rifle. If you are weighing that side of the sport, the differences in recurve-style crossbow designs affect which optics and holdover marks make sense.
How much should I spend on a hunting scope?
A useful rule of thumb is to budget for the optic and mounts as a meaningful share of the rifle's cost, then buy the best glass in that band before paying for features. Sub-$200 scopes frequently fail tracking tests; the practical sweet spot for a do-everything hunting scope with reliable turrets sits in the mid range, and the returns above premium pricing are mostly in low-light resolution and warranty support rather than raw accuracy.
Final Takeaway
You do not need a tactical-style scope to hunt well. Judge the individual features, exposed turrets, detailed reticles, larger tubes, against your terrain, your typical shot distance, and the practice you have actually put in. Many hunters are best served by a lighter, simpler scope with a confirmed zero, while open-country hunters who have trained with dialing or holdovers may benefit from those features. Confirm any equipment rules with your state wildlife agency and take a hunter education course to sharpen shot selection.
Conclusion
The honest answer to "do you need a tactical-style scope for hunting" is that you need the features, not the label — and usually fewer of them than the marketing suggests. Exposed locking turrets with a zero stop earn their place if you dial known distances in open country. A detailed reticle earns its place if you have practiced with it until the holds are automatic. A 34mm tube and a 56mm objective earn their place if you truly need the elevation travel and the dusk performance, and you are willing to carry the extra two pounds every mile of the season. Everything else is weight and complexity between you and a clean shot.
Your next step is simple and costs nothing: before you shop, write down your last ten hunting shots — distance, light, position, and terrain. That list, not a spec sheet, tells you which features to buy and which to skip. Then take your current rifle to the range, run a box test and a zero-stop check, and build a dope card for the distances that list actually contains.
Ready to build around the right optic? Pair your scope decision with the rest of a field-tested loadout in our rundown of the essentials worth packing so nothing on your rifle outperforms the gear supporting it.
Related reading: spotting scope vs binoculars guide.