Bow Sight Setup & Adjustment Guide (Step-by-Step)
Setting up a bow sight comes down to mounting the sight securely, leveling it, and then sighting in one pin at a time by adjusting the sight in the same direction you want the arrow to move. Work at a safe range, start at a close distance, and make small adjustments. This article gives you the overall process so you understand each step and the reason behind it.
Table of contents
This is an overview, not a model-specific manual. Bow sights, risers, and mounting systems differ, and anything involving a bow press, draw weight, draw length, cam timing, or internal adjustment should be handled with your owner’s manual or by a qualified pro shop. If something feels mechanically wrong or you are unsure, stop and get help before drawing the bow. Safe archery practice starts with equipment you trust; for broader setup context, see our compound bow accessories guide and archery safety rules.
Contents
Understand the Parts of a Bow Sight
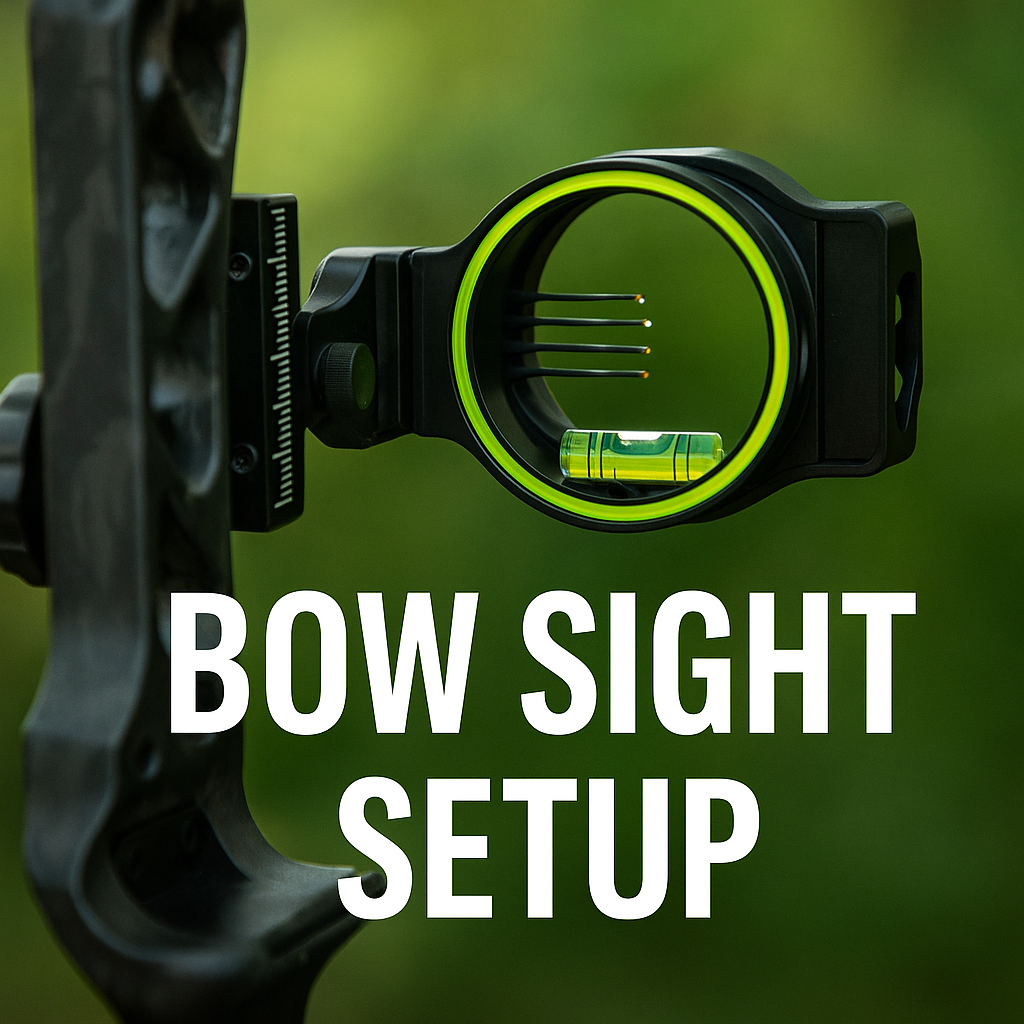
A bow sight is the aiming system that mounts to the riser and gives you reference points to align with the target. Knowing the parts makes setup clearer. Most fixed-pin sights share the same basic pieces.
- Mounting bracket: attaches the sight to the bow riser.
- Sight housing or ring: holds the pins or aiming points.
- Pins: the aiming references, often set for different distances on a multi-pin sight.
- Windage adjustment: moves the pins or housing left and right.
- Elevation adjustment: moves the pins or housing up and down.
- Level: a small bubble level that helps you hold the bow upright.
Single-pin and adjustable sights work on the same windage and elevation logic but use a movable pin set against a yardage scale. Your sight’s manual explains its specific controls.
Safety Before You Start
Bow setup happens around a drawn bow and arrows, so treat it with the same care you would any range session. Only shoot on a proper archery range or a safe backyard setup with a reliable backstop and a clear area well beyond the target. Never dry fire a bow, meaning never release it without an arrow, because that can damage the bow and injure you. USA Archery and World Archery both publish range and shooting safety guidance worth reviewing before you practice.
- Inspect arrows for cracks or damage before every shot, and retire any that are compromised.
- Confirm nocks, rest, and the sight mount are secure before drawing.
- Wear eye protection and keep bystanders behind the shooting line.
- Match arrows to your bow’s specifications. If you are unsure about arrow spine or weight for your draw setup, ask a pro shop rather than guessing.
Mount and Level the Sight
Mounting the sight securely and squarely is the foundation, because a sight that shifts or sits crooked will never hold a reliable zero. Follow the hardware and torque guidance in your sight’s instructions so you do not over-tighten or strip fasteners.
- Attach the mounting bracket to the riser using the supplied hardware, snug but not over-tightened per the manual.
- Position the sight so the housing sits roughly centered for your draw and anchor, leaving room for later windage adjustment.
- Use the sight’s bubble level, and ideally a separate bow level, to set the sight square to the bow.
- Double-check that every screw is secure before drawing the bow for the first time.
If your sight requires moving the rest, adjusting the bow’s draw, or any work that calls for a bow press, do not attempt it freehand. That is pro shop territory.
Sight In Your Pins Step by Step
Sighting in means adjusting the sight so your arrows hit where the pin is aimed, starting close and working out. Begin at a short, safe distance so missed arrows stay on the target and backstop while you dial things in.
- Set up at a close distance, such as 10 to 20 yards, with a solid backstop and a consistent anchor and form.
- Shoot a small group of arrows at the target using your top or chosen pin, keeping your form the same each time.
- Note where the group lands relative to your aim point, not where a single stray arrow lands.
- Adjust windage and elevation in small increments using the adjustment rule below.
- Shoot another group, confirm the change, and repeat until the pin is on.
- For a multi-pin sight, move to the next distance and set the next pin, again confirming with groups.
This guide does not prescribe specific pin distances or universal yardage settings, because the right setup depends on your bow, arrows, draw, and the distances you actually shoot. Set pins to the distances you practice and confirm each one yourself.
Understand the Adjustment Rule
The core rule for most pin sights is to move the sight in the same direction you want the arrows to move on the target. If your arrows are landing low, move the sight or pin down to bring impacts up; if they land left, move the sight left. This is the opposite of how some rifle scopes work, so go slowly and verify with a group after each change.
Make one adjustment at a time and confirm it before making another. Chasing single arrows or changing windage and elevation together at once makes it hard to tell what each adjustment did. Always check your sight’s instructions, since some designs differ.
When to See a Pro Shop
A pro shop is the right call any time setup moves beyond mounting and basic sighting in. Archery shops have the tools and experience to handle adjustments that are unsafe or impractical to do at home.
- Anything requiring a bow press, including string, cam, or limb work.
- Setting or changing draw weight and draw length.
- Arrow rest installation, tuning, or paper tuning.
- Matching arrow spine and weight to your bow’s specifications.
- Any grinding, cracking, or unusual noise from the bow, which means stop and inspect before shooting.
There is no downside to asking for help. A correctly set up bow is safer to shoot and far easier to sight in.
Common Setup Mistakes
- Starting at a long distance, so missed arrows fly past the target and backstop.
- Adjusting to single arrows instead of the center of a group.
- Changing windage and elevation at the same time, hiding what each change did.
- Over-tightening sight hardware and stripping the fasteners.
- Inconsistent form between shots, which looks like a sight problem but is a shooter problem.
- Attempting press, rest, or draw adjustments without the right tools or knowledge.
Frequently Asked Questions
Which way do I move a bow sight to correct my shots?
For most pin sights, move the sight in the same direction you want the arrows to move. Arrows landing low means move the sight down; arrows landing left means move the sight left. Make one change at a time, confirm with a group, and check your sight’s manual since some designs differ.
What distance should I sight in my pins at?
Start close, around 10 to 20 yards, so missed arrows stay on the target and backstop. Set your pins to the distances you actually practice and confirm each one yourself. There is no universal pin setting because it depends on your bow and arrows.
Can I set up a bow sight myself?
You can usually mount, level, and sight in a pin sight yourself by following the manual and working at a safe range. Anything involving a bow press, draw weight, draw length, or arrow rest tuning should go to a qualified pro shop.
Why won’t my bow hold a consistent zero?
Common causes are loose sight hardware, an unlevel sight, inconsistent form or anchor, or damaged arrows. Check that everything is secure and square, focus on repeatable form, and inspect your arrows. If it persists, have a pro shop check the bow’s tune.
Final Takeaway
Bow sight setup is straightforward when you take it in order: mount and level the sight securely, then sight in one pin at a time from a close, safe distance, moving the sight in the direction you want your arrows to go. Keep your form consistent, make one adjustment at a time, and never dry fire. For any mechanical work beyond mounting and sighting in, your manual and a pro shop are the safe path.