Tactical Scope vs Hunting Scope: Which Is Better?
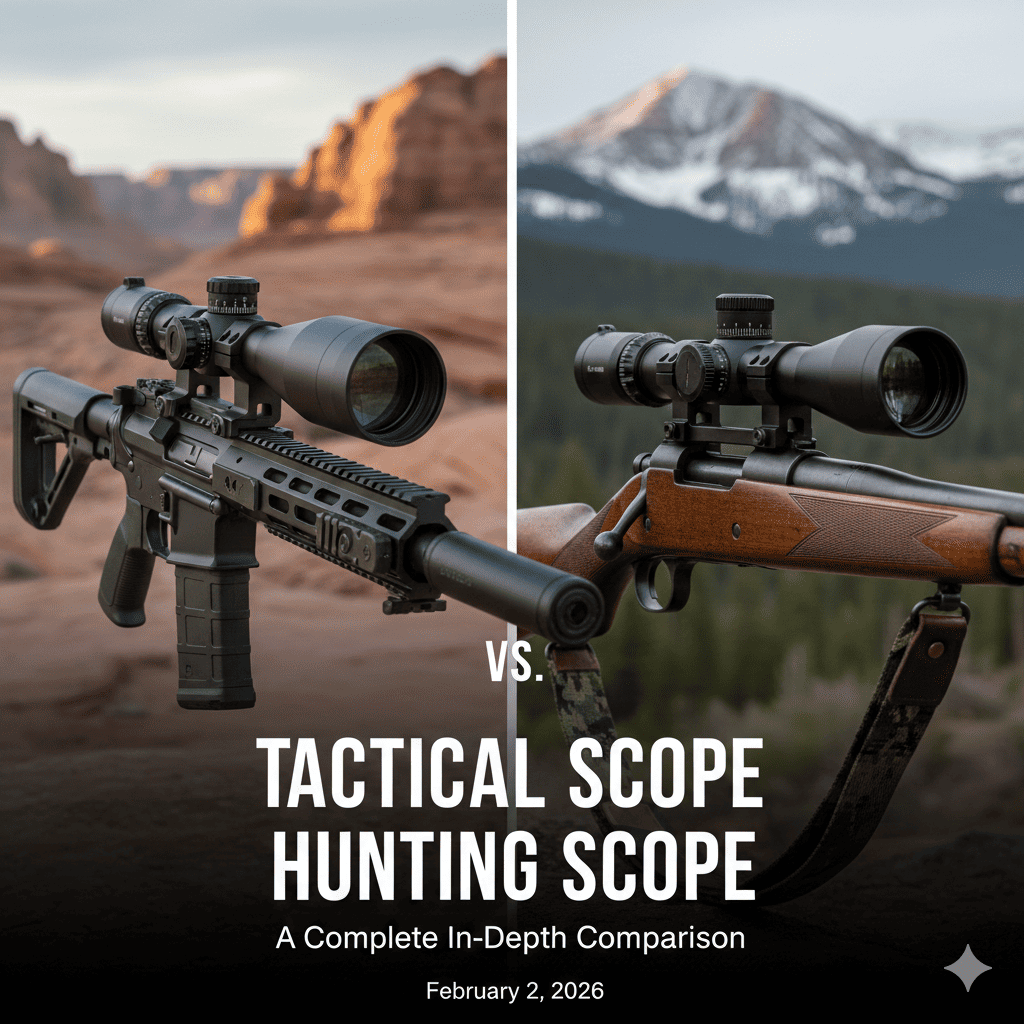
A tactical scope and a hunting scope can look similar, but they are built around different priorities. A hunting scope usually favors lighter weight, simple controls, fast target acquisition, and dependable field use. A tactical-style scope usually favors exposed turrets, detailed reticles, adjustment range, and repeatable corrections. For most hunters, the best choice is the scope that helps make a safe, ethical first shot without adding weight or complexity you do not need.
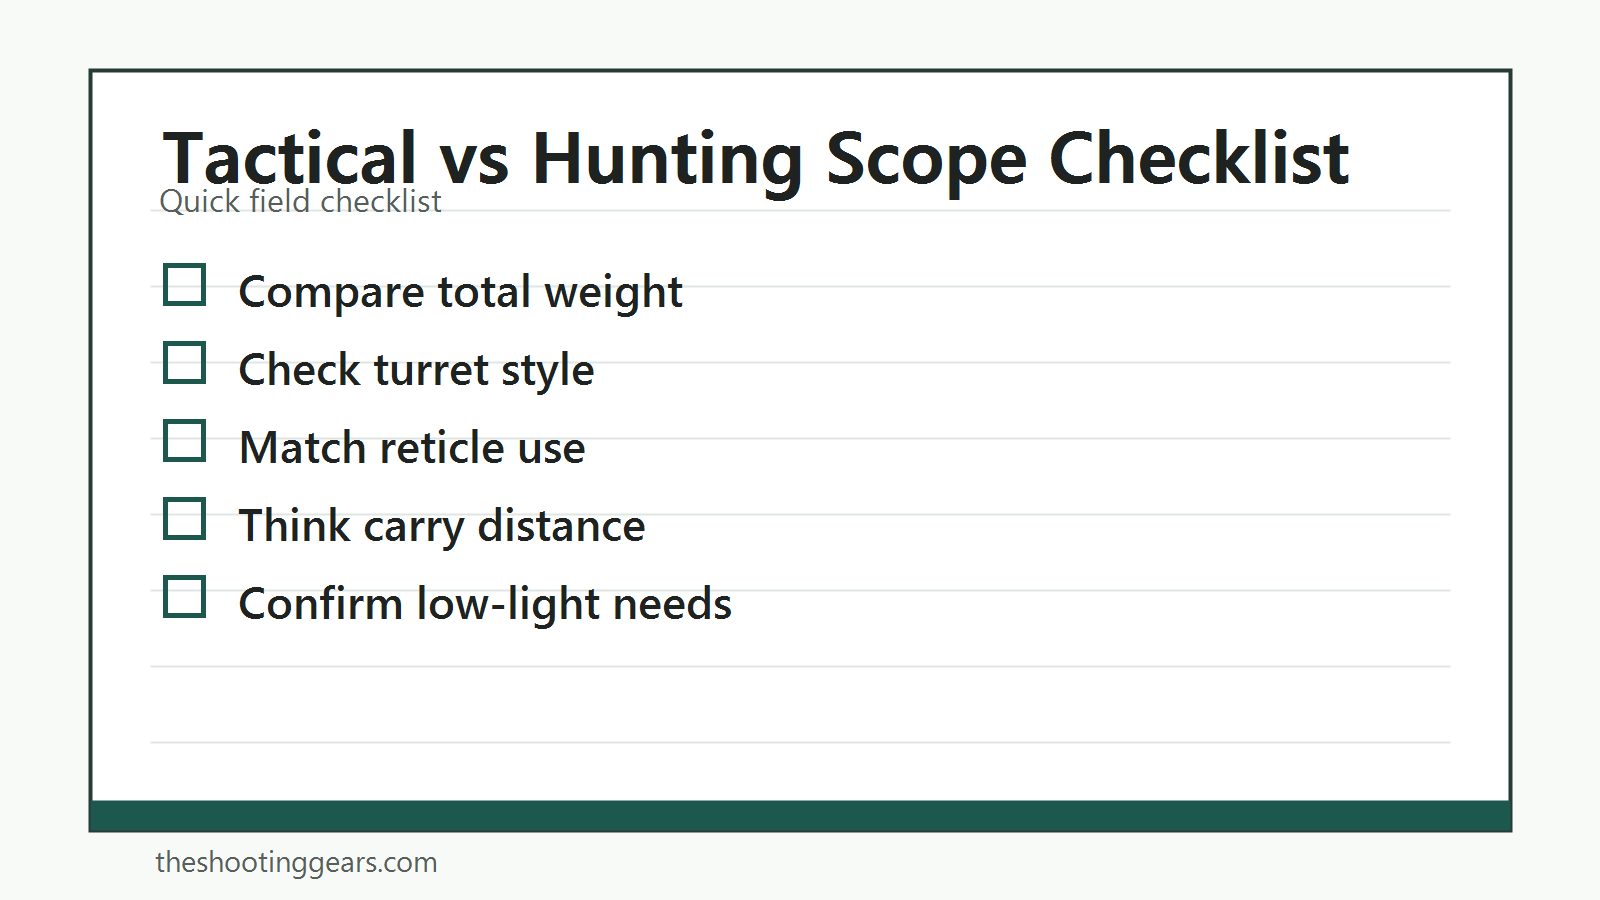
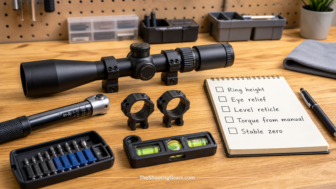
Use this checklist to match optic features to the way you actually hunt, not to the way a scope looks on a spec sheet.
Tactical vs hunting scope tradeoff checklist.
Table of contents
Quick Answer
Best Default for Most Hunters
When Tactical Features Help
Main Difference
Hunting Scope Priorities
Tactical Scope Priorities
Magnification and Field of View
Typical Hunting Ranges
Higher Magnification Tradeoffs
Reticles and Holdovers
Simple Reticles
Detailed Reticles
Table of Contents
Quick Answer
Main Difference
Magnification and Field of View
Reticles and Holdovers
Turrets and Adjustments
Weight and Carry Comfort
Durability and Weather
Best Fit by Use Case
Safety and Ethical Shot Limits
FAQ
Quick Answer
Choose a hunting scope if you mainly hunt deer, elk, hogs, or small game from real field positions and want a lighter, simpler optic. Choose a tactical-style scope only if you truly need exposed turrets, a detailed reticle, or repeatable dialing for known-distance shooting. The more complex optic is not automatically the better hunting optic.
Best Default for Most Hunters
A practical hunting scope is the better default for most hunters. It carries easier, snags less, and usually has simpler controls under pressure. A clean reticle and reliable zero often matter more than advanced dialing features.
When Tactical Features Help
Tactical-style features help when you shoot known distances, practice regularly, understand your reticle, and need repeatable adjustments. They can also be useful on varmint rifles, precision range rifles, and some open-country hunting setups.
In practice, the honest test is a simple one: in the last twelve months, how many times did you actually dial a correction on a live animal? If the answer is zero or one, the tactical features are costing you weight and bulk without paying you back. If you dial regularly, log your data, and verify drops on steel at multiple distances, the same features become the reason you connect. Decide based on your logbook, not on the rifle you wish you shot more often.
Tactical vs Hunting Scope: Side-by-Side Comparison
The table below is a general summary of how the two categories usually differ. Individual models blur these lines, so treat it as a starting framework rather than a rule when you are matching an optic to a rifle.
| Feature | Hunting Scope | Tactical-Style Scope |
|---|---|---|
| Typical weight | 12–20 oz | 22–36 oz |
| Common magnification | 2-7x, 3-9x, 2.5-10x, 4-12x | 3-18x, 4-16x, 5-25x, 6-24x |
| Tube diameter | 1 in or 30 mm | 30 mm or 34 mm |
| Turrets | Capped, low-profile | Exposed, zero stop, often locking |
| Reticle | Duplex or simple holdover | Mil/MOA grid, Christmas tree |
| Focal plane | Usually second (SFP) | Often first (FFP) |
| Parallax control | Fixed (typically 100–150 yd) | Side focus, adjustable |
| Elevation travel | Modest | Large, for extended dialing |
| Primary strength | Fast, light, simple, durable | Precise, repeatable, measurable |
| Main drawback | Limited dialing and holds | Weight, bulk, learning curve |
One caution about reading tables like this: weight is the spec most hunters underestimate and magnification is the spec they overestimate. A scope that is eight ounces heavier than it needs to be changes how the rifle hangs on a sling all day, while the top end of a magnification range often goes unused because mirage, wobble, and light loss make it impractical in the field.
Main Difference
The main difference is design philosophy. Hunting scopes are built to help a hunter carry the rifle all day and make a careful first shot. Tactical scopes are built to support adjustment, observation, and repeatable correction in controlled or precision-focused contexts.
Hunting Scope Priorities
Lower weight and cleaner profile.
Simple capped turrets or low-profile controls.
Fast sight picture at common hunting ranges.
Reticles that stay visible in low light.
Reliable zero through recoil, weather, and travel.
Tactical Scope Priorities
Exposed turrets for dialing elevation and windage.
Detailed reticles for holds and measurements.
More adjustment range.
Often larger tubes and heavier builds.
Features that reward training and data, not guessing.
Where the Line Has Blurred
The clean split between the two categories is less absolute than it used to be. Many current hunting optics now ship with a capped-but-adjustable elevation turret, a zero stop, an exposed elevation dial paired with a capped windage dial, or a lightweight first-focal-plane reticle. Manufacturers call these "hybrid," "hunter-precision," or "long-range hunting" scopes, and they exist because plenty of hunters wanted dialing capability without a 34 mm tube and two pounds of glass.
That trend is good news, but it also means the label on the box tells you less than it once did. Judge the actual hardware: total weight, turret style, focal plane, parallax control, and elevation travel. A 3-15×44 marketed as "tactical" may weigh less than a 4-16×50 marketed as a hunting scope. Read the spec sheet, then put the rifle on a sling and see how it feels after a mile of uphill.
Magnification and Field of View
Magnification should match the hunt. Too much magnification can make it harder to find the animal, track movement, and maintain a safe view of the surroundings. A wider field of view is valuable when an animal appears suddenly or moves through cover.
Typical Hunting Ranges
Many hunting scopes sit in practical ranges like 2-7x, 3-9x, 2.5-10x, or 4-12x. These ranges are enough for many deer, hog, and general big-game hunts while keeping the optic manageable.
Higher Magnification Tradeoffs
Higher magnification can help with small targets and longer distances, but it also magnifies wobble and narrows the view. It works best when the rifle is supported and the hunter has time to identify the target safely.
The Low End Matters More Than the High End
A common mistake is shopping only by the top magnification number. In real hunting, the bottom of the range gets used constantly. A 3-18x cannot go below 3x, and at 3x inside thick timber you will lose animals that a 2x or 2.5x would have caught. If you hunt brush, swamp edges, or anywhere a deer can appear at fifteen yards, prioritize a low bottom end and a wide field of view.
A practical habit that costs nothing: leave the scope parked at its lowest power whenever you are walking or sitting, and only crank up after you have found the animal and decided the shot is worth taking. Hunters who leave a variable at 12x while still-hunting are the ones who end up staring at a patch of brown hair with no idea which end is which. Adjust magnification to the country you hunt, and remember that terrain dictates a lot about how much reach you actually need.
Reticles and Holdovers
A reticle should be easy to use under the conditions you actually hunt. Busy tactical reticles can be powerful, but they can also slow down hunters who do not practice with them. Simple hunting reticles are often faster in low light and brush.
Simple Reticles
A duplex or simple holdover reticle is easy to see and easy to teach. It is a strong choice when most shots are inside a known practical range and the hunter prioritizes speed, clarity, and first-shot confidence.
Detailed Reticles
Mil, MOA, Christmas-tree, or grid-style reticles can help with holds, but only when the shooter understands the system and confirms data at the range. A detailed reticle is not a shortcut around practice.
Illuminated Reticles
Illumination is worth discussing separately because it is often the deciding feature at dawn and dusk. A fine black crosshair can disappear against a dark animal in a shadowed creek bottom, and that is exactly when many shot opportunities happen. A single illuminated center dot, dim enough to glow rather than bloom, solves this without cluttering the sight picture.
Two practical points from field use. First, check that the lowest illumination setting is genuinely low — many scopes are far too bright at their minimum and will wash out a dark target and hurt your night-adapted vision. Second, treat illumination as a bonus, not a crutch: choose a reticle whose black version is already visible against dark timber, then let the illumination help on the worst five minutes of legal light. Hunters who deal with blurry dot problems from astigmatism often find that a thin illuminated crosshair in a magnified optic is easier to use than an unmagnified dot.
First Focal Plane vs Second Focal Plane
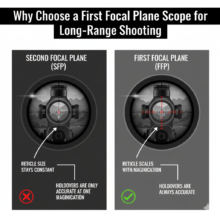
This is one of the most important differences between the two categories, and it is frequently skipped. In a second focal plane (SFP) scope, the reticle stays the same visual size no matter the magnification, so holdover marks and mil or MOA subtensions are only correct at one specified power — usually the maximum. In a first focal plane (FFP) scope, the reticle grows and shrinks with the image, so subtensions are correct at every magnification.
When SFP is the better hunting choice:
- Most shots are taken with holdovers you have memorized at a single power setting.
- You want the reticle to remain clearly visible at low magnification in dark timber.
- You value a thin, clean crosshair that does not thicken when you zoom in.
When FFP earns its place:
- You range, hold, and correct at varying magnifications and cannot afford to remember which power is "correct."
- You use the reticle to measure targets or spot your own misses.
- You shoot in situations where you may not have time to spin to max power before holding off.
The honest trade-off with FFP on a hunting rifle is reticle visibility at the bottom of the range. At 3x, an FFP grid can shrink to near-invisible hairs against a dark background, which is precisely the moment a hunter needs it most. Good FFP hunting reticles solve this with an illuminated center or heavier outer posts, but budget FFP optics often do not. If you cannot try one at dusk before buying, SFP is the lower-risk choice for general hunting.
Turrets and Adjustments
Turrets are one of the biggest practical differences. Hunting scopes often use capped turrets to protect the zero. Tactical scopes often use exposed turrets so the shooter can dial corrections quickly.
Capped Turrets
Capped turrets are simple and protected. They make sense for hunters who zero the rifle, confirm the setup, and avoid adjusting in the field unless there is a clear reason.
Exposed Turrets
Exposed turrets are useful for dialing distance, but they can be bumped in a pack, truck, blind, or brush. If you use exposed turrets for hunting, check zero position before every hunt and before every shot opportunity.
Zero Stops and Locking Turrets
If you do choose exposed turrets for a hunting rifle, two features move them from risky to practical. A zero stop is a mechanical floor that prevents the elevation dial from turning below your zero, so you can always return to your baseline by feel — even in the dark, with gloves on, without counting revolutions. A locking turret requires a deliberate pull or button press before it will rotate, which nearly eliminates the classic "dialed to 400 yards inside a pack" mistake.
Build the habit anyway: every time you pick up the rifle, glance at the turret and confirm it reads zero. It takes one second, and in practice it is the single most common failure point when hunters carry exposed dials.
MOA vs MIL: Pick One System and Match Everything
It does not matter much whether you choose MOA (roughly 1 inch at 100 yards) or MIL (0.1 mil per click, about 0.36 inch at 100 yards). What matters enormously is consistency. Your turret units, your reticle subtensions, your ballistic app output, and your range notes must all speak the same language. A MIL reticle paired with MOA turrets is a recipe for a fumbled correction under pressure.
Whichever system you use, confirm real drops on paper or steel rather than trusting a calculator alone. Muzzle velocity varies with temperature, barrel length, and lot-to-lot ammunition differences; industry pressure and velocity standards are maintained by SAAMI, but the numbers printed on a box are reference figures, not a guarantee of what your barrel produces. Chronograph if you can, verify if you cannot.
Tracking and the Box Test
Before you trust a scope to dial, verify that it tracks. Shoot a group at zero, dial a known amount of elevation up, shoot again, dial the same amount of windage, and continue around a box back to your starting point. The final group should land on the first. If it does not — or if the measured movement does not match the clicks you dialed — the scope's adjustments are not repeatable and you should hold rather than dial with it. This test takes about twenty rounds and tells you more about a scope than any review.
Weight and Carry Comfort
Weight matters more in the field than it does at a bench. A heavy scope can make the rifle top-heavy, slower to shoulder, and less pleasant to carry on long hunts. Tactical-style scopes often add weight through larger tubes, bigger turrets, more glass, and larger objective lenses.
Stand or Blind Hunting
If you hunt from a stand, blind, or fixed position, extra scope weight may matter less. You may value magnification, reticle detail, or low-light performance more than a lightweight setup.
Mountain or Still Hunting
If you walk, climb, or still-hunt, a lighter hunting scope usually feels better. A rifle that carries well is easier to keep with you and easier to handle safely when conditions change.
Mounting Choices Change the Whole Package
Scope weight is only part of the story. A steel one-piece mount can add six or more ounces over quality aluminum rings, and a tall mount raises the bore-to-optic offset, which changes your holds at close range. Mount as low as the objective bell and bolt handle allow, use the correct ring height rather than the tallest one that clears, and torque ring screws to the manufacturer's specification with a proper torque driver — over-tightening can dent a tube and pinch the erector, causing tracking problems that look like scope defects.
Level the reticle to the rifle, not to the world, and check it again after the first range session. A canted reticle costs you nothing at 100 yards and costs you inches at 400. If you are already trimming pack weight elsewhere, the optic and mount are usually where the easiest ounces hide.
Durability and Weather
Both hunting and tactical scopes can be durable. The important question is whether the scope holds zero, resists weather, and stays usable with cold hands, gloves, wet gear, and changing light.
Weather Sealing
Look for waterproofing, fog resistance, and a reputation for holding zero. Hunting scopes should survive realistic field abuse without needing delicate treatment.
Control Simplicity
Simple controls are a durability feature in their own way. The fewer things you can bump or misread, the fewer mistakes you can make in bad weather or fading light.
What Waterproof Ratings Actually Mean
Most quality scopes are nitrogen or argon purged and sealed with O-rings, which prevents internal fogging when the temperature swings. That is different from external fogging on the lens surfaces, which no purge gas can prevent — that requires hydrophobic lens coatings, a scope cover, and the discipline to avoid breathing across the ocular in cold air. Bring a dedicated lens cloth, not your shirt tail, because grit on a coated lens does permanent damage.
Cold weather brings a second issue: turret and zoom-ring grease can stiffen enough that adjustments feel gritty or the power ring becomes hard to turn with gloves. This is worth testing before a late-season trip. Hunters running wet, freezing conditions should also read up on staying effective in the rain, since gear discipline matters more than optic specs once everything is soaked.
Glass Quality, Coatings, and Low-Light Performance
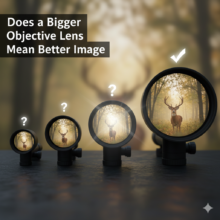
Two scopes with identical magnification and objective size can perform very differently at last light. What separates them is glass quality, coating quality, and internal blackening — not the size of the front lens alone. Fully multi-coated lenses transmit noticeably more light than merely "coated" ones, and better coatings also control glare when the sun is low and directly in front of you.
Exit pupil is the useful number here: divide the objective diameter by the magnification. A 3-9×40 at 9x gives a 4.4 mm exit pupil; the same scope at 4x gives 10 mm, far more than a human eye can use in the dark. This is why cranking magnification down at dusk genuinely brightens the picture, and why a 50 mm objective is not automatically better than a 40 mm one at practical hunting powers. It only helps at the top end of the zoom range, and it forces higher rings that raise the rifle's line of sight.
Practical low-light guidance:
- Dial down to 4–6x in the final minutes of legal light rather than up.
- Prefer a reticle with heavier outer posts that your eye can find instantly.
- Keep the ocular focused correctly; a slightly out-of-focus reticle costs real contrast.
- Match your optic to legal shooting hours, which are set by your state wildlife agency, not by how much you can see through the glass.
If most of your hunting happens in darkness or on hogs and predators after legal daylight where permitted, a magnified day scope is the wrong tool entirely — that is the domain of dedicated night and thermal imaging units, which follow their own set of state-by-state legal rules.
Eye Relief, Eye Box, and Recoil Safety
Eye relief is the distance behind the ocular where you see a full image, and it is a safety issue on hard-recoiling rifles. Generous, consistent eye relief — roughly 3.5 to 4 inches on a typical hunting scope — lets you shoot from awkward field positions without getting cut by the ocular bell. Many high-magnification tactical scopes have shorter or more variable eye relief, which is fine on a benchrest but punishing on a magnum from a steep uphill sitting position.
The eye box, meaning how forgiving the scope is about exact head placement, matters just as much and is rarely listed on a spec sheet. A tight eye box costs you time hunting for the picture when an animal is only visible for two seconds. Test it: mount the rifle quickly with your eyes closed, open them, and see whether the image is instantly full and clear. Do this from standing, kneeling, and prone, because eye relief needs change as body position changes. Practicing the range of stable body positions will tell you more about correct scope placement than any bench session.
Set your scope's fore-aft position for your most likely field position, not for the bench. Most hunters mount the scope too far to the rear because that feels right at a bench, then discover a scope-shaped cut over the eyebrow the first time they shoot uphill.
Parallax, Focus, and Diopter Setup
Parallax error occurs when the target image and the reticle do not sit on the same optical plane, so the reticle appears to shift across the target as your head moves. Most fixed-parallax hunting scopes are factory set for 100 or 150 yards, which is close enough that the error is negligible at normal hunting distances and low magnification. Tactical scopes usually add a side-focus knob so parallax can be corrected at any distance — genuinely valuable above roughly 12x and beyond 300 yards, and largely unnecessary below that.
Whatever scope you own, set the ocular diopter once and correctly:
- Set magnification to maximum.
- Point the scope at a blank, bright surface such as an overcast sky or a white wall.
- Glance in for one or two seconds only, then look away.
- Turn the diopter a small amount and repeat until the reticle is sharp on first glance.
- Lock the ring if your scope has a lock, and re-check it annually — eyes change.
Staring through the scope while adjusting lets your eye accommodate and defeats the whole process. That is the single most common diopter mistake, and it leaves hunters with a slightly soft reticle they blame on the glass.
Field Support: The Cheapest Accuracy You Can Buy
Neither scope type fixes a wobbling rifle. Beyond a certain point, a steadier position improves hits far more than another two power of magnification. A rear bag, a loaded sling, a pack under the fore-end, or a set of shooting sticks will shrink your group more than upgrading from a good scope to a great one.
This is also the practical argument against overbuying magnification. If your unsupported wobble zone at 8x already covers the vitals, going to 20x only makes the wobble easier to see and harder to ignore. Build the support first, then decide whether you need more glass. Time spent with range-day essentials sorted out is time that pays back on opening morning.
Best Fit by Use Case
Deer and General Big Game
A traditional hunting scope is usually the better fit. Keep it clear, light, and simple. A 3-9x, 2.5-10x, or similar range is often more useful than a large precision scope.
Open-Country Hunting
A hybrid hunting/precision scope can make sense in open country if you practice with it. Look for dependable tracking, a usable reticle, and weight that still matches the rifle.
Range and Precision Practice
A tactical-style scope is more useful at the range, where dialing, reticle subtensions, and repeatable corrections are part of the exercise. Those same features should be simplified for field use unless you train with them regularly.
Thick Timber, Brush, and Close Cover
Where shots are under 100 yards and often on moving animals, everything favors the hunting scope: 1-6x, 1.5-5x, 2-7x, an illuminated center, and the widest field of view you can get. Some hunters go further and run a red dot or low-power variable. Reticle subtensions are irrelevant here — the entire game is finding the animal fast and confirming what is behind it.
Varmint, Predator, and Prairie Dog Rifles
This is where tactical features genuinely shine on a hunting rifle. Small targets, long shots, a supported position, no weight penalty from a truck or a bipod, and the freedom to spend time on each shot all argue for higher magnification, side-focus parallax, exposed turrets, and a fine reticle. A 4-16x or 6-24x is not overkill on a dedicated varmint rig.
Rimfire, Youth, and First Rifles
Keep it simple and light. A modest fixed or low-variable scope with generous eye relief lets a new shooter learn cheek weld, trigger control, and target identification without fighting a tight eye box. Save the grid reticle for after the fundamentals are automatic — this is also the setup that makes hunting together as a family far less frustrating for everyone involved.
Stand and Blind Setups
From a fixed position with a rail or window rest, weight is nearly free, so magnification and low-light glass become the priorities. Just make sure the scope's field of view still covers the shooting lanes you cut, and think about optic choice at the same time you are evaluating a stand location — the two decisions are related more often than hunters realize.
Budget: What You Actually Get at Each Tier
Optics pricing is not linear, but the tiers behave predictably. Understanding them prevents both overspending and the far more expensive mistake of buying twice.
- Entry tier: usable daylight glass, adequate zero retention on mild-recoiling rifles, basic duplex reticle. Fine for a rimfire or a first deer rifle used inside 200 yards. Expect noticeable light loss at dusk and do not rely on dialing.
- Mid tier: where value peaks for most hunters. Fully multi-coated glass, dependable zero retention, repeatable turrets, real warranty support, and often a capped-adjustable or locking elevation dial. Most hunters should live here.
- Upper tier: meaningfully better low-light performance, tighter tolerances, more consistent tracking across the full elevation range, and better eye boxes at high magnification. The gains are real but they are gains at the margins.
A useful rule from experience: a mid-tier scope on quality rings beats a premium scope on cheap rings every time, and both beat an expensive optic that you never verified with a tracking test. Spend on the mount and the ammunition before you spend on the last increment of glass. When you are budgeting a whole setup, remember the optic is one line item among several on a complete hunting trip packing list.
Setup and Preseason Checklist
Whichever category you choose, the optic only performs if the setup is correct. Work through this before the season, not the night before the hunt:
- Mount the scope at the lowest ring height that clears the objective and bolt handle.
- Torque ring and base screws to the manufacturer's specification with a torque driver.
- Level the reticle to the rifle's vertical axis and confirm it after the first shots.
- Set eye relief from your most common field position, not from the bench.
- Focus the diopter using the quick-glance method described above.
- Zero at a distance that suits your hunting — 100 yards is standard, 200 is common in open country.
- Confirm the zero from field positions, not only from a bench, with the same ammunition you will hunt with.
- If the scope has exposed turrets, set the zero stop and run a box test.
- Record the load, velocity, zero distance, and confirmed drops in a note kept with the rifle.
- Re-confirm zero after air travel, a fall, or any change in ammunition.
One more step hunters skip: shoot a cold-bore shot at the start of a range session and record where it lands. That single round, from a clean, cold barrel, is the one that matters on an animal — and it is not always in the center of your five-shot group.
Common Mistakes When Choosing Between the Two
- Buying magnification instead of glass. A crisp 3-9x will out-perform a dim 6-24x at the moment that counts.
- Ignoring the bottom of the zoom range. The low end is what you actually hunt with.
- Mounting too high. Tall rings ruin cheek weld and change close-range holds.
- Choosing FFP for the reputation, not the use. If you never measure or dial, SFP is easier to see.
- Leaving exposed turrets unchecked. Confirm zero every time you pick the rifle up.
- Zeroing only from a bench. Field positions are where the shot happens.
- Skipping the tracking test. Never dial with a scope whose adjustments you have not verified.
- Assuming the reticle replaces practice. Grid marks are a tool, not a substitute for confirmed data and honest range limits.
Maintenance and Field Care
Optics maintenance is short and mostly about restraint. Blow or brush grit off a lens before you ever touch it with cloth, then use a proper lens pen or microfiber and a drop of lens fluid — never a solvent, never a dry shirt. Keep flip caps or a neoprene cover on while walking, and check them before you sit; a cap flipping shut at the wrong moment has cost more hunters a shot than fogging has.
Between seasons, back off the ring screw inspection: check torque, look for ring marks that suggest movement, and verify the zero on paper. If the scope has taken a hard fall, re-verify rather than assume. Store the rifle where humidity is controlled and avoid leaving optics in a hot vehicle for weeks, which cooks lubricants and stresses seals over time.
Safety and Ethical Shot Limits
Optics are only one part of a safe hunting decision. Before hunting, review the NSSF firearm safety rules, confirm the rifle is zeroed, and know what is beyond the target. For hunting education and state-specific rule direction, resources like Hunter-Ed can help point hunters toward current requirements.
Do Not Let Features Stretch Your Ethics
A tactical-style scope may make the target look closer, but it does not remove wind, animal movement, shooter wobble, or backstop responsibility. Stay inside the distance where you can make repeated, clean hits from real hunting positions.
Set a Personal Maximum Range Before the Season
Define your limit with a repeatable standard rather than a feeling. A workable one: the farthest distance at which you can place five consecutive cold shots inside an 8-inch circle, from a field position you can actually build in the terrain you hunt, in the wind conditions you expect. That number is your maximum — not the number your ballistic app says is possible, and not the number a rifle magazine prints.
Re-test that limit each season, because it moves with practice, load changes, and conditions. Also remember that legal requirements vary by state and species, including restrictions on certain optics and shooting hours, so check your current state regulations each year rather than relying on what was true a few seasons ago.
FAQ
Can you hunt with a tactical scope?
Yes, if the scope fits the rifle, the hunt, and local rules. The tradeoffs are usually weight, complexity, and exposed controls that need careful checking.
Is a hunting scope less accurate than a tactical scope?
No. Accuracy depends on the rifle, ammunition, zero, shooter, and optic quality. A hunting scope can be very accurate if it holds zero and the reticle fits the shot.
Are exposed turrets good for hunting?
They can be, but only if you know how to use them and check them carefully. For many hunters, capped turrets are safer and simpler.
What scope should a beginner hunter choose?
A beginner should usually choose a clear, lightweight hunting scope with simple controls. Learn zeroing, safe handling, and field positions before adding advanced dialing features.
Do I need a first focal plane scope for hunting?
Most hunters do not. FFP is worth it if you hold or measure with the reticle at varying magnifications. If you dial elevation and hold center, or take most shots at one power setting, an SFP scope with a clean reticle is easier to see and usually lighter.
Is a 30 mm or 34 mm tube better than a 1-inch tube?
A larger tube does not by itself make the image brighter. What it provides is more internal room for the erector to travel, meaning more total elevation adjustment — useful for extended dialing. Larger tubes also add weight and require different rings, so choose based on how much travel you need.
How much magnification do I need for deer hunting?
For most deer hunting inside 300 yards, a 3-9x or 2.5-10x is plenty, and much of the time you will be at the low end. Add magnification only if you hunt open country at longer distances from supported positions.
Should I dial or hold over for hunting shots?
Hold over inside the distance where your reticle marks are reliable and the shot happens fast. Dial when you have time, a supported position, a known distance, and confirmed data. The failure mode of dialing is forgetting to return to zero, so build the habit of checking the turret every time you handle the rifle.
Do tactical scopes hold zero better than hunting scopes?
Not inherently. Zero retention comes from build quality, the erector system, and above all the mount and torque. A well-built hunting scope on properly torqued rings will hold zero as reliably as a heavier tactical model.
Can one scope do both hunting and range work?
Yes, and that is exactly the niche hybrid scopes fill. Look for a 3-15x or 4-16x in the 22–26 ounce range with a locking or capped-adjustable elevation turret, a zero stop, side-focus parallax, and a reticle you can see at the bottom of the zoom range. You will give up a few ounces against a dedicated hunting scope and some top-end precision against a dedicated tactical scope, and for many shooters that is a fair trade.
Are scopes with big objective lenses always better in low light?
No. Exit pupil, glass quality, and coatings matter more than raw objective diameter at typical hunting magnifications. A 50 mm objective only helps at high power, and it forces taller rings that worsen cheek weld. A quality 40 mm or 42 mm is often the better all-round hunting choice.
Final Takeaway
For most hunting rifles, a simple hunting scope is the smarter choice. Tactical-style scopes are useful when their features match your training and conditions, but extra features should never replace safety, legal checks, and honest shot limits.
Related reading: tactical-style scope for hunting.
Conclusion
The tactical-versus-hunting debate is really a question about your hunt, not about which optic has more features. If you carry a rifle for miles, take shots at unpredictable moments, and value a fast, clean sight picture in poor light, a purpose-built hunting scope will serve you better — lighter, simpler, and harder to get wrong under pressure. If you shoot known distances from supported positions, keep a data book, and verify your drops, a tactical-style scope turns those habits into hits. The wrong answer is buying the complicated optic and hoping the features substitute for practice.
Your next step is concrete: take the rifle you actually hunt with to the range, confirm zero from field positions instead of a bench, and run the box test described above. Ten minutes of verification will tell you whether your current scope is the limiting factor — and if it is, you will know exactly which category to shop in.
Ready to upgrade with confidence? Work through our scope-selection walkthrough on picking the right glass for your rifle before you spend a dollar — it will save you from the two most expensive mistakes: buying too much magnification and buying twice.