How to Tune a Compound Bow at Home (Step-by-Step)

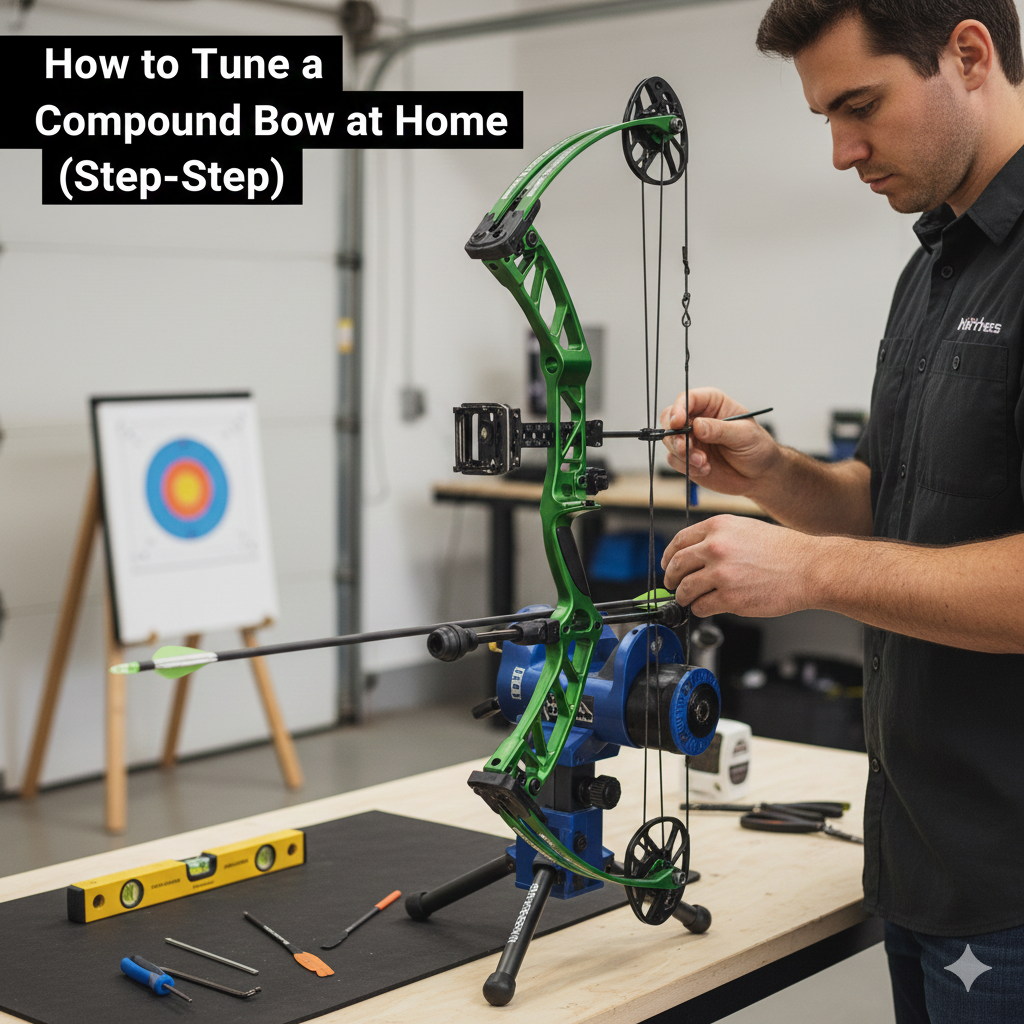
Tuning a compound bow can feel intimidating, especially if you’re new to archery or don’t have access to a professional bow shop. But the truth is you can tune a compound bow at home with the right guidance, basic tools, and a bit of patience. A properly tuned bow shoots smoother, groups tighter, and improves your accuracy dramatically, whether you’re practicing target shooting or preparing for hunting season.
This long-form guide is written in beginner-friendly language and includes clear steps, troubleshooting advice, diagrams you can visualize, and pro tips to help you tune your compound bow confidently without specialist equipment. By the end, you’ll understand not just what to do, but why each tuning step matters.
Let’s dive in.
Why Tuning Your Compound Bow is Essential
Before learning how to tune a bow, it’s helpful to understand why tuning matters. Many archers assume their bow is fine as long as it shoots arrows, but even small misalignments can create major inconsistencies downrange.
Table of Contents
- ✔️ Better Arrow Flight
- ✔️ Improved Accuracy & Consistency
- ✔️ Smooth, Quiet Shooting
- ✔️ Longer Bow and String Life
- ✔️ Broadheads Fly Better
- Basic Tools (Recommended)
- Helpful, but Optional Tools
- ✔️ Check your strings and cables
- ✔️ Inspect the limbs
- ✔️ Check your cams
- ✔️ Check your rest & sight screws
- ✔️ Shoot a few warm-up arrows
- Standard Center Shot Setup
- How to Set Center Shot (Step-by-Step):
- Ideal Nocking Point Position
- How to Set It Correctly
- Common Mistakes to Avoid
- Setup
- How to Read the Tear
- Keep Adjustments Small
- What If You Can’t Get a Bullet Hole?
- How to Check Cam Timing
- Signs of Bad Cam Timing
- Step-by-Step Walk-Back Tuning
- Interpreting the Results
- Broadhead Tuning Steps
- If Broadheads Hit:
- Signs of Wrong Arrow Spine
- Fixing Arrow Spine Issues
- How to Check Cam Lean
- If Lean Is Visible
- ❌ Making big adjustments
- ❌ Changing multiple things at once
- ❌ Poor shooting form during tuning
- ❌ Using mismatched arrows
- ❌ Ignoring cam timing
- ❌ Tuning with worn-out strings
✔️ Better Arrow Flight
A tuned bow sends the arrow forward with minimal side-to-side or up-and-down oscillation, meaning more stable, aerodynamic flight.
✔️ Improved Accuracy & Consistency
When your cams, rest, nocking point, and arrows are aligned, your groups become tighter and more predictable.
✔️ Smooth, Quiet Shooting
A misaligned bow vibrates more and makes extra noise bad for accuracy and terrible for hunting scenarios.
✔️ Longer Bow and String Life
Proper tuning reduces unnecessary stress on cables, cams, and limbs.
✔️ Broadheads Fly Better
Fixed-blade broadheads are very sensitive to tuning. Once your bow is tuned, field points and broadheads will impact in the same group.
Whether you’re an absolute beginner or a seasoned shooter, tuning your compound bow periodically ensures your setup performs at its peak.
Tools You’ll Need to Tune Your Compound Bow at Home
You don’t need a full bow-shop setup, but having some essential tools makes tuning much easier.
Basic Tools (Recommended)
- Allen wrench set
- Bow square (T-square)
- Paper tuning frame (DIY or store-bought)
- Target block
- Level (small bubble level)
- Arrows matched to your draw weight
Helpful, but Optional Tools
- Bow press (for cam timing or twisting cables)
- Draw board (for checking cam sync/timing)
- Nocking pliers
- Serving thread
- Arrow spinner
Don’t worry if you don’t have everything this guide includes alternatives and workarounds for most steps.
Step 1: Inspect & Prepare Your Bow
Before making any adjustments, start with a basic inspection. You want to make sure your bow is safe to tune and shoot.
✔️ Check your strings and cables
Look for signs of wear such as:
- Fraying
- Separation
- Dry or fuzzy appearance
- Cut serving near cams
If strings are older than 1–2 years or heavily worn, consider replacing them before tuning.
✔️ Inspect the limbs
Look closely at the limb pockets for cracks or splits. Damaged limbs can be dangerous.
✔️ Check your cams
Make sure:
- Cams rotate smoothly
- No lean is visible when looking from limb to limb
- Modules are tight
✔️ Check your rest & sight screws
Loose screws cause unpredictable arrow flight, so tighten everything firmly.
✔️ Shoot a few warm-up arrows
This helps seat the string and gives you a baseline feel.
Once your equipment is confirmed safe and stable, you’re ready to begin tuning.
Step 2: Set Your Arrow Rest to Center Shot
Center shot is the starting point for all bow tuning. It positions the arrow so it lines up with the bow’s power stroke.
Standard Center Shot Setup
Most compound bows shoot best with the rest positioned around:
- 13/16 inches (or 0.8125 in) from the riser to the center of arrow shaft
- Arrow perfectly level (0°) when nocked
How to Set Center Shot (Step-by-Step):
- Nock an arrow.
- Look at your bow from behind while holding it steady.
- Adjust the rest left or right until the arrow aligns with the center of the riser.
- Verify using a ruler or digital caliper (optional).
Pro Tip: Most modern bows are designed to shoot well close to 13/16″, so this is the best starting point.
This step won’t guarantee perfect flight yet, but it gives you optimal geometry for the next steps.
Step 3: Set Your Nocking Point & D-Loop
The nocking point determines the arrow’s vertical alignment. If it’s too high or too low, the arrow leaves the bow tail-up or tail-down.
Ideal Nocking Point Position
- Arrow level with the rest
OR - Arrow slightly (1/16–1/8 inch) nock high
How to Set It Correctly
- Clip a bow square on the string.
- Slide it down until it touches the rest.
- Mark a level line.
- Tie your D-loop around that point.
Common Mistakes to Avoid
- Placing the nocking point too high
- Tying one side of the D-loop tighter than the other
- Using a crooked arrow rest
Once the nocking point is correct, you’re ready for the most important stage: paper tuning.
Step 4: Paper Tune Your Compound Bow
Paper tuning shows exactly how your arrow leaves the bow. It’s the single most revealing tuning test you can perform at home.
Setup
- Tape a sheet of paper to a cardboard frame
- Stand 6–8 feet from the paper
- Shoot with good form
How to Read the Tear
Below are the most common paper tears and what causes them:
| Tear | Meaning | Fix |
|---|---|---|
| Perfect Bullet Hole | Arrow flying straight | No adjustment needed |
| Left Tear | Arrow tail kicking left | Move rest right or use stiffer spine |
| Right Tear | Arrow tail kicking right | Move rest left or weaken spine |
| High Tear | Tail high on exit | Lower nocking point or rest |
| Low Tear | Tail low on exit | Raise nocking point or rest |
Keep Adjustments Small
Move the rest 1/32 inch at a time.
After each adjustment:
- Shoot again
- Check tear
- Repeat until you see a clean bullet hole
What If You Can’t Get a Bullet Hole?
Try checking for:
- Arrow spine mismatch
- Poor shooting form
- Uneven D-loop
- Cam lean
99% of paper tune issues can be fixed with tiny lateral or vertical tweaks.
Step 5: Check & Correct Cam Timing
Cam timing ensures both cams hit the draw stops simultaneously. If one cam hits earlier than the other, the bow won’t transfer energy efficiently.
How to Check Cam Timing
- Draw your bow slowly.
- Have someone watch the cams.
- See if top and bottom cams hit the wall at the same time.
If one cam hits early:
- Add twists to the cable on the early cam
- Or remove twists from the cable of the late cam
Without a bow press:
You can visually inspect timing but cannot twist cables. However, many archers shoot well even with small timing differences.
Signs of Bad Cam Timing
- Harsh draw cycle
- Sloppy back wall
- Poor groups
- Broadheads flying inconsistently
Correct timing makes the bow feel smoother and more stable.
Step 6: Set Your Center Shot with Walk-Back Tuning
Walk-back tuning aligns your arrow flight vertically at different distances. It helps you determine whether your rest is perfectly centered.
Step-by-Step Walk-Back Tuning
- Place a vertical line target (string, tape, etc.).
- Stand at 20 yards and set your sight.
- Shoot 3 arrows aiming at the top of the line.
- Then move back to 30–40 yards.
- Shoot another group at the same line.
Interpreting the Results
- If your arrows consistently fall left, move your rest right.
- If they fall right, move your rest left.
- Adjust in tiny increments.
Continue until arrows track perfectly straight along the vertical line from 20 to 40 yards.
This step dramatically improves long-range consistency.
Step 7: Broadhead Tune for Hunters
If you’re using broadheads (especially fixed blades), this step is essential.
Broadhead Tuning Steps
- Shoot field points at 20–30 yards.
- Then shoot broadheads at the same aiming point.
- Compare their impact points.
If Broadheads Hit:
- Right of field points → Move rest right
- Left → Move rest left
- High/low → Adjust nocking point or rest slightly
When tuned properly, your field points and broadheads should group together.
Step 8: Tune Arrow Spine (If Needed)
Sometimes tuning issues aren’t caused by the bow but by the arrows.
Signs of Wrong Arrow Spine
- Persistent left/right paper tears
- Erratic broadhead flight
- Inconsistent group sizes
Fixing Arrow Spine Issues
- Weak spine: Reduce point weight or choose stiffer arrows
- Stiff spine: Increase point weight or choose weaker arrows
Arrow spine charts can help you choose the right arrows for your draw length and draw weight.
Step 9: Check for Cam Lean
Cam lean is when the cam angles left or right during the draw cycle, causing the string to travel off-center.
How to Check Cam Lean
- Nock an arrow.
- Place it vertically against the cam.
- Look at the arrow alignment along the string path.
If Lean Is Visible
- Adjust yoke cables (binary cams)
- Add twists to the yoke cable on the side leaning away
- If your bow has no yokes, rest tuning will compensate
Cam lean directly affects arrow flight, especially with broadheads.
Step 10: Final Accuracy Checks
Your bow is tuned when:
- ✔️ Paper tear is a perfect bullet hole
- ✔️ Walk-back tuning tracks straight
- ✔️ Broadheads match field points
- ✔️ Cam timing is synchronized
- ✔️ Bow feels smooth and quiet
- ✔️ Arrows group consistently
Once you’ve completed all steps, your compound bow is fully tuned and ready for precise, consistent shooting.
Common Mistakes to Avoid When Tuning a Compound Bow
Even small errors can cost accuracy. Here are the most frequent tuning mistakes:
❌ Making big adjustments
Always make tiny corrections 1/32″ at most.
❌ Changing multiple things at once
Only adjust one variable at a time to isolate the result.
❌ Poor shooting form during tuning
Any inconsistency affects paper tear results.
❌ Using mismatched arrows
Spine, weight, and length must match your bow’s specs.
❌ Ignoring cam timing
Even a perfectly centered rest can’t fix bad timing.
❌ Tuning with worn-out strings
Old strings stretch and create inconsistent performance.
How Often Should You Tune a Compound Bow?
The answer depends on how frequently you shoot, but general guidelines:
- Every 3–6 months for regular shooters
- Before hunting season
- Anytime you replace strings or cables
- After changing arrow types or point weights
- If your groups suddenly widen
Routine maintenance keeps your bow performing at its best.
Final Thoughts
Learning how to tune a compound bow at home is one of the most rewarding skills an archer can develop. Not only does it save money on shop fees, but it also gives you complete control over your bow’s performance.
With careful adjustments, patience, and practice, you can achieve professional-level results right in your own garage or backyard. Remember the golden rule small changes make big differences.
Your bow should now shoot smoother, quieter, and more accurately than ever before whether you’re dialing in broadheads for hunting or practicing long-range target shooting.


