How to Clean a Handgun Properly (2025 Guide)
Keeping your handgun clean is one of the most important responsibilities you have as a firearm owner. Whether you carry your pistol daily, keep it for home defense, or take it to the range on weekends, proper cleaning ensures that your handgun stays reliable, accurate, and safe. A well-maintained firearm lasts longer, performs more consistently, and is far less likely to malfunction when you need it most.
In this comprehensive guide, you’ll learn exactly how to clean a handgun properly from safety checks to detailed cleaning steps, lubrication, reassembly, and maintenance tips. This long-form article also provides gear recommendations and product categories to help you choose the right cleaning tools.
Table of Contents
- Why Cleaning Your Handgun Matters More Than You Think
- How Often Should You Clean Your Handgun?
- Preparing for the Cleaning Process: Tools and Workspace Setup
- Safety First: Ensure the Handgun Is Completely Unloaded
- Field Stripping: How to Break Down the Handgun Correctly
- Step 1: Cleaning the Barrel Properly
- Applying Solvent
- Scrubbing the Barrel
- Running Dry Patches
- Applying a Light Oil Coat
- Step 2: Cleaning the Slide Thoroughly
- Step 3: Cleaning the Frame and Internal Components
- Step 4: Cleaning and Inspecting the Recoil Spring
- Step 5: Lubrication The Step Most People Get Wrong
- Step 6: Reassembling the Handgun
- Step 7: Performing a Final Function Check
- Commercial Recommendations: Best Types of Cleaning Gear for Handgun Owners
Why Cleaning Your Handgun Matters More Than You Think
Every time you fire a handgun, carbon, lead residue, copper shavings, and unburnt powder land inside the barrel and the firearm’s internal mechanisms. Even if you don’t shoot regularly, lint, dust, moisture, sweat, and everyday debris collect inside the slide and frame especially if you carry the handgun for self-defense. Over time, these contaminants can cause:
- Failure to feed
- Failure to eject
- Light strikes or misfires
- Corrosion or rust
- Reduced accuracy
- Excessive wear on moving parts
These issues not only affect performance but also safety. A firearm with compromised internal function is unpredictable. Cleaning and lubrication ensure that your gun cycles smoothly, the barrel remains accurate, and the slide moves consistently with every shot.
How Often Should You Clean Your Handgun?
Cleaning frequency depends on how you use your firearm, the type of ammunition you shoot, and your environment.
- If you shoot regularly, clean after every range session.
- If you carry daily, inspect and lightly clean every 2–3 weeks.
- If your gun gets wet, sweaty, or dusty, clean immediately.
- If the firearm is going into long-term storage, give it a deep cleaning and apply a protective oil layer.
Modern firearms are durable, but regular maintenance prevents premature wear and helps keep your handgun reliable for decades.
Preparing for the Cleaning Process: Tools and Workspace Setup
Cleaning your handgun is far easier when you have the right tools. You don’t need expensive gear, but investing in a good cleaning kit will save time and improve results.
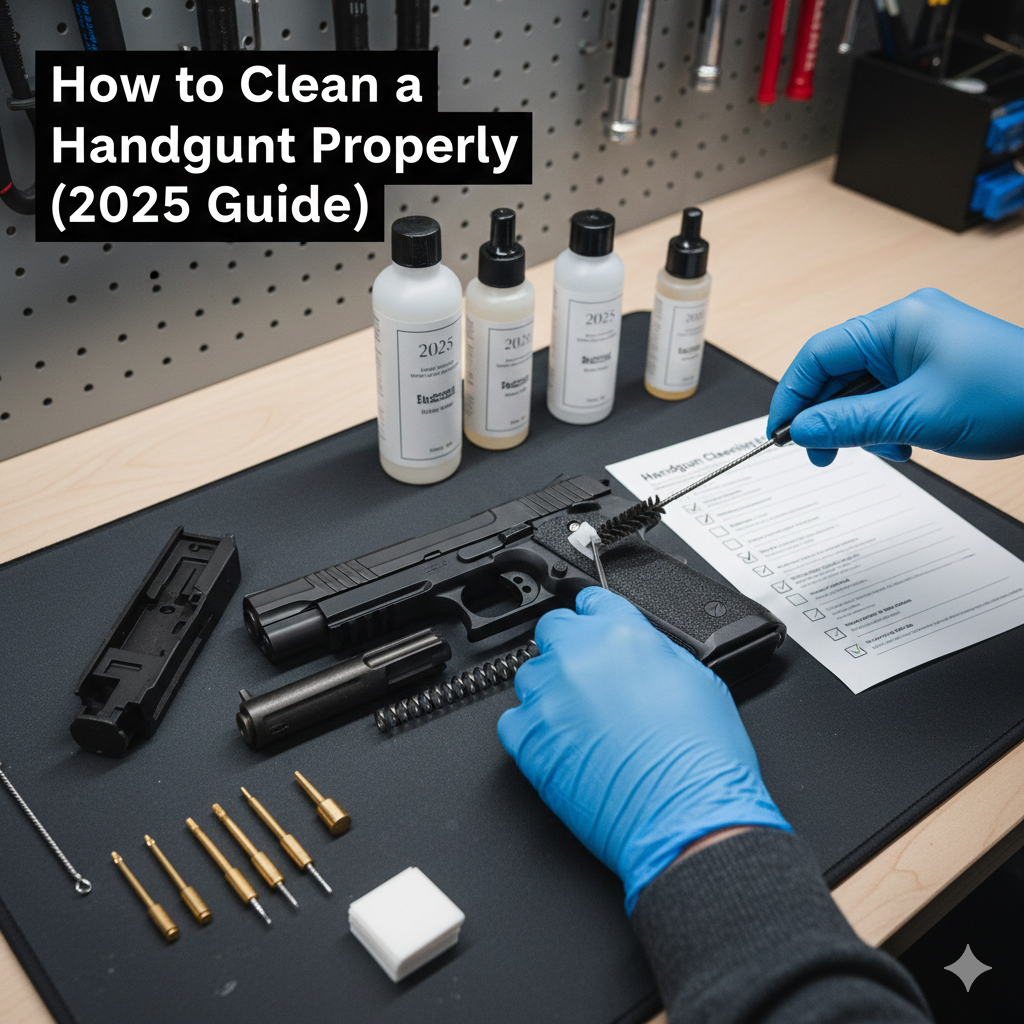
Basic Tools You Should Have
You’ll need a few essentials:
- A cleaning rod or bore snake—matched to your handgun’s caliber.
- A caliber-specific bore brush—usually brass or nylon.
- Cleaning patches—cotton squares used to push solvent and oil through the barrel.
- Gun cleaning solvent—breaks down carbon, lead, and fouling.
- Gun oil or lubricant—protects metal and reduces friction.
- Cotton swabs or pipe cleaners—for tight corners.
- A microfiber cloth—for wiping down the frame and slide.
- A plastic or rubber cleaning mat—to protect your workspace.
Recommended Gear (Commercial Suggestions)
Here are general gear categories you can recommend on theshootinggears.com:
- Universal Handgun Cleaning Kits (work for 9mm, .40, .45, etc.)
- Bore Snake or Pull-Through Barrel Cleaners (excellent for quick cleaning)
- Premium CLP (Clean-Lubricate-Protect) Solvents
- High-quality Gun Oils (synthetic preferred for modern firearms)
- Ceramic-based lubrication for long-term protection
- Carbon removal brushes and picks
- Cleaning mats with parts trays
These categories help your readers find the right tools for cleaning without promoting specific brands.
Once your tools are ready, set up your workspace in a clean, well-lit area. Clear away any ammunition. Ammo should not be near your gun while cleaning.
Safety First: Ensure the Handgun Is Completely Unloaded
Before cleaning any firearm, double-check that the gun is unloaded. This step must never be rushed.
- Hold the handgun with the muzzle pointed in a safe direction.
- Remove the magazine and place it away from your cleaning area.
- Lock the slide open.
- Look inside the chamber use a flashlight if necessary.
- Insert your finger in the chamber to confirm it’s empty.
Only when you are completely certain that the handgun is unloaded should you begin cleaning. Many cleaning accidents happen because of one overlooked round still in the chamber. Take your time with this step.
Field Stripping: How to Break Down the Handgun Correctly
Most modern pistols from Glock to SIG Sauer to Smith & Wesson follow a similar field-stripping process. You typically remove the slide, barrel, and recoil spring. This basic disassembly is all you need for standard maintenance.
After field stripping, lay the parts out in order on your mat. Keeping them organized helps with fast reassembly later.
Step 1: Cleaning the Barrel Properly
The barrel is the heart of the handgun, and it experiences the most fouling. Cleaning it well improves accuracy and prevents carbon buildup.
Applying Solvent
Soak a cleaning patch with solvent and push it through the barrel from chamber to muzzle. Coating the inside allows the solvent to break down carbon and powder residue. Allow it to sit for a few minutes.
Scrubbing the Barrel
Attach a bore brush to your cleaning rod and run it through the barrel several times. This step scrubs out stubborn carbon and metal deposits that patches cannot remove.
Running Dry Patches
Push clean patches through the barrel until they come out nearly white. This process may take 3–10 patches depending on how dirty the barrel is.
Applying a Light Oil Coat
After cleaning, push a lightly oiled patch through the barrel. This prevents corrosion and adds a thin protective layer.
Avoid over-oiling the bore too much oil can cause pressure issues when shooting.
Recommended Product Types:
Bore snakes, brass bore brushes, high-quality CLP solvents, barrel cleaning jags.
Step 2: Cleaning the Slide Thoroughly
The slide collects carbon around the breech face, extractor, and rails. These areas must stay clean for the handgun to function properly.
Apply solvent to a cloth or brush and scrub the interior of the slide, focusing on:
- The breech face
- The extractor area
- The slide rails
- The firing pin channel entrance
Once cleaned, wipe away all solvent with a dry cloth.
Avoid soaking the slide or letting liquid seep into the firing pin channel. Excess solvent can cause light primer strikes or sluggish firing pin movement.
Recommended Product Types:
Nylon brushes, carbon scrapers, microfiber cloths.
Step 3: Cleaning the Frame and Internal Components
The frame includes trigger components and guide rails. Although you don’t disassemble these parts fully during standard cleaning, you must wipe away any dust, carbon, or debris.
Use a brush or cotton swabs to clean around:
- The feed ramp area
- The trigger mechanism opening
- The slide rails on the frame
- Any corners where debris collects
Avoid flooding the frame with oil. Handgun frames especially polymer ones operate best with minimal lubricant.
Recommended Gear:
Cotton swabs, nylon cleaning brushes, frame-safe CLP.
Step 4: Cleaning and Inspecting the Recoil Spring
Recoil springs and guide rods require only light cleaning. Wipe them with a solvent-damp cloth and dry thoroughly. These parts do not need much lubrication unless your handgun manual specifies otherwise.
Inspect the recoil spring for damage, rust, or unusual wear. Recoil springs typically need replacement every 3,000–5,000 rounds for compact pistols and 5,000–8,000 rounds for full-size pistols.
Step 5: Lubrication The Step Most People Get Wrong
Correct lubrication is essential. Too little oil causes friction and wear. Too much oil attracts dust and can cause malfunctions, especially in concealed-carry firearms that sit close to the body and absorb lint and moisture.
Where to Apply Oil
Focus on light lubrication in areas where metal contacts metal, such as:
- The slide rails
- The barrel exterior
- The locking lugs
- The barrel hood
- The guide rod (if required)
- Lightly on the slide (contact points only)
A good rule: If a metal surface rubs or slides, it needs a thin layer of oil.
Recommended Lubrication Products
Synthetic gun oils, ceramic-infused lubricants, CLP oils for multipurpose protection.
Avoid WD-40 and general household oils these are not designed for firearms and can harm the gun’s finish or internals.
Step 6: Reassembling the Handgun
After each part is clean and lightly lubricated, reassemble the firearm. This process is usually quick and follows the reverse of your field-stripping steps.
Once assembled, rack the slide several times to spread the lubricant evenly and ensure the gun cycles smoothly. The slide should feel clean, crisp, and free of any grinding or sticking.
Step 7: Performing a Final Function Check
A function check ensures your handgun is safe and ready. With the firearm unloaded:
- Cycle the slide to verify smooth movement.
- Check that the slide lock works properly.
- Dry fire the weapon if your gun manufacturer allows it.
- Ensure the trigger resets properly when racking the slide.
- Engage and disengage any manual safeties.
If everything feels consistent and smooth, the cleaning job is complete.
Long-Term Handgun Maintenance Tips
Proper storage and regular inspections are just as important as cleaning.
- Store your handgun in a cool, dry place.
- Use a gun safe or lockbox with ventilation.
- Add silica gel packs to reduce moisture.
- Avoid keeping guns stored in foam-lined cases long-term.
- Wipe down the exterior every 1–2 weeks if you carry daily.
- Inspect recoil springs and internal parts every few thousand rounds.
If rust appears, remove it immediately using a rust removal cloth designed for firearms.
Commercial Recommendations: Best Types of Cleaning Gear for Handgun Owners
Here are gear categories you can safely recommend to your readers:
Complete Handgun Cleaning Kits:
Useful for beginners and include everything from rods to brushes and patches.
Bore Snakes / Pull-Through Cleaners:
Fast, convenient, perfect for range bags.
High-Quality Gun Solvents (CLP):
Clean, lubricate, and protect in one step.
Premium Gun Oils:
Essential for preventing wear and corrosion.
Cleaning Mats with Parts Trays:
Prevents losing small components and protects surfaces.
Carbon Removal Tools:
Help break down stubborn fouling around the extractor and breech face.
These are commercial but not brand-specific recommendations, making them ideal for your site.
Conclusion
Learning how to clean a handgun properly is one of the most important skills any firearm owner can master. Whether you own a pistol for concealed carry, sport shooting, or home defense, regular maintenance ensures that your firearm remains safe, accurate, and dependable. With the steps detailed in this guide combined with the right tools, proper lubrication, and consistent long-term care you’ll keep your handgun performing flawlessly for years.