How to Choose the Right Scope Ring Height for Your Rifle
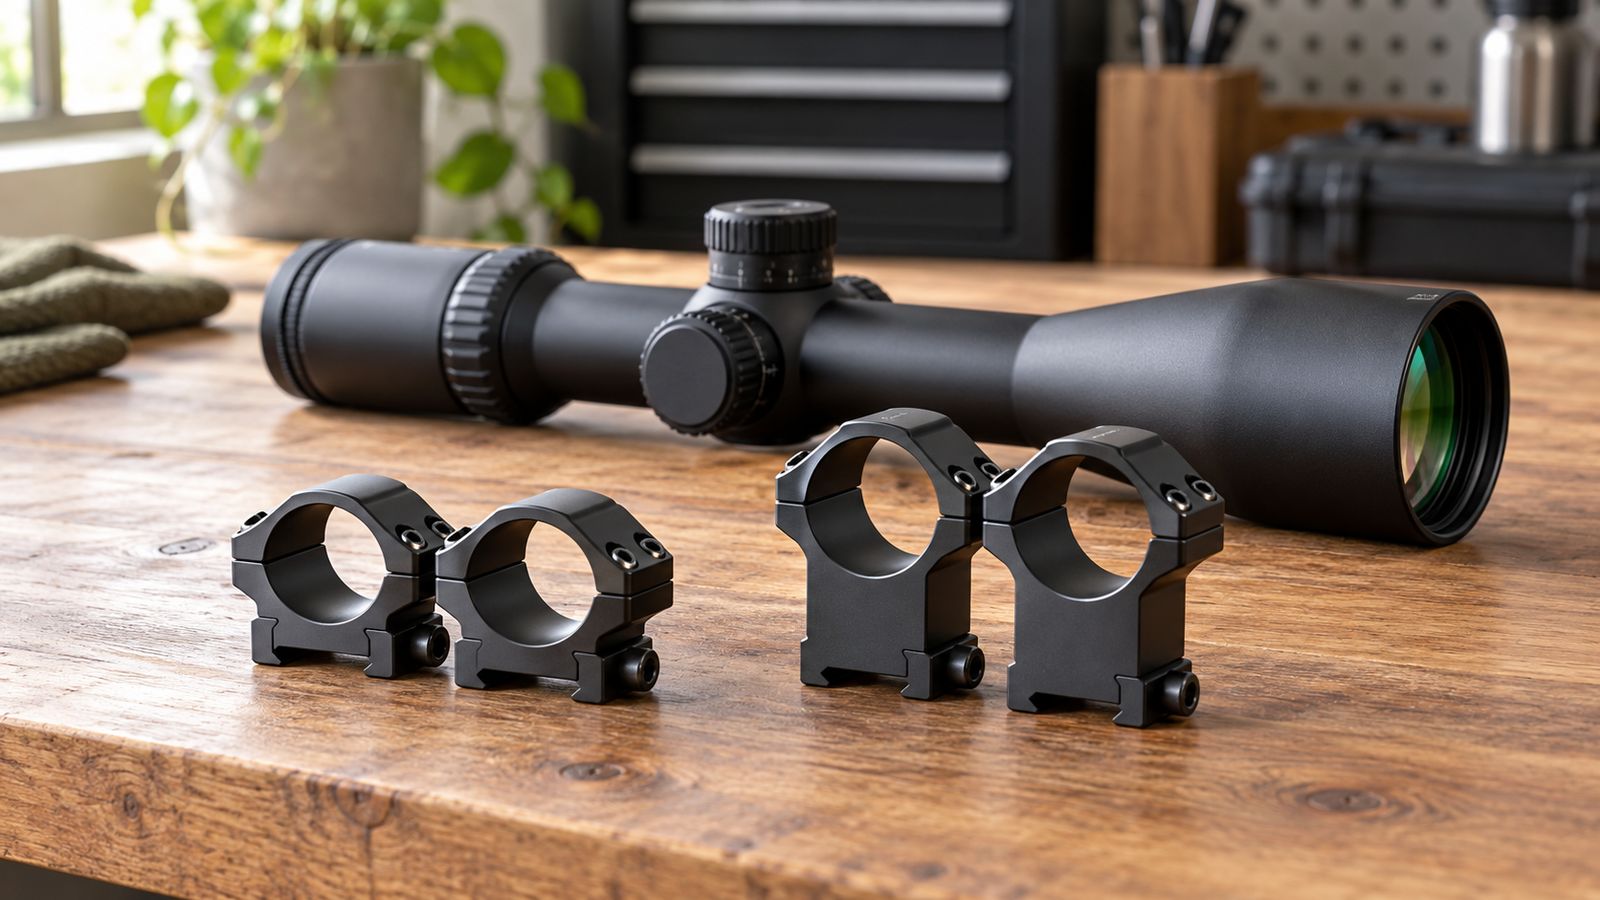
Ring height is the one mount spec people get wrong more than any other, and the fix starts with understanding how to choose scope ring height using measurements instead of guesswork. You measure your objective bell, you measure what's already under the rings, and you check whether your face lands where the eyepiece is. That's it.
The trouble is that almost nobody does step one, and the "Low, Medium, High" labels on the box quietly hide the numbers that matter.
Here's the part that catches people out: ring height isn't standardised. Manufacturer specifications indicate that some brands measure from the base of the ring to the centre of the scope tube, while others measure to the bottom of the ring cradle. That's a difference of roughly half your tube diameter, which on a 30mm tube is about 0.59 inches.
Same word on the label, wildly different result on the rifle.
Quick Answer
Measure your scope's objective bell outer diameter with calipers. Halve that number. Add 0.100 to 0.125 inches of clearance.
Subtract the height of any rail or base already fitted. The result is your minimum ring height to tube centreline. Then check your cheek weld before you buy.
Why Most Shooters Buy Scope Rings Twice
Ask around any range and you'll hear the same story. Someone picked "medium" rings because that sounded sensible, got them home, and found the objective bell kissing the barrel. Or the opposite: the scope sits so high they're chin-welding the stock and hunting for the eyebox on every shot.
Aggregate reviews across major optics retailers show ring height fit as one of the top reasons mounts get returned. It's not a quality problem. It's a measurement problem.
Three separate numbers stack on top of each other, and buyers usually only consider one:
- The objective bell diameter, which is always bigger than the advertised objective size
- The base or rail height, which is already lifting the rings before they lift anything
- Your comb height, which decides whether the finished mount is shootable
Miss any one of those and the mount fails. Miss the third one and it technically "fits" but shoots badly, which is worse because you'll blame the scope, the ammo, or yourself.
There's a second trap. Ring height is a compromise between two competing goals. Low mounting keeps your height over bore small, which flattens close-range holds and helps hunters.
High mounting gives you a more upright head position, faster acquisition, and room for bigger glass or a clip-on device. Neither is better. They're answers to different questions.
And a third trap, mostly on hunting rifles. People buy the scope first, then discover the rifle can't take it at a sensible height. A 56mm objective on a sporter-contour barrel with no rail often needs extra-high rings, and by then you've spent the money.
So the workflow below is deliberately front-loaded with measuring. Ten minutes with a caliper saves a return label and a second order.
The Short Answer: Bell Radius, Rail Height, and Your Cheekbone
Ring height comes down to one formula and one physical test. The formula tells you the minimum. The test tells you what you should actually run.
The clearance formula
Minimum ring height (to tube centreline) = (bell outer diameter ÷ 2) + clearance − drop from rail top to barrel top
| Term | What it means | How to get it |
|---|---|---|
| Bell outer diameter | The widest point of the objective housing, including the metal | Digital calipers across the objective end |
| Clearance | Air gap between bell and barrel | 0.100 in minimum, 0.125 in preferred |
| Drop | Vertical distance from the top of your rail down to the top of the barrel, where the bell will sit | Calipers or a depth gauge |
A worked example makes it clearer. Say you've got a scope with a 50mm objective. Manufacturer specifications indicate the bell housing typically runs 4mm to 8mm wider than the glass, so call it 57mm, or 2.244 inches.
Half of that is 1.122 inches.
Add 0.125 inches of clearance and you need 1.247 inches from the barrel top to the tube centreline. If your one-piece rail sits 0.400 inches above the barrel top at that point, you need rings of at least 0.847 inches to centreline.
That's it. Everything else here is about getting those three numbers right, then sanity-checking the result against your face.
Why the cheekbone overrules the formula
The formula gives you a floor, not an answer. Clearing the barrel by 0.125 inches means nothing if you can't get a repeatable sight picture.
Here's the priority order, and it's the opposite of how most people shop:
- Cheek weld first. Where does your face naturally rest on the comb? The scope should meet your eye there.
- Clearance second. Whatever height your face demands, confirm the bell clears.
- Looks last. "Mounted as low as possible" is a habit, not a rule.
If those first two conflict, you have two options. Raise the comb with a cheek riser or adjustable stock, or accept a different mount height. We'll cover that trade later.
One more thing worth flagging early. Always measure the bell yourself. Two scopes with identical 44mm objectives can have bell housings 5mm apart in diameter depending on the maker's tube and turret design.
Published objective size tells you about the glass, not the metal wrapped around it.
What "Low, Medium, and High" Actually Mean (and Why They Don't Match Across Brands)
They mean nothing on their own. There's no standards body governing ring height nomenclature, and as of 2026 there still isn't one. Each manufacturer picks its own ranges and its own measuring reference, then prints a chart.
That's why a "high" ring from one brand can sit lower than a "medium" from another. It's not marketing dishonesty. It's an unregulated label.
Measured to Tube Centreline vs Measured to the Cradle Floor
This is the biggest source of confusion, and it's worth understanding properly.
Centreline measurement runs from the bottom of the ring base (the surface contacting your rail) up to the optical centreline of the tube. This is the more useful number because it maps directly to the clearance formula.
Cradle floor measurement runs from the bottom of the ring base up to the lowest point of the ring's inner curve, where the tube rests. To get centreline from this, add half the tube diameter.
The gap between the two conventions is significant.
| Tube diameter | Add this to cradle-floor height to get centreline |
|---|---|
| 1 inch (25.4mm) | 0.500 in |
| 30mm | 0.591 in |
| 34mm | 0.669 in |
| 35mm | 0.689 in |
| 36mm | 0.709 in |
A ring listed at 0.400 inches using the cradle-floor convention, on a 30mm tube, is functionally a 0.991 inch ring by the centreline convention. Nearly a full inch of difference in interpretation.
Why a Leupold "Medium" Isn't a Vortex "Medium"
Because the two companies use different reference points and different bands. Leupold publishes ring height charts across its STD, Dual Dovetail, PRW2 and Mark series, and the reference used depends on the ring family. Vortex Optics publishes its Pro Series and Precision Matched ring heights to tube centreline.
The practical rule is simple. Never cross-shop by label. Compare the raw dimension in inches or millimetres, and confirm which reference point the manufacturer used before doing the maths.
Here's how to check without guessing:
- Look for "to centre of scope tube" or "centreline" on the spec sheet. That's the easy case.
- If a chart lists a ring for a 1 inch tube at 0.900 in and a 30mm tube at 0.900 in in the same "medium" row, it's almost certainly a centreline measurement.
- If the numbers look small (0.250 in to 0.500 in), it's a cradle-floor measurement.
- When in doubt, email the manufacturer. Every reputable mount maker will tell you.
A quick note on AR-pattern mounts. Those are sold by an explicit optical height figure like 1.5 inches or 1.93 inches, measured from the top of the receiver's Picatinny rail to the tube centreline. That convention is far more consistent across brands, which is why AR mount shopping tends to go more smoothly than bolt-gun ring shopping.
The Five Variables That Decide Your Ring Height
Everything that affects your answer falls into one of five buckets. Work through them in order and the decision makes itself.
Objective Bell Outer Diameter (Not the Advertised Objective Size)
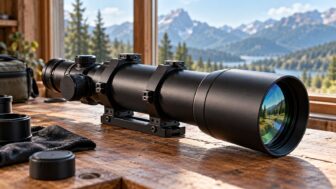
The advertised objective is the diameter of the front glass. The bell outer diameter is the glass plus the housing around it, and that's what has to clear your barrel.
The gap between the two typically runs 4mm to 8mm, but there's no rule you can rely on. Some scopes with aggressive light-gathering designs have thick objective housings. Some compact hunting scopes have surprisingly slim ones.
Rough starting estimates, to be confirmed with calipers:
| Advertised objective | Typical bell OD range | Bell radius (upper estimate) |
|---|---|---|
| 32mm | 38mm to 40mm | 0.787 in |
| 40mm | 46mm to 49mm | 0.965 in |
| 42mm | 48mm to 51mm | 1.004 in |
| 44mm | 50mm to 53mm | 1.043 in |
| 50mm | 56mm to 60mm | 1.181 in |
| 56mm | 62mm to 66mm | 1.299 in |
Two extras catch people out. A screw-on sunshade often has a slightly larger outer diameter than the bell itself. And a flip-up objective cap adds a hinge that sits proud of the housing.
If you plan to run either, measure with them fitted.
Base or Rail Deck Height Already Under the Rings
Whatever's between your receiver and your rings has already done some lifting.
- Integral rails on modern rifles (Tikka T3x picatinny models, many chassis systems) usually sit fairly high
- Bolt-on one-piece rails typically add 0.200 in to 0.400 in above the receiver
- Two-piece bases vary hugely, and front and rear are often different heights by design
- Dovetails cut into the receiver (Tikka, Sako, CZ) have effectively zero added deck height, because the rings clamp straight into the receiver
The key measurement isn't how thick your rail is. It's the drop: the vertical distance from the rail's top surface down to the top of the barrel, measured where the objective bell will sit.
On most bolt actions the barrel steps down considerably ahead of the receiver ring, so that drop is generous. On a heavy-contour or bull barrel it's much tighter. On rifles with a raised chassis handguard, tighter still.
Receiver Shape: Round Bolt Action vs Flat-Top AR
These two platforms behave completely differently, and advice that works for one often fails on the other.
Round bolt-action receivers are curved, so the scope centreline ends up close to the bore axis. Height over bore on a properly mounted hunting rifle typically lands between 1.5 and 1.8 inches. The comb is usually shaped to match a low-mounted scope.
Flat-top AR receivers already put the rail well above the bore. Add a mount and you're commonly at 2.4 to 2.6 inches of height over bore. That's by design.
The AR's straight-line stock puts your face high, so a low mount would be uncomfortable.
Rimfire and air rifles are a third case. Many use 11mm or 13mm dovetails, which sit low, and the small objectives on most rimfire scopes mean low rings usually work fine. The constraint there is often the rear sight or the ejection port, not the barrel.
Bolt Handle, Ejection Port, and Turret Clearance
Barrel clearance gets all the attention. These three get forgotten and cause just as many failed installs.
Bolt handle swing. On bolt actions, the handle rotates up and back. If the ocular bell or the elevation turret housing is in the way, the rifle won't cycle. Straight-pull actions and rifles with a large turret housing are the usual offenders.
Test with the scope dry-fitted and the bolt cycled through its full stroke.
Ejection port. Empty cases need somewhere to go. Mount too low and brass can clip the underside of the tube, then bounce back into the action. This shows up most on short actions and rifles with mild ejection.
Turret and rail contact. On some setups the elevation turret's housing sits close enough to the rail that a capped turret can't rotate. Rare, but it happens with very low mounts and large tactical turrets.
Add rear iron sights, receiver-mounted peep sights, and the bolt shroud on certain actions. All of them can dictate a higher mount than the barrel clearance formula suggests.
Comb Height and Where Your Face Naturally Lands
This variable decides whether the rifle is pleasant to shoot, and it gets the least thought at the point of purchase.
Shoulder the rifle with your eyes closed. Settle your cheek onto the comb naturally, without craning or lifting. Open your eyes.
- Looking at the underside of the tube? Your mount is too high for that comb.
- Looking at the top of the turret? Your mount is too low.
- Centred in a full, round sight picture? That's the height.
Things that shift this answer:
- Straight-comb stocks generally suit lower mounts
- Monte Carlo and adjustable combs tolerate higher mounts
- Chassis rifles with adjustable cheekpieces make mount height almost a free choice
- Thick winter clothing raises your shoulder pocket, which changes head position
- Younger or smaller-framed shooters often need lower mounts than an adult male reference
If the comb and the required clearance genuinely conflict, remember you can change the comb. You can't change the objective bell.
How to Measure Your Setup in Under 10 Minutes
Do this once, properly, and you'll order the right rings first time.
Before anything else: clear the firearm. Remove the magazine, open the action, visually and physically confirm the chamber is empty, and keep it pointed in a safe direction throughout.
Tools You Actually Need
You don't need much, and everything here is reusable for future mounts.
| Tool | Purpose | Typical cost (USD) |
|---|---|---|
| Digital calipers | Bell OD, rail height, drop measurement | $20 to $60 |
| Feeler gauge set | Verifying final clearance | $10 to $20 |
| Inch-pound torque driver | Correct ring and base torque | $40 to $120 |
| Torx and hex bits (T15, T25) | Ring caps and base screws | Often included |
| Painter's tape | Protecting the barrel during dry-fit | $5 |
| Index cards or business cards | Quick clearance check | Free |
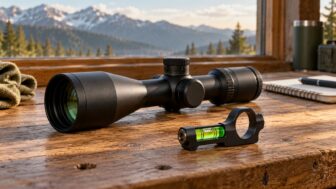
An anti-cant level or scope levelling kit is worth adding at install time, but it isn't part of the measuring step.
Step 1: Caliper the Objective Bell
Open the calipers wide and measure across the widest point of the objective housing. Not the glass. The metal.
Take the measurement twice, rotating the scope 90 degrees between attempts, to catch the true maximum. Write it down in both inches and millimetres so you can cross-reference against any manufacturer chart.
If you're running a sunshade or objective flip cap, fit it and measure again. Use the larger figure.
Now halve it. That's your bell radius, and the rest of the process revolves around it.
Step 2: Measure Deck Height Above the Barrel Line
Fit your base or rail to the receiver first, torqued to spec. You're measuring the finished platform, not the bare receiver.
Set the depth rod of your calipers on the rail's top surface, directly above where the objective bell will end up. Extend it down to the top of the barrel at that point. That reading is your drop.
Two practical notes. Measure at the point of closest approach, not the muzzle, because the barrel tapers. On most sporters that's just forward of the receiver ring.
And if your rail extends over the barrel, measure from the rail's top surface, not the receiver's.
Step 3: Run the Clearance Math
Plug the numbers in.
Minimum centreline height = bell radius + 0.125 in clearance − drop
Example, using round numbers:
- Bell OD measured at 2.244 in, so bell radius is 1.122 in
- Desired clearance: 0.125 in
- Measured drop from rail top to barrel top: 0.400 in
- Minimum ring height to centreline: 1.122 + 0.125 − 0.400 = 0.847 in
Order the next standard height above your calculated minimum, not the exact figure. Rings come in fixed increments, and rounding down leaves you with no margin.
If the answer comes out negative or near zero, you've got plenty of room. Your limiting factor will be cheek weld, bolt clearance, or the rear sight instead.
For AR-pattern rifles, skip the barrel maths entirely. The handguard sits well below the rail and clearance is almost never the issue. Choose on optical height instead.
Step 4: Dry-Fit and Card-Check Before You Commit
Once the rings arrive, don't torque anything until you've verified.
- Tape the barrel. A strip of painter's tape under the objective prevents scratches during fit-up.
- Set the scope in the lower ring halves. Caps on loosely, just enough to hold position.
- Slide an index card under the bell. It should pass freely. A standard business card is roughly 0.012 in, so stack 8 to 10 for a rough 0.100 to 0.125 in check. A feeler gauge is more precise.
- Cycle the bolt through full travel. Watch the handle and the ocular bell. Any contact means you go up a height.
- Drop dummy rounds through the ejection port. Confirm nothing fouls the tube underside.
- Set eye relief, then shoulder the rifle with your eyes shut. Open them. Is the sight picture full and round?
- Repeat that shoulder test prone, kneeling, and standing. The bench lies. Field positions tell the truth.
- Crank to maximum magnification and check again. The eyebox is tightest at full power, and that's where marginal height shows up.
If any step fails, you know exactly which direction to move before a single screw gets torqued.
Ring Height Decision Tree by Rifle Platform
The formula gives you a floor. Your platform tells you where to land above it. Work through whichever branch matches your rifle.
Bolt-Action Hunting Rifle
If you're running a 40mm or 42mm objective on a sporter-contour barrel with two-piece bases, then low rings usually work and keep your height over bore around 1.5 inches.
That's the classic setup. A Remington 700, Tikka T3x, or Winchester XPR with a 3-9×40 mounted low is about as close to a default as this hobby gets.
If you've stepped up to a 50mm objective, then you're almost certainly into medium or high rings, depending on your base. This is where most hunters get caught. The jump from 44mm to 50mm adds roughly 3mm of bell radius, which sounds trivial until it eats your entire clearance margin.
If you're on a 56mm objective, then budget for high or extra-high rings and accept the cheek weld consequences. A 56mm bell measures around 62mm to 66mm across the housing. On a standard sporter stock, you'll likely need a comb riser to shoot it properly.
Branch points worth checking on a bolt gun:
- Heavy or varmint barrel contour? Add height. The barrel doesn't taper away as fast.
- Integral dovetail receiver (Tikka, Sako, CZ 457)? Your deck height is effectively zero, so rings do all the lifting.
- Magnum calibre with heavy recoil? Set eye relief long and check the ocular bell clears the bolt shroud under recoil, not just at rest.
- Rear iron sight still fitted? Either remove it or mount above it. Half-clearing an iron sight is worse than either option.
Precision and PRS Chassis Rifles
If you're shooting a chassis rifle with an adjustable cheekpiece, then ring height becomes a much softer decision. You can raise the comb to meet almost any mount.
Common practice in precision circles runs higher than hunting practice. Heights around 1.0 to 1.1 inches to centreline are typical on MDT, KRG, and Magpul Pro 700 chassis builds. Higher mounts let you keep your head more upright in prone, which is more sustainable over a long stage.
If you're running a 34mm or 35mm tube with a large tactical turret, then check turret-to-rail clearance specifically. Big elevation knobs on very low mounts can bind.
If you're using a 20 MOA canted base, then remember the rail isn't parallel to the bore. The rear of the rail sits higher than the front. Measure your drop at the front ring position, where the bell sits, not at the rear.
One more consideration. Barricade and prop work means your head position changes constantly. A slightly higher mount gives you more tolerance for imperfect positions, which is why the discipline has drifted upward over the past decade.
AR-15 and AR-10 with an LPVO
If you're mounting an LPVO on a flat-top AR, then ignore barrel clearance and choose on optical height. The handguard sits well below the rail and the bell almost never touches anything.
The decision here is about your head, your iron sights (if any), and whether you want an offset red dot.
- Traditional prone-heavy shooting? 1.5 in to 1.57 in
- Mixed practical use, standing and moving? 1.7 in
- Plate carrier, helmet, or fast transitions? 1.93 in
- Night vision under a helmet? 1.93 in to 2.05 in
If you want to co-witness with backup iron sights, then your choice narrows to 1.54 in (absolute) or roughly 1.7 in (lower one-third).
If you're mounting an offset red dot on a ring cap, then higher mounts make the offset optic easier to reach at a natural cant angle.
Cantilever offset matters as much as height on an AR. A 2.0 inch forward throw puts the scope's ocular in the right place relative to your charging handle and stock length. Match the offset to your stock and buffer setup, not just to the rail length.
Rimfire Trainers and 11mm Dovetail Guns
If you're scoping a Ruger 10/22, CZ 457, or Tikka T1x, then the constraint is usually the receiver, not the barrel.
Rimfire scopes tend to have small objectives (32mm to 44mm) and the barrels are slim, so clearance is easy. The dovetail interface is what trips people up. 11mm and 3/8 inch dovetails aren't identical, and 13mm CZ dovetails are different again. Buy rings that match your specific groove width.
If you're building a rimfire trainer to mirror a centrefire rifle, then match the mount height and comb setup of the parent gun. That's the entire point of a trainer. A 10/22 with a 1.5 inch height over bore trains different holds than a bolt gun at 1.6 inches, and at NRL22 distances those differences show.
If you're mounting a scope on a springer air rifle, then use rings with a recoil arrestor pin. Spring-piston guns move the scope backwards and forwards, and standard rings walk under that double-shuffle recoil.
Suppressed Rifles and Clip-On Thermal or NV Setups
If you've fitted a suppressor, then check clearance at the can, not just the barrel. Most moderators are considerably fatter than the muzzle.
Manufacturer specifications for common rifle suppressors show outer diameters between 1.5 and 2.0 inches. If your can extends back over the barrel (a reflex or over-barrel design), it can sit right under your objective bell. Measure with the suppressor fitted.
If you're running a clip-on night vision or thermal device in front of your day scope, then the clip-on's optical centreline must match your scope's centreline exactly. This isn't a preference. Misalignment shifts your point of impact.
That usually means picking your scope height to suit the clip-on, which pushes you toward higher mounts in the 1.93 in to 2.05 in range on an AR, or extra-high rings on a bolt gun.
If you're using a dedicated thermal scope, then check the objective housing dimensions carefully. Thermal units often have chunky, squared-off housings rather than round bells, and the widest point may not be where you expect.
AR Mount Heights Decoded: 1.5", 1.54", 1.7", 1.93", and 2.05"
These numbers all measure from the top of the upper receiver's Picatinny rail to the centreline of the scope tube. That convention is consistent across nearly every reputable AR mount maker, which makes cross-shopping much easier than on bolt guns.
| Height | Co-witness | Best for | Trade-off |
|---|---|---|---|
| 1.5 in | Slightly below absolute | Prone shooting, traditional carbine work | Head-down posture, slower in awkward positions |
| 1.54 in | Absolute co-witness | Backup irons centred in the reticle at 1x | Irons clutter the sight picture |
| 1.7 in | Lower one-third | General practical use, mixed positions | Compromise on both ends, but a good one |
| 1.93 in | Above irons entirely | Plate carrier, helmet, fast transitions | Height over bore around 2.6 in |
| 2.05 in | Well above irons | Night vision under helmet, big-frame shooters | Noticeable close-range offset |
What does absolute co-witness actually mean?
It means your backup iron sights appear centred in the optic's sight picture at 1x. The AR-15's standard iron sight optical axis sits at roughly 1.535 inches above the receiver rail, which is why 1.54 in mounts are the absolute co-witness standard.
Lower one-third co-witness puts the irons in the bottom third of the view. You can see them if you need them, but they're not in the way. That's why 1.7 in has become the most popular general-purpose height.
Why has the AR world drifted higher?
Because ergonomics beat tradition. Higher mounts let you shoot with your head up and your neck neutral, which is faster and less fatiguing.
The shift toward 1.93 in mounts came largely from military and competition use, where shooters wear body armour and helmets. Both push your head up and back. A 1.5 in mount forces you to duck down to find the eyebox, and under a helmet that's genuinely uncomfortable.
The counterargument is real. At 1.93 in your height over bore is roughly 2.6 inches. At 10 yards your rounds land about 2.5 inches below your point of aim.
For close work you have to know your offset cold.
Choosing your AR height in three questions
- Do you wear a helmet or plate carrier when shooting? If yes, start at 1.93 in.
- Do you want your backup irons visible? If yes, 1.54 in or 1.7 in.
- Is most of your shooting inside 50 yards? If yes, lean lower to reduce holdover complexity.
If your answers conflict, 1.7 in is the safe default. Aggregate retailer data suggests it's the single best-selling LPVO mount height, and that's not an accident.
Objective Size to Ring Height Reference Chart
Use this as a starting point, then confirm with your own measurements. Every figure assumes ring height measured to tube centreline and 0.125 in of clearance.
Bolt-action rifles with a flat one-piece rail (0.400 in drop)
| Objective | Estimated bell OD | Minimum centreline height | Practical ring class |
|---|---|---|---|
| 32mm | 39mm (1.535 in) | 0.493 in | Low |
| 40mm | 47mm (1.850 in) | 0.650 in | Low |
| 42mm | 49mm (1.929 in) | 0.690 in | Low to medium |
| 44mm | 51mm (2.008 in) | 0.729 in | Medium |
| 50mm | 57mm (2.244 in) | 0.847 in | Medium to high |
| 56mm | 64mm (2.520 in) | 0.985 in | High |
Bolt-action rifles with integral dovetail or low bases (0.150 in drop)
| Objective | Minimum centreline height | Practical ring class |
|---|---|---|
| 32mm | 0.743 in | Low to medium |
| 40mm | 0.900 in | Medium |
| 44mm | 0.979 in | Medium to high |
| 50mm | 1.097 in | High |
| 56mm | 1.235 in | Extra-high |
Notice how the same scope needs a completely different ring class depending on what's underneath. That's exactly why using a generic chart without measuring your own drop causes failed orders.
Adjustments to apply to any chart figure
- Heavy or bull barrel: add 0.050 in to 0.100 in
- Screw-on sunshade fitted: add 0.030 in to 0.060 in
- Suppressor extending over the barrel: measure at the can, expect a significant jump
- 20 MOA canted base: measure your drop at the front ring, not the rear
- Large tactical turrets: confirm turret-to-rail clearance separately
If your calculated figure sits between two available ring heights, go up. Being slightly high costs you a small change in cheek weld. Being slightly low costs you a scope that doesn't fit.
Cheek Weld Beats Clearance: The Test That Settles It
Clearance is a pass/fail check. Cheek weld decides whether you shoot well. Once you've confirmed the bell clears, this is the test that picks the actual height.
Running the test properly
The mistake is doing it at a bench with your elbows planted. That position lets you manipulate your head into almost any position, so everything feels fine. It tells you nothing.
Do it like this instead:
- Fit the scope loosely in the rings with rough eye relief set.
- Stand up. Shoulder the rifle with your eyes closed.
- Let your cheek settle onto the comb naturally. Don't hunt, don't adjust.
- Open your eyes and note what you see before you correct anything.
- Repeat prone with a bipod, then kneeling, then off a barricade or bag if you shoot that way.
- Do it at maximum magnification, where the eyebox is tightest.
That first half-second before you correct is the honest answer. Everything after that is you compensating.
Reading the results
| What you see | What it means | Fix |
|---|---|---|
| Full, round sight picture | Height is correct | Nothing |
| Dark crescent at the bottom | Head sitting too low, mount too high | Lower rings or raise the comb |
| Dark crescent at the top | Head sitting too high, mount too low | Raise rings or lower the comb |
| Full circle but you had to lift your head | Mount too high for the comb | Add a cheek riser |
| Full circle but your neck feels crunched | Mount too low | Go up one height |
| Vignetting only at high magnification | Marginal eye relief or height | Adjust fore/aft first, then height |
That dark crescent has a name: scope shadow, or vignetting. It happens when your eye isn't aligned with the exit pupil. It's not cosmetic.
Inconsistent head position feeds directly into parallax error and vertical stringing on target.
Why the tightest test is at maximum power
Because exit pupil shrinks as magnification rises. Exit pupil is the objective diameter divided by the magnification.
A 3-9×40 at 3x gives you a 13.3mm exit pupil, which is enormous and very forgiving of sloppy head position. Crank it to 9x and you're at 4.4mm. Suddenly the eyebox is tiny, and any ring height error shows up immediately.
If your setup passes at maximum magnification, it'll pass everywhere. If you only ever check at low power, you're testing the easy case.
The seasonal check nobody does
Try the test wearing what you'll actually be wearing. A thick winter coat and layered clothing lift your shoulder pocket by an inch or more.
That shifts where the buttstock sits, which changes your head position on the comb. Hunters in cold climates sometimes find their perfect summer mount height feels wrong in November. If you shoot in heavy clothing, test in heavy clothing.
What Height-Over-Bore Does to Your Close-Range Holds
Height over bore is the vertical distance between your line of sight and the axis of the bore. It's the direct consequence of your ring height choice, and it changes where your bullets land at close range.
The basic geometry
Your bullet starts below your line of sight. It rises to cross that line (the near zero), continues above it, then falls back through (the far zero).
Between the muzzle and the near zero, every shot lands low. How low depends entirely on your height over bore.
That's the part people forget. A rifle zeroed at 100 yards isn't zeroed at 25 yards. It's shooting low, and the higher your mount, the lower it shoots.
How much does it actually matter?
Here's the practical impact at close range for typical setups, using a 100 yard zero.
| Height over bore | Impact at 10 yd | Impact at 25 yd | Impact at 50 yd |
|---|---|---|---|
| 1.5 in (bolt gun, low rings) | ~1.4 in low | ~1.1 in low | ~0.6 in low |
| 1.8 in (bolt gun, high rings) | ~1.7 in low | ~1.3 in low | ~0.7 in low |
| 2.6 in (AR at 1.93 in mount) | ~2.4 in low | ~1.9 in low | ~1.0 in low |
Figures are approximate and vary with cartridge and velocity. The pattern holds regardless.
For a deer hunter shooting at 80 to 200 yards, a 0.3 inch difference is irrelevant. For someone shooting steel at 25 yards or hunting small game up close, it matters a lot.
Where this actually bites you
- Close-range small targets. A squirrel's head at 20 yards is smaller than your offset.
- Shooting through a narrow gap. The bullet leaves the bore lower than you're looking. Clear the obstacle with the bore, not the crosshair.
- AR close-quarters work. At 1.93 in mount height you're holding roughly 2.5 inches high inside 15 yards.
- Rimfire competition. NRL22 stages often include very close targets where offset matters more than wind.
Feeding the number into your ballistics app
Every modern ballistic solver asks for sight height. That's your height over bore, and getting it wrong throws off your entire trajectory table.
Measure it rather than estimating. With the scope mounted and torqued, measure from the top of the barrel to the tube centreline, then add half the barrel diameter at that point.
Solvers including Hornady 4DOF, Applied Ballistics, and the various Kestrel units all use this input. A half-inch error in sight height produces meaningful errors in your close and mid-range solutions, and it compounds when you're holding over rather than dialling.
The trade nobody can escape
Lower mounts reduce close-range offset. Higher mounts improve head position and speed. You can't have both.
Pick based on where you actually shoot. If your typical engagement is 100 yards and beyond, prioritise comfort and go higher. If you're regularly working inside 50 yards, keep it low and keep the maths simple.
When to Raise the Comb Instead of Raising the Rings
Sometimes the mount isn't the problem. Your stock is. Knowing which one to change saves money and gives a better result.
The rule to work to: fix the clearance problem with rings, fix the comfort problem with the comb.
The decision, in plain terms
If the bell won't clear the barrel, then you must go up in ring height. No comb adjustment fixes a physical interference.
If the bell clears fine but you're lifting your head to find the eyebox, then raise the comb. The mount is already correct.
If the bell clears fine and you're mashing your face down into the stock, then lower the rings if you can. If you can't go lower, you're stuck with it and you'll adapt.
If you can't decide, then raise the comb. It's cheaper, reversible, and doesn't require re-zeroing.
Comb-raising options and what they cost
| Option | Typical cost (USD) | Adjustability | Best for |
|---|---|---|---|
| Neoprene cheek pad (slip-on) | $15 to $30 | Fixed, add foam to tune | Quick fix, hunting rifles |
| Strap-on leather cheek rest | $30 to $60 | Fixed | Classic wood stocks |
| Adhesive foam riser kit | $20 to $40 | Stackable layers | Cheap experimentation |
| Aftermarket adjustable stock | $200 to $600 | Fully adjustable | Serious precision use |
| Chassis with adjustable cheekpiece | Built into chassis cost | Fully adjustable | PRS, tactical builds |
Aggregate buyer feedback shows the stackable foam kits are the most useful diagnostic tool here. Add layers until the sight picture goes full and round, measure the stack, then decide whether you want a permanent solution at that height.
The five-minute test before you spend anything
Tape a folded strip of closed-cell foam or a piece of thin plywood to the comb. Shoulder the rifle. See if the problem disappears.
That test tells you whether comb height is genuinely your issue. If a quarter-inch of foam fixes everything, you don't need different rings. You need a cheek pad.
One thing a comb riser can't fix
Bolt clearance. Raise the comb on a bolt-action rifle and the comb itself can start interfering with bolt removal.
Some stocks have a scalloped cutout for exactly this reason. Many aftermarket risers don't. Check that you can still strip the bolt out with the riser fitted, or you'll be pulling it off every time you clean the rifle.
Also worth checking: a raised comb slightly changes how your length of pull feels. Most people don't notice. Shooters with short necks who were already compensating sometimes do.
One-Piece Mounts vs Two-Piece Rings vs Integral Systems
The mount format you choose affects your available heights, your alignment quality, and how easily you can swap optics.
Two-piece rings on separate bases
The traditional bolt-gun setup. Two bases screw to the receiver, two rings clamp to the bases.
Strengths:
- Lightest option, often by a noticeable margin
- Widest choice of heights, including very low
- Front and rear bases can be different heights to build in cant
- Cheapest entry point
- Loading port stays clear on rifles fed through the top
Weaknesses:
- Alignment depends on two separately machined bases
- May need lapping to get true ring alignment
- Ring spacing is fixed by base positions, which limits eye relief adjustment
- More parts, more torque points, more to check
Best for: hunting rifles, lightweight builds, classic bolt actions where weight matters.
One-piece mounts and unimounts
A single machined block carrying both rings, clamping to a rail.
Strengths:
- Ring alignment is machined in, so lapping is rarely needed
- Stronger and more rigid under heavy recoil
- Cantilever versions push the scope forward for correct eye relief on ARs
- Faster to install with fewer failure points
- Consistent height across the whole mount
Weaknesses:
- Heavier, sometimes by 6 to 10 ounces
- Fewer very low height options
- Requires a full-length rail
- More expensive at the quality end
Best for: AR-pattern rifles, precision rigs, anything with a suppressor or clip-on device, and anyone who values install simplicity.
Manufacturers like Nightforce Optics publish detailed unimount height and offset specifications, which makes matching a one-piece mount to a rifle far more predictable than piecing together bases and rings.
Integral ring systems
Rings that clamp directly into the receiver, with no separate base. Common on Tikka, Sako, CZ 457, and Ruger rifles with factory dovetails.
Strengths:
- Fewest components, so fewest things to loosen
- Very low profile because deck height is essentially zero
- Clean look, popular on classic sporters
- No base screws to strip or loosen
Weaknesses:
- Locked into that receiver's specific dovetail dimensions
- Limited height range, and the low deck means you often need taller rings
- Adding a canted rail for long-range work usually means abandoning the integral system
- Fewer aftermarket options
Best for: hunting rifles where you'll never change the optic, and shooters who want the lowest possible mount.
Quick side-by-side
| Factor | Two-piece rings | One-piece mount | Integral rings |
|---|---|---|---|
| Typical weight | 2 to 5 oz | 6 to 14 oz | 2 to 4 oz |
| Height options | Widest | Moderate | Narrowest |
| Alignment quality | Depends on bases | Machined in | Depends on receiver |
| Lapping often needed | Yes | Rarely | Sometimes |
| Eye relief flexibility | Limited | Good with cantilever | Limited |
| Price range | $25 to $250 | $80 to $650 | $60 to $200 |
Where polymer-insert rings fit in
Insert-style rings (Burris Signature and similar) solve two problems at once. The self-aligning polymer inserts remove the need for lapping and eliminate ring marks on the tube.
They also allow mechanical elevation and windage correction. Offset insert sets let you build in roughly 5 to 20 MOA of adjustment without a canted base, which conserves your scope's internal travel.
The trade is a slightly softer clamping interface than metal-on-metal. For hunting rifles and most sporting use that's a non-issue. Hard-recoiling magnums and heavy competition use tend to favour direct metal contact.
Mistakes That Cost People a Second Set of Rings
These failures show up over and over in return data and troubleshooting threads. All of them are avoidable in about ten minutes.
Buying by label instead of by number
Ordering "medium" because the last rifle used medium. The chart on the box only applies to that manufacturer's own reference point, and the rifle underneath is different anyway.
Fix: work in inches or millimetres, always. Confirm centreline versus cradle-floor before comparing anything.
Measuring the advertised objective, not the bell
Using 50mm as the bell diameter when the housing is really 57mm. That 7mm error is 3.5mm of radius, which is more than a quarter of your typical clearance budget.
Fix: calipers on the metal, every time.
Forgetting the rail is already lifting the rings
Calculating a required height, then buying rings of exactly that height while ignoring the 0.300 in rail already fitted. The scope ends up far too high.
Fix: subtract the drop. It's the term people skip most often.
Measuring clearance at the muzzle
The barrel tapers. Checking clearance where the barrel is thin gives you a false pass.
Fix: measure at the point of closest approach, usually just forward of the receiver ring.
Testing cheek weld only at the bench
Everything works from a rested position with your elbows down. Then you shoot prone and the sight picture is half black.
Fix: test standing, prone, and kneeling. At maximum magnification.
Ignoring the sunshade
Buying rings that clear by exactly 0.100 in, then screwing on a sunshade that's 2mm fatter than the bell.
Fix: measure with all accessories fitted, including flip caps.
Mixing up ring caps
Ring cap halves are machined and lapped as matched pairs. Swapping left and right caps, or front and rear caps, introduces misalignment and uneven clamping.
Fix: mark the caps with a paint pen before you remove them. Keep pairs together.
Setting eye relief before the height is settled
Torquing everything down, then discovering the height is wrong and starting over.
Fix: dry-fit and confirm height first. Eye relief second. Torque last.
Over-tightening to "make sure it's secure"
This is the expensive one. Crushing the tube dents the erector housing and can void your warranty.
Fix: use an inch-pound torque driver.
Buying the scope before checking the rifle
Falling for a 56mm objective on a rifle that can't mount it sensibly. By the time you've bought extra-high rings and a cheek riser, the setup is compromised and heavy.
Fix: run the clearance maths before the optic purchase, not after.
Assuming a rimfire dovetail is universal
11mm, 3/8 inch, and 13mm CZ dovetails are all different. Rings that nearly fit will shift under recoil or crack at the base.
Fix: identify your exact dovetail width before ordering.
Torque Specs, Thread Locker, and Not Crushing Your Tube
Getting the height right and then wrecking the scope during installation is a common outcome. Scope tubes are thin-walled aluminium, usually around 0.030 to 0.040 inches at the clamping area. They dent.
What the numbers actually are
Follow your specific manufacturer's published figure. These are the common ranges across major mount makers.
| Fastener | Typical torque | Notes |
|---|---|---|
| Ring cap screws | 15 to 18 in-lb | Some premium rings specify 20 to 25 in-lb |
| Base or rail screws to receiver | 25 to 30 in-lb | Blue thread locker recommended |
| Picatinny cross-bolt or nut | 45 to 65 in-lb | Varies widely, check the spec |
| Ring-to-base clamp (Weaver style) | 30 to 45 in-lb | Follow the maker's figure |
| QD lever mounts | Preset by design | Adjust the tension nut, not a torque wrench |
Note the units. These are inch-pounds, not foot-pounds. Confusing the two is how tubes get crushed. 18 foot-pounds is roughly 216 inch-pounds, which will destroy a scope.
Why you can't do this by feel
Because human hands are poor at estimating low torque values. The ranges here are small enough that a confident wrist easily doubles the target.
An inch-pound torque driver costs $40 to $120. That's cheap insurance on a scope worth several hundred to several thousand.
The torque sequence that prevents tube stress
- Degrease the tube, ring cradles, and caps. Oil reduces friction and lets you over-clamp at a given torque reading.
- Seat the scope, set rough eye relief, fit the caps finger tight.
- Level the reticle to the rifle using a plumb line or levelling kit.
- Tighten in a diagonal cross pattern, a quarter turn at a time.
- Bring all screws up in stages: roughly one third torque, then two thirds, then full.
- Check the ring gap on both sides. It should be even.
That even-gap check is a useful visual tell. If one side has closed up and the other hasn't, back everything off and start again.
Thread locker: where it goes and where it doesn't
Use blue (medium strength) thread locker on:
- Base screws into the receiver
- Rail screws
- Anywhere the manufacturer specifies it
Don't use thread locker on:
- Ring cap screws, unless the maker explicitly calls for it
- Anything you'll want to adjust during setup
Red thread locker is permanent. It generally requires heat to break, and applying heat near a scope is a bad idea. Stick with blue.
Let thread locker cure before shooting. Most medium-strength formulas need several hours to reach useful strength, and around 24 hours for full cure.
Re-checking after live fire
Torque settles. Fire 20 to 50 rounds, then re-check every fastener with the torque driver.
This is standard practice among precision shooters and it catches problems early. A base screw that's backed off by 5 in-lb won't be obvious on the bench, but it will produce mysterious vertical stringing on paper.
Re-check again after any hard knock, a drop, or a season of hard use.
What Good Rings Actually Cost
Ring pricing spans a huge range, and the relationship between price and performance isn't linear. Here's roughly where the money goes, based on current US street pricing as of 2026.
| Tier | Price range | What you get | Sensible for |
|---|---|---|---|
| Budget | $25 to $70 | Basic machining, adequate for light recoil, may need lapping | Rimfire, low-recoil hunting rifles, .22 trainers |
| Mid-tier | $80 to $200 | Good tolerances, quality alloy, reliable clamping | Most hunting and general-purpose rifles |
| Premium | $200 to $400 | Tight tolerances, proven under heavy recoil, excellent finish | Precision rifles, magnums, hard use |
| Elite one-piece and QD | $300 to $650 | Machined alignment, return-to-zero QD, integrated features | PRS, professional use, NV and thermal setups |
Does spending more get you a better fit?
Not directly. Ring height accuracy is about the manufacturer's published data, not the price tag.
What money buys is tolerance consistency and clamping quality. Premium rings hold their stated dimensions more tightly, which means less lapping and less ring-mark risk. Under heavy recoil that consistency matters.
Our research into aggregate user reviews shows a clear pattern. Budget rings perform acceptably on rimfire and mild centrefire cartridges. Complaint rates rise noticeably on magnum calibres and on rifles that see rough field handling.
The proportional rule
A reasonable guideline: spend roughly 10 to 20 percent of your scope's value on the mounting system.
- $300 scope: $40 to $70 of rings is fine
- $1,000 scope: $120 to $200 makes sense
- $2,500 scope: $300 to $500 is proportionate
Mounting a $2,000 optic on $30 rings is the classic false economy. The rings are what hold your zero.
Budget for the whole job, not just the rings
| Item | Typical cost |
|---|---|
| Rings or mount | $25 to $650 |
| Base or rail (if needed) | $30 to $120 |
| Inch-pound torque driver | $40 to $120 |
| Digital calipers | $20 to $60 |
| Levelling kit or plumb line setup | $0 to $90 |
| Ring lapping kit (optional) | $40 to $90 |
| Cheek riser (if needed) | $15 to $60 |
The tools are one-time purchases that serve every rifle you'll ever mount. Calipers and a torque driver together cost less than most people's second set of wrongly-sized rings.
Where it's fine to save
- Rimfire and air rifle mounts. Recoil is minimal. Decent budget rings hold zero indefinitely.
- Low-power fixed scopes on light-recoiling rifles. Not much stress in the system.
- Bases from reputable value brands. Several makers produce solid Picatinny bases at modest prices.
Where it isn't
- Magnum and dangerous-game rifles. Recoil forces are severe and ring failure is a real risk.
- Suppressed and clip-on NV setups. Alignment tolerances are much tighter.
- QD mounts you actually detach and reattach. Cheap QD levers rarely return to zero reliably.
- Anything you'll trust in the field far from home. A mount failure on day one of a booked hunt costs far more than the rings ever did.
Safety Checks and Warranty Traps Worth Knowing
Ring height decisions carry a few risks that don't show up until you're at the range or filing a warranty claim.
Scope bite and eye relief on hard-recoiling rifles
Eye relief is a safety issue, not just a comfort one. A scope that sits at the wrong height pushes you forward or back on the stock, and that changes your eye-to-ocular distance.
On a heavy-recoiling rifle the ocular bell can strike your brow. It's a real injury, and it happens most often when a shooter has shifted position to compensate for a mount that doesn't suit them.
Practical guidance:
- Set eye relief at the long end of the usable range on magnum calibres
- Confirm your position in the shooting stance you'll actually use, not the bench
- If you find yourself creeping forward on the stock to get a full sight picture, your height or your length of pull is wrong
- Test eye relief again wearing shooting glasses and hearing protection, since both change your head position slightly
Warranty limits most people don't read
Nearly every major optics manufacturer excludes damage from improper mounting. Over-torqued rings, crushed tubes, and dents from lapping abrasive are the common exclusions.
Manufacturer warranty documentation from the major brands generally covers defects in materials and workmanship, not installation damage. A dented erector tube from 40 in-lb on the ring caps is installation damage. That claim gets declined.
Follow the published spec and photograph the finished install. If something does fail, you've got evidence the mounting was done correctly.
Lapping: useful, but easy to overdo
Ring lapping removes material from the ring cradles to correct alignment. Done properly it improves contact area and reduces stress on the tube.
Done badly it removes too much material and leaves the rings loose. Some manufacturers void warranty on rings lapped beyond a stated limit.
Guidelines that keep you out of trouble:
- Lap only until you see 70 to 80 percent contact across the cradle
- Clean all abrasive out thoroughly before the scope goes in
- Wear eye protection
- Skip lapping entirely on quality one-piece mounts. They're machined in alignment already
Suppressors, night vision, and legal context
If a suppressor is driving your ring height decision, the ownership side is regulated in the US under the National Firearms Act. Transfer, registration, and interstate transport rules all apply. The Bureau of Alcohol, Tobacco, Firearms and Explosives publishes the current requirements.
Night vision and thermal use for hunting is regulated at state level, and the rules vary widely by species, season, and county. Some states permit thermal for hogs and coyotes but not deer. Check your state wildlife agency before you build a mount stack around a clip-on device.
Muzzleloader and primitive-weapons seasons often restrict magnified optics entirely. If you're mounting a scope on a muzzleloader, confirm what's legal in your hunting area first.
Basic handling rules during the whole process
- Firearm unloaded, magazine out, chamber visually and physically checked
- Muzzle in a safe direction the entire time, including during dry-fitting
- No ammunition on the bench while you're working
- Use dummy rounds for ejection port clearance checks, never live rounds
- Confirm zero on a proper range after any mount change
That last one gets skipped more than it should. Any change to ring height changes your point of impact. Assuming otherwise is how people miss on the first shot of the season.
Frequently Asked Questions
How much clearance should there be between the scope and the barrel?
A minimum of 0.100 inches, with 0.125 inches preferred. That gap accounts for barrel heating and expansion, plus slight flex under recoil. Anything tighter risks contact, which can shift your zero or dent the objective housing.
Check the gap at the barrel's closest point, not at the muzzle where the contour has already tapered.
Can scope rings be too low?
Yes, and it causes more problems than being too high. Rings that are too low force the objective bell against the barrel, block the ejection port, or interfere with bolt handle travel. Even when clearance is fine, an overly low mount makes you crane your neck downward, which hurts consistency.
Low mounting is a habit, not a rule.
Do I need higher rings for a 50mm objective?
Usually yes. A 50mm scope typically has a bell housing measuring 56mm to 60mm across, so you need roughly 1.12 to 1.18 inches from the barrel to the tube centreline. On a standard sporter with a low base, that means medium or high rings.
Always measure your own bell rather than trusting the advertised objective figure.
What ring height do I need for an AR-15 with an LPVO?
Most shooters land on 1.7 inches, measured from the receiver rail to the tube centreline. That gives lower one-third co-witness with backup irons and a comfortable head position. Go to 1.93 inches if you shoot in a helmet or plate carrier.
Drop to 1.5 inches if you shoot mostly prone and want less close-range offset.
Should I match ring height across multiple rifles?
Only if the rifles are meant to shoot alike. Matching height over bore between a centrefire rifle and its rimfire trainer keeps your holds consistent, which is the whole point of a trainer. For unrelated rifles, match the mount to each rifle's comb and barrel instead.
Forcing a shared number onto different stocks creates bad cheek weld on both.
How do I know if my rings are measured to centreline or cradle floor?
Check the manufacturer's spec sheet for the phrase "to centre of scope tube." If a chart lists the same height for both 1 inch and 30mm tubes, it's almost certainly centreline. If the numbers look unusually small, around 0.250 to 0.500 inches, it's measured to the cradle floor. Add half your tube diameter to convert.
Your Ring Height Decision Checklist
Work through this in order. Each step either confirms the previous answer or sends you back one level.
Before you order anything
- Firearm confirmed unloaded, chamber clear
- Objective bell outer diameter measured with calipers, accessories fitted
- Bell radius calculated (bell OD divided by 2)
- Base or rail already installed and torqued
- Drop measured from rail top to barrel top at the closest point
- Minimum centreline height calculated: bell radius + 0.125 in, minus drop
- Manufacturer's measuring reference confirmed (centreline or cradle floor)
- Rounded up to the next available ring height
- Tube diameter matched (1 in, 30mm, 34mm, 35mm)
- Rail interface matched (Picatinny, Weaver, 11mm, 13mm, proprietary dovetail)
After the rings arrive, before you torque
- Barrel taped, scope dry-fitted in lower ring halves
- Feeler gauge or card stack confirms 0.100 in minimum clearance
- Bolt cycled through full travel without contact
- Dummy rounds ejected cleanly with no tube contact
- Turret housing clears the rail
- Rear iron sight or bolt shroud clearance confirmed
- Eye relief set for your actual shooting position
- Eyes-closed shoulder test passed standing
- Same test passed prone and kneeling
- Same test passed at maximum magnification
- Sight picture full and round with no crescent shadow
Installation
- Tube, cradles, and caps degreased
- Reticle levelled to the rifle
- Ring caps tightened in a cross pattern, in stages
- Torque driver set to the manufacturer's inch-pound figure
- Ring gaps even on both sides
- Blue thread locker on base and rail screws only
- Thread locker allowed to cure before shooting
After live fire
- Boresighted, then zeroed at your chosen distance
- Eye relief re-confirmed under recoil
- All fasteners re-torqued after 20 to 50 rounds
- Height over bore measured and entered into your ballistic solver
- Close-range offset noted for your typical shooting distances
If something failed
Bell won't clear: go up one ring height. Don't try to solve this any other way.
Bolt won't cycle: go up one ring height, or move the scope forward if the ocular is the issue.
Crescent at the bottom of the sight picture: mount is high for your comb. Add a cheek riser or drop a height if clearance allows.
Crescent at the top: mount is low. Go up, or lower the comb.
Fine at 1x, dark at max power: adjust eye relief fore and aft first. If that doesn't fix it, your height is marginal.
Everything fits but nothing feels right: the comb is usually the culprit, not the rings. Test with foam taped to the stock before spending money on new mounts.