Anti-Cant Device on a Rifle Scope: Do You Really Need One?
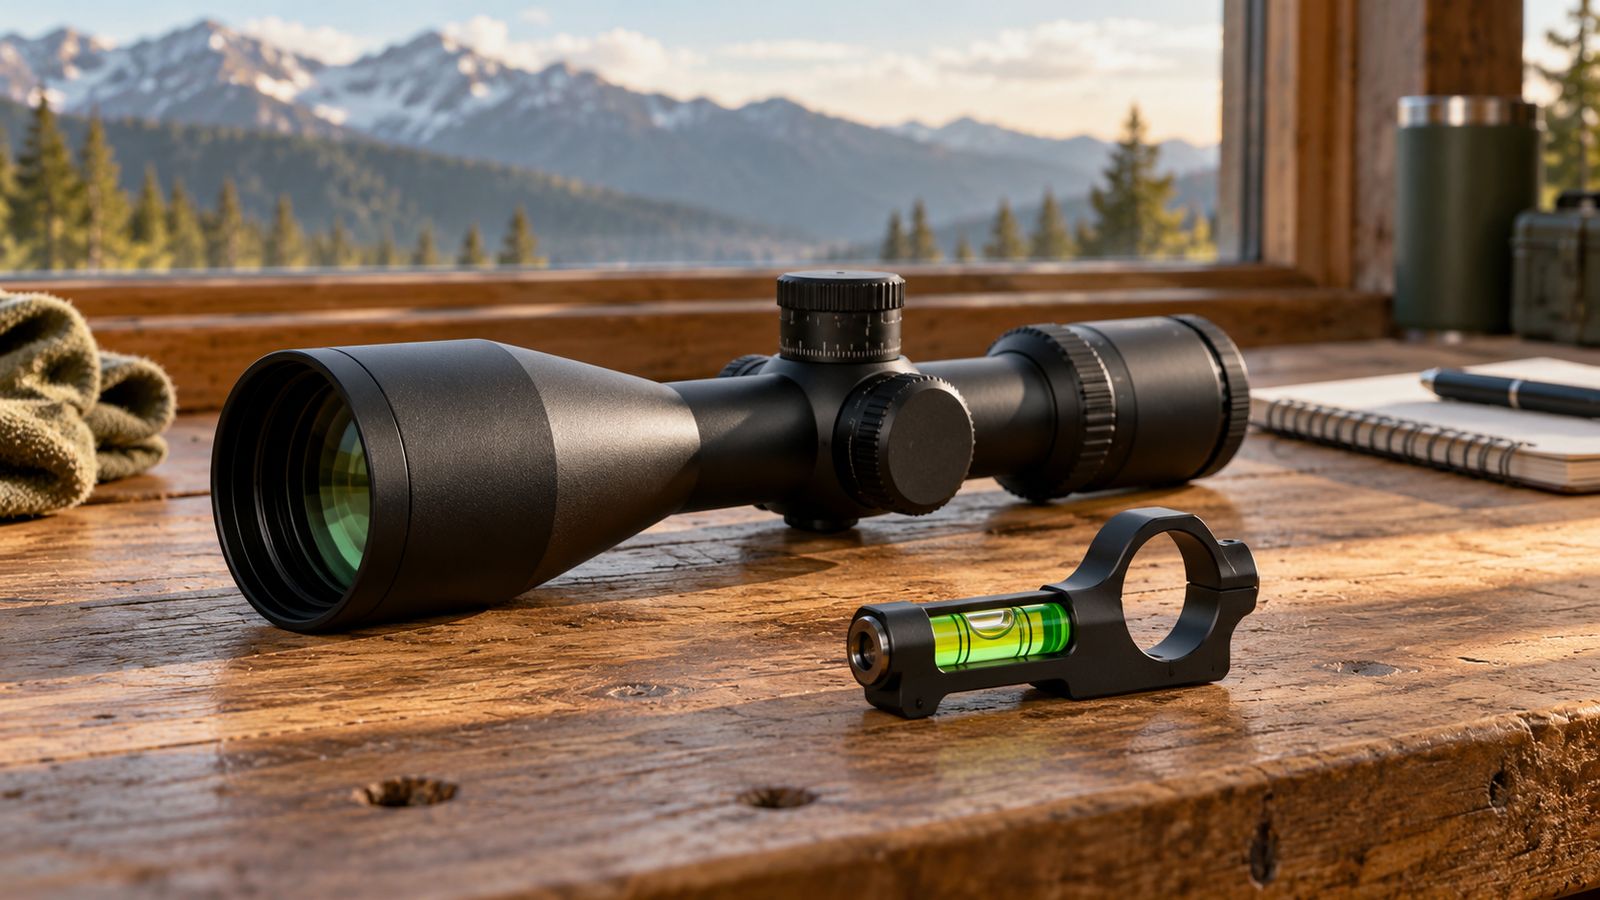
Miss left and right at 900 yards often enough and you'll start blaming the wind. Frequently it isn't the wind. It's cant, and an anti cant device rifle scope setup solves it for roughly the price of a box of match ammo.
The catch is that five distinct types exist, and they don't all do the same job.
Here's the number that decides everything: cant error equals your bullet's drop multiplied by the sine of the cant angle. So 5 degrees of roll with 300 inches of drop shoves the bullet about 26 inches sideways. That same 5 degrees at 300 yards moves it roughly an inch.
Where you sit on that curve determines which level you need, and whether you need one at all.
Quick Answer
An anti-cant device is a level showing when your rifle rolls off plumb. It mounts on the scope tube, rings, rail, or optic mount. Cant error equals bullet drop times the sine of the cant angle.
Under 400 yards the error is usually negligible. Past 700 yards it becomes a genuine miss.
Why a Level Only Matters Once Your Bullet Starts Dropping Hard
Cant is rotation of the rifle around the bore axis. Roll the gun clockwise and your dialled elevation stops pointing straight up. It now points up and slightly right.
That's the whole problem in one sentence. Your scope's elevation travel is only vertical if the rifle is plumb to gravity. Tip it, and every click you've dialled gets split into a vertical component and a horizontal one you never asked for.
The critical part, and the part most write-ups get wrong, is that the error scales with drop. Not with distance. Drop.
The Actual Math: Drop Times the Sine of the Cant Angle
Two formulas cover it:
- Horizontal error = drop × sin(cant angle)
- Vertical loss = drop × (1 − cos(cant angle))
Run the numbers and the vertical term almost disappears. At 5 degrees of cant with 300 inches of drop, you lose about 1.1 inches of elevation. You pick up 26 inches of lateral error.
That's a 23:1 ratio.
So when people say cant costs you elevation, they're technically right and practically wrong. Cant is a horizontal problem. Treat it as one.
Here's what that looks like across common setups. Drop figures are approximate, from a 100-yard zero, at sea-level standard conditions.
| Load and distance | Approx. drop | Error at 1° | Error at 3° | Error at 5° |
|---|---|---|---|---|
| .308 Win 175gr, 300 yd | ~14 in | 0.2 in | 0.7 in | 1.2 in |
| 6.5 Creedmoor 140gr, 600 yd | ~95 in | 1.7 in | 5.0 in | 8.3 in |
| 6mm Dasher 105gr, 1,000 yd | ~250 in | 4.4 in | 13.1 in | 21.8 in |
| 6.5 Creedmoor 140gr, 1,000 yd | ~290 in | 5.1 in | 15.2 in | 25.3 in |
| .308 Win 175gr, 1,000 yd | ~390 in | 6.8 in | 20.4 in | 34.0 in |
| .338 Lapua 300gr, 1,500 yd | ~1,000 in | 17.5 in | 52 in | 87 in |
Look at the two 1,000-yard rows. Same distance, same cant angle, and the .308 shooter eats 34 inches while the Dasher shooter eats 22. The slow, high-drop cartridge gets punished harder.
Every time.
Why 5 Degrees Is Nothing at 300 Yards and Brutal at 1,000
At 300 yards with a .308, five degrees of cant costs you about an inch and a quarter. Your wind call is off by more than that on a calm day. Your ammo's vertical spread is probably bigger.
At 1,000 yards, that same five degrees is 34 inches. Almost a full mil. That's a clean miss on a 20-inch plate even with a perfect wind call.
Push to ELR distances and it stops being a miss and starts being an embarrassment. At 1,500 yards with a .338 Lapua, five degrees puts you more than seven feet off centre. You'd never spot the impact.
So the honest guidance breaks down like this:
- Inside 400 yards: skip it. Cant error is buried in your group size.
- 400 to 700 yards: helpful on smaller targets, optional on deer-sized ones.
- 700 to 1,200 yards: you want one. This is where cant becomes a named error source.
- Past 1,200 yards: mandatory. There's no argument here.
How much do shooters actually cant? Aggregate coaching feedback and match observation suggest a prone shooter on a well-set bipod usually holds within 1 to 2 degrees with no reference at all.
Put that same shooter on a barricade, tripod, or awkward rooftop position and the drift commonly runs 4 to 8 degrees. On a steep hillside where the terrain fools your inner ear, more.
That's the real argument for a level. It isn't prone shooting. It's everything else.
Rifle Cant vs Scope Cant: Two Different Problems, One Confused Fix
These get used interchangeably all the time and they are not the same thing. Getting this straight saves you money and a lot of frustration.
Rifle cant is you rolling the rifle at the moment of the shot. It changes shot to shot. It's a shooter error.
Scope cant is the reticle sitting tilted relative to the rifle's vertical plane, baked in during mounting. It never changes. It's a setup error.
An anti-cant device only addresses the first one. If your reticle went on 2 degrees off, a bubble level will faithfully tell you the rifle is perfectly plumb while your reticle sits 2 degrees crooked. You've just automated a permanent error.
What an Anti-Cant Device Actually Corrects
The device gives you a live gravity reference in your peripheral vision so you can roll the rifle back to plumb before the break. That's it. It's a feedback tool, nothing more.
It works best on the errors you can't feel:
- Roll induced by an awkward barricade or tripod position
- Terrain that fools your sense of level on a sidehill
- Inconsistent cheek weld pushing the rifle off-axis
- Sling tension pulling the rifle over in a positional shot
- Bipod feet on uneven ground when you can't reset
What it doesn't do is force you to be plumb. You still have to look at it and act on it, which brings its own problem we'll get to later.
What It Can't Fix
Three things routinely get blamed on cant when a level was never going to help.
Mounting error. If the reticle isn't plumb to the rifle, no level fixes it. You have to remount. This is why the level must be trued to the reticle, not to the scope tube, not to the rail.
Inclination. Shooting steeply uphill or downhill changes your effective drop. That's an angle problem, solved by an Angle Cosine Indicator or by feeding the inclination into your ballistic solver. A bubble level tells you nothing about it.
Different axis, different tool.
Spin drift and aerodynamic jump. Both produce horizontal error at distance. Spin drift pushes a right-twist bullet right, and at 1,000 yards it's commonly around 7 to 10 inches depending on the load. Aerodynamic jump shows up as vertical dispersion tied to crosswind.
Neither has anything to do with cant, and both live in the same lateral error bucket.
That last point is the strongest practical case for a level. It removes one variable permanently. When you're chasing an unexplained horizontal string, you can rule cant out and move on.
The Five Types of Anti-Cant Device, Broken Down
Every product on the market falls into one of five families. They differ in where they mount, what they reference, how well you can see them, and how much they interfere with the rest of your setup.
Scope Tube Clamp-On Levels
The classic. A split-ring or hinged aluminium clamp wraps the main tube, with a curved spirit vial sitting on top or off to one side.
Vortex's Anti-Cant Device, Holland's Radical ACD, the Flatline Ops Accu/Level, and units from Segway Industries and MK Machine all live here. You'll find them in 1 inch, 30mm, 34mm, and 35mm fitments. Weights typically run 0.6 to 1.5 ounces.
The big advantage is position freedom. You can slide it anywhere along the tube and lock it exactly where your eye picks it up. That usually means just forward of the ocular bell, as close to your line of sight as the scope allows.
Strengths:
- Cheapest entry point, commonly $30 to $80
- Position anywhere along the tube
- Most have a rotatable vial you can true to the reticle
- Works with almost any ring and mount combination
Weaknesses:
- Needs bare tube real estate, which is scarce on short scopes with long turret housings
- Can slip under heavy recoil if underclamped
- Can dent or crush the tube if overclamped
- Adds a snag point in drag bags and scabbards
- Fouls throw levers, sunshades, and flip caps on tight builds
Best suited to: shooters who want maximum control over placement, and anyone running a mount without an integrated level.
Ring-Integrated Bubble Levels
Here the vial lives in the ring cap itself, either recessed into the top or hanging off the side on a small saddle. Seekins Precision, Badger Ordnance, Hawkins Precision, and Vortex's Precision Matched rings all offer versions.
The appeal is obvious. No extra clamp, no tube contact beyond what the rings already provide, and one less thing to snag.
The catch is that position is dictated by your rings, and your rear ring position is dictated by eye relief. On plenty of builds that puts the bubble too far forward to read at 20x or higher without breaking your cheek weld. Check this before you buy, not after.
Strengths:
- Zero added tube clamping
- Clean, low-profile build
- Nothing extra to torque or align
- Usually the lightest option
Weaknesses:
- Position is fixed by your ring spacing
- Often too far forward for high-magnification use
- Locks you into one ring system
- Many are non-rotatable, so alignment depends on ring installation being perfect
Best suited to: lightweight hunting rifles and anyone already buying rings, provided the rear ring sits close enough to the ocular.
Rail-Mounted and Receiver-Mounted Levels
These bolt into Picatinny slots behind the scope, or onto the receiver directly. They never touch the optic.
That's genuinely useful if you've got a scope tube with no free space, or if you're nervous about clamping anything to a $3,000 optic. It's also the type with the most serious conceptual flaw.
A rail-mounted level references the rail. Your rail may not be square to your reticle. On a factory-drilled receiver with a factory rail, small angular errors are routine. You now have two independent alignment errors stacked on each other.
You can partly work around it if the unit has a rotatable vial, truing it to the reticle rather than the rail.
The bigger practical issue is visibility. Sitting low behind the scope, the vial falls well outside the peripheral cone you're using at 25x. Most shooters end up lifting their head to read it, which defeats the point.
Strengths:
- Zero contact with the scope tube
- No crush risk
- Fits scopes with no spare tube length
- Often the sturdiest mechanically
Weaknesses:
- References the rail, not the reticle
- Hard to see without breaking cheek weld
- Eats rail space you might want for a rear bag rider or night vision bridge
Best suited to: builds where the tube is genuinely full, and shooters who'll take the time to true the vial to the reticle.
Mount-Integrated Levels
Certain one-piece mounts build the bubble into the mount body, usually up near the ocular where you actually want it. Spuhr's ISMS mounts are the best-known example, with ERA-TAC, some Nightforce Magmount configurations, and various European makers offering the same idea. Nightforce Optics publishes fitment details for its mount and level accessories on its own site, worth checking before ordering.
This is the cleanest execution of the concept. The bubble sits in the top rear of the mount, high enough to read, with no clamps, no extra weight, and nothing to snag.
Strengths:
- Best positioning of any type, right where your eye naturally goes
- No added weight, no added parts
- Nothing to slip or lose calibration from clamp movement
- Usually the most durable long-term
Weaknesses:
- You're buying the mount to get the level
- Premium pricing, often $400 to $800 for the mount itself
- Still references the mount, so reticle truing matters
- Most are not user-adjustable, so a scope mounted slightly off is a remount, not a tweak
Best suited to: shooters already committed to a premium one-piece mount, and anyone building a rifle from scratch where the mount decision is still open.
Electronic LED Levels and In-Scope Bubble Levels
Two different things, both aiming at the same goal: get the level information into your sight picture instead of beside it.
Electronic LED levels like the SEND IT Ballistic Level project a small illuminated bar into your peripheral vision. As the rifle rolls, the lit segment walks left or right. You read it without shifting focus off the reticle.
Most run on a coin cell, offer selectable brightness, and auto-sleep to save battery. Expect roughly $300 and up as of 2026.
In-scope levels put a bubble or indicator inside the field of view itself. A handful of scopes from March and some European makers offer this. It's the theoretical ideal because there's zero head-position parallax and zero glance away.
It's also rare, expensive, and locks you into a specific optic.
Strengths of the electronic route:
- Readable without moving your eye off the target
- Excellent in low light where a plain vial is invisible
- No fluid to thicken in the cold
- Typically finer resolution than a bubble vial
Weaknesses:
- Battery dependency, and dead batteries happen mid-stage
- Highest cost of any type
- Extra bulk on the rail or tube
- Check match rules and state hunting regulations first, since some jurisdictions restrict electronic devices attached to a firearm during hunting hours
Best suited to: PRS and NRL competitors running positional stages under time, and low-light shooters who find plain vials unreadable.
Side-by-Side Comparison: Weight, Visibility, Price, and Fitment
Here's how the five families stack up on the things that actually influence the decision. Prices reflect typical US market ranges as of 2026 and vary by fitment and finish.
| Type | Typical weight and price | Peripheral visibility at 25x | Best suited to |
|---|---|---|---|
| Tube clamp-on | 0.6 to 1.5 oz, $30 to $80 | Excellent if positioned near the ocular | Most builds, budget-conscious shooters |
| Ring-integrated | 0.2 to 0.6 oz added, $0 to $40 over base rings | Varies, often poor if rear ring sits forward | Lightweight hunting rifles |
| Rail-mounted | 0.8 to 2.0 oz, $40 to $90 | Poor, usually needs a head lift | Scopes with no free tube length |
| Mount-integrated | No added weight, mount runs $400 to $800 | Excellent, factory-positioned | Premium builds, new setups |
| Electronic LED | 1.5 to 2.8 oz, $300+ | Excellent, readable in the sight picture | Competition, low-light work |
A few points that don't fit neatly in a table.
Weight matters more than people admit on a mountain rifle. Two ounces at the top of the scope sits high above the bore axis. It makes the rifle feel tippier in the hand than the raw number suggests. On a 6.5-pound backcountry build, ring-integrated is the only option that makes real sense.
Visibility is the most decision-relevant spec and the one nobody publishes. It comes down to how far the vial sits from your eye and how far off-axis it is.
Here's a rough test. At your normal cheek weld and maximum magnification, you should catch the bubble in your lower peripheral field without moving your head at all. If you have to shift, it's mounted wrong or it's the wrong type.
Fitment is not just tube diameter. Check the free tube length between the ocular bell and the elevation turret housing. Check clearance for your throw lever. Check that a scope cap can still open.
Plenty of returns happen because a 34mm level fits a 34mm tube but there's nowhere to put it.
The Features That Actually Decide the Purchase
Once you've picked a family, four attributes separate a level you'll trust from one you'll take off after two range trips.
Rotatable vs Fixed Vial: Can You True It to the Reticle?
This is the most important feature on the list and it barely gets mentioned in product copy.
A rotatable vial sits in a housing you can turn independently of the clamp, then lock with a grub screw. Mount the level, set the reticle plumb against a hanging plumb line, then rotate the vial until the bubble centres. The level is now referenced to your reticle.
Which is the only reference that matters.
A fixed vial is aligned to the clamp body. It assumes your scope tube's exterior is a perfectly concentric machined surface and that your reticle is perfectly plumb inside it. Both assumptions are optimistic.
Even on excellent optics, small reticle rotation relative to the tube exists.
The practical rule: if you're buying a clamp-on or rail-mounted unit, insist on a rotatable, lockable vial. If you're buying ring-integrated or mount-integrated with a fixed vial, your entire scope mounting job has to be right, because there's no correction available afterwards.
Manufacturers like Vortex Optics publish installation instructions and torque values for their level and ring products. Those figures override any generic advice you read.
Distance From the Ocular and Peripheral Visibility at 25x
The closer to your eye, the better. Full stop.
At 4x on a hunting scope, you've got a wide field of view and a generous eye box. You'll spot a bubble almost anywhere. At 25x on a precision scope, your eye box shrinks and your head position gets locked.
Anything more than a few inches forward of the ocular disappears from the useful peripheral field.
Two things follow from this:
- Mount the level as far rearward as the tube allows. Forward of the elevation turret is almost always too far.
- Consider mounting height. A vial that sits high on the tube is easier to catch in the lower periphery than one buried at 9 or 3 o'clock.
There's also a parallax issue people miss. If the bubble sits well below your line of sight, your reading changes with head position. Move your cheek half an inch and the bubble appears to shift.
The fix is a locked, repeatable cheek weld, which you should have anyway.
Single vs Dual Bubble, and Which Side You Mount It On
Single bubble units put one vial on top of the tube or off to one side. Simple, light, cheap. If it's a side-mounted single vial, you're reading it at an angle, which makes very small deviations harder to spot.
Dual bubble designs, like the Badger Ordnance Dual Bubble, place a vial on each side. You read both, and when they match, you're plumb. Faster and less ambiguous under stress, because you're comparing two references instead of judging one against a pair of etched lines.
Side choice is a real decision, not a coin flip:
- Right-handed shooters generally read a left-side vial more comfortably, since the head tilts slightly right on the stock.
- Left-handed shooters get the mirror problem, and plenty of ring-integrated levels only come in one orientation. Check before ordering.
- Top-mounted vials work for both hands but can be blocked by a tall turret or an elevation throw lever.
If you shoot both shoulders, or you transition to weak-side barricade positions in a match, a dual bubble or top-mounted unit removes the problem entirely.
Illumination, Tritium, and Cold-Weather Vial Behaviour
Plain glass vials are invisible in low light. That's the whole story for anyone shooting the last twenty minutes of legal light.
Three approaches solve it:
- Tritium inserts glow continuously for years with no battery. Adds cost, and some jurisdictions have restrictions on tritium-equipped devices.
- Fibre-optic light pipes collect ambient light and brighten the vial in daylight. They do nothing in genuine darkness.
- Electronic LED units are the only option that works in full dark, at the cost of a battery.
Cold is the other environmental factor and it's underdiscussed. Spirit vials are filled with an alcohol or ether mixture, and viscosity climbs as temperature drops. Below roughly 20°F (-7°C), bubble response slows noticeably.
Below 0°F, some vials take a second or two to settle after you roll the rifle.
If you hunt Alaska, the northern Rockies, or high alpine in late season, this matters. A slow bubble in a rushed positional shot is worse than no bubble. You'll trust a reading that hasn't finished moving.
Electronic levels sidestep the problem completely.
Best Pick by Discipline: PRS, ELR, F-Class, and Mountain Hunting
The right type depends almost entirely on what you shoot and from what positions. Here's how the families sort out.
| Discipline | Typical distances | Recommended type | Why |
|---|---|---|---|
| PRS / NRL centrefire | 300 to 1,200 yd | Tube clamp-on or electronic LED | Constant positional changes, time pressure |
| NRL22 / rimfire precision | 25 to 300 yd | Tube clamp-on (cheap) | Huge drop despite short range |
| ELR / King of 2 Miles | 1,500 to 3,000+ yd | Mount-integrated or electronic | Error is measured in feet, not inches |
| F-Class (F-TR, F-Open) | 300 to 1,000 yd | Tube clamp-on, high sensitivity | Fixed prone position, tiny margins |
| 1,000-yd benchrest | 1,000 yd | Tube clamp-on or rail-mounted | Bench is stable, reading time is generous |
| Western big-game hunting | 200 to 800 yd | Ring-integrated | Weight matters more than anything |
| Backcountry / sheep hunting | 200 to 600 yd | Ring-integrated or none | Every ounce is carried uphill |
| Military and LE precision | Varies | Mount-integrated | Durability and no snag points |
Rimfire deserves a note because people skip it. A .22 LR at 200 yards drops something like 40 to 50 inches. That's more drop than a 6.5 Creedmoor at 600.
Cant error scales with drop, remember. NRL22 shooters get punished harder than they expect, and a $35 clamp-on is one of the best value upgrades in that game.
Lightweight Hunting Rigs Where Every Ounce Counts
If you're building a mountain rifle under 7 pounds all-in, ring-integrated is the only sensible answer. You're adding a quarter-ounce instead of an ounce and a half, and there's nothing sticking out to catch on a pack strap or a scabbard mouth.
The trade-off is real though. Rear ring position is set by eye relief, and on a compact hunting scope the rear ring often sits 2 to 3 inches forward of the ocular. At 4x to 12x you'll still catch the bubble.
At 18x or higher, you probably won't.
Test it before the season. Get into a field position, settle behind the rifle at your highest usable magnification, and see whether the bubble appears without a head shift. If it doesn't, treat it as a pre-shot check rather than a live reference, or switch to a clamp-on.
There's also the honest question of whether you need one at all. Most western game gets shot inside 400 yards. At those distances, a level is dead weight.
If your personal limit is 500 yards and beyond, it earns its place.
Tripod and Barricade Work
This is where anti-cant devices stop being nice-to-have. Aggregate match observation and coaching feedback point the same way. Cant error on unsupported and semi-supported positions runs several times higher than prone.
The reason is simple. On a tripod, the rifle's roll axis is decoupled from the ground. There's no bipod leg planting a reference for you.
Your sense of level relies on your inner ear and your visual horizon, and both get fooled by sloped terrain.
Three things help here:
- A dual bubble or top-mounted vial so you can read it from either shoulder without hunting for it
- An electronic LED unit if you're on the clock, since it reads in your sight picture with no glance away
- A levelling base under the tripod head rather than a plain ball head, so you're not fighting the platform itself
Really Right Stuff, Two Vets, and MDT all sell heads and Ckyepod-style bipods with cant adjustment built in. Those don't replace a level. They make it easier to act on what the level tells you.
Left-Handed Shooters and Awkward Fitments
Southpaws get a narrower selection and should check orientation before ordering. A lot of side-mounted vials, particularly ring-integrated ones, ship in a single handed configuration.
Your options:
- Reversible clamp-on units that mount on either side of the tube
- Top-mounted vials, hand-agnostic but sometimes blocked by tall turrets
- Dual bubble designs, which solve it by putting a vial on both sides
Awkward fitments come up on short scopes too. A 4-16x with a wide elevation turret housing and a 34mm tube can leave under an inch of bare tube between the turret and the ocular bell. That's not enough for most clamp-ons.
Measure it with calipers before buying, and factor in throw lever clearance.
Levelling It Properly: Reticle Plumb, Not Tube Plumb
Here's the part that determines whether any of this works. The level has to be trued to the reticle, because the reticle is what you aim with. Nothing else is a valid reference.
Not the scope tube. Machined tube exteriors are close to concentric but not perfect, and the reticle inside can sit slightly rotated relative to it. Not the rail.
Factory receivers and rails carry small angular errors as routine manufacturing tolerance. Not the bipod feet, and definitely not the magazine.
Get this wrong and you've built a very precise system for repeating the same error on every shot.
Step-by-Step Mounting and Vial Calibration
Clear the rifle first. Confirm it's empty, remove the bolt, and keep ammunition out of the room.
- Clamp the rifle in a vise. A Tipton Best Gun Vise or similar. It needs to hold the rifle still without twisting it.
- Level the receiver. Use a machinist's level or a precision bubble on a genuine flat surface. The rail top or the bottom of the receiver both work if they're flat and clean.
- Set the rings and eye relief. Snug the rings just enough to hold the scope while it still rotates.
- Hang a plumb line. A weighted string on a wall at 25 to 100 yards. This is your gravity reference, and it beats any levelling gadget.
- Rotate the scope until the vertical stadia sits perfectly on the plumb line. Look through the scope from your normal cheek weld. Take your time. This is the single most important step.
- Torque the ring caps in a cross pattern to the manufacturer's spec, usually 15 to 18 inch-pounds. Use a proper torque driver, not feel.
- Recheck the reticle against the plumb line. Torquing moves things. Verify before you go further.
- Fit the anti-cant device and snug the clamp lightly.
- Rotate the vial until the bubble centres, with the rifle still levelled and the reticle still plumb on the line.
- Lock the vial set screw and torque the clamp to spec. Thread locker on the set screw if the manufacturer allows it.
- Recheck one final time. Reticle plumb, bubble centred, everything torqued.
A note on torque. Overtightening a tube clamp is one of the more common ways to damage a scope, and it can void the optic warranty. If the manufacturer publishes a figure, use it.
If they don't, err light and add a strip of grip tape or rosin at the interface instead of more torque.
Verifying With a Tall Target Test
The tall target test confirms two things at once: that your reticle is plumb, and that your turret tracks true. It's the closest thing to proof you'll get without a collimator.
Set it up like this:
- Hang a target at exactly 100 yards with a verified plumb vertical line at least 36 inches tall. Use a plumb bob, not eyeballing.
- Mark an aiming point near the bottom of the line.
- Fire a 3-shot group at that point with zero dialled.
- Dial exactly 10 mils (or 30 MOA) of elevation up. Do not touch windage.
- Aim at the original point again and fire another 3-shot group.
Now measure. The second group should sit 36 inches directly above the first, along the plumb line. Two readings matter:
| Measurement | What it tells you |
|---|---|
| Vertical distance vs 36 in | Turret tracking accuracy (36.0 in = perfect, 35.2 in = 2% slow) |
| Horizontal drift from the line | Reticle cant, or erector misalignment |
Any horizontal drift means you're not plumb. Convert it to an angle: roughly 1 inch of drift over 36 inches of travel equals about 1.6 degrees of cant. Under half a degree is fine for serious long-range work.
More than a degree and you should remount.
Do the test on a calm day. A crosswind will drift the upper group and give you a false cant reading. Early morning, flags hanging dead, is ideal.
Price Bands and What You Genuinely Get for the Money
Prices below reflect typical US market ranges as of 2026. Expect higher figures in the UK and EU once VAT and import costs land.
| Price band | What you get | Worth it for |
|---|---|---|
| $25 to $50 | Basic aluminium clamp, fixed or roughly adjustable vial, single bubble | Rimfire, entry-level builds, testing whether you'll use one |
| $50 to $100 | Machined 6061 or 7075 body, hard-coat anodising, properly lockable rotatable vial | The sweet spot for most centrefire shooters |
| $100 to $180 | Dual bubble, tritium or fibre-optic illumination, tighter vial sensitivity, better clamp geometry | Low-light hunting, competition, harsh conditions |
| $180 to $300 | Premium integrated ring or mount units, precision-ground vials | Shooters buying rings or mounts anyway |
| $300+ | Electronic LED levels, in-scope indicators | Timed positional stages, ELR, genuine low-light work |
What actually improves as you move up the ladder:
- Vial sensitivity. Cheap vials use a shallow radius, so the bubble moves lazily and small deviations don't register. Better vials show you a half degree clearly.
- Clamp quality. Cheap split rings distribute pressure unevenly. They're the ones most likely to dent a tube or slip under recoil.
- Adjustment lockdown. A grub screw that actually holds. Budget units often creep out of calibration after a hundred rounds of magnum recoil.
- Anodising and sealing. Type III hard-coat resists case and scabbard wear. Poor sealing lets moisture into the vial housing.
Where the money stops buying performance is around the $100 mark for a bubble unit. Past that you're paying for illumination, dual vials, or brand-name machining. All useful, none of it transformative.
The genuinely underpriced option is a $40 to $60 clamp-on with a rotatable vial on a rifle that shoots past 700 yards. Best return on investment in the entire long-range accessory category. The overpriced situation is a $300 electronic level on a hunting rifle that never sees 500 yards.
Mistakes That Make an Anti-Cant Device Useless
Most level-related failures aren't product failures. They're setup or technique failures, and they're all avoidable.
Bubble Chasing and Fighting Your Natural Point of Aim
Bubble chasing is the most common problem and the least discussed. You settle in, glance at the bubble, roll the rifle to centre it, and now the reticle has walked off target. You correct the reticle, and the bubble drifts.
Round and round.
The root cause is almost always a broken natural point of aim. Your body is holding the rifle in a position it doesn't want to be in. Muscle tension keeps rolling it back off level.
The fix is positional, not equipment:
- Reset the position rather than muscling the rifle. Shift your body, not your grip.
- Level first, then aim. Get the rifle plumb, then move your whole position until the reticle lands on target.
- Check the bubble before the shot, not during. One glance to confirm, then eyes on the reticle for the break.
If you find yourself watching the bubble through the trigger press, you've inverted the priority. The reticle is what you're aiming with. The level is a pre-shot check.
Levelling Off the Rail, Bipod Feet, or Magazine
Every one of these is a proxy reference, and every one of them lies.
The rail is machined to the receiver, and receiver drilling carries tolerance. Factory rails on hunting actions are frequently out by a fraction of a degree, sometimes more.
Bipod feet tell you about the ground, not the rifle. Uneven terrain, one leg on a rock, and your reference is gone.
The magazine or floorplate is a stamped or moulded part, not a precision surface. Worst reference of the lot.
Use a hanging plumb line and the reticle itself. Nothing else. A Wheeler Professional Reticle Leveling System, Real Avid Level Right Pro, or Badger Ordnance Dead Level speeds the process up.
Those are mounting aids, and they still get verified against a plumb line and a tall target test.
Overtorquing the Clamp and Denting the Tube
Scope tubes are thin-walled aluminium. A 30mm tube wall can be under 1mm thick in places, and the erector assembly runs directly beneath it.
Crush the tube even slightly and you can bind the erector. Symptoms show up as inconsistent tracking, a reticle that won't return to zero, or a scope that suddenly won't hold a group. It's a warranty conversation you don't want to have.
Guard against it:
- Use a calibrated torque driver, not a hex key and a feeling
- Follow the manufacturer's published figure for that specific clamp
- If no figure exists, start at 12 to 15 inch-pounds and stop
- Add grip tape, rosin, or a thin polymer shim instead of more torque if the clamp slips
- Never combine a heavy clamp with an already-tight ring set on a lightweight tube
Other Errors Worth Naming
Smaller ones that show up repeatedly in verified buyer feedback and range diagnostics:
- Mounting the level forward of the turret, where you can't see it at high magnification
- Never rechecking after air travel. Cases get thrown. Vials get knocked out of calibration.
- Trusting a frozen bubble. In sub-zero conditions, wait for it to settle before reading.
- Assuming the level fixes inclination. It doesn't. Different axis entirely.
- Reading from an inconsistent head position, which introduces parallax between your eye and the vial.
- Forgetting the spare battery on electronic units. They die at the worst possible moment.
Anti-Cant Device vs Angle Cosine Indicator vs Bipod Cant Adjustment
These three get lumped together and they solve three completely different problems. Confusing them is the fastest route to buying the wrong thing.
| Tool | Axis it addresses | What it tells you | When you need it |
|---|---|---|---|
| Anti-cant device | Roll (rotation around the bore) | Whether the rifle is plumb to gravity | Long-range shots, positional shooting |
| Angle Cosine Indicator | Pitch (inclination) | The uphill or downhill angle | Steep-angle hunting, mountain shooting |
| Bipod cant adjustment | Roll (mechanically) | Nothing. It lets you correct roll | Uneven ground, prone off a slope |
An Angle Cosine Indicator, like the units from Sniper Tools Design Co., displays the cosine of your shooting angle. Multiply your ballistic drop by that number and you get the corrected hold. It matters because gravity only acts on the horizontal component of the flight path.
Shoot 500 yards at a 30-degree downhill angle and the bullet behaves more like a 433-yard shot. Ignore that and you'll shoot high. Ballistic solvers from Kestrel with Applied Ballistics, or Hornady's 4DOF, take an inclination input directly and handle the maths.
An ACI is the manual backup.
Bipod cant adjustment is a mechanical feature, not an indicator. An Atlas PSR, a Harris with a pod-lock, or an MDT Ckyepod lets the rifle roll independently of the leg position. That's how you get plumb on a sidehill without lifting a leg off the ground.
Here's the relationship in plain terms. The bipod lets you fix the cant. The level tells you when you've fixed it.
You want both on a precision rifle, and neither replaces the other.
One more overlap worth clearing up. Some shooters assume a ballistic solver's cant input replaces a level. It doesn't.
The solver can correct for a known cant angle, but it has no idea what your cant angle is unless you measure it. Something still has to do the measuring.
Keeping It Honest: Re-Checking Calibration After Travel and Recoil
A level that's drifted out of calibration is worse than no level at all. You'll trust it, and it'll be wrong every single shot.
Vials creep. Grub screws back out under recoil. Cases get thrown by baggage handlers.
None of it is dramatic, and that's the problem, because nothing about a drifted vial looks broken.
Build a quick verification habit and it takes ninety seconds.
The Plumb Line Check
Keep a plumb line somewhere you can get to easily. A weighted string on a garage wall, a doorframe with a verified vertical edge, even a hanging chain.
Set the rifle up, look through the scope, and line the vertical stadia up on the plumb reference. Now look at the bubble. It should be dead centre.
If it isn't, you've got two possibilities. Either the vial has rotated in its housing, or the whole clamp has slipped on the tube. Check the clamp position first against a witness mark.
Witness Marks Save You Time
Put a witness mark on the clamp the day you install it. A thin line of paint pen or a sliver of vinyl tape spanning the clamp and the tube.
If that line breaks, the clamp has rotated. If it's intact but the bubble reads off, the vial itself has moved. Two-second diagnosis instead of a full remount.
Do the same on the vial housing where it meets the clamp body. Cheap, and it turns a guessing game into a glance.
When to Re-Verify
Not on a fixed schedule. On triggers.
| Trigger | Why it matters |
|---|---|
| After air travel | Case handling routinely knocks clamps and vials loose |
| After a drop or hard knock | Obvious, and easily forgotten in the field |
| Before a match or hunt | Cheapest insurance available |
| After 200 to 300 rounds of magnum recoil | Grub screws creep under sustained recoil |
| After any scope removal or remount | The reference has changed |
| Start of cold season | Confirms vial response before you need it |
Maintenance Beyond Calibration
Not much to do. These are simple devices.
- Check the grub screw torque periodically. Fresh thread locker every couple of seasons.
- Keep the vial clean. Oil film and dust make the bubble hard to read in bright light.
- Inspect the clamp interface for tube marking. Light witness marks are normal. Dents are not.
- Swap electronic batteries annually whether or not they've died, and carry a spare cell.
- Store the rifle in the orientation the manufacturer specifies if the vial has a preferred one.
One failure mode worth knowing: a spirit vial can develop a second, smaller bubble after a hard shake or heat exposure. If you see two bubbles, the vial is compromised. Replace the unit.
There's no fix.
Match Rules, Hunting Regs, and Torque Specs Worth Knowing
Three separate compliance areas, and only one is about safety. Worth checking all the same.
Competition Equipment Rules
Bubble levels are legal in essentially every discipline. Nobody restricts a passive spirit vial.
Electronic levels are a different conversation. Rules vary by organisation and division, and they change. Check the current rulebook for whatever you're shooting rather than relying on last season.
- PRS and NRL generally permit electronic levels in open divisions. Production and tactical divisions may have equipment cost caps worth reading.
- CMP and service rifle events run tighter equipment lists. Assume nothing is permitted until you've read the rules for your class.
- F-Class has division-specific rules on what attaches to the rifle. Bubble levels are standard. Electronics need checking.
The safest move is to email the match director before you show up with something new. Two minutes, and it saves an equipment protest.
Hunting Regulations on Electronic Devices
This one has genuine legal consequences. Several US states restrict electronic or illuminated devices attached to a firearm during hunting hours, and the rules are not consistent state to state.
Tritium vials sit in a grey area in some jurisdictions because they're self-illuminating. Electronic LED levels are more clearly caught by rules written around illuminated sights and electronic aids.
Check your state wildlife agency's current regulations before the season. The U.S. Fish and Wildlife Service links to state agencies, and every state publishes its hunting regulations digest online.
Read the section on legal firearms and devices, not just the season dates.
UK and EU shooters face a different set of rules, mostly around night shooting and lamping, varying by country and quarry species. Same principle. Check locally, check current.
Torque Specifications That Actually Matter
Overtorque damage isn't covered by most optic warranties. Get these right.
| Fastener | Typical range | Notes |
|---|---|---|
| Scope ring caps | 15 to 18 in-lb | Cross pattern, gradual, even gaps both sides |
| Base or rail screws to receiver | 25 to 30 in-lb | Thread locker, degreased threads |
| Anti-cant clamp on tube | 12 to 20 in-lb | Manufacturer figure overrides this range |
| Vial locking grub screw | Snug only | Usually under 8 in-lb, easy to strip |
| Picatinny mount recoil lug nuts | 45 to 65 in-lb | Varies widely by mount design |
Always use the figure the manufacturer publishes for your specific part. Vortex, Nightforce, Badger Ordnance, Seekins Precision and Spuhr all publish torque values in their installation documentation. Those numbers beat any general guidance.
A few practical notes:
- Degrease threads before applying thread locker. Oil defeats it.
- Use a calibrated driver. Fix It Sticks, Wheeler FAT Wrench, and Borka Tools all make suitable units.
- Check ring gaps after torquing. Uneven gaps mean uneven clamping pressure.
- Let thread locker cure before shooting. Most need 12 to 24 hours for full strength.
Safe Handling During Setup
Clear the rifle and remove the bolt before any mounting work. Keep ammunition in a different room. Point the muzzle in a safe direction even with the bolt out.
Wear eye protection for the tall target test and zero verification. You'll be working close to the bench, adjusting between strings, and hot brass and ricochet debris don't care that you're only shooting three rounds.
Frequently Asked Questions
Do I really need an anti-cant device under 500 yards?
No. At 500 yards, a typical 6.5 Creedmoor drops around 60 inches. Three degrees of cant moves the bullet roughly 3 inches sideways.
That's inside most shooters' group size at that distance. Save your money unless you're shooting small targets or plan to stretch further.
Should the level be mounted on the scope tube or the rail?
The scope tube, in nearly every case. A tube-mounted unit sits closer to your eye and stays visible in your peripheral view at high magnification. Rail-mounted levels reference the rail rather than the reticle, and most shooters have to lift their head to read them, which defeats the purpose.
How do I know if my scope is mounted with cant already built in?
Run a tall target test. Hang a plumb line at 100 yards, fire a group, dial 10 mils up, and fire again without touching windage. If the second group drifts sideways from the plumb line, your reticle isn't plumb.
Roughly 1 inch of drift equals about 1.6 degrees of cant.
Are electronic levels worth the extra money over a bubble?
Only for specific use cases. They earn their keep in timed positional stages, genuine low light, and sub-zero conditions where spirit vials go sluggish. For daytime prone shooting or hunting inside 700 yards, a $60 bubble with a rotatable vial does the same job without a battery to worry about.
Can I use one anti-cant device across multiple rifles?
Yes, if the tube diameters match and you re-calibrate each time. Moving a clamp-on between rifles means re-truing the vial to that rifle's reticle on every swap. Most shooters find it faster to buy a second unit at $40 than to redo the plumb line setup before every range trip.
Will a bubble level help with uphill or downhill shots?
Not directly. A level only reads roll, not inclination. Steep-angle shooting needs an Angle Cosine Indicator or an inclination input into a ballistic solver like Kestrel with Applied Ballistics.
That said, sidehill terrain fools your sense of level badly, so a bubble is genuinely useful on mountain shots for the roll axis alone.
The Verdict: What to Buy for Your Rifle and Your Distances
Start with distance, because that's what decides whether you need anything at all.
Shooting inside 400 yards? Skip it. Cant error is smaller than your group size and smaller than your wind call error. Spend the money on ammunition instead.
Shooting 400 to 700 yards? A basic clamp-on with a rotatable, lockable vial in the $40 to $70 range. Mount it just forward of the ocular bell, true it to a plumb line, and verify with a tall target test.
Shooting 700 to 1,200 yards? Same clamp-on, but pay for better vial sensitivity and a dual bubble if you shoot positional. This is where cant becomes a named error source, and you want a reference you can read fast under time pressure.
Shooting past 1,200 yards? Mount-integrated or electronic. At ELR distances the error is measured in feet and you can't afford ambiguity in the reading.
Now adjust for your situation:
- Building a mountain rifle under 7 pounds? Ring-integrated, and check bubble visibility at your top magnification before the season.
- Running PRS or NRL positional stages? Dual bubble or electronic LED. The bubble has to be readable from both shoulders without hunting for it.
- Buying a premium one-piece mount anyway? Get one with the level built in. Spuhr, ERA-TAC, and certain Nightforce configurations put it exactly where your eye wants it.
- Hunting the last light of legal shooting hours? Tritium or fibre-optic illumination, and check your state's rules on electronic devices first.
- Shooting in genuinely cold country? Electronic, or accept that a spirit vial needs a second to settle below 20°F.
- Left-handed, or you switch shoulders? Reversible clamp-on, top-mounted vial, or dual bubble. Confirm orientation before ordering.
Whatever you pick, the install matters more than the product. A $300 electronic level trued to the scope tube instead of the reticle is a precision instrument telling you a precise lie. A $35 clamp-on set properly against a plumb line and verified with a tall target test will put rounds on steel.
Get the reticle plumb first. Everything else is downstream of that.