Rifle Cleaning Tips for Beginners: Step-by-Step Guide to Keep Your Gun Accurate
When it comes to shooting whether for hunting, target practice, or tactical use your rifle’s performance depends heavily on how well you maintain it. A clean rifle not only performs better but also lasts longer and keeps you safe. Yet, many beginners underestimate how vital regular cleaning truly is.
In this guide, we’ll walk you through rifle cleaning basics, explain why it’s essential, outline the tools you’ll need, and share step-by-step rifle cleaning tips for beginners so your firearm stays as precise and reliable as the day you bought it.
Table of Contents
- Why Cleaning Your Rifle Matters
- How Often Should You Clean Your Rifle?
- Essential Rifle Cleaning Tools and Supplies
- Safety First: Preparation Before Cleaning
- Step-by-Step: How to Clean a Rifle for Beginners
- Common Mistakes Beginners Make While Cleaning Rifles
- Deep Cleaning vs. Quick Cleaning
- Best Rifle Cleaning Practices for Longevity
- Rifle Cleaning Tips for Different Calibers
- How to Clean a Scoped Rifle Safely
- Signs Your Rifle Needs Cleaning
- Recommended Cleaning Kits for Beginners
- Storing and Maintaining Your Cleaning Tools
- Final Thoughts: Clean Rifle, Confident Shooter
Why Cleaning Your Rifle Matters
Even if your rifle looks fine after a range session, every shot leaves behind carbon, copper, lead, and powder residue inside the barrel and action. Over time, these build up and can cause:
- Reduced accuracy – Fouling can disrupt bullet spin and consistency.
- Corrosion and rust – Moisture and carbon residue can eat away at the barrel and bolt.
- Feeding or ejection issues – Dirt in the chamber or bolt face can cause malfunctions.
- Unsafe pressure levels – Blockages can increase chamber pressure, leading to dangerous conditions.
Regular maintenance ensures your rifle fires smoothly, chambers cleanly, and remains safe during every shot.
How Often Should You Clean Your Rifle?
This depends on how you use it:
- Casual shooters: Clean every 200–300 rounds or after every few range trips.
- Hunters: Clean before and after each hunting trip to prevent rust and ensure accuracy.
- Precision shooters: Clean after every shooting session for consistent grouping.
- Storage: Always clean before long-term storage and apply protective oil.
Even if your rifle hasn’t been fired, clean it every few months—dust and humidity can still cause oxidation.
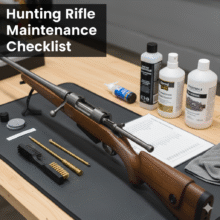
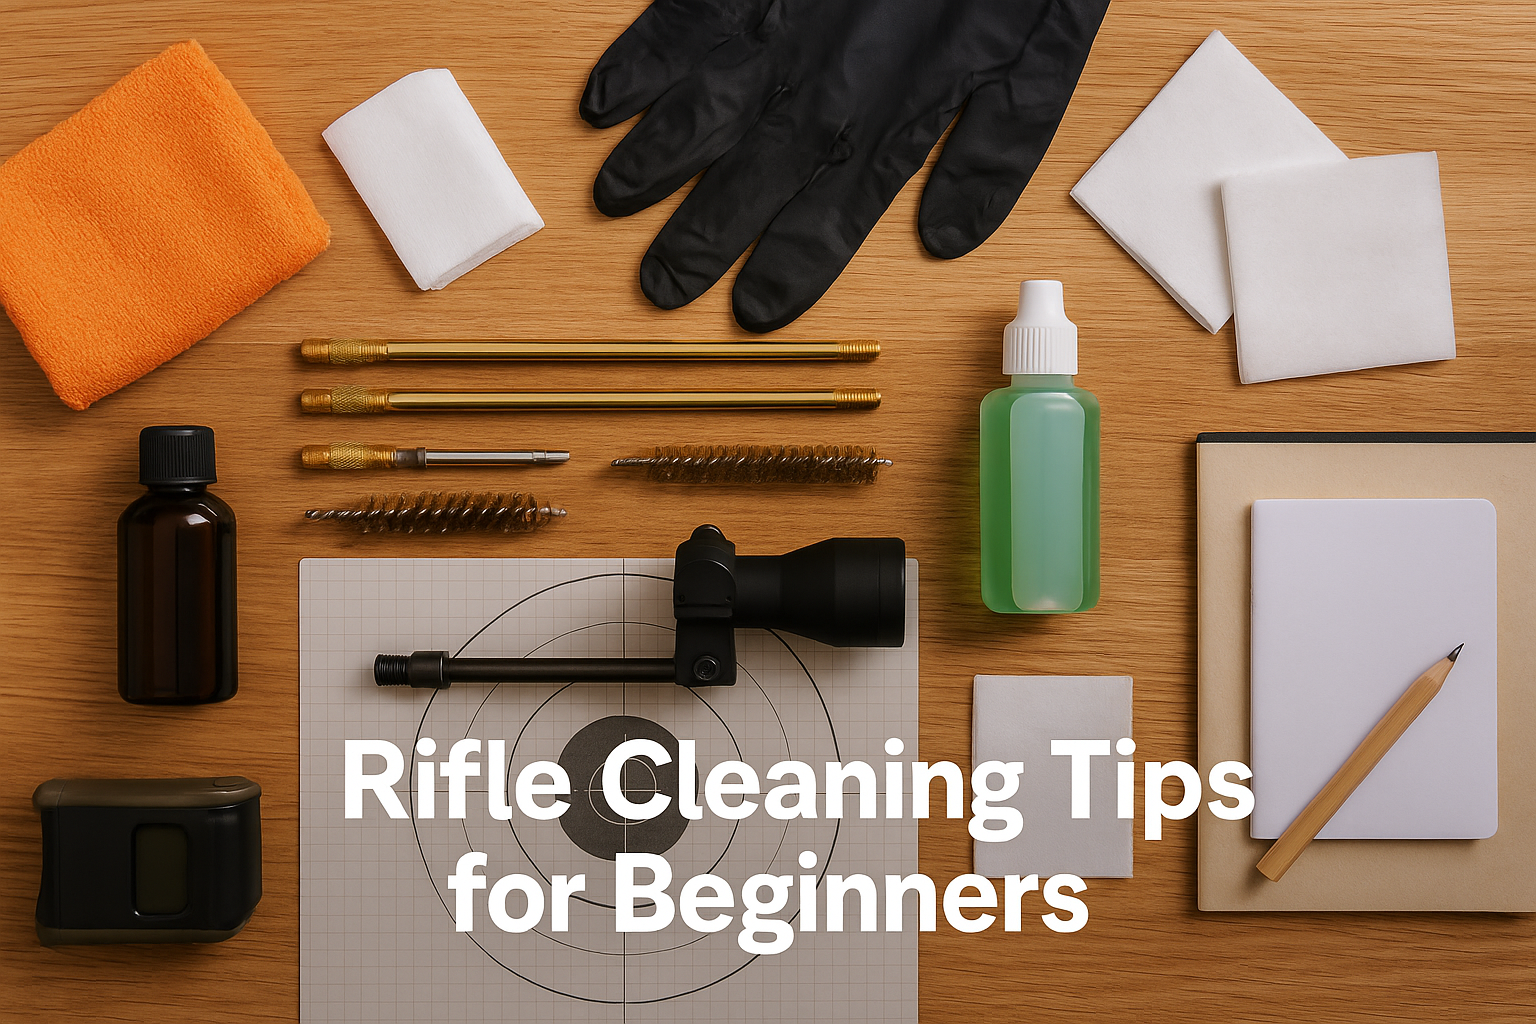
Essential Rifle Cleaning Tools and Supplies
Before you start, make sure you have the right tools. Investing in quality cleaning equipment prevents accidental damage.
1. Cleaning Rod or Bore Snake
- Cleaning Rod: A straight rod (usually brass or coated steel) used with patches and brushes.
- Bore Snake: A convenient all-in-one pull-through cleaner perfect for quick field cleaning.
2. Bore Brush
Choose bronze or nylon brushes depending on your barrel type. These help scrub away carbon and copper fouling inside the bore.
3. Cleaning Patches
Cotton patches remove loosened fouling and apply solvents and oils evenly through the bore.
4. Jags and Patch Holders
Attach these to your cleaning rod for pushing patches through the bore.
5. Solvent or Bore Cleaner
A good bore solvent breaks down powder and copper fouling. Some popular choices include:
- Hoppe’s No.9
- Bore Tech Eliminator
- CLP (Clean, Lubricate, Protect)
6. Gun Oil or Lubricant
After cleaning, apply a light layer of oil to prevent rust and ensure smooth action.
7. Cleaning Mat or Bench Pad
Protects your workspace from oil and solvents.
8. Nylon Brush and Picks
Perfect for scrubbing bolt faces, trigger groups, and hard-to-reach areas.
9. Microfiber Cloth
Used for wiping down parts and removing excess oil.
10. Gun Vise or Cleaning Stand
Holds your rifle securely in place, freeing up your hands during cleaning.
Safety First: Preparation Before Cleaning
Before touching your rifle, safety comes first. Follow these steps:
- Unload your rifle completely.
- Remove the magazine.
- Open the action and check the chamber.
- Look and feel to ensure no round is inside.
- Work in a well-ventilated area.
- Solvents can have strong fumes.
- Lay out your cleaning supplies.
- Keep everything within reach to avoid mishandling your rifle mid-clean.
- Disassemble according to your owner’s manual.
- Remove the bolt or slide if applicable, and ensure you know how to reassemble properly.
Step-by-Step: How to Clean a Rifle for Beginners
Let’s go through a full cleaning routine that applies to most bolt-action or semi-automatic rifles.
Step 1: Secure the Rifle
Mount your rifle in a cleaning vise or lay it on a padded mat. Keep the muzzle pointing away from you and slightly downward—this ensures solvents don’t run back into the action.
Step 2: Clean the Barrel
The bore is the heart of your rifle’s accuracy. Start from the chamber end, never the muzzle.
- Attach a bore brush to your cleaning rod.
- Dip the brush in bore solvent.
- Push the brush through the bore several times (6–10 passes).
- Let the solvent soak for a few minutes.
- Swap the brush for a patch holder or jag.
- Run clean patches through until they come out spotless.
- If patches still come out dirty, repeat steps 2–6.
- Run one last dry patch to remove any solvent residue.
👉 Pro Tip: Always push the brush completely through before reversing to avoid damaging the crown (the edge of the muzzle).
Step 3: Clean the Chamber
Residue often collects here. Use a chamber brush or cotton swab dipped in solvent to scrub inside, then wipe clean with dry patches.
For semi-automatics, pay extra attention to the feed ramps—they often collect carbon buildup.
Step 4: Clean the Bolt and Action
Use a nylon brush and solvent to scrub:
- Bolt face
- Extractor claw
- Ejector slot
- Lugs and raceways
Then wipe dry and apply a thin layer of oil. Avoid over-lubrication—too much oil can attract dust and debris.
Step 5: Clean the Trigger Group
Unless heavily fouled, the trigger group usually only needs a light brushing and an air blast. Avoid soaking it in solvent, which can remove necessary grease from internal parts.
Step 6: Wipe Down the Exterior
Apply a few drops of oil to a cloth and wipe all metal surfaces to protect from corrosion. For wooden stocks, use furniture wax or specialized gun stock oil instead of regular gun lubricant.
Step 7: Reassemble and Function Check
Once everything is dry and lightly oiled:
- Reassemble the rifle carefully.
- Cycle the bolt to ensure smooth operation.
- Dry-fire with a snap cap (optional) to confirm proper trigger function.
- Wipe down one final time before storage.
Common Mistakes Beginners Make While Cleaning Rifles
Avoiding these will save you from damaging your firearm:
- Cleaning from the muzzle end.
This can damage the crown, reducing accuracy. - Using steel cleaning rods.
They can scratch your bore—use coated or brass rods instead. - Over-oiling.
Too much oil attracts dirt and causes gumming. - Skipping regular cleaning.
Even stainless-steel barrels can corrode without proper care. - Not checking for obstructions.
Always inspect the bore before shooting again. - Mixing solvents and oils.
Some react poorly together—use one brand’s full system if possible. - Forgetting the scope lenses.
Use lens wipes or air dusters—never gun oil—to clean optics.
Deep Cleaning vs. Quick Cleaning
There are two main types of maintenance routines every shooter should know.
Quick Cleaning (Field Cleaning)
Ideal for hunting trips or quick range sessions.
Takes 10–15 minutes:
- Use a bore snake to remove powder fouling.
- Wipe the bolt face and apply a few drops of oil.
- Clean the exterior to prevent rust.
Deep Cleaning
Performed every few hundred rounds or after a wet or dusty trip.
Takes 45–60 minutes:
- Full disassembly.
- Thorough bore scrubbing.
- Cleaning all moving parts, trigger group, and magazines.
- Protective oiling and inspection for wear.
Best Rifle Cleaning Practices for Longevity
1. Store Firearms in a Controlled Environment
Keep rifles in a cool, dry place with low humidity. Consider silica gel packs or a dehumidifier in your gun safe.
2. Always Inspect Before Storage
Even small fingerprints can lead to corrosion. Wipe your rifle down before putting it away.
3. Use Bore Guides
A bore guide centers your cleaning rod and prevents solvent from spilling into the action.
4. Record Cleaning Sessions
Keep a small log noting when you last cleaned the rifle and how many rounds were fired.
5. Don’t Forget Magazines
Magazines collect dust and unburned powder—disassemble and clean periodically.
6. Check Screws and Mounts
After cleaning, inspect scope mounts, action screws, and stock bedding to ensure nothing has loosened.
Rifle Cleaning Tips for Different Calibers
Each rifle caliber has its quirks when it comes to cleaning.
.22 LR Rifles
- Fouling builds up fast due to unjacketed bullets.
- Clean more frequently (every 100–150 rounds).
- Use soft brushes to avoid damaging the delicate bore.
Centerfire Rifles (.223, .308, .30-06, etc.)
- Copper fouling is more common.
- Use copper-specific solvents and allow time to soak.
High-Powered Magnum Rifles
- Clean after each outing.
- Always inspect for throat erosion near the chamber—excess heat can cause micro-pitting.
Hunting Rifles
- Pay attention to environmental exposure—mud, rain, and debris can enter the barrel and trigger group.
- After each hunt, field-clean immediately, then perform a full cleaning once home.
How to Clean a Scoped Rifle Safely
Scopes add an extra layer of complexity—here’s how to protect them:
- Cover the lenses before cleaning to prevent splatter.
- Avoid leaning on the scope during scrubbing.
- Check mount tightness after reassembly—vibration and handling can loosen screws.
- Clean lenses only with lens solution and microfiber cloth.
For brand-new rifles, many shooters follow a barrel break-in procedure:
- Fire one round.
- Clean thoroughly.
- Repeat for 5–10 rounds.
- Then, clean after every 5 shots for the next 20 rounds.
This helps smooth out microscopic imperfections in the barrel’s rifling, leading to tighter groups and easier future cleaning.
Signs Your Rifle Needs Cleaning
If you’re unsure when to clean, watch for these signs:
- Difficulty chambering or extracting rounds
- Sticky bolt or trigger pull
- Sudden drop in accuracy
- Visible carbon or copper streaks at the muzzle
- Odd smell or discoloration inside the chamber
Cleaning should restore smoothness and accuracy. If not, inspect for damaged parts or excessive fouling buildup.
Recommended Cleaning Kits for Beginners
Here are a few all-in-one kits perfect for newcomers:
- Hoppe’s No. 9 Deluxe Cleaning Kit – Ideal for most rifle calibers.
- Otis Elite Cleaning System – Compact, field-friendly design.
- Real Avid Gun Boss Rifle Kit – Durable case and caliber-specific brushes.
- Allen Company Ultimate Cleaning Kit – Affordable and comprehensive.
These kits usually include rods, brushes, patches, and solvents—everything you need to start.
Storing and Maintaining Your Cleaning Tools
Don’t neglect your cleaning gear. Store brushes and patches in a dry, sealed box, and occasionally wipe your rods with oil to prevent corrosion. Replace brushes that lose stiffness or show fraying—worn tools can scratch your bore.
Final Thoughts: Clean Rifle, Confident Shooter
Cleaning your rifle isn’t just about aesthetics—it’s about reliability, accuracy, and safety. A well-maintained firearm gives you confidence in the field, whether you’re hunting deer at dawn or hitting steel targets at 500 yards.
Beginners often find the process intimidating, but once you follow these steps a few times, it becomes second nature. Treat cleaning as part of your shooting routine—your rifle will thank you with years of dependable service.