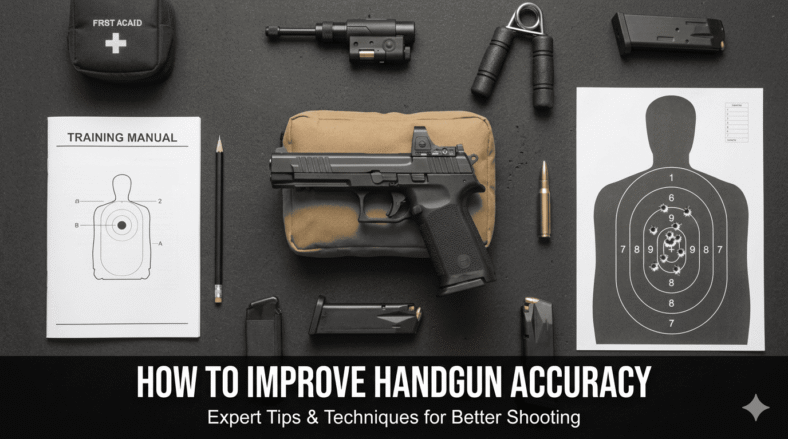
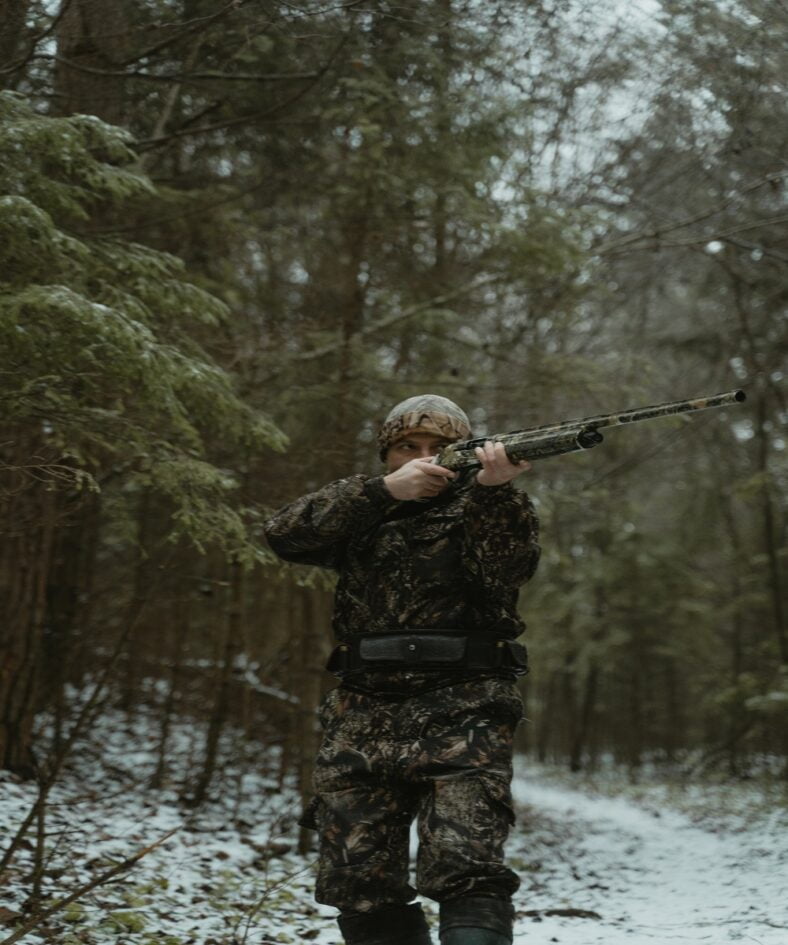
Improving handgun accuracy starts with safe gun handling and repeatable range fundamentals: a stable stance, a consistent grip, clear sight alignment, smooth trigger control, and accountable practice. None of these guarantee a specific group size, and results vary by shooter, firearm, ammunition, instruction, and practice time.
This guide is for supervised sport and recreational range practice. It does not cover defensive shooting, drawing from concealment, movement drills, or tactical use. Follow your range rules, your firearm manual, and qualified instructor guidance first.
Table of Contents
Start With Firearm Safety Rules
Safety comes before accuracy work, every range session, with no exceptions. Treat every firearm as if it is loaded, keep your finger off the trigger until your sights are on target and you have decided to fire, never point the muzzle at anything you are not willing to destroy, and be sure of your target and what is beyond it.
Hearing and vision protection are accuracy tools as well as safety equipment. Flinching in anticipation of noise and recoil is one reason shots move off target. Good protection, clear range commands, and calm practice conditions make it easier to focus on fundamentals. For more on protective gear, see our guide to eye and ear protection for shooting.
Accuracy Fundamentals for Range Practice
Handgun accuracy is influenced by fundamentals that work together: stance, grip, sight alignment, sight picture, trigger control, breathing, and follow-through. Consistency across all of them matters more than any one trick or equipment upgrade.
Stance and grip
A stable stance gives the rest of your technique a base. Many newer shooters use a balanced, athletic stance with feet about shoulder-width apart, knees slightly bent, and weight slightly forward. Your grip should be firm and repeatable, with the support hand filling open space on the grip and both thumbs resting in a consistent position.
The goal is the same hand placement and pressure on every shot. Inconsistent grip changes how the muzzle sits when the trigger breaks. The CMP rifle and pistol training resources are a helpful reference for building a repeatable position, and our shooting stance guide explains the range-safety side in more detail.
Sight alignment and sight picture
Sight alignment is the relationship between the front sight and rear sight. Sight picture is that aligned sight placed on the target. With iron sights, a common teaching point is to keep visual focus on the front sight while the target and rear sight appear slightly softer.
Small sight errors grow as distance increases, so avoid rushing this step. If your groups are inconsistent, slow down and confirm the sights are aligned before blaming ammunition, sights, or the handgun.
Trigger control and follow-through
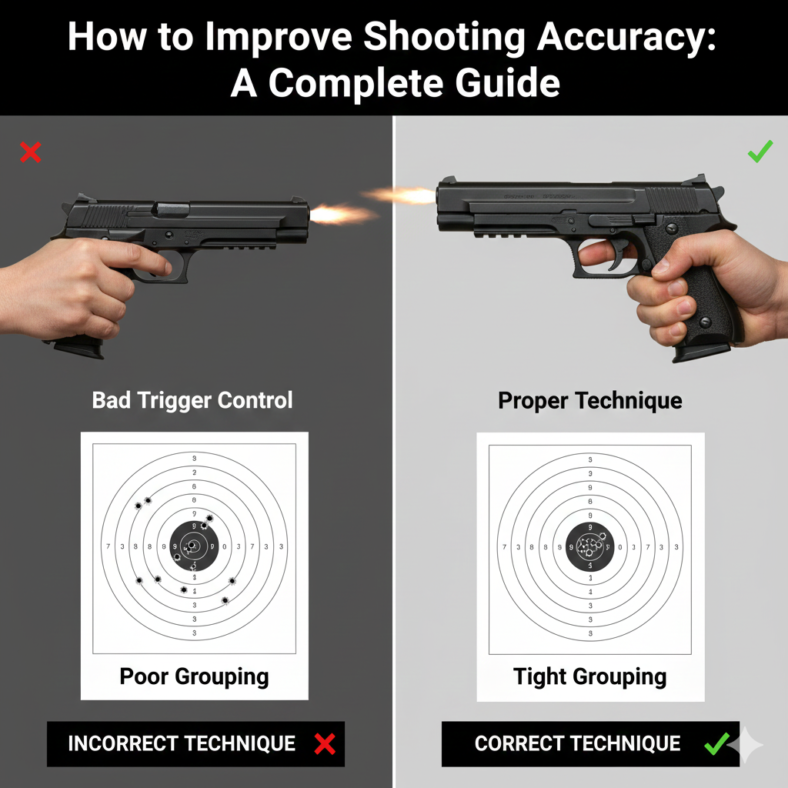
Trigger control is pressing the trigger straight back without disturbing the sights. Jerking, slapping, or anticipating recoil can move shots off center. Follow-through means keeping grip, stance, and sight focus for a moment after the shot instead of relaxing as soon as the firearm fires.
Breathing also plays a role. A normal breathing pause can give you a steadier moment to press the trigger, but do not hold your breath long enough to create tension. For a deeper explanation, read our guide on trigger control for shooting accuracy.
Practice Habits That Build Consistency
Consistent, accountable practice does more for most newer shooters than equipment changes. Build habits that let you see what is happening on the target and adjust deliberately.
Start slow: deliberate shots help you apply fundamentals before adding pace.
Use a comfortable distance: confirm a repeatable group before moving farther away.
Track targets: save or photograph groups so you can compare sessions honestly.
Change one thing at a time: grip, stance, sight focus, and trigger press should not all change at once.
Dry practice is sometimes used to work on trigger control, but it carries real risk and is outside the step-by-step scope of this beginner guide. If it is ever done, the firearm must be verified unloaded, ammunition must be removed from the room, and the firearm manual and a safe direction must be followed. Secure storage guidance from Project ChildSafe is worth reviewing before any home handling routine.
When to Take a Class
A qualified instructor can spot issues that are difficult to diagnose alone, including flinch, inconsistent grip pressure, recoil anticipation, and uneven trigger movement. If your groups are not improving after careful practice, instruction can shorten the trial-and-error stage and reinforce safe habits.
Look for classes focused on safe sport and range fundamentals if your goal is target accuracy. Our guide to firearm safety course benefits can help you think through what a beginner class should provide.
Frequently Asked Questions
What is the most important factor in handgun accuracy?
There is no single factor because the fundamentals work together. For many newer shooters, trigger control and a consistent grip are common areas where small improvements show up on the target.
Will better sights or a new handgun make me more accurate?
Equipment can matter, but technique is usually the larger variable for newer shooters. Work on fundamentals with qualified guidance before assuming the handgun, sights, or accessories are the limiting factor.
How long does it take to see improvement?
It varies by shooter, firearm, practice quality, and instruction. Consistent, focused sessions usually help more than occasional high-volume sessions. Tracking targets over several range trips is the clearest way to see progress.
Is dry practice at home safe?
Dry practice has risk and should not be treated casually. This guide does not provide at-home dry-practice steps. If you consider it, review your firearm manual, remove ammunition from the area, verify the firearm condition, and get qualified instruction first.
Final Takeaway
To improve handgun accuracy safely, start with firearm safety, then build repeatable stance, grip, sight alignment, trigger control, breathing, and follow-through. Practice slowly, track your targets, avoid unsupported guarantees, and get qualified instruction when you need correction that a target alone cannot explain.
Improving shooting accuracy starts with safe handling and repeatable fundamentals: a stable position, correct sight alignment and sight picture, smooth trigger control, steady breathing, follow-through, and accountable practice. No technique promises a specific result, because accuracy depends on the shooter, firearm, ammunition, conditions, and practice quality.
This guide is for sport and recreational range shooting. It stays at the fundamentals level and does not cover advanced field methods. Always follow your range rules, firearm manual, and qualified instructor guidance first.
Table of Contents
Safety Comes Before Accuracy
Safe gun handling is the foundation of every accuracy session. Treat every firearm as if it is loaded, keep your finger off the trigger until your sights are on target and you intend to fire, keep the muzzle in a safe direction, and be sure of your target and what is beyond it. The NSSF firearm safety rules are a useful public reference for these fundamentals.
Accuracy practice also requires the correct ammunition for your firearm, eye and ear protection, clear range procedures, and awareness of the backstop. If you are unsure about loading, unloading, clearing, or checking your firearm, stop and ask qualified help before continuing.
Core Accuracy Fundamentals
A small set of fundamentals drives accuracy across most firearm disciplines. They work together, so consistency across the whole process matters more than chasing one trick.
Fundamental
Beginner Focus
Why It Matters
Position or stance
Stable, repeatable body support
Reduces unnecessary movement
Sight alignment
Consistent relationship between sights and target
Helps aim stay repeatable
Trigger control
Smooth press without disturbing sights
Reduces pulled shots
Breathing
Calm, natural rhythm
Reduces body tension
Follow-through
Maintain position after the shot
Prevents relaxing too early
Position or stance
A stable position gives every other fundamental something to build on. For standing range work, many shooters start with a balanced stance, feet about shoulder-width apart, weight slightly forward, and a relaxed but firm hold. Our shooting stance for beginners guide covers that foundation in more detail.
Sight alignment and sight picture
Sight alignment is the relationship between the sights, and sight picture is that alignment placed on the target. A consistent sight picture makes shot placement easier to evaluate over time.
Trigger control
Trigger control means pressing smoothly without disturbing the sights. Jerking, slapping, or anticipating recoil can move the firearm before the shot breaks. For more detail, read our guide on the importance of trigger control for shooting accuracy.
Follow-through
Follow-through means holding your position, grip, and focus for a moment after the shot rather than relaxing immediately. It helps make each shot part of the same repeatable process.
Rifle, Handgun, and Shotgun Differences
Accuracy fundamentals overlap, but rifle, handgun, and shotgun shooting differ enough that general advice should stay cautious. Treat these notes as orientation, not discipline-specific instruction.
Rifles: Stability, support, cheek placement, and consistent shoulder position matter.
Handguns: Grip consistency, stance, trigger control, and sight management carry extra weight.
Shotguns: Smooth mount, target focus, movement, and follow-through are common themes.
The NSSF shooting resources are a helpful starting point for understanding organized shooting activities and safety context.
Practice Plans and Training Classes
Accountable practice usually helps more than equipment changes for newer shooters. Work slowly, record what you are doing, and compare targets over several sessions instead of judging from one group. Add distance, speed, or complexity only when the basics are consistent.
A qualified instructor can spot habits that are hard to feel on your own, such as flinch, uneven grip pressure, or inconsistent trigger movement. If practice at home ever becomes part of your routine, review secure storage and safe handling resources such as Project ChildSafe, and follow your firearm manual.
Common Accuracy Mistakes
Trying to shoot faster than the fundamentals allow.
Changing equipment before checking technique.
Using an inconsistent stance, grip, or support position.
Anticipating recoil and disturbing the firearm before the shot breaks.
Relaxing before follow-through is complete.
Ignoring range safety while focusing too hard on the target.
Before each range session, review our shooting range safety rules guide so safety remains the first habit, not an afterthought.
Frequently Asked Questions
What improves shooting accuracy the most?
No single factor improves accuracy by itself. For many newer shooters, consistent position and smooth trigger control are common areas where careful practice can help.
Are accuracy fundamentals the same for rifle, handgun, and shotgun?
The core ideas overlap, but each firearm type has different emphasis. Rifles reward stability, handguns reward grip and trigger consistency, and shotguns reward mount and movement.
Will better equipment make me more accurate?
Equipment can matter, but technique is usually the larger variable for newer shooters. Work on fundamentals with qualified guidance before assuming a firearm or accessory is the limiting factor.
How long does it take to improve shooting accuracy?
It varies by shooter, firearm, ammunition, and practice quality. Consistent, safe, accountable sessions are more useful than occasional unfocused practice.
Final Range Takeaway
Better accuracy starts with safety, repeatability, and honest practice. Keep the muzzle in a safe direction, follow range commands, use the correct ammunition and protective gear, and build fundamentals slowly with qualified help when needed.
When it comes to shooting whether rifle, shotgun, or pistol recoil is one of the biggest obstacles to consistent accuracy. A heavy kick can disrupt your sight picture, cause you to flinch, spoil follow-up shots, and ultimately make you less confident behind the gun. But recoil is not something you just have to “deal with” there are techniques, gear choices, and mindset adjustments that can significantly reduce felt recoil and improve your shooting consistency.
In this article, we’ll explore the mechanics of recoil, common mistakes shooters make, and proven strategies to reduce recoil and thus boost accuracy.
Understanding Recoil: The Physics and the Feel
Before jumping into solutions, it helps to understand what recoil really is and more importantly, what felt recoil is.
What is recoil?
Recoil (or “kick”) is simply Newton’s Third Law in action: for every action, there is an equal and opposite reaction. When the gunpowder ignites and propels the bullet (or shot) forward, an equal force pushes the firearm backward into your shoulder or palm.
However, several variables influence how “bad” or “mild” that recoil feels:
Mass of the firearm — a heavier gun absorbs more energy, so less is felt by you.
Mass of the projectile & powder charge — a heavier or faster bullet (or more powder) produces stronger recoil.
Gun fit, stock geometry & ergonomics — how well the gun is shouldered and how force is transferred into your body matter a lot.
Muzzle design (brakes, ports, suppressors) — these can redirect gas and mitigate recoil or muzzle rise.
Recoil pad / cushioning — materials can absorb some of the shock.
Shooter technique, stance, muscle tension, grip — how your body interacts with the gun influences how much recoil you “feel.”
Also important: felt recoil is subjective and is influenced by your expectation, anticipation, and even psychological factors like flinching. As one extension publication notes:
So reducing recoil isn’t just a matter of gadgets; it’s partly about technique and mindset.
Why You Should Reduce Recoil (Beyond Comfort)
You might wonder: is recoil reduction just about comfort? Not at all. There are real performance gains when recoil is better managed:
Less flinching A heavy or unpredictable recoil often causes the shooter to anticipate the kick, subconsciously “jerking” or pushing before firing, which introduces error. Learning to manage recoil helps eliminate flinch.
Faster sight recovery / follow-up shots A gun that recoils violently or unpredictably takes longer to settle back on target. A more controlled recoil means faster recovery and more consistent follow-up shots.
Better shot-to-shot consistency When recoil is consistent and controlled, your point of impact shifts less from shot to shot, which improves group tightness.
Reduced shooter fatigue Extended shooting sessions with heavy recoil can wear you out — both physically and mentally. Managing recoil helps you shoot longer with less strain.
Greater shooter confidence A shooter who expects severe recoil is more likely to tense up. Reducing recoil helps build confidence and smoother technique.
Given all that, let’s explore how to reduce recoil — in gear, in technique, and in mindset.
1. Choose the Right Caliber & Ammunition
One of the most effective and straightforward ways to reduce recoil is starting with ammunition.
Use lighter loads / “reduced recoil” rounds Many manufacturers offer lighter or lower-power ammunition options. Tailoring your load to the level of recoil you can comfortably manage makes a huge difference. The NRA’s “10 Ways to Manage Recoil” lists “make your loads lighter” as a top method.
Opt for smaller calibers when possible For many hunting or target applications, you don’t need the most powerful round. Dropping a caliber to something with naturally less recoil (while maintaining effective performance) can produce huge benefits to accuracy.
Avoid overbore / excessive power loads Just because you can load a cartridge to maximum doesn’t mean you should for everyday shooting. The difference in recoil between a mild and “hot” load is often dramatic — and performance gains beyond a certain point may be negligible for your use case.
2. Add Weight & Mass to the Firearm
A heavier firearm resists rearward motion better, converting more recoil energy into internal stress rather than your shoulder or grip.
Use a heavier rifle / shotgun frame If feasible, choosing a heavier variant or using heavier components (barrels, stocks, etc.) is helpful. Many shooters note that a 10-pound rig has noticeably less “punch” than a 6-pound rig in the same caliber.
Add weight via accessories Add-ons like heavier optics, rail-mounted weight blocks, or internal weights (e.g. tungsten tubes in the buttstock) can help tame recoil. Just be cautious about altering point-of-impact — after adding weight, re-zero your rifle.
Use a recoil reduction tube or buffer Some stocks are designed to accept recoil reduction tubes or damping systems that help absorb recoil energy internally.
3. Utilize Muzzle Brakes, Ports & Suppressors
One of the most visible modifications shooters make for recoil control is to the muzzle end of the barrel.
Muzzle brakes / compensators These devices capture and redirect gases to reduce rearward impulse and muzzle rise. A good brake can make a magnum feel like a more modest round. Caveat: they can increase noise and blast to the sides — so good hearing protection is essential.
Barrel porting Porting (holes in the barrel near the muzzle) can vent gases upward to reduce muzzle climb. Porting is more common on shotguns and some specialized rifles.
Suppressors / sound moderators A suppressor adds mass and delays the discharge of gas, which reduces felt recoil somewhat. Some users find that a suppressor “softens” recoil in addition to reducing noise.
4. Use a Quality Recoil Pad or Recoil Cushioning
The interface between gun and your body is crucial. A soft, well-designed recoil pad or cushioning system can absorb some of the shock.
Replace or upgrade the recoil pad Swap out factory pads for premium cushioning ones (like LimbSaver, Decelerator, or other high-end pads). Many shooters swap their standard pad for something that spreads out the blow better.
Wider / deeper pad / shaped to your shoulder pocket A larger contact area spreads the force over a wider region of your shoulder, reducing the “sting.”
Slip-on or add-on recoil pads If you can’t change the stock, slip-on or wrap-around pads can be a cost-effective alternative.
5. Proper Gun Fit & Ergonomics
Even the best recoil mitigation gadgets won’t do much if your gun doesn’t fit you well. Gun fit is a foundational element of recoil control.
Length of Pull (LOP) & stock dimensions The gun should naturally come to your shoulder and allow you to place your cheek on the stock without excessive stretch or crash-back. If you have to shift your head or body to find the sight picture, your recoil experience will suffer.
Drop at comb, drop at heel The vertical alignment must allow you to get your eye on the sights without having to contort. Misalignment can cause you to shoulder the gun awkwardly, which worsens recoil.
Butt placement on the shoulder The butt should sit naturally in the hollow between the shoulder and collarbone not on the upper arm. A mis-placed butt contacts harder bones or muscles and amplifies discomfort.
Consistent and solid mount Practice mounting the gun repeatedly until it becomes second nature. This consistency helps your body expect and absorb recoil predictably.
Grip, cheek weld, and tension Your grip—neither too tight nor too loose—matters. Tension in your muscles can transmit recoil more sharply rather than absorbing it. Relaxed muscles can flex and distribute energy.
6. Master Recoil-Controlling Technique & Body Mechanics
Even with ideal gear, technique often makes the biggest difference. Here are key mechanical and mental strategies.
Natural Point of Aim (NPOA)
Natural point of aim is when the gun, with the shooter relaxed, naturally rests on the target without muscular strain. If your position isn’t balanced, the shot may jump off-course on recoil. Establishing NPOA ensures that your muscles aren’t fighting the gun, which helps reduce unwanted movement.
Use Your Body Mass / Angle the Recoil
When possible, lean into the shot slightly. If your body is aligned behind the rifle and you use skeletal support (not just muscle) to absorb rearward force, recoil will feel milder. Some shooters “ride the recoil” rather than resisting it abruptly.
Also, the idea of “punching back” is a tip from NRA: applying a small backward force during trigger press helps you meet recoil with your own counter-pressure.
Trigger Control & Smooth Press
Jerky or abrupt trigger pulls can induce uneven recoil and pull the shot off target. A smooth, deliberate press helps maintain alignment and control through the recoil impulse.
Follow-through & maintaining position
A very common mistake: shooters fire and immediately break their cheek weld or drop the gun mid-recoil to look at the target. Bad idea. Instead, keep your cheek welded, maintain grip, and let recoil play out naturally. Only once the rifle “settles” should you shift or scan.
Also, plan for the second sight-picture: after recoil and gun motion, the gun should return to near the original alignment so you can see where the bullet struck for adjustments.
Dry-fire and “dummy round” drills
One helpful way to train recoil control is through dry-firing exercises (on an unloaded gun). This helps you ingrain the motion without actually absorbing recoil. Another method is the “dummy round technique,” where the shooter doesn’t know if it’s loaded, forcing consistent technique regardless of actual recoil.
Progressive exposure & mental desensitization
If heavy recoil intimidates you, build up tolerance gradually. Start with light loads, work your way up, and practice on the bench before field use. Repetition, positive reinforcement, and slow progression reduce anticipatory tension (flinch).
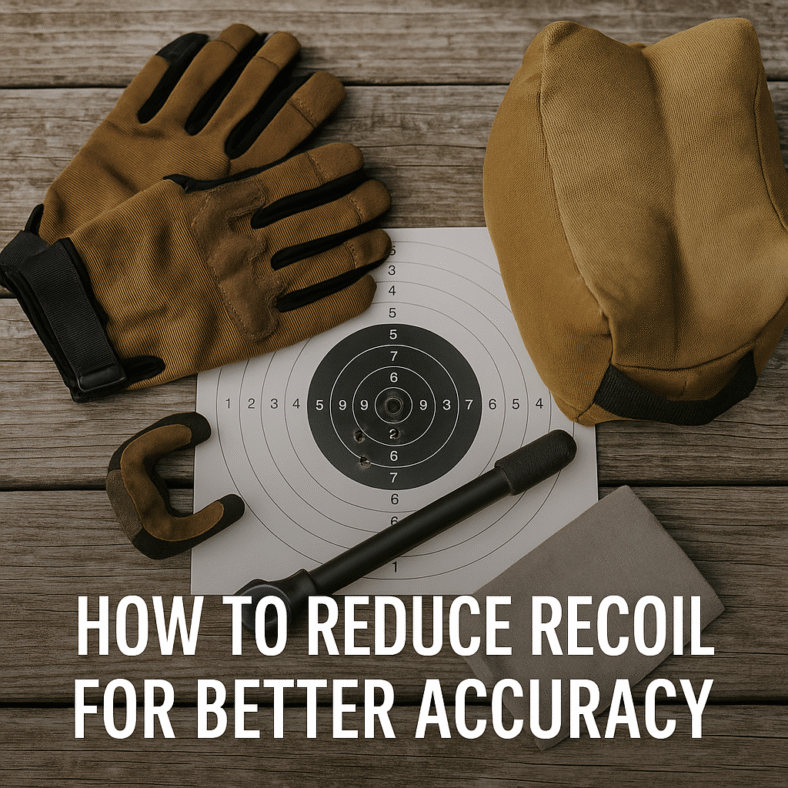
7. Wear Proper Gear (Clothing & Accessories)
Small things can make a big difference in how recoil is perceived.
Gloves / padded shooting vest A glove or padded vest can soften the sting of recoil on your hand or shoulder. The NRA’s list even includes “wear gloves” as a recoil mitigation tip.
Layered clothing Soft layers can cushion recoil slightly, though this is secondary to stock pads and technique.
Shoulder harness / recoil absorbing straps Some hunters use specialized straps or slings that reduce the felt shoulder shock, usually by distributing force across a broader area. (Less common, but worth exploring in heavy recoil setups.)
8. Regular Practice, Consistency & Re-Evaluation
Reducing recoil is not a one-time fix — it’s a skill. Here’s how to reinforce it.
Consistent form / routine Always mount the gun the same way, grip the same, use the same cheek weld and sight alignment habits. The more consistent your form, the more predictable recoil behavior will be.
Record results and adjust After modifying gear (e.g. adding a brake or pad), test your point-of-impact shifts and adjust zero. Keep logs of group sizes and recoil perception.
Incremental upgrades Don’t try to fix everything at once. Start with fit and technique, then add a pad, then a brake, etc., so you understand which change gives which benefit.
Mental training & confidence building Accept recoil as part of shooting. Don’t dwell on past shots focus on the next shot’s fundamentals. This mental approach reduces flinch and promotes calm execution.
Recoil Reduction Tips Summed Up (Checklist)
Here’s a quick checklist you can use before heading to the range or field:
Strategy
Benefit
Notes / Caveats
Use lighter or reduced-power ammunition
Lower recoil impulse
Ensure terminal performance remains effective
Switch to smaller caliber (if viable)
Less baseline recoil
May reduce ballistic capability
Add weight / heavier components
Resist rearward motion
Re-zero gun after changes
Use muzzle brakes / compensators
Redirect gas, reduce kick & muzzle rise
Increased noise, side blast
Add a suppressor
Adds weight, moderates gas
Also reduces noise, but may shift POI
Use a quality recoil pad
Cushioning and force spreading
Must match stock geometry
Ensure perfect gun fit
Ergonomic absorption of recoil
Adjust LOP, comb, etc.
Practice proper technique
Predictable, gentle recoil
Includes follow-through, NPOA, grip
Use dry-fire and dummy drills
Repetition without recoil
Builds muscle memory
Wear padded gear
Additional cushioning
Secondary benefit
Gradual exposure / mental conditioning
Reduced flinch
Requires patience
Regular evaluation & logging
Know what’s working
Helps plan further gear or technique tweaks
Case Study: Applying Recoil Reduction to a Hunting Rifle
Let’s walk through an example say you own a .308 Win bolt action rifle that kicks harder than you like. Here’s how you might systematically reduce recoil:
Check your ammo Use a mild hunting load (e.g. 150–165 gr) rather than a high-velocity match load.
Evaluate fit Adjust your stock (LOP, comb height) to ensure the rifle mounts cleanly without stress.
Install a better recoil pad Swap to a premium cushioning pad and ensure full shoulder contact.
Add weight Add internal weight in the butt or opt for heavier optics or rail-mounted weights.
Install a muzzle brake Choose a brake suited for .308, mount it, and re-zero at your normal distance.
Practice technique On the range, use dry-fire first, then live fire focusing on smooth trigger pull, maintaining cheek weld, and letting recoil play out.
Evaluate performance Monitor group sizes, point-of-impact shifts, shooter fatigue, and perceived recoil. If still too much, consider cutting back to a lower-power cartridge or further technique refinement.
Over time, these changes can make your .308 feel much more manageable — boosting accuracy, confidence, and enjoyment.
Recoil in Shotguns, Pistols & Other Platforms
Though this article focuses mostly on rifles/hunting arms, many of these same principles apply to shotguns, pistols, and other firearms:
Shotguns: use ported barrels, soft recoil pads, or gas-operated designs to reduce felt recoil. Gun fit (shoulder placement) matters a lot.
Pistols / handguns: grip technique, wrist lock, consistent hold, and compensators (on semi-autos) help reduce perceived recoil. The Armory Life emphasizes managing muzzle climb and bounce in pistols.
Autoloaders: operating action absorbs part of the recoil energy, mitigating the punch you feel. Many semi-autos are inherently softer-shooting than bolt-action counterparts of the same caliber.
So regardless of your weapon of choice, the strategies here can be adapted and applied.
Common Mistakes & Pitfalls to Avoid
When trying to reduce recoil, many shooters make avoidable errors. Be aware of these so you don’t undermine your efforts:
Tightening muscles / over-gripping If you grip or shoulder too rigidly, your body transmits recoil directly instead of absorbing it.
Breaking off too early Lifting your head or breaking cheek weld before the shot settles ruins consistency.
Adding gadgets randomly Throwing on a brake or pad without checking gun fit or technique often leads to worse results (e.g. POI shift, increased noise). Always test and re-zero.
Expecting “zero recoil” There is no such thing — recoil must be managed and learned, not completely eliminated.
Neglecting hearing protection near brakes With muzzle brakes, side blast becomes much louder. Use double hearing protection (plugs + muffs).
Changing multiple things at once If you adjust pad, brake, weight, and grip all at once, you won’t know which change made a difference.
Ignoring mental factors Fear or anticipatory flinch can wreck your performance even if your gear is optimized. Mental training matters.
Final Thoughts: Recoil Is Manageable, Not an Enemy
Recoil doesn’t have to be your nemesis. With a combination of smart gear choices, sound technique, and practice, you can significantly reduce felt recoil and gain better accuracy and confidence.
At TheShootingGears.com, we believe that mastering recoil control is one of the foundational skills every shooter and hunter must develop. Whether your passion lies in long-range precision rifles, smooth shotguns, or fast pistols the principles here apply.
Ballistic coefficient, often shortened to BC, describes how efficiently a bullet moves through air. A higher BC bullet usually slows down less, drifts less in wind, and carries velocity better than a lower BC bullet of similar speed and caliber, but BC is only one part of long-range performance.
This guide explains BC in practical shooter language. It does not replace a ballistic calculator, confirmed range data, or safe firearm handling. Before any live-fire testing, follow your firearm manual, range rules, and the NSSF firearm safety rules.
Higher usually means less drag for that bullet shape and model
Helps predict drop, wind drift, and retained velocity.
Drag model
G1 and G7 BC values are not interchangeable
Using the wrong model can make calculator results misleading.
Velocity
Muzzle velocity still matters alongside BC
A high-BC bullet still needs verified speed data.
Bullet stability
Twist rate must stabilize the bullet
An unstable bullet will not perform well just because BC is high.
Wind
BC helps reduce drift, but wind reading still controls real results
Long-range misses often come from wind judgment.
Verification
Confirm predictions with live-fire data
Calculators are starting points, not proof.
Safety
Use a legal range, safe backstop, and known target distance
Long-range practice magnifies mistakes.
What Ballistic Coefficient Means
Ballistic coefficient is a way to compare how well a projectile resists air drag. In simple terms, bullets with better aerodynamic efficiency keep speed longer. That can reduce drop, reduce wind drift, and keep the bullet more predictable over distance.
For a general technical definition, the ballistic coefficient overview on Wikipedia is a useful starting reference. For real shooting, the important point is that BC must be used with accurate velocity, distance, atmosphere, and confirmed rifle/ammunition data.
Why BC Matters for Long-Range Shooting
At short distances, BC may not matter much for many shooters. At longer distances, small differences in drag start to show up as more drop, more wind drift, and less retained velocity. That is why long-range shooters often compare bullet BC when choosing ammunition or handload components.
BC is especially important when wind is part of the problem. A bullet that stays faster longer generally spends less time in flight, which can reduce wind drift. It does not remove the need to read wind, build a stable position, or verify data at distance.
BC Is Not Everything
A higher BC bullet is not automatically the best choice. The rifle must stabilize it, the cartridge must drive it consistently, the ammunition must group well, and the shooter must be able to confirm the trajectory. A lower-BC bullet that shoots tight groups from your rifle can be more useful than a high-BC bullet that does not group well.
Ammunition standards and terminology can be checked through SAAMI. For your own rifle, the deciding evidence is safe live-fire performance: group size, chronograph data if available, confirmed drop, and repeatable results.
G1 vs G7 BC
BC values are often listed with a drag model, commonly G1 or G7. G1 is older and often used broadly in marketing and basic charts. G7 is usually a better fit for modern long, boat-tail rifle bullets. The numbers are different scales, so a G1 BC and G7 BC should not be compared as if they are the same thing.
When using a ballistic calculator, enter the BC with the correct drag model. A wrong model can make the data look precise while still being wrong downrange.
How To Use BC in Practice
Start with the ammunition maker’s published BC, then enter your actual muzzle velocity, sight height, zero distance, weather, and target distance into a calculator. After that, confirm the predicted drop and wind holds at the range. Adjust your data based on what the rifle actually does.
Keep notes. Write down ammunition lot, temperature, distance, group size, drop, wind, and scope setting. Long-range accuracy improves when you build a record instead of relying on one range session or one number from a box.
Common Ballistic Coefficient Mistakes
Choosing ammunition only because the BC number is high.
Mixing G1 and G7 values in the same comparison.
Ignoring actual muzzle velocity from your rifle.
Using calculator predictions without confirming at the range.
Forgetting that wind reading, position, trigger control, and scope setup still matter.
No. Higher BC can help at distance, but accuracy, stability, velocity, recoil, ammunition consistency, and rifle fit still matter. The best bullet is the one that performs reliably in your rifle for your use case.
What is the difference between G1 and G7 BC?
G1 and G7 are different drag models. G7 is often more appropriate for modern long, boat-tail rifle bullets, while G1 is commonly seen in general bullet data. Do not compare the numbers directly without knowing the model.
Does ballistic coefficient affect wind drift?
Yes. A bullet with better drag efficiency usually stays faster longer, which can reduce wind drift. Wind reading and verified range data still matter.
Can BC replace range practice?
No. BC helps a ballistic calculator estimate performance, but you still need to confirm zero, drop, and wind behavior safely at the range.
Final Recommendation
Use ballistic coefficient as one decision point, not the whole decision. A good long-range setup combines safe firearm handling, consistent ammunition, a stable rifle, verified scope data, wind practice, and live-fire confirmation. The BC number helps, but the range tells the truth.
Using a rifle scope well means more than seeing the target clearly. The shooter still has to mount the scope correctly, set eye relief, understand the reticle, confirm zero, manage parallax, and verify every adjustment at the range before trusting the setup in the field.
This guide focuses on safe, practical scope use for accuracy. Always follow firearm safety rules, your optic manual, your firearm manual, and local range rules. The NSSF firearm safety rules are the starting point before any live-fire scope work.
Unload and clear before setup; follow range commands during live fire
Optic work never comes before safety.
Mount fit
Base, rings, tube diameter, ring height, and torque are correct
A loose or stressed scope will not hold zero.
Eye relief
Full sight picture from your real shooting position
Reduces scope bite risk and improves consistency.
Diopter/focus
Reticle appears sharp to your eye
A fuzzy reticle makes precise aiming harder.
Zero
Confirmed with the exact ammunition you will use
Different loads can shift point of impact.
Parallax
Adjusted for distance when the scope has parallax control
Helps reduce aiming error at longer distances.
Data
Record distance, ammo, group size, and adjustments
Good notes prevent repeat mistakes.
Start With Safe Setup
Before using a rifle scope, confirm the scope is mounted correctly. The rings should match the tube diameter, the base should match the rifle, and screws should be tightened to the manufacturer’s inch-pound specs. If the scope shifts under recoil, every other accuracy step becomes unreliable.
Use a stable bench or rest when setting up and zeroing. Keep the muzzle pointed in a safe direction and follow every range command. Scope work often involves repeated adjustments, so slow handling is better than rushing between shots.
Set Eye Relief and Focus
Eye relief is the distance from your eye to the scope where the full image appears. Set it from a real shooting position, not just from a bench posture that you will never use again. A consistent cheek weld and relaxed head position make scope use much more repeatable.
Next, adjust the diopter so the reticle looks sharp. Do this by looking briefly through the scope at a plain background, then adjusting until the reticle is crisp. Avoid staring through the scope while adjusting because your eye may compensate and hide a poor setting.
Understand the Reticle and Turrets
Know whether your scope uses MOA, MIL, BDC marks, or a simpler duplex reticle. Also know how much each turret click moves point of impact at 100 yards or meters. Guessing at clicks wastes ammunition and can make zeroing confusing.
Reticle and turret systems should match your shooting needs. A simple hunting scope may be faster for close field shots, while a more detailed reticle can help with distance work if you practice enough to understand it.
Zero and Confirm With Your Ammunition
Boresighting can help get shots on paper, but it is not a finished zero. Fire careful groups, adjust based on group center, and confirm again. Use the same ammunition you plan to hunt or practice with because different bullet weights and loads can change point of impact.
For ammunition standards and technical terminology, SAAMI is a useful industry authority. For your own setup, the most important data still comes from live-fire confirmation with your rifle, scope, and ammunition.
Manage Parallax
Parallax error happens when the reticle appears to shift on the target as your eye moves behind the scope. Many hunting scopes are factory-set for a common distance, while some scopes have adjustable objective or side-focus controls. If your scope has parallax adjustment, set it for the target distance and verify that the reticle stays stable as your eye position changes slightly.
Parallax matters more as distance increases or targets get smaller. It does not replace a consistent cheek weld, but it helps reduce one more source of aiming error.
Field Use Habits
In the field, keep the scope on a sensible magnification for the terrain. Too much magnification can make close targets harder to find. Too little can make precision harder at distance. Practice changing magnification, checking reticle visibility, and mounting the rifle safely before relying on the optic under pressure.
For formal marksmanship pathways and competition learning, USA Shooting is a useful authority source. For hunting, pair scope skills with local regulations, ethical shot limits, and a clear backstop.
What is the first thing to adjust on a rifle scope?
Start with safe mounting, eye relief, and reticle focus before live-fire zeroing. A scope that is uncomfortable or unfocused will be harder to use consistently.
Is boresighting enough to use a rifle scope?
No. Boresighting is only a starting point. You still need to confirm zero with live fire and the ammunition you plan to use.
Why does my scope lose zero?
Common causes include loose mounts, incorrect torque, damaged rings, inconsistent ammunition, scope damage, or shooter technique. Start by checking the mount and confirming groups from a stable position.
Do I need parallax adjustment?
It depends on distance and target size. Many basic hunting scopes work fine within normal ranges, but adjustable parallax can help with longer-distance precision or smaller targets.
Final Recommendation
A rifle scope improves accuracy only when the whole system is verified: safe firearm handling, correct mounting, clear focus, confirmed zero, understood adjustments, and repeatable shooting fundamentals. Take notes, confirm changes at the range, and do not trust an unverified setting in the field.
A bipod can improve shooting accuracy by giving the rifle a steadier front support, but it does not replace safe handling, good position, trigger control, or verified zero. The main advantages are stability, repeatable rifle height, reduced fatigue, and better control from prone or supported positions.
This guide explains when a bipod helps, when it can hurt, and how to use one safely. Always follow range rules, your firearm manual, and the NSSF firearm safety rules before any live-fire practice.
Bipod fits the rifle’s sling stud, rail, or mount correctly
A loose bipod can shift point of impact.
Height
Leg height matches your prone, bench, or field position
Wrong height creates strain and poor alignment.
Surface
Feet grip the ground or bench consistently
Sliding or bouncing hurts repeatability.
Load
Use consistent forward pressure when appropriate
Inconsistent pressure changes recoil behavior.
Rear support
Use a stable rear bag or hand position
A bipod supports the front, not the whole rifle.
Zero check
Confirm zero from the position you will use
Bench zero and bipod/prone zero may not feel identical.
Safety
Keep muzzle direction and backstop clear
Stability does not replace safe shooting decisions.
Better Stability
The biggest advantage of a bipod is front-end stability. It reduces wobble compared with unsupported shooting and gives the rifle a consistent point of contact with the ground, bench, or shooting mat. That can make it easier to see the target, hold the reticle steady, and call shots.
A bipod helps most when the shooter also has a stable rear support. A rear bag, consistent shoulder pressure, and relaxed body position all matter. If the rear of the rifle is floating or the shooter is muscling the stock, the bipod alone will not fix accuracy.
Repeatable Shooting Position
A bipod can make position setup more repeatable. The rifle sits at a predictable height, the support point is consistent, and the shooter can build a natural point of aim more easily. This is useful for zeroing, group testing, prone practice, and some hunting setups.
For formal marksmanship development and competitive shooting pathways, USA Shooting is a useful authority source. Practical accuracy still comes from verified practice, not from the accessory alone.
Recoil Management
A good bipod setup can help the rifle track more predictably under recoil. Many shooters apply gentle forward pressure into the bipod so the rifle loads consistently before the shot. The key word is consistently. Changing pressure from shot to shot can change how the rifle moves.
Ammunition and firearm standards are separate from bipod technique, but SAAMI is a useful reference for ammunition terminology and standards. At the range, your own group data is what proves whether a bipod setup is helping.
Field Use
In hunting or field shooting, a bipod can help when the ground allows a stable prone or seated position. It may be less useful in tall grass, steep terrain, brush, or situations where quick movement is needed. Adjustable legs, swivel/cant features, and durable feet can matter more in the field than on a flat bench.
Do not let a bipod tempt you into shots you cannot identify, backstop, or hold ethically. A steadier rifle is still only one part of a safe shot.
When a Bipod Can Hurt Accuracy
A bipod can hurt accuracy if it is loose, mounted poorly, too tall, too short, or used with inconsistent pressure. Hard benches can cause some bipods to hop. Soft ground can make legs sink. Uneven terrain can cant the rifle unless the bipod or shooter position compensates.
Test the rifle from the positions you actually use. If groups open up with the bipod, compare setup, rear support, pressure, and surface before blaming the rifle or ammunition.
Common Bipod Mistakes
Using a bipod without stable rear support.
Mounting the bipod loosely or on the wrong adapter.
Changing forward pressure from shot to shot.
Using the wrong leg height for the position.
Forgetting to confirm zero from the bipod position.
A bipod can make the shooter and rifle system steadier, which may improve practical accuracy. It does not change the rifle’s mechanical accuracy by itself.
Should I zero a rifle from a bipod?
If you plan to shoot from a bipod, confirm zero from that position. Changes in support and recoil behavior can affect how the setup feels and groups.
What bipod height is best?
The best height depends on position and terrain. Low bipods can work well for prone shooting on flat ground, while taller legs may help in grass, uneven ground, or seated positions.
Do I still need a rear bag with a bipod?
For precision work, rear support is very helpful. A bipod stabilizes the front of the rifle, but the rear of the stock still needs consistent support.
Final Recommendation
A bipod is useful when it supports a stable, repeatable, safe shooting position. Choose the right height, mount it securely, use consistent pressure, confirm zero from that position, and remember that the bipod supports fundamentals rather than replacing them.
Trigger control matters because the rifle or handgun can be aimed correctly and still miss if the shooter moves the firearm while pressing the trigger. Good trigger control means pressing the trigger smoothly to the rear while keeping the sights stable, the grip consistent, and the shot process safe.
This guide focuses on safe practice habits and shooting fundamentals. Always follow your firearm manual, use an appropriate range, and keep the basic safety rules first. The NSSF firearm safety rules are a useful baseline before any dry-fire or live-fire practice.
Confirm the firearm is unloaded for dry practice and use a safe direction/backstop
Skill work never comes before safe handling.
Grip
Use a repeatable grip without crushing or changing pressure mid-shot
Changing grip pressure moves the sights.
Sight focus
Watch the sight picture through the press
You can see movement as the trigger breaks.
Trigger press
Press smoothly straight to the rear
Side pressure pushes the muzzle off target.
Follow-through
Keep aiming after the shot breaks
Prevents dipping or relaxing early.
Pace
Practice slowly before adding speed
Clean movement matters before faster movement.
Feedback
Use groups, a coach, or video to diagnose movement
Guessing at mistakes slows progress.
What Trigger Control Means
Trigger control is the way you move the trigger without disturbing the firearm. It includes finger placement, direction of pressure, grip consistency, breathing rhythm, sight awareness, and follow-through. The goal is not to make the trigger feel magical; the goal is to avoid adding movement at the exact moment the shot breaks.
Different firearms feel different. A hunting rifle, striker-fired pistol, revolver, and target rifle may all have different trigger weight, travel, reset, and break feel. The principle stays the same: press the trigger in a controlled way while maintaining the sight picture and safe muzzle direction.
Why Trigger Control Affects Accuracy
The muzzle only has to move a small amount to change point of impact. A jerky press, tightened fingers, flinch, or early anticipation can pull the shot away from where the sights were aimed. This is why a shooter may have a good optic, good ammunition, and a stable rest but still see inconsistent groups.
Trigger control also interacts with other fundamentals. Poor stance, weak support, uncomfortable recoil, and bad sight alignment can all make the trigger press worse. For newer shooters, accuracy improves faster when the whole shot process is practiced calmly instead of chasing one magic trick.
Safe Dry Practice for Trigger Control
Dry practice can help because it lets you watch the sights without recoil or noise. Only do it after unloading the firearm, checking the chamber, removing ammunition from the practice area, and choosing a safe direction. If your firearm requires snap caps or has manufacturer restrictions, follow the manual.
During dry practice, press the trigger slowly while watching the front sight, dot, or reticle. The sight should stay steady before, during, and after the trigger break. If it dips, jumps, or moves sideways, slow down and focus on a smoother press and more consistent grip.
For household safety and secure storage habits, Project ChildSafe is a good resource to keep close. Practice routines should never leave firearms or ammunition unsecured.
Live-Fire Practice at the Range
At the range, use slow groups to confirm whether your dry-practice feel carries into live fire. Start close enough that you can clearly see group movement and do not rush cadence. A clean five-shot group teaches more than a fast string where you cannot tell what changed.
Watch for patterns. Low-left impacts for a right-handed pistol shooter, wide horizontal groups, or shots that appear just as recoil anticipation builds can all point to trigger and grip problems. These patterns are clues, not proof, so use them with coaching or careful self-review.
If you want to understand formal shooting-sport fundamentals and training pathways, USA Shooting is a useful authority source for the competitive side of marksmanship.
Common Trigger Control Mistakes
Slapping the trigger instead of pressing it smoothly.
Changing grip pressure as the shot breaks.
Looking over the sights to see the hit too early.
Holding your breath so long that tension builds.
Practicing too fast before the fundamentals are stable.
Ignoring recoil anticipation or flinch.
When To Get Coaching
Get coaching if your groups do not improve, recoil makes you tense, you are new to a firearm type, or you are practicing defensive, hunting, or competition skills. A qualified instructor can spot movement that is hard to feel in the moment.
Coaching is also useful when changing platforms. A shooter moving from a rifle to a pistol, from iron sights to a red dot, or from bench shooting to field positions may need different feedback even if the trigger-control principle is familiar.
Trigger control is pressing the trigger without moving the sights off target. It depends on smooth pressure, consistent grip, sight awareness, and follow-through.
Does dry firing help trigger control?
Dry practice can help if it is done safely and your firearm manual allows it. Always unload, remove ammunition from the area, and use a safe direction before dry practice.
Why do I pull shots when I press the trigger?
Common causes include jerking the trigger, tightening the whole hand, anticipating recoil, or changing grip pressure. Slow practice and coaching can help identify the exact cause.
Should trigger control be different for rifles and handguns?
The basic idea is the same, but the feel is different. Handguns usually reveal trigger movement more clearly because they are lighter and have a shorter sight radius. Rifles may hide some errors from a stable rest but still punish poor follow-through.
Final Recommendation
Trigger control is not a shortcut; it is one part of a repeatable, safe shot process. Practice slowly, keep the firearm safe, watch the sights through the trigger press, and verify progress at the range. If accuracy problems continue, get trained eyes on your grip, stance, and follow-through.
Scope parallax adjustment helps reduce aiming error when your eye is not perfectly centered behind the scope. If your scope has a side-focus or adjustable-objective control, the practical goal is to make the reticle stay still on the target when your eye moves slightly behind the eyepiece.
This guide explains parallax in practical shooter language. It is not a replacement for your optic manual, safe firearm handling, or live-fire confirmation. Start with the NSSF firearm safety rules before any scope setup or range work.
Unload during setup and follow range commands during live fire
Optic adjustment never comes before firearm safety.
Set reticle focus
Adjust the diopter so the reticle looks sharp
A blurry reticle makes parallax harder to judge.
Set magnification
Use the magnification you plan to shoot or test
Parallax sensitivity can feel different at higher power.
Aim at target
Use a stable rest and a clear target at known distance
A stable rifle makes reticle movement easier to see.
Move eye slightly
Shift your eye behind the scope without moving the rifle
Reticle movement on target shows parallax error.
Adjust side focus/AO
Turn until the reticle appears stable on the target
This reduces aiming error from imperfect eye position.
Confirm with shots
Verify groups at the range
Adjustment is only useful if real shots confirm it.
What Scope Parallax Is
Parallax happens when the target image and reticle do not appear on the same optical plane. When that happens, the reticle can seem to shift on the target as your eye moves behind the scope, even if the rifle itself has not moved.
Parallax is not the same as focus, but the controls can feel related. Reticle focus is usually adjusted with the diopter near the eyepiece. Parallax or side-focus adjustment is usually on the side turret or objective bell when the scope includes that feature.
When Parallax Matters
Parallax matters more at longer distances, higher magnification, and smaller targets. It is less noticeable at short distances or low magnification, but it can still affect precision. Many hunting scopes are factory-set for a common distance and may not have a parallax control.
If your scope does not have a parallax adjustment, focus on consistent cheek weld, proper eye relief, and confirmed zero. Those fundamentals still matter even with an adjustable scope.
How To Adjust Scope Parallax
Set up on a stable rest with the firearm pointed safely at the target. Make sure the reticle is sharp first. Then aim at a clear target at the distance you plan to shoot. Without touching the rifle, move your eye slightly up, down, left, and right behind the scope.
If the reticle appears to move across the target, adjust the side-focus or adjustable objective control. The distance numbers on the knob are a starting point, not a guarantee. The practical test is whether the reticle stays still on the target as your eye moves slightly.
Common Parallax Mistakes
Using the side-focus knob only to make the target look sharp.
Skipping reticle focus before checking parallax.
Trusting the knob’s yardage number without verifying on target.
Trying to diagnose parallax while the rifle is wobbling.
Ignoring cheek weld and eye position.
Parallax and Zero
Parallax adjustment does not replace zeroing. You still need to confirm point of impact with live fire at the range. For ammunition terminology and standards, SAAMI is a useful authority reference, but your actual zero comes from your rifle, scope, ammunition, and shooting position.
When testing zero, use careful groups instead of single shots. If groups shift when your eye position changes, parallax or inconsistent cheek weld may be part of the issue.
Field Use
In the field, you may not have time for perfect adjustment. Set the scope for a practical distance range, keep magnification reasonable, and build a repeatable cheek weld. For formal marksmanship pathways and training culture, USA Shooting is a useful resource.
For hunting, the ethical choice is always to pass on shots where distance, target ID, backstop, or stability are uncertain. Parallax adjustment helps precision, but it cannot fix unsafe conditions.
It looks like the reticle moving across the target when your eye shifts behind the scope, even though the rifle is still.
Is parallax the same as focus?
No. Focus makes the reticle or target look sharp. Parallax adjustment helps align the reticle and target image so the reticle does not appear to shift with eye movement.
Do all rifle scopes have parallax adjustment?
No. Many hunting scopes are factory-set and do not include a side-focus or adjustable objective control. In that case, consistent eye position is especially important.
Can parallax cause missed shots?
Yes, especially at longer distances, high magnification, or on small targets. It is one possible source of error along with wind, zero, ammunition, trigger control, and shooting position.
Final Recommendation
Adjust parallax by watching reticle movement, not just by reading the yardage number on the knob. Set reticle focus first, use a stable position, verify with live-fire groups, and keep your safety and shot conditions ahead of any optic setting.
Low-light shooting is harder because the target, sights, background, and safety risks are all less obvious. The safest improvement is not simply “add more light.” It is learning when not to shoot, how to identify the target and what is beyond it, how your sights behave in dim light, and how to practice under controlled range conditions.
This guide is written for responsible range practice, hunting preparation, and general marksmanship awareness. Always follow your firearm manual, local laws, range rules, and the core safety rules. The NSSF firearm safety rules are the baseline before any low-light practice.
Hunting or range activity is allowed at that time and location
Low light can create legal and ethical problems fast.
Target ID
You can clearly identify the target, not just a shape or sound
Never shoot at an uncertain target.
Backstop
You know what is behind and around the target
Backgrounds are harder to read in dim light.
Sight picture
Your sights, reticle, or dot are visible without covering the target
Aiming errors increase when contrast drops.
Light discipline
You know how your light affects vision and target visibility
Too much or too little light can both cause problems.
Practice setting
Low-light drills happen only at an approved range or safe setup
Controlled practice beats guessing in the field.
Stop rule
You know when visibility is too poor to continue
The best low-light skill is knowing when not to shoot.
Why Low Light Is Different
Low light reduces contrast. That makes it harder to judge distance, see sight alignment, read terrain, and confirm what is beyond the target. It can also change how your eyes respond to muzzle flash, bright lights, shadows, and reflective surfaces.
Accuracy problems in low light are often decision problems before they are trigger problems. If the target is unclear, the backstop is uncertain, or the sight picture is not reliable, the correct choice is to stop. Better equipment cannot fix a bad identification decision.
Identify the Target Before Shooting
Target identification is the central rule. A shooter must know what the target is, where the safe backstop is, and what else is nearby. Low-light conditions make shapes and movement easier to misread, so do not treat movement, noise, or outline alone as enough information.
For secure storage and safe firearm habits around the home, Project ChildSafe is also worth referencing. Low-light awareness should include the full safety picture, not only aiming technique.
Understand Your Sights and Optics in Dim Light
Iron sights, illuminated reticles, red dots, scopes, and night sights all behave differently as light fades. A bright dot can bloom and cover detail. A non-illuminated reticle may disappear against a dark target. A scope can show a clearer image than the naked eye, but it does not remove the need to identify the target and background.
Practice with the same sighting system you plan to use. Check brightness settings, battery status, reticle visibility, and how the sight appears from different positions. If your optic has illumination, use the lowest setting that gives a clear aiming reference without washing out the target.
Build a Safe Low-Light Practice Plan
Low-light practice should happen only where it is allowed and controlled. Confirm range rules, target setup, backstop, emergency lighting, and supervision if needed. Start with simple drills: clear target identification, slow groups, sight visibility checks, and safe reload or handling practice only if the range permits it.
Do not add speed until safety and visibility are reliable. Record what worked: lighting level, sight setting, distance, target color, and whether you could call your shots. That information is more useful than trying to “win” a dark practice session.
Low-Light Hunting Considerations
Hunting adds legal and ethical limits. Shooting hours, species identification, blaze-orange rules, artificial-light rules, and property boundaries vary by place. Check your local wildlife agency before relying on any general advice. When visibility is marginal, passing the shot is often the responsible choice.
For competitive and formal marksmanship pathways, USA Shooting is a useful authority source. For hunting, pair marksmanship practice with local regulations and hunter education before field use.
Common Low-Light Shooting Mistakes
Shooting before the target and backstop are clearly identified.
Using an optic illumination setting that is too bright.
Assuming a scope can replace safe visual confirmation.
Practicing low-light handling in an unsafe or unapproved place.
Ignoring local hunting-hour or artificial-light laws.
Forgetting that fatigue and darkness make judgment worse.
What is the most important low-light shooting rule?
The most important rule is target identification. If you cannot clearly identify the target and what is beyond it, do not shoot.
Do illuminated reticles help in low light?
They can help, but only when set correctly. Too much brightness can cover detail or reduce your ability to see the target clearly.
Can I practice low-light shooting at home?
Live-fire practice belongs only in approved safe locations. Dry practice should follow your firearm manual, strict unloading procedures, safe direction, and secure ammunition separation.
Is low-light hunting always legal?
No. Legal shooting hours, artificial-light rules, and species rules vary by location. Check your local wildlife agency before hunting in low-light conditions.
Final Recommendation
Low-light shooting should be treated as a decision-making and safety problem first, and an accuracy problem second. Practice in controlled settings, learn how your sights behave, verify every target and backstop, and stop when visibility is not good enough. That discipline matters more than any single piece of gear.