Long Range Scope Settings for Windy Conditions Guide

Long-range shooting in calm weather already demands precision, but when wind enters the equation, accuracy becomes far more complex. Wind is invisible, constantly shifting, and rarely uniform from the shooter to the target. Unlike elevation, which can be dialed once and trusted, wind must be continuously read, interpreted, and corrected. Proper scope setup and intelligent use of reticles and turrets allow the shooter to manage this unpredictable force and achieve consistent hits at extended distances.

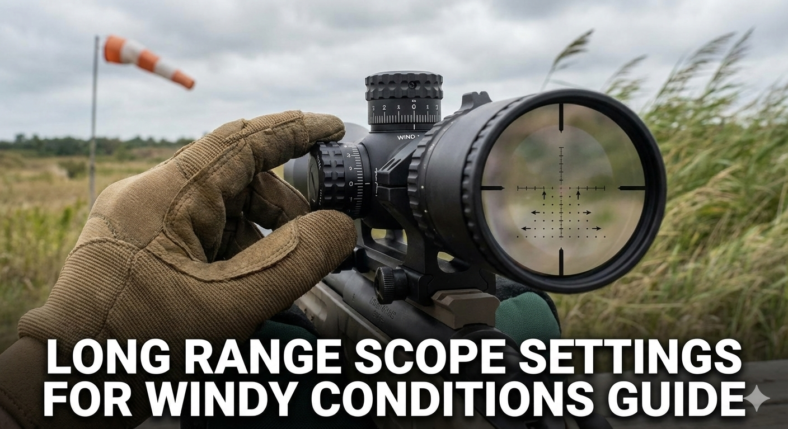
How Wind Influences Bullet Flight at Long Range

A bullet traveling hundreds or thousands of yards is exposed to airflow for a significant amount of time. Even a light crosswind can push it several inches off target, while stronger winds can cause feet of horizontal drift. The effect grows with distance and depends on bullet speed, weight, ballistic coefficient, and air density. Wind also changes along the bullet’s path, meaning the air near the shooter may not be the same as the air halfway to the target or near the impact point. This is why wind correction is never a single fixed number but a continuously refined estimate.

Importance of Proper Scope Mounting and Zero

Before any wind correction can be trusted, the scope must be perfectly mounted and zeroed. A level scope is critical because even slight cant can create horizontal error when elevation is dialed, making wind corrections appear incorrect. A true mechanical zero, accurate turret tracking, and properly set parallax ensure that every adjustment you make is real and repeatable. Without this foundation, it becomes impossible to distinguish between wind error and equipment error.

Choosing the Right Reticle for Wind Holds

The reticle is the shooter’s primary tool for managing wind in real time. First focal plane reticles are especially valuable because their subtensions remain accurate at all magnifications. Reticles with multiple horizontal reference marks or full “Christmas tree” designs allow precise wind holds while also compensating for elevation. This makes it possible to hold into the wind rather than constantly dialing the turret, which is faster and more adaptable in changing conditions.

Dialing Windage Versus Holding in the Reticle

Wind can be corrected either by dialing the windage turret or by holding using the reticle. Dialing is precise and clean when the wind is steady and consistent across the entire range, but it becomes slow and risky when the wind is switching or gusting. Holding with the reticle allows instant adjustment shot to shot, making it the preferred method for most long-range shooters in real-world conditions. By shifting the aiming point left or right along the reticle’s scale, the shooter can respond immediately to changes in wind speed or direction.

Using Ballistic Data to Set Initial Wind Values

Accurate wind correction starts with ballistic calculations. By inputting distance, muzzle velocity, ballistic coefficient, and estimated wind speed into a ballistic solver, the shooter obtains an initial wind drift value in mils or MOA. This value is then applied either by dialing or holding. It serves as a starting point rather than a final answer, as real-world conditions often differ slightly from calculated models. Observing bullet impact and trace allows the shooter to refine this value for maximum precision.

Reading Wind Through Mirage and Visual Cues

The scope itself becomes a wind-reading instrument when observing mirage. When mirage rises straight up, wind is minimal. When it flows at an angle, wind is present, and the flatter the angle, the stronger the wind. By focusing the scope at different distances, the shooter can identify changes in wind speed and direction along the bullet’s path. This helps determine whether stronger wind exists mid-range or near the target, where its influence may be greater than at the firing position.

Managing Variable Winds with Bracketing and Averaging

In unstable conditions, it is often impossible to assign a single exact wind value. Instead, the shooter estimates a low and high wind speed and chooses a hold between them. This bracketing approach increases first-round hit probability and allows quick correction after observing the impact. Reticles with fine horizontal markings make this method especially effective, as small adjustments can be made without touching the turrets.

Role of Turret Precision and Click Values

Fine turret resolution is essential for precise wind correction. Click values such as 0.1 mil or 0.25 MOA allow small, accurate adjustments after spotting impacts. Coarse adjustments can lead to overcorrection and wasted shots. Smooth, repeatable turret tracking ensures that any dialed correction matches the reticle’s subtensions and ballistic data exactly.

Understanding Wind Zones Along the Bullet Path

Wind rarely behaves the same from muzzle to target. Terrain, vegetation, and temperature differences create multiple wind layers or zones. A bullet may pass through calm air, then strong crosswind, and finally a different direction near the target. By observing mirage and environmental indicators in each zone, the shooter can mentally average the conditions and apply a more realistic overall wind hold.

Final Thoughts

Long-range scope settings for windy conditions are not about a single perfect adjustment but about creating a reliable system. A level and accurately zeroed scope, a reticle designed for precise wind holds, dependable ballistic data, and skilled wind reading all work together. Wind will always be the most unpredictable variable in long-range shooting, but with proper scope setup and disciplined technique, it becomes a controllable factor rather than a mystery. Mastery comes from continuous observation, correction, and confidence in both equipment and method.

Ballistic Coefficient Explained for Long-Range Shooting

Ballistic coefficient, often shortened to BC, describes how efficiently a bullet moves through air. A higher BC bullet usually slows down less, drifts less in wind, and carries velocity better than a lower BC bullet of similar speed and caliber, but BC is only one part of long-range performance.

This guide explains BC in practical shooter language. It does not replace a ballistic calculator, confirmed range data, or safe firearm handling. Before any live-fire testing, follow your firearm manual, range rules, and the NSSF firearm safety rules.

Table of Contents
  1. Quick Ballistic Coefficient Checklist
  2. What Ballistic Coefficient Means
  3. Why BC Matters
  4. BC Is Not Everything
  5. G1 vs G7 BC
  6. How To Use BC in Practice
  7. Common Mistakes
  8. Related Guides
  9. FAQ
  10. Final Recommendation

Quick Ballistic Coefficient Checklist

FactorWhat to knowWhy it matters
BC numberHigher usually means less drag for that bullet shape and modelHelps predict drop, wind drift, and retained velocity.
Drag modelG1 and G7 BC values are not interchangeableUsing the wrong model can make calculator results misleading.
VelocityMuzzle velocity still matters alongside BCA high-BC bullet still needs verified speed data.
Bullet stabilityTwist rate must stabilize the bulletAn unstable bullet will not perform well just because BC is high.
WindBC helps reduce drift, but wind reading still controls real resultsLong-range misses often come from wind judgment.
VerificationConfirm predictions with live-fire dataCalculators are starting points, not proof.
SafetyUse a legal range, safe backstop, and known target distanceLong-range practice magnifies mistakes.

What Ballistic Coefficient Means

Ballistic coefficient is a way to compare how well a projectile resists air drag. In simple terms, bullets with better aerodynamic efficiency keep speed longer. That can reduce drop, reduce wind drift, and keep the bullet more predictable over distance.

For a general technical definition, the ballistic coefficient overview on Wikipedia is a useful starting reference. For real shooting, the important point is that BC must be used with accurate velocity, distance, atmosphere, and confirmed rifle/ammunition data.

Why BC Matters for Long-Range Shooting

At short distances, BC may not matter much for many shooters. At longer distances, small differences in drag start to show up as more drop, more wind drift, and less retained velocity. That is why long-range shooters often compare bullet BC when choosing ammunition or handload components.

BC is especially important when wind is part of the problem. A bullet that stays faster longer generally spends less time in flight, which can reduce wind drift. It does not remove the need to read wind, build a stable position, or verify data at distance.

BC Is Not Everything

A higher BC bullet is not automatically the best choice. The rifle must stabilize it, the cartridge must drive it consistently, the ammunition must group well, and the shooter must be able to confirm the trajectory. A lower-BC bullet that shoots tight groups from your rifle can be more useful than a high-BC bullet that does not group well.

Ammunition standards and terminology can be checked through SAAMI. For your own rifle, the deciding evidence is safe live-fire performance: group size, chronograph data if available, confirmed drop, and repeatable results.

G1 vs G7 BC

BC values are often listed with a drag model, commonly G1 or G7. G1 is older and often used broadly in marketing and basic charts. G7 is usually a better fit for modern long, boat-tail rifle bullets. The numbers are different scales, so a G1 BC and G7 BC should not be compared as if they are the same thing.

When using a ballistic calculator, enter the BC with the correct drag model. A wrong model can make the data look precise while still being wrong downrange.

How To Use BC in Practice

Start with the ammunition maker’s published BC, then enter your actual muzzle velocity, sight height, zero distance, weather, and target distance into a calculator. After that, confirm the predicted drop and wind holds at the range. Adjust your data based on what the rifle actually does.

Keep notes. Write down ammunition lot, temperature, distance, group size, drop, wind, and scope setting. Long-range accuracy improves when you build a record instead of relying on one range session or one number from a box.

Common Ballistic Coefficient Mistakes

  • Choosing ammunition only because the BC number is high.
  • Mixing G1 and G7 values in the same comparison.
  • Ignoring actual muzzle velocity from your rifle.
  • Using calculator predictions without confirming at the range.
  • Forgetting that wind reading, position, trigger control, and scope setup still matter.

FAQ

Is a higher ballistic coefficient always better?

No. Higher BC can help at distance, but accuracy, stability, velocity, recoil, ammunition consistency, and rifle fit still matter. The best bullet is the one that performs reliably in your rifle for your use case.

What is the difference between G1 and G7 BC?

G1 and G7 are different drag models. G7 is often more appropriate for modern long, boat-tail rifle bullets, while G1 is commonly seen in general bullet data. Do not compare the numbers directly without knowing the model.

Does ballistic coefficient affect wind drift?

Yes. A bullet with better drag efficiency usually stays faster longer, which can reduce wind drift. Wind reading and verified range data still matter.

Can BC replace range practice?

No. BC helps a ballistic calculator estimate performance, but you still need to confirm zero, drop, and wind behavior safely at the range.

Final Recommendation

Use ballistic coefficient as one decision point, not the whole decision. A good long-range setup combines safe firearm handling, consistent ammunition, a stable rifle, verified scope data, wind practice, and live-fire confirmation. The BC number helps, but the range tells the truth.

Exit mobile version