How to Improve Handgun Accuracy Safely

Improving handgun accuracy starts with safe gun handling and repeatable range fundamentals: a stable stance, a consistent grip, clear sight alignment, smooth trigger control, and accountable practice. None of these guarantee a specific group size, and results vary by shooter, firearm, ammunition, instruction, and practice time.

This guide is for supervised sport and recreational range practice. It does not cover defensive shooting, drawing from concealment, movement drills, or tactical use. Follow your range rules, your firearm manual, and qualified instructor guidance first.

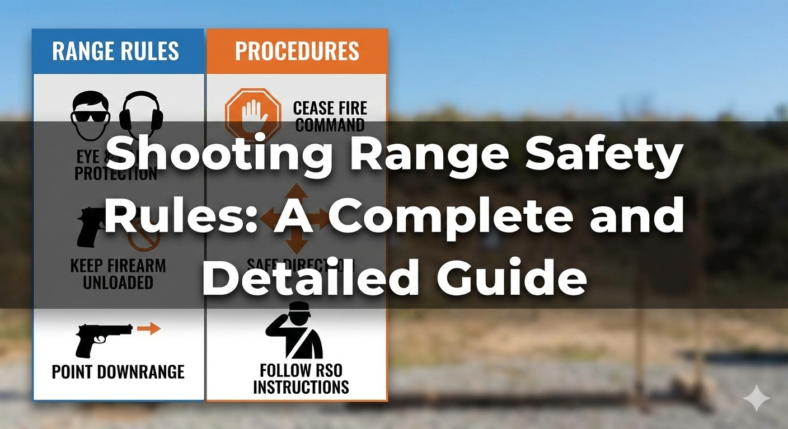
Start With Firearm Safety Rules

Safety comes before accuracy work, every range session, with no exceptions. Treat every firearm as if it is loaded, keep your finger off the trigger until your sights are on target and you have decided to fire, never point the muzzle at anything you are not willing to destroy, and be sure of your target and what is beyond it.

The National Shooting Sports Foundation firearm safety rules are a strong refresher before any practice session. For range behavior and broader safety context, the Civilian Marksmanship Program safety resources are also useful.

Eye and ear protection matter

Hearing and vision protection are accuracy tools as well as safety equipment. Flinching in anticipation of noise and recoil is one reason shots move off target. Good protection, clear range commands, and calm practice conditions make it easier to focus on fundamentals. For more on protective gear, see our guide to eye and ear protection for shooting.

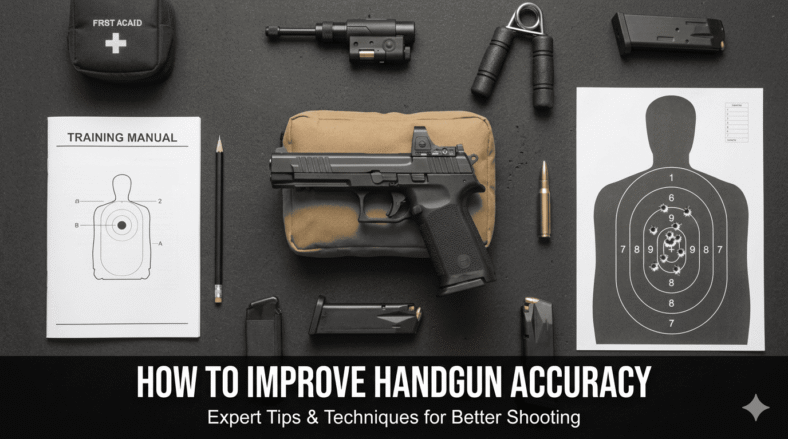
Accuracy Fundamentals for Range Practice

Handgun accuracy is influenced by fundamentals that work together: stance, grip, sight alignment, sight picture, trigger control, breathing, and follow-through. Consistency across all of them matters more than any one trick or equipment upgrade.

Stance and grip

A stable stance gives the rest of your technique a base. Many newer shooters use a balanced, athletic stance with feet about shoulder-width apart, knees slightly bent, and weight slightly forward. Your grip should be firm and repeatable, with the support hand filling open space on the grip and both thumbs resting in a consistent position.

The goal is the same hand placement and pressure on every shot. Inconsistent grip changes how the muzzle sits when the trigger breaks. The CMP rifle and pistol training resources are a helpful reference for building a repeatable position, and our shooting stance guide explains the range-safety side in more detail.

Sight alignment and sight picture

Sight alignment is the relationship between the front sight and rear sight. Sight picture is that aligned sight placed on the target. With iron sights, a common teaching point is to keep visual focus on the front sight while the target and rear sight appear slightly softer.

Small sight errors grow as distance increases, so avoid rushing this step. If your groups are inconsistent, slow down and confirm the sights are aligned before blaming ammunition, sights, or the handgun.

Trigger control and follow-through

Trigger control is pressing the trigger straight back without disturbing the sights. Jerking, slapping, or anticipating recoil can move shots off center. Follow-through means keeping grip, stance, and sight focus for a moment after the shot instead of relaxing as soon as the firearm fires.

Breathing also plays a role. A normal breathing pause can give you a steadier moment to press the trigger, but do not hold your breath long enough to create tension. For a deeper explanation, read our guide on trigger control for shooting accuracy.

Practice Habits That Build Consistency

Consistent, accountable practice does more for most newer shooters than equipment changes. Build habits that let you see what is happening on the target and adjust deliberately.

  • Start slow: deliberate shots help you apply fundamentals before adding pace.
  • Use a comfortable distance: confirm a repeatable group before moving farther away.
  • Track targets: save or photograph groups so you can compare sessions honestly.
  • Change one thing at a time: grip, stance, sight focus, and trigger press should not all change at once.
  • Avoid unsafe shortcuts: speed, movement, and drawing drills require qualified in-person instruction.

A careful note on dry practice

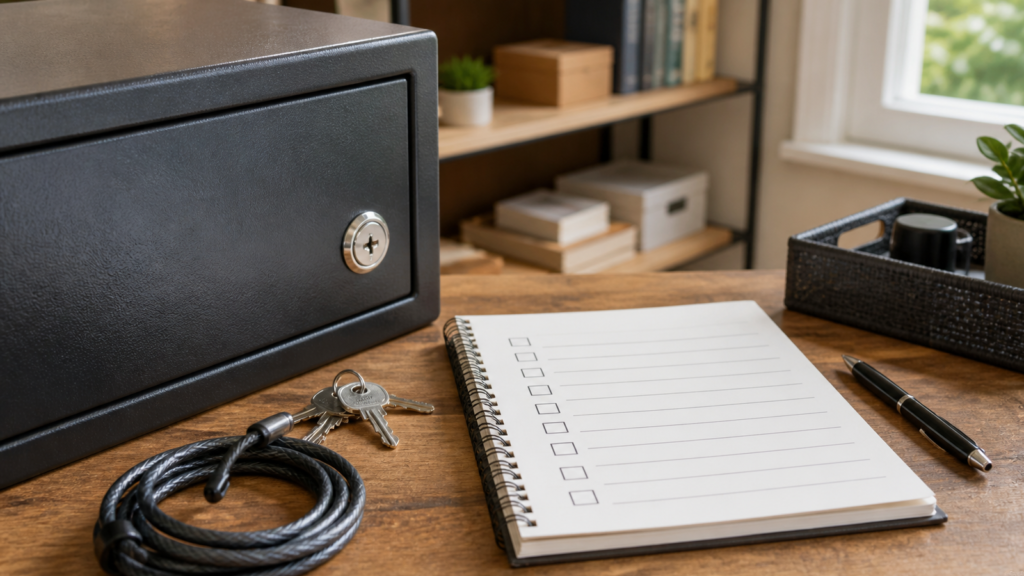
Dry practice is sometimes used to work on trigger control, but it carries real risk and is outside the step-by-step scope of this beginner guide. If it is ever done, the firearm must be verified unloaded, ammunition must be removed from the room, and the firearm manual and a safe direction must be followed. Secure storage guidance from Project ChildSafe is worth reviewing before any home handling routine.

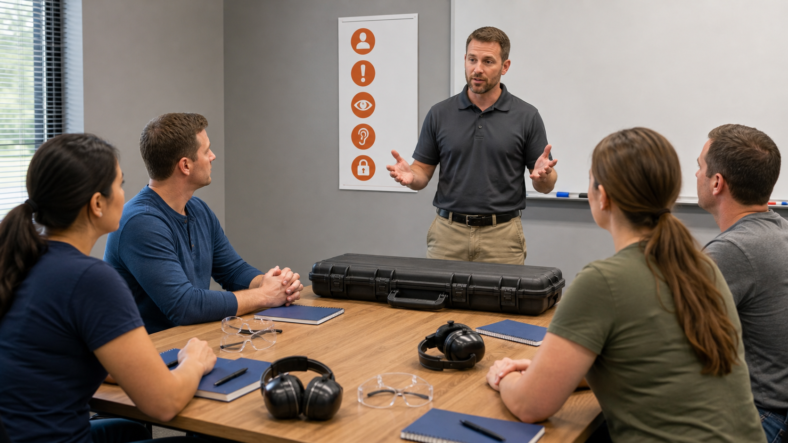
When to Take a Class

A qualified instructor can spot issues that are difficult to diagnose alone, including flinch, inconsistent grip pressure, recoil anticipation, and uneven trigger movement. If your groups are not improving after careful practice, instruction can shorten the trial-and-error stage and reinforce safe habits.

Look for classes focused on safe sport and range fundamentals if your goal is target accuracy. Our guide to firearm safety course benefits can help you think through what a beginner class should provide.

Frequently Asked Questions

What is the most important factor in handgun accuracy?

There is no single factor because the fundamentals work together. For many newer shooters, trigger control and a consistent grip are common areas where small improvements show up on the target.

Will better sights or a new handgun make me more accurate?

Equipment can matter, but technique is usually the larger variable for newer shooters. Work on fundamentals with qualified guidance before assuming the handgun, sights, or accessories are the limiting factor.

How long does it take to see improvement?

It varies by shooter, firearm, practice quality, and instruction. Consistent, focused sessions usually help more than occasional high-volume sessions. Tracking targets over several range trips is the clearest way to see progress.

Is dry practice at home safe?

Dry practice has risk and should not be treated casually. This guide does not provide at-home dry-practice steps. If you consider it, review your firearm manual, remove ammunition from the area, verify the firearm condition, and get qualified instruction first.

Final Takeaway

To improve handgun accuracy safely, start with firearm safety, then build repeatable stance, grip, sight alignment, trigger control, breathing, and follow-through. Practice slowly, track your targets, avoid unsupported guarantees, and get qualified instruction when you need correction that a target alone cannot explain.

Shooting Range Safety Rules: A Beginner-Friendly Guide

Shooting range safety comes down to a small set of rules followed every single time: keep the muzzle pointed in a safe direction, keep your finger off the trigger until you are ready to fire, treat every firearm as loaded, know your target and what is beyond it, and follow the range officer’s commands without exception. These habits do not change with experience level. A first-time shooter and a lifelong competitor follow the same core rules because range safety depends on consistency, not skill.

This guide explains the universal handling rules, how range commands work, what to do before and during a cease-fire, why eye and ear protection matter, and the hygiene steps that reduce lead exposure at indoor ranges. Range rules vary by facility, so always read and follow the posted rules and the range officer’s instructions at the range you are using.

The Core Firearm Safety Rules

The core firearm safety rules are the foundation of every range, and they apply whether you are handling a rifle, pistol, or shotgun. Most range incidents trace back to breaking one of these basics, so they are worth knowing before you ever step up to the firing line. The National Shooting Sports Foundation’s firearm safety rules are a useful authority reference for these habits.

Always Point the Muzzle in a Safe Direction

A safe direction is one where an accidental discharge would not strike a person or cause unintended harm. At a range, that almost always means pointing the muzzle downrange toward the backstop or target line. Never let the muzzle cross your body or another person, including while picking up, setting down, or carrying a firearm.

Keep Your Finger Off the Trigger Until Ready to Fire

Rest your trigger finger straight along the frame or receiver, outside the trigger guard, until your sights are on the target and you have decided to shoot. This single habit prevents many unintentional discharges and pairs naturally with safe stance and grip practice.

Treat Every Firearm as If It Is Loaded

Handle every firearm as though it can fire, even one you believe is empty. Visually and physically confirm the chamber is clear when you pick one up, and do not rely only on someone else’s word that it is unloaded.

Know Your Target and What Is Beyond It

Be sure of your target and the area behind and around it before firing. At a supervised range the backstop handles this, but you are still responsible for placing shots where the range allows and not firing at anything other than your authorized target.

How Range Commands Work

Range commands are verbal instructions a range safety officer uses to control what everyone on the line does at the same time. Following them immediately is one of the most important safety behaviors at any supervised range because they keep all shooters synchronized.

Common Commands You May Hear

  • Commence fire or the range is hot: shooters at the firing line may load and fire at authorized targets.
  • Cease fire: stop shooting immediately, take your finger off the trigger, and wait for the next instruction. Anyone may call a cease-fire if they see a hazard.
  • Make safe or unload and show clear: unload the firearm, remove the magazine if applicable, open the action, and confirm the chamber is empty.
  • The range is cold: no one handles firearms. This is when shooters may go forward of the line to set or retrieve targets.

Exact command wording can vary by facility, so the range officer and posted range rules always override generic online guidance.

Never Touch a Firearm During a Cold Range

When the range is cold and people may be downrange, do not touch any firearm for any reason, even to case it or move it. Step back from the bench and keep your hands away until the range is called hot again.

Before You Step to the Firing Line

Before you approach the firing line, confirm a few things so you arrive ready and do not create a hazard while setting up. Good preparation reduces fumbling on the line, which is where many handling mistakes happen.

  • Bring firearms to the range unloaded and cased unless the range directs otherwise.
  • Read posted rules, ammunition restrictions, target rules, and lane procedures.
  • Put on eye and ear protection before entering or approaching the active firing area.
  • Keep ammunition, magazines, and gear organized so you do not need to turn around with a firearm in hand.

Cease-Fire Behavior

A cease-fire means stop firing now, and it can be called by the range officer or by any shooter who sees a problem. Stop shooting, remove your finger from the trigger, keep the muzzle pointed in a safe direction, and wait for instructions.

Do not finish your shot, do not turn around with the firearm in hand, and do not ask why before making the firearm safe if instructed. Once the situation is resolved, the range officer will call the range hot again before anyone resumes.

Eye and Ear Protection

Eye and ear protection are required at most ranges because gunfire produces noise that can permanently damage hearing and debris that can injure unprotected eyes. The OSHA eye and face protection overview is a helpful source for understanding why eye protection matters, although range-specific rules still come from the facility.

Hearing Protection

Use earplugs, earmuffs, or both together for higher protection, especially indoors or next to large-caliber firearms. Hearing damage from impulse noise can be permanent and is not always noticeable right away.

Eye Protection

Wear impact-rated safety glasses to guard against ejected casings, fragments, and unburned powder. Side coverage helps, and ordinary prescription glasses are not a substitute unless they meet an appropriate safety rating.

Indoor Range Lead and Noise Hygiene

Indoor ranges carry two extra considerations: lead exposure from primer residue and airborne particles, and concentrated noise in an enclosed space. The CDC/NIOSH indoor firing range guidance explains why ventilation, hygiene, and hearing protection matter in these spaces.

  • Wash your hands and face before eating, drinking, or leaving the range.
  • Avoid eating, drinking, or touching your face on the firing line.
  • Keep range clothing separate from other laundry when practical.
  • Use strong hearing protection indoors because reflected sound can make gunfire feel louder.

A Simple Range Safety Checklist

Use this quick checklist before and during a range trip. It is not a replacement for facility rules, but it helps keep the most important habits visible.

  • Firearm transported unloaded and cased.
  • Posted range rules and range officer instructions read and understood.
  • Eye protection on and appropriate for impact risk.
  • Ear protection on, doubled up indoors or near louder firearms when needed.
  • Muzzle always pointed downrange in a safe direction.
  • Finger off the trigger until ready to fire.
  • Every firearm treated as loaded.
  • Target and backstop confirmed before firing.
  • Immediate stop on any cease-fire call.
  • No firearm handling when the range is cold and people are downrange.
  • Hands and face washed before eating or leaving the range.

Frequently Asked Questions

What are the most important shooting range safety rules?

The most important rules are to keep the muzzle pointed in a safe direction, keep your finger off the trigger until ready to fire, treat every firearm as loaded, know your target and what is beyond it, and follow the range officer’s commands immediately.

Can anyone call a cease-fire at a shooting range?

Yes. Any shooter who sees a hazard can call cease-fire. Everyone on the line should stop firing immediately, remove their finger from the trigger, and wait for instructions.

Do I need both eye and ear protection at the range?

Yes. Eye protection guards against ejected casings and fragments, and ear protection helps reduce hearing risk from gunfire noise. Wear both whenever you are on or near an active firing line.

Why is lead hygiene important at indoor ranges?

Indoor shooting can produce airborne lead particles and residue from primers. Washing your hands and face, avoiding food and drink on the line, and separating range clothing help reduce exposure.

Are shooting range rules the same everywhere?

The core handling rules are consistent, but each range sets its own rules for calibers, rapid fire, holster use, targets, and procedures. Always follow the posted rules and the range officer at the facility you are using.

What Is Gun Caliber? A Simple Beginner Explanation

Gun caliber usually describes bullet or bore diameter, but cartridge names are not always simple measurements. That is why beginners can see names like 9mm, .22 LR, .308 Winchester, or 7.62x39mm and feel like the system is harder than it should be. The most important rule is simple: the ammunition must match the firearm markings, the ammunition packaging, and the owner’s manual.

This guide explains caliber in plain language. It is not a recommendation guide, not a technical ammunition-building guide, and not a substitute for firearm markings, manufacturer instructions, range rules, or qualified instruction.

Quick Beginner Summary

  • Caliber usually refers to bullet or bore diameter.
  • A cartridge is the complete round of ammunition, not just the diameter.
  • Cartridge names mix measurement, history, and naming conventions.
  • Similar names are not automatically interchangeable.
  • Always verify ammunition against the firearm markings, packaging, and manual.

Caliber vs Cartridge

People often use caliber and cartridge as if they mean the same thing, but they are different ideas. Caliber generally refers to diameter. A cartridge is the complete round of ammunition, including the case, primer, propellant, and bullet. A cartridge name may include a caliber figure, but the full name matters because it identifies the specific ammunition type.

For terminology, the SAAMI glossary is a useful authority because SAAMI publishes firearm and ammunition industry standards and definitions. For a beginner, the practical point is this: caliber gives part of the story, but cartridge designation tells you much more.

TermPlain MeaningBeginner Takeaway
CaliberA diameter measurement or naming conventionHelpful, but not enough by itself
CartridgeThe complete round of ammunitionThe full cartridge designation must match the firearm
Firearm markingThe designation marked on the firearmUse it with the manual and ammunition box before loading

Why Caliber Names Can Confuse Beginners

Caliber names developed over a long time. Some names come from bullet diameter, some from case design, some from older conventions, and some from manufacturer or military naming history. That is why the number in a name is not always a simple literal measurement.

This is also why similar-looking names can be risky for beginners. A name that looks close on a shelf is not proof that the ammunition is correct for your firearm. Compatibility is a manual-and-marking question, not a guess from memory.

Metric vs Inch-Based Names

You will see cartridge names in metric measurements and inch-based measurements. Metric names often use millimeters, such as 9mm or 7.62mm. Some metric names include another number for case length. Inch-based names use decimals such as .22, .30, .357, or .45.

The measurement system is only part of the label. Do not assume that two cartridges are the same because their numbers seem close, and do not assume that one naming system translates neatly into the other. The correct source is still the firearm marking, owner’s manual, and ammunition packaging.

Why Matching Ammunition Matters

A firearm is designed around a specific cartridge or a clearly stated set of compatible cartridges. Using the wrong ammunition can damage equipment and injure people. A cartridge that appears similar, or even one that seems to fit, is not automatically safe.

Safety organizations make this point directly. The NSSF rules of safe gun handling include using only the correct ammunition for your firearm. SAAMI also publishes firearm safety rules that reinforce the same manual-first mindset.

For more on this specific safety check, read our guide to choosing the right ammunition for your firearm.

Common Beginner Mistakes

  • Relying on memory: A remembered caliber name is not enough. Check the marking and box.
  • Assuming close names match: Similar numbers or similar words do not prove compatibility.
  • Using fit as a test: A cartridge appearing to fit is not proof that it is safe.
  • Ignoring the manual: The owner’s manual and manufacturer guidance are part of the safety check.
  • Mixing loose ammunition: Keep ammunition organized and clearly identified.

How to Check the Right Ammunition Safely

Start with the cartridge designation marked on the firearm. Depending on the firearm, that marking may be on the barrel, slide, frame, or receiver. Then compare that exact designation with the owner’s manual and the ammunition box. If the markings and packaging do not clearly match, do not use that ammunition.

If anything is unclear, stop and ask a qualified range officer, instructor, gunsmith, or the firearm manufacturer. This is not a place to guess. A few minutes of verification is much better than trying to solve a compatibility question at the firing line.

Where Caliber Fits in Safe Shooting

Caliber knowledge helps you understand ammunition labels, compare terminology, and ask better questions. It does not replace the rest of firearm safety. You still need safe handling, safe storage, range commands, eye and ear protection, and clear ammunition organization.

If you are new to shooting, pair this article with our shooting range safety rules overview before live-fire practice.

Frequently Asked Questions

What does caliber mean in simple terms?

Caliber usually refers to bullet or bore diameter, expressed in inches or millimeters. It is part of how ammunition is described, but it is not always the complete cartridge designation.

Is caliber the same as cartridge?

No. Caliber is a diameter-related term. A cartridge is the complete round of ammunition, including the case, primer, propellant, and bullet.

Why are caliber names confusing?

Names come from different measurement systems, historical conventions, case designs, and manufacturer naming habits. That is why a cartridge name is not always a literal measurement.

Are similar cartridge names interchangeable?

Not unless your firearm markings or manual clearly state that they are compatible. Similar names, close numbers, or physical fit do not prove safety.

How do I know which ammunition my firearm uses?

Read the cartridge designation marked on the firearm, confirm it in the owner’s manual, and match it to the ammunition box and headstamp. If you are unsure, ask a qualified professional before loading or firing.

Final Safety Reminder

Caliber is a useful term, but it is not enough by itself. Cartridge names can be historical and confusing, so the safest habit is to verify the exact ammunition designation every time. Match the firearm marking, manual, ammunition packaging, and headstamp, and ask for qualified help whenever something is unclear.

Pistol Parts Explained: A Beginner-Friendly Guide

A pistol has a frame, slide, barrel, chamber, trigger, sights, magazine, grip, recoil system, extractor, ejector, and safety-related controls. Those parts work together to load, fire, extract, eject, and prepare the next round, but the exact layout depends on the pistol design. This guide explains the common parts in plain language so beginners can understand terminology without treating it like a repair manual.

Before handling any firearm, keep it pointed in a safe direction, keep your finger off the trigger, remove the magazine if applicable, open the action, and verify the chamber is clear according to the firearm manual. If you are unsure, stop and ask a qualified instructor, range officer, gunsmith, or the manufacturer.

Table of Contents

How Pistol Parts Work Together

Most modern pistols are designed around a simple sequence: the magazine holds cartridges, the action feeds one cartridge into the chamber, the firing system ignites it when the trigger is pressed, the slide or action cycles, the spent case is extracted and ejected, and the next round is prepared.

That broad sequence is useful for understanding terminology, but it is not a substitute for your owner’s manual. Different pistols use different locking systems, safeties, takedown procedures, and maintenance requirements. The NSSF firearm safety rules are the baseline before any inspection or cleaning: treat every firearm carefully, control muzzle direction, and keep your finger away from the trigger until ready to shoot.

For new shooters, part names are most useful when they make range instruction easier to follow. If an instructor says to lock the slide open, check the chamber, seat the magazine, or align the front sight, you should know the area they mean before live fire begins.

Major External Pistol Parts

Frame

The frame is the main body of the pistol. It supports the grip, trigger area, slide rails, and many controls. On many pistols, the frame is the serialized firearm component, although legal definitions can vary by country and jurisdiction.

Slide

The slide is the moving upper portion on many semi-automatic pistols. It houses or supports the barrel, firing system parts, extractor, sights, and recoil system. During firing, it cycles rearward and forward to help eject the spent case and chamber the next round.

Barrel and Chamber

The barrel directs the bullet as it leaves the firearm. The chamber is the rear part of the barrel area where the cartridge sits before firing. Always verify the chamber is clear when unloading or inspecting a pistol; do not rely only on removing the magazine.

Grip

The grip is where the shooter holds the pistol. Grip size, texture, backstrap shape, and angle affect control and comfort. A pistol should let the shooter reach the trigger safely without shifting the hand into an unstable position.

Internal and Moving Parts

Trigger

The trigger starts the firing sequence, but it should not be treated casually. Trigger weight, travel, reset, and safety design vary widely. Do not modify trigger parts unless you are qualified and the work follows the manufacturer’s guidance.

Firing Pin or Striker

The firing pin or striker is the part that helps ignite the cartridge primer. Hammer-fired pistols and striker-fired pistols use different systems, but both rely on precise timing and proper maintenance. Light strikes, repeated misfires, or unusual trigger behavior should be inspected by a qualified person.

Extractor and Ejector

The extractor helps pull the spent case from the chamber. The ejector helps kick it out of the firearm as the action cycles. If cases fail to extract or eject, the cause may be ammunition, fouling, magazine issues, worn parts, or technique. Repeated failures deserve inspection, not guesswork.

Recoil Spring and Guide Rod

The recoil system helps control slide movement and return the slide forward after cycling. Springs are wear items. The correct replacement interval depends on the pistol model, caliber, ammunition, and round count, so follow the manual rather than a universal schedule.

Magazine and Ammunition Path

The magazine stores cartridges and presents them for feeding. It commonly includes a magazine body, spring, follower, feed lips, and base plate. A weak spring, damaged feed lips, dirty magazine, or incorrect magazine can cause feeding problems.

Use the correct ammunition for the firearm and follow the manufacturer’s instructions. SAAMI firearm safety information is a useful authority for understanding why correct ammunition matching, inspection, and safe handling matter.

Sights, Controls, and Safety Features

Sights

Most pistols use front and rear sights, though some accept optics. Sights help align the pistol with the target, but safe shooting still depends on training, backstop awareness, trigger control, and knowing what is beyond the target.

Magazine Release and Slide Stop

The magazine release lets the magazine be removed. The slide stop or slide lock can hold the slide open on many pistols. Controls may be ambidextrous, reversible, or model-specific. Beginners should learn them with an unloaded firearm under qualified supervision.

Manual and Passive Safeties

Some pistols have manual thumb safeties, grip safeties, trigger safeties, firing-pin blocks, or other internal systems. A safety feature is not a replacement for safe handling. The user is still responsible for muzzle direction, trigger discipline, secure storage, and following the manual.

Maintenance and Inspection Boundaries

Basic cleaning and inspection help keep a pistol reliable, but there is a line between owner maintenance and gunsmithing. Field-strip only as the manual allows. Do not polish, file, bend, or replace critical parts unless you are qualified and the work follows manufacturer guidance.

Secure storage is also part of responsible ownership. Project ChildSafe provides firearm storage resources designed to reduce unauthorized access. Understanding pistol parts is useful, but safe storage and handling are the higher priority.

If a pistol has repeated malfunctions, visible cracks, abnormal wear, a stuck case, a possible bore obstruction, or controls that do not work normally, stop using it and get qualified help.

FAQ

What is the most important pistol part to understand first?

Start with the chamber, magazine, muzzle, and trigger. Those terms connect directly to loading, unloading, muzzle control, and trigger discipline, which are the safety basics every beginner needs.

Is the magazine the same thing as the clip?

No. A magazine feeds cartridges into the firearm. A clip is a different loading aid used with some firearm designs. Most modern pistols use detachable magazines.

Can I replace pistol parts myself?

Only do owner-level maintenance allowed by your manual. Parts that affect firing, safety, lockup, extraction, or trigger function should be handled by a qualified gunsmith or manufacturer support unless you are properly trained.

Why does the slide lock open?

On many semi-automatic pistols, the slide locks open after the last round because the magazine follower engages the slide stop. Some malfunctions or magazine issues can also affect this behavior.

Do all pistols have the same parts?

No. Semi-automatic pistols, revolvers, hammer-fired pistols, striker-fired pistols, rimfire pistols, and competition designs can differ. Use this guide for terminology, then rely on the manual for your exact firearm.

Final Takeaway

Learning pistol parts helps you understand safety instructions, range commands, maintenance language, and malfunction descriptions. Keep the focus practical: know the frame, slide, barrel, chamber, magazine, trigger, sights, and controls, then let the firearm manual and qualified instruction guide anything beyond basic identification.

How to Grip a Handgun Correctly

A correct handgun grip should let you control the pistol without fighting it. In simple terms, place the firing hand high on the backstrap, keep the wrist firm, wrap the support hand into the open space on the grip, angle both thumbs safely forward along the frame area, and press the trigger without changing muzzle direction. Grip should feel secure, repeatable, and safe, not painful or forced.

This guide explains the beginner fundamentals of handgun grip for range practice and training language. It is not a replacement for qualified instruction, your firearm manual, or live supervision. Before handling any firearm, keep the muzzle directed safely, keep your finger off the trigger until ready to shoot, and verify the firearm condition according to the manual and range rules.

Table of Contents

Why Handgun Grip Matters

Grip is one of the first skills a handgun shooter should learn because it affects control, sight movement, trigger press, and follow-up shots. A poor grip can make the pistol shift in the hand, push shots off target, or make the shooter overcorrect after recoil.

Good grip does not mean squeezing as hard as possible. It means building stable contact with the firearm so the sights return consistently and the trigger can move without dragging the muzzle away from the target. The foundation still starts with safety. The NSSF firearm safety rules are worth reviewing before any grip work because muzzle control and trigger discipline come before technique.

Basic Two-Hand Handgun Grip

Start With the Firearm Safe and Clear

Practice grip only under safe conditions. At a range, follow the range officer’s commands. At home, use only the unloaded handling procedure allowed by your manual, remove ammunition from the room, and avoid practicing if you are tired, distracted, or unsure.

Use a High, Stable Grip

The firing hand should sit high on the backstrap so the pistol is aligned with the forearm. A high grip helps manage recoil because the pistol has less room to rotate upward. Do not place the hand so high that it contacts the slide or moving parts.

Fill the Open Space With the Support Hand

After the firing hand is placed, the support hand should fill the open space on the grip panel. The support hand is not decoration; it helps control the pistol, stabilize the wrists, and reduce unnecessary movement during the trigger press.

Firing-Hand Position

Backstrap Contact

The web of the firing hand should contact the backstrap firmly. This makes the pistol feel seated in the hand rather than balanced loosely in the fingers. If the pistol shifts after every shot, the grip may be too low, too loose, or not matched well to hand size.

Trigger Finger Independence

The trigger finger should be able to move without the rest of the hand clenching. If pressing the trigger causes the whole hand to tighten, shots may move off target. Beginners often improve by focusing on steady grip pressure while the trigger finger moves straight to the rear.

Thumb Placement

Thumb placement depends on pistol design and shooter anatomy. Many modern semi-automatic shooters use forward thumbs, but thumbs should never interfere with the slide, controls, cylinder gap on revolvers, or safe operation. If a grip causes discomfort or contact with moving parts, stop and adjust with qualified help.

Support-Hand Position

Palm Contact

The support-hand palm should make meaningful contact with the grip and firing hand. Empty space usually means less control. Rotate the support hand slightly forward so the palm presses into the available grip area without crossing in front of the muzzle.

Finger Wrap

The support-hand fingers usually wrap over the firing-hand fingers. The goal is to create a secure, repeatable two-hand structure. Avoid placing the support-hand fingers near the trigger guard in a way that pulls the pistol sideways or interferes with controls.

Wrist Stability

Both wrists should feel firm and aligned. Loose wrists can make the pistol move more than necessary and may contribute to cycling problems with some semi-automatic pistols. Do not lock the body into a painful position; stable is the goal, not stiff.

Trigger Control and Grip Pressure

Grip pressure should be consistent before, during, and after the trigger press. Many shooters miss low or sideways because they tighten the whole hand at the same moment the trigger breaks. A useful range cue is to build the grip first, then move only the trigger finger.

Different instructors describe pressure differently, so do not get stuck on a single percentage rule. The real test is whether the sights stay stable, the pistol tracks predictably, and your hands can repeat the same grip every time. If recoil control feels erratic, ask an instructor to watch your hands from a safe position.

Common Grip Mistakes

  • Low firing-hand grip: leaves more leverage for muzzle flip and makes the pistol shift.
  • Weak support-hand contact: leaves empty space and reduces control.
  • Milking the grip: tightening all fingers during the trigger press.
  • Thumbs interfering with controls: can prevent normal slide lock or safe manipulation.
  • Practicing too fast: hides basic problems and builds sloppy habits.
  • Ignoring firearm fit: a pistol that is too large or too small may make a good grip harder.

If the issue is firearm fit, do not force a grip that puts your finger, wrist, or thumbs in unsafe positions. A qualified instructor can often tell whether the problem is technique, hand size, grip texture, or an unsuitable pistol.

Safe Practice Boundaries

Grip practice should stay inside safe handling rules. Use live ammunition only at a proper range or legal training setting. Keep muzzle direction safe at all times. Avoid mirrors, cameras, or online advice if they distract you from basic safety discipline.

For general ammunition and firearm safety context, SAAMI firearm safety information is a reliable reference. For secure storage and access-control reminders, Project ChildSafe is useful, especially if firearms are stored in a home with other people.

FAQ

Should I grip a handgun as hard as possible?

No. Grip firmly enough to control the pistol, but not so hard that your hands shake, your trigger finger drags, or the pistol becomes painful to manage. Consistency matters more than brute force.

Where should my thumbs go?

On many semi-automatic pistols, thumbs point generally forward along the frame area, but placement depends on the firearm and your hands. Keep thumbs away from the slide, muzzle, cylinder gap, and controls unless the manual/instructor says otherwise.

Why do my shots move when I press the trigger?

The grip may be changing during the trigger press. Watch for clenching, pushing, wrist movement, or support-hand pressure changing at the same time the trigger breaks.

Can handgun grip fix all accuracy problems?

No. Grip matters, but accuracy also depends on sight alignment, trigger control, stance, breathing, vision, firearm fit, ammunition, and training quality.

Should beginners practice grip at home?

Only if they can follow safe unloaded-handling procedures exactly and keep ammunition separate. Beginners are usually better served by practicing under a qualified instructor until the safety process is automatic.

Final Takeaway

A good handgun grip is high, stable, repeatable, and safe. Build the firing-hand grip first, fill the open space with the support hand, keep wrists firm, and press the trigger without changing grip pressure. Above all, keep safety rules ahead of technique and get qualified feedback before turning practice into habit.

What Is a Misfire and How to Prevent It

A misfire happens when you press the trigger, the firing system tries to ignite the cartridge, and the round does not fire. The safest response is not to rush, not to look into the action, and not to assume the round is harmless. Keep the muzzle pointed in a safe direction, keep your finger off the trigger, follow your range or firearm manual procedure, and treat the event as a possible delayed ignition until it is cleared safely.

Misfires are usually caused by ammunition, firearm condition, or the firearm not being fully in battery. This guide explains the difference between a misfire, hang fire, and squib load, what to do in the moment, and how to reduce the chance of it happening again without giving risky shortcut advice.

Table of Contents

What Is a Misfire?

A misfire is a failure to fire. In a typical centerfire or rimfire firearm, the trigger is pressed, the firing pin or striker hits the primer or rim, but the cartridge does not ignite. You may hear a click, feel the trigger break, and see no shot fired.

The important safety point is uncertainty. In the first moment after a click, you do not know whether the cartridge is truly dead, whether ignition is delayed, or whether another malfunction has occurred. That is why the basic response starts with muzzle control and patience, not immediate inspection.

The NSSF firearm safety rules are a useful foundation here: always keep the muzzle pointed in a safe direction and keep your finger off the trigger until you are ready to shoot. Those rules matter even more when the firearm does something unexpected.

Misfire vs. Hang Fire vs. Squib Load

People often use these terms together, but they are not the same problem. Knowing the difference helps you respond with the right level of caution.

Misfire

A misfire means the cartridge does not fire when struck. The cause may be a bad primer, damaged ammunition, light firing-pin strike, dirty firing-pin channel, weak spring, or a firearm that was not fully closed or locked.

Hang Fire

A hang fire is delayed ignition. The trigger is pressed, nothing happens immediately, and then the round may fire after a delay. Because a hang fire can look like a misfire at first, do not open the action instantly after a click. Follow your range rules, instructor guidance, and firearm manual.

Squib Load

A squib load is different because the round may fire weakly and leave a bullet or obstruction in the barrel. Warning signs can include an unusually quiet report, light recoil, smoke, or a shot that feels wrong. If you suspect a squib, stop shooting immediately and have the firearm inspected before firing again.

What To Do After a Misfire

If the firearm clicks instead of firing, keep the muzzle pointed downrange or in another safe direction. Keep your finger away from the trigger. Do not turn the firearm sideways to look into the chamber, and do not point it toward yourself or another person while trying to diagnose the problem.

Many range procedures use a short waiting period before clearing the firearm because of the possibility of a hang fire. Your firearm manual, range officer, instructor, or club rules should control the exact procedure. When in doubt, slow down and ask for qualified help.

After the waiting period required by your setting, open the action carefully while maintaining safe muzzle direction. Remove the cartridge if it can be removed safely. Keep the suspect cartridge separate, do not try to fire it again, and follow local range or manufacturer guidance for disposal.

If the firearm does not open normally, the cartridge is stuck, the bolt or slide feels jammed, or you are unsure what happened, stop. Forcing parts can make the situation worse. Let a qualified range officer, instructor, gunsmith, or manufacturer support channel guide the next step.

Common Causes of Misfires

Most misfires come from one of three areas: ammunition, firearm condition, or handling/setup. The cause is not always obvious from a quick glance, so avoid guessing if the malfunction repeats.

Ammunition Problems

Old, wet, corroded, contaminated, or damaged ammunition can fail to ignite. Ammunition stored in high humidity, extreme heat, vehicle trunks, damp hunting bags, or unsealed boxes may become less reliable over time. A primer that is damaged, improperly seated, or defective can also fail even when the firearm is functioning normally.

Use ammunition that matches the firearm marking and manual, and inspect cartridges before loading. If a round looks swollen, corroded, cracked, dented, or contaminated with oil or solvent, do not use it.

Firearm Condition

A dirty firing-pin channel, worn spring, damaged firing pin, heavy fouling, or neglected action can reduce ignition reliability. Cold weather, rain, dust, and heavy lubricant can also affect function, especially if the firearm has not been cleaned and inspected after use.

For technical ammunition and firearm safety context, SAAMI firearm safety information is a strong reference because it focuses on safe ammunition/firearm matching and handling principles.

Not Fully in Battery

Some firearms may not fire correctly if the bolt, slide, or action is not fully closed. This can happen from riding the slide, dirt in the chamber, damaged magazines, improper loading, or mechanical wear. If a firearm repeatedly fails to go fully into battery, stop using it until the cause is identified.

How To Prevent Misfires

You cannot prevent every defective cartridge, but you can reduce avoidable misfires with better storage, inspection, and maintenance habits.

  • Use the correct ammunition. Match caliber/gauge and cartridge type to the firearm manual and barrel markings.
  • Inspect before loading. Avoid cartridges with corrosion, dents, cracked cases, loose bullets, or moisture damage.
  • Store ammunition properly. Keep it cool, dry, stable, and away from oils, solvents, and long-term humidity.
  • Clean on a schedule that fits use. Range sessions, hunting in rain, dusty travel, and defensive-practice training all justify inspection and cleaning afterward.
  • Follow the manual. Maintenance points, lubrication amount, replacement intervals, and approved ammunition vary by firearm.
  • Stop repeated malfunctions early. If more than one misfire occurs with the same firearm or ammunition lot, pause and investigate before continuing.

Safe storage also matters beyond misfire prevention. Project ChildSafe has practical secure-storage resources for keeping firearms inaccessible to unauthorized users, especially children. Reliable equipment and responsible access control belong together.

When To Stop and Get Help

Stop shooting and get qualified help if the firearm will not open normally, the cartridge is stuck, the action feels damaged, the report sounded weak, the bore may be obstructed, or the same problem happens again. Do not keep firing to “test it out.” A repeated misfire can point to a mechanical issue, ammunition lot issue, or unsafe condition that needs inspection.

For beginners, the safest help source is a certified instructor, range officer, gunsmith, firearm manufacturer, or the official firearm manual. Online advice can help you understand terms, but it should not replace qualified inspection when a live-round malfunction or possible barrel obstruction is involved.

FAQ

Can a misfired round go off later?

It is possible for a delayed ignition, called a hang fire, to look like a misfire at first. That is why you should keep the firearm pointed in a safe direction and follow your range or firearm-manual procedure before opening the action.

Should I try to fire the same round again?

No. Treat the cartridge as suspect. Keep it separate and follow range, manufacturer, or local disposal guidance instead of trying to fire it again.

Is a misfire always caused by bad ammunition?

No. Ammunition is one common cause, but a weak firing-pin strike, dirty action, worn part, or firearm not being fully in battery can also cause a misfire.

What is the most dangerous mistake after a misfire?

The biggest mistake is moving the muzzle in an unsafe direction or immediately opening the action while assuming nothing can happen. Keep the muzzle safe first, then clear the firearm according to proper procedure.

When should a gunsmith inspect the firearm?

Use a qualified gunsmith or manufacturer support if misfires repeat, the action feels abnormal, parts appear worn or damaged, the bore may be obstructed, or you cannot confidently identify the cause.

Final Takeaway

A misfire is not just a failed shot. It is a safety event. Keep the muzzle pointed safely, wait and clear the firearm according to proper procedure, separate the suspect cartridge, and investigate the cause before continuing. Good ammunition storage, regular maintenance, and manual-first habits reduce risk without encouraging shortcuts.

Gun Storage Safety Tips: Secure, Responsible Firearm Storage at Home


Responsible gun storage means keeping firearms secure from unauthorized access, especially by children, guests, or anyone prohibited from handling them, using a method that fits your firearms and your household. These gun storage safety tips focus on the habits that matter most: unload, verify, lock, store ammunition appropriately, and control the keys and codes. This guide covers practical, source-backed storage principles. It is not legal advice or a state-by-state law guide, and no safe or lock prevents every possible theft, misuse, or accident, so treat secure storage as risk reduction layered with safe handling.

Table of Contents

Quick Safe-Storage Checklist

Use this short gun storage safety tips checklist as your storage routine. Each point is expanded below.

Storage StepWhat To ConfirmWhy It Matters
Unload and verifyFirearm is cleared before storagePrevents unsafe handling during the storage routine
Lock the firearmSafe, lock box, cable lock, or another secure method is usedReduces unauthorized access risk
Control accessKeys, codes, and combinations are protectedA lock fails if access tools are easy to find
Store ammunition thoughtfullyAmmunition is secured and separated where appropriateAdds another household safety layer
Plan for visitorsChildren, guests, and shared-home risks are consideredStorage must fit real household behavior
Check local requirementsCurrent local and state rules are reviewedStorage requirements can vary by location

Why Secure Gun Storage Matters

Secure storage is the single most reliable way to prevent unauthorized access to firearms in the home. Responsible-ownership programs such as Project ChildSafe center on exactly this: keeping firearms out of the hands of children and anyone who should not have access. Good storage reduces the risk of accidents, theft, and misuse. It does not replace safe handling, and no device is a guarantee, but consistent secure storage meaningfully lowers risk every day.

Start With the Basic Safety Rules

Storage habits rest on the basic rules of firearm safety. The NSSF rules of safe gun handling start from always treating a firearm as if it is loaded and keeping the muzzle in a safe direction. Before any firearm goes into storage, confirm it is unloaded, keep it pointed in a safe direction while you handle it, and store firearms securely when they are not in use. These habits make the storage step itself safer. For range-day context, also review our shooting range safety rules.

Choose a Storage Method That Fits the Firearm and Household

There is no single right storage device; the best choice fits your firearms and your home. Options include locked safes, lock boxes, cable locks, and trigger locks, and they differ in security, speed of access, portability, and how well they suit long guns versus handguns. A full-size safe offers strong security and capacity for long guns, a small lock box secures a handgun, and cable or trigger locks add a layer where a safe is not practical. Choose according to your household’s risk, your firearms, and the manufacturer’s instructions for both the firearm and the device. The ATF firearms safety and security resources offer further safety and security context.

Control Keys, Codes, and Access

A lock is only as secure as its key or code. Keep keys and combinations away from the people you are securing firearms against, and do not store keys on top of or beside the safe. Change default codes, limit who knows a combination, and update access when circumstances change. Controlling access is often the difference between a storage method that works and one that only looks secure.

Store Ammunition Thoughtfully

Handle ammunition with the same care as the firearms. Where appropriate for your household, store ammunition separately from firearms and keep it secured against unauthorized access. Follow safe ammunition storage and handling practices, keep it in a cool, dry place, and keep it out of reach of children and unauthorized users. Separate, controlled ammunition storage adds another layer of safety, especially in homes with children or frequent visitors. If you are also reviewing storage-adjacent maintenance habits, our gun cleaning frequency guide is a useful next read.

Plan for Visitors, Children, and Shared Homes

Your storage plan should account for everyone who enters your home. Children are naturally curious, guests may not share your safety habits, and shared or multi-person households add more access points. Make sure firearms are secured before visitors arrive, talk with family members about access rules, and never assume a hidden firearm is a secure one. Storage should be planned around the realistic comings and goings of your household, not the ideal case.

Check Local Requirements

Storage laws and requirements vary by location and change over time. Check your current local and state storage rules, and consider household-specific risks beyond the legal minimum. This article does not provide a state-by-state legal guide, and you should confirm any legal obligation with current official sources for your area rather than relying on general guidance.

Common Gun Storage Mistakes

A handful of mistakes undermine otherwise good intentions. Leaving a firearm loaded or unverified before storage, hiding an unsecured firearm instead of locking it, and leaving keys or codes accessible are among the most common. Others include choosing a device that does not fit the firearm or the household, forgetting to secure firearms before guests arrive, and storing ammunition carelessly. Treating storage as a one-time setup rather than a daily routine is the underlying error behind most of these.

Frequently Asked Questions

What is the safest way to store a gun at home?

The safest approach is to store firearms unloaded and locked in a method that prevents access by children, guests, and prohibited users, with keys and codes controlled. The best device depends on your firearms and household. Pair secure storage with consistent safe-handling habits.

Should I store ammunition separately from firearms?

Storing ammunition separately and securely is a sensible added layer, especially in homes with children or visitors. Keep it in a cool, dry place, out of reach of unauthorized users, and follow safe storage and handling practices for both the ammunition and the firearm.

Is a gun safe legally required where I live?

It depends on your location. Storage laws vary and change over time, so confirm current requirements with official sources for your state and locality. This guide does not provide legal advice or a state-by-state breakdown.

What are the most important gun storage safety tips?

The most important gun storage safety tips are to confirm the firearm is unloaded before storage, lock it against unauthorized access, control keys and codes, store ammunition thoughtfully, and adjust the storage plan when children, visitors, or shared living arrangements are involved.

Do cable locks and trigger locks count as secure storage?

They add a layer of security and can prevent a firearm from being readily used, but they are not the same as a locked safe or lock box. Choose based on your household risk, and consider combining methods. No single device prevents every form of access or theft.

How do I store firearms safely with children in the house?

Keep firearms unloaded, locked, and inaccessible, store ammunition separately and secured, and control all keys and codes. Talk with your family about access rules, and secure firearms before visitors arrive. Responsible-ownership programs like Project ChildSafe focus on exactly this goal.

Final Responsible-Storage Recommendation

Good gun storage is a routine, not a product: unload and verify, lock firearms away from unauthorized access, control your keys and codes, store ammunition thoughtfully, and plan for everyone in your home. Match your method to your firearms and household, check your local rules, and keep the habit consistent. No device removes all risk, but these gun storage safety tips can help make responsible storage part of your normal safety routine.

Gun Safety Course Benefits: Why Firearm Safety Education Matters

A gun safety course helps beginners learn firearm safety rules, range etiquette, protective gear habits, and storage basics under supervision. The main benefit is simple: you learn from a qualified instructor instead of guessing, and you build safer habits before practicing on your own.

This guide explains what beginner firearm safety courses usually cover, why they matter, and how to choose a credible program. It is general education only and does not replace local laws, instructor guidance, range rules, or manufacturer instructions.

What a Gun Safety Course Teaches Beginners

A beginner gun safety course usually starts with the core safety rules. Students learn safe muzzle direction, trigger discipline, how to follow range commands, and why they must verify a firearm’s condition before handling it. The NSSF firearm safety rules are a useful public reference for these fundamentals.

Courses may also introduce safe loading and unloading concepts, eye and ear protection, range etiquette, storage basics, and what to do when something feels unclear or unsafe. The exact curriculum varies, so read the course description before enrolling.

Course TopicBeginner BenefitWhat to Confirm
Core safety rulesBuilds safe handling habitsRules are taught before live-fire practice
Range commandsReduces confusion on the firing lineInstructor explains local range procedures
Eye and ear protectionNormalizes protective gearFit and required PPE are covered
Storage basicsConnects range safety to home safetySecure storage resources are included

Why Firearm Safety Education Matters

Safety education matters because beginners form habits quickly. A structured class gives new shooters a safer starting point than informal trial and error. It also helps students understand that responsible ownership is not just about one range visit; it includes storage, transport, maintenance, and ongoing respect for safety rules.

For storage education, programs such as Project ChildSafe provide safety resources focused on secure storage and responsible ownership. If your course includes storage habits, ask whether it points students to manufacturer instructions and recognized safety resources.

How to Choose a Credible Gun Safety Course

Choose a course connected to a recognized organization, licensed range, state hunter education program, or qualified instructor. A credible course should be clear about instructor qualifications, beginner level, safety rules, range format, and what students will and will not do.

  • Check who teaches the course and what qualifications they list.
  • Confirm the class is appropriate for true beginners.
  • Ask whether eye and ear protection requirements are explained before range time.
  • Confirm whether live-fire practice is included, optional, or not part of the course.
  • Check current local requirements if you need a certificate for a specific purpose.

Hunter education programs are another established safety-education path. The Hunter-Ed study guide is one public example of structured outdoor safety education, though state-specific requirements vary.

Course Red Flags to Avoid

A safety course should feel calm, structured, and rule-first. Be cautious if a course emphasizes speed, bravado, or advanced skills before covering basic safety. Beginners should not be pressured into handling tasks they do not understand.

  • No clear instructor qualifications.
  • No written safety rules or range procedures.
  • No mention of eye and ear protection.
  • Vague promises that one class makes someone fully trained.
  • Pressure to skip beginner material and jump to advanced drills.

What to Do After the Course

After a course, keep practicing safety habits slowly and deliberately. Review range rules before each visit, keep protective gear organized, and ask qualified help when something is unfamiliar. A class is a starting point, not the finish line.

Useful next steps include reviewing our shooting range safety rules, learning why eye and ear protection matters, and checking your gun storage safety habits.

Frequently Asked Questions

Do beginners need a gun safety course?

A beginner course is strongly recommended because it gives new shooters supervised instruction and a safer foundation. Whether a course is legally required depends on your location and purpose, so check current local rules.

What happens in a beginner gun safety course?

Most beginner courses cover core safety rules, safe handling concepts, range commands, protective gear, storage basics, and sometimes supervised range practice. The exact format depends on the provider.

How do I know a course is legitimate?

Look for clear instructor qualifications, recognized program backing, written safety procedures, beginner-appropriate curriculum, and transparent information about what the class includes.

Will a gun safety course cover local laws?

Some courses include a general rules overview, but requirements vary and can change. Verify current requirements through official local sources before relying on a certificate for any purpose.

Is one safety course enough?

One course is a good starting point, but safety is an ongoing habit. Continue practicing under supervision, reviewing rules, using proper protective gear, and storing firearms securely.

Final Safety Reminder

A good gun safety course should make safety feel practical, repeatable, and serious. Choose credible instruction, follow range rules, use protective gear, store firearms securely, and ask qualified help before guessing.

Trigger Control for Shooting Accuracy: Safe Practice Guide

Trigger control matters because the rifle or handgun can be aimed correctly and still miss if the shooter moves the firearm while pressing the trigger. Good trigger control means pressing the trigger smoothly to the rear while keeping the sights stable, the grip consistent, and the shot process safe.

This guide focuses on safe practice habits and shooting fundamentals. Always follow your firearm manual, use an appropriate range, and keep the basic safety rules first. The NSSF firearm safety rules are a useful baseline before any dry-fire or live-fire practice.

Table of Contents
  1. Quick Trigger Control Checklist
  2. What Trigger Control Means
  3. Why It Affects Accuracy
  4. Safe Dry Practice
  5. Live-Fire Practice
  6. Common Mistakes
  7. When To Get Coaching
  8. Related Guides
  9. FAQ
  10. Final Recommendation

Quick Trigger Control Checklist

CheckWhat to doWhy it helps
Safety firstConfirm the firearm is unloaded for dry practice and use a safe direction/backstopSkill work never comes before safe handling.
GripUse a repeatable grip without crushing or changing pressure mid-shotChanging grip pressure moves the sights.
Sight focusWatch the sight picture through the pressYou can see movement as the trigger breaks.
Trigger pressPress smoothly straight to the rearSide pressure pushes the muzzle off target.
Follow-throughKeep aiming after the shot breaksPrevents dipping or relaxing early.
PacePractice slowly before adding speedClean movement matters before faster movement.
FeedbackUse groups, a coach, or video to diagnose movementGuessing at mistakes slows progress.

What Trigger Control Means

Trigger control is the way you move the trigger without disturbing the firearm. It includes finger placement, direction of pressure, grip consistency, breathing rhythm, sight awareness, and follow-through. The goal is not to make the trigger feel magical; the goal is to avoid adding movement at the exact moment the shot breaks.

Different firearms feel different. A hunting rifle, striker-fired pistol, revolver, and target rifle may all have different trigger weight, travel, reset, and break feel. The principle stays the same: press the trigger in a controlled way while maintaining the sight picture and safe muzzle direction.

Why Trigger Control Affects Accuracy

The muzzle only has to move a small amount to change point of impact. A jerky press, tightened fingers, flinch, or early anticipation can pull the shot away from where the sights were aimed. This is why a shooter may have a good optic, good ammunition, and a stable rest but still see inconsistent groups.

Trigger control also interacts with other fundamentals. Poor stance, weak support, uncomfortable recoil, and bad sight alignment can all make the trigger press worse. For newer shooters, accuracy improves faster when the whole shot process is practiced calmly instead of chasing one magic trick.

Safe Dry Practice for Trigger Control

Dry practice can help because it lets you watch the sights without recoil or noise. Only do it after unloading the firearm, checking the chamber, removing ammunition from the practice area, and choosing a safe direction. If your firearm requires snap caps or has manufacturer restrictions, follow the manual.

During dry practice, press the trigger slowly while watching the front sight, dot, or reticle. The sight should stay steady before, during, and after the trigger break. If it dips, jumps, or moves sideways, slow down and focus on a smoother press and more consistent grip.

For household safety and secure storage habits, Project ChildSafe is a good resource to keep close. Practice routines should never leave firearms or ammunition unsecured.

Live-Fire Practice at the Range

At the range, use slow groups to confirm whether your dry-practice feel carries into live fire. Start close enough that you can clearly see group movement and do not rush cadence. A clean five-shot group teaches more than a fast string where you cannot tell what changed.

Watch for patterns. Low-left impacts for a right-handed pistol shooter, wide horizontal groups, or shots that appear just as recoil anticipation builds can all point to trigger and grip problems. These patterns are clues, not proof, so use them with coaching or careful self-review.

If you want to understand formal shooting-sport fundamentals and training pathways, USA Shooting is a useful authority source for the competitive side of marksmanship.

Common Trigger Control Mistakes

  • Slapping the trigger instead of pressing it smoothly.
  • Changing grip pressure as the shot breaks.
  • Looking over the sights to see the hit too early.
  • Holding your breath so long that tension builds.
  • Practicing too fast before the fundamentals are stable.
  • Ignoring recoil anticipation or flinch.

When To Get Coaching

Get coaching if your groups do not improve, recoil makes you tense, you are new to a firearm type, or you are practicing defensive, hunting, or competition skills. A qualified instructor can spot movement that is hard to feel in the moment.

Coaching is also useful when changing platforms. A shooter moving from a rifle to a pistol, from iron sights to a red dot, or from bench shooting to field positions may need different feedback even if the trigger-control principle is familiar.

FAQ

What is trigger control in shooting?

Trigger control is pressing the trigger without moving the sights off target. It depends on smooth pressure, consistent grip, sight awareness, and follow-through.

Does dry firing help trigger control?

Dry practice can help if it is done safely and your firearm manual allows it. Always unload, remove ammunition from the area, and use a safe direction before dry practice.

Why do I pull shots when I press the trigger?

Common causes include jerking the trigger, tightening the whole hand, anticipating recoil, or changing grip pressure. Slow practice and coaching can help identify the exact cause.

Should trigger control be different for rifles and handguns?

The basic idea is the same, but the feel is different. Handguns usually reveal trigger movement more clearly because they are lighter and have a shorter sight radius. Rifles may hide some errors from a stable rest but still punish poor follow-through.

Final Recommendation

Trigger control is not a shortcut; it is one part of a repeatable, safe shot process. Practice slowly, keep the firearm safe, watch the sights through the trigger press, and verify progress at the range. If accuracy problems continue, get trained eyes on your grip, stance, and follow-through.

How to Store and Transport Ammunition Safely


Store ammunition in a cool, dry location, away from heat, open flame, solvents, petroleum products, acids, ammonia, and other chemicals. Keep it in the original box or purpose-designed ammunition packaging when possible, and keep it inaccessible to children, guests, and other unauthorized people.

`r`n`r`n
A safe ammunition routine starts with cool dry storage, closed packaging, clear labels, secure access, and current transport rules.
`r`n`r`n

This guide explains safe ammunition storage and transport basics without pretending one article can replace current local law, product labels, or manufacturer instructions. It does not cover reloading, powder or primer storage, disposal, firefighting tactics, or state-by-state legal advice.

Table of Contents

Quick Answer: How To Store Ammunition Safely

The safest general approach is simple: keep ammunition cool, dry, properly packaged, separated from chemicals and heat sources, and controlled so unauthorized people cannot access it. That matches the practical direction in SAAMI ammunition storage and handling guidance.

  • Cool and dry: avoid hot, damp, or rapidly changing storage conditions.
  • Away from heat and chemicals: do not store ammunition next to solvents, petroleum products, acids, ammonia, open flame, or heat sources.
  • Properly packaged: use original packaging or a purpose-designed ammunition container that keeps rounds identified and protected.
  • Access-controlled: prevent access by children, guests, and anyone who should not handle it.

Why Ammunition Storage Conditions Matter

Storage conditions matter because heat, moisture, chemical exposure, and rough handling can affect ammunition over time. Good storage is mostly about controlling those risks before they become a problem.

Heat and humidity

Choose a location that stays moderate and dry rather than hot, humid, or exposed to wide temperature swings. A hot attic, damp basement, or vehicle interior is usually a poor default unless the environment is controlled.

Water and chemical exposure

Keep ammunition away from direct water contact and away from cleaning chemicals, fuels, petroleum products, acids, ammonia, and solvents. A separate shelf or cabinet away from gun-cleaning supplies is usually a cleaner setup than mixing everything together.

Physical damage and inspection

Handle ammunition carefully and keep it protected in proper packaging. Do not use ammunition that looks damaged, corroded, deformed, wet, or otherwise suspect.

Where To Store Ammunition At Home

A good home storage location is boring in the best possible way: dry, stable, labeled, and access-controlled. A cabinet, shelf, or dedicated storage container can work if it stays away from heat, moisture, chemicals, and unauthorized access.

Original boxes help you identify caliber, load, manufacturer, and lot information. If you move ammunition into a different purpose-designed container, keep it clearly labeled and avoid mixing loose, unidentified rounds.

For households with children or frequent visitors, access control matters as much as the environment. Project ChildSafe and the NSSF Project ChildSafe program are useful starting points for broader secure-storage thinking.

Where Not To Store Ammunition

  • Direct sunlight or hot vehicles: temperatures can rise quickly and are hard to control.
  • Damp basements without moisture control: moisture works against the dry-storage goal.
  • Near solvents, oils, acids, ammonia, or fuels: keep ammunition away from chemical exposure.
  • Loose in random containers: mixed loose rounds make identification and inspection harder.
  • Accessible drawers or open shelves: any location reachable by children, guests, or unauthorized users fails the access-control test.

How To Transport Ammunition Safely

For normal range trips, keep ammunition packaged, protected from impact, and separated from loose tools, liquids, and cleaning chemicals. Use a sturdy range bag or container that keeps boxes from opening and keeps the ammunition identifiable.

Transport rules can change by state, locality, range, and travel method. This article does not give legal transport advice. If you are crossing state lines, flying, or transporting firearms and ammunition in a regulated situation, check current official rules before you travel.

Ammunition Storage Checklist

Use this checklist before you settle on a storage spot. It is not a legal checklist; it is a practical safety screen.

CheckSafe directionWhy it matters
TemperatureCool, stable locationReduces avoidable heat exposure
MoistureDry storage areaHelps avoid dampness and corrosion risk
PackagingOriginal or purpose-designed packagingKeeps ammunition identified and protected
ChemicalsAway from solvents, petroleum products, acids, ammonia, and other chemicalsAvoids chemical exposure
AccessInaccessible to children, guests, and unauthorized personsSupports responsible home storage
FirearmsConsider separate storage based on household risk and local rulesAdds another layer of access control
ConditionDo not use damaged or suspect ammunitionPrevents use of questionable rounds

What This Guide Does Not Cover

  • Reloading procedures: no powder charges, primer substitutions, recipes, or troubleshooting are covered here.
  • Powder and primer storage: those components need separate guidance.
  • Disposal: contact a source-backed option such as local law enforcement, a shooting facility, the manufacturer, or local waste authority for damaged or unwanted ammunition.
  • Firefighting tactics: follow local fire department and official emergency guidance.
  • State-by-state law: requirements vary, so verify current rules where you live and travel.

Frequently Asked Questions

Can ammunition be stored in a garage?

A garage can work only if it stays cool, dry, chemical-free, and access-controlled. Many garages get hot, humid, or hold solvents and fuels, which are the conditions to avoid. If a garage cannot stay controlled, choose a better indoor location.

Should ammo stay in the original box?

Original packaging is usually the best default because it helps identify the ammunition and protects it from unnecessary handling damage. Purpose-designed ammunition containers can also work if they keep the contents clearly labeled and protected.

Can ammo be stored with a firearm?

It depends on household risk, space, and current local rules. Storing ammunition separately from firearms is a commonly cited safety practice because it adds another access-control layer, but this article does not claim one universal legal rule applies everywhere.

What should I do with damaged ammunition?

Do not use ammunition that looks damaged, corroded, wet, deformed, or otherwise suspect. For disposal, contact local law enforcement, a shooting facility, the manufacturer, or a local waste authority. Do not guess or improvise disposal methods.

Is ammunition dangerous in a house fire?

Ammunition can be affected by fire, which is one reason storage guidance emphasizes keeping it away from heat sources and open flames. This article does not provide firefighting tactics; follow your local fire department and official emergency guidance.

Is this legal advice for transporting ammunition?

No. This is a safety and organization guide, not legal advice. Transport rules vary by location and travel method, so check current official rules before transporting ammunition, especially across state lines or by air.

Final Recommendation

The practical ammunition-storage standard is consistent: cool, dry, away from heat and chemicals, properly packaged, and inaccessible to unauthorized persons. Do not use damaged or suspect ammunition, keep it away from cleaning chemicals, and verify current local rules for storage or transport questions.

Exit mobile version