Public Land Deer Hunting Guide: Scouting, Access, Pressure, and Safety

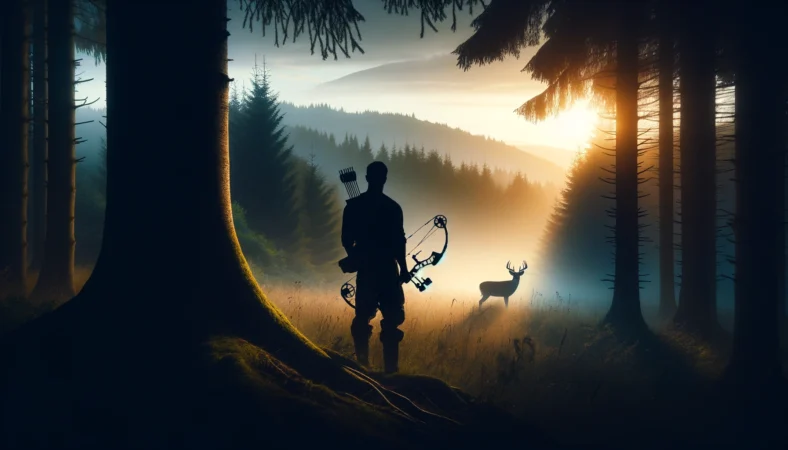
Public land deer hunting can be one of the most rewarding ways to hunt because access is open, the ground is shared, and success depends on preparation more than permission. It can also be frustrating if you treat public land like private land. The best public-land hunters scout more, walk farther when needed, study pressure, follow regulations closely, and keep backup plans ready.

The short version: find legal hunting land, confirm the rules for that exact property, scout deer sign and hunter access points, choose stand locations based on wind and pressure, and hunt with a safety-first plan. Public land is not about secret tricks. It is about doing the basics carefully in places where other hunters may be doing the obvious things.

Table of contents

Quick Answer

To hunt public-land deer well, start by confirming that the property is open to deer hunting during your season. Then identify access points, parking areas, terrain funnels, bedding cover, food sources, water, and escape routes. Scout more than one area so you are not locked into one spot when wind, pressure, or other hunters change the plan.

A good public-land setup usually balances deer movement with low human pressure. The easiest trail from the parking lot is rarely the best spot. Look for overlooked pockets, hard-to-reach edges, thick cover near food, terrain breaks, creek crossings, saddles, benches, and downwind access routes that let you enter without alerting deer.

What Public Land Means

Public land includes property owned or managed by federal, state, county, or local agencies. Some land is open to hunting with a normal state license. Other land may require a special permit, lottery draw, refuge-specific rules, check-in process, weapon restriction, or seasonal closure. Never assume that one public property has the same rules as another.

Common Public-Land Types

Hunters may encounter national forests, Bureau of Land Management land, wildlife management areas, state forests, state game lands, waterfowl production areas, national wildlife refuges, and county or municipal properties. The Bureau of Land Management hunting page and U.S. Forest Service hunting guidance are useful starting points for understanding federal-land access, but your state wildlife agency rules still control seasons, tags, and legal methods.

Why Public Land Hunts Differ

Public land adds one variable private-land hunters may not face as often: other people. Deer react to pressure from parking areas, trails, roads, food plots, popular ridges, and obvious stand trees. That does not mean you must always hike miles. Sometimes the best spot is an overlooked corner close to access that most hunters walk past. The key is to understand how people move and how deer avoid them.

Rules, Access, and Permits

Before scouting, verify the rules for the exact property. Check the state hunting regulation booklet, agency map, property signboard, and any special area page. Pay attention to open dates, weapon restrictions, blaze-orange rules, antler rules, check-in requirements, baiting rules, stand placement rules, camping restrictions, motorized access, and whether the property allows Sunday hunting if that matters in your state.

Confirm Boundaries

Public-land boundaries can be confusing, especially near private parcels, timber leases, utility corridors, and water access. Use official maps whenever possible, and cross-check with current property signs. Mapping apps are helpful, but they should not replace agency rules or posted boundaries. If a boundary is unclear, treat it conservatively until you can verify it.

Have Backup Properties

Public areas can fill quickly on opening weekend, during the rut, or after a fresh cold front. Build a list of backup locations before the season. A simple three-level plan works well: primary property, nearby backup property, and small overlooked property for crowded days. For broader trip planning, see our guide to hunting trip planning for beginners.

Digital Scouting

Digital scouting helps you eliminate poor spots before spending time in the woods. Start with access points, parking lots, roads, trails, creeks, ridges, field edges, recent timber cuts, bedding cover, and terrain funnels. Mark several potential stand locations, then study wind direction and entry routes before visiting.

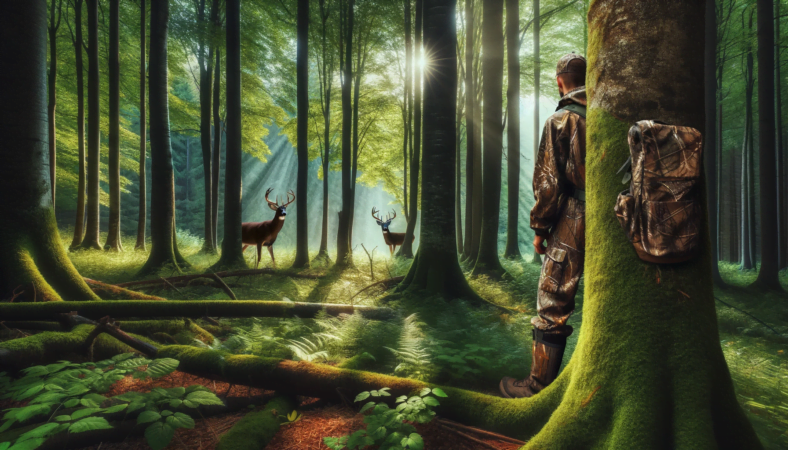
Look for Terrain That Guides Movement

Deer often use terrain that offers security and efficient travel. Saddles, benches, creek crossings, inside corners, ridge points, drainage heads, and narrow strips of cover can all concentrate movement. On flat public land, focus more on vegetation edges, bedding cover, food transitions, water, and subtle elevation changes.

Map Hunter Pressure Too

Mark likely human routes just like you mark deer routes. Parking lots, easy trails, obvious field corners, old logging roads, and scenic overlooks can all collect pressure. Deer may shift to thicker cover, steeper terrain, or odd travel routes after pressure increases. This is where public-land scouting becomes a businesslike process: predict where people go, then predict how deer adjust.

Boots-On-Ground Scouting

Digital maps are only the first pass. Walk the property when legal and appropriate, ideally outside peak hunting hours or during the off-season. Confirm whether the promising map spot actually has deer sign, safe shooting lanes, legal access, and a realistic route in and out.

Scout Entry and Exit Routes

A stand location is only useful if you can reach it without ruining it. Look for quiet entry routes that use terrain, wind, water, or cover to hide your approach. A great-looking spot that requires walking through bedding cover every morning may educate deer before you ever climb into position.

Keep Notes

Track what you see: rubs, scrapes, trails, beds, droppings, tracks, acorns, browse, food sources, water, hunter sign, and wind behavior. Photos and short notes can save time later. If you keep a hunting journal, record the date, weather, wind, pressure, and deer movement so patterns become easier to see over multiple trips.

Deer Sign to Prioritize

Not all deer sign deserves the same attention. A huge rub beside a popular trail may be less useful than a faint trail between bedding cover and a secluded food source. Focus on sign that matches current season, fresh use, and huntable wind.

Fresh Tracks and Trails

Fresh tracks in mud, snow, or soft soil can tell you recent travel direction and size range. Trails are useful when they connect bedding, food, water, or terrain features. On pressured land, the best trail may be less obvious and closer to thick cover than the wide trail everyone notices.

Rubs, Scrapes, Food, and Bedding

Rubs and scrapes can help during pre-rut and rut, but they should be read with context. Food and bedding often matter more across the full season. Acorns, crop edges, browse, clear-cuts, and late-season food sources can shift deer movement quickly. During the rut, combine sign with terrain and doe movement; our article on hunting the rut covers that seasonal shift in more detail.

How to Hunt Around Pressure

Public-land pressure is not always bad. Other hunters can push deer into secure cover, secondary trails, and overlooked pockets. The mistake is pretending pressure does not exist. Pay attention to where trucks park, where boot tracks go, where stands appear, and when people enter or leave.

Hunt Overlooked Places

Small parcels, noisy access points, awkward corners, steep slopes, wet crossings, thick cover, and spots close to roads can all be overlooked. Many hunters assume they must hike far. Sometimes that is true. Other times, the best deer movement is in a place people dismiss because it does not look perfect on a map.

Adjust Timing

Pressure often changes deer movement after opening morning. Midday sits can be valuable when other hunters leave the woods. Evening hunts can work near food or transition cover if your exit route is clean. During the rut, all-day sits near funnels, doe bedding edges, and downwind travel routes may be worth the patience.

Stand and Ground Setup

Choose a setup that matches the property rules and your safety plan. Some areas allow portable tree stands, saddle setups, or ground blinds. Others restrict screw-in steps, cutting lanes, leaving stands overnight, or marking trees. Read the rules first, then keep your setup simple and mobile.

Tree Stand and Saddle Safety

If you hunt elevated, use a full-body harness and follow the stand manufacturer’s instructions. Inspect straps, platforms, ropes, and steps before each hunt. Public-land trees may look suitable from the ground but be unsafe when you climb. Dead trees, loose bark, hidden rot, and poor angles are not worth the risk.

Ground Setups

Ground setups can be very effective on public land because they are quiet, flexible, and less gear-heavy. Use natural cover, stay downwind, break up your outline, and clear only what is legal and necessary. A small stool or pad can make long sits more realistic. For ethics and shot discipline, review our guide to ethical hunting practices.

Public-Land Deer Hunting Gear

Public-land gear should help you move quietly, stay safe, and adapt. You do not need the most expensive setup, but you do need reliable basics: license and permits, legal weapon, safety harness if elevated, navigation, headlamp, knife, first-aid basics, water, weather-appropriate clothing, rangefinder if useful, drag or pack-out plan, and a way to contact help.

Pack Light but Complete

Heavy packs slow you down and make noise. Too little gear creates safety problems. Build your pack around the hunt length, weather, distance from the truck, and recovery plan. If you are new, our beginner outdoor shooting range equipment guide can help with basic safety gear habits, though hunting adds navigation, weather, and recovery needs.

Plan for Recovery

Before the shot, think through what happens after the shot. Know your tracking plan, tagging rules, local reporting requirements, and how you will move the deer legally and safely. In warm weather, recovery speed and meat care matter. In remote spots, a pack-out plan may be better than dragging over rough ground.

Safety and Ethics

Public land requires extra awareness because other hunters, hikers, dog walkers, horseback riders, or land managers may be present. Identify your target and what is beyond it. Wear required blaze orange. Avoid unsafe shot angles, skyline shots, and shots toward trails, roads, buildings, or unknown movement.

Respect Other Users

If another hunter is already set up, give space. Do not walk through someone’s active setup if you can reasonably avoid it. If a parking area is full, use a backup plan instead of forcing the same spot. Public land belongs to everyone, and the best hunters protect that access through good behavior.

Leave the Land Better

Pack out trash, follow stand removal rules, avoid unnecessary cutting, and report major violations through proper channels. Ethical public-land hunting protects future opportunity. The goal is not just to fill a tag; it is to keep public access respected and sustainable.

FAQ

Is public-land deer hunting harder than private-land hunting?

Public-land deer hunting can be harder because access is shared and deer may react to more human pressure. It can also be very productive if you scout well, understand pressure, and build multiple backup plans.

How far should I walk on public land?

Walk as far as the sign and pressure tell you to walk. Some good spots are deep. Others are overlooked pockets near access. Distance alone does not make a spot good; deer sign, wind, safety, and pressure matter more.

Can I leave a tree stand on public land?

It depends on the property rules. Some public lands allow stands to be left for a limited time with owner identification. Others require removal each day or prohibit certain equipment. Always check the exact agency rules before leaving gear.

What is the best time to hunt public land?

Opening days, cold fronts, rut periods, and late-season food patterns can all be productive. Midday can also be useful on pressured public land because other hunters may move deer when they enter or leave.

Do I need special permits for public-land deer hunting?

Sometimes. A normal hunting license may be enough on some properties, while refuges, military lands, quota hunts, and certain state areas may require special permits, drawings, or check-in steps. Verify before you hunt.

Final Thoughts

Public land deer hunting rewards hunters who prepare carefully and adapt without cutting corners. Confirm the rules, scout both deer movement and human pressure, choose safe setups, and keep backup plans ready. When you treat public land with respect and hunt it with patience, it can become one of the most valuable hunting opportunities available.

Can I Carry a Pistol While Bow Hunting? Laws, Safety, and Ethics

In many places, you may be able to carry a pistol while bow hunting, but the answer depends on the state, the land manager, the season, your permit status, and whether the handgun is carried only for defense or used to take game. Do not rely on a general internet answer for this one. Before a hunt, check the current regulation book for the state and unit you plan to hunt, then confirm unclear rules with the wildlife agency or local game warden.

The safest way to think about it is simple: your bow tag does not automatically give you permission to carry or use a sidearm. Some states allow a defensive handgun during archery season. Some restrict firearms in archery-only areas. Some allow carry but do not allow a pistol to be used for dispatching game. Public-land rules can add another layer, especially on state parks, national parks, national forests, wildlife refuges, and private land with written access rules.

Table of contents

Quick Answer: Can You Carry a Pistol While Bow Hunting?

Sometimes, yes. But it is not universal. A pistol may be legal for personal defense in one state and restricted in another. It may be legal on one type of public land and prohibited in a nearby park, refuge, or archery-only unit. It may be legal to possess but illegal to use for taking or finishing game during archery season.

If you need one rule to remember, use this: verify the hunting rule and the carry rule separately. Hunting regulations answer what equipment may be used to take game. Firearm and carry laws answer whether you may possess, conceal, transport, or openly carry a handgun. Those two rule sets do not always match.

A Practical Yes, No, or Maybe Framework

  • Likely yes: the state allows defensive carry during archery season, your permit or constitutional carry status is valid, and the land manager does not add a restriction.
  • Maybe: carry is allowed generally, but archery-only areas, state parks, refuges, or local ordinances may restrict firearms.
  • Likely no: the regulation says no firearms during archery-only seasons or on that specific property, or your permit is not valid in that state.

What to Check Before Carrying a Pistol on a Bow Hunt

Start with the current regulation book from the state wildlife agency. Search for the words handgun, firearm, archery season, sidearm, dispatch, concealed carry, open carry, and method of take. Then check the land manager rules for the specific place you will hunt. If the answer still is not clear, call the agency and write down the name, date, and answer you received.

For federal land, do not assume one federal rule controls everything. The National Park Service explains that firearm possession in park units generally has to comply with the law of the state where the park is located, while federal facilities such as visitor centers and ranger stations remain restricted. The U.S. Forest Service hunting page also tells hunters to follow state hunting laws and local forest rules. Those are good examples of why a hunt plan needs both state and land-manager checks.

The Five Questions That Matter Most

  1. Does the state allow handgun possession during the archery season you are hunting?
  2. Does your carry permit, reciprocity, or permitless carry status apply in that state?
  3. Does the specific property allow firearms during that season?
  4. Can the pistol be loaded, concealed, or carried in the way you plan?
  5. Is it legal to use the handgun for defense only, for dispatch, or for taking game?

Archery Season Rules Are the Big Catch

Archery seasons are designed around legal archery equipment. That does not always mean a sidearm is banned, but it does mean the handgun cannot be treated as backup hunting equipment unless the regulation clearly allows it. Many violations happen because a hunter reads the carry law but not the method-of-take rule.

This matters most for deer, elk, pronghorn, turkey, and other archery-only hunts. If the season is archery-only, a handgun may be allowed for personal defense yet still prohibited for harvesting game. Using it on an animal can turn a legal carry situation into an illegal take. When in doubt, assume the pistol is for emergency defense only until your state agency confirms otherwise.

Do Not Mix Carry Permission With Method-of-Take Permission

A carry permit means you may carry under certain conditions. It does not automatically mean you may use that firearm for hunting. A bow tag means you may hunt with legal archery equipment. It does not automatically authorize a handgun. Keep those permissions separate in your notes and your decision-making.

Public Land, Parks, and Refuges Can Change the Answer

Public land is not one rulebook. National forests, Bureau of Land Management land, state wildlife areas, national parks, state parks, and national wildlife refuges can all have different restrictions. Some places allow hunting but restrict discharge near roads, buildings, water, campgrounds, or developed recreation areas. Others allow carry outdoors but restrict firearms inside government buildings or visitor facilities. National wildlife refuges deserve extra care because refuge-specific rules can change what is allowed even when a state season is open.

Before you leave home, check the map boundary, the property name, and the managing agency. If you are hunting near a park boundary, private land edge, campground, trail system, or road, be extra careful. The U.S. Forest Service notes that private land may be interspersed with public land and that hunters need maps and permission where required. That same planning mindset applies to firearm carry rules.

National Parks Are Not the Same as National Forests

National parks commonly have different hunting access and firearm-use rules from national forests. A national forest may allow hunting under state seasons and local forest rules. A national park may prohibit hunting unless specifically authorized. Even where firearm possession is lawful, federal facilities can still be off limits. Refuges add another layer because the eCFR rules for the National Wildlife Refuge System include both general prohibited-act rules and refuge-by-refuge hunting entries. Check the exact unit, not just the agency name.

Concealed Carry vs Open Carry While Bow Hunting

The carry method matters. A chest holster, belt holster, pack-mounted holster, concealed waistband holster, or open hip rig may be treated differently under state law and property rules. Some states require a permit for concealed carry but not open carry. Others limit open carry in certain places. Some land managers may also restrict visible firearms around campgrounds, visitor areas, or developed sites.

From a field-use perspective, concealed is not always better and open is not always safer. The holster must stay secure during climbing, crawling, glassing, kneeling, drawing a bow, and wearing layers. If the handgun shifts into your bowstring path or snags on your pack strap, it creates a safety issue even if it is legally carried.

Carry Position Should Not Interfere With Your Shot

Test the full bow draw at home with an unloaded firearm and the exact clothing you will wear. Check your anchor point, bow arm, release hand, safety harness, pack straps, binocular harness, and rangefinder. If the holster changes your draw or causes you to move awkwardly, choose a different carry setup or leave the handgun at home.

Defense Carry Is Different From Using a Handgun on Game

Most hunters who ask this question are thinking about protection from bears, feral hogs, mountain lions, aggressive dogs, or people. That is a different issue from taking game. A defensive emergency is rare and immediate. A hunting decision is planned and regulated by season, tag, weapon type, and method of take.

Do not use a pistol to finish a wounded animal unless your state clearly allows it for that species, season, and tag. Some states may allow certain dispatch methods. Others may not. The ethical goal is a quick recovery, but ethics do not erase the regulation. If the rule is unclear, contact the agency before the hunt instead of deciding under pressure in the field.

Warning Shots Are Usually a Bad Plan

Older advice sometimes mentions firing a pistol as an emergency signal. That can be unsafe, illegal, or misunderstood depending on location. A whistle, satellite messenger, phone, radio, headlamp, map, and trip plan are better emergency tools. Use a firearm only within the law and only when you can account for the target, backstop, and surroundings.

How to Carry a Pistol Safely With Bowhunting Gear

If the law allows carry and you decide it is necessary, use a retention holster that protects the trigger and keeps the handgun in place through real hunting movement. Avoid loose pockets, open pack compartments, and soft sleeves that do not cover the trigger. The handgun should stay secure when you climb, sit, crawl, drag, quarter, or remove layers.

Safety also means planning around tree stands, ground blinds, and vehicle transport. Know whether the handgun must be unloaded while traveling, while in a vehicle, or while entering certain public areas. If you hunt from a stand, use the same careful process you use with a bow or firearm: secure gear, avoid climbing with loose equipment, and keep control of every weapon at all times.

Field Safety Checklist

  • Use a holster with trigger coverage and retention.
  • Confirm the holster does not block your bow draw.
  • Keep the muzzle direction controlled during all movement.
  • Know the loaded/unloaded transport rule for your state and property.
  • Keep the handgun away from children, camp visitors, and untrained partners.
  • Review firearm safety rules before the season, not during an emergency.

The Ethical Check: Should You Carry One?

Legal is the first gate. Ethical and practical are the next two. If carrying a pistol makes you less careful with shot selection, less patient during recovery, or more likely to enter a risky situation, it is not helping. A sidearm should not become an excuse to push into unsafe conditions or take lower-quality shots with a bow.

Good bowhunting still starts with close-range discipline, clear shooting lanes, sharp broadheads where legal, a tuned bow, honest range limits, and careful recovery. If you want a broader field conduct refresher, our guide to ethical hunting practices pairs well with this article.

When Leaving It Home May Be Smarter

Leave the pistol at home if you cannot confirm the rule, if your carry setup interferes with your bow, if you are crossing multiple jurisdictions, or if the property owner does not allow firearms. Also consider leaving it behind when the extra weight and complexity do not match the real risk of the hunt.

Pre-Hunt Legal and Safety Checklist

Use this checklist before each season because laws, season structures, and property rules can change. Do not assume last year’s answer is still correct.

  • Read the current state hunting regulation book for your species and season.
  • Search specifically for archery-only firearm restrictions.
  • Confirm carry law, permit rules, and reciprocity for the state.
  • Check the land manager page for the exact property.
  • Call the state wildlife agency if the written rule is unclear.
  • Ask private landowners for written permission and property-specific firearm rules.
  • Test your holster with your bow, pack, harness, and cold-weather layers.
  • Carry non-firearm emergency tools such as a whistle, light, map, and communication device.

Sources Worth Checking Every Season

For public-land hunters, start with official pages such as the National Park Service firearm guidance, the U.S. Forest Service hunting guidance, the U.S. Fish and Wildlife Service refuge overview, and the eCFR rules for refuge prohibited acts and refuge hunting and fishing. Then verify state-specific hunting regulations through your state wildlife agency. For field preparation, our beginner hunting trip planning guide can help you organize the non-legal parts of the hunt.

FAQ

Can I carry a pistol while bow hunting on public land?

Maybe. Public land rules depend on the state, agency, property, season, and carry method. Check both the state hunting regulations and the land manager’s rules for the exact area.

Can I use a pistol to finish a deer during archery season?

Only if your state clearly allows it for that season and species. Many archery seasons restrict firearms as a method of take, even if defensive carry is allowed.

Does a concealed carry permit override hunting regulations?

No. A carry permit may let you possess or carry a handgun, but hunting regulations still control what equipment can be used to take game.

Is a pistol legal in national parks during a bow hunt?

It depends on the park, the state, and where you are inside the park. The National Park Service says possession generally has to comply with state law, but federal facilities are restricted and hunting is not automatically allowed in every park unit.

What is the safest holster for bow hunting?

The safest choice is a secure retention holster that covers the trigger and does not interfere with your bow draw, safety harness, pack straps, or layers. Test it unloaded before the hunt.

Should every bowhunter carry a pistol?

No. Carrying a pistol adds legal responsibility, weight, safety complexity, and possible property restrictions. It only makes sense when it is legal, practical, and matched to a real risk.

Final Thoughts

You may be able to carry a pistol while bow hunting, but the responsible answer is never a blanket yes. Check the state hunting rule, the carry law, the property rule, and the season rule before you go. If any part is unclear, ask the agency before the hunt. A sidearm can be a defensive tool in some situations, but it should never replace legal planning, safe handling, ethical shot choices, and good bowhunting judgment.

Predator Hunting Tactics: Wind, Calling, Setups, Safety, and Ethics

Predator hunting works best when the setup is simple, legal, and built around wind, cover, sound, and safe shot decisions. The goal is not to call louder or move more. It is to pick a stand that lets you see likely approach routes, keep your scent out of the animal’s path, and leave yourself a clear, ethical shot only when the target and background are certain.

Table of contents

Quick Setup Plan

For most predator stands, start downwind or crosswind of the cover you expect animals to use. Sit with shade or cover behind you, keep the caller away from your body if using one, watch the downwind side, and stop the stand if you cannot identify the animal or the background. This approach keeps the setup practical and keeps safety ahead of excitement.

Pick one job for each stand

Before you sit down, decide what the stand is meant to do. You may be calling a brushy creek bottom, watching a field edge, covering a pasture draw, or checking a travel route between bedding and feeding cover. A stand with one clear job is easier to hunt than a stand trying to cover every direction at once.

Expect predators to use cover

Coyotes, foxes, and bobcats often approach with cover, terrain breaks, shadows, or wind in their favor. Do not focus only on the most open lane. Watch edges, low spots, brush fingers, old roads, creek crossings, and the downwind side where an animal may try to check the sound before stepping into the open.

Keep the first stand simple

If you are repairing your strategy after poor results, simplify the next hunt. Use one calling sequence, one wind plan, one exit route, and one clear shooting lane. Too many sounds, too much movement, and too much gear often create more problems than they solve.

Rules and Ethics First

Predator hunting rules vary by state, season, land type, species, firearm, night-hunting method, electronic caller use, lights, suppressors, and bait. Always check your state wildlife agency and the land manager before the hunt. If you hunt public land, the U.S. Fish and Wildlife Service explains that hunting access and rules can vary across refuges and units on its National Wildlife Refuge hunting page.

Confirm species, season, and method

Do not assume every predator is open year-round or that every method is legal. Coyotes may be treated differently from bobcats, foxes, raccoons, or other furbearers. Night hunting, thermal devices, electronic calls, and centerfire rifles can also have separate rules. The safe habit is to check the current regulation before each season and again before traveling to a new state.

Use fair-chase judgment

Legal does not always mean wise. Keep fair-chase ethics in the decision. The Boone and Crockett Club’s Fair Chase Statement is a useful reminder that the hunt should give wild animals a real chance to avoid the hunter and should respect the land, the animal, and other people nearby.

Respect landowners and other hunters

Predator calling can carry across property lines. Know where you are allowed to hunt, where neighboring homes and livestock are located, and where other hunters may be set up. If a stand creates pressure near a boundary, road, house, barn, or trail, choose a different stand.

Wind and Stand Choice

Wind is the main planning tool. A good call sequence can fail quickly if your scent blows into the exact route a predator wants to use. Instead of fighting the wind, set the stand so the animal can approach naturally while you still watch the downwind side.

Use crosswind when possible

A crosswind setup often gives the best balance. The sound pulls from one direction, the animal tries to get scent from another, and you watch the likely downwind approach. It does not promise a shot, but it gives you a better view of the route an animal may choose.

Keep cover behind you

Sit with brush, a tree line, a fence row, a hay bale, or a slope behind you when possible. A clean backdrop breaks up your outline. Avoid sitting on a skyline or in bright open ground where small movements are easy to spot.

Plan the exit before calling

Predators can be close before you see them. Walk in quietly, close gates, avoid shining lights where they are not legal or safe, and leave by a route that does not spread scent through the cover you want to hunt next time. A noisy exit can burn a useful stand for later hunts.

Calling Plan

Calling should match the place, pressure, and season. Loud, constant sound is not always better. Many stands work best with a short opening sequence, a quiet pause, then a second sound or lower-volume repeat if nothing shows.

Start with the volume that fits the cover

In tight brush, start softer. A loud first sound can startle an animal that is already close. In open country or wind, more volume may be needed, but it should still sound natural for the distance. If you use an electronic caller, place it where the animal’s attention goes away from your body.

Give the stand time

Some coyotes come fast. Bobcats and foxes may take longer and use cover more carefully. If the area has pressure, animals may circle, pause, or hold up. Do not stand up the moment the first few minutes are quiet. Stay still and keep scanning before ending the set.

Change sounds with a reason

Switching sounds every minute can make the stand feel busy and unnatural. Change sounds when the first approach has had time to work, when you need to reach a different distance, or when the season suggests a different trigger. Keep notes on which sounds worked in which cover and weather.

Decoys and Movement

A decoy can help focus attention away from the hunter, but it can also add motion, setup time, scent, and one more thing to carry. Use it only when it helps the stand.

Place movement away from your body

If you use a motion decoy, place it near the caller and away from your seated position. The goal is to pull eyes toward the sound and movement, not toward your hands, face, or rifle. Keep the decoy low enough that it does not create unsafe shooting angles.

Skip decoys in tight or risky setups

In thick cover, near roads, near livestock, or near property boundaries, a decoy may not help. It may also bring attention to a spot where you do not have a safe lane. If the setup already has enough cover and natural movement, simple can be better.

Control your own movement

Predators see small changes. Keep your hands low, adjust the rifle or shotgun before starting the stand, and turn your head slowly. If you need to move, wait until the animal is blocked by cover or looking away.

Shot Safety and Target ID

Safety decides whether a shot should happen. The National Shooting Sports Foundation’s firearm safety rules are a good baseline: know your target, what is beyond it, and keep the muzzle pointed in a safe direction at all times.

Identify the animal fully

Do not shoot at movement, eyes, sound, or a shape in brush. Confirm the species and make sure it is legal to take. This matters even more near homes, farms, public land boundaries, and areas where dogs may be present.

Check the background

A predator may stop on a ridge, road edge, frozen pond, field entrance, or skyline. If the background is not safe, pass the shot. A missed opportunity is better than an unsafe shot.

Choose realistic lanes

Before calling, mark the lanes where you would actually shoot. Brush, fences, rocks, livestock, roads, and buildings can remove lanes that looked good from a distance. If the safe lanes are too narrow, move to a better stand.

Adjust by Season and Pressure

Predator behavior changes with food, breeding, weather, human pressure, and local prey movement. A stand that works in one month may be poor later in the year.

Early season

Young predators and lower hunting pressure can make early season more responsive. Keep stands clean and avoid overcalling one property. If you educate animals early, later hunts may become harder.

Cold weather

Cold weather can make food needs more important, but it can also make sound carry farther and expose noise from clothing and gear. Pack warmer layers, watch wind chill, and keep gloves thin enough to handle equipment safely.

Pressured areas

In pressured areas, animals may avoid common parking spots, obvious field edges, and loud call sequences. Try quieter entries, less-used wind angles, and stands that cover escape routes rather than only open feeding areas.

Gear Organization

Predator hunting gear should help you stay still and safe. Carry less than you think you need, but keep the right items easy to reach.

Carry the safety basics

Bring your license, required permits, headlamp if legal and needed, first-aid kit, navigation, communication device, and weather layer. If you hunt at night where legal, double-check light, visibility, and land-access rules before leaving home.

Keep the caller setup tidy

Loose remotes, extra batteries, cords, and decoys can create noise when you need to be still. Use one pouch for caller items and check batteries before walking in. If the caller fails, be ready to finish the stand quietly or use a mouth call if legal and safe.

Link the pack plan to the hunt

If your pack is hard to use, the stand becomes harder to hunt. For a better field layout, see our guide on how to organize your hunting backpack. New hunters can also review the first-time hunting guide before building a plan.

Common Mistakes

Predator stands fail for many reasons, but the same problems show up often: poor wind, too much movement, weak target ID, and stands placed where the animal has no safe approach route.

Calling from the wrong wind

If the wind carries your scent into the cover you expect animals to use, the stand is already weak. Move, wait for a better wind, or choose another property. Wind discipline matters more than a favorite calling spot.

Leaving too soon

Fast responses happen, but not every predator runs straight to the sound. Scan slowly before standing up. Many animals are spotted at the edge of cover after the hunter thinks the stand is over.

Using success language too freely

No tactic makes a predator show up on command. Weather, pressure, food, breeding behavior, human activity, and land access all matter. Write notes after each hunt and improve the next stand instead of chasing one magic trick.

For more field planning, read our guide to coyote hunting and prey strategies. If you hunt mixed public land or shared access, our public-land hunting guide has useful access and pressure reminders. For broader seasonal planning, start with deer hunting tips for beginners and adapt the scouting habits to your local predator rules.

FAQ

What is the most important part of a predator hunting setup?

Wind and safe visibility are usually the first two checks. A good stand lets you watch likely approach routes without sending scent into the cover and without creating unsafe shooting angles.

How long should I stay on a predator stand?

It depends on the species, cover, and pressure. Coyotes may respond quickly, while bobcats and cautious predators may take longer. Stay long enough to scan carefully before standing up, especially in brushy areas.

Are electronic calls legal for predator hunting?

Electronic caller rules vary by state, species, season, and land type. Check your current state wildlife regulations before using one, especially for bobcats, foxes, night hunting, and public land.

Should I always use a decoy?

No. A decoy can help in open setups, but it can be unnecessary in tight cover or unsafe near roads, livestock, or property lines. Use one only when it improves the stand.

How do I avoid unsafe shots while predator hunting?

Identify the animal fully, know what is behind it, and decide your safe lanes before calling. Never shoot at sound, eyes, movement, or a shape you cannot confirm.

Public-Land Bowhunting Strategy: Access, Wind, Pressure, and Ethical Shots

Public-land bowhunting is mostly a planning problem: find legal access, avoid the most obvious pressure, use the wind, and choose shot opportunities that match your skill and the rules. The best setup is not the most dramatic one. It is the one you can reach quietly, hunt safely, and leave without making the next sit worse.

Table of contents

Quick Public-Land Bowhunting Plan

Start with legal access, then pick a route that avoids the easiest parking-lot pressure. Hunt a wind that keeps your scent out of bedding cover or likely travel routes. Set up where you can draw without being seen, keep your shot distance realistic, and leave the area with as little noise and ground scent as possible.

Make the first decision at the map

Before you walk in, mark the parking area, property boundary, access trail, water, thick cover, food sources, and likely human pressure. Public land rewards hunters who avoid random wandering. A simple route plan saves energy and lowers the chance of walking through the deer sign you hoped to hunt.

Build a backup plan

Another truck at the gate should not end your hunt. Have a second parking area, a second wind option, and a low-impact scouting route ready. Backup plans help you stay calm and keep you from forcing a bad stand because the first idea was taken.

Keep the hunt legal and quiet

Rules can change by state, weapon type, season, permit, and public-land unit. Check current regulations before every trip. After that, the field goal is simple: move slowly, avoid skyline movement, keep gear quiet, and only hunt a setup that gives you a safe shot and a safe recovery path.

Rules, Access, and Boundaries

Public land can include state wildlife areas, national forests, Bureau of Land Management parcels, wildlife refuges, county land, timber company access, and walk-in programs. Each can have different rules. The U.S. Forest Service offers a useful hunting planning and safety overview, but your state wildlife agency and land manager are the final source for current rules.

Check the exact unit

Do not rely on a general map color alone. Confirm the unit name, season dates, legal weapon, antler rules, blaze-orange rules, bait rules, tree-stand rules, access hours, and any special permit requirements. Some public parcels are open for one method and closed for another.

Respect private boundaries

Public parcels often border private farms, homes, timber land, and leased hunting ground. Mark boundaries before the hunt and keep a margin for safety. If a deer crosses private land after a shot, follow your state rules and get permission where required before recovery.

Use ethical pressure

Legal access does not mean careless access. Do not crowd another hunter, walk through an active setup, or use someone else’s stand without permission. The Boone and Crockett Club’s fair chase statement is a good reminder that good hunting includes respect for animals, land, and other people.

Scout Pressure Before Deer

On public land, human pressure shapes deer movement. Fresh tracks and rubs matter, but so do boot tracks, parking patterns, trail-camera straps, flagging tape, old stands, and easy access routes. Learn where hunters go first, then look for deer routes that avoid that pressure.

Read parking lots and trailheads

Check where vehicles gather on weekends, evenings, and opening week. Obvious parking areas can still produce deer, but the best bow setup may be offset from the main trail, behind a terrain fold, or near a quiet exit route other hunters ignore.

Look for overlooked cover

Small cover pockets near access can hold deer when pressure is high. That might be a brushy ditch, island of cover, creek bend, cattail edge, old clear-cut, or steep bench. The key is not distance alone. It is whether deer feel safer there than on the obvious route.

Scout without burning the spot

Use wind-aware scouting, keep visits short, and avoid walking directly through bedding cover unless the season plan calls for a high-risk move. If you find fresh sign, mark it, back out, and decide whether the wind and access support a hunt.

Wind, Entry, and Exit Routes

A good public-land setup can fail before sunrise if the entry route spreads scent through the bedding cover or food edge you plan to hunt. Wind, thermals, and exit routes should be part of the first plan, not something you fix after getting there.

Hunt a wind you can leave on

Many hunters choose a wind for the sit but forget the exit. If the evening exit blows scent into the main trail, the spot may hunt worse the next day. Plan how you will leave after dark without crossing the best deer movement when possible.

Use terrain to hide movement

Ditches, creek banks, old logging roads, brush lines, and low ridges can hide your approach. Open field edges may look easy on a map, but they often expose movement. Pick the route that keeps you hidden and quiet, even if it takes longer.

Avoid overusing one access route

If every hunt starts and ends on the same path, deer may learn that pressure. Rotate access when legal and practical. Even small changes can help protect a good stand from repeated ground scent and noise.

Stand and Ground Setup Choices

Public-land bowhunters need setups that match the rules and the terrain. Some areas allow portable stands or saddle setups. Others restrict screw-in steps, cutting limbs, permanent stands, or overnight gear. Check the rules before carrying equipment in.

Set up for the draw

A bow setup is not only about seeing deer. You need enough cover to draw without being picked off. Place the setup where a tree, brush screen, terrain edge, or momentary blind spot lets you come to full draw before the deer enters the lane.

Keep lanes natural

Do not cut lanes unless the land rules clearly allow it. Even when trimming is legal, keep it modest. A natural opening, trail pinch, creek crossing, fence gap, or inside corner often works better than forcing a large open lane that makes deer nervous.

Know when ground setups make sense

Ground setups can work when trees are poor, cover is thick, or a mobile stand would be noisy. Sit with cover behind you, clear only the minimum foot space needed, and keep the bow positioned so movement is controlled.

Shot Discipline for Bowhunters

Public-land success should not come at the cost of poor shot judgment. A close deer can still be a bad shot if the angle, distance, brush, alertness, or background is wrong. The International Hunter Education Association has hunter safety resources through IHEA-USA that are worth reviewing before the season.

Set a personal distance limit

Your field limit should be shorter than your best backyard group. Wind, cold hands, steep angles, low light, and a live animal all add pressure. Pick a distance that you can repeat from hunting positions, not only from a flat practice range.

Watch angle and body language

Quartering-away shots are often cleaner than steep, frontal, or hard-quartering angles. An alert deer can move at the shot. If the deer is tense, facing you, screened by brush, or already leaving, wait or pass.

Mark the shot before moving

After the shot, pick a landmark where the deer stood and where it was last seen. Listen. Wait if the situation calls for it. Rushing into the trail can make recovery harder and can push a wounded deer farther.

Mobile Gear and Pack Setup

Public-land bowhunting favors quiet, simple gear. Carry what helps you hunt safely and recover ethically, but avoid packing so much that every move becomes noisy and slow.

Pack for the full exit

Include a headlamp, backup light, first-aid kit, knife, game bags where needed, license, tags, water, snacks, weather layer, and a way to navigate after dark. If you need help organizing the load, use our guide on how to organize your hunting backpack.

Quiet every loose item

Metal buckles, stand parts, carabiners, and loose tools can ruin a calm entry. Tape, wrap, or separate noisy items before the season. Test the pack by walking, kneeling, and drawing at home.

Carry less on short hunts

A short evening hunt near the truck does not need the same load as an all-day sit. The lighter the setup, the easier it is to move carefully and adapt to fresh sign.

After the Shot and Recovery

Recovery planning starts before the shot. Public land may involve other hunters, boundaries, thick cover, water, steep terrain, and poor phone service. Think through the recovery route before choosing a lane.

Know the rules for tracking

Some states have rules around tracking dogs, crossing boundaries, tagging, quartering, evidence of sex, and transportation. Check those rules before the season. If recovery may cross private land, permission matters.

Protect the sign

Do not stomp through the impact site. Mark the spot, take a quiet breath, and look for hair, blood, tracks, and direction of travel. Move slowly and avoid spreading sign with your boots.

Ask for help early

If the shot looked poor, the blood trail is weak, or the deer crossed a boundary, pause and get help. Good recovery decisions are part of ethical bowhunting.

Common Public-Land Mistakes

Most public-land bowhunting problems come from rushing. Rushed access, rushed setup, rushed shot decisions, and rushed recovery all create avoidable trouble.

Hunting sign with no access plan

Fresh sign is useful only if you can hunt it on the right wind and reach it without warning deer. If the access is poor, save the spot for a better day or scout a different angle.

Competing with other hunters

Do not turn the hunt into a race from the parking lot. If another hunter is already headed toward your plan, adjust. Public land is shared land, and a calm backup plan is better than crowding.

Using story language instead of field notes

Real improvement comes from notes: wind, access, sightings, pressure, acorns, crop status, water, moonlight if relevant, and recovery details. Save the big words for camp. Use field notes to make the next hunt better.

For a wider public-land approach, read our public-land deer hunting guide. Newer hunters should start with the first-time hunting guide. If you are still building seasonal habits, our deer hunting tips for beginners can help with scouting, timing, and shot discipline.

FAQ

How do I find less pressured public-land bowhunting spots?

Start by identifying where most hunters park and walk. Then look for legal access to overlooked cover, terrain breaks, small bedding pockets, creek crossings, or routes that require quieter planning rather than just a longer walk.

Should I hunt far from the parking lot?

Distance can help, but it is not the only answer. A close spot with poor human traffic and good wind can be better than a far spot that every serious hunter uses. Pressure, access, and wind matter together.

What wind is best for public-land bowhunting?

The best wind keeps your scent out of bedding cover, food edges, and likely travel routes while still letting you enter and exit cleanly. If the wind helps the sit but ruins the exit, wait for a better plan.

Can I leave a tree stand on public land?

Rules vary by state and land manager. Some areas allow temporary stands with dates and identification rules, while others restrict overnight gear. Check the current regulation for the exact property before leaving equipment.

What should I do if another hunter is near my setup?

Give them space and move to a backup plan. Public land is shared, and crowding can create safety problems and poor hunting for both people.

Unexpected Buck Encounter: Calm Shot Decisions, Wind, and Recovery

An unexpected buck encounter is usually won or lost by calm decisions. Do not rush to move, call, or shoot. Confirm the wind, read the buck’s body language, wait for a safe angle, and only take a shot that fits your practiced range, legal rules, and recovery plan.

Table of contents

Quick Plan for an Unexpected Buck

If a buck appears where you did not expect him, freeze first. Move only when his eyes are blocked, his head is down, or cover hides your motion. Range the lane if you can do it without being seen, check the background, and wait for a broadside or quartering-away angle that matches your weapon and skill.

Slow the moment down

Surprise creates bad movement. A hunter who rushes often bumps the deer, draws too early, shoulders the firearm at the wrong time, or takes a poor shot. The first job is to stay still enough to understand what the buck is doing.

Decide if the shot is real

Seeing a buck is not the same as having a shot. Brush, angle, range, wind, other hunters, property lines, roads, and low light can all make a tempting shot wrong. Decide before raising the weapon whether the shot is safe and ethical.

Let the buck make the next move

Many unexpected encounters give you a second chance if you do not panic. A buck may pause, feed, turn, or step into a better lane. If he is not alarmed, patience can create a cleaner decision.

Prepare Before the Hunt

Unexpected deer feel less chaotic when your gear, lanes, and limits are already set. Good preparation does not remove surprise, but it gives you a simple plan when it happens.

Set a personal shot limit

Your field limit should be based on practice from real hunting positions, not your best group on a calm range. Cold hands, steep angles, wind, buck fever, and uneven footing all matter. Pick a limit you can repeat under pressure.

Know the legal details

Check current state regulations before the hunt: season dates, weapon rules, antler restrictions, tagging, shooting hours, blaze-orange rules, and recovery requirements. The International Hunter Education Association offers hunter safety resources through IHEA-USA, but your state wildlife agency is the final source for current deer rules.

Mark safe lanes early

Before the sit settles in, mark the lanes where you would actually shoot. Identify brush, fences, roads, buildings, livestock, skyline areas, and property lines. If a buck appears later, you will already know which lanes are off limits.

Read Buck Behavior

A buck’s body language tells you how much time you may have. The right move for a relaxed deer is different from the right move for a tense deer.

Relaxed deer

A relaxed buck may feed, browse, scent-check, or move slowly with his head down. This is your best chance to wait for the right angle. Move in small pieces only when his eyes are hidden or pointed away.

Alert deer

An alert buck may stare, stomp, lift his head, swing his ears, or lock onto a sound. Do not force movement when he is studying the area. If the deer relaxes, you may get another chance. If he stays tense, passing may be the better decision.

Moving deer

A walking buck can create a short window. Avoid rushing a shot through brush or at a poor angle. If you need him to stop, use a soft mouth sound only when you are already ready and the lane is safe. Do not use a loud sound that startles him into a jump.

Wind, Cover, and Movement

Wind and movement matter most when a deer is close. The buck may not know you are there yet, but one swirl of scent or one sharp movement can end the encounter.

Watch the downwind side

Bucks often use wind to check cover, food edges, or doe groups. If the wind is wrong, be realistic. You may have only seconds before he catches your scent. Do not move unless the shot is already safe and within your limit.

Use cover to move

Draw, shoulder, range, or adjust only when a tree, brush screen, terrain fold, or the buck’s own body position hides the motion. Smooth movement beats fast movement. If you cannot move cleanly, wait.

Control noise

Unexpected encounters expose noisy gear. Loose zippers, metal buckles, hard calls, and clanking stands can ruin a close deer. Keep key gear in the same place every hunt and quiet your pack before the season. Our guide on organizing your hunting backpack can help with that setup.

Shot Discipline

Shot discipline is the center of the whole encounter. A buck that surprises you is still not worth a poor shot. The National Deer Association has useful deer-recovery and shot-placement education on its deer hunting education site.

Wait for the angle

Broadside and slight quartering-away angles are usually easier to judge than hard-quartering, frontal, or steep-angle shots. If brush covers the vitals or the deer is too alert, wait. A passed shot is part of responsible hunting.

Confirm the background

Know what is behind the deer. This matters with firearms, crossbows, and bows. Roads, houses, livestock, other hunters, skylines, and property boundaries can make a shot unsafe even if the deer is in range.

Do not let antlers rush you

Antlers can make a hunter forget the plan. Use the same process for every deer: legal animal, safe background, known range, good angle, steady position, and recovery plan. If one piece is missing, wait or pass.

After the Shot

The work is not over after the shot. Recovery decisions should be calm, legal, and based on what you saw and heard.

Mark the shot location

Pick a landmark where the deer stood and where you last saw him. Listen carefully. Note the direction of travel, body reaction, and any sound of a crash or movement. These details help you avoid guessing later.

Wait when the sign says wait

Recovery timing depends on shot placement and sign. If the shot looked poor or uncertain, slow down and get help. Pushing too soon can make recovery harder. Follow your state rules for tracking, tagging, and crossing property lines.

Protect the blood trail

Move slowly, mark blood without stepping on it, and avoid trampling the impact site. If you lose sign, return to the last confirmed mark and restart from there. Do not turn the search into random walking.

Public Land and Hunting Pressure

Unexpected buck encounters are common when pressure changes deer movement. Other hunters, weather, rut activity, food changes, and access routes can push deer into places they do not use every day.

Use pressure without crowding

On public land, deer may skirt parking areas, trails, and obvious stands. Hunt escape cover and overlooked edges, but give other hunters room. Our public-land deer hunting guide covers access and pressure planning in more detail.

Watch midday movement

Late arrivals, hunters leaving stands, farm activity, and weather shifts can move deer outside the usual first-light and last-light windows. If conditions are good, staying longer can be useful.

Keep a flexible plan

If fresh sign or pressure changes the day, adjust without rushing. A backup stand, a still-hunting route, or a quiet observation sit can be better than forcing the original plan.

Common Mistakes

Most mistakes in a surprise buck encounter come from speed: moving too fast, shooting too fast, tracking too fast, or changing the plan too fast.

Drawing or shouldering too early

If you move while the buck is looking at you, the encounter may end immediately. Wait for cover, a head turn, or a better moment. Being ready matters, but being seen matters too.

Taking a shot outside your real limit

A bigger buck does not extend your range. Use the limit you set before the hunt. If the deer is beyond that limit, keep watching and hope for a closer chance.

Leaving no recovery plan

Before any shot, think about where the deer may go, whether you can legally recover there, and how you will mark sign. A good shot decision includes what happens after impact.

Field Checklist

Use this short checklist when a buck appears unexpectedly. It is meant to slow the decision down.

Before moving

  • Is the buck relaxed, alert, or leaving?
  • Is the wind about to give you away?
  • Can you move without being seen?
  • Is the animal legal under current rules?

Before shooting

  • Is the range inside your practiced limit?
  • Is the angle clean?
  • Is the background safe?
  • Is there brush, fence, or cover in the path?

After the shot

  • Mark where the deer stood.
  • Mark where you last saw him.
  • Listen before climbing down or moving.
  • Follow recovery rules and get help if the sign is uncertain.

For broader deer planning, read our deer hunting tips for beginners. If you are building a first-season plan, start with the first-time hunting guide. For access and pressure strategy, use the public-land deer hunting guide.

FAQ

What should I do first when a buck appears unexpectedly?

Freeze and read the situation. Check the buck’s body language, wind, range, angle, and background before moving. A calm pause often prevents the biggest mistakes.

Should I stop a walking buck with a sound?

Only if you are already ready, the lane is safe, and the sound will not create a rushed shot. Use a soft sound. If the deer is tense or the shot is not ready, do not force it.

How far should I shoot at an unexpected buck?

Use the distance you can repeat from real hunting positions under pressure. Do not extend your range because the deer is larger than expected.

What if the buck crosses onto private land after the shot?

Follow your state rules and get landowner permission where required before crossing. Plan for this possibility before taking shots near boundaries.

How do I avoid rushing the shot?

Use a simple process: legal deer, safe background, known range, clean angle, steady position, and recovery plan. If any piece is missing, wait.

Forest Hunting Guide: Safety, Habitat, Tracks, Wind, and Ethical Shots

Forest hunting starts with identification, safety, and movement control. Before you hunt any animal in timber, confirm the season and species rules, know where other people may be, use the wind, move slowly, and only take shots with a safe background and a clear legal target.

Table of contents

Quick Forest Hunting Plan

Start with the map and the rulebook. Mark legal access, boundaries, trails, water, bedding cover, food sources, and safe exit routes. In the woods, move with the wind in mind, stop often, listen more than you walk, and avoid shooting through brush or at movement you cannot identify.

Pick one target species

Forest hunters may see deer, turkey, squirrels, rabbits, predators, and other wildlife on the same property. The rules are not the same for every animal. Decide what you are hunting before the trip and learn the legal season, method, limits, and identification details for that species.

Move less than you think

In thick timber, noise and motion travel farther than hunters expect. A slow step, a long pause, and a careful scan often work better than covering ground quickly. Use terrain, trunks, and shade to break up your outline.

Leave a clear recovery plan

Before any shot, think about where the animal may go, whether the background is safe, and whether you can legally recover it. Forest cover can hide sign quickly, so mark shot locations and last sightings carefully.

Rules and Species ID

Forest hunting rules vary by state, public-land unit, season, species, weapon, and method. The U.S. Forest Service has a useful hunting planning overview, but your state wildlife agency and land manager are the final sources for current rules.

Check the exact property

Do not assume every forest parcel follows the same rule. Some areas restrict bait, fires, vehicles, tree stands, night access, ammunition type, or hunting methods. Check the exact unit before you go.

Identify before aiming

Never shoot at sound, color, antler flash, wing movement, or a shape in brush. Confirm the animal, the legal status, and what is beyond it. Low light and thick cover make identification harder.

Know other-use pressure

Public forests may have hikers, dog walkers, horseback riders, mushroom hunters, timber workers, and other hunters. Wear required visibility clothing and avoid risky shots near trails, roads, camps, and boundaries.

Read Forest Habitat

Animals use forests for food, cover, travel, and bedding. Good hunting starts by learning which part of the forest serves which job.

Food sources

Look for acorns, browse, soft mast, crop edges, clear-cuts, berries, green shoots, and water. Food changes through the season, so old sign is not always current sign.

Cover and bedding

Thick cover, blowdowns, creek bends, young growth, cedar pockets, and south-facing slopes can all hold animals. Hunt near cover with care. Walking directly through bedding areas can damage the next sit.

Travel routes

Forest animals often use terrain to move safely. Watch saddles, benches, creek crossings, logging roads, fence gaps, and edges where open timber meets thick cover.

Wind, Noise, and Movement

Wind and noise shape forest hunts. Swirling wind, crunchy leaves, and close-range encounters make small mistakes easy to notice.

Use wind checks

Wind in timber can change with ridges, hollows, thermals, and weather shifts. Check it often. If the wind is carrying scent into the cover you plan to hunt, adjust the route or the setup.

Step with the forest

Move during light wind, falling leaves, distant noise, or natural sound. Stop when the woods go quiet. Avoid brushing against dry branches or letting gear scrape bark.

Pause to scan

After a short move, pause long enough for the woods to settle. Scan with your eyes before turning your head. Many animals are spotted after the hunter stops, not while walking.

Shot Safety in Timber

The National Shooting Sports Foundation’s firearm safety rules are a strong baseline for any firearm hunt. Bowhunters and crossbow hunters should apply the same target-identification and background discipline.

Do not shoot through brush

Branches can deflect arrows, bolts, and bullets. If the path is not clear, wait for a better lane. A blocked shot is not an ethical shot.

Know the background

Forest backgrounds can hide roads, houses, livestock, trails, and other hunters. Never take a skyline shot or a shot toward unknown cover.

Control close encounters

In timber, animals may appear at close range. Stay calm, confirm legality, and do not rush the shot just because the window is short.

Tracks, Sign, and Recovery

Forest sign can be rich but easy to misread. Fresh tracks, droppings, rubs, feathers, scratchings, beds, and trails all matter, but freshness and context matter more.

Separate fresh from old

A trail may look strong because animals used it last month. Check track edges, fresh droppings, disturbed leaves, and current food. Hunt current movement, not just old memories.

Mark sign during recovery

After a shot, mark the impact location and last sighting. Move from sign to sign. If the trail weakens, return to the last confirmed point instead of wandering.

Respect boundaries

If recovery crosses private land, follow your state rules and get permission where required. Plan for this before taking shots near property lines.

Simple Forest Hunting Gear

Forest gear should be quiet, legal, and easy to reach. Too much gear can slow movement and add noise.

Carry safety basics

Bring license, tags, map, compass or GPS, headlamp, first-aid kit, water, weather layer, and a way to communicate. For pack setup, see our guide on organizing your hunting backpack.

Quiet the pack

Wrap noisy tools, shorten loose straps, and keep metal items from touching. Test the pack at home by walking, kneeling, and shouldering or drawing safely.

Dress for visibility and weather

Follow blaze-orange or visibility rules for your season. Layer for sweat and cold stops. Wet clothing, wind, and long sits can turn a mild day uncomfortable.

Ethics and Low-Impact Habits

Good forest hunting leaves the land usable for wildlife, other hunters, and non-hunters. The Leave No Trace 7 Principles are useful for campsite, trash, trail, and access habits.

Pack out trash

Pick up spent shells, food wrappers, flagging where required, and broken gear. Leave the site cleaner than you found it.

Respect other users

Give other hunters room. Be courteous to hikers and land staff. A calm interaction protects access better than an argument at a trail or gate.

Use fair-chase judgment

Legal choices still need judgment. Avoid unsafe shots, respect wounded-game recovery, and do not treat wildlife as targets only. A good hunt includes restraint.

Common Mistakes

The most common forest hunting mistakes are simple: moving too fast, ignoring wind, shooting at poor lanes, and failing to check current rules.

Walking through the best cover

Do not scout or enter straight through bedding cover unless the plan calls for that risk. Use edges, terrain, and wind to protect the spot.

Trusting old sign

Old tracks and rubs can teach patterns, but current food and fresh movement decide today’s hunt. Check what changed since the last visit.

Forgetting the exit

A clean entry is only half the plan. Leave without crossing the main trail or bedding cover when possible, especially if you want to hunt the area again.

For first-season planning, start with our first-time hunting guide. For public access and pressure, read the public-land deer hunting guide. For shot and recovery decisions, see our guide to a suspected liver shot on a deer.

FAQ

What animals can you hunt in a forest?

It depends on the state, season, property, and license. Deer, turkey, squirrels, rabbits, predators, and other game may be legal in some forests and closed in others. Check current regulations before hunting.

How do you move quietly in the woods?

Take short steps, pause often, avoid dry branches, secure loose gear, and move when wind or natural sound covers noise. Slow movement usually beats fast movement.

Is forest hunting safe on public land?

It can be safe when hunters follow visibility rules, identify targets, know the background, avoid trails and roads, and respect other users. Never shoot at movement or sound.

Where should I look for animals in the forest?

Look near food, water, bedding cover, travel routes, edges, creek crossings, benches, saddles, and fresh sign. Current sign matters more than old sign.

Should I hunt from a stand or still-hunt?

Both can work. A stand is useful near predictable movement. Still-hunting can work when wind, noise, and visibility allow slow movement. Choose the method that fits the terrain and rules.

Outdoor Adventure Hunting: 10 Safety Checks Before a Field Trip

Outdoor adventure hunting is safest when the trip is planned before anyone leaves the driveway. Start with the legal season, land access, weather, route, communication plan, first-aid kit, and a clear rule for when the group turns around. A good hunt is not only about finding game; it is about getting everyone home with the land, other hunters, and wildlife respected.

This guide is for hunters planning a day hunt, scouting trip, shed walk, or mixed outdoor trip with family or friends. Use it as a field-planning checklist, then check your state wildlife rules and local land manager requirements before the trip.

Table of contents

Outdoor Adventure Hunting: Quick Trip Plan

Before the trip, write down where you are going, who is going, when you expect to return, and what you will do if weather, injury, road closures, or low light change the plan. Share that plan with someone who is not going on the trip.

Pick one clear purpose

A scouting walk, a youth learning trip, a deer hunt, and a long backcountry hike all need different pacing. Decide the main purpose first so the route, gear, and expectations match the people in the group.

Set a turn-around time

Many outdoor problems start when a group keeps pushing after daylight, energy, or weather has changed. Set a return time before the trip starts and treat it as part of the plan.

Match the trip to the least experienced person

If a new hunter or child is with you, plan around their pace, clothing, food, and attention span. A shorter safe trip teaches more than a long trip that becomes cold, rushed, or frustrating.

Rules, Access, and Permission

Legal access comes first. Check season dates, license requirements, weapon rules, blaze-orange requirements, tagging rules, public-land boundaries, and local closures before the trip.

Check state hunting regulations

State wildlife agencies set many of the rules hunters must follow. The U.S. Fish and Wildlife Service hunting page is a useful federal starting point, but your state agency and the specific property rules are the final reference for most hunts.

Confirm land access

Do not assume a gate, trail, field edge, or old family route is open. Confirm public boundaries or written private-land permission before entering. If the property uses check-in stations, permits, or parking rules, handle those before the morning of the hunt.

Know firearm and bow transport rules

Loaded-status rules can vary by state, vehicle, public land, and equipment type. Check the current rules for firearms, bows, crossbows, muzzleloaders, and ammunition before traveling.

Route, Weather, and Timing

Weather and daylight control the trip more than enthusiasm does. A route that looks simple in fair weather can become slow or unsafe with wind, snow, mud, heat, or high water.

Read the forecast before leaving

Use the National Weather Service forecast for the hunting area, not only your home address. The NWS weather safety page is a practical reference for storms, cold, heat, flooding, and other field risks.

Carry a paper backup

Phone maps are helpful, but batteries die and coverage drops. Carry a paper map, compass, or offline navigation backup for unfamiliar land. If using GPS, save the route before leaving service.

Plan for low light

Morning setup and evening recovery often happen near darkness. Bring a headlamp, spare batteries, and reflective markers where legal and appropriate. Do not rely on a phone light as the only light source.

Gear That Matters

Good gear supports the plan. It should help with safety, weather, navigation, hydration, meat care, and communication before it adds weight or distraction.

Start with clothing and footwear

Choose boots and layers for the terrain and temperature. Wet cotton, poor socks, and stiff new boots can make a short hunt miserable. Break in footwear before a longer trip.

Pack first aid and emergency basics

Carry a small first-aid kit, blister care, a tourniquet if you are trained to use one, fire starter, whistle, emergency blanket, water, snacks, and any personal medication. The Ready.gov emergency kit guide is a useful baseline for thinking through emergency supplies.

Keep the pack simple

A heavy pack can slow the group and create fatigue. Pack what the trip needs, then remove items that do not support safety, legal compliance, navigation, weather protection, or game care.

Group Safety

When more than one person is hunting or scouting, communication matters. Everyone should know the safe direction of fire, where others are located, and when the group is moving.

Use clear zones of fire

Before anyone loads or nocks an arrow, agree on safe shooting lanes and no-shoot directions. A missed animal, ricochet, or unseen person beyond the target can turn a trip dangerous quickly.

Make visibility part of the plan

Wear required blaze orange or pink where the law requires it. Even where not required, visibility can help during group movement, public-land hunting, and low-light pack-out.

Check in during the trip

If the group separates, set check-in times and a meeting point. Do not rely only on texting if coverage is weak. Radios, satellite messengers, or a simple route card can help on larger properties.

Land and Wildlife Respect

Outdoor adventure hunting should leave the area in good shape. Respecting land, water, other users, and wildlife keeps access open and makes the trip better for the next hunter.

Follow Leave No Trace basics

Pack out trash, avoid damaging vegetation, use existing trails where appropriate, and keep camps or rest stops clean. The Leave No Trace 7 Principles are a simple outside reference for low-impact outdoor travel.

Handle game responsibly

If hunting, plan for the recovery and pack-out before the shot. Know how far the animal may need to be moved, how meat will be cooled, and who can help if the terrain is difficult.

Respect other users

Public land may include hikers, bird hunters, anglers, land managers, horseback riders, and other deer hunters. Keep interactions calm, avoid crowding, and do not interfere with someone else’s legal use of the land.

Family and Beginner Trips

A beginner trip should build confidence, not prove toughness. Keep the plan short, warm, dry, and easy to end early if needed.

Teach one skill at a time

Navigation, track reading, quiet walking, safe firearm handling, and field dressing are all separate lessons. Pick one or two skills for the day instead of trying to teach everything at once.

Keep food, water, and breaks easy

Hungry or cold beginners stop learning. Pack extra snacks, water, gloves, and a simple place to sit. A good break can save the trip.

End on a good note

Leaving while everyone is still comfortable makes people want to come back. Success may be a track found, a safe shot passed, a bird watched, or a map lesson learned.

Common Mistakes

Most hunting-trip problems come from weak planning, overconfidence, or guessing about rules.

Trusting one app too much

Mapping apps are helpful, but they can be wrong or unavailable offline. Confirm boundaries, carry a backup, and do not cross private land because a screen looked unclear.

Packing gear without a plan

Gear does not replace decision-making. A good pack supports a clear route, weather plan, communication plan, and legal hunt.

Ignoring the exit route

Walking downhill in daylight may feel easy. Coming back uphill in rain, snow, darkness, or with meat can be much slower. Plan the exit before choosing the farthest spot.

Outdoor Hunting Checklist

Use this checklist before a scouting walk, family hunt, or day hunt. Add local requirements for your state, property, season, and equipment.

  1. License, tags, season dates, and property rules checked.
  2. Land access or private permission confirmed.
  3. Route, parking, meeting point, and turn-around time written down.
  4. Weather, daylight, and road conditions checked.
  5. Someone at home has the trip plan and return time.
  6. Navigation backup packed: paper map, compass, or offline map.
  7. First aid, water, snacks, light, and emergency layer packed.
  8. Weapon, ammunition, arrows, or muzzleloader components checked safely.
  9. Blaze-orange or visibility rules handled.
  10. Game recovery, meat care, and exit route planned.

For more field planning, read our first-time hunting guide, tips for hunting in different terrains, and shooting range safety rules.

FAQ

What is outdoor adventure hunting?

It is a hunting or scouting trip planned around outdoor travel, learning, and field experience. It may be a day hunt, shed walk, youth outing, or scouting trip, but it still needs legal access and safety planning.

What should beginners bring on a hunting trip?

Beginners should bring legal documents, weather-appropriate clothing, broken-in footwear, water, snacks, a headlamp, first aid, navigation backup, and any required safety colors or gear.

How do I make a hunting trip safer for kids?

Keep the trip short, choose easy terrain, bring extra layers and food, teach one skill at a time, and set clear safety rules before anyone handles hunting equipment.

Do I need a GPS for a short hunt?

A GPS or mapping app helps, but it should not be the only navigation tool. Carry an offline map or paper backup when land boundaries, weather, or weak cell service could be a problem.

How can hunters reduce impact on public land?

Stay within legal access, pack out trash, avoid damaging habitat, respect other users, follow posted rules, and use low-impact travel habits from established outdoor ethics guidance.

Beginner Hunting Trip Planning: Safety, Gear, Licenses, Scouting, and Recovery

A first hunting trip should be planned around safety, legal access, simple gear, realistic expectations, and a clear recovery plan. Beginners do not need a complicated expedition. They need the right license, the right season, safe firearm or bow handling, weather-appropriate clothing, navigation, a mentor when possible, and a plan for what happens after a successful shot.

The best beginner hunting trip is usually close to home, short enough to stay manageable, and focused on learning rather than chasing a trophy. Choose one species, one legal area, one method, and one simple plan. When the basics are handled well, the trip becomes safer, calmer, and much more enjoyable.

Table of contents

Quick Answer

For a beginner hunting trip, start by choosing one legal species and one accessible hunting area. Complete hunter education if required, buy the correct license and tag, learn the local rules, confirm land access, practice safely with your equipment, pack essential safety gear, and plan how you will recover, tag, transport, and process game if the hunt is successful.

Do not make the first trip too complicated. A half-day or one-day hunt close to home can teach more than a rushed multi-day trip with too much gear and too many unknowns. The goal is to return safely with better field judgment, whether or not you fill a tag.

Choose the Right First Hunt

The right first hunt is legal, realistic, and forgiving. Small game, turkey, upland birds, or a simple deer hunt with an experienced mentor can be good options depending on your state and season. Avoid starting with a remote, physically demanding, gear-heavy hunt unless you already have strong outdoor skills and trustworthy help.

Pick One Species

Trying to learn deer, ducks, coyotes, and turkeys at the same time creates confusion. Pick one species, study its season and habitat, and build the trip around that animal. This makes gear, scouting, legal rules, and shot decisions much easier.

Keep Travel Simple

A nearby public area or private property with clear permission is better than an ambitious trip you cannot scout. Close-to-home hunts let you learn without high travel cost, complicated lodging, or pressure to force a bad decision because you came a long way.

License, Tags, and Regulations

Before buying gear, confirm the legal requirements. Most hunters need a hunting license, and many species require tags, permits, stamps, hunter education, or special area access. Rules can change by state, county, season, weapon type, age, and land ownership.

Use Official Sources

Use your state wildlife agency as the authority for regulations. National resources such as Hunter-ed can help explain hunter education and safety basics, but your state agency controls the exact rules for your hunt. Save the regulation PDF or web page offline in case service is poor in the field.

Check Property-Specific Rules

Public land, wildlife management areas, refuges, and private leases may have special rules. Some require check-in, quota permits, stand removal, non-toxic shot, parking limits, or specific legal weapons. If you are planning a deer hunt on public land, our public land deer hunting guide is a useful next read.

Safety Planning

Safety is the foundation of a good hunting trip. Firearm or bow safety, navigation, weather, communication, first aid, and physical limits all matter. A beginner should never treat safety as something to figure out after arriving.

Firearm and Bow Safety

Know how to load, unload, carry, and make your equipment safe before the trip. Keep the muzzle pointed in a safe direction, keep your finger off the trigger until ready to shoot, identify your target and what is beyond it, and follow all range and field rules. The NSSF firearm safety rules are a strong refresher for hunters using firearms.

Tell Someone Your Plan

Give a trusted person your hunting location, parking area, expected return time, and emergency contact plan. Carry a charged phone, power bank, map, compass or GPS, headlamp, water, and basic first aid. If you hunt where cell service is unreliable, plan accordingly.

Scouting and Location Planning

Scouting helps you avoid wandering randomly. For beginners, scouting is partly about finding game sign and partly about understanding access, terrain, wind, parking, property boundaries, and safe shot directions. A simple map review before the trip can prevent many mistakes.

Digital Scouting

Mark parking areas, legal boundaries, trails, water, food sources, terrain funnels, open fields, thick cover, and likely bedding areas. Also mark places to avoid, such as homes, roads, livestock, trails used by hikers, or unclear boundaries.

Boots-On-Ground Scouting

If legal and practical, visit before the hunt. Look for tracks, droppings, trails, feeding sign, rubs, feathers, beds, or fresh movement. Also look for other hunters’ sign, unsafe shooting directions, and quiet entry routes.

Beginner Hunting Gear

Beginner gear should be reliable, legal, and simple. Do not overpack, but do not skip safety essentials. Build your list around the species, season, weather, terrain, and distance from the vehicle.

Core Checklist

Bring license and tags, legal weapon and ammunition or arrows, eye and ear protection for practice or range confirmation, blaze orange if required, knife, gloves, headlamp, water, snacks, first aid, navigation, weather layers, game bags or drag, and a way to contact help. Our essential range gear checklist can help beginners build good safety habits before field season.

Avoid Gear Overload

More gear does not automatically make you more prepared. Heavy packs make beginners noisy and tired. Carry what the hunt requires, then add only what solves a real problem. If you cannot explain why an item is in your pack, it may not need to come.

Weather and Clothing

Weather can make or break a beginner hunt. Dress in layers, avoid cotton in wet or cold conditions, bring rain protection when needed, and match boots to terrain. Being cold, soaked, overheated, or blistered leads to rushed decisions.

Layering Basics

Use a moisture-managing base layer, insulating layer, and weather-resistant outer layer when conditions call for it. Gloves, socks, and a warm hat can matter as much as a jacket. In warm weather, prioritize hydration, sun protection, and meat-care planning.

Visibility and Camouflage

Camouflage can help in some hunts, but legal safety colors come first. If blaze orange or pink is required, wear it correctly. Do not trade visibility to other hunters for a small concealment advantage.

Opening-Day Plan

Create a simple schedule before the hunt. Decide when to leave, where to park, how to enter, where to sit or walk, when to stop, and what backup plan to use if the first location is crowded or the wind is wrong.

Arrive Early, Move Slowly

Give yourself extra time. Rushing in the dark leads to noise, boundary mistakes, and unsafe handling. Move slowly, check wind, and avoid crossing through bedding or feeding areas unless your plan requires it.

Know When to Quit or Adjust

If the weather becomes unsafe, the area is too crowded, or you are unsure about boundaries, back out and reset. A smart retreat is better than a forced hunt. Beginners build skill by making good decisions, not by staying stubborn.

After-The-Shot Planning

Beginners often plan the hunt but forget the recovery. Before taking a shot, know what you will do next. Watch where the animal goes, mark the shot location, wait when appropriate, follow sign carefully, and get help if needed. If your trip involves deer on shared ground, review our public land deer hunting guide before choosing access and recovery routes.

Tagging and Reporting

Follow your state’s tagging and reporting rules exactly. Some states require immediate tagging, electronic reporting, harvest checks, or specific transport evidence. Know this before the hunt.

Meat Care

Meat care is an ethical responsibility. Field dress and cool the animal as conditions require. Have a plan for dragging, packing, processing, storage, and disposal of remains. Our guide to ethical hunting practices explains why recovery and meat care matter.

FAQ

What should a beginner do before their first hunting trip?

Complete hunter education if required, choose one species, learn the regulations, confirm land access, practice safely with your equipment, pack essential safety gear, and tell someone your plan.

What is the easiest hunt for a beginner?

The easiest hunt depends on your state, season, access, and mentor support. Small game or a simple local deer hunt can be good beginner options because they teach scouting, safety, patience, and field movement without requiring an expensive trip.

How much gear does a beginner hunter need?

A beginner needs legal equipment, safety gear, weather-appropriate clothing, navigation, water, first aid, license and tags, and a recovery plan. Start simple and add gear only when it solves a real field problem.

Should beginners hunt alone?

A beginner can hunt alone where legal, but going with a safe mentor is usually better. If you do hunt alone, choose an easy-access area, share your plan, carry communication, and avoid risky terrain or marginal shots.

What is the biggest beginner hunting mistake?

The biggest mistake is rushing: rushing the plan, rushing the shot, rushing recovery, or rushing through safety checks. Slow, legal, thoughtful decisions make the first trip much better.

Final Thoughts

A beginner hunting trip does not need to be dramatic to be successful. Choose a realistic hunt, follow the rules, practice safely, pack the essentials, respect the land, and plan for recovery before you ever take a shot. If you come home safe, smarter, and more prepared for the next trip, the hunt did its job.

Exit mobile version