First Hunting Experience: 10 Safety Checks for New Hunters

A first hunting experience should start with safety, legal preparation, and realistic expectations. Before the hunt, complete hunter education where required, confirm licenses and season rules, practice with your equipment, plan your route, and hunt with an experienced mentor if possible.

This guide is for new hunters preparing for a first legal hunt. It is support content, not a product roundup, and it is not a substitute for hunter education, state regulations, landowner permission, or hands-on instruction.

Table of contents

First Hunting Experience: Quick Answer

For a first hunting experience, focus on legal compliance, firearm or bow safety, weather, navigation, shot discipline, and recovery planning. Success is not only harvesting game. A safe hunt, a legal hunt, and a clear lesson learned are already good outcomes.

Start with the rules

Check your state wildlife agency for license, tag, season, weapon, land-access, orange clothing, and reporting rules. Do not rely on old advice or another hunter’s memory.

Keep the first hunt simple

Choose a legal species, familiar land, reasonable weather, and a short plan. A simple sit with a mentor is often better than trying to do everything at once.

Plan to pass shots

A new hunter should be ready to pass on poor angles, long distance, unclear targets, unsafe backstops, and rushed opportunities. Passing is part of ethical hunting.

Every first hunt starts with legal details. Regulations vary by state, species, weapon, age, public land, and season.

License and tags

Confirm the exact license, tag, stamp, permit, or harvest authorization you need. Some hunts require species-specific tags or zone-specific permissions.

Season and weapon rules

Archery, crossbow, muzzleloader, shotgun, rifle, and youth seasons can have different dates and equipment limits. Read the current regulation digest before the hunt.

Land access

Public land may have special rules. Private land requires permission. The U.S. Fish and Wildlife Service’s hunting information is a useful federal starting point, but state and property rules still control your hunt.

Hunter Education

Hunter education builds the safety base a beginner needs before carrying a weapon in the field.

Learn the safety rules

Review firearm or bow safety before the hunt. The NSSF firearm safety rules are a clear starting point for muzzle control, target identification, and safe handling.

Know your target and beyond

Never shoot at sound, movement, color, or a partial shape. Identify the animal, confirm it is legal, and confirm what is beyond it.

Understand local ethics

Ethical hunting means staying within your skill, following rules, recovering game responsibly, and respecting other land users.
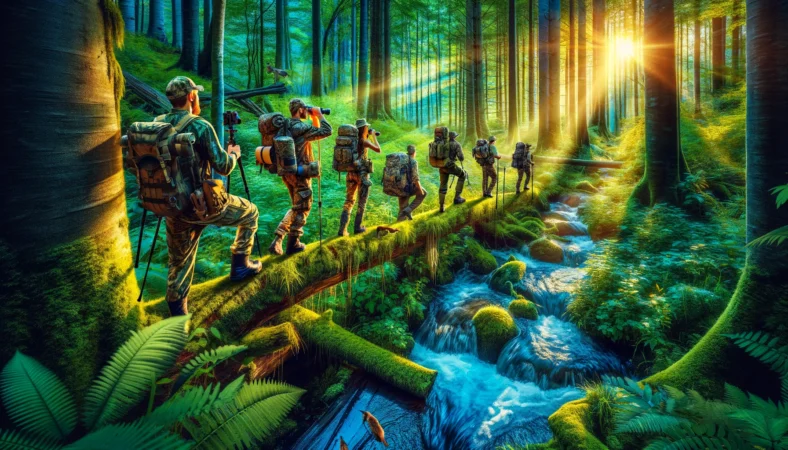
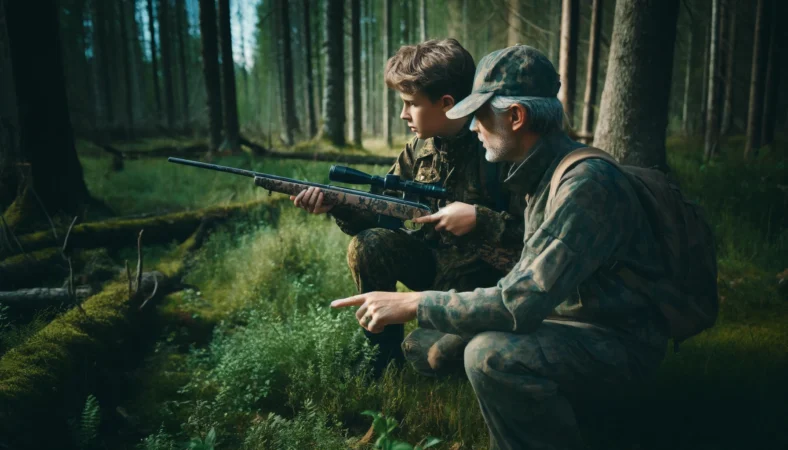
Mentor and Plan

A mentor can help a first hunter avoid rushed decisions. Choose someone calm, legal-minded, and patient.

Set expectations

Talk before the hunt about what species is legal, which shots are acceptable, when you will leave, and what to do if the weather changes.

Share the route

Tell someone where you are going, where you will park, and when you expect to return. Carry a charged phone, map, compass, or GPS as appropriate.

Use a short first hunt

A first hunt does not need to be all day. Shorter hunts can reduce fatigue, poor decisions, and unsafe handling.

Agree on stop rules

Before leaving, decide what will end the hunt: unsafe weather, poor visibility, a tired hunter, unclear property lines, or equipment trouble. Stop rules make it easier to leave before a small issue becomes a serious one.

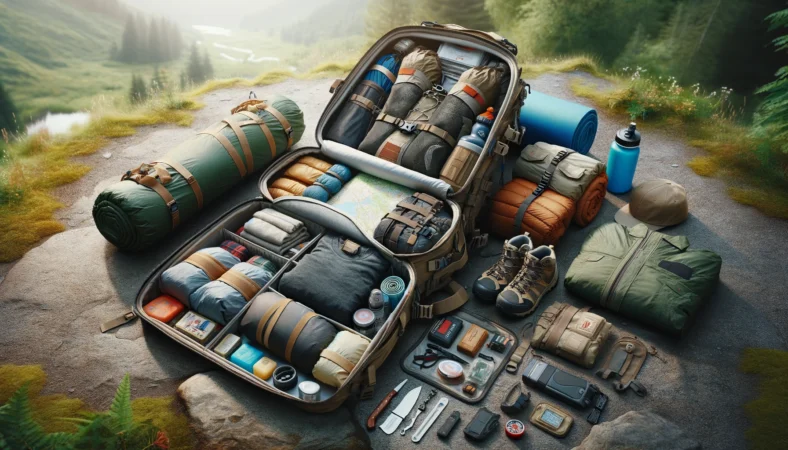
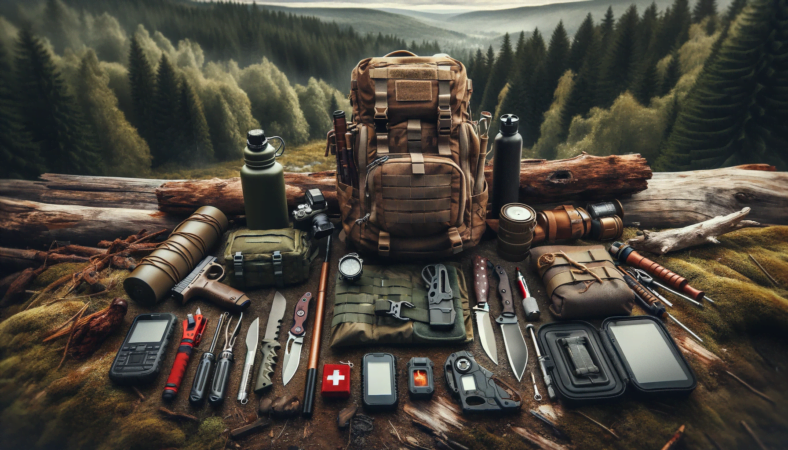
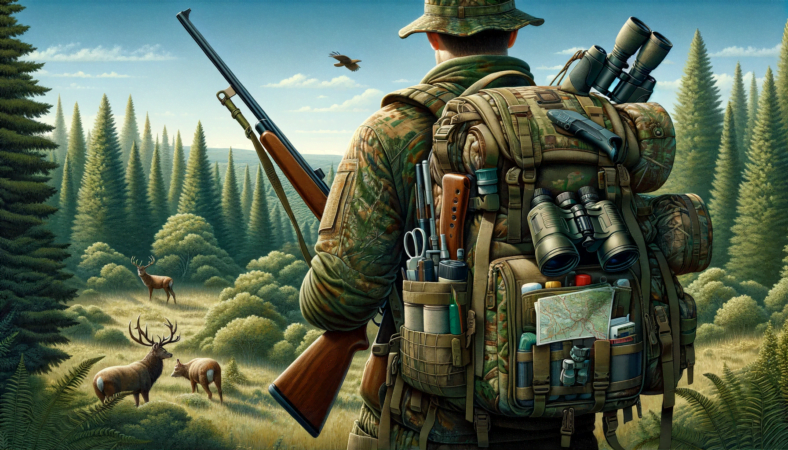
Gear Without Overbuying

New hunters often buy too much gear before learning what they actually need. Start with safety and legal essentials.

Core items

Depending on the hunt, core items may include legal weapon, ammunition or arrows, required orange, license, tags, knife, water, food, light, first aid, weather layers, and navigation.
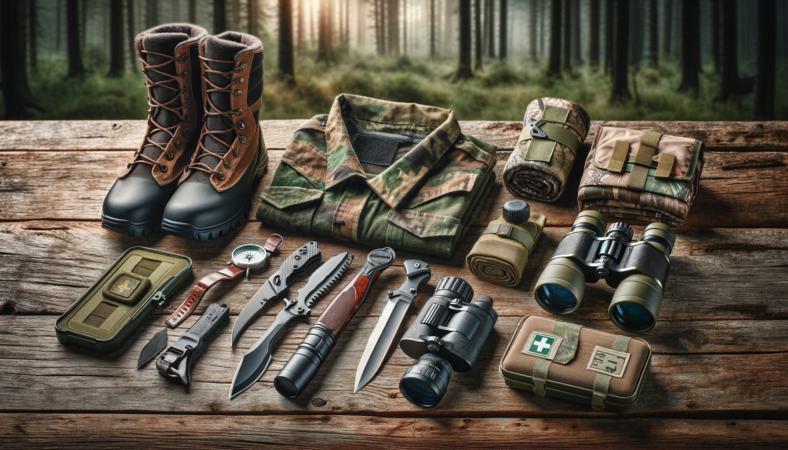
Fit and comfort

Boots, pack weight, and clothing matter because discomfort can lead to shortcuts. Test gear before the hunt.

Skip unnecessary gadgets

Trail cameras, rangefinders, apps, blinds, calls, and scent products can help later, but they should not distract from safety, scouting, and legal basics.

Pack for the walk out

Many beginners plan for the sit and forget the walk back. Keep a headlamp, spare batteries, warm layer, water, and a simple way to mark your route.

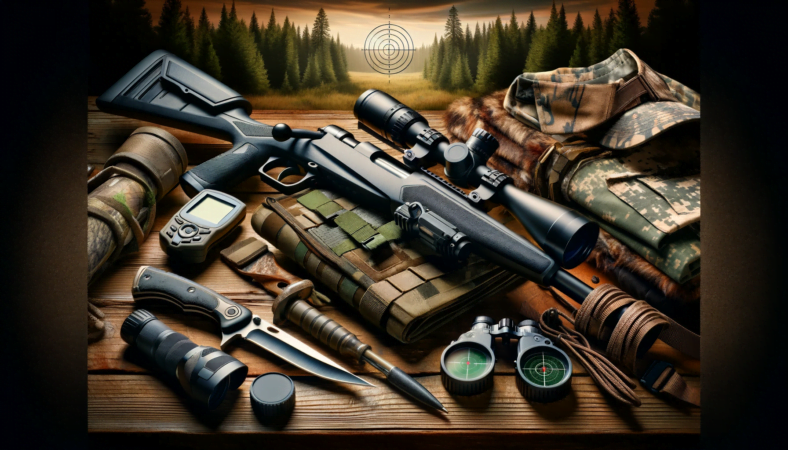
Practice Before the Hunt

Practice should match the hunt. A benchrest group alone does not prove you are ready for field conditions.

Practice realistic positions

Practice from safe, legal positions similar to the hunt: seated, kneeling, standing, from a rest, from a blind window, or from an elevated setup if you will use one.

Know your limit

Set a maximum distance based on repeatable practice, not a best-case shot. Stay inside that limit during the hunt.

Practice loading and unloading

Know how to load, unload, clear, and make your equipment safe before entering the field. Ask a qualified instructor if any step is uncertain.

Practice the no-shot decision

During range or dry practice, call out situations where you would not shoot: animal partly hidden, unsafe backstop, wrong species, too far, hunter movement nearby, or shaky rest. Practicing no-shot decisions makes it easier to stay calm when adrenaline rises.

First Day in the Field

The first day should be slow and deliberate. Arrive early, move quietly, and keep the plan simple.

Check weather and visibility

Use current forecasts and alerts before leaving. The National Weather Service weather safety guidance is useful when wind, lightning, cold, or flooding may affect a hunt.

Control movement

Move with muzzle or broadhead safety in mind. Do not climb fences, cross ditches, or enter stands with a loaded firearm in hand.

Stay patient

Most hunts involve waiting, watching, and learning. Use the time to study wind, sign, access, and animal behavior.

If You Take a Shot

A first harvest adds responsibility. Slow down and follow your mentor, local rules, and safety plan.

Mark the location

Note where the animal stood, the direction it traveled, and the last place you saw it. Avoid rushing into the recovery.

Follow recovery rules

Some states have rules for tagging, reporting, tracking, property boundaries, nighttime recovery, and transport. Confirm those before the hunt.

Learn field dressing safely

Use a sharp knife carefully, wear gloves if appropriate, and ask an experienced hunter for help. Food safety matters from the first cut onward.

Handle the end of the day

Unload or unstring equipment according to the manual and local rules, confirm tags and reporting if there was a harvest, and check that no gear, trash, or personal items are left behind.

Common Beginner Mistakes

Most first-hunt problems come from rushing or trying to do too much.

Skipping the regulation check

Rules change. Check the current season, tag, weapon, and land rules before every hunt.

Overpacking

A heavy pack can make a short hunt harder than needed. Carry essentials and leave nonessential gear at home.

Forcing the shot

If the target, backstop, angle, distance, or legal status is unclear, do not shoot. A safe pass is a successful decision.

Skipping the review

After the hunt, write down what went well, what felt unsafe, what gear stayed unused, and what you need to practice next. A simple written review, done honestly, turns the first hunt into a better second hunt.

For a broader beginner checklist, read our first-time hunting guide. For safety habits, review hunting safety tips. For range behavior, see shooting range safety rules.

FAQ

What should a beginner do before a first hunt?

Complete required hunter education, check current regulations, practice with the equipment, plan the route, and hunt with a responsible mentor if possible.

Does a first hunt need to end with a harvest?

No. A safe, legal hunt where you learn the land and make good decisions is a good first experience.

What gear should a first hunter buy first?

Start with legal requirements, safety gear, weather-appropriate clothing, water, navigation, first aid, and equipment you have practiced with. Avoid buying gadgets before the basics are covered.

How can a beginner hunt ethically?

Stay within your skill limit, identify the target clearly, know what is beyond it, follow regulations, avoid risky shots, and recover game responsibly.

Should a beginner hunt alone?

It is usually better to hunt with an experienced, safety-minded mentor at first. If you hunt alone where legal, share your plan and keep the hunt simple.

How to Organize Your Hunting Backpack: Pack Zones, Weight, Safety, and Checklist

A good hunting backpack is organized by access, weight, and safety. Keep emergency items and navigation tools easy to reach, put heavier gear close to your back, protect food and scent-sensitive items in sealed bags, and leave the items you need first in outside pockets or the top of the pack.

Table of contents

Quick Pack Plan

If you only have a few minutes before a hunt, use this simple layout: safety and navigation in the fastest pocket, water and food near the middle, layers near the top, field tools in a sealed pouch, and heavy items close to your spine. That setup keeps the pack stable while still letting you reach the things you may need in a hurry.

Fast-access pocket

Use the top pocket, hip-belt pocket, or outside admin pocket for items you may need without digging. That usually means a headlamp, small first-aid kit, license, wind checker, rangefinder, extra batteries, whistle, fire starter, and a map or phone backup. The exact list depends on where you hunt, but the point is the same: urgent gear should not be buried under clothing.

Main compartment

The main compartment should hold the bulk of the load: clothing layers, water, food, kill kit or game bags where legal and needed, rain gear, and extra gloves or socks. Use small pouches or dry bags so the pack does not become one loose pile. Labeling is not required, but using the same pouch colors each time makes it easier to find gear in low light.

Outside pockets and straps

Use outside pockets for gear that can handle weather and brush. A water bottle, trekking pole, compact tripod, or wet rain shell may belong outside. Avoid hanging loose metal tools or dangling straps. They catch on limbs, make noise, and can pull your balance off when you climb over deadfall or move through thick cover.

Before You Pack

Backpack organization starts before the first item goes inside. Empty the pack, spread your gear on the floor, and remove anything that does not serve the hunt. A lighter pack is easier to carry, quieter to handle, and less likely to hide the item you actually need.

Match the load to the hunt

A short morning sit near the truck does not need the same loadout as an all-day public-land hunt. For a short hunt, you may only need safety gear, water, a layer, snacks, license, field tools, and weather protection. For a longer hunt, add more water, calories, insulation, navigation backups, and a clear plan for packing out meat if that applies.

Check local rules and land guidance

Some public lands have rules for fires, game retrieval, tagging, bait, access hours, and vehicle use. Before packing tools or planning a route, check the land manager and your state wildlife agency. The U.S. Forest Service has a helpful hunting safety and planning overview for public-land users.

Pack by use, not by category alone

It is easy to group all clothing together, all tools together, and all food together. That can work at home, but in the field you need access by timing. Rain gear belongs near the top if storms are possible. A knife may be buried during the hike in, then moved to a reachable pouch after a shot. Your organization should match the order of the day.

Use Backpack Zones

The easiest way to organize your hunting backpack is to divide it into zones. Each zone has a job: bottom for low-use soft items, middle for dense weight, top for quick layers, outside for fast access, and sealed pouches for small gear.

Bottom zone: soft and low-use items

Put items you will not need until later near the bottom. On a hunting day, that may be a puffy layer, spare socks, light gloves, or a compact seat pad. If the pack has a separate lower compartment, use it for soft gear rather than heavy tools. Soft items create a cushion and help the pack sit better against your back.

Middle zone: dense items close to your back

Water, food, optics support gear, and other dense items should ride near the center of the pack and close to your spine. This keeps the load from pulling backward. If heavy gear sits too far away from your back, the pack feels heavier than it is and can make downhill walking less stable.

Top zone: first-use items

Use the top of the pack for items you may need soon: rain shell, extra hat, gloves, snacks, or a lightweight layer. If you stop to glass, still-hunt, or wait out weather, this zone lets you adjust without unloading the whole pack.

Pouches: small gear and quiet access

Small items disappear fast in a dark pack. Use separate pouches for first aid, fire, repair, field dressing, electronics, and licenses. Soft pouches are quieter than loose plastic boxes. Keep sharp or messy tools in sleeves or sealed bags so they do not damage clothing or food.

Balance Weight and Comfort

Comfort is not only about pack weight. It is also about where that weight sits. A well-balanced pack carries better, moves less, and lets you walk more quietly.

Keep heavy items high enough, but not top-heavy

For most day hunts, dense items should sit around the middle of your back, not deep at the bottom and not stacked high above your shoulders. A heavy bottom makes the pack sag. A heavy top can shift when you lean, duck, or cross uneven ground.

Use the hip belt and sternum strap

If your backpack has a hip belt, tighten it so part of the load rides on your hips instead of only on your shoulders. Then adjust the shoulder straps and sternum strap until the pack sits close without restricting breathing. A pack that swings away from your body is noisy and tiring.

Test the pack before the hunt

Walk around with the full pack before leaving home. Bend, kneel, shoulder your firearm or bow only in a safe direction, and check whether anything clanks, shifts, or digs into your back. This short test catches problems while they are still easy to fix.

Keep Safety Gear Easy to Reach

Safety gear should be simple to find under stress, bad weather, and low light. Do not bury it under clothing or food. The National Shooting Sports Foundation lists core firearm safety rules that are worth reviewing before any hunt involving a firearm.

First aid and emergency items

Carry a small first-aid kit where you can reach it with either hand. Add a whistle, headlamp, fire starter, emergency blanket, and a way to call or signal for help. If you hunt alone or in remote terrain, tell someone your plan and expected return time.

Navigation backup

A phone app is useful, but batteries fail and service can disappear. Carry a backup map, compass, or GPS unit if the area calls for it. Keep spare batteries or a small power bank in a dry pouch. If you use digital maps, download them before leaving service.

Weather and exposure gear

Cold rain, wind, and sudden temperature drops can turn a simple hunt into a problem. Keep a rain shell, insulating layer, gloves, and hat where you can reach them before you are soaked or chilled. For long days, pack extra calories and water treatment if needed.

Control Noise, Scent, and Weather

A hunting pack should be quiet, dry, and easy to open without spreading scent across everything inside. These details matter most when you are close to game or hunting in wet weather.

Quiet the pack

Remove loose zipper pulls, tape noisy buckles if needed, and keep metal tools from touching each other. Wrap small tools in cloth or store them in separate sleeves. Before a hunt, shake the pack lightly. If it rattles at home, it will be louder in the woods.

Separate food, field tools, and clothing

Food smells, fuel, field-dressing tools, and wet clothing should not share the same loose space. Use sealed bags or pouches. This keeps the pack cleaner and makes it easier to find gear without handling everything. For low-impact habits in the field, review the Leave No Trace 7 Principles.

Keep the inside dry

A pack cover helps, but water can still run down straps and seams. Put clothing, first aid, electronics, and fire items in dry bags or freezer bags. If you hunt in snow or rain often, keep one empty waterproof bag for wet gloves or a soaked layer.

Day Hunt Backpack Checklist

This checklist is a starting point, not a rule for every hunter. Adjust it for your state laws, season, weather, terrain, distance from the truck, and whether you are hunting alone.

Safety and navigation

  • License, tags, and required documents
  • Map, compass, GPS, or downloaded offline map
  • Headlamp plus spare batteries
  • Small first-aid kit
  • Whistle, fire starter, and emergency blanket
  • Phone or satellite communicator if needed

Food, water, and clothing

  • Water bottle or bladder
  • High-calorie snacks or lunch
  • Rain shell or wind layer
  • Insulating layer for long sits
  • Spare gloves, hat, or socks when weather calls for them

Hunting and field items

  • Optics, rangefinder, or calls if used
  • Wind checker
  • Field-dressing tools and game bags where legal and needed
  • Trash bag or extra dry bag
  • Small repair kit with tape, cord, and a multitool

Common Packing Mistakes

Most backpack problems come from carrying too much, burying important gear, or failing to repack after the first stop. A few habits can prevent most of that.

Carrying gear because it always lived in the pack

Old snacks, extra tools, dead batteries, and duplicate clothing build up over time. Empty the pack after each hunt and reload it for the next trip. That one habit keeps the load honest.

Burying safety gear

First aid, navigation, headlamp, and fire items should not sit under lunch, clothing, and field tools. Put them in a marked pouch or the same pocket every time. In poor light or bad weather, muscle memory helps.

Forgetting the pack-out plan

If there is any chance you will need to carry meat, plan space and weight for that before the hunt. A pack that is stuffed full on the hike in may be hard to use after success. Carry only what earns its place.

If you are building a complete hunt plan, start with our first-time hunting guide, then use the beginner hunting trip planning guide to map out scouting, weather, timing, and backup plans. For a lighter setup, see our guide to simple hunting gear.

FAQ

What should go in the top of a hunting backpack?

Put items you may need soon in the top of the pack: rain shell, gloves, snacks, headlamp, wind checker, and a small first-aid kit. Anything urgent should be reachable without emptying the main compartment.

Where should heavy items sit in a backpack?

Heavy items usually carry best near the middle of your back and close to your spine. This helps keep the load stable and reduces the backward pull that makes a pack feel heavier.

How do I keep my hunting backpack quiet?

Stop metal tools from touching, shorten loose straps, quiet zipper pulls, and use soft pouches for small items. After packing, shake the bag gently at home and fix anything that rattles.

Should food and field tools be packed together?

No. Keep food, field tools, wet clothing, and fuel or strong-smelling items in separate sealed bags. This keeps the pack cleaner and makes gear easier to find.

How often should I reorganize my backpack?

Empty and reload it after each hunt. Remove trash, dry wet gear, replace used supplies, check batteries, and adjust the load for the next hunt instead of carrying the same pack all season.

Survival Gear for Serious Hunting: 10 Field Safety Items to Pack

Survival gear for serious hunting should solve field problems, not just fill a pack. The core kit should help you navigate, stay warm, treat injuries, signal for help, make water safer, handle weather, and get back out when the plan changes. Start with the hunt location, season, distance from the truck, and worst likely weather.

This guide is a practical checklist for day hunts, remote scouting, public-land trips, and cold-weather sits. It does not replace local rules, firearm safety training, medical training, or a real emergency plan.

Table of contents

Survival Gear for Serious Hunting: Quick List

The best survival kit is matched to the trip. A short evening sit near the truck needs less than a mountain hunt, but the basics stay similar.

Core items to carry

Carry navigation backup, headlamp, extra batteries, fire starter, emergency blanket or bivy, first-aid kit, water treatment, extra food, knife or multi-tool, whistle, weather layer, and a charged phone or communication device. The National Park Service Ten Essentials list is a useful outside baseline for building a field kit.

Adjust for season and distance

Cold, heat, rain, steep terrain, water crossings, and long pack-outs all change what belongs in the kit. Pack for the hardest likely condition, not the easiest forecast.

Practice before the hunt

Gear only helps if you know how to use it. Practice reading the map, starting a fire safely where legal, filtering water, using the headlamp with gloves, and accessing the first-aid kit without emptying the pack.

Navigation is the first survival layer. Getting turned around, losing daylight, or missing the exit trail can turn a normal hunt into a long night.

Carry two navigation methods

A phone map or GPS is useful, but batteries and signal can fail. Carry an offline map, paper map, compass, or another backup. The federal GPS.gov site is a useful reference for understanding GPS basics.

Share a trip plan

Leave your route, parking spot, hunting area, and return time with someone at home. If plans change, update that person when you have service.

Choose communication for the terrain

A phone may be enough near roads and service. In remote areas, a satellite messenger, personal locator beacon, or radio may be worth carrying. Test the device before the season.

Shelter and Warmth

Exposure is a real risk for hunters because long sits, sweat, wind, rain, and darkness can drop body temperature fast.

Pack an emergency layer

A compact rain shell, puffy layer, wool hat, gloves, or emergency blanket can buy time when weather shifts or a pack-out takes longer than planned.

Keep insulation dry

Use a dry bag or liner for key layers. Wet insulation loses value quickly, especially when wind picks up or you stop moving.

Know cold-stress signs

The CDC’s cold stress guidance is a useful safety reference for hypothermia and frostbite risk. Hunters should treat shivering, confusion, numbness, and poor coordination seriously.

Water and Food

Water and calories affect decision-making. A tired, thirsty hunter is more likely to rush, miss signs, or make poor route choices.

Carry water and a treatment option

Bring enough water for the planned hunt and a way to treat more if the trip runs long. Filters, purification tablets, or boiling can reduce risk when used correctly. The CDC’s water treatment guidance for travel and outdoor use is a useful reference before relying on streams or ponds.

Pack simple calories

Choose food that can be eaten cold, with gloves, and without cooking. Bars, nuts, jerky, dried fruit, and electrolyte packets are simple options.

Avoid depending on foraging

Foraging is not a reliable emergency food plan unless you have strong plant-identification skill. Mistakes with wild plants or mushrooms can be dangerous.

First Aid and Emergency Care

A hunting first-aid kit should match the likely injuries: cuts, sprains, blisters, cold exposure, dehydration, eye irritation, and more serious bleeding risk.

Build the kit around training

Carry supplies you know how to use. A small kit may include bandages, gauze, tape, blister care, antiseptic wipes, gloves, pain reliever, personal medicine, and a pressure dressing. The American Red Cross first-aid kit guidance is a practical reference for basic kit contents.

Consider bleeding-control training

Hunters use knives, broadheads, firearms, and rough tools. First-aid training is worth taking before a remote hunt, especially if you hunt alone or far from roads.

Keep medicine accessible

Personal medication, allergy treatment, inhalers, or glucose should not be buried deep in the pack. Make sure a hunting partner knows where critical medicine is stored.

Tools, Light, and Fire

Small tools can solve simple problems before they become bigger ones. Keep them easy to reach and test them before the hunt.

Use a headlamp, not only a phone

A headlamp keeps both hands free for blood trailing, field dressing, walking out, or fixing gear. Carry spare batteries or a backup light.

Carry two fire-starting methods

A lighter and waterproof matches, or a lighter and ferro rod, give backup. Follow local fire rules and avoid starting fires where they are unsafe or prohibited.

Bring repair basics

A small multi-tool, tape, cord, zip ties, and a few safety pins can repair straps, hang a tarp, mark gear, or fix small pack problems.

Clothing and Pack Fit

Clothing is survival gear. It controls moisture, heat, noise, and mobility.

Layer for movement and sitting

Hunters often hike in, then sit still. Wear layers that can be adjusted before sweat soaks the base layer. Pack a dry layer if the weather is cold or wet.

Break in boots early

New boots can cause blisters and slow the exit. Wear boots before the season and carry blister care on longer walks.

Keep the pack balanced

Put heavier items close to your back and centered. Keep emergency gear, water, headlamp, and navigation tools where they can be reached quickly.

How to Pack the Kit

Pack by priority, not by how items look on a table. The most important items should be reachable under stress, in low light, and with cold hands.

Make a grab zone

Use one pocket or pouch for emergency items: headlamp, lighter, whistle, small first-aid items, water treatment, and communication device.

Check weight honestly

A survival kit that is too heavy may get left behind. Choose compact, reliable items and remove duplicates that do not add real backup value.

Run a pre-season pack check

Before the opener, empty the pack, replace dead batteries, inspect medicine dates, check water filters, update maps, and remove old food. Use the National Weather Service weather safety hub to review seasonal risks before longer trips.

Common Mistakes

The weakest survival plans usually fail in simple ways: missing batteries, no map backup, wet layers, or gear the hunter has never practiced with.

Buying gear instead of learning skills

A compass does not help if you never practice. A water filter does not help if it is frozen, clogged, or left at home. Skill turns gear into safety.

Skipping the exit plan

The walk out is often harder than the walk in. Darkness, weather, steep terrain, and game recovery can make the return slower than expected.

Forgetting local rules

Some areas restrict fires, camping, motor access, bait, carcass movement, or overnight parking. Check property rules before building the plan.

Hunting Survival Checklist

Use this checklist before a serious hunt, then add items required by your season, terrain, and personal needs.

  1. Offline map, paper map, compass, or GPS backup.
  2. Charged phone plus communication backup for remote areas.
  3. Headlamp and spare batteries.
  4. First-aid kit and personal medication.
  5. Water, water treatment, and simple food.
  6. Emergency blanket, bivy, rain shell, or extra insulation.
  7. Lighter, waterproof matches, or other legal fire-starting backup.
  8. Knife or multi-tool, tape, cord, and small repair items.
  9. Whistle, signal mirror, or other signaling option.
  10. Written trip plan shared with someone at home.

For more preparation, read our outdoor adventure hunting guide, sickness on the hunt guide, and first-time hunting guide.

FAQ

What survival gear should every hunter carry?

Every hunter should carry navigation backup, light, water, food, first aid, fire-starting backup, emergency insulation, communication, and a simple repair tool set. The exact kit should match the trip.

Should a hunting survival kit include a GPS?

A GPS or phone map is useful, but it should have a backup. Carry an offline map, paper map, compass, or other option in case batteries, signal, or screens fail.

How heavy should a hunting pack be?

There is no single safe weight for everyone. Pack weight depends on fitness, terrain, distance, season, and game recovery. Carry what the trip needs, but keep the kit light enough that you will actually bring it.

Do day hunters need emergency gear?

Yes. Day hunters can still get delayed by injury, weather, darkness, difficult terrain, or game recovery. A small emergency kit can make a short problem easier to handle.

What is the most overlooked survival item?

A shared trip plan is often overlooked. Someone should know where you parked, where you planned to hunt, who is with you, and when to expect you back.

Fundamental Hunting Gear Items: Safety, Navigation, Clothing, Tools, and Checklist

Fundamental hunting gear should cover safety, navigation, weather protection, visibility, first aid, food, water, legal requirements, and the specific tools needed for your hunting method. The best checklist is not the longest one. It is the one that matches the season, terrain, species, trip length, and distance from help.

For a short day hunt, the essentials may fit in a small pack. For a cold-weather, public-land, or backcountry hunt, the same categories become more serious. Start with safety and survival first, then add hunting-specific items.

Table of contents

Quick Answer

The most important hunting gear items are navigation, first aid, water, food, weather layers, headlamp, fire starter, emergency shelter, knife, legal documents, communication, blaze orange where required, and the gear specific to your weapon and species. Use the outdoor Ten Essentials idea as a safety foundation, then adapt it for hunting.

Do not build your pack around convenience items before safety items. A forgotten snack is annoying. A forgotten headlamp, compass, rain layer, water, or license can become a real problem.

Safety And Emergency Gear

Safety gear should be packed before calls, scents, camera gear, or comfort extras. At minimum, carry a compact first aid kit, emergency whistle, headlamp, backup light or batteries, fire starter, emergency blanket or shelter, and a way to call or signal for help.

For firearm hunts, safe handling matters more than any pack item. Know your target and what is beyond it, control muzzle direction, keep your finger off the trigger until ready, and follow all local hunter education rules. For a dedicated signaling guide, see our article on ways to signal for help in the wilderness.

Map And Compass

A phone app or GPS is useful, but batteries fail and screens break. Carry a compass and know the basic terrain before leaving the truck. A paper map or downloaded offline map is especially important on large public land.

Phone, Radio, Or Beacon

Cell service can be weak in hunting areas. Depending on the trip, a satellite messenger, PLB, or radio may be worth carrying. Tell someone where you are going and when you expect to return.

Clothing And Weather Protection

Clothing should match weather, movement level, and legal visibility rules. A good system starts with a moisture-managing base layer, insulation suited to the temperature, and a wind or rain layer when conditions demand it. Cotton can become uncomfortable and risky when wet and cold.

Blaze orange or other safety colors may be required by law depending on state, season, and method of take. Check regulations before packing. Camouflage is useful in some situations, but safety visibility and weather protection come first.

Footwear And Foot Care

Boots should match distance, terrain, insulation needs, and expected moisture. A stand hunter in cold weather needs a different boot than a mobile hunter covering miles. Socks matter too. Pack a spare pair if wet feet are likely.

Foot problems can end a hunt early. Break boots in before the season, carry blister care, and avoid changing to untested footwear on opening day. For cold trips, connect this with our cold-weather hunting boots guide.

Optics And Observation

Binoculars, a rangefinder, or a spotting scope can help you identify animals, judge distance, and avoid unnecessary movement. The right optic depends on terrain. Dense woods may need compact binoculars. Open country may justify stronger glass or a tripod-supported optic.

Optics do not replace legal and ethical judgment. Identify the animal, confirm a safe background, and know your realistic range. If you are comparing optic roles, our monocular vs spotting scope guide explains the difference clearly.

Knife, Multi-Tool, And Repair Items

A sharp knife is useful for field care, rope, food, and small camp tasks. A multi-tool, tape, cordage, zip ties, and a small repair kit can solve problems that otherwise end the day. Keep cutting tools safely stored and easy to reach.

For bows, pack a few small bow-specific items such as a release backup, Allen keys, serving material, or spare nocks where appropriate. For firearms, pack only legal and safe maintenance items needed for the day, not a full workbench.

Food, Water, And Fire

Carry more water than you expect to need or carry a safe purification method. Pack food that is quiet, simple, and usable when cold. For longer or colder hunts, extra calories matter because your body burns energy staying warm and moving through difficult terrain.

A lighter, waterproof matches, or fire starter can matter in an emergency, but check fire restrictions. In dry or windy areas, fire may be unsafe or illegal. Emergency warmth does not have to mean a fire; an emergency blanket, extra layer, and shelter plan can be safer.

Legal items are part of the gear list. Carry your license, tags, required stamps, hunter education proof if needed, land access permission, and current regulations. Know season dates, shooting hours, legal weapons, blaze-orange rules, and tagging requirements before the hunt begins.

Do not rely on memory from last year. Regulations change. Screenshots, printed backups, and offline files can help if phone service disappears.

Simple Day-Hunt Checklist

  • License, tags, regulations, and permission details.
  • Map, compass, GPS or phone with offline map.
  • Headlamp, backup light, and spare power.
  • First aid kit, whistle, emergency blanket, and fire starter.
  • Water, snacks, and extra food for delays.
  • Weather-appropriate layers, rain shell, gloves, and hat.
  • Boots, spare socks, and blister care.
  • Knife, multi-tool, tape, cordage, and small repair items.
  • Binoculars or rangefinder where useful.
  • Game bags, gloves, and field-care items if harvesting is possible.

Common Packing Mistakes

Packing Too Much

A heavy pack can make you noisy, tired, and less mobile. Carry what fits the hunt, not every item you own.

Forgetting Weather Changes

Weather can shift quickly. A small rain layer or warm layer can protect the entire day.

Depending Only On A Phone

Phones are helpful, but they are not enough by themselves. Carry backup navigation and light.

Using Untested Gear

New boots, packs, optics, and rain gear should be tested before the hunt. Opening morning is a poor time to discover something fails or does not fit.

FAQ

What is the most important hunting gear item?

There is no single item for every hunt, but navigation, light, first aid, water, weather protection, legal documents, and safe equipment handling are always near the top.

Do I need a compass if I have GPS?

Yes. GPS and phone maps are useful, but batteries and electronics can fail. A compass and basic map awareness are important backups.

Are binoculars necessary for every hunt?

No, but they are useful for many hunts. They help you observe without unnecessary movement and can improve identification and decision-making.

How should I build my first hunting gear list?

Start with safety and legal requirements, then add weather gear, navigation, food, water, and species-specific tools. Review the list after each hunt and remove what you did not need.

Final Takeaway

Fundamental hunting gear is about preparedness, not clutter. Build your pack around safety, navigation, weather, legal compliance, food, water, and the exact hunt you are doing. Once those basics are covered, add comfort and hunting-specific tools only when they serve a real purpose.

How the Right Hunting Gear Improves Safety, Comfort, and Results

The right hunting gear does not replace woodsmanship, practice, or good judgment, but it can make a hunt safer, more comfortable, and more efficient. Poor gear can cause missed opportunities, unsafe decisions, cold hands, noisy movement, bad visibility, or fatigue at the worst possible time.

This guide explains how hunting gear affects real field results without turning the article into a product pitch. The goal is to help hunters choose gear that supports ethical shots, safe movement, weather protection, and better decision-making.

Table of contents

Quick Answer

The right hunting gear improves results by helping you stay safe, quiet, warm, mobile, organized, and prepared to make a responsible shot. The most important gear is not always the most expensive item. It is the gear that fits the hunt, the weather, the terrain, your weapon, and your skill level.

A hunter with simple, tested gear usually performs better than a hunter carrying expensive equipment they have not practiced with. Field confidence comes from fit, familiarity, and preparation.

Gear Supports Skill, It Does Not Replace It

Good gear makes important skills easier to apply. Quiet clothing helps you move carefully. Reliable optics help you identify animals and read terrain. A comfortable pack helps you carry essentials without fighting your load. None of that replaces scouting, patience, firearm or bow practice, and safe judgment.

Before buying more gear, ask what problem you are trying to solve. If the problem is missed shots, practice and fit may matter more than a new accessory. If the problem is leaving early because you are cold, clothing and layering may be the better upgrade.

Safety Gear Changes The Hunt

Safety gear has a direct impact on outcomes because it affects what risks you can manage. A headlamp, navigation tool, first aid basics, blaze orange where required, treestand harness, communication device, and weather layers may not feel exciting, but they matter when the hunt gets longer than planned.

The Hunter Ed safety resources are a useful starting point for reviewing firearm safety, field safety, and responsible hunting behavior. Gear should support those rules rather than encouraging shortcuts.

Clothing And Weather Protection

Weather can decide how long you stay alert. Cold hands, wet socks, overheating, or noisy fabric can reduce patience and make movement sloppy. Layering helps because you can adjust during the walk in, the sit, and the pack out.

Choose clothing for the actual hunt instead of the average forecast. A still treestand sit needs different insulation than an active upland walk. Rain gear, wind layers, gloves, and base layers should match terrain, expected movement, and temperature swings.

Boots, Packs, And Mobility

Boots and packs affect endurance. Poor footwear can create blisters, cold feet, slipping, or noise. A bad pack can make every mile harder and bury essential items where you cannot reach them. When mobility suffers, scouting and recovery suffer too.

Match boots to terrain and weather. Match packs to hunt length and load. For a simple preparation baseline, our day hunting field checklist covers practical items that help prevent avoidable problems.

Optics And Field Awareness

Optics help you identify animals, study movement, and avoid unnecessary walking. Binoculars, rangefinders, and scopes can all improve field awareness when used responsibly. The key is choosing clear, reliable optics that match your hunting distance and legal requirements.

Practice with optics before the hunt. Learn how to adjust focus, steady your view, range common landmarks, and avoid glassing unsafe areas. A tool you understand is more valuable than one with features you do not use.

Weapon Fit, Accuracy, And Confidence

Firearms and bows must fit the hunter and the hunt. Length of pull, draw length, recoil, weight, sight picture, trigger control, and practice distance all affect confidence. Gear that is technically powerful but uncomfortable can create poor field performance.

Use the range or practice session to confirm what you can do under realistic conditions. Know your limits before the hunt. If you cannot make the shot consistently in practice, do not treat the field as the place to test it.

Navigation gear affects both safety and confidence. A map, compass, GPS device, phone map, or satellite communicator can help you avoid getting turned around, especially in low light, big timber, public land, or bad weather.

Do not rely on one battery-powered tool. Download maps before leaving service, carry backup power when needed, and tell someone where you are hunting. Your route plan matters as much as the device in your pocket.

Ethical Shot Decisions

Better gear can support ethical decisions by improving visibility, stability, distance judgment, and comfort. It should not push a hunter into taking longer or riskier shots. The right gear helps you know when to shoot and when to pass.

Think about recovery before the shot. Lighting, terrain, weather, and your ability to track sign all matter. For field-sign basics, see our guide on tracking animals and reading signs.

Where To Spend First

When the budget is limited, spend first on gear that affects safety, comfort, and core performance. Boots that fit, clothing that manages weather, a reliable light, basic navigation, and a safe weapon setup usually matter more than small accessories.

After the basics are solid, upgrade based on the hunt. A treestand hunter may benefit from better safety and cold-weather layers. A western hunter may need better boots, pack fit, and optics. A waterfowl hunter may prioritize waterproof clothing and safe dog or boat handling gear.

Pre-Hunt Gear Testing

Every important item should be tested before the hunt. Walk in your boots, pack your bag, climb with your safety system where appropriate, check batteries, confirm your weapon setup, and practice finding key items in the dark.

Testing reveals problems while they are still easy to fix. A noisy jacket, loose sling, uncomfortable pack strap, dim headlamp, fogging optic, or confusing app is much easier to solve at home than on a cold morning in the field.

Hunting Gear Decision Checklist

Does It Fit This Hunt?

Choose gear for species, season, terrain, weather, distance, and legal requirements.

Have You Tested It?

Use new gear before the hunt so you know how it works and what can fail.

Is It Quiet And Comfortable?

Noise, bulk, poor fit, or discomfort can ruin otherwise good equipment.

Does It Improve Safety?

Prioritize gear that helps you navigate, communicate, stay visible where required, and manage weather.

Common Gear Mistakes

Carrying Too Much

Extra weight can slow you down, make noise, and hide the items you actually need.

Not Testing Gear First

New boots, optics, packs, calls, or layers should be tested before opening day.

Ignoring Weather

The wrong clothing can make you leave early, move too much, or make poor decisions.

Buying Gear Instead Of Practicing

Gear can help, but practice and judgment are still the foundation of ethical hunting.

FAQ

How much does hunting gear really matter?

Gear matters when it improves safety, comfort, accuracy, mobility, or field awareness. It matters less when it is untested, unnecessary, or chosen without a clear purpose.

What is the most important hunting gear?

It depends on the hunt, but safety gear, weather-appropriate clothing, reliable footwear, navigation, and a properly fitted weapon or bow are usually more important than accessories.

Do I need expensive gear to hunt well?

No. You need reliable gear that fits the hunt and has been tested. Expensive gear can help in some conditions, but poor planning can waste any gear advantage.

What gear should beginners upgrade first?

Upgrade the item that solves your biggest field problem first. For many hunters that means boots, clothing layers, optics, a pack, or safety/navigation gear before specialty accessories.

Final Takeaway

The right hunting gear improves results when it supports safety, comfort, mobility, awareness, and ethical shot decisions. Choose gear for the hunt you are actually taking, test it before the season, and remember that skill and judgment still matter most.

Perfect Hunting Kit: What to Pack for a Safer, Better Trip

The perfect hunting kit is not the biggest pack or the most expensive gear list. It is the set of items that helps you stay safe, legal, comfortable, organized, and prepared for the specific hunt you are taking. A good kit changes with season, terrain, weather, game, distance from the vehicle, and trip length.

This guide gives a practical framework for assembling a hunting kit without overpacking. Use it as a starting point, then adjust for local rules, personal needs, and the conditions you expect in the field.

Table of contents

Quick Answer

A solid hunting kit should include legal hunting gear, safety basics, navigation, communication, weather-appropriate clothing, water, food, a light, first aid basics, field tools, and the weapon or bow setup required for the hunt. Start with essentials, then add items only if they solve a real field problem.

The best kit is tested before the hunt. Pack it, carry it, open it in low light, and make sure you can find important items quickly.

Start With The Hunt Plan

Your kit should begin with the hunt plan. A short whitetail sit near the truck does not require the same gear as a long public-land hike, mountain hunt, waterfowl setup, or overnight trip. Species, season, terrain, temperature, and legal requirements shape the list.

Before packing, answer four questions: Where am I hunting? How long will I be out? What weather could happen? What do I need to stay legal and safe? That keeps the kit useful instead of bloated.

Safety And Emergency Items

Safety items deserve space even in a lightweight kit. Carry a headlamp or flashlight, spare power where needed, a small first aid kit, emergency contact plan, identification, weather protection, and required visibility such as blaze orange where applicable.

Review safe field practices through Hunter Ed and match the kit to the risks of your hunt. A treestand hunt may require fall protection. A remote hunt may require stronger communication and navigation backups.

Navigation and communication tools keep a hunt from becoming a problem. A phone map can help, but batteries and signal are not guaranteed. Download maps before leaving service, carry backup power, and consider a paper map or compass when appropriate.

Tell someone where you are going and when you expect to return. If you hunt remote country, a satellite messenger or radio may be worth the weight. The farther you are from help, the more important redundancy becomes.

Clothing And Weather Layers

Clothing should match both movement and waiting. Active hunts need breathable layers. Still hunts and treestand sits need warmth. Wet conditions need rain protection. Cold conditions need gloves, headwear, and insulation that still lets you operate your gear.

Avoid packing random extra clothing. Choose a system: base layer, insulation, weather shell, and accessories that fit the forecast. For mobility-focused packing, see our lightweight hunting gear guide.

Weapon, Ammo, Or Archery Gear

Your firearm, bow, ammunition, arrows, release, broadheads, or other legal hunting equipment must be checked before the trip. Confirm zero, sight marks, strings, screws, batteries, safety, and legal requirements before the hunt day.

Carry enough ammunition or arrows for realistic needs, not a careless amount of extra weight. The bigger issue is usually preparation: practice with the exact setup you will carry.

Legal paperwork and access details belong in the kit plan. Confirm licenses, tags, permits, public-land rules, private-land permission, weapon restrictions, season dates, and reporting requirements before you leave. A perfect gear kit fails if the hunt itself is not legal.

Keep physical or digital copies organized and accessible. If your phone battery dies, know whether you still have the required proof or tag available. Regulations change, so check current official sources before each season.

Optics And Field Tools

Binoculars, a rangefinder, knife, game bags, gloves, calls, and other field tools should be chosen by hunt type. A tool you never use is just weight. A tool you need once and forgot can become a serious problem.

Keep field tools organized. Put frequently used items where they can be reached quietly. Loose metal, plastic wrappers, and bouncing accessories can create noise at the wrong moment.

Food, Water, And Comfort

Water is heavy but essential. Plan for temperature, distance, and how long you may stay out. Food should be quiet, simple, and enough to keep you sharp if the hunt runs longer than expected.

Comfort items can be worth it if they keep you still and focused. A seat pad, hand warmers, or lightweight rain layer may matter more than extra accessories that never leave the pack.

Packing And Organization

Pack heavy items close to your back and keep emergency gear easy to reach. Use small pouches or consistent pockets so you can find items in low light. Repack noisy food wrappers and secure straps that slap or rattle.

After each hunt, review what you used and what stayed buried. Keep emergency essentials, but remove habit items that do not fit the hunt. For a simpler version, use our day hunting field checklist.

Day Hunt Vs Multi-Day Kit

A day hunt usually needs safety, navigation, weather layers, food, water, field tools, and legal hunting equipment. A multi-day trip adds shelter, sleep system, more food, water treatment, repair items, and a deeper emergency plan.

Do not simply double a day kit for a longer trip. Think through shelter, warmth, water access, food storage, weather exposure, and how you will handle a delay or injury away from the vehicle.

Post-Hunt Kit Review

The best time to improve a hunting kit is right after a hunt. Note what you used, what you missed, what was too heavy, what made noise, and what was hard to reach. Small improvements after every trip build a better system over time.

Do not remove emergency gear just because you did not use it once. Separate true clutter from low-probability safety items. The goal is a smarter kit, not a reckless one.

Hunting Kit Checklist

License, tags, required visibility, legal weapon setup, and land access permission.

Safety Items

Light, first aid basics, navigation, communication, weather protection, and emergency plan.

Field Items

Optics, knife, game bags if needed, calls, gloves, water, food, and pack organization.

Tested Items

Boots, clothing, pack, weapon, optics, lights, and electronics should all be tested before the trip.

Common Mistakes

Overpacking

Too much gear slows movement, creates noise, and makes important items harder to find.

Underpacking Safety Gear

Cut comfort extras before cutting light, navigation, weather protection, or emergency basics.

Using Untested Gear

New boots, packs, electronics, and clothing can fail or feel wrong. Test before the hunt.

Ignoring Weather Changes

Weather can shift quickly. Pack layers and protection for realistic worst-case conditions.

FAQ

What is the most important item in a hunting kit?

There is no single item for every hunt, but safety, navigation, weather protection, legal gear, and a tested weapon or bow setup are core priorities.

What should be in a day hunting pack?

A day pack should cover water, food, light, first aid basics, navigation, communication, weather layers, required tags or licenses, and hunt-specific tools.

How heavy should a hunting pack be?

It depends on the hunt. Carry enough for safety and performance, but remove clutter that does not fit the trip. Comfort and organization matter as much as the scale number.

What should beginners buy first?

Beginners should focus on legal requirements, safety gear, suitable clothing, boots, navigation, and a properly fitted weapon or bow before buying specialty accessories.

Final Takeaway

The perfect hunting kit is specific, tested, organized, and safe. Build around the hunt you are actually taking, keep essentials easy to reach, remove clutter, and review the kit after every trip so it gets better over time.

Outdoor Adventure Hunting: 10 Safety Checks Before a Field Trip

Outdoor adventure hunting is safest when the trip is planned before anyone leaves the driveway. Start with the legal season, land access, weather, route, communication plan, first-aid kit, and a clear rule for when the group turns around. A good hunt is not only about finding game; it is about getting everyone home with the land, other hunters, and wildlife respected.

This guide is for hunters planning a day hunt, scouting trip, shed walk, or mixed outdoor trip with family or friends. Use it as a field-planning checklist, then check your state wildlife rules and local land manager requirements before the trip.

Table of contents

Outdoor Adventure Hunting: Quick Trip Plan

Before the trip, write down where you are going, who is going, when you expect to return, and what you will do if weather, injury, road closures, or low light change the plan. Share that plan with someone who is not going on the trip.

Pick one clear purpose

A scouting walk, a youth learning trip, a deer hunt, and a long backcountry hike all need different pacing. Decide the main purpose first so the route, gear, and expectations match the people in the group.

Set a turn-around time

Many outdoor problems start when a group keeps pushing after daylight, energy, or weather has changed. Set a return time before the trip starts and treat it as part of the plan.

Match the trip to the least experienced person

If a new hunter or child is with you, plan around their pace, clothing, food, and attention span. A shorter safe trip teaches more than a long trip that becomes cold, rushed, or frustrating.

Rules, Access, and Permission

Legal access comes first. Check season dates, license requirements, weapon rules, blaze-orange requirements, tagging rules, public-land boundaries, and local closures before the trip.

Check state hunting regulations

State wildlife agencies set many of the rules hunters must follow. The U.S. Fish and Wildlife Service hunting page is a useful federal starting point, but your state agency and the specific property rules are the final reference for most hunts.

Confirm land access

Do not assume a gate, trail, field edge, or old family route is open. Confirm public boundaries or written private-land permission before entering. If the property uses check-in stations, permits, or parking rules, handle those before the morning of the hunt.

Know firearm and bow transport rules

Loaded-status rules can vary by state, vehicle, public land, and equipment type. Check the current rules for firearms, bows, crossbows, muzzleloaders, and ammunition before traveling.

Route, Weather, and Timing

Weather and daylight control the trip more than enthusiasm does. A route that looks simple in fair weather can become slow or unsafe with wind, snow, mud, heat, or high water.

Read the forecast before leaving

Use the National Weather Service forecast for the hunting area, not only your home address. The NWS weather safety page is a practical reference for storms, cold, heat, flooding, and other field risks.

Carry a paper backup

Phone maps are helpful, but batteries die and coverage drops. Carry a paper map, compass, or offline navigation backup for unfamiliar land. If using GPS, save the route before leaving service.

Plan for low light

Morning setup and evening recovery often happen near darkness. Bring a headlamp, spare batteries, and reflective markers where legal and appropriate. Do not rely on a phone light as the only light source.

Gear That Matters

Good gear supports the plan. It should help with safety, weather, navigation, hydration, meat care, and communication before it adds weight or distraction.

Start with clothing and footwear

Choose boots and layers for the terrain and temperature. Wet cotton, poor socks, and stiff new boots can make a short hunt miserable. Break in footwear before a longer trip.

Pack first aid and emergency basics

Carry a small first-aid kit, blister care, a tourniquet if you are trained to use one, fire starter, whistle, emergency blanket, water, snacks, and any personal medication. The Ready.gov emergency kit guide is a useful baseline for thinking through emergency supplies.

Keep the pack simple

A heavy pack can slow the group and create fatigue. Pack what the trip needs, then remove items that do not support safety, legal compliance, navigation, weather protection, or game care.

Group Safety

When more than one person is hunting or scouting, communication matters. Everyone should know the safe direction of fire, where others are located, and when the group is moving.

Use clear zones of fire

Before anyone loads or nocks an arrow, agree on safe shooting lanes and no-shoot directions. A missed animal, ricochet, or unseen person beyond the target can turn a trip dangerous quickly.

Make visibility part of the plan

Wear required blaze orange or pink where the law requires it. Even where not required, visibility can help during group movement, public-land hunting, and low-light pack-out.

Check in during the trip

If the group separates, set check-in times and a meeting point. Do not rely only on texting if coverage is weak. Radios, satellite messengers, or a simple route card can help on larger properties.

Land and Wildlife Respect

Outdoor adventure hunting should leave the area in good shape. Respecting land, water, other users, and wildlife keeps access open and makes the trip better for the next hunter.

Follow Leave No Trace basics

Pack out trash, avoid damaging vegetation, use existing trails where appropriate, and keep camps or rest stops clean. The Leave No Trace 7 Principles are a simple outside reference for low-impact outdoor travel.

Handle game responsibly

If hunting, plan for the recovery and pack-out before the shot. Know how far the animal may need to be moved, how meat will be cooled, and who can help if the terrain is difficult.

Respect other users

Public land may include hikers, bird hunters, anglers, land managers, horseback riders, and other deer hunters. Keep interactions calm, avoid crowding, and do not interfere with someone else’s legal use of the land.

Family and Beginner Trips

A beginner trip should build confidence, not prove toughness. Keep the plan short, warm, dry, and easy to end early if needed.

Teach one skill at a time

Navigation, track reading, quiet walking, safe firearm handling, and field dressing are all separate lessons. Pick one or two skills for the day instead of trying to teach everything at once.

Keep food, water, and breaks easy

Hungry or cold beginners stop learning. Pack extra snacks, water, gloves, and a simple place to sit. A good break can save the trip.

End on a good note

Leaving while everyone is still comfortable makes people want to come back. Success may be a track found, a safe shot passed, a bird watched, or a map lesson learned.

Common Mistakes

Most hunting-trip problems come from weak planning, overconfidence, or guessing about rules.

Trusting one app too much

Mapping apps are helpful, but they can be wrong or unavailable offline. Confirm boundaries, carry a backup, and do not cross private land because a screen looked unclear.

Packing gear without a plan

Gear does not replace decision-making. A good pack supports a clear route, weather plan, communication plan, and legal hunt.

Ignoring the exit route

Walking downhill in daylight may feel easy. Coming back uphill in rain, snow, darkness, or with meat can be much slower. Plan the exit before choosing the farthest spot.

Outdoor Hunting Checklist

Use this checklist before a scouting walk, family hunt, or day hunt. Add local requirements for your state, property, season, and equipment.

  1. License, tags, season dates, and property rules checked.
  2. Land access or private permission confirmed.
  3. Route, parking, meeting point, and turn-around time written down.
  4. Weather, daylight, and road conditions checked.
  5. Someone at home has the trip plan and return time.
  6. Navigation backup packed: paper map, compass, or offline map.
  7. First aid, water, snacks, light, and emergency layer packed.
  8. Weapon, ammunition, arrows, or muzzleloader components checked safely.
  9. Blaze-orange or visibility rules handled.
  10. Game recovery, meat care, and exit route planned.

For more field planning, read our first-time hunting guide, tips for hunting in different terrains, and shooting range safety rules.

FAQ

What is outdoor adventure hunting?

It is a hunting or scouting trip planned around outdoor travel, learning, and field experience. It may be a day hunt, shed walk, youth outing, or scouting trip, but it still needs legal access and safety planning.

What should beginners bring on a hunting trip?

Beginners should bring legal documents, weather-appropriate clothing, broken-in footwear, water, snacks, a headlamp, first aid, navigation backup, and any required safety colors or gear.

How do I make a hunting trip safer for kids?

Keep the trip short, choose easy terrain, bring extra layers and food, teach one skill at a time, and set clear safety rules before anyone handles hunting equipment.

Do I need a GPS for a short hunt?

A GPS or mapping app helps, but it should not be the only navigation tool. Carry an offline map or paper backup when land boundaries, weather, or weak cell service could be a problem.

How can hunters reduce impact on public land?

Stay within legal access, pack out trash, avoid damaging habitat, respect other users, follow posted rules, and use low-impact travel habits from established outdoor ethics guidance.

Exit mobile version