How to Double Up Ear Protection at Indoor Ranges


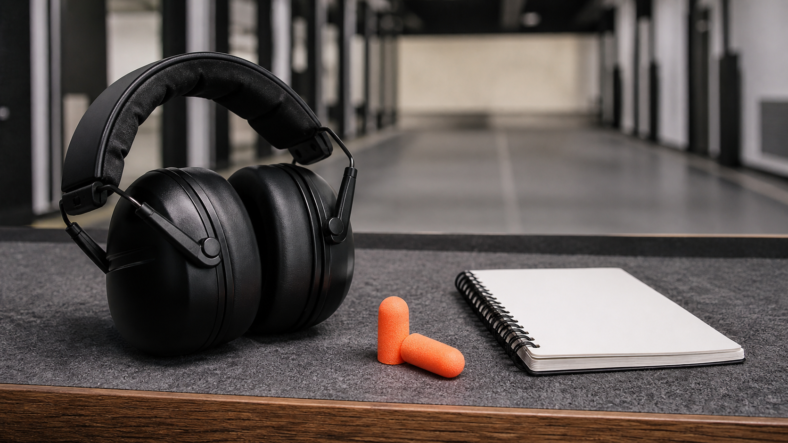
Doubling up ear protection means wearing properly inserted earplugs underneath properly sealed earmuffs. For indoor shooting ranges and other loud impulse-noise settings, this extra layer may be worth considering because hard walls reflect sound and shooters are often close to other firearms. Doubling up can reduce exposure when both layers fit correctly, but it is not a hearing-loss guarantee, and NRR math does not simply add into a real-world protection number.

For indoor ranges, double protection usually means correctly inserted foam plugs plus properly sealed earmuffs, with range rules still leading the session.

This guide explains when plugs-plus-muffs make sense, how to wear them correctly, what mistakes reduce protection, and when to ask a range safety officer or qualified hearing professional for help.

Table of Contents

What Double Ear Protection Means

Double ear protection means wearing two protective layers at the same time: earplugs inside the ear canal and earmuffs sealed over the outside of the ears. The order matters. Plugs go in first, then muffs go over them so each layer can keep its own fit.

The CDC/NIOSH hearing protection guidance describes double protection as earmuffs worn over earplugs and recommends it in very loud occupational settings, including impulse-noise exposure. That guidance is useful safety context for range users, but it should not be treated as a recreational shooting law or as a promise of complete protection.

Why Indoor Ranges Raise the Stakes

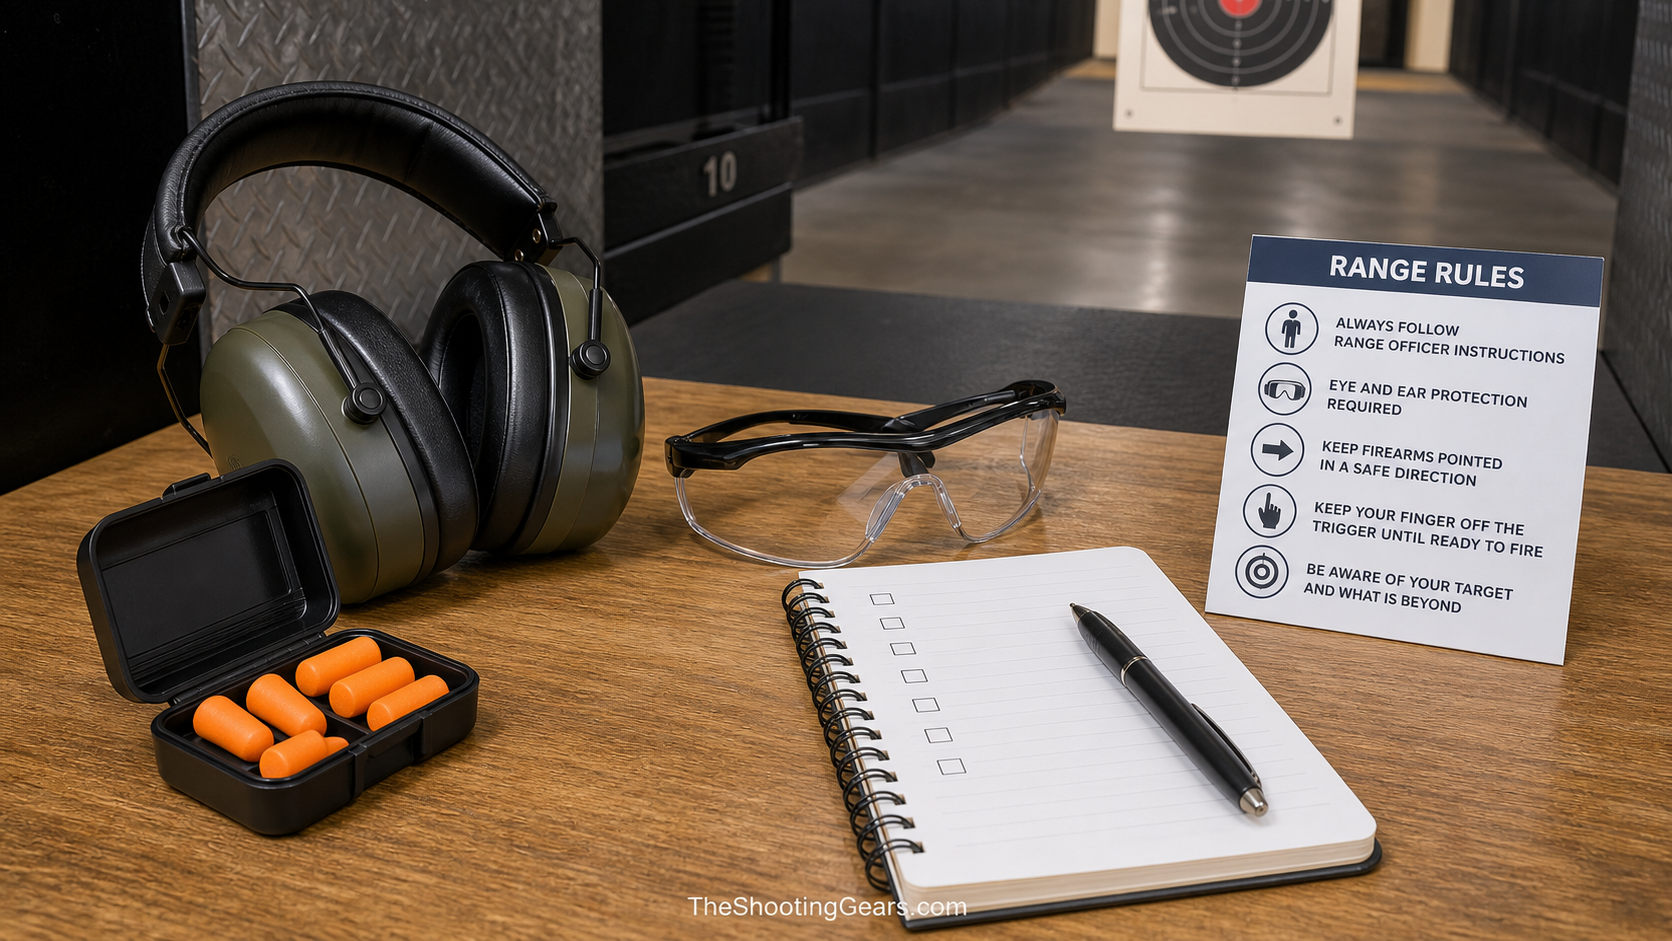
Indoor ranges are different from open outdoor bays because hard walls, ceilings, and dividers reflect sound instead of letting it dissipate. You may also stand close to other shooters using short barrels, compensators, muzzle brakes, or high-volume firing strings. That combination can make a single layer feel less comfortable and less forgiving.

NRR labels are useful for comparing hearing protectors, but they do not tell you exactly what your ears receive in a real shooting lane. Federal hearing-protector labeling rules in 40 CFR Part 211 Subpart B also warn that NRR may not indicate protection against impulsive noise such as gunfire. That is why this guide focuses on fit, seal, and realistic expectations instead of simple number math.

How to Wear Earplugs Under Earmuffs

To double up correctly, insert the earplugs first, then place the earmuffs over them without breaking either seal. The combination only helps when both layers are worn properly for the full time anyone on the line is shooting.

Insert the Earplugs Correctly

Foam earplugs should sit inside the ear canal, not loosely at the opening. Roll the plug down, insert it, and hold it in place while it expands. Reusable plugs should be seated according to the maker’s instructions. If a plug feels loose, falls out, or leaves sound obviously louder on one side, stop and refit it.

Seat the Earmuffs Without Breaking the Seal

Place the earmuffs so the cushions fully surround each ear. The headband should sit securely, and the cups should not be propped open by hair, hat brims, hoodie fabric, or thick glasses arms. A small gap under the cushion can quietly reduce real-world protection.

Check Eyewear, Hair, Hats, and Stock Fit

Safety glasses are required at many ranges, but thick temples can interfere with earmuff cushions. The 3M hearing protection selection guidance notes that compatibility with eyewear and other equipment matters when selecting protection. Thin safety-glasses arms, careful muff placement, and a quick seal check can help.

Rifle and shotgun shooters should also confirm the muffs do not shift when they mount the firearm. If your cheek weld knocks a cup loose, a lower-profile muff or different setup may be needed.

What Not to Do When Doubling Up

Do not treat the earplug NRR plus earmuff NRR as a single real-world rating. Protection depends on fit, insertion depth, cushion seal, product condition, and how consistently you keep both layers on.

  • Do not leave foam plugs barely seated at the ear opening.
  • Do not wear earmuffs over bulky hats or hair that breaks the seal.
  • Do not remove protection while other shooters are still firing.
  • Do not use cracked muff cushions, dirty plugs, or damaged gear.
  • Do not assume electronics or active noise cancellation replaces rated hearing protection.

Electronic Earmuffs With Earplugs

Electronic earmuffs can still be useful when worn over plugs because they may help you hear range commands and conversation between shots. However, the protective part is still the rated muff cup and seal, not a magic cancellation effect. With plugs underneath, speech and amplified sounds may be quieter, so you may need to adjust volume and listen carefully to range staff.

The NSSF reminds shooters to wear eye and ear protection, and that advice pairs naturally with a practical range habit: keep both layers on whenever firing is active, even if you are not the person shooting.

What Double Protection Does Not Guarantee

Double protection can add margin, but it does not guarantee that your hearing is safe in every indoor lane or with every firearm. Fit, seal, eyewear, hair, hats, product wear, shooter position, and range design all matter. No article can promise a specific decibel reduction for your ears.

If you have ear pain, tinnitus, hearing aids, previous hearing loss, or recurring fit problems, ask a qualified hearing professional. If something feels wrong during a range session, ask the range safety officer for help before continuing.

Indoor Range Double-Protection Checklist

  • Insert earplugs so they seal inside the ear canal.
  • Seat earmuffs so the cushions fully surround each ear.
  • Check that glasses, hair, hats, and clothing do not break the seal.
  • Confirm the muff seal stays in place when you mount the firearm.
  • Keep both layers on whenever anyone on the firing line is shooting.
  • Replace disposable plugs and worn muff cushions before they fail.
  • Ask for help if the setup hurts, leaks sound, or feels uneven.

Frequently Asked Questions

Should you wear earplugs and earmuffs at an indoor shooting range?

It may be worth considering, especially in loud indoor bays, near muzzle brakes, or during high-volume sessions. The second layer can add margin when both layers fit correctly, but it is still not a guarantee against hearing damage.

Can you combine the NRR labels?

No. Treating two labels as one simple number overstates protection. NRR is a comparison label, while real-world protection depends heavily on fit, seal, and consistent use.

Are electronic earmuffs enough at indoor ranges?

Sometimes they may be enough for a particular shooter and range, but electronics do not change the need for a proper rated seal. Many shooters choose plugs under electronic muffs indoors for extra passive protection while still hearing commands better than with passive muffs alone.

Should plugs go under muffs or over muffs?

Plugs go in first, then earmuffs go over the ears. Earplugs protect from inside the ear canal, while earmuffs seal around the outside of the ear.

Can shooting glasses break the earmuff seal?

Yes. Thick eyewear temples can create small gaps under earmuff cushions. Use shooting glasses that fit well under muffs and check the seal before firing starts.

What if double protection still feels uncomfortable?

Stop and refit the plugs and muffs. Do not force a setup that causes pain. If discomfort continues, ask the range safety officer or a qualified hearing professional for help choosing a safer fit.

Final Recommendation

For indoor shooting ranges, properly inserted earplugs under properly sealed earmuffs are a sensible option when noise exposure feels high or when you want extra margin. Focus on fit, seal, and keeping protection on the whole time. Treat double protection as a careful habit, not a mathematical shortcut or a guarantee.

Pistol Parts Explained: A Beginner-Friendly Guide

A pistol has a frame, slide, barrel, chamber, trigger, sights, magazine, grip, recoil system, extractor, ejector, and safety-related controls. Those parts work together to load, fire, extract, eject, and prepare the next round, but the exact layout depends on the pistol design. This guide explains the common parts in plain language so beginners can understand terminology without treating it like a repair manual.

Before handling any firearm, keep it pointed in a safe direction, keep your finger off the trigger, remove the magazine if applicable, open the action, and verify the chamber is clear according to the firearm manual. If you are unsure, stop and ask a qualified instructor, range officer, gunsmith, or the manufacturer.

Table of Contents

How Pistol Parts Work Together

Most modern pistols are designed around a simple sequence: the magazine holds cartridges, the action feeds one cartridge into the chamber, the firing system ignites it when the trigger is pressed, the slide or action cycles, the spent case is extracted and ejected, and the next round is prepared.

That broad sequence is useful for understanding terminology, but it is not a substitute for your owner’s manual. Different pistols use different locking systems, safeties, takedown procedures, and maintenance requirements. The NSSF firearm safety rules are the baseline before any inspection or cleaning: treat every firearm carefully, control muzzle direction, and keep your finger away from the trigger until ready to shoot.

For new shooters, part names are most useful when they make range instruction easier to follow. If an instructor says to lock the slide open, check the chamber, seat the magazine, or align the front sight, you should know the area they mean before live fire begins.

Major External Pistol Parts

Frame

The frame is the main body of the pistol. It supports the grip, trigger area, slide rails, and many controls. On many pistols, the frame is the serialized firearm component, although legal definitions can vary by country and jurisdiction.

Slide

The slide is the moving upper portion on many semi-automatic pistols. It houses or supports the barrel, firing system parts, extractor, sights, and recoil system. During firing, it cycles rearward and forward to help eject the spent case and chamber the next round.

Barrel and Chamber

The barrel directs the bullet as it leaves the firearm. The chamber is the rear part of the barrel area where the cartridge sits before firing. Always verify the chamber is clear when unloading or inspecting a pistol; do not rely only on removing the magazine.

Grip

The grip is where the shooter holds the pistol. Grip size, texture, backstrap shape, and angle affect control and comfort. A pistol should let the shooter reach the trigger safely without shifting the hand into an unstable position.

Internal and Moving Parts

Trigger

The trigger starts the firing sequence, but it should not be treated casually. Trigger weight, travel, reset, and safety design vary widely. Do not modify trigger parts unless you are qualified and the work follows the manufacturer’s guidance.

Firing Pin or Striker

The firing pin or striker is the part that helps ignite the cartridge primer. Hammer-fired pistols and striker-fired pistols use different systems, but both rely on precise timing and proper maintenance. Light strikes, repeated misfires, or unusual trigger behavior should be inspected by a qualified person.

Extractor and Ejector

The extractor helps pull the spent case from the chamber. The ejector helps kick it out of the firearm as the action cycles. If cases fail to extract or eject, the cause may be ammunition, fouling, magazine issues, worn parts, or technique. Repeated failures deserve inspection, not guesswork.

Recoil Spring and Guide Rod

The recoil system helps control slide movement and return the slide forward after cycling. Springs are wear items. The correct replacement interval depends on the pistol model, caliber, ammunition, and round count, so follow the manual rather than a universal schedule.

Magazine and Ammunition Path

The magazine stores cartridges and presents them for feeding. It commonly includes a magazine body, spring, follower, feed lips, and base plate. A weak spring, damaged feed lips, dirty magazine, or incorrect magazine can cause feeding problems.

Use the correct ammunition for the firearm and follow the manufacturer’s instructions. SAAMI firearm safety information is a useful authority for understanding why correct ammunition matching, inspection, and safe handling matter.

Sights, Controls, and Safety Features

Sights

Most pistols use front and rear sights, though some accept optics. Sights help align the pistol with the target, but safe shooting still depends on training, backstop awareness, trigger control, and knowing what is beyond the target.

Magazine Release and Slide Stop

The magazine release lets the magazine be removed. The slide stop or slide lock can hold the slide open on many pistols. Controls may be ambidextrous, reversible, or model-specific. Beginners should learn them with an unloaded firearm under qualified supervision.

Manual and Passive Safeties

Some pistols have manual thumb safeties, grip safeties, trigger safeties, firing-pin blocks, or other internal systems. A safety feature is not a replacement for safe handling. The user is still responsible for muzzle direction, trigger discipline, secure storage, and following the manual.

Maintenance and Inspection Boundaries

Basic cleaning and inspection help keep a pistol reliable, but there is a line between owner maintenance and gunsmithing. Field-strip only as the manual allows. Do not polish, file, bend, or replace critical parts unless you are qualified and the work follows manufacturer guidance.

Secure storage is also part of responsible ownership. Project ChildSafe provides firearm storage resources designed to reduce unauthorized access. Understanding pistol parts is useful, but safe storage and handling are the higher priority.

If a pistol has repeated malfunctions, visible cracks, abnormal wear, a stuck case, a possible bore obstruction, or controls that do not work normally, stop using it and get qualified help.

FAQ

What is the most important pistol part to understand first?

Start with the chamber, magazine, muzzle, and trigger. Those terms connect directly to loading, unloading, muzzle control, and trigger discipline, which are the safety basics every beginner needs.

Is the magazine the same thing as the clip?

No. A magazine feeds cartridges into the firearm. A clip is a different loading aid used with some firearm designs. Most modern pistols use detachable magazines.

Can I replace pistol parts myself?

Only do owner-level maintenance allowed by your manual. Parts that affect firing, safety, lockup, extraction, or trigger function should be handled by a qualified gunsmith or manufacturer support unless you are properly trained.

Why does the slide lock open?

On many semi-automatic pistols, the slide locks open after the last round because the magazine follower engages the slide stop. Some malfunctions or magazine issues can also affect this behavior.

Do all pistols have the same parts?

No. Semi-automatic pistols, revolvers, hammer-fired pistols, striker-fired pistols, rimfire pistols, and competition designs can differ. Use this guide for terminology, then rely on the manual for your exact firearm.

Final Takeaway

Learning pistol parts helps you understand safety instructions, range commands, maintenance language, and malfunction descriptions. Keep the focus practical: know the frame, slide, barrel, chamber, magazine, trigger, sights, and controls, then let the firearm manual and qualified instruction guide anything beyond basic identification.

How to Grip a Handgun Correctly

A correct handgun grip should let you control the pistol without fighting it. In simple terms, place the firing hand high on the backstrap, keep the wrist firm, wrap the support hand into the open space on the grip, angle both thumbs safely forward along the frame area, and press the trigger without changing muzzle direction. Grip should feel secure, repeatable, and safe, not painful or forced.

This guide explains the beginner fundamentals of handgun grip for range practice and training language. It is not a replacement for qualified instruction, your firearm manual, or live supervision. Before handling any firearm, keep the muzzle directed safely, keep your finger off the trigger until ready to shoot, and verify the firearm condition according to the manual and range rules.

Table of Contents

Why Handgun Grip Matters

Grip is one of the first skills a handgun shooter should learn because it affects control, sight movement, trigger press, and follow-up shots. A poor grip can make the pistol shift in the hand, push shots off target, or make the shooter overcorrect after recoil.

Good grip does not mean squeezing as hard as possible. It means building stable contact with the firearm so the sights return consistently and the trigger can move without dragging the muzzle away from the target. The foundation still starts with safety. The NSSF firearm safety rules are worth reviewing before any grip work because muzzle control and trigger discipline come before technique.

Basic Two-Hand Handgun Grip

Start With the Firearm Safe and Clear

Practice grip only under safe conditions. At a range, follow the range officer’s commands. At home, use only the unloaded handling procedure allowed by your manual, remove ammunition from the room, and avoid practicing if you are tired, distracted, or unsure.

Use a High, Stable Grip

The firing hand should sit high on the backstrap so the pistol is aligned with the forearm. A high grip helps manage recoil because the pistol has less room to rotate upward. Do not place the hand so high that it contacts the slide or moving parts.

Fill the Open Space With the Support Hand

After the firing hand is placed, the support hand should fill the open space on the grip panel. The support hand is not decoration; it helps control the pistol, stabilize the wrists, and reduce unnecessary movement during the trigger press.

Firing-Hand Position

Backstrap Contact

The web of the firing hand should contact the backstrap firmly. This makes the pistol feel seated in the hand rather than balanced loosely in the fingers. If the pistol shifts after every shot, the grip may be too low, too loose, or not matched well to hand size.

Trigger Finger Independence

The trigger finger should be able to move without the rest of the hand clenching. If pressing the trigger causes the whole hand to tighten, shots may move off target. Beginners often improve by focusing on steady grip pressure while the trigger finger moves straight to the rear.

Thumb Placement

Thumb placement depends on pistol design and shooter anatomy. Many modern semi-automatic shooters use forward thumbs, but thumbs should never interfere with the slide, controls, cylinder gap on revolvers, or safe operation. If a grip causes discomfort or contact with moving parts, stop and adjust with qualified help.

Support-Hand Position

Palm Contact

The support-hand palm should make meaningful contact with the grip and firing hand. Empty space usually means less control. Rotate the support hand slightly forward so the palm presses into the available grip area without crossing in front of the muzzle.

Finger Wrap

The support-hand fingers usually wrap over the firing-hand fingers. The goal is to create a secure, repeatable two-hand structure. Avoid placing the support-hand fingers near the trigger guard in a way that pulls the pistol sideways or interferes with controls.

Wrist Stability

Both wrists should feel firm and aligned. Loose wrists can make the pistol move more than necessary and may contribute to cycling problems with some semi-automatic pistols. Do not lock the body into a painful position; stable is the goal, not stiff.

Trigger Control and Grip Pressure

Grip pressure should be consistent before, during, and after the trigger press. Many shooters miss low or sideways because they tighten the whole hand at the same moment the trigger breaks. A useful range cue is to build the grip first, then move only the trigger finger.

Different instructors describe pressure differently, so do not get stuck on a single percentage rule. The real test is whether the sights stay stable, the pistol tracks predictably, and your hands can repeat the same grip every time. If recoil control feels erratic, ask an instructor to watch your hands from a safe position.

Common Grip Mistakes

  • Low firing-hand grip: leaves more leverage for muzzle flip and makes the pistol shift.
  • Weak support-hand contact: leaves empty space and reduces control.
  • Milking the grip: tightening all fingers during the trigger press.
  • Thumbs interfering with controls: can prevent normal slide lock or safe manipulation.
  • Practicing too fast: hides basic problems and builds sloppy habits.
  • Ignoring firearm fit: a pistol that is too large or too small may make a good grip harder.

If the issue is firearm fit, do not force a grip that puts your finger, wrist, or thumbs in unsafe positions. A qualified instructor can often tell whether the problem is technique, hand size, grip texture, or an unsuitable pistol.

Safe Practice Boundaries

Grip practice should stay inside safe handling rules. Use live ammunition only at a proper range or legal training setting. Keep muzzle direction safe at all times. Avoid mirrors, cameras, or online advice if they distract you from basic safety discipline.

For general ammunition and firearm safety context, SAAMI firearm safety information is a reliable reference. For secure storage and access-control reminders, Project ChildSafe is useful, especially if firearms are stored in a home with other people.

FAQ

Should I grip a handgun as hard as possible?

No. Grip firmly enough to control the pistol, but not so hard that your hands shake, your trigger finger drags, or the pistol becomes painful to manage. Consistency matters more than brute force.

Where should my thumbs go?

On many semi-automatic pistols, thumbs point generally forward along the frame area, but placement depends on the firearm and your hands. Keep thumbs away from the slide, muzzle, cylinder gap, and controls unless the manual/instructor says otherwise.

Why do my shots move when I press the trigger?

The grip may be changing during the trigger press. Watch for clenching, pushing, wrist movement, or support-hand pressure changing at the same time the trigger breaks.

Can handgun grip fix all accuracy problems?

No. Grip matters, but accuracy also depends on sight alignment, trigger control, stance, breathing, vision, firearm fit, ammunition, and training quality.

Should beginners practice grip at home?

Only if they can follow safe unloaded-handling procedures exactly and keep ammunition separate. Beginners are usually better served by practicing under a qualified instructor until the safety process is automatic.

Final Takeaway

A good handgun grip is high, stable, repeatable, and safe. Build the firing-hand grip first, fill the open space with the support hand, keep wrists firm, and press the trigger without changing grip pressure. Above all, keep safety rules ahead of technique and get qualified feedback before turning practice into habit.

What Is a Misfire and How to Prevent It

A misfire happens when you press the trigger, the firing system tries to ignite the cartridge, and the round does not fire. The safest response is not to rush, not to look into the action, and not to assume the round is harmless. Keep the muzzle pointed in a safe direction, keep your finger off the trigger, follow your range or firearm manual procedure, and treat the event as a possible delayed ignition until it is cleared safely.

Misfires are usually caused by ammunition, firearm condition, or the firearm not being fully in battery. This guide explains the difference between a misfire, hang fire, and squib load, what to do in the moment, and how to reduce the chance of it happening again without giving risky shortcut advice.

Table of Contents

What Is a Misfire?

A misfire is a failure to fire. In a typical centerfire or rimfire firearm, the trigger is pressed, the firing pin or striker hits the primer or rim, but the cartridge does not ignite. You may hear a click, feel the trigger break, and see no shot fired.

The important safety point is uncertainty. In the first moment after a click, you do not know whether the cartridge is truly dead, whether ignition is delayed, or whether another malfunction has occurred. That is why the basic response starts with muzzle control and patience, not immediate inspection.

The NSSF firearm safety rules are a useful foundation here: always keep the muzzle pointed in a safe direction and keep your finger off the trigger until you are ready to shoot. Those rules matter even more when the firearm does something unexpected.

Misfire vs. Hang Fire vs. Squib Load

People often use these terms together, but they are not the same problem. Knowing the difference helps you respond with the right level of caution.

Misfire

A misfire means the cartridge does not fire when struck. The cause may be a bad primer, damaged ammunition, light firing-pin strike, dirty firing-pin channel, weak spring, or a firearm that was not fully closed or locked.

Hang Fire

A hang fire is delayed ignition. The trigger is pressed, nothing happens immediately, and then the round may fire after a delay. Because a hang fire can look like a misfire at first, do not open the action instantly after a click. Follow your range rules, instructor guidance, and firearm manual.

Squib Load

A squib load is different because the round may fire weakly and leave a bullet or obstruction in the barrel. Warning signs can include an unusually quiet report, light recoil, smoke, or a shot that feels wrong. If you suspect a squib, stop shooting immediately and have the firearm inspected before firing again.

What To Do After a Misfire

If the firearm clicks instead of firing, keep the muzzle pointed downrange or in another safe direction. Keep your finger away from the trigger. Do not turn the firearm sideways to look into the chamber, and do not point it toward yourself or another person while trying to diagnose the problem.

Many range procedures use a short waiting period before clearing the firearm because of the possibility of a hang fire. Your firearm manual, range officer, instructor, or club rules should control the exact procedure. When in doubt, slow down and ask for qualified help.

After the waiting period required by your setting, open the action carefully while maintaining safe muzzle direction. Remove the cartridge if it can be removed safely. Keep the suspect cartridge separate, do not try to fire it again, and follow local range or manufacturer guidance for disposal.

If the firearm does not open normally, the cartridge is stuck, the bolt or slide feels jammed, or you are unsure what happened, stop. Forcing parts can make the situation worse. Let a qualified range officer, instructor, gunsmith, or manufacturer support channel guide the next step.

Common Causes of Misfires

Most misfires come from one of three areas: ammunition, firearm condition, or handling/setup. The cause is not always obvious from a quick glance, so avoid guessing if the malfunction repeats.

Ammunition Problems

Old, wet, corroded, contaminated, or damaged ammunition can fail to ignite. Ammunition stored in high humidity, extreme heat, vehicle trunks, damp hunting bags, or unsealed boxes may become less reliable over time. A primer that is damaged, improperly seated, or defective can also fail even when the firearm is functioning normally.

Use ammunition that matches the firearm marking and manual, and inspect cartridges before loading. If a round looks swollen, corroded, cracked, dented, or contaminated with oil or solvent, do not use it.

Firearm Condition

A dirty firing-pin channel, worn spring, damaged firing pin, heavy fouling, or neglected action can reduce ignition reliability. Cold weather, rain, dust, and heavy lubricant can also affect function, especially if the firearm has not been cleaned and inspected after use.

For technical ammunition and firearm safety context, SAAMI firearm safety information is a strong reference because it focuses on safe ammunition/firearm matching and handling principles.

Not Fully in Battery

Some firearms may not fire correctly if the bolt, slide, or action is not fully closed. This can happen from riding the slide, dirt in the chamber, damaged magazines, improper loading, or mechanical wear. If a firearm repeatedly fails to go fully into battery, stop using it until the cause is identified.

How To Prevent Misfires

You cannot prevent every defective cartridge, but you can reduce avoidable misfires with better storage, inspection, and maintenance habits.

  • Use the correct ammunition. Match caliber/gauge and cartridge type to the firearm manual and barrel markings.
  • Inspect before loading. Avoid cartridges with corrosion, dents, cracked cases, loose bullets, or moisture damage.
  • Store ammunition properly. Keep it cool, dry, stable, and away from oils, solvents, and long-term humidity.
  • Clean on a schedule that fits use. Range sessions, hunting in rain, dusty travel, and defensive-practice training all justify inspection and cleaning afterward.
  • Follow the manual. Maintenance points, lubrication amount, replacement intervals, and approved ammunition vary by firearm.
  • Stop repeated malfunctions early. If more than one misfire occurs with the same firearm or ammunition lot, pause and investigate before continuing.

Safe storage also matters beyond misfire prevention. Project ChildSafe has practical secure-storage resources for keeping firearms inaccessible to unauthorized users, especially children. Reliable equipment and responsible access control belong together.

When To Stop and Get Help

Stop shooting and get qualified help if the firearm will not open normally, the cartridge is stuck, the action feels damaged, the report sounded weak, the bore may be obstructed, or the same problem happens again. Do not keep firing to “test it out.” A repeated misfire can point to a mechanical issue, ammunition lot issue, or unsafe condition that needs inspection.

For beginners, the safest help source is a certified instructor, range officer, gunsmith, firearm manufacturer, or the official firearm manual. Online advice can help you understand terms, but it should not replace qualified inspection when a live-round malfunction or possible barrel obstruction is involved.

FAQ

Can a misfired round go off later?

It is possible for a delayed ignition, called a hang fire, to look like a misfire at first. That is why you should keep the firearm pointed in a safe direction and follow your range or firearm-manual procedure before opening the action.

Should I try to fire the same round again?

No. Treat the cartridge as suspect. Keep it separate and follow range, manufacturer, or local disposal guidance instead of trying to fire it again.

Is a misfire always caused by bad ammunition?

No. Ammunition is one common cause, but a weak firing-pin strike, dirty action, worn part, or firearm not being fully in battery can also cause a misfire.

What is the most dangerous mistake after a misfire?

The biggest mistake is moving the muzzle in an unsafe direction or immediately opening the action while assuming nothing can happen. Keep the muzzle safe first, then clear the firearm according to proper procedure.

When should a gunsmith inspect the firearm?

Use a qualified gunsmith or manufacturer support if misfires repeat, the action feels abnormal, parts appear worn or damaged, the bore may be obstructed, or you cannot confidently identify the cause.

Final Takeaway

A misfire is not just a failed shot. It is a safety event. Keep the muzzle pointed safely, wait and clear the firearm according to proper procedure, separate the suspect cartridge, and investigate the cause before continuing. Good ammunition storage, regular maintenance, and manual-first habits reduce risk without encouraging shortcuts.

Why Eye and Ear Protection Matters When Shooting

Eye and ear protection matter when shooting because firearms create separate hazards for hearing and vision. Gunfire is a sudden loud impulse noise, and shooting can also involve ejected cases, debris, fragments, hot gases, dust, and other range hazards. Hearing protection helps reduce noise exposure, while eye protection helps guard against impact and debris.

This is general safety information for range, hunting, and sport-shooting contexts. It is not medical advice, and it does not replace your range rules, instructor guidance, equipment instructions, or advice from a qualified hearing or eye-care professional.

Why Shooters Need Eye and Ear Protection

Shooters wear eye and ear protection because the eyes and ears face different risks. Gunfire can create harmful noise exposure, especially indoors or near other shooters. Eye hazards can include ejected brass, blown debris, powder particles, fragments, and general range impact risks.

The CDC/NIOSH noise resources explain why noise exposure deserves prevention, and OSHA publishes general guidance on eye and face protection. For firearm handling rules, review the NSSF firearm safety rules.

Understanding Hearing Protection Ratings

Hearing protection in the United States is commonly labeled with a Noise Reduction Rating, or NRR. A higher NRR generally indicates more potential noise reduction under test conditions, but real-world protection depends heavily on fit and proper use.

Earplugs and earmuffs can both help, and some shooters use plugs and muffs together at indoor ranges or around louder firearms. Do not simply add two NRR numbers together; combined protection is more nuanced than that. Follow the manufacturer’s instructions and your range’s requirements.

Understanding Eye Protection Standards

Shooting eye protection should be impact-rated. Regular sunglasses may reduce glare, but they are not automatically suitable for range impact hazards. Look for safety eyewear that clearly states the impact standard it is designed to meet, fits securely, and offers good side coverage.

Replace scratched, cracked, or damaged lenses. Eye protection only helps when it stays clear, fits correctly, and remains in place during the activity.

Fit and Proper Use Matter

Protection only works when worn correctly. Earplugs need a proper seal in the ear canal. Earmuffs need the cup cushions to seal around the ears, and that seal can be affected by hair, hats, eyewear arms, or poor adjustment.

Eye protection should sit close enough to protect the eyes without blocking vision or becoming uncomfortable. If protection is distracting, fogged, loose, or painful, people are more likely to adjust or remove it at the wrong time. Fit checks are part of range preparation.

Protection TypeWhat to CheckWhy It Matters
EarplugsCorrect insertion and sealA shallow fit can reduce protection
EarmuffsFull cushion seal around the earHair, hats, or glasses can break the seal
Safety glassesImpact rating, side coverage, clear lensesOrdinary eyewear may not protect against range hazards

Range and Hunting Safety Context

At a range, keep eye and ear protection on whenever shooting is active or range rules require it. Nearby shooters can expose you to noise and debris too, so protection is not only about the firearm you are personally using.

While hunting, some people use electronic hearing protection that reduces impulse noise while still allowing environmental sounds. Whatever gear you choose, follow local rules, manufacturer instructions, and hunter education guidance. For more range habits, read our shooting range safety rules guide.

Where to Get Qualified Guidance

For personal hearing concerns, talk with an audiologist or physician. For eye concerns or protective eyewear needs, talk with an eye-care professional. For range practice, ask a range safety officer or certified instructor. A general article can explain why protection matters, but it cannot evaluate your hearing, vision, firearm, range, or medical situation.

If you are assembling basic range equipment, pair this guide with our essential shooting gear guide and beginner shooting stance guide.

Frequently Asked Questions

Do I need both eye and ear protection at the range?

Yes. They protect against different hazards. Hearing protection helps reduce noise exposure, while eye protection helps guard against debris, ejected cases, and impact risks. Always follow your range’s rules.

What does NRR mean on hearing protection?

NRR stands for Noise Reduction Rating. It is a labeled test rating for hearing protection, but real-world protection depends on fit, seal, and correct use.

Can I use regular sunglasses for shooting?

Do not assume regular sunglasses are enough. Shooting glasses should be impact-rated and designed for safety use, not just glare reduction.

Should I wear earplugs and earmuffs together?

Many shooters double up at indoor ranges or around louder firearms. Combined protection can help, but it does not equal the simple sum of both ratings. Fit still matters.

When should I replace eye or ear protection?

Replace damaged eyewear, scratched lenses, worn earmuff cushions, dirty reusable plugs, and any protection that no longer fits or seals properly. Follow the manufacturer’s maintenance instructions.

Final Safety Reminder

Eye and ear protection are basic range safety gear, not optional accessories. Choose impact-rated eyewear, use hearing protection correctly, check fit before shooting starts, and follow your range safety officer’s commands. When in doubt, ask qualified help before stepping to the firing line.

Essential Shooting Gear Checklist for Safe Range Trips

Essential shooting gear starts with safety gear, not accessories. For most range trips, the core kit is eye protection, ear protection, correct ammunition, safe firearm transport, approved targets, a basic tool/cleaning kit, and a simple plan for what you want to practice.

This guide is a practical checklist for responsible range users and new shooters. Always follow your firearm manual, local law, and range rules. The NSSF firearm safety rules should come before any gear recommendation.

Table of Contents
  1. Quick Essential Gear Checklist
  2. Eye and Ear Protection
  3. Safe Transport Gear
  4. Ammunition and Targets
  5. Range Bag Organization
  6. Maintenance and Tools
  7. What Beginners Can Skip
  8. Related Guides
  9. FAQ
  10. Final Recommendation

Quick Essential Gear Checklist

GearWhat to look forWhy it matters
Eye protectionImpact-rated wraparound shooting glassesProtects against debris, brass, target fragments, and weather.
Ear protectionFoam plugs, earmuffs, or doubled-up protection when neededGunfire can damage hearing quickly.
Range bagSeparate pockets for safety gear, ammo, tools, and paperworkOrganization reduces mistakes and wasted time.
Correct ammunitionExact caliber/gauge confirmed against the firearmWrong ammunition is a serious safety risk.
Targets and toolsApproved targets, tape/stapler, marker, and pastersMissing small items can end practice early.
Cleaning/maintenance kitBasic bore care, lubricant, cloth, and small toolsKeeps equipment functional and catches issues.
First-aid basicsSmall kit plus any personal medicationsRange days should be planned like outdoor activities.
Notebook or appRecord firearm, ammo, distance, zero, and resultsNotes make practice measurable.

Eye and Ear Protection Come First

Eye protection should fit securely and provide side coverage. Clear lenses are useful indoors or in low light, while tinted lenses can help outdoors. The best pair is the one you will actually wear for the full session.

Ear protection is equally important. Many shooters use earmuffs, foam plugs, or both together, especially indoors or around rifles and muzzle brakes. The CDC/NIOSH noise resource is a helpful authority reference for understanding why loud sound exposure matters.

Safe Transport Gear

A case, lock, chamber flag, and clear storage plan help keep the trip organized and safe. Transport rules vary by location, so check your local requirements. As a baseline habit, firearms should be unloaded before transport and handled only in safe, approved areas.

Secure storage matters before and after the range day. Project ChildSafe is a useful resource for responsible firearm storage and safety education.

Ammunition and Targets

Bring only ammunition that matches the firearm exactly. Similar-looking cartridges can still be unsafe or wrong. Keep ammunition in labeled boxes or containers and avoid mixing calibers in loose bags.

Targets should match range rules. Some ranges allow only paper; others allow steel at specific distances. Bring target stands, staplers, tape, markers, and pasters only if they are permitted by the facility.

Range Bag Organization

A good range bag does not need to be expensive, but it should separate safety gear, ammunition, tools, documents, and small accessories. Keep eye and ear protection in an easy-to-reach pocket so they go on before the session starts.

Useful extras include a marker, small flashlight, multitool, cleaning cloth, batteries for optics or electronic earmuffs, a small towel, water, and weather-appropriate clothing. Avoid turning the bag into a heavy junk drawer; pack for the actual session.

Maintenance and Tools

Bring basic tools only if you know how to use them safely. A small screwdriver set, optic battery, lubricant, bore snake or cleaning rod, and cloth can solve minor issues. Do not perform unfamiliar repairs at the firing line.

After the trip, inspect the firearm, optics, magazines, and range gear. Record any failures, zero changes, ammunition notes, or gear problems before you forget them.

What Beginners Can Skip

New shooters do not need every accessory at once. Skip complicated timers, specialty rests, advanced holsters, and extra optics until the safety fundamentals, basic marksmanship, and range habits are solid. Spend first on protection, training, correct ammunition, and reliable storage.

When in doubt, ask the range before buying gear. Range rules can make some accessories unnecessary or unusable. A simple, compliant kit is better than a crowded bag full of items you cannot use.

FAQ

What shooting gear should beginners buy first?

Beginners should start with eye protection, ear protection, correct ammunition, safe transport/storage gear, approved targets, and basic cleaning supplies. Training and safe habits matter more than extra accessories.

Do I need both earplugs and earmuffs?

Many shooters double up indoors, around rifles, or near muzzle brakes. The right choice depends on the environment, firearm, and comfort, but hearing protection should always be used around gunfire.

What should stay in a range bag?

Keep eye and ear protection, target tools, a marker, small maintenance items, optic batteries, a first-aid kit, and range documents in the bag. Store ammunition and firearms according to law and range rules.

Is expensive shooting gear necessary?

No. Reliable safety gear and correct ammunition matter more than expensive accessories. Upgrade only when you know what problem the new gear solves.

Final Recommendation

Build your shooting gear kit around safety, organization, and the actual purpose of the range trip. Eye protection, ear protection, correct ammunition, safe transport, and a simple practice plan will do more for most shooters than a bag full of unnecessary accessories.

Shooting Range Trip Checklist: Safe Preparation Guide

A good shooting trip starts before you leave home. Whether you are going to a public range, a private range, or a supervised field session, the safest plan is to confirm rules, pack verified gear, transport firearms and ammunition correctly, and know what you will practice before the first shot.

This guide is a practical pre-trip checklist for responsible shooters. Always follow local laws, range rules, firearm manuals, and the basic safety rules. The NSSF firearm safety rules are the baseline for every range day or shooting activity.

Table of Contents
  1. Quick Pre-Trip Checklist
  2. Confirm Rules and Purpose
  3. Pack Safety Gear
  4. Transport Firearms and Ammunition
  5. Plan Your Practice
  6. Range Etiquette
  7. After-Trip Checks
  8. Related Guides
  9. FAQ
  10. Final Recommendation

Quick Pre-Trip Checklist

CategoryWhat to confirmWhy it matters
RulesRange hours, allowed firearms, allowed ammunition, target rules, and required safety gearEvery range has its own operating rules.
Firearm statusFirearms are unloaded, cased, functional, and legal to transportSafe transport starts before the vehicle moves.
AmmunitionCorrect caliber/gauge, safe condition, and enough for the practice planWrong ammunition is a serious safety risk.
Eye and ear protectionEveryone has suitable protection before shooting startsHearing and eye protection are non-negotiable.
Targets and toolsApproved targets, stapler/tape, marker, spotting aid, and basic maintenance itemsSmall missing items waste range time.
Practice planZeroing, grouping, position work, safety drills, or gear checkA plan makes practice more useful and safer.
Storage after tripFirearms and ammunition return to secure storageThe trip is not over until everything is secured.

Confirm Rules and Purpose Before You Go

Before packing gear, decide what the trip is for. Are you sighting in a rifle, testing a new optic, practicing trigger control, checking hunting gear, or introducing a beginner to safe range habits? A clear purpose keeps the session focused and prevents random gear piles.

Next, check the rules for the location. Public ranges may limit ammunition types, target materials, rapid fire, drawing from a holster, steel target distance, or shotguns. Private land also needs a safe backstop, permission, and compliance with local law.

Pack Safety Gear First

Eye and ear protection should be packed before optional accessories. Bring protection for every person attending, not only the shooter. Electronic earmuffs, foam plugs, wraparound eye protection, a brimmed hat, and a small first-aid kit are basic range-day items.

For secure storage and responsible firearm ownership reminders, Project ChildSafe is a useful resource. Good preparation includes how firearms are stored before and after the trip, not just what happens at the firing line.

Transport Firearms and Ammunition Carefully

Transport rules vary by location, so check your state and local requirements. As a general safety habit, firearms should be unloaded, actions checked, and gear organized so there is no confusion at the range. Keep ammunition in the correct packaging or clearly labeled containers.

Before leaving, confirm that the ammunition matches the firearm. Do not rely on memory or similar-looking cartridges. A quick caliber/gauge check is one of the simplest ways to prevent a serious mistake.

Plan Your Practice Session

A good practice plan is short and specific. Examples include confirming zero, shooting three careful groups, practicing safe loading and unloading, checking optic settings, or working on one accuracy fundamental. Trying to practice everything in one session usually makes progress harder to measure.

Write down firearm, ammunition, distance, weather, optic setting, group size, and any issues. Those notes help you spot patterns later. For organized marksmanship and competition pathways, USA Shooting is a good authority source to keep in your learning path.

Range Etiquette and Communication

Listen to the range officer, follow cease-fire commands immediately, and communicate clearly with the people around you. Do not handle firearms while people are downrange. Keep gear organized so benches, walkways, and firing points stay clear.

If you bring a new shooter, explain the safety rules before arriving and keep the first session simple. A calm, predictable session builds better habits than overwhelming someone with too many firearms, targets, or drills.

After-Trip Checks

When the session is over, confirm firearms are unloaded before casing them, collect targets and trash, and account for ammunition and accessories. At home, clean or inspect firearms as needed, record notes, and return firearms and ammunition to secure storage.

Post-trip notes are especially useful after sight-in work or gear testing. If a scope shifted, ammunition grouped poorly, or a piece of gear failed, write it down before the details fade.

FAQ

What should I bring to a shooting range?

Bring the firearm, correct ammunition, eye protection, ear protection, approved targets, target tools, a range bag, identification or membership card if required, and any manuals or tools needed for the session.

Should I plan drills before going to the range?

Yes. A simple plan helps you use ammunition and time wisely. Focus on one or two goals, such as zero confirmation, group size, trigger control, or safe handling.

How should firearms be transported to the range?

Follow local law and range rules. As a safety habit, firearms should be unloaded, cased, and separated from confusion with loose gear. Ammunition should be clearly identified and matched to the firearm.

What is the most common range-day mistake?

One common mistake is packing gear without a purpose. Another is forgetting small essentials such as eye protection, ear protection, targets, a stapler, or the correct ammunition.

Final Recommendation

A safe shooting trip is built around preparation: rules, safety gear, correct ammunition, organized transport, a clear practice plan, and secure storage afterward. Keep the plan simple, respect the range, and use every trip to build safer habits.

Exit mobile version