Best Hunting Backpacks for 2025: A Complete Buyer’s Guide

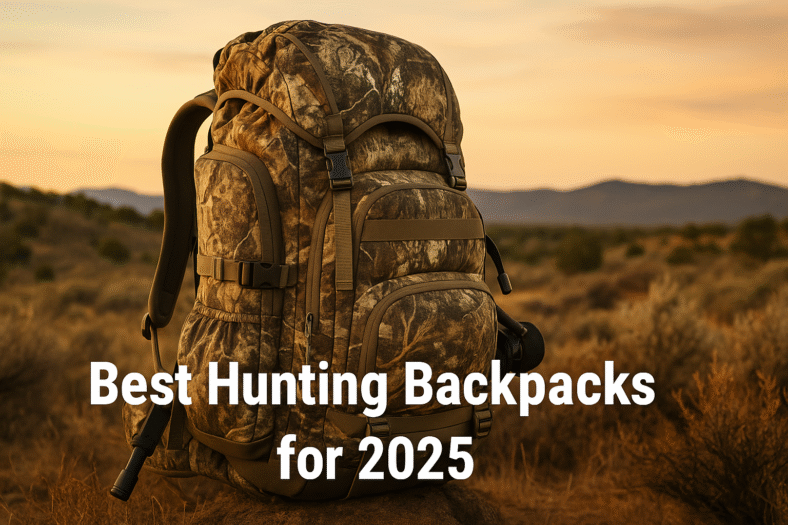
Heading into the backcountry without the right backpack is one of the easiest ways to ruin a hunt. A good pack keeps your gear organized, carries heavy loads comfortably and quietly and holds up to harsh conditions. In contrast, the wrong pack leaves you sore, disorganized and frustrated. This long‑form guide explains what differentiates hunting backpacks from ordinary packs, how to choose the right one for your style of hunting and highlights some of the best models available for the 2025 season.

Why hunting backpacks matter

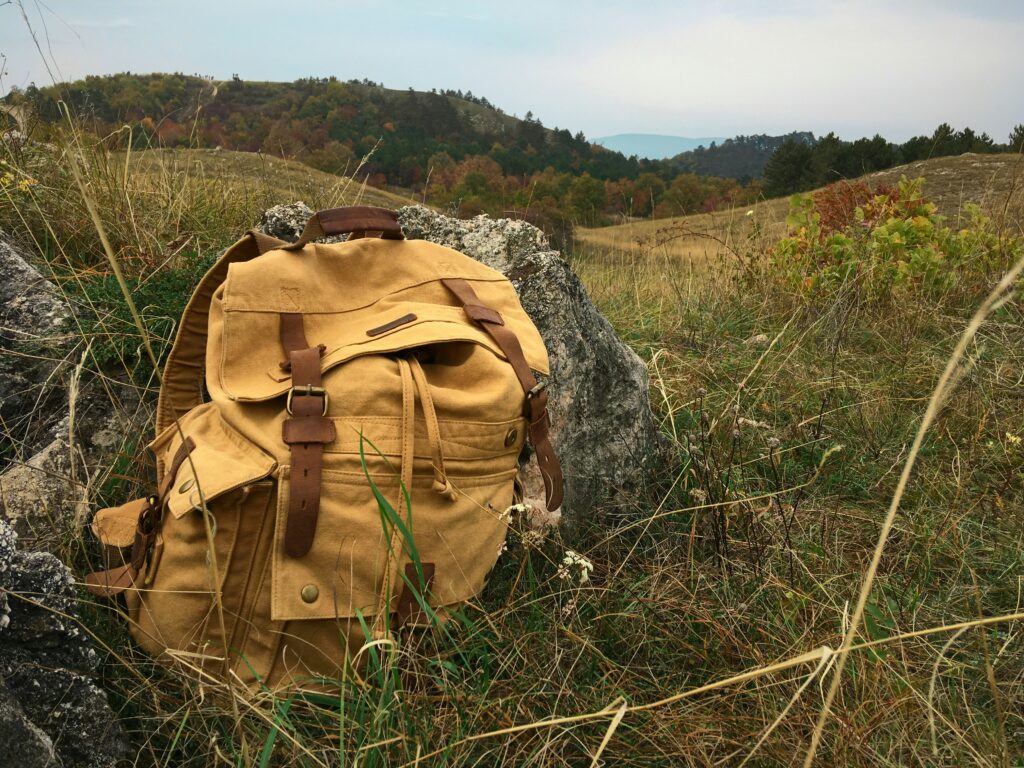
Most hunters carry more than a day’s worth of gear. Modern backpack designs allow you to pack sleeping bags, shelters, optics, weapons and meat in a way that keeps weight balanced and your hands free. Hunting packs are also built from tough fabrics like Cordura and Xpac to resist abrasion and weather. Good packs are quiet, with buckles and fabric that won’t squeak when you slip through brush.

They include features like load‑lifters and adjustable frames to move the weight to your hips and away from your shoulders, hydration sleeves, compression straps to secure a rifle or bow and external pockets for quick access to essentials.

Key considerations when choosing a hunting backpack

Trip length and capacity

Before shopping, decide how long your hunts typically last. Backpacks are sized in cubic inches or liters. Day‑packs for treestand or whitetail hunting often hold 1 200–2 000 cubic inches (20–30 L) and focus on organization and quiet operation. Multi‑day backcountry packs start around 3 500 cubic inches and grow past 7 000 cubic inches for week‑long expeditions. The Outdoor Life editors note that backcountry elk hunters might need space for a tent, sleeping bag, food, optics and a rifle. Meanwhile, a whitetail hunter sitting in a stand may only need room for lunch and a few layers. Always choose a pack big enough to haul meat out as well as your gear.

Frame style

Hunting backpacks come in two general styles: internal frame packs and external frame systems with detachable bags. Internal frame packs are lighter, quieter and streamlined. They are perfect for day hunts or short trips where meat hauling isn’t the primary concern. External frame systems, like those offered by Stone Glacier and Kifaru, include a rigid frame and a separate bag. The frame provides a shelf between it and the bag where you can strap quarters and game bags. External frames also allow you to switch bags for different tasks and they often carry heavy loads more comfortably. The trade‑off is cost and complexity; external frames are typically more expensive and require more setup.

Fit and adjustability

Regardless of brand, a pack must fit your body. Outdoor Life recommends measuring your torso length by placing your hands on your hip bones (iliac crest) and measuring to the prominent vertebra at the base of your neck. Many manufacturers offer multiple

frame sizes and adjustable suspension systems. Stone Glacier’s packs, for example, allow you to choose belt lengths and adjust shoulder strap height. A pack that fits correctly shifts the weight to your hips via the padded waist belt; it should not feel like it is hanging from your shoulders.

Weight and materials

Weight matters, especially on long hikes. Ultralight hunters often choose packs built with fabrics like Xpac and 500D Cordura, which provide strength without excess weight. The Stone Glacier Solo 3600 weighs about 4 pounds 6 ounces yet can haul more than 150 pounds. Heavier expedition‑style packs like the Kifaru Dall weigh over 6 pounds but can handle 10‑day trips and 7 000+ cubic inches of gear. Evaluate your strength, typical loads and the length of your hunts when deciding how much weight you can accept.

Organization and accessibility

Good organization separates a hunting pack from a simple dry bag. Look for dedicated compartments for optics, hydration b

ladders, knives and tags. Large horseshoe or U‑shaped zippers, like those on Stone Glacier and Mystery Ranch packs, provide wide access to the main compartment so you don’t have to dig through from the top. Many packs include detachable pockets or lids that double as small daypacks for scouting trips. Quiet closure systems such as magnets or fleece flaps are beneficial for tree‑stand hunters who need to access gear silently.

Meat hauling capability

When you are successful, your pack must carry meat comfortably and securely. External frames often incorporate a “load shelf” where boned meat or quarters can be lashed between the frame and the bag. The Stone Glacier Solo offers a 2 500‑cubic‑inch expandable load shelf and 150‑pound load rating. The Kifaru Dall features an integral load shelf and can host additional pouches for long expeditions. Even some day packs, like the Mystery Ranch Treehouse, have bottom compression straps and front pockets designed to secure a stand or

Top hunting backpacks for 2025

The following models represent some of the best packs tested by hunting publications and professional gear reviewers. Each excels in a particular niche.

Best overall: Stone Glacier Solo 3600

The Solo has become a favorite among mountain hunters because it balances light weight and load‑hauling ability. The pack’s main bag holds 3 600 cubic inches and features a U‑shaped zipper for easy access. It rides on Stone Glacier’s X Curve frame and weighs about 4 pounds 6 ounces. A load shelf between the bag and frame adds over 2 500 cubic inches for meat or camp gear. Reviewers praise its compression straps, which secure rifles, tripods and trekking poles. The Solo is built with 500D Cordura and Xpac fabric and rated to carry more than 150 pounds. The downside is price and minimal pockets, but for those who want a durable ultralight mountain pack, the Solo is hard to beat.

Best for backcountry hunts: Stone Glacier Sky Archer 6400

Designed for long, self‑supported hunts, the Sky Archer offers 6 400 cubic inches of storage on the Krux frame and weighs roughly 5 pounds 2 ounces. It can compress down to a day‑pack or expand to haul meat thanks to its load shelf. Stone Glacier updated the 2025 version with a side‑zip pocket for accessories and a larger spotting scope pocket. Multiple frame and belt sizes allow a custom fit. Although set‑up can take time, once dialed the pack carries heavy loads well and remains lighter than most comparably sized models.

Quietest day‑pack: Sitka Fanatic Pack

Whitetail hunters who value stealth will appreciate the Sitka Fanatic. Instead of noisy buckles and zippers, it uses berber fleece material and a silent strap/latch system. The pack holds about 2 166 cubic inches and includes dozens of internal pockets for organizing calls, rangefinders and snacks. It is designed to hang open from a tree, giving you access to gear while seated in a stand. The lack of a rigid frame makes

it less suitable for ground hunts or heavy loads, but for treestand hunters who want the quietest pack available, the Fanatic is an excellent choice.

Best heavy‑hauler: Kifaru Dall

Kifaru’s packs are legendary among sheep and goat hunters for their durability and comfort under heavy loads. The Dall combines a simple roll‑top bag with the Duplex Lite frame and can haul 7 080 cubic inches of gear. It weighs around 6 pounds 2 ounces on the Duplex Lite frame and includes a built‑in load shelf for meat. The bag can attach three additional external pouches and Kifaru’s guide lids, allowing you to customize storage. Because the frame and bag are sold separately, the system is pricey, and fine‑tuning the fit takes time. However, hunters undertaking 10‑ to 14‑day expeditions will appreciate its capacity and comfort.

Best for saddle hunting: Mystery Ranch Treehouse 20

The Treehouse 20 was designed specifically for saddle and treestand hunters. The semi‑rigid 1 275‑cubic‑inch bag holds your camera, extra layers and other essentials while allowing you to strap climbing sticks or a lightweight stand to the exterior. Internal cinch pockets with silent closures organize gear, and a fuzzy polyester exterior reduces noise. A bottom compression strap and front stretch pocket secure larger items. This pack is not meant for hauling quarters, but it excels at keeping treestand gear quiet and accessible.

Best value pack: ALPS OutdoorZ Elite Frame + 3800

For hunters on a budget, the ALPS Elite Frame system provides excellent features at a lower price point. It pairs a six‑position adjustable torso frame with a 3 800‑cubic‑inch bag. Gear reviewers praise its comfortable air‑mesh suspension, load lifters and anti‑slip lumbar pad. The pack detaches from the frame quickly, and ALPS offers smaller day‑pack bags that clip on for shorter hunts. Features include waist‑belt pockets, an adjustable lashing system and a rifle/bow drop‑down pocket. The PU‑coated 500D Cordura fabric and included rain cover protect your gear.

Most durable: Stone Glacier Sky 5900

If durability is your priority, consider the Stone Glacier Sky 5900. Built on the XCurve frame, it uses carbon fiber composite stays and a Powerlock hip belt to distribute weight effectively. The bag itself weighs only 2.4 pounds yet handles over 100 pounds of meat and gear. It features a full‑panel zipper for easy access and attaches to the frame via tab‑style hooks and loops. The Sky 5900 is expensive but can handle anything from an overnight deer hunt to a multi‑week sheep hunt.

Most versatile: Mystery Ranch Metcalf

The Metcalf is a favorite among western hunters for its versatility. At roughly 4.5 pounds with the Guide Light MT frame, it offers 4 335 cubic inches of space plus an overload shelf for meat.

The split‑lid design and multiple compression straps adapt to loads of various shapes and sizes. Sturdy 500D LP Cordura fabric and quality buckles ensure durability. The Metcalf is pricey but can serve as your one‑pack solution for day hunts through week‑long backcountry trips.

Most comfortable: Badlands Vario System

Badlands developed the Vario system to offer custom comfort. The frame uses an aluminum structure with a thick molded foam back panel and adjustable shoulder yoke. Hunters can pair the frame with different bag sizes ranging from 1 800 to 6 500 cubic inches. Reviewers highlight its excellent ventilation and supportive hip belt. The modular design lets you choose the right bag for each hunt.

Best looking: Kuiu Pro LT 5500 Pack

While looks may be subjective, Kuiu’s Pro LT 5500 stands out for its sleek design and color options. Built from 330D HT nylon with a protective PE sheet, it weighs only about 3.5 pounds yet holds 5 500 cubic inches. An adjustable fr

ame fits a wide range of torso lengths. The pack includes numerous organization pockets, load lifters and side compression straps for securing weapons. Kuiu offers accessories like hydration reservoirs and hip‑belt pouches to customize your loadout.

Notable new packs for 2025

Hunting pack innovation continues. Bowhunting.com highlighted several new packs releasing in 2025. The Mystery Ranch Sawtooth 45 is a day pack built from durable Robic Kodra Ripstop and Cordura fabric with a 270‑degree horseshoe zipper, external accessory pockets and customizable compression straps. At 45 liters it is ideal for overnight trips and weighs about 5 pounds. The Mystery Ranch Beartooth 85 offers 85 liters of space for 3‑5 day adventures, with a dual split‑lid design, stretch‑woven side pockets and a removable lid that doubles as a day pack. For longer expeditions, the Mystery Ranch Marshall 105 provides 105 liters of capacity with dual torpedo pockets and an adjustable overload shelf. Saddle hunters may appreciate the Grit Pack from Tethrd; it offers about 1 700 cubic inches in the main compartment with another 340 cubic inches in a compression pocket and MOLLE straps for attaching sticks, platforms and accessories. It also features a waterproof bottom pocket for your kill kit.

Tips for packing and using your backpack

  1. Balance the load. Place heavy items like water, optics and meat close to your back and centered vertically. Lighter gear such as clothing and sleeping bags can go towards the outside or top.
  2. Use compression straps effectively. Tighten straps to prevent the load from shifting. Many packs let you thread the straps over a rifle or bow to secure it externally.
  3. Keep essentials accessible. Use hip‑belt pockets and top lids for frequently used items like headlamps, rangefinders, snacks and tags. Day hunters should choose packs with quiet closure systems for these pockets.
  4. Protect optics and electronics. Many packs have dedicated sleeves for s

potting scopes or hydration bladders. If yours doesn’t, pack optics in padded cases and place them near the top of the bag where they are protected.

  1. Practice with your load. Before the season, load your pack with gear and take it on training hikes. Adjust the hip belt, shoulder straps and load lifters to find the most comfortable fit.
  2. Care for your pack. After each hunt, remove meat and wash away blood with mild soap. Dry the pack thoroughly before storage to prevent mold or odors. Check buckles and straps for wear and replace as needed.

Conclusion

Hunting backpacks are more than just bags – they are essential tools for carrying gear safely and comfortably. When selecting a pack, consider the length of your hunts, the weight you expect to carry, the materials and frame design and whether you need specialized features like a quiet closure system or modular components. The models highlighted here have earned high marks from professional testers. The Stone Glacier Solo 3600 and Sky Archer 6400 lead the field for mountain and backcountry hunters, while packs like the Sitka Fanatic and Mystery Ranch Treehouse serve treestand and saddle hunters exceptionally well. Budget‑minded hunters can trust the ALPS OutdoorZ Elite Frame, and those undertaking long expeditions might invest in the Kifaru Dall or Stone Glacier Sky 5900. New offerings like the Mystery Ranch Sawtooth 45 and Grit Pack ensure that innovation continues. By investing in a quality pack that fits your body and matches your hunting style, you’ll be better prepared for the adventures that 2025 has in store.

Youth Compound Bows: The Complete Guide for Young Archers

Archery is one of the oldest sports in the world, combining skill, patience, and focus. In recent years, it has become especially popular among younger generations thanks to movies, video games, and the rise of outdoor adventure sports. For young beginners stepping into archery, having the right equipment is crucial and nothing is more important than choosing the best youth compound bow.

A properly designed youth compound bow ensures safety, comfort, and accuracy, helping young archers build confidence while developing essential shooting skills. In this guide, we’ll cover everything parents and coaches need to know about youth compound bows: what they are, how to choose one, safety considerations, and the best models available in 2025.

What Are Youth Compound Bows?

A youth compound bow is a specially designed compound bow tailored for younger archers. Unlike adult bows, these models feature:

  • Lower draw weights (10–40 lbs) suitable for smaller muscles.
  • Shorter draw lengths (18–27 inches) to fit smaller body frames.
  • Lightweight designs for easier handling.
  • Adjustability so the bow can grow with the child.

Compound bows use cams and pulleys to reduce holding weight at full draw (known as “let-off”), making it easier for young archers to focus on accuracy rather than strength.

Why Choose a Youth Compound Bow Instead of a Recurve or Longbow?

  1. Easier Learning Curve – The let-off feature makes compound bows less tiring to shoot.
  2. Better Accuracy – Cams and stabilizers allow steadier shots.
  3. Adjustability – Many youth compound bows can be adjusted for years of use.
  4. Modern Appeal – Kids often find compound bows more exciting because they resemble professional archery gear.

Key Features to Look for in a Youth Compound Bow

1. Draw Weight

  • Youth bows typically range between 10–40 lbs.
  • Beginners should start on the lower end (10–20 lbs).
  • For hunting, most states require a minimum of 35 lbs for ethical shots.

2. Draw Length

  • Most youth archers fall between 18–27 inches.
  • Choose a bow with adjustable draw length to allow growth.

3. Weight of the Bow

  • A lightweight bow (2–3.5 lbs) is best for younger kids.
  • Heavy bows can cause fatigue and poor form.

4. Adjustability

  • Look for compound bows that allow easy adjustments without a bow press.
  • This ensures the bow “grows” with the child, saving money in the long run.

5. Safety Features

  • Rounded cam edges to prevent string slap injuries.
  • Comfortable grips sized for small hands.
  • Smooth draw cycles for beginner-friendly shooting.

6. Accessories

  • Many youth bows come in ready-to-shoot kits, including sights, rests, quivers, and arrows.
  • This makes setup easy for beginners.

Best Youth Compound Bows in 2025

1. Diamond Archery Infinite Edge Pro (Youth-Friendly)

  • Draw Length: 13–31 inches
  • Draw Weight: 5–70 lbs
  • Why It’s Great: Highly adjustable, grows with the archer.
  • Best For: Older youth and teens serious about archery.

2. Bear Archery Cruzer Lite

  • Draw Length: 12–27 inches
  • Draw Weight: 5–45 lbs
  • Why It’s Great: Lightweight and versatile.
  • Best For: Beginners and young hunters.

3. Genesis Original Bow

  • Draw Length: Universal (15–30 inches)
  • Draw Weight: 10–20 lbs
  • Why It’s Great: Official NASP (National Archery in Schools Program) bow.
  • Best For: School programs and first-time archers.

4. PSE Mini Burner

  • Draw Length: 16–26.5 inches
  • Draw Weight: 4–40 lbs
  • Why It’s Great: Compact size and complete package kit.
  • Best For: Youth archers 7–12 years old.

5. Bear Archery Royale Youth Compound Bow

  • Draw Length: 12–27 inches
  • Draw Weight: 5–50 lbs
  • Why It’s Great: Super adjustable and lightweight.
  • Best For: Kids who want a bow they won’t outgrow quickly.

Safety Considerations for Youth Archers

  1. Supervision: Children should never shoot unsupervised.
  2. Proper Draw Weight: Avoid setting draw weight too high, which can cause strain.
  3. Protective Gear: Arm guards and finger tabs prevent injuries.
  4. Safe Environment: Always practice in a controlled range or safe outdoor space.
  5. Proper Arrows: Arrows must be the correct length and spine rating for the bow.

Youth Compound Bows for Hunting

Many young archers eventually want to transition into hunting. Here are some tips for choosing a youth hunting bow:

  • Ensure the bow can reach 35 lbs minimum draw weight (state regulations vary).
  • Use arrows with appropriate broadheads.
  • Choose compact bows for maneuverability in blinds and treestands.
  • Practice extensively on 3D targets before going into the field.

Top Hunting Pick: Bear Cruzer Lite – meets most hunting requirements while remaining lightweight and easy to handle.

Tips for Parents Buying a Youth Compound Bow

  1. Try Before Buying: Visit a pro shop to test bows for comfort and fit.
  2. Start with Adjustability: Kids grow fast; choose a bow that can adjust in weight and length.
  3. Don’t Over-Spend Initially: A mid-range bow is perfect for beginners. Upgrade later if interest continues.
  4. Encourage Practice: Set up safe backyard ranges or join youth archery programs.
  5. Make It Fun: Let kids choose colors or accessories to personalize their bow.

Common Mistakes to Avoid

  • Too Heavy Draw Weight: Causes bad habits and frustration.
  • Buying Adult Bows for Kids: Unsafe and ineffective.
  • Skipping Safety Gear: Increases risk of injuries.
  • Using Wrong Arrows: Can cause tuning problems and dangerous misfires.
  • Ignoring Adjustability: Leads to buying new bows too soon.

Accessories That Help Youth Archers

  • Sights: Multi-pin sights make aiming easier.
  • Arrow Rests: Whisker Biscuits are beginner-friendly.
  • Quivers: Lightweight designs that attach to bows.
  • Releases: Simple wrist-strap releases improve consistency.
  • Stabilizers: Small stabilizers help with balance and reduce vibration.

Training Tips for Youth Archers

  1. Start Close: Begin at 5–10 yards and gradually increase distance.
  2. Focus on Form: Teach proper stance, anchor points, and release.
  3. Short Sessions: Keep practice fun, 20–30 minutes at a time.
  4. Games and Challenges: Make practice engaging with scoring games.
  5. Join a Program: Many schools and clubs have youth archery programs.

Maintenance Tips for Youth Compound Bows

  • Inspect Strings: Wax regularly to prevent fraying.
  • Check Screws: Ensure sights, rests, and cams are tight.
  • Store Properly: Keep bows in dry, safe places.
  • Pro Shop Tune-Up: Get annual checks for tuning and safety.
  • Replace Worn Parts: Change out arrow rests, strings, or cams as needed.

Benefits of Archery for Youth

  • Physical Fitness: Builds strength, coordination, and focus.
  • Confidence: Hitting targets builds self-esteem.
  • Patience & Discipline: Teaches focus and perseverance.
  • Stress Relief: Outdoor shooting reduces screen time and promotes relaxation.
  • Bonding: Great family activity for parents and kids.

Conclusion

Archery is an exciting and rewarding sport for young people, but having the right equipment is critical. A youth compound bow provides the perfect balance of safety, adjustability, and performance to help kids learn proper shooting technique while having fun.

From recreational backyard shooting to competitive school programs and even hunting, youth compound bows are versatile enough to grow with a child’s skill level. By focusing on adjustability, proper draw weight, and safe accessories, parents can ensure their child has the best start in archery.

In the end, archery is more than hitting targets it’s about building confidence, discipline, and lifelong skills. With the right youth compound bow, young archers are set up for success, both on the range and beyond.

Bow Stabilizers Explained: How They Work and How to Choose

A bow stabilizer is a weighted rod, or a set of rods, that attaches to a bow to influence balance, steady the aiming feel, and help manage vibration after the shot. A stabilizer does not guarantee accuracy by itself. It can make a bow easier to hold steady, but good shooting still depends on fit, form, tuning, and practice.

This guide explains what bow stabilizers do, the common types, how hunting and target setups differ, and how to think about balance without chasing unnecessary weight. It is an educational setup guide, not a product ranking or brand recommendation.

Table of Contents
  1. What a Bow Stabilizer Actually Does
  2. Common Types of Bow Stabilizers
  3. How to Fit a Stabilizer to Your Bow
  4. Hunting vs Target Setup Tradeoffs
  5. Setting Balance and Weight
  6. Common Mistakes to Avoid
  7. Related Archery Setup Guides
  8. Frequently Asked Questions

What a Bow Stabilizer Actually Does

A stabilizer adds weight away from the bow’s center. That changes how the bow balances and how it reacts while you aim and after you release. The common goals are steadier holding, better front-to-back balance, less hand shock, and a calmer feel during the shot cycle.

Archery stabilizers are common enough to have their own equipment category in references such as archery stabilizer descriptions, but the important point is practical: a stabilizer is a tuning aid. It helps the bow feel better matched to the archer. It does not replace a repeatable anchor, clean release, correct arrow setup, or practice.

A stabilizer setup can include a front bar, side bar, rear bar, removable weights, and a balance point that matches the archer.

Common Types of Bow Stabilizers

Stabilizers are usually described by where they mount and what role they play. The exact names vary by brand and bow type, but the main categories are consistent enough to understand before you shop or adjust your own bow.

Front Stabilizer Bar

The front bar mounts to the front of the riser and is the stabilizer most archers notice first. A longer front bar increases leverage and can make the bow feel steadier on aim. A shorter front bar is easier to carry and move through cover, which is why compact versions are common on hunting bows.

Side Bar and Rear Bar

Side and rear bars help fine-tune left-right and front-back balance. Target archers often use them to settle the bow more precisely. Hunters may skip them or use a smaller setup if weight, noise, and maneuverability matter more than fine balance control.

Weights and Dampeners

Removable weights let you adjust how the bow holds. Dampening components can change the feel of vibration after the shot. Add weight gradually, shoot groups, and pay attention to fatigue. A setup that feels excellent for three arrows may not feel as good after a full practice session or a long day in the field.

How to Fit a Stabilizer to Your Bow

Most modern compound bows have an accessory bushing for a front stabilizer, but fit still matters. Check your bow manual and stabilizer specifications for thread compatibility, weight guidance, and any installation limits. If you use side or rear bars, confirm that the mount works with your riser, sight, quiver, and rest setup.

Fit is not only about hardware. It also includes how much weight you can hold comfortably, how you carry the bow, whether you shoot from a stand or blind, and whether you compete under rules that limit stabilizer length or configuration. Competition rules can change, so use current rulebooks such as the World Archery rulebook when equipment class matters.

Hunting vs Target Setup Tradeoffs

Hunting and target setups often look different because they solve different problems. A target archer may accept a longer, heavier setup because the bow is used on a range or course. A hunter may choose a shorter stabilizer because the bow needs to move through trees, blinds, treestands, packs, and uneven terrain.

Setup factorHunting tendencyTarget tendency
LengthShorter and easier to maneuverLonger for steadier aim
WeightLighter for carrying and quick handlingHeavier for balance and hold feel
PriorityQuiet, compact, practical in coverMaximum steadiness and repeatability
Side barsOften minimal or skippedCommon for fine balance
EnvironmentStands, blinds, woods, 3D practiceKnown line, target range, tournament setup

These are tendencies, not rules. A hunter who shoots 3D archery may like a longer setup for practice. A target archer may prefer less weight for comfort. The best stabilizer is the one that helps your bow settle without making the whole setup harder to shoot well.

Setting Balance and Weight

The goal is a bow that holds naturally and returns calmly after the shot. Start with a simple front stabilizer, shoot enough arrows to feel the difference, then add or remove weight in small steps. If the bow wants to dip, roll, or fight your hand, balance may need adjustment.

Do Not Chase the Heaviest Setup

More weight can feel steady at first, but too much weight creates fatigue. Fatigue usually hurts form, and poor form can erase the benefit of any stabilizer. If you hunt, also think about carry weight, noise, and how the bow handles when you are wearing layers or moving in tight cover.

Change One Thing at a Time

Adjust stabilizer weight, bar length, or side-bar position one change at a time. Shoot enough arrows to know what changed. If you change the stabilizer, sight, arrow setup, and release routine all at once, you will not know which change helped or hurt.

Common Mistakes to Avoid

  • Expecting a stabilizer to fix weak form or poor tuning.
  • Adding too much weight and creating fatigue.
  • Buying a long target-style bar for tight hunting setups without considering maneuverability.
  • Ignoring thread compatibility, mount clearance, or class rules.
  • Changing too many setup variables at once.

Stabilizers are only one part of a complete setup. For broader practice structure, read the 3D archery setup guide. For other tuning components, see the arrow rest guide and the arrow spine guide. If you are building strength carefully, the guide on increasing draw weight safely is a useful next step.

Frequently Asked Questions

Do bow stabilizers really improve accuracy?

They can support more consistent shooting by improving balance and making the bow easier to hold steady. They do not guarantee accuracy. Form, tuning, fit, and practice are still the foundation.

What length stabilizer should I use?

There is no single correct length. Hunters often prefer shorter stabilizers for easier carrying and movement. Target archers often use longer bars for steadier aiming. Choose based on use, comfort, and any class rules.

Do I need a side bar or back bar?

Not always. A side or rear bar helps fine-tune balance, especially in target setups. Many hunting bows work well with a single compact front stabilizer.

Can I use the same stabilizer for hunting and target archery?

You can, but the ideal setup may differ. A moderate front stabilizer can work for both, while specialized target setups may feel too long or heavy for hunting.

Are stabilizers allowed in competition?

It depends on the organization, class, and current rulebook. Check the rules for the specific event before competing, especially if you use long bars, side bars, or unusual weight setups.

Arrow Rest Guide: Rest Types, Fit, and Setup Basics for Archers

An arrow rest is the part of the bow that supports the arrow until release. The main rest types are drop-away rests, containment or full-capture rests, and prong or blade-style rests. The right choice depends on your bow, arrow setup, shooting style, and how much retention, clearance, and tuning complexity you want.

A better rest can support cleaner arrow flight, but it does not guarantee accuracy by itself. Fit, arrow spine, nocking point, form, and tuning all work together. Use this guide to understand the rest types, then confirm final setup with your bow and rest manufacturer instructions or a qualified pro shop.

What An Arrow Rest Does

An arrow rest holds the arrow in position on the bow and supports it through the shot. A well-matched rest helps the arrow launch consistently. A poorly matched or mistuned rest can create fletching contact, erratic flight, and frustrating groups.

The rest is only one part of the setup. Your arrow spine, point weight, nocking point, draw length, release, and form also matter. For broader shooting form work, see our guide on improving archery shooting.

Common Types Of Arrow Rests

Arrow rests fall into a few practical categories. The descriptions below are general, so confirm exact behavior and compatibility for your specific bow and rest.

Drop-away rests

A drop-away rest supports the arrow during the draw and drops out of the way during the shot. The goal is to reduce contact between the rest and the arrow or fletching. Drop-away rests are common on compound bows, but they need correct setup and timing.

Containment and full-capture rests

Containment rests surround or partly surround the arrow so it stays in place while you move, draw, or hold at an angle. That retention can be useful for hunting, field use, and new archers. The tradeoff is that some designs create more arrow or vane contact than a well-set drop-away rest.

Prong, blade, and shoot-through rests

Prong and blade-style rests support the arrow on small contact points and are often associated with target setups. They can be precise, but they also require careful matching to arrow diameter, spine, point weight, and shooting style.

Traditional shelf rests

Many traditional bows use the shelf or a simple stick-on rest rather than a compound-style rest. Do not assume compound rest advice applies to recurves or longbows. Follow the bow maker’s setup guidance.

How To Choose By Use Case

Choose by how you shoot, not by the most expensive or most complicated design.

  • Hunting and field use: arrow retention matters because you may move, change angles, or draw from uneven positions.
  • Target archery: repeatability, clearance, and fine adjustment usually matter more than maximum retention.
  • 3D archery: balance retention, clearance, and class rules. Our 3D archery setup guide explains the broader setup context.
  • Beginners: simplicity and reliability usually beat complicated tuning until form is more stable.

Compatibility And Fit

Before choosing a rest, confirm it fits your bow and your arrows. Check the riser’s mounting interface, arrow diameter, vane clearance, and whether the rest type matches your shooting discipline. If your rest has timing or activation parts, make sure the bow can support that setup correctly.

Manufacturer support pages and manuals are the safest place for model-specific information. For example, Bear Archery’s product manuals and Mathews customer support are better references for setup limits than a generic article.

Setup And Tuning Cautions

Arrow rest setup is connected to the rest of the bow. Centershot, nocking point, arrow spine, fletching clearance, and drop-away timing can all interact. That is why beginners should treat tuning instructions as equipment-specific, not universal.

Use the rest maker’s instructions, the bow manual, and a pro shop or coach when you are unsure. For safe learning context, USA Archery’s safety guidance is also worth reviewing before working with new equipment.

Maintenance Checks

  • Check mounting screws for looseness.
  • Inspect moving parts on drop-away rests.
  • Look for worn bristles, blades, pads, or launcher arms.
  • Check for fletching contact or unusual arrow marks.
  • Recheck tune after changing arrow spine, point weight, vanes, or draw settings.

If you are also working on overall bow balance, see our bow stabilization guide.

Frequently Asked Questions

What type of arrow rest is best for beginners?

Many beginners do well with a simple containment or full-capture rest because it helps keep the arrow in place. The best choice still depends on the bow, arrow setup, and shooting style.

What is the difference between a drop-away rest and a containment rest?

A drop-away rest moves out of the arrow’s path during the shot to reduce contact. A containment rest holds the arrow more securely during movement. Drop-away rests emphasize clearance; containment rests emphasize retention.

Do I need a pro shop to set up an arrow rest?

Not always, but a pro shop is smart if you are unsure about centershot, vane clearance, drop-away timing, or compound bow setup. Small rest changes can affect the whole tune.

Will a better arrow rest make me more accurate?

A well-matched and well-tuned rest can support more consistent arrow flight, but it does not guarantee accuracy. Form, arrows, bow fit, and practice still matter.

How do I know if a rest is compatible with my bow?

Check the rest and bow manufacturer information for mounting style, bow type, arrow compatibility, and setup instructions. If anything is unclear, ask the manufacturer or a local pro shop before buying.

Final Takeaway

The right arrow rest is the one that fits your bow, supports your arrows, and matches how you shoot. Drop-away rests prioritize clearance, containment rests prioritize arrow retention, and prong or blade-style rests can support precise target setups. Treat the rest as part of a complete bow system, not a standalone accuracy fix.

3D Archery Bows: A Practical Setup and Getting-Started Guide

3D archery is a target sport where archers shoot at life-size foam animal targets placed at varied distances along an outdoor course. A good 3D archery bow is not a magic model or a stale yearly pick list. It is a bow that fits you, launches matched arrows consistently, and stays inside the rules for the format or class you plan to shoot.

This guide explains how 3D archery works, what setup choices matter, and how to prepare for a course safely. It does not promise a score, rank products, or tell you that one bow type is best for everyone.

What Is 3D Archery?

3D archery uses three-dimensional foam targets, often shaped like game animals, on a walking course. Unlike a flat target lane, a 3D course may include uphill or downhill angles, changing light, natural terrain, and distances that are sometimes unmarked.

It is still target archery, not hunting. Many bowhunters use 3D as off-season practice, but the event itself is about safe target shooting, range judgment, and consistent form. For broad sport context and participation pathways, USA Archery is a useful starting point, while World Archery’s 3D archery discipline page explains the international discipline at a high level.

3D Archery Bow Setup Factors

A good 3D setup starts with fit and repeatability. Chasing speed, weight, or a model name before fit usually leads to frustration. The goal is a bow you can draw, hold, aim, and shoot repeatedly over a full course without fighting the equipment.

Draw length and draw weight

Correct draw length helps your anchor point, sight picture, and release stay repeatable. Draw weight should be controllable across many shots, not just impressive for one shot. Overbowing yourself can hurt form and consistency.

Balance and holding feel

3D archery often rewards a bow that holds steady on uneven terrain and varied target angles. Bow weight, stabilizer setup, grip feel, and overall balance all influence that hold. For a deeper support article on this piece, see our guide to bow stabilization for target shooting.

Course practicality

A course bow must also be practical to carry. A long, heavy target setup may aim beautifully, but it can be tiring on a walking course. A compact hunting bow may be easier to carry but less stable for some shooters. Fit the setup to the way you will actually shoot.

Bow Types Used In 3D Archery

Different bow types can be used in 3D archery, depending on the event, class, and local rules. Do not assume every club or organization allows the same equipment.

Compound bows

Compound bows are common in 3D because let-off, sights, releases, and stabilizers can support steady aiming. They also require correct setup and periodic service. If your compound needs press-dependent work, use a qualified pro shop.

Recurve bows

Recurve bows bring a simpler equipment path and a more form-focused challenge. They can be a rewarding choice for archers who prefer fewer mechanical parts, but they do not give compound-style let-off at full draw.

Traditional bows

Traditional bows can be used in some 3D contexts, depending on class rules. They reward consistent form, distance judgment, and a realistic understanding of your effective range.

Arrows And Tuning For 3D

Consistent arrow flight matters more than any single accessory. Arrow spine, length, point weight, and fletching should match your bow and draw setup. Use manufacturer spine charts and a pro shop when you are unsure.

3D archery uses field points, not broadheads. Broadheads can damage foam targets and are not part of normal 3D practice or competition. Keep field point weight consistent with the arrow setup you tune. For rest-related setup context, see our arrow rest guide.

Sights, Rests, And Stabilization

Sights, rests, stabilizers, and release aids can help consistency, but they do not guarantee a better score. They must also be legal for your chosen class.

Sights

Some classes allow adjustable sights, some limit sight styles, and some traditional classes may restrict sights heavily. Read the rulebook before buying around a class.

Rests

The rest should support clean, repeatable arrow launch. If arrows are showing contact problems or inconsistent flight, rest setup is one of the areas to inspect.

Stabilizers

Stabilizers can change how the bow balances at full draw and through the shot. A longer target-style stabilizer may hold steadier for one archer, while a shorter setup may be more practical on a walking course for another.

Course And Range Safety Basics

Safety comes before score. Only nock and draw when it is safe, follow the shooting stake and range directions, never shoot when someone is forward of the line, and keep arrows pointed safely downrange. Outdoor courses add terrain and visibility concerns, so follow the host club’s instructions.

For general range-safety thinking, our shooting range safety guide covers habits that transfer well to structured shooting environments. USA Archery’s archery safety page is also worth reviewing, especially for beginners and youth programs.

Formats, Classes, And Rules

3D archery rules vary by organization and event. Equipment class can affect sights, stabilizer length, release aids, rangefinders, arrow type, and scoring. Do not buy gear based on assumptions from a different event.

Before competing, read the current official rulebook for the organization or club hosting the event. If you shoot casually, still ask the range or club about allowed points, walking direction, scoring, and safety procedure before starting.

Getting Started Checklist

Use this checklist as a planning aid before your first course. It is not a replacement for your event’s rulebook or in-person instruction.

  • Confirm draw length and a comfortable draw weight.
  • Match arrows to your bow using spine and point-weight guidance.
  • Use field points only for 3D targets.
  • Check rest contact, sight setup, and broad equipment class rules.
  • Practice at varied known and unknown distances.
  • Read the current event or club rulebook.
  • Follow all course and range safety instructions.

For practice habits that support better consistency, see our guide on improving archery shooting form.

Frequently Asked Questions

What kind of bow is best for 3D archery?

The best bow for 3D archery is one that fits you, shoots matched arrows consistently, and is legal for your chosen class. Many archers use compound bows, but recurves and traditional bows can also fit depending on the format.

Can I use my hunting bow for 3D archery?

Yes, many archers use a hunting compound for 3D practice. Use field points, confirm the setup fits the class or club rules, and tune the bow for consistent arrow flight.

Do I shoot broadheads in 3D archery?

No. Use field points for 3D archery. Broadheads can damage foam targets and are not part of normal 3D target practice or competition.

Are distances marked in 3D archery?

It depends on the event and class. Some 3D formats use unknown distances, while others may allow rangefinders or known-distance formats. Check the event rules before you shoot.

Will a better setup guarantee better scores?

No. A better-fitting, well-tuned setup can support consistency, but scores come from form, practice, range judgment, and following the rules. No bow or accessory guarantees a result.

Final Setup Recommendation

Start with fit, matched arrows, field points, and safe course habits. Then refine the rest, sight, stabilizer, and release setup inside your chosen class rules. A 3D archery bow should help you shoot comfortably and consistently across a course; it should not be chosen from a stale model list or a single spec.

Why Eye and Ear Protection Matters When Shooting

Eye and ear protection matter when shooting because firearms create separate hazards for hearing and vision. Gunfire is a sudden loud impulse noise, and shooting can also involve ejected cases, debris, fragments, hot gases, dust, and other range hazards. Hearing protection helps reduce noise exposure, while eye protection helps guard against impact and debris.

This is general safety information for range, hunting, and sport-shooting contexts. It is not medical advice, and it does not replace your range rules, instructor guidance, equipment instructions, or advice from a qualified hearing or eye-care professional.

Why Shooters Need Eye and Ear Protection

Shooters wear eye and ear protection because the eyes and ears face different risks. Gunfire can create harmful noise exposure, especially indoors or near other shooters. Eye hazards can include ejected brass, blown debris, powder particles, fragments, and general range impact risks.

The CDC/NIOSH noise resources explain why noise exposure deserves prevention, and OSHA publishes general guidance on eye and face protection. For firearm handling rules, review the NSSF firearm safety rules.

Understanding Hearing Protection Ratings

Hearing protection in the United States is commonly labeled with a Noise Reduction Rating, or NRR. A higher NRR generally indicates more potential noise reduction under test conditions, but real-world protection depends heavily on fit and proper use.

Earplugs and earmuffs can both help, and some shooters use plugs and muffs together at indoor ranges or around louder firearms. Do not simply add two NRR numbers together; combined protection is more nuanced than that. Follow the manufacturer’s instructions and your range’s requirements.

Understanding Eye Protection Standards

Shooting eye protection should be impact-rated. Regular sunglasses may reduce glare, but they are not automatically suitable for range impact hazards. Look for safety eyewear that clearly states the impact standard it is designed to meet, fits securely, and offers good side coverage.

Replace scratched, cracked, or damaged lenses. Eye protection only helps when it stays clear, fits correctly, and remains in place during the activity.

Fit and Proper Use Matter

Protection only works when worn correctly. Earplugs need a proper seal in the ear canal. Earmuffs need the cup cushions to seal around the ears, and that seal can be affected by hair, hats, eyewear arms, or poor adjustment.

Eye protection should sit close enough to protect the eyes without blocking vision or becoming uncomfortable. If protection is distracting, fogged, loose, or painful, people are more likely to adjust or remove it at the wrong time. Fit checks are part of range preparation.

Protection TypeWhat to CheckWhy It Matters
EarplugsCorrect insertion and sealA shallow fit can reduce protection
EarmuffsFull cushion seal around the earHair, hats, or glasses can break the seal
Safety glassesImpact rating, side coverage, clear lensesOrdinary eyewear may not protect against range hazards

Range and Hunting Safety Context

At a range, keep eye and ear protection on whenever shooting is active or range rules require it. Nearby shooters can expose you to noise and debris too, so protection is not only about the firearm you are personally using.

While hunting, some people use electronic hearing protection that reduces impulse noise while still allowing environmental sounds. Whatever gear you choose, follow local rules, manufacturer instructions, and hunter education guidance. For more range habits, read our shooting range safety rules guide.

Where to Get Qualified Guidance

For personal hearing concerns, talk with an audiologist or physician. For eye concerns or protective eyewear needs, talk with an eye-care professional. For range practice, ask a range safety officer or certified instructor. A general article can explain why protection matters, but it cannot evaluate your hearing, vision, firearm, range, or medical situation.

If you are assembling basic range equipment, pair this guide with our essential shooting gear guide and beginner shooting stance guide.

Frequently Asked Questions

Do I need both eye and ear protection at the range?

Yes. They protect against different hazards. Hearing protection helps reduce noise exposure, while eye protection helps guard against debris, ejected cases, and impact risks. Always follow your range’s rules.

What does NRR mean on hearing protection?

NRR stands for Noise Reduction Rating. It is a labeled test rating for hearing protection, but real-world protection depends on fit, seal, and correct use.

Can I use regular sunglasses for shooting?

Do not assume regular sunglasses are enough. Shooting glasses should be impact-rated and designed for safety use, not just glare reduction.

Should I wear earplugs and earmuffs together?

Many shooters double up at indoor ranges or around louder firearms. Combined protection can help, but it does not equal the simple sum of both ratings. Fit still matters.

When should I replace eye or ear protection?

Replace damaged eyewear, scratched lenses, worn earmuff cushions, dirty reusable plugs, and any protection that no longer fits or seals properly. Follow the manufacturer’s maintenance instructions.

Final Safety Reminder

Eye and ear protection are basic range safety gear, not optional accessories. Choose impact-rated eyewear, use hearing protection correctly, check fit before shooting starts, and follow your range safety officer’s commands. When in doubt, ask qualified help before stepping to the firing line.

Best Bows for Women in 2025 | Hunting & Archery Buyer’s Guide

Archery has seen a massive rise in popularity among women in recent years. From recreational backyard shooting to competitive target archery and hunting, more women are discovering the thrill, skill, and satisfaction that bows provide. But here’s the challenge: not all bows are created equal, and women often need bows designed with specific considerations in mind such as draw weight, draw length, grip size, and overall comfort.

In this comprehensive guide, we’ll explore the best bows for women, factors to consider when choosing one, types of bows available, and expert tips for making the right purchase. Whether you’re a beginner looking for your first bow or an experienced archer upgrading your gear, this article will help you make an informed decision.

Why Women Need Bows Designed for Them

Anatomical Considerations

On average, women tend to have shorter draw lengths (typically between 24–27 inches) compared to men. Using a bow with an overly long draw length can result in poor accuracy and discomfort. Similarly, draw weights that are too heavy can lead to muscle strain and fatigue.

Comfort and Grip

Smaller hand sizes mean that ergonomic grips are essential for women’s bows. A bow designed for a woman’s hand ensures better control, reduced torque, and a more consistent shot.

Performance and Confidence

When the bow feels comfortable and fits properly, shooting becomes more enjoyable. A poorly fitted bow can discourage beginners, while the right bow builds confidence and improves accuracy.

Types of Bows for Women

1. Recurve Bows

Recurve bows are one of the most popular choices for women entering the world of archery. They’re lightweight, simple in design, and effective for both target practice and hunting.

Best for: Beginners, target archery, traditional archery enthusiasts.
Pros: Lightweight, easy to handle, elegant design.
Cons: Requires more practice for accuracy compared to compounds.

2. Compound Bows

Compound bows use a system of pulleys and cams that reduce holding weight at full draw, making them ideal for women who want power without excessive strain.

Best for: Hunting, competitive shooting, women needing more accuracy and speed.
Pros: High accuracy, adjustable draw weights and lengths, powerful performance.
Cons: Heavier and more complex than recurves.

3. Longbows

Longbows are traditional and elegant but can be more challenging for beginners due to the lack of mechanical aids.

Best for: Traditional archery enthusiasts.
Pros: Simple design, lightweight, historical appeal.
Cons: Requires significant practice, no let-off.

4. Crossbows

Crossbows have grown in popularity among women hunters because they allow powerful shots without requiring as much upper-body strength.

Best for: Hunting, women with limited draw strength.
Pros: High power, less upper-body strain, modern designs available in lightweight models.
Cons: Heavier overall, often regulated by hunting laws.

Key Factors to Consider When Choosing a Bow

1. Draw Length

  • Women typically fall between 24–27 inches.
  • Choosing a bow with an adjustable draw length ensures proper fit.

2. Draw Weight

  • Recommended starting range: 25–40 lbs.
  • For hunting, most states require at least 35–40 lbs for ethical kills.
  • Start lower for practice, then gradually increase.

3. Bow Weight

  • A lighter bow is easier to handle during long shooting sessions.
  • Average weight range for women: 2.5–4 lbs.

4. Adjustability

Look for compound bows with wide adjustability in both draw weight and length. This allows growth and flexibility without needing to replace the bow frequently.

5. Grip Design

Narrow grips with ergonomic shaping help women maintain steady shots.

Top Bows for Women in 2025

1. Diamond Archery Infinite Edge Pro

  • Type: Compound Bow
  • Why It’s Great for Women: Extremely adjustable (draw length 13–31”, draw weight 5–70 lbs).
  • Best For: Beginners to advanced archers.

2. Bear Archery Cruzer G2

  • Type: Compound Bow
  • Highlights: Lightweight, versatile, adjustable for small frames.
  • Best For: Women hunters and recreational shooters.

3. Samick Sage Recurve Bow

  • Type: Recurve Bow
  • Highlights: Affordable, reliable, available in multiple draw weights.
  • Best For: Beginner women archers.

4. Genesis Original Bow

  • Type: Universal Compound Bow
  • Highlights: Popular with schools and training programs, lightweight and simple.
  • Best For: Women and youth beginners.

5. PSE Stinger Max

  • Type: Compound Bow
  • Highlights: Compact, forgiving, smooth draw cycle.
  • Best For: Women who want hunting performance.

Benefits of Archery for Women

1. Physical Fitness

Shooting a bow builds upper body strength, balance, and coordination.

2. Stress Relief

Archery requires focus and calm, making it a form of active meditation.

3. Confidence & Empowerment

Women gain a sense of accomplishment from mastering a skill traditionally dominated by men.

4. Versatility

Archery can be enjoyed recreationally, competitively, or for hunting.

Women in Hunting: Why Bows Are Becoming More Popular

Over the last decade, the number of women hunters has increased significantly. Many prefer bows because:

  • They are quieter than firearms, allowing stealth in the field.
  • Archery offers a closer, more intimate hunting experience.
  • Lightweight compound bows are now specifically designed for women.

Tips for Women Buying Their First Bow

  1. Get measured for your draw length at a pro shop.
  2. Start with adjustable bows that can grow with your skill.
  3. Try before you buy—comfort is key.
  4. Invest in accessories like stabilizers, wrist slings, and release aids.
  5. Don’t go too heavy on draw weight—focus on accuracy first.

Safety Considerations for Women Archers

  • Always wear arm guards to prevent string slap.
  • Use finger tabs or release aids to reduce strain.
  • Ensure your bow is properly tuned for your draw length and weight.
  • Start with supervised range practice before hunting.

Common Mistakes Women Make When Choosing a Bow

  1. Picking a bow with too high a draw weight.
  2. Using a bow with the wrong draw length.
  3. Ignoring comfort in grip size.
  4. Choosing based only on looks instead of performance.
  5. Skipping professional setup and tuning.

Accessories That Improve Performance

  • Arrows: Choose spine ratings that match your draw weight.
  • Sights: Multi-pin sights improve accuracy for beginners.
  • Quivers: Lightweight designs keep arrows accessible.
  • Stabilizers: Reduce vibration and improve shot balance.
  • Releases: Mechanical releases increase consistency for compound shooters.

Maintenance Tips for Women’s Bows

  1. String care: Wax bowstrings regularly.
  2. Check limb integrity: Inspect for cracks or damage.
  3. Proper storage: Store in cool, dry places.
  4. Annual tune-ups: Take your bow to a pro shop at least once a year.
  5. Transport safely: Use padded bow cases.

Best Practices for Women Bow Hunters

  • Opt for lighter bows that won’t fatigue you during long hunts.
  • Practice shooting from elevated stands and ground blinds.
  • Use broadheads appropriate for your draw weight.
  • Always follow local hunting laws and ethical practices.

SEO-Friendly Key Takeaways

  • Bows for women should prioritize adjustability, comfort, and fit.
  • Compound bows offer accuracy and ease of use.
  • Recurve bows are great for beginners and traditionalists.
  • Women should focus on draw length, draw weight, and grip size when buying.
  • Top bows for women in 2025 include Diamond Infinite Edge Pro, Bear Cruzer G2, and Samick Sage.

Conclusion

Archery is no longer just a male-dominated sport. With the growing number of women entering the field, manufacturers have responded with bows tailored to women’s unique needs. Choosing the right bow comes down to fit, comfort, and intended use.

Whether you’re drawn to the elegance of a recurve, the power of a compound, or the versatility of a crossbow, there’s a perfect bow for every woman. By focusing on proper draw length, manageable draw weight, and quality accessories, women can enjoy a safe, empowering, and rewarding archery experience.

So, if you’re searching for the best bows for women, remember this: the right bow doesn’t just make shooting easier it makes it more enjoyable, accurate, and confidence-boosting.

Can I Carry a Pistol While Bow Hunting? A Complete Guide for Hunters

Hunting laws can be complex, especially when firearms intersect with archery. While bowhunting focuses on stealth and archery skills, there may be practical reasons a hunter wishes to carry a pistol. From protection against wild animals to personal security in remote areas, the idea isn’t far-fetched. But regulations, ethics, and public land rules must be considered.

Let’s explore these in detail.

Why Carry a Pistol While Bow Hunting?

There are several valid reasons a hunter might consider carrying a sidearm during a bow hunt:

  • Predator Protection: Encounters with bears, mountain lions, wild hogs, and wolves can be dangerous.
  • Personal Safety: Some remote areas may have risks of encountering hostile individuals or situations.
  • Wounded Game Dispatch: Occasionally, a bow shot may not be fatal. A pistol may be used for humane dispatch in some states.
  • Emergency Signaling: A pistol shot may serve as an emergency signal if you’re lost or injured.
  • Confidence and Peace of Mind: Simply having a backup weapon adds a layer of security.

However, justifiable reasons don’t always align with legal allowances. That’s why it’s important to check laws before carrying a firearm on a bow hunt.

3. Federal Law and Firearm Carry While Hunting

From a federal perspective, the Second Amendment protects your right to bear arms, but it does not override state hunting laws or park regulations. While federal law allows the possession of firearms on federal lands, it leaves the regulation of hunting methods to state wildlife agencies.

As of 2010, federal law allows the carry of firearms in national parks, but only if the person complies with the laws of the state where the park is located. That means, even on federal lands, state law governs whether you can carry a pistol while bowhunting.

4. State-by-State Laws: An Overview

This is where it gets complicated. Each state has unique laws regarding bowhunting and carrying firearms. Below is a summary of key state stances:

✅ States that Generally Allow Carrying a Pistol While Bow Hunting:

  • Texas: Yes, for self-defense only. Cannot be used to harvest game during archery season.
  • Arizona: Legal to carry for protection; must not be used on game in archery season.
  • Colorado: Legal on National Forest lands; cannot use to hunt during archery-only season.
  • Montana: Legal to carry if you have a concealed carry permit.
  • Alaska: Strongly encouraged due to bear country; pistol must not be used for game during archery season.

⚠️ States with Restrictions:

  • California: Legal only if you have a concealed weapons permit (CCW). Restricted in archery-only zones.
  • New York: Strict gun laws; illegal to carry a handgun unless you have a valid NY permit.
  • Illinois: Limited allowance with a concealed carry permit; cannot use for game during archery season.

⛔ States where it’s Prohibited or Highly Regulated:

  • New Jersey: Extremely limited; nearly impossible unless you are law enforcement.
  • Massachusetts: Illegal without a state permit; most archery-only areas do not permit firearms.
  • Hawaii: Prohibited under most hunting regulations.

Important Note: Always verify with your state’s Department of Natural Resources (DNR) or Fish and Wildlife Agency before any hunting trip.

Concealed Carry vs. Open Carry on Hunts

Even in states where carrying is allowed, the method of carry (concealed or open) may be regulated. For example:

  • Concealed Carry: Often requires a valid permit. Some states recognize out-of-state permits, others don’t.
  • Open Carry: May be legal in rural areas or public hunting land but discouraged in populated areas.

Some states do not differentiate between carry types for hunters, but others strictly enforce permit-based restrictions. Always research carry laws in your specific hunting zone.

6. National and State Park Regulations

Hunting in National Parks is typically prohibited, but National Forests and BLM lands often allow hunting. Firearm rules vary:

  • National Forests: Generally allow carry if the state permits it.
  • State Parks: Many prohibit firearms unless specifically allowed during designated hunting seasons.

Some parks even have archery-only rules that prohibit firearms regardless of purpose.

7. Archery-Only Season vs. General Season Considerations

A big distinction is whether you’re hunting during:

  • Archery-Only Season: Firearms are typically prohibited for game harvesting. Sidearms may be allowed for protection only.
  • General Season: Firearms and bows may both be legal for taking game. Carrying a pistol is more accepted.

Using a pistol to kill game during an archery-only season can result in heavy fines or loss of hunting privileges. It may also be considered poaching.

8. Bowhunting Ethics and Carrying Sidearms

Even if it’s legal to carry a pistol, bowhunters often debate the ethics:

  • Does it undermine the “primitive” nature of bowhunting?
  • Will other hunters feel uncomfortable?
  • Could it result in accidental misuse or game poaching?

The ethical bowhunter respects both the spirit and the letter of the law. If you carry a sidearm, it should be for defense only, not a shortcut to avoid a poor shot.

9. Common Scenarios: Self-Defense, Predators, and Emergency Use

Here are real-life scenarios where carrying a pistol makes sense:

  • Bear Encounter: Especially in Alaska or Montana, where brown bears are common.
  • Wild Hog Charge: In southern states, feral hogs can be aggressive.
  • Injured Game: Some states allow the dispatch of wounded animals with a pistol—but only if permitted by law.
  • Lost in the Woods: A pistol can be used to fire warning shots or signal search teams.

10. Recommended Pistols for Bow Hunters

If you’re going to carry, choose wisely:

  • Caliber Matters: .44 Magnum, 10mm Auto, or .357 Magnum are recommended for predator protection.
  • Compact Models: Look for lightweight models to avoid interfering with your gear.
  • Holsters: Use chest rigs or belt holsters that don’t obstruct your bow draw.

Top Picks:

  • Glock 20 (10mm Auto)
  • Ruger Super Redhawk (.44 Magnum)
  • Smith & Wesson Model 686 (.357 Magnum)
  • Springfield XD-M Elite 10mm

11. How to Carry a Pistol Safely While Bow Hunting

Carrying a sidearm safely means:

  • Using a retention holster to prevent accidental drops.
  • Keeping the firearm unloaded until needed, if required by state law.
  • Not interfering with your bow arm or draw path.
  • Practicing drawing and aiming with cold-weather gloves or under gear.

Legal Tips: Permits, Licenses, and Checking with State Agencies

Before you head out:

  • Check state hunting laws annually.
  • Carry a valid concealed weapons permit if required.
  • Ensure your pistol is registered if required by law.
  • Understand transport rules, especially if traveling across state lines.
  • Record DNR or Game Warden contact info for your hunting area.

13. Final Thoughts

So, can you carry a pistol while bow hunting? The answer is: it depends.

The legality hinges on where you’re hunting, when you’re hunting, what you’re hunting, and how you’re carrying. Many states allow it for self-defense, but almost none allow using it for taking game during archery-only season.

Always prioritize safety, legality, and ethical hunting practices. A pistol may offer peace of mind, but with that comes responsibility.

FAQs

Q: Can I use a pistol to finish off a wounded deer during bow season?

A: Only in some states. Others prohibit any firearm use during archery-only season.

Q: Is it legal to carry a pistol while bow hunting in Alaska?

A: Yes, and it’s encouraged for predator defense. Cannot use for harvesting game unless in general season.

Q: Can I carry a pistol with an out-of-state concealed carry permit?

A: Some states honor out-of-state permits; others don’t. Check reciprocity laws.

Q: What’s the best way to carry a pistol while using a compound bow?

A: Use a chest rig holster for easy access that doesn’t obstruct your draw or gear.

What to Wear When Kayaking: A Safety and Clothing Guide

What you wear kayaking should be chosen for safety first, starting with a properly fitted life jacket and clothing matched to the water temperature, not just the air temperature. If you capsize, you will be in the water, so dress for immersion before you dress for comfort. From there, build a layered outfit that handles sun, wind, splash, and temperature changes, add secure footwear, and protect yourself from glare and changing weather. This guide explains the clothing system in practical terms so you can paddle prepared.

Table of contents

Start With a Life Jacket

A life jacket, also called a personal flotation device or PFD, is the most important thing you wear on the water. It should be worn, not just stored in the kayak, because putting one on after a capsize can be difficult or impossible. The U.S. Coast Guard boating safety guidance encourages wearing a life jacket whenever you are on or near the water.

Choose a PFD that fits snugly without riding up over your face when you lift the shoulders. A paddling-style PFD usually has larger arm openings so your paddle stroke feels natural. Check your state and local boating rules too, because requirements can vary by age, water body, boat type, and location.

Dress for the Water, Not Only the Air

The biggest clothing mistake is dressing only for warm air. A sunny day can still sit over cold water, and sudden immersion can become dangerous quickly. Cold water can affect breathing, coordination, and decision-making, so clothing should be based on what happens if you end up in the water, not only how comfortable you feel at the launch.

When the water is cold, paddlers often need immersion protection such as a wetsuit or drysuit, plus insulating layers. A wetsuit traps a thin layer of water that your body warms, while a drysuit keeps water out and works with insulating clothing underneath. Because conditions and personal risk vary, use official boating guidance, local outfitters, or qualified instructors for cold-water decisions instead of guessing.

A Simple Kayaking Layering System

A good kayaking outfit works in layers. The goal is to manage sweat, splash, wind, and temperature changes without wearing bulky clothing that becomes heavy when wet.

Base Layer

Wear a moisture-wicking base layer made from synthetic fabric or merino wool. This layer moves sweat away from your skin and stays more comfortable when damp. Avoid cotton as a base layer because it holds water and loses warmth when wet.

Insulating Layer

Add a fleece or similar insulating layer when conditions are cool. The colder the water and air, the more important this layer becomes. In warm weather, you may skip the insulating layer and use sun-protective clothing instead.

Outer Layer

A wind and water-resistant paddling jacket helps block spray and wind chill. In cold water, a casual rain jacket is not a substitute for proper immersion gear. Think of the outer layer as weather protection, while a wetsuit or drysuit is immersion protection.

PFD Over the Layers

Your PFD goes over your clothing and must still fit correctly after layers are added. Test the fit before launching, especially in cold weather when extra clothing can change how the life jacket sits on your body.

Footwear for Kayaking

Kayaking footwear should protect your feet, stay secure when wet, drain well, and give you grip at the launch. Good options include water shoes, neoprene paddling booties, or secure sandals with heel straps. Neoprene booties add warmth in cold water, while lightweight water shoes are comfortable in summer.

Avoid loose flip-flops and bare feet. Flip-flops can float away, and bare feet leave you exposed to rocks, shells, hooks, broken glass, or slick banks. Secure footwear also makes loading, launching, and landing less stressful.

Sun and Weather Protection

On the water, sun exposure comes from above and reflects off the surface. Weather can also change quickly, especially when wind picks up. Check the forecast before launching; the National Weather Service safety resources are a useful starting point for weather hazards. For longer remote paddles, also think through basic communication and emergency visibility; our guide to ways to signal for help in the wilderness is useful pre-trip reading.

  • Sun-protective clothing: Lightweight long sleeves and pants can protect skin without overheating.
  • Hat: A brimmed hat with a retention strap shades your face and stays on in wind.
  • Sunglasses: Polarized sunglasses reduce glare. Use a retainer strap so they stay attached.
  • Sunscreen: Apply water-resistant sunscreen on exposed skin and reapply during longer trips.
  • Gloves: Paddling gloves can help with grip, blisters, and cold hands.

Seasonal Clothing Tips

Warm Weather

In warm weather, wear lightweight, quick-drying, sun-protective clothing. Still check the water temperature, because warm air over cold water may call for more protection. Bring water, use sun protection, and avoid heavy clothing that traps heat.

Spring and Fall

Spring and fall can be tricky because the air may feel comfortable while the water stays cold. Use synthetic or wool layers, consider a wetsuit or drysuit when conditions call for it, and build in extra safety margin.

Cold Weather and Cold Water

Cold-water paddling deserves extra caution. A drysuit or wetsuit, insulating layers, neoprene footwear, gloves, and a worn PFD may be necessary. If you are new to cold-water paddling, take instruction or go with experienced paddlers before attempting it alone.

Anglers and Hunters Who Paddle

If you kayak to fish, scout, or reach a hunting area, the clothing rules do not change. Wear your PFD, dress for immersion, and follow boating and wildlife rules for the location. If rain is part of the plan, our waterproof hunting clothing guide can help with layer thinking, but paddling-specific safety still comes first.

What to Avoid Wearing

  • Cotton and denim: They hold water, dry slowly, and lose warmth when wet.
  • Loose flip-flops: They slip off easily and do not protect your feet at the launch.
  • Bulky clothing: Heavy waterlogged layers can make movement harder after a capsize.
  • No PFD: A life jacket in the boat is not the same as a life jacket on your body.
  • Air-temperature-only outfits: The water temperature is the real safety check.

Frequently Asked Questions

Do I really need to wear a life jacket the whole time?

Yes, wearing a properly fitted PFD while paddling is the safest practice. Rules vary by location and age, but a worn PFD protects you when a capsize happens suddenly.

What does dress for the water temperature mean?

It means choosing clothing that protects you if you fall in, based on the water temperature rather than only the air. Cold water may require a wetsuit, drysuit, or insulating layers even on a pleasant day.

Can I wear jeans or a cotton shirt kayaking?

It is not a good idea. Cotton and denim soak up water, get heavy, dry slowly, and can leave you cold. Choose quick-drying synthetic or wool clothing instead.

What shoes are best for kayaking?

Water shoes, neoprene paddling booties, or secure sandals with heel straps are usually better than flip-flops. They protect your feet, drain well, and stay on when wet.

What should I wear kayaking in cold weather?

Cold-weather paddling usually calls for immersion protection, insulating synthetic or wool layers, neoprene footwear, gloves, and a worn PFD. Get local guidance before paddling cold water if you are new to it.

Final Takeaway

Dress for kayaking from the water up. Wear a properly fitted life jacket, dress for the water temperature, use quick-drying layers, choose secure footwear, and protect yourself from sun and weather. For longer days, pack enough drinking water and know your backup plan; our wilderness guide to safe drinking water methods can help with broader trip planning. Good clothing is not about looking technical; it is about staying comfortable enough to paddle well and prepared enough to handle a capsize or weather change.

The Ultimate Guide to Wild Turkey Sounds


Wild turkeys communicate with a set of distinct sounds, and the main ones a hunter learns are the yelp, cluck, purr, cutt, putt, tree call, and the gobble. Each sound carries meaning: the yelp is the basic locating and contentment call, the cluck and purr signal calm and feeding, the cutt is loud and excited, the putt is an alarm, and the gobble is the male’s announcement and challenge. Knowing what each sound means, and when a real turkey would make it, is the foundation of effective and ethical calling. This guide explains the core vocalizations, how hunters use them, and the ethics and rules that should shape every setup.

Table of contents

The core wild turkey sounds

Wild turkeys use a vocabulary of calls that signal location, mood, alarm, and dominance. Learning the core sounds, and what each one communicates, lets you read live birds and respond the way a real turkey would.

  • Yelp: the most common call, a series of notes used to locate other birds and signal contentment.
  • Cluck: one or a few short notes that say a turkey is calm and present.
  • Purr: a soft, rolling sound made by content, feeding birds.
  • Cutt: loud, sharp, irregular clucks that signal excitement.
  • Putt: a sharp single or double note that usually means alarm.
  • Tree call: soft early-morning sounds made by birds still on the roost.
  • Gobble: the loud, rolling call of a male announcing his presence.
  • Kee-kee: the whistling call of young birds, useful in the fall.

Hen sounds in detail

Most spring turkey calling imitates a hen to draw in a gobbler, so the hen sounds are the ones hunters practice most. Each communicates a different message and works best in a specific situation.

The yelp

The plain yelp is the workhorse call. A hen yelps to locate and gather other birds, and a gobbler may answer to advertise his location. Hunters use the yelp to start a conversation and gauge how a tom responds. Pace and rhythm matter more than volume; a clean, natural cadence is more convincing than a loud, ragged one.

The cluck and purr

Clucks and purrs are the quiet, close-range sounds of a calm, feeding bird. Once a gobbler is approaching, soft clucking and purring can reassure him and coax those last few yards without the risk that loud calling will make him hang up. These are confidence sounds, so use them softly and sparingly.

The cutt

Cutting is loud, fast, and excited, used to grab attention or imitate a fired-up hen. It can pull a distant or hung-up tom, but it can also sound aggressive, so many hunters reserve cutting for specific moments rather than overusing it.

The putt

The putt is usually an alarm sound. A turkey that putts has likely seen or heard something it does not trust, and the sound can scatter nearby birds. Hunters generally avoid making it, and a sharp putt from a live bird is a signal to hold still and reassess.

Gobbler sounds in detail

Gobblers make distinctive sounds tied to dominance and breeding, and the gobble is the one most people recognize. Understanding these helps you locate birds and time your setup.

The gobble

The gobble is the male’s loud, rolling announcement, used to proclaim territory and attract hens, especially in spring. Hunters listen for gobbles at dawn to locate roosted birds, and some use a locator call to provoke a shock gobble that gives away a tom’s position without imitating a turkey. Imitating a gobble yourself carries added safety risk, discussed below, and many hunters avoid it.

Tree calls and roosting sounds

Early in the morning, roosted birds make soft tree yelps and clucks before flying down. Light tree calling can let a tom know a hen is nearby without committing to loud calling before legal shooting time. Keep these sounds quiet and brief to match a bird that is still waking up.

Calling context and timing

Good calling is about reading the bird and matching real turkey behavior, not running through every sound you know. The same call can help or hurt depending on timing.

Start subtle and let the turkey’s responses guide your volume and frequency. If a tom is fired up and closing, call less and let him come. If he hangs up, a change in cadence, a soft cluck and purr, or going quiet can be more effective than calling louder. Match the season, too: spring calling centers on hen sounds to draw gobblers, while fall hunting often uses the kee-kee and assembly yelps to regroup scattered flocks. There is no script that works every time, and patient woodsmanship usually beats aggressive calling. Different calling devices, box calls, slate or pot calls, and diaphragm calls, each produce these sounds with their own learning curve, so pick one and practice the cadence until it sounds natural.

Turkey hunting ethics and safety

Turkey hunting ethics and safety are tied directly to sound, because hunters sit camouflaged, call to attract birds, and may be near other hunters doing the same. This makes positive target identification essential.

  • Positively identify a legal bird, and never shoot at sound or movement alone.
  • Be cautious with gobble imitations, since another hunter may move toward the sound.
  • Set up with your back against a tree wide enough to cover you, with a clear view of approaching birds.
  • Do not stalk a gobbling turkey; the sound you hear may be another hunter calling.
  • Wear or carry blaze orange when moving, and follow the firearm or archery safety rules at all times. The four firearm safety rules from the National Shooting Sports Foundation apply fully to turkey hunting.

Ethical hunters also accept that calling does not guarantee a bird. Turkeys are wary, and pressured or call-shy gobblers may not respond at all. Patience, good setups, and respect for the animal and other hunters matter more than any single call.

State rules and where to learn more

Turkey seasons, legal hunting hours, bag limits, legal methods, and rules on calls and decoys vary by state and sometimes by season, so confirm the current rules with your state wildlife agency before you hunt. This article is general guidance, not legal advice.

Some states regulate electronic calls, set spring and fall season structures differently, or restrict certain methods, so look up the specifics where you hunt. To hear accurate recordings of each turkey sound and study calling in more depth, the National Wild Turkey Federation is a trusted reference. You can find your state agency through the U.S. Fish and Wildlife Service, and complete any required hunter education through Hunter-Ed or the International Hunter Education Association.

Frequently asked questions

What is the most important turkey call to learn?

The plain yelp is the most useful call to learn first, because it is the basic locating and contentment sound and works in many situations. Add the cluck and purr for close birds once your yelp sounds natural.

What does it mean when a turkey putts?

A putt is usually an alarm sound, meaning the turkey has seen or heard something it does not trust. If you hear a live bird putt, stay still, because it often signals that nearby birds are about to leave.

Should I imitate a gobble while hunting?

Many hunters avoid imitating a gobble because it can draw other hunters toward the sound, which is a safety risk. A locator call that prompts a tom to shock-gobble is often a safer way to pinpoint a bird.

Does calling guarantee I will get a turkey?

No. Turkeys are wary, and pressured or call-shy birds may ignore calling entirely. Good setups, patience, reading the bird, and woodsmanship matter as much as the calls themselves.

Final takeaway

Learn the core turkey sounds, the yelp, cluck, purr, cutt, putt, tree call, and gobble, and focus on what each one means and when a real bird would use it. Start subtle, read the gobbler’s response, and let patience and clean cadence do the work rather than constant loud calling. Always identify your target positively, mind the safety risks of imitating a gobble, and confirm your season, hours, and legal methods with your state wildlife agency. Use the National Wild Turkey Federation for accurate sound references as you practice.

Exit mobile version