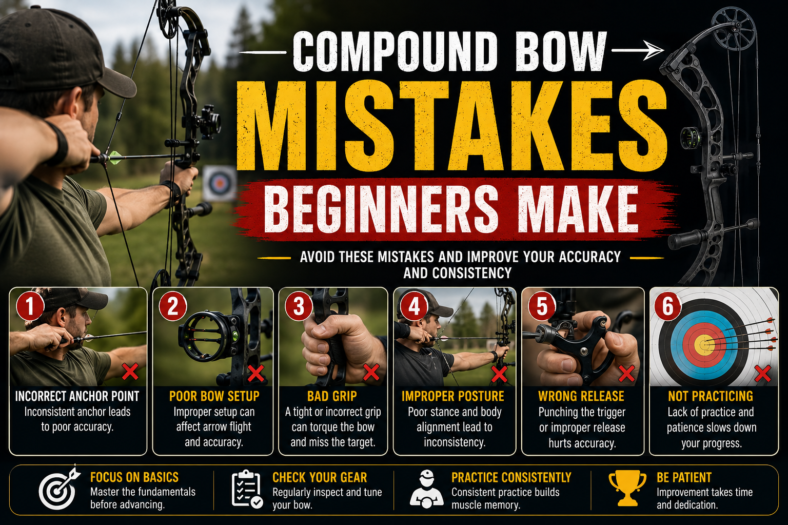
Most beginner compound bow problems come from a few avoidable mistakes: skipping safety checks, using a bow that does not fit, guessing on arrow compatibility, changing too many settings at once, attempting advanced tuning too early, and practicing without a safe target setup. Fix those first and your practice becomes safer, easier to understand, and more consistent.
This guide is for beginner-friendly inspection and setup decisions, not bow-press work or technical tuning. Your owner manual, arrow manufacturer’s chart, and a qualified pro shop should guide anything model-specific or advanced.
Table of Contents
- Quick Answer: The Biggest Compound Bow Mistakes Beginners Should Avoid
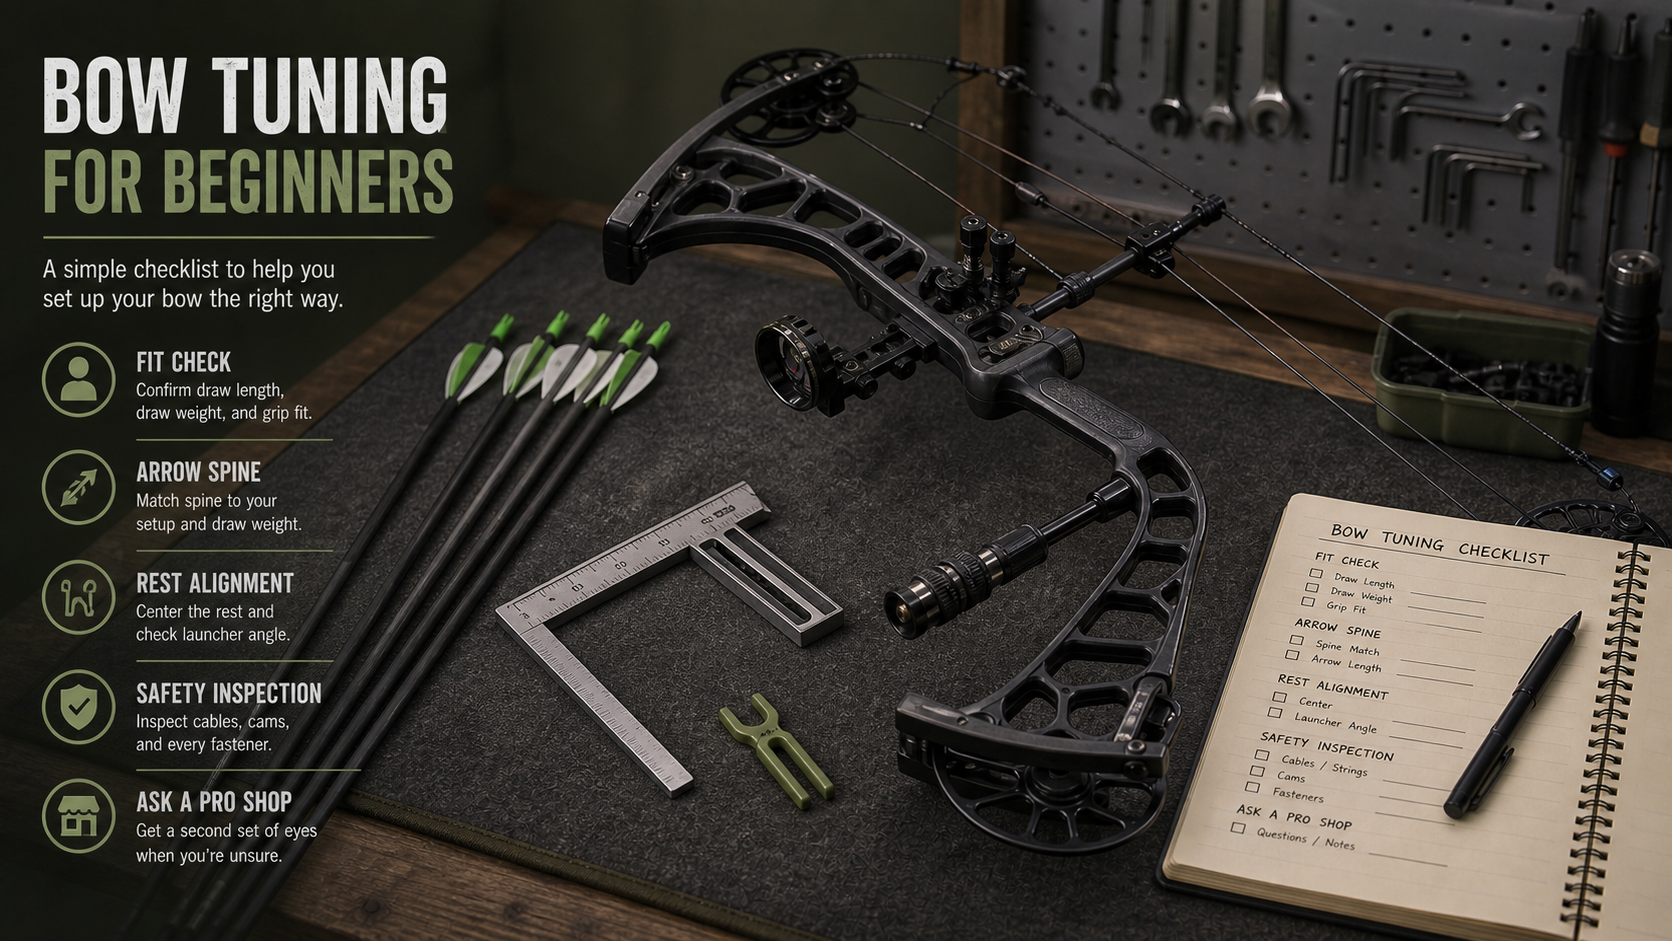
- Skipping Basic Safety Checks
- Starting With Poor Bow Fit
- Ignoring Arrow Spine and Compatibility
- Adjusting Too Many Things at Once
- Treating Advanced Tuning as Beginner DIY
- Practicing Without a Safe Range Setup
- Beginner Compound Bow Mistake Checklist
- Related Archery Guides
- Frequently Asked Questions
Quick Answer: The Biggest Compound Bow Mistakes Beginners Should Avoid
The biggest beginner compound bow mistakes are shooting without checking the bow and arrows, starting with poor draw length or too much draw weight, buying arrows by guesswork, changing several setup items at the same time, trying advanced tuning at home, and shooting without a controlled target lane and backstop.
The best fix is not complicated: inspect first, keep setup changes simple, use verified charts and manuals, practice where the target and backstop are safe, and send advanced work to a pro shop.
Skipping Basic Safety Checks
The first mistake is assuming the bow is ready because it shot fine last time. A compound bow stores a lot of energy, and small damage can matter. Before each session, look over the bow, arrows, target area, and anything that changed since your last practice.
Bowstring, Cables, Limbs, and Cams
Check the bowstring and cables for fraying, broken strands, and serving separation. Look at the limbs for cracks, splinters, or chips, and check the cams and tracks for anything bent, loose, or out of place. Manufacturer safety pages such as Hoyt’s compound bow safety and warnings show why visible damage should be treated as a stop-use issue.
Arrows, Nocks, Points, and Fletching
Inspect every arrow before shooting. Look for cracked shafts, damaged nocks, loose points, damaged inserts, or torn fletching. A questionable arrow should be set aside, not tested at full draw. USA Archery’s safety resources are a useful reminder that safe shooting habits include both equipment checks and range discipline.

Starting With Poor Bow Fit
A bow that does not fit the archer makes good form harder. Beginners often blame themselves for inconsistency when the real problem is a draw length, draw weight, or anchor position that never gave them a fair start.
Draw Length and Anchor Point
If draw length is too long, the archer may overextend, lean, or float around the anchor point. If it is too short, the archer may feel cramped and inconsistent. Draw length should be set for the archer and the specific bow model, not copied from a friend or guessed from height alone.
Draw Weight and Form Breakdown
Too much draw weight causes beginners to raise the bow, twist the body, punch the release, or rush the shot. A manageable draw weight that allows smooth, repeatable form is better for learning than a number that only looks impressive. Stay within the manual’s adjustment limits and ask a pro shop if you are unsure.
Ignoring Arrow Spine and Compatibility
Arrow spine, arrow length, draw weight, draw length, and point weight all work together. Guessing at arrows can create poor flight and safety risk. Use the current selector or chart from the arrow manufacturer for the exact arrow family you are considering. Tools like the Easton arrow selector help organize the needed inputs, but you should still verify with the product’s current chart or a pro shop.
For a deeper explanation, read our guide on how to choose arrow spine for your bow. Keep the important boundary in mind: no single online rule replaces the current chart for your exact setup.
Adjusting Too Many Things at Once
Another common mistake is changing draw weight, sight position, rest position, release technique, and arrows all at the same time. When everything changes at once, you cannot tell what helped and what hurt.
Make one safe, manual-approved change at a time, then shoot enough arrows to observe the result. Keep notes. This slower method is more useful than chasing a new adjustment every time a group opens up.
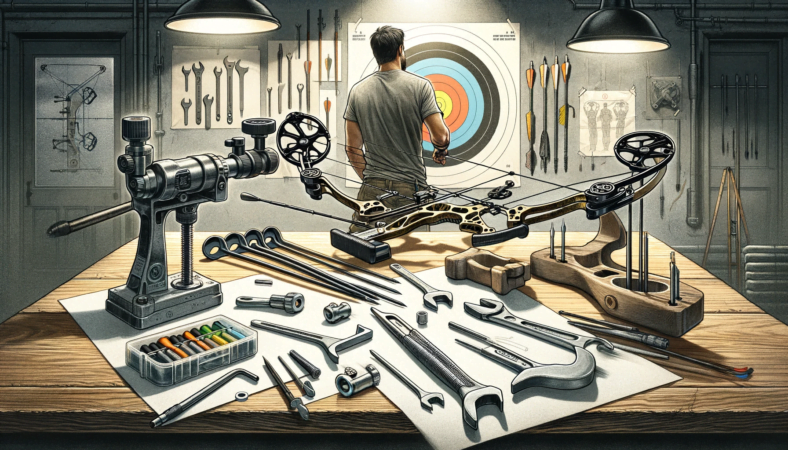
Treating Advanced Tuning as Beginner DIY
Basic inspection and manual-approved adjustments are one thing. Bow-press work, cam timing, string or cable replacement, peep work, D-loop installation, module changes, and limb-related service are different. Those jobs belong with a qualified technician. Manufacturer support pages such as Mathews support point owners toward proper service channels rather than guesswork.
If you are learning, use our beginner bow tuning guide for boundaries, but do not turn a beginner tune-up into advanced repair. The safest confidence comes from knowing where your role stops.
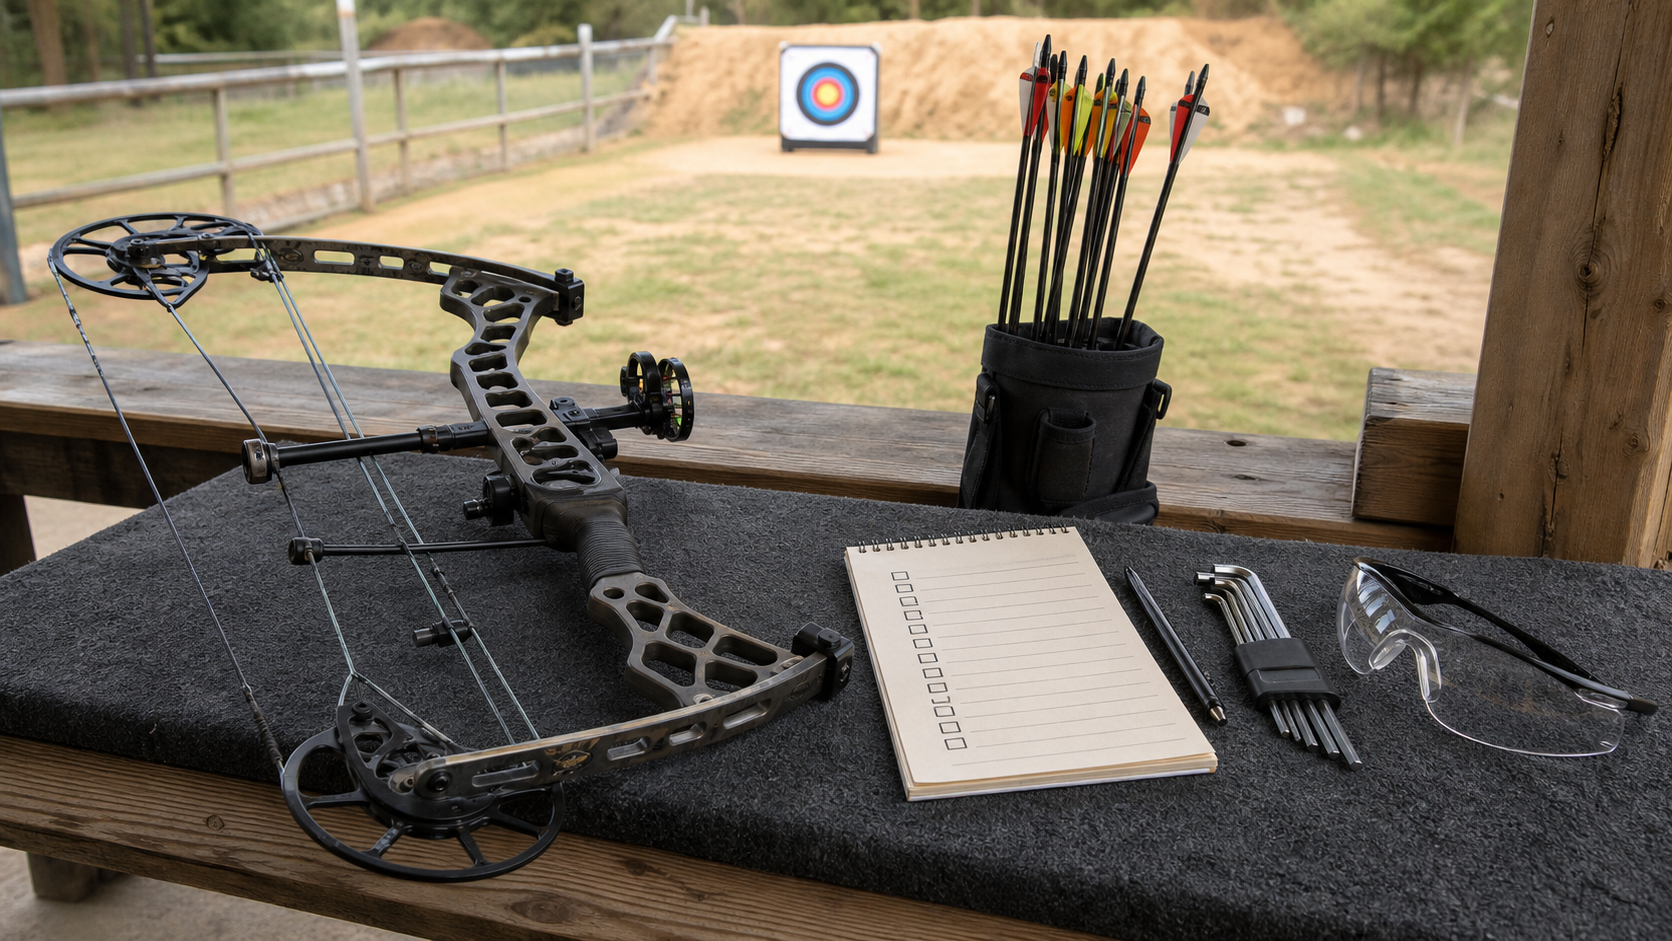
Practicing Without a Safe Range Setup
A safe target area is part of the setup, not an afterthought. Shoot only where you have a proper target, reliable backstop, clear lane, and no people, animals, roads, windows, or unsafe property behind the target. Follow range rules and local restrictions.
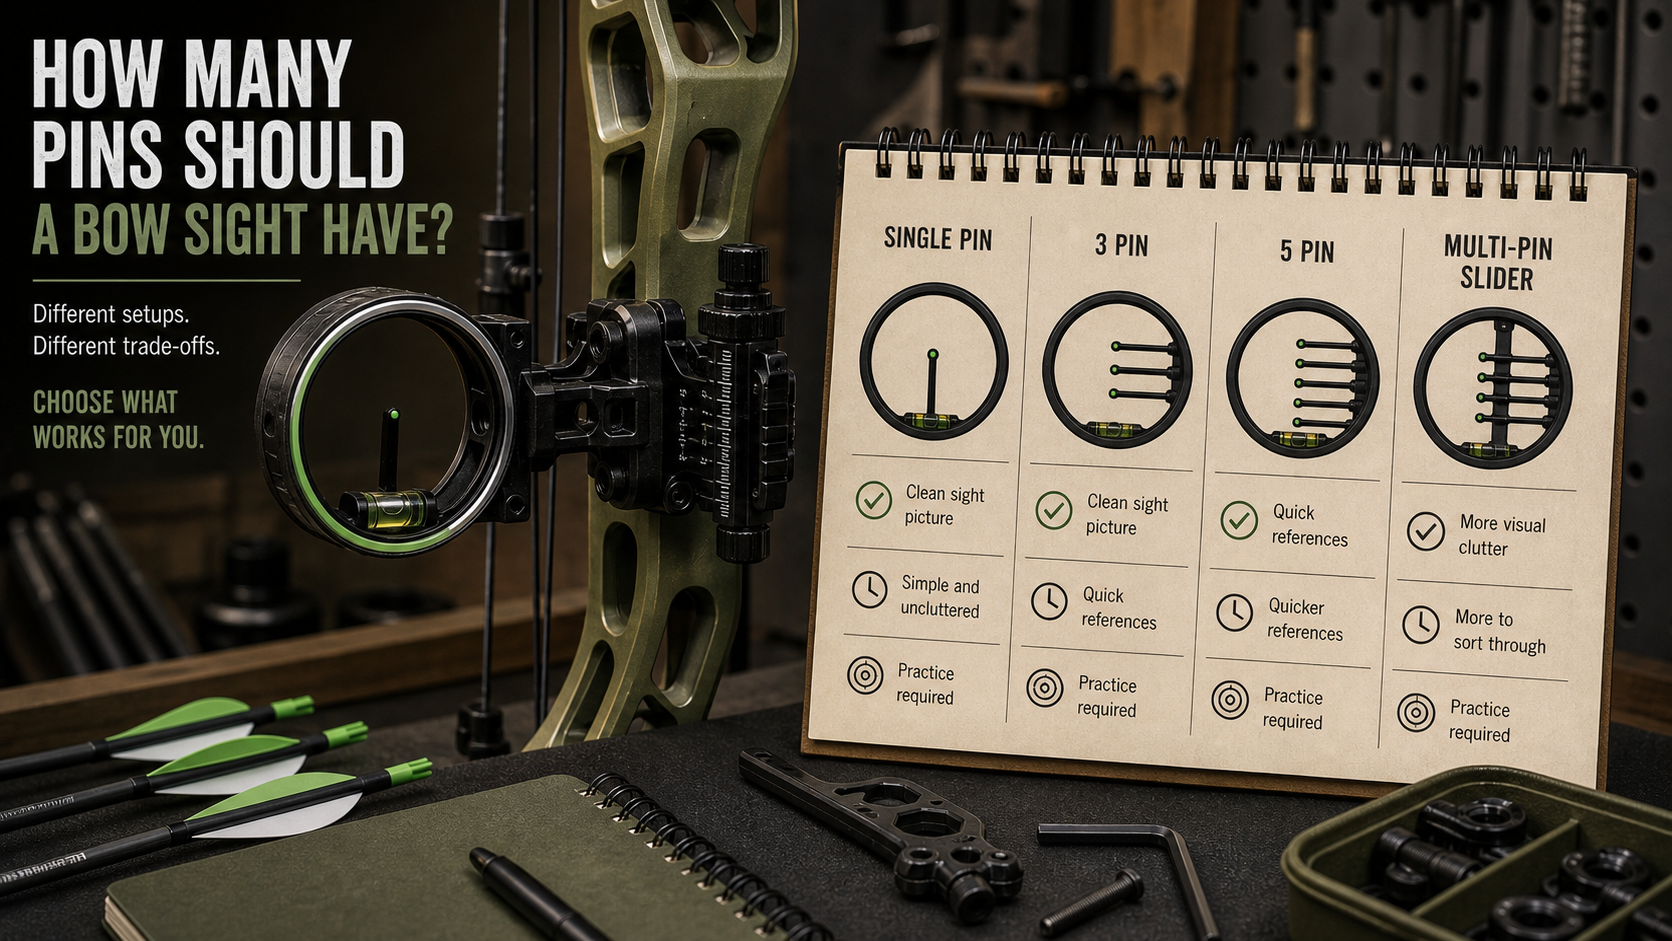
For more fundamentals, see our archery safety rules. If your practice session includes sights, our guide on how many pins a bow sight should have can help keep aiming setup realistic instead of overly complicated.
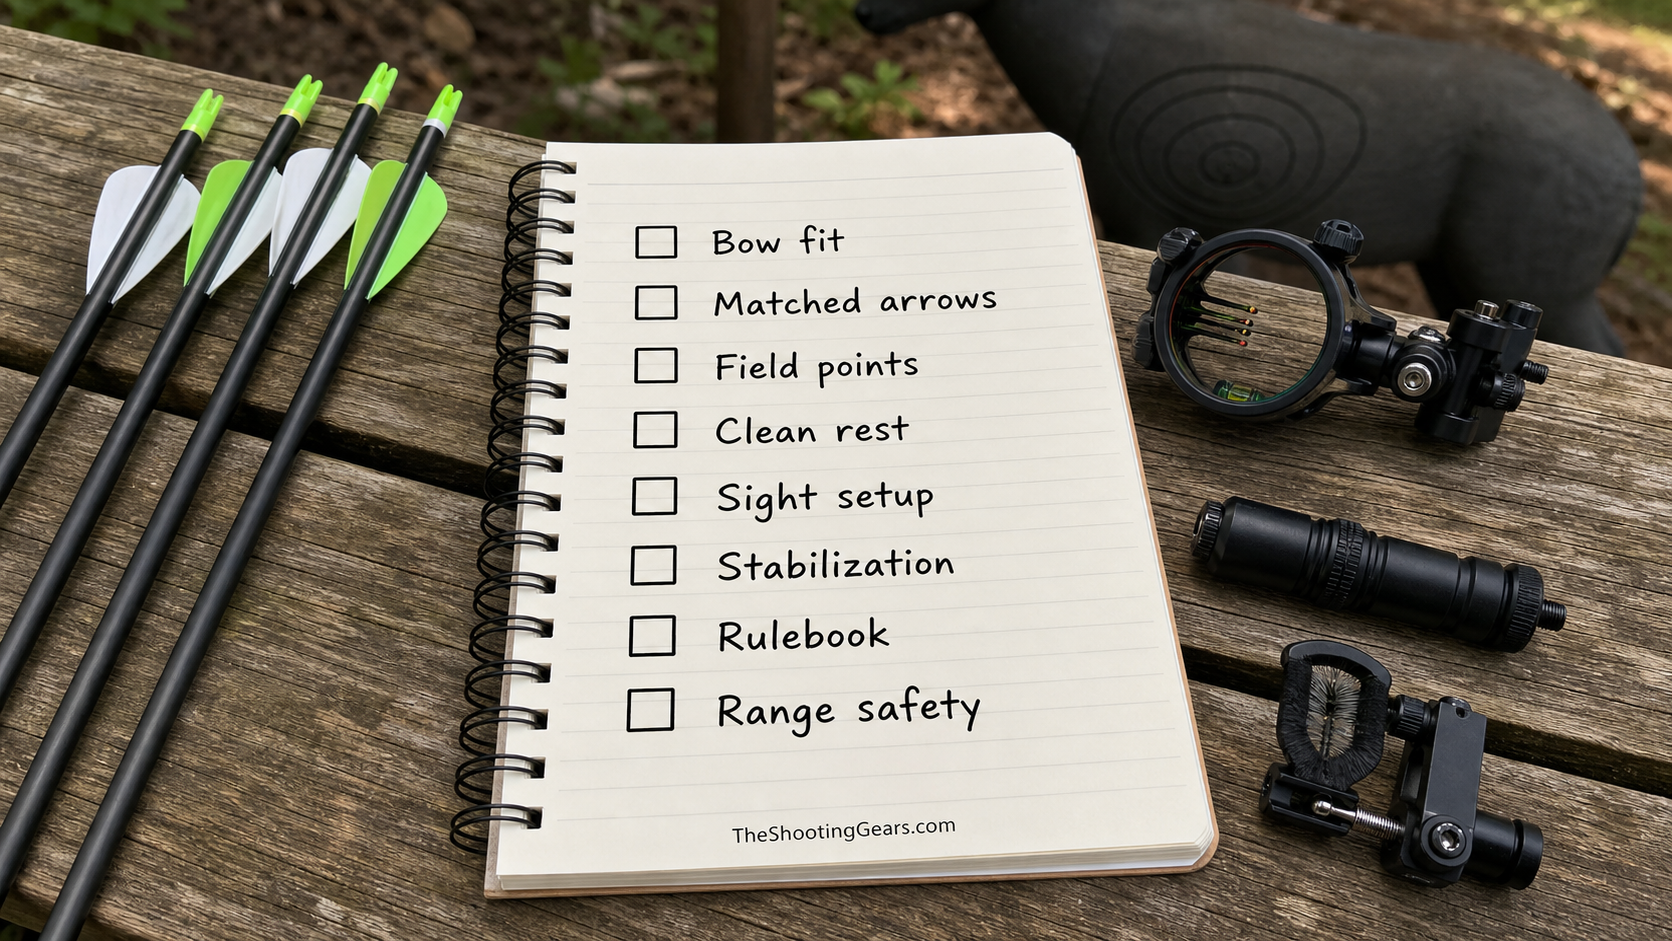
Beginner Compound Bow Mistake Checklist
| Mistake | Why It Matters | Better Habit |
|---|---|---|
| Skipping inspection | Damage can make a bow or arrow unsafe | Check strings, cables, limbs, cams, arrows, and nocks first |
| Wrong draw length | Anchor and form become inconsistent | Set fit by manual and pro-shop guidance |
| Too much draw weight | Form breaks down and shots get rushed | Use a weight you can control smoothly |
| Guessing arrow spine | Arrow flight and safety can suffer | Use the current manufacturer chart or selector |
| Changing everything at once | You cannot diagnose the result | Change one variable and track the outcome |
| DIY advanced tuning | Stored energy and setup errors can be dangerous | Use a qualified pro shop for advanced work |
Related Archery Guides
- Safety rules of archery
- Bow tuning for beginners
- How to choose arrow spine for your bow
- How often should bow strings be replaced?
- How many pins should a bow sight have?
Frequently Asked Questions
What is the most common beginner compound bow mistake?
Skipping the pre-shoot safety check is one of the most common mistakes. Beginners should inspect the bowstring, cables, limbs, cams, arrows, nocks, points, and target lane before shooting.
How do I know if my draw weight is too high?
If you cannot draw smoothly, hold steady, and aim without straining or lifting the bow awkwardly, the weight is likely too high for learning. Stay within the bow manual’s range and choose control over ego.
Can I tune my compound bow myself as a beginner?
You can handle basic inspection and manual-approved adjustments. Advanced tuning, press work, string and cable service, cam timing, and peep or D-loop work should go to a qualified pro shop.
How do I pick the right arrows for a compound bow?
Use the arrow manufacturer’s current selector or chart for the exact arrow model, then match draw weight, draw length, arrow length, and point weight. A pro shop can help confirm the fit.