Mountain Hunting in Kazakhstan: Planning Guide

Mountain hunting in Kazakhstan can be a serious, high-altitude adventure, but it is not a trip to plan casually. The country has huge mountain country, remote hunting areas, changing weather, protected landscapes, and paperwork that must be confirmed before you ever pack gear or book flights.

This updated guide turns the old trip story into a practical planning checklist. It does not replace a licensed outfitter, local wildlife authority, customs broker, or current legal advice. Use it to understand the questions you must answer before hunting in Kazakhstan.

Table of Contents

Quick Answer

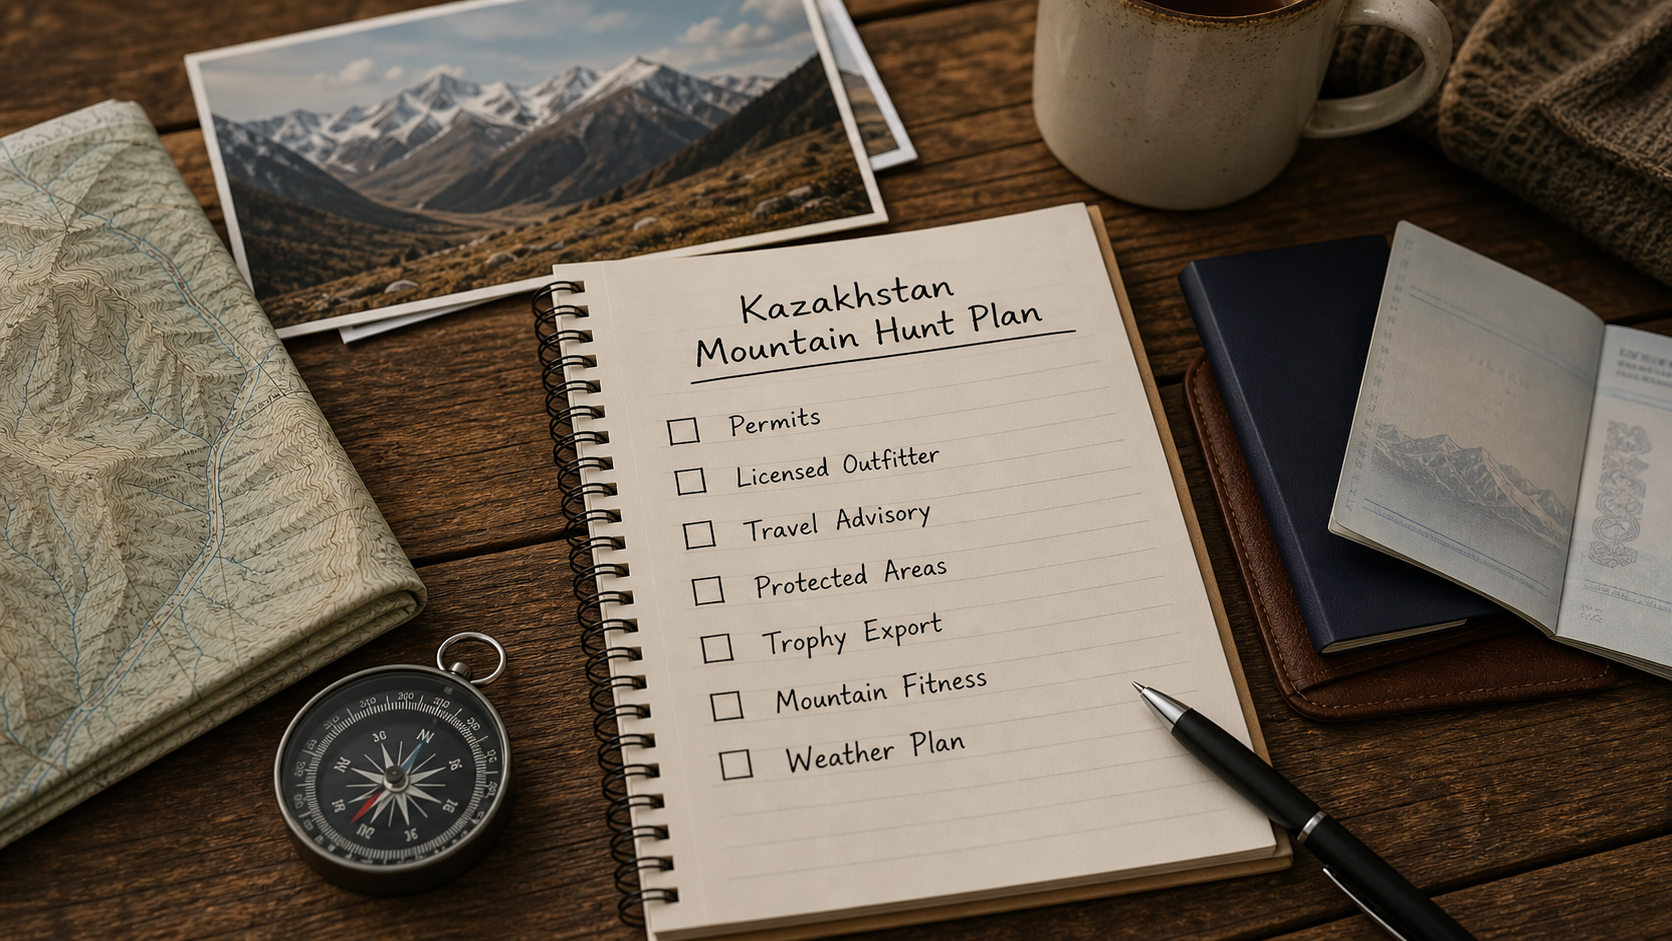
Kazakhstan mountain hunting is best approached as an international expedition, not a normal weekend hunt. Before booking, confirm the hunting area, legal species, licensed outfitter, permit process, travel advisory, protected-area boundaries, trophy/export paperwork, firearm or bow transport rules, and emergency plan.

For travel risk, start with the current U.S. State Department Kazakhstan Travel Advisory. For conservation boundaries and protected landscapes, check country-level resources such as Protected Planet’s Kazakhstan profile. If a trophy export is involved, verify whether CITES or other wildlife trade paperwork applies before the hunt.

Why Kazakhstan Draws Mountain Hunters

Kazakhstan appeals to mountain hunters because the landscape is big, remote, and physically demanding. Depending on the region and legal program, hunters may be looking at steep climbs, glassing from ridges, long vehicle approaches, horseback support, and weather that changes quickly. The attraction is not only the trophy. It is the scale of the country, the altitude, the camp experience, and the challenge of moving safely in unfamiliar terrain.

That same appeal is also the risk. A beautiful mountain hunt can become a poor decision if the outfitter is vague, the permit process is unclear, the hunting boundary is not documented, or the travel plan has no backup. Treat the destination with respect before treating it as an adventure.

Kazakhstan mountain hunting trip planning checklist with permits outfitter travel advisory and weather plan

What to Confirm Before Booking

Before paying a deposit, get clear written answers. Ask what species is being hunted, what legal quota or permit supports the hunt, who holds the license, what land or concession is involved, and what paperwork you receive before arrival. A serious outfitter should be able to explain the process without vague promises.

  • Legal species: Confirm the exact species and whether the hunt is currently open.
  • Hunting area: Ask for the region, boundary, concession, or reserve relationship in writing.
  • Outfitter credentials: Verify who is licensed, who guides, and who handles permits.
  • Weapon import: Confirm firearm, ammunition, bow, or optic transport rules before flights.
  • Trophy/export process: Confirm veterinary, customs, CITES, and shipping steps if applicable.
  • Emergency plan: Ask about satellite communication, evacuation, medical care, and weather delays.

Do not accept “we handle everything” as the only answer. Good operators may handle much of the process, but you still need to understand what documents exist, whose name is on them, and what happens if a border, airline, or wildlife officer asks questions.

The legal side is the most important part of any Kazakhstan mountain hunt. You need to know whether the outfitter is operating legally, whether the animal is covered by a valid quota or permit, and whether you can legally transport your equipment into and out of the country.

If a protected or internationally regulated species is involved, trophy export may require additional paperwork. CITES requirements can change by species and country, so verify the exact scientific/common species name before the hunt and confirm the export path with the outfitter and destination authorities. The official CITES Appendices page is the starting point for checking whether international wildlife trade controls may apply.

Also verify local protected-area rules. Kazakhstan has many protected and conserved areas, and the exact boundary matters. A hunt that is legal in one concession or management area may be illegal in another. Protected Planet’s country data shows why hunters should take boundaries seriously before assuming open mountain country is huntable.

Travel Safety and Remote Country

International hunting travel has two layers of risk: normal travel risk and remote-country risk. Before departure, review the current travel advisory, passport validity, visa or entry rules, medical insurance, local contacts, and communication options. In the mountains, ask how the guide team handles weather, vehicle failure, altitude issues, injury, and delayed extraction.

Do not assume mobile service will exist. A satellite communicator, medical evacuation plan, and clear camp check-in routine are not luxuries on a remote mountain hunt. They are part of the plan.

Gear and Fitness Realities

Kazakhstan mountain hunts can punish weak boots, poor layering, and unrealistic fitness. Your gear list should be built around terrain, temperature swings, snow or rain, wind, long glassing sessions, and recovery from steep climbs. A flatland packing list is not enough.

Boots and Clothing

Break in mountain boots before the trip. Bring a layering system that handles sweat on climbs and cold during glassing. Ask the outfitter what previous hunters actually wore during that same season, not only what looks good on a generic gear list.

Optics and Glassing

Good binoculars, a stable tripod, and a spotting scope can matter more than extra gadgets. In mountain country, finding the animal is often harder than taking the shot. Plan for long periods of glassing in wind and cold.

Fitness and Altitude

Train with elevation, pack weight, and repeated climbs if possible. If you have medical concerns, talk to a physician before booking. A guide can slow the pace, but they cannot make up for poor preparation in steep country.

Ethical Hunting Expectations

Ethical international hunting starts before the shot. Confirm that the hunt supports legal wildlife management, does not cross protected boundaries, uses a qualified local team, and has a clear plan for meat, recovery, and documentation. If the outfitter cannot explain where the animal may be hunted and how the paperwork works, walk away.

In the field, take only shots you have practiced for and that conditions allow. Mountain wind, distance, angle, fatigue, and excitement can all distort judgment. Passing a poor shot is part of doing the trip right.

FAQ

Is mountain hunting in Kazakhstan good for beginners?

Usually no. It is better for hunters who already understand mountain travel, physical preparation, optics, and international paperwork. A beginner should build experience closer to home first.

Do you need a local outfitter in Kazakhstan?

For most visiting hunters, yes. A licensed outfitter or local operator is essential for permits, area access, language, logistics, and field safety. Verify credentials before paying.

Should you check CITES before a Kazakhstan hunt?

Yes, if any trophy or wildlife part may be exported. CITES rules depend on the species and country, so check the exact species and paperwork before the hunt.

What is the biggest planning mistake?

The biggest mistake is treating the hunt like a normal outfitted trip and not verifying permits, travel risk, protected-area boundaries, export rules, and emergency plans in writing.

What gear matters most?

Boots, layering, optics, communication, and weatherproof organization matter most. The best gear list depends on season, region, elevation, and outfitter logistics.

Final Recommendation

Mountain hunting in Kazakhstan can be memorable for the landscape, challenge, and people you share camp with. But the trip only makes sense when the paperwork, travel plan, outfitter, conservation boundaries, and emergency plan are clear before you go.

Choose the operator carefully, verify current rules from official sources, train for the mountains, and keep ethics ahead of excitement. That is how a hard international hunt becomes a good story instead of a preventable problem.

Where to Shoot a Whitetail Deer With a Crossbow

The ethical answer is simple: with a crossbow, only take a whitetail deer shot when the deer is calm, broadside or slightly quartering away, within your proven effective range, and there is a clear path to the heart-lung area with a safe backstop beyond. If the angle, distance, movement, or recovery plan is uncertain, pass the shot.

This guide is about ethical shot selection, not forcing a risky opportunity. Crossbow bolts kill by cutting tissue and causing blood loss, so shot angle, penetration, broadhead sharpness, and recovery discipline matter more than bravado.

Table of Contents
  1. Quick Answer
  2. Before You Think About Aiming
  3. Best Crossbow Shot Angles
  4. Shots to Pass
  5. Know Your Proven Range
  6. Crossbow Deer Shot Checklist
  7. After the Shot
  8. Common Mistakes
  9. Frequently Asked Questions
  10. Final Recommendation

Quick Answer

The best crossbow shot on a whitetail deer is usually a calm broadside or slight quartering-away shot aimed through the vital chest area, with the exact hold adjusted for angle and height. Avoid frontal, hard-quartering-to, running, obstructed, and long shots beyond your practiced limit.

Why Crossbow Shot Placement Is Different

A crossbow bolt does not create the same effect as a high-powered rifle bullet. It relies on sharp broadhead cutting, penetration, and a clear path through vital tissue. That makes angle and discipline especially important. A small change in deer position can turn a good opportunity into a shot you should pass.

Crossbows can be accurate, but accuracy on a target is not the same as field judgment on a live deer. Clothing, rest position, tree-stand angle, animal movement, brush, low light, and nerves all reduce the margin for error. Build your hunting limit around real field practice, not the advertised speed of the crossbow.

Before You Think About Aiming

Good shot placement starts before the deer appears. Confirm your state crossbow rules, legal light, tag requirements, broadhead rules, and property boundaries. Crossbow regulations vary widely, so use your state wildlife agency as the final authority.

Also confirm your equipment. A crossbow should be sighted in with the same bolts and broadheads you plan to hunt with, and the shooter should know the actual point of impact at hunting distances. For general equipment safety, review resources such as the National Bowhunter Education Foundation crossbow safety page.

Best Crossbow Shot Angles

Broadside

A broadside deer gives the clearest path through the chest cavity. Wait until the front leg position and body angle leave a clean path, and avoid forcing the shot through heavy shoulder bone. The goal is a fast, humane kill and a trackable recovery.

Slightly Quartering Away

A slight quartering-away angle can be very effective when the bolt can pass forward through the chest. The key is thinking about the exit path, not just the entry point. If the angle becomes steep or uncertain, wait for the deer to turn.

From an Elevated Stand

Tree-stand height changes the angle through the deer. Do not simply aim at the same visual spot you would from ground level. Think through the path of the bolt and avoid steep angles that reduce the chance of both-lung penetration.

Before taking a crossbow shot, confirm angle, distance, legal light, backstop, broadhead readiness, and recovery plan.

Shots to Pass

Passing a shot is part of ethical hunting. Do not shoot because you are excited, cold, or afraid the deer will leave. A poor shot can wound an animal and create a difficult recovery.

  • Frontal shots, especially with a crossbow.
  • Hard quartering-to shots where the shoulder blocks the chest path.
  • Running or alert deer that may jump the string.
  • Shots through brush, grass, limbs, or unknown cover.
  • Long shots beyond your proven range.
  • Steep downward shots where the path may hit only one lung.

Bowhunting education materials often emphasize patience, close-range discipline, and ethical shot selection. If you use online education references such as Bowhunter Ed, pair them with your state rules and in-person practice.

Know Your Proven Range

Your ethical range is not the farthest distance your crossbow can launch a bolt. It is the distance where you can repeatedly place hunting broadheads into the vital-size target from realistic positions, under pressure, with the same rest and clothing you will use in the field.

Practice from sitting, kneeling, elevated, and awkward positions if those match your hunt. Practice with a rangefinder, because guessing distance is a common source of missed or poor hits. If you cannot verify the range, do not shoot.

Crossbow Deer Shot Checklist

  • Is the deer legal and clearly identified?
  • Is the deer calm enough for a clean shot?
  • Is the angle broadside or slightly quartering away?
  • Is the distance inside your practiced limit?
  • Is there a clear path with no brush or limbs?
  • Is there a safe backstop and no people, roads, buildings, or livestock beyond?
  • Do you have a recovery plan and enough daylight?

After the Shot

After the shot, watch and listen carefully. Mark where the deer was standing and the direction it traveled. Do not rush into the area blindly. Give the animal appropriate time, inspect sign carefully, and follow local best practices for recovery.

If sign is poor or the hit is uncertain, consider calling an experienced tracker where legal. Recovery discipline is part of ethical hunting, not an afterthought.

Common Mistakes

  • Aiming at the deer as if crossbow bolts behave like rifle bullets.
  • Taking frontal or hard-quartering-to shots.
  • Shooting beyond practiced broadhead range.
  • Ignoring stand angle and exit path.
  • Forgetting to check state crossbow rules before the hunt.
  • Leaving without a recovery plan.

Frequently Asked Questions

Where should you aim at a deer with a crossbow?

Only take a shot that gives a clear path through the heart-lung area, usually on a calm broadside or slightly quartering-away deer. The exact hold depends on angle, height, and distance.

Should you take a frontal shot with a crossbow?

No. Frontal shots leave little margin for error and can be poor choices with crossbow bolts. Wait for a better angle.

How far should you shoot a deer with a crossbow?

Your limit is the distance where you can consistently place hunting broadheads from realistic field positions. If you have not proven that distance in practice, it is too far for hunting.

What if the deer is quartering toward you?

Pass the shot. Quartering-toward angles often put heavy bone and shoulder structure in the way of the chest path, especially for archery equipment.

Final Recommendation

The best crossbow shot on a whitetail is the one you are willing to pass if conditions are not right. Wait for a calm broadside or slight quartering-away deer, stay inside your proven range, think through the bolt path, and commit to a careful recovery. Ethical restraint is what turns crossbow shot placement into responsible hunting.

When Does Coyote Season Start?

When does coyote season start? There is no single national start date. Coyote hunting seasons are set by each state, and many states treat coyotes differently from deer, turkey, waterfowl, or other game animals. Some states allow coyote hunting year-round, while others add license rules, night-hunting limits, public-land restrictions, weapon rules, or seasonal overlap rules.

The safest answer is simple: check your state wildlife agency before every hunt. Coyote regulations can change by state, property type, season, method, and time of day, so an old date from a forum or blog post is not enough.

Table of Contents

Quick Answer

In many places, coyote season is open for much or all of the year. But that does not mean the same rule applies everywhere, or that you can ignore license, land, night-hunting, firearm, trapping, or local restrictions.

For example, Texas Parks and Wildlife lists coyotes under nongame animals and explains that nongame species have no closed seasons or bag limits on private property, while still noting license and restriction details. Pennsylvania’s Game Commission lists coyotes with no closed season, but adds different license context depending on big-game seasons. California’s Department of Fish and Wildlife publishes nongame and furbearer season/limit information separately. Those examples show why your state page matters more than a generic answer.

Why There Is No One Coyote Season

Coyotes are managed differently across the United States because states classify them differently. One state may treat coyotes as nongame animals, another may manage them under furbearer or predator rules, and another may allow year-round hunting but restrict night methods, lights, suppressors, bait, electronic calls, or public-land access.

That means the phrase “coyote season” can refer to several different things: when hunting is legal, when trapping is legal, when night hunting is legal, when public land is open, or when certain licenses are valid. Before planning a hunt, identify which version you actually need.

State Examples

These examples are not a substitute for checking your own state, but they show how different the rules can be.

Texas

The Texas Parks and Wildlife Department’s Nongame, Exotic, Endangered, Threatened & Protected Species page lists coyotes as nongame animals and explains the no-closed-season framework for nongame species on private property. It also includes important notes about licenses, private-property authorization, night hunting courtesy, public-land restrictions, and live coyote transport.

Pennsylvania

The Pennsylvania Game Commission’s Seasons and Bag Limits page lists coyotes with no closed season and no limit, but it also explains license context around big-game seasons. That is a good reminder that “open” does not mean “no rules.”

California

The California Department of Fish and Wildlife maintains a Nongame and Furbearer Hunting page with current season and license information. If you hunt in California, use that page and the current regulations instead of assuming the rules match another state.

What to Check Before Hunting

Before hunting coyotes, confirm these items from the state wildlife agency and the land manager or landowner:

  • Season: Is coyote hunting open now, and does the rule differ for hunting versus trapping?
  • License: Do you need a hunting license, furtaker license, predator permit, or other validation?
  • Land type: Are the rules different on private land, public land, WMAs, federal land, or leased land?
  • Night hunting: Are lights, thermal optics, night vision, or electronic calls legal?
  • Weapon rules: Are rifles, shotguns, rimfires, suppressors, airguns, or archery equipment restricted?
  • Big-game overlap: Do rules change during deer, bear, elk, turkey, or other big-game seasons?
  • Local rules: Do county, city, discharge, road, or noise ordinances apply?
  • Reporting: Is harvest reporting, tagging, or check-in required?

Best Times of Year for Coyote Hunting

Legal season and best hunting timing are not the same thing. Even where coyotes are open year-round, many hunters prefer late fall and winter because visibility can improve, food patterns change, and calling can be productive. Winter also avoids some conflict with warm-weather insects and heavy cover.

Spring and summer require extra caution. In many areas, coyotes may be raising pups or moving differently. Heat, snakes, livestock activity, crop work, and public-land use can also change the practical side of hunting. If your goal is predator management around livestock, coordinate with the landowner and follow state rules closely.

Night Hunting, Public Land, and Local Rules

Night hunting is where many coyote hunters make rule mistakes. A state may allow coyote hunting but restrict lights, night vision, thermal optics, shooting hours, firearm type, road access, or public-land hunting. Some public lands also have their own posted rules even when private land is more flexible.

Local ordinances matter too. Being legal under state wildlife rules does not automatically mean you can discharge a firearm near a road, residence, town boundary, or subdivision. Check the hunting regulation, land manager rule, and local law before the first stand.

Ethical Coyote Hunting

Coyotes are not pests to treat carelessly. They are wild animals, and ethical hunting still matters. Make clean shots, know your backstop, avoid unsafe night setups, respect landowners, and do not leave a mess at the stand. If you are hunting for predator management, be honest about your goals and follow the law.

Ethical hunting also means knowing when not to shoot. If the background is unsafe, the animal is too far, the light is poor, or you are uncertain about the rule, pass the shot.

FAQ

Is coyote season open year-round?

In some states, yes. In others, the answer depends on license, land type, hunting method, season overlap, or local rules. Always check your state wildlife agency.

Do you need a license to hunt coyotes?

Usually yes, but there are exceptions in some states or situations. For example, Texas has specific private-property language for depredating coyotes. Check your state rule before hunting.

Can you hunt coyotes at night?

Sometimes, but night rules vary heavily. Lights, thermal optics, night vision, firearm type, shooting hours, and public land may all be regulated.

What is the best month for coyote hunting?

Many hunters like late fall and winter because calling and visibility can improve, but the best month depends on local pressure, weather, cover, land access, and legal rules.

Where should you check coyote season dates?

Check your state wildlife agency’s current hunting regulations first, then confirm public-land or local restrictions if you are not hunting private land.

Final Recommendation

Coyote season starts whenever your state regulation says it starts, and in many states that may mean there is no closed season. But a season answer is only the first step. Confirm your license, land type, night-hunting rules, weapon rules, big-game overlap, and local ordinances before you hunt.

If you remember one thing, make it this: coyotes may be open in many places, but coyote hunting is never rule-free.

What Is Snipe Hunting? Real Bird Hunt vs the Prank

Snipe hunting can mean two very different things. Real snipe hunting is the legal pursuit of small migratory shorebirds such as Wilson’s snipe in wetland habitat. A “snipe hunt” can also mean a prank where someone is sent to catch an imaginary animal. This article explains both meanings, then focuses on the real hunting basics.

If you plan to hunt real snipe, do not rely on old rules or general advice. Seasons, licenses, bag limits, nontoxic shot rules, and public-land requirements can change. Always confirm current regulations for the state and property you will hunt.

Table of Contents
  1. Quick Answer
  2. Real Snipe Hunting vs the Prank
  3. What Is a Snipe?
  4. Where Snipe Live
  5. Rules and Safety Checks
  6. Snipe Hunting Gear Checklist
  7. Basic Snipe Hunting Method
  8. Common Mistakes
  9. Frequently Asked Questions
  10. Final Recommendation

Quick Answer

Real snipe hunting is usually a wetland walk-up hunt for fast, zigzag-flying migratory birds. Hunters look for muddy edges, marshy pasture, wet meadows, and shallow water areas, then flush birds on foot with careful attention to rules, safe shooting lanes, and bird identification.

Real Snipe Hunting vs the Prank

The phrase “snipe hunt” is famous as a camp prank, but snipe are real birds. The joke usually involves sending a new camper or friend into the dark with a bag and an impossible task. That folklore meaning is separate from legal migratory bird hunting.

If you are researching the joke, the snipe hunt folklore entry gives useful background. If you are researching real hunting, focus on bird identification, habitat, hunting rules, and safe field practice.

What Is a Snipe?

In North America, hunters most often mean Wilson’s snipe. It is a small, camouflaged, long-billed shorebird that uses wet ground, marsh edges, and muddy feeding areas. Its flight can be quick and erratic, which is why snipe hunting has a reputation for being challenging.

For basic species background, see the Wilson’s snipe reference. When hunting, do not rely on a single photo. Learn shape, flight, habitat, behavior, and legal identification details before entering the field.

Where Snipe Live

Snipe are associated with wet, soft ground where they can probe for food. Productive places can include marsh edges, wet pastures, seep areas, ditches, rice-field edges, mud flats, and grassy wetland margins. They often hold tight until approached, then flush quickly.

The habitat is part of what makes the hunt different from upland walking. Footing may be slick, water depth can change quickly, and visibility can be limited by grass or reeds. Move slowly and plan your route so every possible shot has a safe direction.

A useful snipe hunt starts with habitat, identification, regulations, footing, and safe shooting lanes.

Rules and Safety Checks

Snipe are migratory game birds, so hunting them is regulation-heavy compared with casual small-game assumptions. Check your state hunting guide for open dates, daily limits, possession limits, legal shooting hours, license/stamp requirements, public-land rules, and ammunition restrictions.

State pages are the source that matters in the field. For example, New York maintains a migratory game bird regulations page. Use the equivalent official page for your own state before hunting.

Bird Identification Comes First

Do not shoot at a small bird simply because it flushed from wet grass. Confirm species, legal season, safe direction, and what lies beyond the bird. If identification is uncertain, pass the shot and use the encounter as scouting information.

Beginners should spend time watching snipe habitat before hunting it. Notice how birds flush, how they hold in cover, and how wetland edges change with rain and water levels. That scouting helps you avoid guessing in the moment and makes the hunt more ethical.

It also helps to compare legal snipe with look-alike wetland birds before the season. A pocket guide, state wildlife booklet, or mentor can prevent mistakes that a short online description cannot cover. If your identification is only “small brown bird in a marsh,” you are not ready to shoot.

Snipe Hunting Gear Checklist

  • Current license, stamps, and regulation notes for your state.
  • Waterproof boots or waders suited to the depth and footing.
  • Binoculars for checking wetland edges and other hunters.
  • High-visibility clothing where required or wise for shared land.
  • Eye and hearing protection.
  • Small first-aid kit, water, and weather protection.
  • Map or GPS app with property boundaries and safe exit routes.

Basic Snipe Hunting Method

Walk Wet Edges Slowly

A common method is to walk wet meadow edges, marsh margins, and muddy strips slowly enough that birds flush within view. Keep the muzzle or bow direction safe at all times, and avoid pushing toward houses, roads, livestock, or other hunters.

Use a Partner Safely

Two hunters can cover more ground, but only if they agree on lanes before moving. Walk in a predictable line, communicate turns, and never swing across another person. If the cover makes safe spacing unclear, slow down or hunt separately.

Expect Fast, Erratic Flushes

Snipe may flush suddenly and fly in a twisting pattern. That challenge is part of the appeal, but it is also why discipline matters. A rushed shot at a poorly identified bird or unsafe angle is not worth taking.

When in doubt, let the bird go and reset your position.

Common Mistakes

  • Confusing the camp prank with real bird hunting rules.
  • Assuming all wetland birds are legal snipe.
  • Ignoring state-specific migratory bird regulations.
  • Walking marsh edges without a safe exit route.
  • Shooting at low angles without knowing what lies beyond the bird.
  • Hunting wet ground without suitable boots, weather protection, or communication.

Frequently Asked Questions

Is snipe hunting real?

Yes. Snipe are real birds, and legal snipe hunting exists in many places. The phrase also has a prank meaning, so context matters.

Is snipe the same as woodcock?

No. Snipe and woodcock are different birds, even though both can be associated with wet or soft-ground habitat and long bills. Check species identification carefully before hunting.

Do I need special rules for snipe hunting?

Usually yes. Snipe are migratory game birds, so rules may include seasons, limits, stamps, ammunition restrictions, and shooting-hour requirements. Confirm your state rules before every season.

Where should beginners look for snipe?

Beginners should look for legal hunting areas with wet meadow edges, muddy margins, and marshy habitat, then scout carefully before hunting. A mentor who already knows migratory bird identification is very helpful.

Final Recommendation

Snipe hunting is real, but it is not a casual guessing game. Learn the bird, separate the folklore joke from the legal hunt, verify state rules, and focus on safe wetland movement and positive identification. If you are not certain about the bird, rule, or shot angle, do not shoot.

How To Remove Rust From a Gun Safely

Rust on a firearm should be handled slowly and safely. Before any cleaning, unload the firearm, remove ammunition from the work area, follow the manual, and inspect the rust level. Light surface rust may be manageable with proper gun oil and gentle cleaning, but deep pitting, bore rust, or rust around critical parts should be checked by a qualified gunsmith.

This guide is a conservative maintenance checklist, not a shortcut for damaged firearms. Start with the NSSF firearm safety rules, work in a ventilated area, and avoid harsh chemicals or abrasive methods unless the firearm maker specifically recommends them.

Table of Contents
  1. Quick Rust Removal Checklist
  2. Safety Before Cleaning
  3. Inspect the Rust Level
  4. Light Surface Rust
  5. When To Stop and Use a Gunsmith
  6. How To Prevent Rust
  7. Common Mistakes
  8. Related Guides
  9. FAQ
  10. Final Recommendation

Quick Rust Removal Checklist

StepWhat to doWhy it matters
Unload firstRemove magazine, open action, check chamber, and remove ammunition from the roomMaintenance starts with safe handling.
Identify rust levelSeparate light surface rust from pitting, bore rust, or damaged partsDifferent rust levels need different decisions.
Use proper productsUse firearm-safe oil, cloth, nylon brush, or approved toolsHarsh abrasives can damage finish and metal.
Work gentlyUse light pressure and check progress oftenRemoving finish can make future rust worse.
Avoid risky chemicalsDo not mix chemicals or use unknown household acids/cleanersChemical damage can be permanent or unsafe.
Stop for deep rustUse a gunsmith for pitting, bore obstruction, action rust, or structural concernsSome rust is a safety issue, not a cleaning task.
Prevent recurrenceDry, lightly oil, inspect, and store correctlyPrevention is easier than repair.

Safety Before Cleaning

Point the firearm in a safe direction, remove the magazine, open the action, and visually and physically confirm the chamber is clear. Move all ammunition away from the cleaning area. If you are not comfortable disassembling the firearm according to the manual, stop and get help from a qualified person.

Use gloves and ventilation when working with oils, solvents, or rust-removal products. The OSHA chemical hazards resource is a useful reminder that cleaning chemicals should be treated with care, labels, and ventilation.

Inspect the Rust Level

Light surface rust often appears as a thin orange or brown film on exterior metal. Deeper rust may show pitting, rough texture, flaking finish, bore damage, or rust around screws, action parts, sights, or the muzzle. Deep rust is not just cosmetic.

Check the bore only after the firearm is confirmed unloaded and safe to inspect. If the bore looks obstructed, heavily rusted, bulged, or damaged, do not fire the gun. Have it inspected by a gunsmith.

How To Handle Light Surface Rust

For light surface rust, apply a small amount of firearm-safe oil to a soft cloth and let it sit briefly. Wipe gently and check the surface often. A nylon brush can help in textured areas, but avoid aggressive scraping. The goal is to remove rust without cutting through the finish.

After the rust is removed, wipe away excess oil and apply a light protective film. Too much oil can collect dust or migrate into areas where it does not belong. Follow the firearm manual for lubrication points.

When To Stop and Use a Gunsmith

Stop and use a gunsmith if rust is deep, pitted, inside the bore, around the chamber, on locking surfaces, near the action, or on parts that affect safe operation. Also stop if a screw strips, a part will not move normally, or you are unsure whether the firearm is safe to fire.

Cosmetic rust and safety-critical rust are different problems. A firearm can look mostly fine and still need professional inspection if rust affects the bore, chamber, action, or structural surfaces.

How To Prevent Rust

Rust prevention starts with moisture control. Dry the firearm after rain, sweat, snow, or humid storage. Wipe metal surfaces with a light protective oil, inspect periodically, and store firearms in a stable, secure location. Avoid foam cases or damp bags for long-term storage.

Secure storage also matters. Project ChildSafe is a useful resource for responsible storage habits, especially when maintenance and storage routines overlap at home.

Common Rust-Removal Mistakes

  • Cleaning before confirming the firearm is unloaded.
  • Using harsh abrasives that remove finish and expose more metal.
  • Mixing chemicals or using household cleaners not intended for firearms.
  • Ignoring rust in the bore, chamber, or action.
  • Storing a firearm in a damp case after cleaning.

FAQ

Can light rust be removed from a gun at home?

Light surface rust may be manageable at home with firearm-safe oil, a soft cloth, and gentle pressure. Deep rust, bore rust, or rust near operating parts should be inspected by a gunsmith.

Should I use abrasive tools on gun rust?

Avoid aggressive abrasives unless the firearm maker or a qualified gunsmith recommends a specific method. Removing finish can expose more metal and make future rust worse.

Is rust inside a barrel dangerous?

It can be. Rust inside the bore or chamber may affect safety and accuracy. If the bore looks pitted, obstructed, or heavily rusted, do not fire the firearm until it is inspected.

How can I prevent gun rust after cleaning?

Dry the firearm, apply a light protective oil where appropriate, avoid damp storage, and inspect regularly. Moisture control is the best rust prevention habit.

Final Recommendation

Treat rust removal as firearm maintenance, not a cosmetic shortcut. Handle the firearm safely, use gentle firearm-safe products, stop when rust looks deep or structural, and prevent future rust with dry storage and regular inspection.

How To Install a Rifle Scope: Safe Mounting Checklist

Installing a rifle scope is mostly about alignment, fit, and verification. The short version: use the right base and rings, keep the rifle unloaded, level the scope, set eye relief, tighten screws evenly to the manufacturer’s torque specs, then confirm zero at the range before hunting or relying on the setup.

This guide is written as a practical checklist, not a substitute for your firearm manual, optic manual, or a qualified gunsmith. If a mount does not fit cleanly, screws feel wrong, or the rifle has heavy recoil, get the setup checked before firing.

Table of Contents
  1. Quick Scope Install Checklist
  2. Before You Start
  3. Choose the Right Mounts
  4. Set Eye Relief
  5. Level the Rifle and Scope
  6. Tighten and Check
  7. Boresight and Zero
  8. Common Mistakes
  9. FAQ
  10. Final Recommendation

Quick Scope Install Checklist

StepWhat to confirmWhy it matters
Unload and clearMagazine out, chamber clear, muzzle pointed in a safe directionEvery setup job starts with firearm safety.
Match base and ringsCorrect action, rail style, tube diameter, ring height, and recoil ratingWrong parts cause poor fit, scope movement, or damage.
Dry-fit firstBase, rings, optic, bolt clearance, and objective clearanceCatches fit issues before thread locker or final torque.
Set eye reliefFull sight picture from your real shooting positionReduces scope bite risk and makes the rifle easier to mount.
Level reticleRifle level and reticle vertical/horizontalA canted reticle can cause misses, especially at distance.
Torque screwsUse the optic or mount manufacturer’s inch-pound specsOver-tightening and under-tightening both create problems.
BoresightInitial alignment before live fireSaves ammunition and gets shots on paper faster.
Live zeroConfirm zero with the ammunition you will useThe rifle is not ready until it is verified at the range.

Before You Start

Start by making the firearm safe. Remove the magazine, open the action, confirm the chamber is empty, and keep the muzzle pointed in a safe direction. The NSSF firearm safety rules are a good baseline for handling habits during any setup or maintenance task.

Gather the manuals for your firearm, scope, base, and rings. You need exact fit and torque information. Generic torque numbers found online can be wrong for your hardware, especially with lightweight rings, aluminum parts, or optics with thin tubes.

Choose the Right Base and Rings

The base must match the rifle action, and the rings must match both the base style and the scope tube diameter. Common tube diameters include 1 inch, 30 mm, and 34 mm, but you should verify your specific scope. Ring height should give the objective bell enough clearance while keeping the scope low enough for a natural cheek weld.

Do not force parts together. If screws bind, a rail rocks, or the rings leave uneven marks, stop and diagnose the fit. For hard-recoiling rifles, confirm that the mount is rated for that recoil level and that any recoil lug or crossbolt seats correctly.

Set Eye Relief From a Real Shooting Position

Eye relief is the distance between your eye and the ocular lens where you see a full, clear image. Set it while holding the rifle the way you actually shoot: shoulder position, cheek weld, clothing thickness, and shooting stance all matter.

Move the scope forward and backward in the rings until the sight picture is full without stretching your neck. Leave enough clearance to reduce the chance of the scope contacting your eyebrow under recoil. This matters most on lightweight rifles, steep-angle shots, and heavier cartridges.

Level the Rifle and Scope

Leveling keeps the reticle aligned with the rifle. Use a stable rest, a small level, or a scope leveling kit. The goal is not just making the scope look straight; it is making the reticle track vertically when you dial elevation or hold for distance.

Take your time here. Many poor scope installs come from rushing the reticle alignment, then compensating later with awkward holds. If your rifle has a canted rail or unusual stock geometry, visual alignment can be misleading, so use a repeatable leveling method.

Tighten Screws Evenly and Check the Fit

Tighten ring screws in small, even steps so the gap stays balanced on both sides. Use an inch-pound torque driver and follow the mount or scope manufacturer’s spec. Over-tightening can crush or mark a scope tube; under-tightening can let the scope shift under recoil.

After tightening, check that the magnification ring turns freely, the bolt cycles without contacting the scope, the safety works, and the objective bell does not touch the barrel or rail. If you use thread locker, use only the type recommended by the mount manufacturer and keep it away from the optic body.

Boresight and Zero at the Range

Boresighting is only a starting point. It helps you get on paper, but it does not replace live-fire zeroing. Once you reach the range, confirm zero with the ammunition you plan to use. Different loads can shift point of impact, even from the same rifle.

For ammunition and pressure terminology, SAAMI is a useful industry reference. For safe range habits and responsible firearm handling, Project ChildSafe is also worth keeping in your resource list.

Common Rifle Scope Installation Mistakes

  • Using rings that are too high or too low for the rifle and objective bell.
  • Forgetting to set eye relief from a real shooting position.
  • Cranking screws by feel instead of using an inch-pound torque driver.
  • Leveling the scope by appearance only.
  • Skipping live-fire zero confirmation.
  • Assuming one ammunition load will hit the same point as another.

FAQ

Can I install a rifle scope without a gunsmith?

Many shooters can install a scope with the right tools, manuals, and patience. Use a qualified gunsmith if parts do not fit cleanly, you lack torque specs, the rifle has heavy recoil, or you are not confident about safe firearm handling.

Do I need a torque driver for scope rings?

Yes, a torque driver is strongly recommended. Scope rings and bases often use inch-pound specs, and guessing can either loosen the mount or damage the optic.

Should the scope be mounted as low as possible?

Usually the scope should be low enough for a natural cheek weld, but it still needs clearance for the objective bell, bolt handle, caps, and barrel. The lowest possible ring is not always the right ring.

Is boresighting the same as zeroing?

No. Boresighting is a rough alignment step. Zeroing requires live fire at the range with the ammunition you plan to use.

Final Recommendation

A good scope install should feel boring: safe firearm handling, correct parts, careful eye relief, level reticle, proper torque, and verified zero. Do those steps patiently and the rifle will be easier to shoot well. Rush them, and even an expensive scope can perform like a poor setup.

Where to Shoot a Bear With a Bow

If you are wondering where to shoot a bear with a bow, the safest ethical answer is: wait for a calm broadside or slightly quartering-away bear, stay inside your proven bow range, and aim only when the path is clear and you are confident in the shot. If the angle, distance, light, brush, or the bear’s behavior is wrong, pass the shot.

Bear bowhunting is not a place for rushed guesses. A bear’s heavy hair, rounded body, and different posture can make the aiming point harder to read than on a deer. This guide focuses on shot selection, when to wait, and when to walk away so the decision is ethical, legal, and realistic.

Table of Contents

Quick Answer

For most bowhunters, the best bear shot is a broadside or slightly quartering-away shot at a calm animal. The aiming point should be selected from the bear’s body position, not from hair outline alone. Keep the shot inside the range you can repeat accurately under hunting pressure, and avoid any angle that forces the arrow through heavy shoulder structure, brush, or too much body before reaching the vital area.

That does not mean every broadside bear is automatically a shot opportunity. Wind, legal rules, distance, light, recovery access, and the bear’s behavior all matter. State wildlife agencies may also have season, bait, tagging, sex, cub, and recovery rules, so check your current state bear regulations before hunting. Florida’s official bear hunting information is one example of why state-specific rules matter.

Before You Think About Aiming

The first decision is not where to hold the pin. It is whether you should take the shot at all. A responsible bowhunter should already know the legal season, have a sharp broadhead that matches the bow setup, understand the recovery plan, and know the maximum distance they can shoot cleanly without stretching.

Use a rangefinder before the bear steps into the opening if possible. Pick clear landmarks, know your shooting lanes, and decide your pass-shot limits before adrenaline shows up. If you are hunting from a stand, account for the downward angle and practice from that type of position before the season. If you cannot explain your plan calmly before drawing, wait.

Why Bears Are Different From Deer

Bears can look bigger and lower than they really are because of hair, fat, and a rounded body shape. The leg position can also be harder to read, especially on a dark bear in shade. That is why experienced hunters often warn new bear hunters not to aim by the outline of the hair. Study the body angle, shoulder line, and leg position instead.

There is also a bigger judgment issue: bear behavior and identification matter. Do not take a shot if you are unsure whether cubs are nearby, if the bear is alert and about to move, or if the situation feels rushed. Resources like Bear Smart’s bear education material are useful background because ethical hunting starts with understanding the animal, not just the equipment.

Best Bowhunting Shot Angles

The right shot angle is the one that gives your arrow a clean path and gives you a realistic recovery. The best options are usually simple, patient shots. Complicated angles are where wounded animals, lost recovery trails, and unsafe follow-up decisions happen.

Broadside

A broadside bear is usually the clearest bow shot because the body angle is easiest to read. Wait until the near-side front leg is not blocking the path. Pick a clean lane, settle the pin, and avoid drifting too far forward into heavy shoulder structure or too low into hair and body outline.

The key is patience. If the bear is walking, turning, or stretching, let it settle. A calm standing bear gives you time to confirm the angle and distance. If the bear never gives you that calm position, passing is the right decision.

Slightly Quartering Away

A slight quartering-away shot can be ethical when the angle is mild and the arrow path is clear. Think about where the arrow needs to travel through the body, not just where it touches the near side. If the angle becomes steep, or the shot would need to drive through too much body before reaching the vital area, do not force it.

This is where many hunters make mistakes by treating every quartering-away animal the same. Slight is different from hard quartering. When the angle is hard, wait for a turn or pass the shot completely.

Elevated Stand Angles

From a treestand, the contact point and exit path matter more than the pin picture alone. A steep downward shot can make the arrow path narrower and less forgiving. Practice from elevated positions, use a rangefinder with angle awareness if you trust it, and avoid steep shots that look tempting but reduce recovery confidence.

Bowhunter education resources often stress patience, controlled shot execution, and understanding your limits. If you need a refresher on bowhunting fundamentals, start with a reputable hunter-education source such as Bowhunter Ed, then apply your own state’s current rules.

Shots to Pass

A strong bear hunter knows which shots not to take. Passing is not failure; it is part of ethical hunting. The shots below are the ones most likely to create poor penetration, unclear recovery, or unsafe follow-up.

Frontal Shots

Do not take frontal bow shots on a bear. The target window is small, the structure is heavy, and the margin for error is too narrow. Wait for the bear to turn broadside or quarter slightly away.

Hard Quartering-To

A hard quartering-to bear usually protects the clean path you need. Even if the range is close, this is a shot to pass. Let the animal move, or let the opportunity go.

Running or Alert

Never rush a shot at a running, nervous, or alert bear. The animal can move during your shot sequence, and a small aiming error becomes a major recovery problem. Draw only when the situation is calm enough to finish the shot cleanly.

Brush, Obstructed, or Too Far

Do not shoot through brush, branches, grass, or uncertain cover. Do not stretch the range because the bear is impressive or because the hunt has been slow. Your field range is not your best range on a perfect practice day; it is the distance you can repeat when your heart rate is high.

Bear Bowhunting Shot Checklist

Before drawing, run through a short checklist. Is the bear legal? Is the distance known? Is the bear calm? Is the angle broadside or slightly quartering away? Is the shooting lane clear? Is your recovery plan realistic? If one answer is no, wait.

  • Legal: Season, tag, area, bait rules, and bear identification are confirmed.
  • Distance: The bear is inside your proven bow range, not just your hopeful range.
  • Angle: Broadside or slight quartering-away only.
  • Lane: No brush, limbs, grass, or other animals in the path.
  • Behavior: The bear is calm enough that you can finish the shot cleanly.
  • Recovery: You have light, help, permissions, and a plan for follow-up.

After the Shot and Recovery

After the shot, watch and listen carefully. Mark the spot where the bear stood and the last place you saw it. Do not climb down or start moving immediately unless your state rules, safety, or specific situation require it. If you are unsure about the hit, slow down and get help instead of pushing too fast.

Recovery rules and best practices vary by state, property, terrain, weather, and available tracking help. Plan this before the hunt. Know who you can call, what lights or marking tape you carry, and what your local regulations allow. A good recovery plan is part of ethical shot selection, not an afterthought.

Common Mistakes

The most common mistake is rushing because the bear finally appeared. Another is aiming from the hair outline instead of reading the body. A third is using deer habits without adjusting for bear shape, hair, and behavior. Good bear bowhunting is slower than that. You wait, verify, breathe, and only shoot when the answer is clear.

Another mistake is letting gear confidence replace judgment. Sharp broadheads, a tuned bow, and solid arrows matter, but they do not make a bad angle ethical. Equipment supports the decision; it does not rescue the wrong one.

FAQ

What is the best shot angle for a bear with a bow?

A calm broadside bear is usually the clearest bow shot. A slight quartering-away angle can also work when the arrow path is clean and the angle is not steep.

Should you shoot a bear facing you?

No. A frontal bow shot on a bear has too little margin for error. Wait for the bear to turn or pass the shot.

How far should you shoot a bear with a bow?

Stay inside the distance you can repeat accurately under field pressure. That number is different for each hunter, and it should be based on honest practice, not hope.

Is bear shot placement the same as deer shot placement?

No. Bear hair, body shape, posture, and shoulder structure can make the aiming picture different. Do not aim from the hair outline alone.

What should you do if the shot does not feel right?

Do not shoot. Passing a questionable shot is the ethical choice, especially with a powerful animal and a difficult recovery situation.

Final Recommendation

The best place to shoot a bear with a bow is not a single magic dot. It is the right shot opportunity: legal bear, calm behavior, known distance, broadside or slight quartering-away angle, clear lane, and a recovery plan. If those pieces are not present, pass the shot and wait for a better one.

That mindset protects the animal, the hunter, and the quality of the hunt. A bear you pass today is better than a bear you cannot recover tomorrow.

How to Train a Hunting Dog: Beginner Field Guide

To train a hunting dog, build obedience first, then add field skills in small steps: recall, heel, sit or whoa, place, steadiness, retrieving, scent work, and calm exposure to hunting environments. A good hunting dog is not created by pressure alone; it is built through clear commands, consistency, safety, and trust.

This guide is for beginners who want a practical training roadmap. It does not replace a professional trainer, veterinarian, or experienced gun-dog mentor, especially if the dog shows fear, aggression, injury, or stress around field work.

Table of Contents
  1. Quick Answer
  2. Start With Foundation Obedience
  3. Match Training to the Dog’s Purpose
  4. Core Hunting Dog Field Skills
  5. Training Checklist
  6. Common Training Mistakes
  7. Simple Training Timeline
  8. Frequently Asked Questions
  9. Final Recommendation

Quick Answer

The best way to train a hunting dog is to teach reliable obedience first, then introduce hunting tasks one layer at a time. Start with recall, leash manners, steadiness, and calm handling. After that, add retrieving, scent work, water or cover exposure, and field drills that match the type of hunting the dog will actually do.

Start With Foundation Obedience

A hunting dog that cannot listen at home will not become reliable in a noisy field. Foundation work should include name recognition, recall, sit, stay, heel, place, crate comfort, and calm handling. Keep sessions short and end before the dog becomes frustrated.

Positive reinforcement is useful because it teaches the dog what behavior earns reward. Humane World has a helpful overview of positive reinforcement training. Hunting dogs still need boundaries, but fair training starts with clarity, timing, and consistency.

Recall Is Non-Negotiable

Recall should be practiced in low-distraction places before moving to fields, woods, water, or birds. Use a long line or check cord until the dog is reliable. Do not gamble with an off-leash dog around roads, livestock, other hunters, or unsafe terrain.

Match Training to the Dog’s Purpose

Not every hunting dog is trained for the same job. Retrievers, pointers, flushers, hounds, and versatile breeds use different instincts. A duck retriever needs steadiness and water work. A pointing dog needs bird contact and steadiness. A tracking dog needs nose work and patience.

Groups such as the North American Versatile Hunting Dog Association are useful for understanding versatile hunting-dog testing and training culture. Use breed purpose as a guide, but train the individual dog in front of you.

A good hunting dog plan starts with obedience, safety, field exposure, and gradual skill building.

Core Hunting Dog Field Skills

Steadiness

Steadiness means the dog can wait instead of breaking early. It protects the dog, prevents ruined hunts, and helps the handler stay in control. Practice steadiness with low excitement before adding bumpers, birds, water, or gunfire.

Retrieving

Retrieving starts with short, fun sessions. Teach the dog to go out, pick up, return directly, and deliver calmly. Avoid turning every session into a marathon; quality repetitions matter more than exhausting the dog.

Scent Work

Introduce scent work gradually with simple trails, bird wings where legal and appropriate, or controlled training setups. Let the dog learn how scent moves with wind and cover instead of rushing into advanced drills too soon.

Field Exposure

Field exposure should feel like education, not chaos. Walk the dog through light cover, short grass, different footing, shallow water edges, and quiet training areas before expecting polished work in a real hunt. Let the dog learn new surfaces, smells, and sounds in manageable pieces.

Keep early field sessions simple. A few calm retrieves, a short scent trail, or a clean recall from cover is better than a long session that ends with confusion. When the dog succeeds, stop and build from that success next time.

Gunfire and Field Noise

Do not surprise a young or unprepared dog with loud gunfire. Noise exposure should be slow, positive, and paired with confidence-building work. If a dog shows fear, stop and get help from an experienced trainer.

Training Checklist

  • Short daily obedience sessions.
  • Reliable recall on a long line before off-leash work.
  • Calm leash and crate habits.
  • Gradual exposure to fields, water, cover, decoys, and other dogs.
  • Simple retrieving or scent drills matched to the dog’s job.
  • Slow, careful noise conditioning.
  • Rest days, hydration, paw checks, and injury monitoring.

Common Training Mistakes

  • Skipping obedience and rushing straight to birds or bumpers.
  • Training too long after the dog loses focus.
  • Using harsh pressure when the dog does not understand the task.
  • Introducing gunfire too quickly.
  • Expecting one dog to excel at every hunting style.
  • Ignoring fitness, heat, cold, paw injuries, and hydration.

Simple Training Timeline

A young dog should begin with socialization, confidence, handling, and short obedience. As the dog matures, add longer recalls, steadiness, retrieving, scent games, and controlled field exposure. Advanced work should come only after the foundation is reliable.

Do not compare your dog to a finished field-trial dog or a polished guide dog. The right pace is the one where your dog stays confident, healthy, and clear about what you are asking.

The Handler Matters Too

Many hunting dog problems begin with unclear handling. Use the same command words, reward timing, hand signals, and release cues every time. If one family member allows jumping, another corrects it, and a third repeats commands five times, the dog learns noise instead of rules.

Train yourself to be calm and predictable. A dog working around birds, water, other dogs, or field noise will make mistakes. Correct the setup first, simplify the drill, and help the dog understand the job before adding more pressure.

Frequently Asked Questions

When should hunting dog training start?

Basic manners and confidence-building can start early, but advanced field work should wait until the dog is physically and mentally ready. Keep puppy sessions short and positive.

Can any dog become a hunting dog?

Any dog can learn obedience and field manners, but breed traits and individual temperament matter. Some dogs are naturally better suited to retrieving, pointing, flushing, tracking, or scent work.

How long should training sessions be?

Short sessions are usually better than long ones. Stop while the dog is still engaged, and repeat consistently instead of trying to fix everything in one day.

Should I use an e-collar?

An e-collar should never be used to teach a command the dog does not understand. If you use one, learn from a qualified trainer and treat it as a communication tool, not a shortcut or punishment device.

Final Recommendation

The best hunting dog training plan is patient, fair, and specific. Build obedience first, match drills to the dog’s hunting role, introduce field pressure gradually, and protect the dog’s confidence and health. A steady, safe, responsive dog is more valuable than a rushed dog with unfinished basics.

How to Shoot Skeet – Tips for Skeet Shooting

How to Shoot Skeet: Shooting skeet is fun for all ages, whether you’re a seasoned competitor or just looking to have some fun. Also, it is a great way to spend time outdoors and start your shooting practice. Hence, it requires focusing on a tiny target and hitting it with speed and accuracy.

Hence, learning how to shoot skeet like a pro is necessary if you are a beginner shooter. Therefore, to learn how to shoot skeet, read the following steps below attentively.

Learning the Rules

Know What to Shoot

The first step in shooting skeet is knowing what to shoot. To hit a target in skeet shooting, usually, a shotgun is used to aim at small clay targets, released into the air to mimic bird hunting. They’re usually orange and have a diameter of 4 to 5 inches (10.2 to 12.7 cm).

These targets are shot separately and continuously from two sides of an arc that includes ground stations on both sides. However, you can rotate between stations and fire two to four rounds at each target when shooting skeet. A skeet round includes 25 shots.

Read Next – Best Shooting Vest

Use of Skeet Gun

When it comes to shooting skeet, almost any type of shotgun will do. But experienced shooters, choose to use a shotgun, known as a skeet gun, that is accurate and long-range.

Usually, skeet guns are shotguns with over-under barrels. However, by adding relatively open chokes, you can increase your accuracy and make consistent hits on the target. Many skeet shooters prefer to add this.

Know the Difference Between Stations

Skeet shooting is a sport of shotguns. At skeet shooting, you’ll need to move between 7 stations that are arranged 21 yards far away from your target in an arc and a point, which is comparatively closer than other stations. You will constantly aim in the same specific direction (downrange) from your initial station to your final station.

However, the angle that you view the targets from will change depending on your position. Again, two traps discharge clay targets on either side of the range: low and high. These two clay targets will appear and cross your field of view together, and you’ll have to hit both of them.

Learn the Target Pattern

Usually, target release order varies from station to station. In general, each trap will allow you to hit only one target, though, at certain times, that may vary. However, learning the pattern is a core part of the skeet shooting strategy.

At Stations 1 & 2

At stations 1 and 2, the upper trap releases a single target, followed by the bottom trap releasing another single target. The respective traps are called “high house” and “low house.”

The next target will be released from the low trap, and then multiple targets will be released continuously. During the simultaneous release, your goal should be to shoot the higher target first. At each station, the shooter will take 4-shorts.

At Stations 3 to 5

At each of the stations 3–5, the shooter will take a total of 2-shots. One target will be released from the upper trap and another from the lower trap.

At stations 6 & 7

The pattern of 1st and 2nd stations is exactly the same here: a high, a low, and then the continuous targets. One exception is that this time shooter will fire the lower target first. Each of these stations will have 4-shots to shoot.

At station 8

You’ll shoot a high and a low target at this closer-up station. If you do not miss the target, you will get another chance to hit a lower house target.

Read Next – Best Shooting Ear Plugs

Shooting Accuracy

Take Position

A half-circle comprises seven evenly spaced stations on one side of the skeet field. Choose one of the seven stations and take your position located between the lower and upper houses.

Before taking the final shot, it may be helpful to practice shooting at some other targets so that you can get an idea about flight patterns, timing, and accuracy.

Assume the Right Shooting Stance

When approaching a clay target, keep your back straight, spread your feet apart, and be flexible in your position. Also, keep your knees slightly bent and stand on your forward foot. Bring the gun up to your shoulder and hold it tightly.

Practice

Put the gun unloaded and point the gun at a fixed target. Then swing the gun in an arc to get a feel for the motion of the swing. As the targets move quickly, people who want to shoot well must develop muscle memory to get good at it.

It’s not only about aiming precisely but also about the mechanics of how you aim. Once you’ve practiced your swing, it’s time to take some shots.

Take a Shot Ahead of the Targets

If you’re new to skeet shooting, it will take some time to get an idea about the flight pattern and feel for how much lead you may need to give each target.

But once you’ve got it, you’ll start hitting more and more targets. If you consistently miss the target, change your lead time and retry.

Learn to swing naturally and quickly so that you can follow each target and take the most efficient shots.

Follow-through

Target shooting requires a high level of patience. When you pull the trigger, your swing will stay connected to your mind (your brain) for a brief moment. It is important to start thinking about the target as soon as you start moving.

After you fire a shot, continue to move your gun through your swing. But as soon as you’re done firing, put your finger away from the trigger.

Read Next – Best Shooting Glasses for Sporting Clays

Some Further Steps

Join a Skeet Club

If you want to shoot skeet regularly, consider joining a skeet club. In skeet clubs, you can learn tips from other shooters. You can even join leagues at clubs.

Join NSSA (National Skeet Shooting Association)

Being a member of the NSSA allows you to practice and enter tournaments to improve your accuracy and rank. There are classes for different skill levels of shooters.

For instance, if you’re just starting, you’ll be in a class of other beginners/novices. As you improve, you’ll progress with your level and find people to compete against. Don’t worry about how you rank. Just focus on becoming better by practicing, and you’ll eventually rank up.

Take Skeet Lessons

If you want to improve your shooting skills, take lessons from an experienced shooter. You can learn a lot by being around experienced skeet shooters and listening to their tips and advice, even if you’re not yet at the same level.

The more advanced skeet shooters can show you where your weaknesses lie and help you avoid the same mistakes they made. Overall, you can learn a lot from an experienced shooter.

Keep Practicing

Shooting is just like any other sport – you improve by actually doing it. If you want to get better at shooting, go practice. Regularly shooting will build the muscle memory needed to shoot accurately. Besides, when you go shooting, you’ll learn a lot more than you will be reading about it. Plus, shooting is fun!

Final Verdict

Skeet shooting is a great way to learn how to shoot a shotgun and improve your bird hunting skills. Also, it’s a fun and challenging sport for people of all skill levels.

But, knowing the fundamentals of skeet shooting can make you a much better skeet shooter. In this article, we have covered all the necessary steps of skeet shooting.

We hope this article will prove helpful to you to learn how to shoot skeet.

Read Next – Best Shooting Bags

How Does a Compound Bow Work?

How Does a Compound Bow Work: The modern compound bow is mechanical assistance to reduce the draw weight. They are now regarded as the smoothest, fastest, most accurate, efficient, and powerful bows ever created. For both amateur and professional archers, it’s essential to know how to handle and operate a compound bow.

Therefore, in this article, first, we’ll go over the various components of a compound bow in better detail. Next, we’ll explain how they work. Then, we will discuss some common compound bow terminologies as well.

At the end of this article, we will cover the advantages of using a compound bow and answer relevant queries regarding compound bows. Hopefully, after reading this article, you’ll have a correct understanding of compound bows and their working principle.

Compound Bow Accessories

Before understanding how compound bow works, it’s essential to have the necessary knowledge of various parts of a compound bow.

Especially if you’ve never touched any compound bow before, you must learn these fundamentals first. Therefore, here we will discuss some essential compound bow accessories in the following.

After reading this section, we hope that anyone will easily pick up the right compound bow and be an expert archer with enough practice.

However, if you’re already an experienced compound bow user, you can skip this part and go ahead.

Limbs

The limbs are the compound bow’s most flexible part that stores and releases energy. The majority of these limbs are constructed from carbon fiber or other types of composite material.

When you pull back on the string, the limbs become compressed. And therefore, all of the energy for your shot comes from the limbs. In another word, most of the draw weight flows from the limbs.

Usually, the pulley system in a compound bow creates a lot of force, and the bow limbs can withstand that pressure.

String

In a compound bow, you will find a string and 2-cables. The string is the outermost wire of the compound bow. The string passes over the cams and also wraps around both cams on the inside.

The archer usually pulls the string backward to create tension for drawing the bow. Then when the archer releases the string, it sends the compound bow arrow flying.

Cables

The role of cables in a compound bow is significant. Their function is not limited to guiding the limbs and keeping them in place but also has a direct impact on arrow speed and helps to achieve accuracy.

Generally, the cables are hooked to the cam on one side and the limb on the other. Unlike string, cables do not run over a bow’s cam but run over the mod. Both cables are attached to the bows having the same distance and also connected in a similar way.

Cams

Both the lower and upper limbs of a compound bow are usually equipped with large wheels. These wheels are known as cams.

All of the parts that contribute to the let-off effect are connected to the cams. However, the cams have groves in them that keep the string on track.

Furthermore, compound bows come in various designs. Some designs result in faster shots, while others provide better handling.

So, you should select the design that best suits your shooting style. Again, there are many different cam configurations available to choose from.

Mod

The mod usually takes place at the cam’s side. Each cam contains a mod, and each cable is connected to a mod. As the name refers, you can easily modify its placement to change the draw length.

Read Next – Recurve Bow VS Compound Bow

Riser

The riser is the fundamental portion of the compound bow. It preserves the bow’s main components together (the sight, limbs, rest, stabilizers, etc.).

Since there are numerous parts connected to the riser, so it must be firm but light. Contemporary risers are used to withstand tension while remaining light and easy to handle.

How Does a Compound Bow Work?

The compound bow is a new advancement in archery that takes the benefit of mechanical advantage. The mechanism of a compound bow is quite the same as the pulley system.

A compound bow works similarly to a pulley system because they are both based on the block and tackle system. This bow drives the arrow using multiple energy. Again, it also lacks the straight force found in most conventional bows. When the string reaches a certain level during pulling the string, it peaks, sending the arrow flying.

Moreover, the most challenging part of ancient archery is pulling a maximum weight while maintaining your aim steady.

Therefore, the compound bow employs mechanical devices such as cams, cables, or pulleys to apply power. These components are designed to reduce the bow weight at full draw and make aiming much more effortless.

The pulley system on a compound bow removes around 80% of the draw weight when you’re at full draw, saving your effort of holding back some of that weight. This removed weight is referred to as “let-off.”

Read Next – The 10 Best Youth Compound Bow

Compound Bow Terms

There are 2-compound bow terms you should know:

Let-Off

We’ve already mentioned it, but here we will shed some more light on this factor. You may be able to achieve different let-off rates depending on your bow.

Therefore, it ups to you which let-off rate you will found more convenient for you. In archery, comfort is just as important as accuracy.

Also, make sure to choose one with a let-off value that gives you the right kind of shooting zone. However, keep in mind that a compound bow with a high let-off will be easier to handle than one with a low let-off.

Valley

Most archers define the “valley” as the point when a cam transitions from making adjustments to a full let-off. To achieve aggressive shots, you’ll have to be shooting with the bow positioned in a way that creates a short valley.

Benefits of Using a Compound Bow

While we’re on the subject of compound bows, let’s have a look at the reasons why this is the ideal sort of bow:

  • For those interested in archery, compound bows give the necessary force and accuracy without requiring excessive effort.
  • A compound bow has a longer let-off potential and is easier to hold, so it will allow you to take a more accurate shot at your target.
  • This bow shoots arrows faster. If you want to shoot arrows with more energy, this is a fast and accurate bow for you.
  • Generally, there is a low draw weight requirement for compound bows. It makes them easy to handle and safe to use.
  • Compound bows come with a wide range of archery accessories that can improve your performance.
  • Compound bows are generally lighter and easier to carry, so you won’t have to worry about your equipment weighing you down.

Read Next – The 10 Best String Silencers for Compound Bow

Several Cam Configurations

In addition to the construction and design of the compound bow, there are various cam configurations to choose from.

Take your time experimenting with different bow configurations to determine which bow you are most comfortable with.

How to Configure Draw Length?

We can modify the draw length by adjusting the mod location because you can adjust the mod only when the let-off occurs.

Also, concentrating on the upper limb, we may raise the draw weight by turning it clockwise and lowering it by turning it counter-clockwise. We can reach the cam’s flat area at any point in the draw as long as we adjust the mod’s position on the cam.

Why Compound Bows Shoot Faster?

A compound bow operates in the same way as a simple block and tackle. It uses a pulley system to multiply the energy you apply over distance. In short, compound bows store more potential energy in the limbs, which allows them to shoot faster.

Read Next – The 10 Best Compound Bow for the Money

Are Compound Bows Easier to Shoot?

Yes, shooting a compound bow requires less energy than shooting an old-fashioned bow and arrow, but it still takes a lot of practice to master.

A powerful compound bow is more manageable to aim than a traditional bow due to let-off, which lowers string forces at full draw.

In addition, the compound bow is safer and smaller than recurve bow, it requires less practice, and it is also easy to handle.

Final Word

It’s very reasonable to be curious about how your compound bow works when you first get it. The preceding section will quickly introduce you as a beginner to some compound bow fundamentals.

However, if you’re already an archer who shoots with a compound bow, you’ll also likely find this article helpful to read.

You May Like to Read

Exit mobile version