How to Scout Upland Birds: Pheasant and Quail Habitat Guide

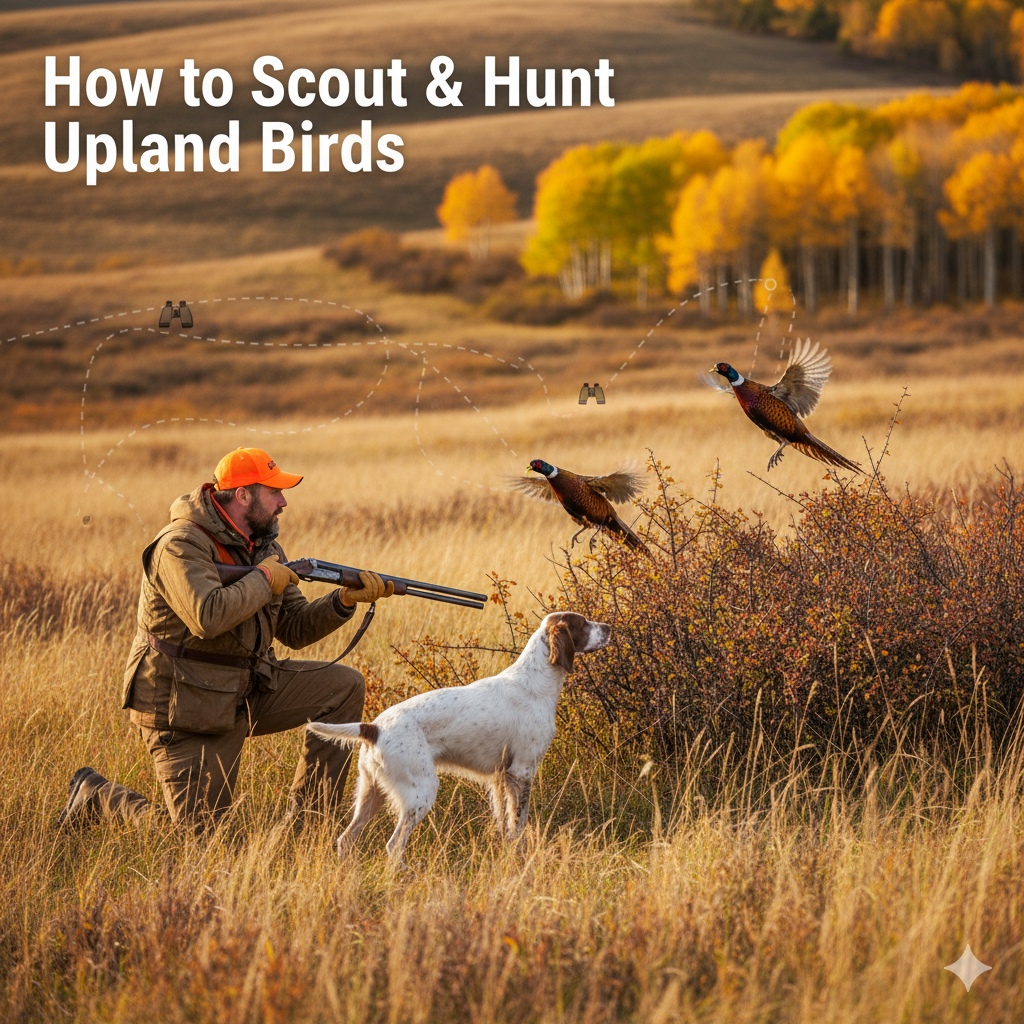
Scouting upland birds means learning where pheasant and quail find cover, food, water, and escape routes, then planning safe, legal field movement before the hunt. Good scouting is mostly habitat reading, access planning, and safety awareness. It never guarantees birds will be there, and it never replaces target identification.

This guide focuses on pheasant and quail habitat clues, safe movement with partners and dogs, and the regulation checks every hunter should make through current official sources. Season dates, bag limits, blaze-orange rules, licenses, access rules, and legal methods vary by state and year.

Upland Bird Scouting Basics

Scouting for upland birds is the process of identifying likely habitat, safe access points, and field boundaries before the hunt. The goal is to narrow a large area down to a few spots worth walking, based on cover quality, food, water, pressure, and safe shooting layout.

  • Cover: birds need protection from weather and predators.
  • Food: crop edges, weed seeds, insects, and waste grain can concentrate birds.
  • Water: moist low spots and water edges matter more in dry country.
  • Edges: transitions between cover and food often deserve extra attention.
  • Escape routes: birds need somewhere to run or fly when pressured.
  • Pressure: heavily walked areas may push birds into thicker or less obvious cover.

Treat these as clues, not promises. Regional habitat differs, so compare what you see with habitat guidance from groups such as Pheasants Forever and Quail Forever.

Pheasant Habitat and Sign

Pheasants favor dense nesting or loafing cover near reliable food, with thick escape cover close by. Look for grassy fields, cattail sloughs, shelterbelts, weedy fence lines, and the edges of standing or harvested crops.

Cover, food, water, and escape routes

The most useful spots usually combine thick cover, a nearby food source, and a way for birds to escape pressure. Grassy or weedy strips that connect larger cover blocks can act as travel lanes. In dry regions, low wet areas can also draw birds.

Pressure, weather, and time of day

Hunting pressure can push pheasants into the thickest cover and make them run before flushing. Early and late in the day, birds often move toward food. Midday, they may sit tighter in heavier cover. Wind, rain, and snow can change where birds shelter, so re-scout after major weather or pressure changes.

Quail Habitat and Sign

Quail are covey birds that favor a patchwork of low woody cover, open ground underneath, and seed-producing plants nearby. Brushy edges, field borders, fence rows, and shrubby draws are common places to start looking.

Covey cover and edge habitat

Quail need overhead cover for protection, room at ground level to move, and food close enough that they do not have to expose themselves for long. Edge habitat where brush meets field or grassland often provides that mix in a small area.

Regional differences to verify

Quail species and habitat vary widely by region. Before relying on one pattern, confirm what local quail habitat looks like through Quail Forever, local habitat programs, and your state wildlife agency. Good-looking cover improves odds, but it does not guarantee a covey is present.

Safe Field Movement and Shot Awareness

Safe upland hunting depends on muzzle control, partner awareness, dog awareness, and clear target identification. Follow established firearm safety rules from sources such as the NSSF firearm safety rules and your hunter education program.

  • Keep the muzzle pointed in a safe direction, including when crossing fences or ditches.
  • Agree on safe zones of fire before walking.
  • Identify the bird and confirm a safe background before mounting the gun.
  • Know where partners and dogs are before any shot.
  • Do not shoot at sound, movement, low birds, skylined birds, or unknown ground.
  • When in doubt, do not shoot.

For broader safety habits, review IHEA-USA hunter education resources and our beginner-friendly shooting range safety rules guide. Eye and ear protection also matter in the field; see our guide on shooting eye and ear protection.

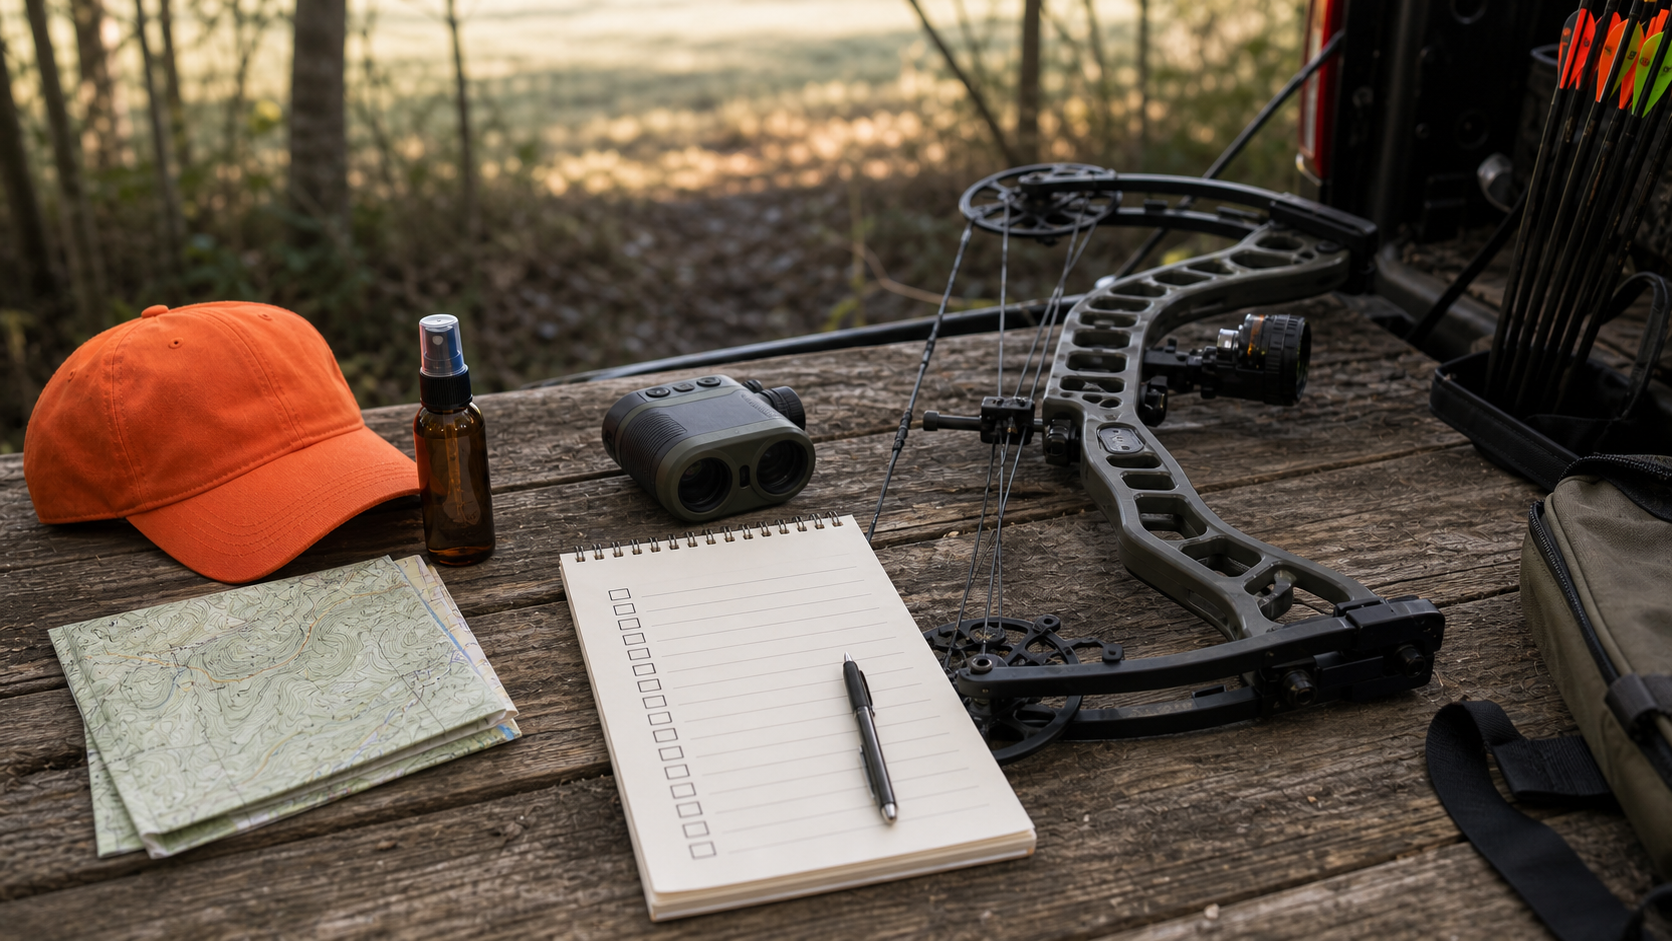
Gear and Dog-Handling Considerations

Upland gear should support safe walking, clear communication, and comfort without turning the hunt into a heavy loadout. Common considerations include sturdy boots, brush-resistant clothing, hearing and eye protection, water, and a way to carry birds. Many states require hunter-orange clothing for upland hunting, but the exact rule must be checked through the current state source.

For dogs, plan around conditioning, water, weather, terrain, and clear handling. A dog can help locate birds, but the hunter remains responsible for target identification, safe zones of fire, and knowing what is beyond the bird. Plan shots around the dog’s position, not the other way around.

Season, Land Access, and Regulation Checks

Season dates, bag and possession limits, license and stamp requirements, blaze-orange rules, shooting hours, dog rules, and public/private land access all change by state and season. Check your current state wildlife agency pages before scouting or hunting.

For access planning context, our public land hunting guide is a useful companion, even though upland access rules still need to be verified for the exact state and property. For broader beginner hunting habits, see deer hunting tips for beginners.

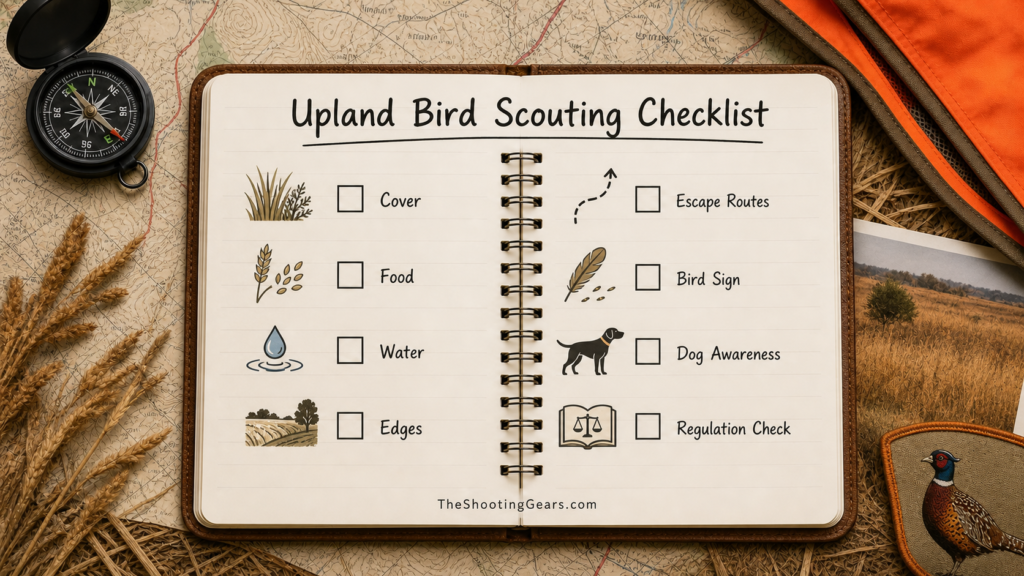
Upland Bird Scouting Checklist

Scouting CheckWhat to Look For
CoverGrass, cattails, brush, shelterbelts, fence rows, and shrubby draws
FoodCrop edges, weed seeds, insects, waste grain, and seed-producing plants
WaterMoist low spots, nearby water, and cover close to water in dry country
EdgesTransitions where food, cover, and open ground meet
Escape routesThicker cover birds can run or fly into when pressured
Bird signTracks, droppings, dusting areas, feathers, flushes, and calls
Dog awarenessDog position, range, hydration, and safe zones of fire
Regulation checkSeason, license, limits, blaze orange, access, and legal methods
Use the checklist to plan the walk, then verify current rules and safe shooting lanes before hunting.

Frequently Asked Questions

When is the best time of day to scout upland birds?

Early morning and late afternoon are often useful because birds may move toward food. Midday scouting can still reveal cover, sign, and access points even when birds are sitting tight.

How do I find pheasant or quail without trespassing?

Start with public hunting lands and access programs listed by your state wildlife agency. For private land, get clear permission before scouting or hunting. Access rules vary, so verify them through official sources.

Does good habitat guarantee I will find birds?

No. Habitat tells you where birds are more likely to be, not that they are present. Pressure, weather, food availability, and season timing all affect whether birds are using a spot.

Do I still need to identify my target if I am hunting with a dog?

Yes. A dog can help locate and flush birds, but you must always identify the bird, confirm a safe background, and know where the dog and partners are before any shot.

What clothing color is required for upland hunting?

Many states require hunter orange or blaze orange for upland hunting, but the amount and placement vary. Check your state wildlife agency’s current rules before hunting.

Final Takeaway

Scout upland birds by reading cover, food, water, edges, escape routes, pressure, and bird sign, then layer in safe field movement and current regulation checks. Habitat can guide your plan, but safe target identification, dog awareness, partner communication, and official rules decide whether the hunt is responsible.

Hunting Rifle Maintenance Checklist: Safe Basic Care

A safe hunting rifle maintenance routine starts by unloading the rifle, opening the action, removing all ammunition from the cleaning area, and following your rifle’s manufacturer manual. Basic post-hunt care then means drying exterior metal, checking for moisture, cleaning the bore only as the manual directs, applying light lubrication only where specified, and storing the rifle unloaded in a secure place.

This checklist is for manual-led basic care and rust prevention. It does not cover trigger work, headspace, bedding, chamber work, or model-specific disassembly. If anything looks damaged, functions oddly, or is unclear in the manual, stop and take the rifle to a qualified gunsmith.

Safe Rifle Maintenance Starts Before Cleaning

Every maintenance session begins with making the rifle safe. Unload it, open the action, visually and physically confirm the chamber and magazine are clear, and move all ammunition away from the work surface before any cleaning tool comes out. Keep the muzzle pointed in a safe direction throughout the process.

Before you clean, review established firearm safety rules such as the NSSF firearm safety rules, then read the cleaning section in your rifle manual. The manual is the authority for what can be opened, what should be left alone, and how to handle your exact model.

A safe maintenance routine starts with an unloaded rifle, the manual, ventilation, dry metal, and secure storage.
  • Unload the rifle and open the action.
  • Confirm the chamber and magazine are empty.
  • Remove all ammunition from the cleaning area.
  • Keep the muzzle pointed in a safe direction.
  • Have the specific rifle manual on hand.
  • Set up in a ventilated area suitable for solvents.

Basic Post-Hunt Maintenance Checklist

Basic post-hunt maintenance focuses on moisture, fouling, visible wear, and safe storage. After confirming the rifle is unloaded and clear, work slowly through the checklist instead of rushing straight to the bore.

Unload, Clear, and Separate Ammunition

Confirm again that the rifle is unloaded and the action is open. Keep ammunition separated from the cleaning bench for the entire session. Never have live rounds near solvents, lubricants, or the cleaning surface, and never store the rifle loaded.

Dry Exterior Metal and Inspect for Moisture

Wipe down exterior metal to remove water, sweat, fingerprints, and field grime, especially after rain, snow, or humidity. Look for early rust or pitting, and check that the bore is free of obstructions before storage. Do not dry-fire or function-test unless the manual specifically allows it and all safety checks are complete.

Bore, Action, and Exterior Care

Bore, action, and exterior care should follow the rifle manual’s procedure for your model. Use proper tools, correct patch and brush sizes, and cleaning chemicals according to their labels. Do not force rods, brushes, or patches, and do not improvise procedures the manual does not describe.

Follow the Rifle Manual for Bore Cleaning

Clean the bore according to the manual using a proper rod or cable, jag or brush, and patches sized for the bore. Stop if a tool binds, a patch will not pass normally, or you suspect a bore obstruction. For cartridge and chamber terminology, SAAMI technical information is a useful standards reference, but your rifle manual still controls the actual cleaning method.

Use Solvents and Lubricants Carefully

Cleaning solvents and lubricants are chemicals. Use them only as directed, work with ventilation, avoid eating or drinking while cleaning, and wash your hands afterward. Lead residue can be part of shooting environments; the CDC/NIOSH publication on preventing lead and noise exposures at indoor firing ranges and OSHA hazard communication guidance are helpful references for why labels and safety data sheets matter.

Apply lubricant lightly and only where the manual specifies. Over-lubrication can attract debris, and using improvised chemicals can create avoidable problems. Never spray oil into ammunition.

Storage and Rust Prevention

Rust prevention depends on drying the rifle, applying a light protective film where the manual allows, storing it securely in a dry environment, and inspecting it periodically. Moisture is the main enemy after wet hunts, sweaty handling, or transport through changing temperatures.

  • Make sure the rifle is fully dry before storage.
  • Apply a light protective oil to exterior metal where the manual allows.
  • Store the rifle unloaded in a secure, dry, temperature-stable place.
  • Avoid sealed cases for long-term storage if they trap humidity.
  • Inspect stored firearms periodically for moisture or rust.
  • Use secure storage to keep firearms away from unauthorized users.

For secure storage practices, Project ChildSafe is a useful public safety resource. A cleaned and oiled rifle still needs periodic checks because storage conditions change with the seasons.

What to Leave to a Gunsmith

Anything beyond manual-led cleaning, light lubrication, and exterior care should be left to a qualified gunsmith, especially work involving internal parts, function, fit, or safety-critical adjustments. Trying model-specific disassembly without the right training and tools can create safety problems.

  • Damaged, worn, broken, or missing parts.
  • Failure to feed, extract, or eject.
  • A suspected bore obstruction.
  • Trigger feel that has changed or seems unsafe.
  • Disassembly the manual does not clearly describe.
  • Any uncertainty about whether the rifle is safe to use.

This guide does not cover trigger adjustment, bedding, headspace, chamber work, or model-specific disassembly. Cleaning is not a substitute for a professional safety inspection, so a gunsmith is the right call whenever something seems off.

Frequently Asked Questions

How often should I clean my hunting rifle?

Cleaning frequency depends on how much you shoot, the conditions you hunt in, and your manufacturer’s guidance. Many hunters do basic care after each hunt or range session, with more thorough cleaning as the manual recommends. Clean sooner if the rifle was exposed to rain, snow, mud, or saltwater.

What do I need to clean a rifle safely?

At a basic level, you need the rifle manual, a proper cleaning rod or cable, a jag or brush and patches sized for the bore, appropriate solvent, light lubricant, eye protection as appropriate, and a ventilated work area. Remove all ammunition before cleaning.

Can I store my rifle after oiling it without further checks?

No. Even a cleaned and oiled rifle should be inspected periodically because temperature and humidity changes can still cause moisture problems. Store the rifle unloaded, dry, and secure, then check it from time to time.

Is it safe to take apart my rifle for a deep clean?

Only to the extent your manufacturer manual clearly describes for your exact model. Disassembly beyond manual basics, along with trigger, bedding, headspace, and chamber work, is gunsmithing and should be left to a qualified professional.

Do I need eye protection and ventilation to clean a rifle?

Yes, as appropriate. Solvents and lubricants are chemicals, and residue from shooting can be present. Work in a ventilated area, use eye protection where appropriate, avoid eating or drinking while cleaning, follow product labels and safety data sheets, and wash your hands afterward.

Waterproof Hunting Clothing: Layers, Fabrics, and Care


Waterproof hunting clothing keeps rain and wind out while letting some body moisture escape, and it works best as part of a layering system rather than as a single jacket. The key parts are a waterproof, breathable outer shell built around a membrane or coating, a durable water repellent (DWR) finish on the face fabric, and sealed seams that block water at the stitching. No clothing stays dry in every condition forever, so the realistic goal is choosing the right layers for your hunt and caring for them so they keep performing.

Table of contents

Start With a Layering System

Staying dry and comfortable in the field is about the whole system, not one waterproof jacket. The common three-layer approach gives you the flexibility to handle changing weather and effort levels.

  • Base layer. Sits against the skin and moves sweat away from your body. Wool and synthetic fabrics manage moisture well, while cotton holds water and is generally avoided in cold or wet conditions.
  • Mid layer. Provides insulation by trapping warm air. Fleece and synthetic or down insulation are typical choices, adjusted to the temperature.
  • Outer shell. The waterproof, breathable layer that blocks rain and wind while letting some moisture escape from the layers beneath.

The point of layering is control. You add or shed layers as you warm up climbing a ridge or cool down sitting on a glassing point, which keeps you from sweating through your clothes and then getting chilled. A waterproof shell over a sweat-soaked base layer can still leave you cold, so managing the inside moisture matters as much as blocking the rain outside.

How Waterproof Breathable Fabrics Work

Waterproof breathable fabric does two opposing jobs at once: it stops liquid water from getting in while allowing water vapor from sweat to pass out. It manages this because liquid water droplets are far larger than individual water-vapor molecules, so a barrier can block one while passing the other.

Membranes and Coatings

Most waterproof breathable garments use either a membrane or a coating bonded to the inside of the face fabric. Membranes are thin films laminated to the fabric. Some are microporous, with pores too small for liquid water but large enough for vapor, and others are nonporous films that pass moisture through the material itself. Coatings are applied as a layer rather than a separate film. Both approaches aim for the same balance of keeping rain out and letting vapor escape, and the right choice depends on the activity and conditions more than on any single technology being best.

Breathability has limits. In heavy rain, high humidity, or hard exertion, even a good fabric cannot move sweat out as fast as you produce it, and you may feel damp from the inside. That is normal physics, not a defect, and it is why pit zips and ventilation features exist on many hunting shells.

DWR: The Finish That Makes Water Bead

Durable water repellent, or DWR, is a treatment applied to the outer face fabric so water beads up and rolls off instead of soaking in. DWR is not the waterproof barrier itself; that job belongs to the membrane or coating underneath. Instead, DWR keeps the face fabric from “wetting out,” which is when the outer fabric saturates, feels heavy and cold, and blocks breathability even though the membrane is still keeping you dry.

DWR wears off with use, abrasion, dirt, and washing, which is why a jacket that beaded water when new may start wetting out over time. The good news is that DWR can usually be revived by cleaning the garment and either applying heat per the care label or using a wash-in or spray-on DWR product. Restoring DWR is one of the simplest ways to bring an aging shell back to life.

Seam Sealing and Construction

Every stitch in a garment is a small hole, so a jacket can use a fully waterproof fabric and still leak at the seams if they are not sealed. Quality waterproof garments use taped or sealed seams, where a thin waterproof tape is bonded over the stitching on the inside to block water from passing through the needle holes.

Construction details decide how well a shell keeps water out in practice. Storm flaps over zippers, waterproof or treated zippers, adjustable hoods and cuffs, and a drawcord hem all reduce the places water sneaks in. When evaluating a piece of waterproof hunting clothing, look at how the openings are protected, not just the fabric claim on the tag.

Understanding Waterproof and Breathability Claims

Manufacturers often rate fabrics with numbers for waterproofness and breathability. Waterproof ratings are commonly given as a hydrostatic head measurement in millimeters, where a higher number indicates the fabric resists more water pressure before leaking. Breathability is often expressed as a moisture vapor transmission rate, where a higher number suggests more vapor can pass through.

Treat these numbers as general guidance, not guarantees. Test methods vary between manufacturers, real-world wear adds abrasion and dirt that lab tests do not, and a high rating on the fabric does not help if the seams, zippers, or DWR fail. Use ratings to compare roughly within a brand and to gauge whether a garment is built for light showers or sustained downpours, while remembering that no rating means a garment stays dry in all conditions.

Choosing for Your Hunt

The best waterproof hunting clothing for you depends on your climate, season, and how active you are. Match the gear to the hunt rather than buying the heaviest-duty option for every situation.

Hard Shells

Hard shells use a sturdy waterproof breathable fabric and prioritize weather protection and durability. They suit sustained rain, wind, and rough country. The tradeoff is that they can feel less breathable during hard exertion and may be noisier, which matters when game can hear you.

Soft Shells and Water-Resistant Layers

Soft shells and water-resistant pieces trade full waterproofing for more breathability, stretch, and quiet fabric. They handle light precipitation and active hunts well but are not built for prolonged downpours. Many hunters carry a packable waterproof shell as backup over a more breathable, quieter layer.

Quiet Fabric and Fit

For hunting specifically, fabric noise and fit matter alongside waterproofing. A crinkly shell can spook game, and a jacket too tight to layer under or too loose to move in undercuts its purpose. Consider how the garment will sound and move during the kind of hunt you actually do.

Caring for Waterproof Clothing

Waterproof clothing performs better and lasts longer with proper care, and dirty gear is one of the most common reasons a shell seems to stop working. Always follow the garment’s care label first, since products differ.

  • Wash when dirty, since body oils, sweat, and grime clog the fabric and reduce both water repellency and breathability.
  • Use a cleaner suited to technical fabrics rather than regular detergent or fabric softener, which can leave residues that harm DWR.
  • Reactivate or reapply DWR when water stops beading, using heat per the care label or a dedicated DWR product.
  • Store the garment clean and dry, hung or loosely folded rather than stuffed away damp.
  • Repair small tears and worn seam tape promptly with appropriate gear-repair products before they spread.

For specific products such as a particular jacket or treatment, follow the manufacturer’s instructions, which override general advice and protect any warranty.

Frequently Asked Questions

What is the difference between waterproof and water-resistant?

Water-resistant clothing sheds light rain and splashes for a while but soaks through under sustained wetting. Waterproof clothing uses a membrane or coating plus sealed seams to keep liquid water out far more effectively. Neither term means a garment stays dry forever in every condition, so match the level of protection to your hunt.

Why is my waterproof jacket leaking or feeling wet inside?

Often the membrane is fine and the issue is wetting out, where worn DWR lets the face fabric saturate and block breathability so sweat builds up inside. Cleaning the jacket and reviving the DWR usually helps. Damp inside can also simply be sweat that breathability cannot keep up with during hard effort.

Do I need waterproof clothing for every hunt?

Not always. For dry climates or short, active hunts a breathable water-resistant layer may serve better, with a packable waterproof shell as backup. For sustained rain, wind, or wet snow, a true waterproof shell earns its place. Check the forecast and match the gear to the conditions.

Can I wash waterproof hunting clothing in a regular machine?

Usually yes, if you follow the care label, but avoid regular detergent and fabric softener, which can leave residues that harm the DWR finish. A cleaner made for technical fabrics is the safer choice. The garment’s own instructions always take priority over general advice.

Final Takeaway

Waterproof hunting clothing works best understood as a system: a moisture-managing base layer, an insulating mid layer, and a waterproof breathable shell built on a membrane or coating, with DWR on the surface and sealed seams at the stitching. Ratings help you compare roughly, but no garment stays dry in all conditions, and care matters as much as the original spec. Match your layers to your climate and effort, keep them clean, revive the DWR when water stops beading, and follow each product’s own instructions.

Hunting Season Regulations: Official Checklist Before You Go

Hunting regulations change by state, species, zone, weapon type, land type, and season. The safest rule is simple: before every hunt, verify the current regulation from the official state wildlife agency or the federal land/refuge manager for the exact place and species you plan to hunt. Keep that habit every season.

This guide is an evergreen checklist, not legal advice and not a substitute for your current rulebook. Use it to know what to check before you buy tags, pack gear, or step into the field.

Table of Contents

Quick Answer

Before hunting, confirm five things from official sources: the open season date, the legal species and zone, the license or tag requirement, the legal hunting method, and any reporting or check-in rule. If any one of those is unclear, do not hunt until you verify it.

Use a regulations checklist before each hunt: license, season dates, tags, zone, legal method, reporting, and land-specific rules.

Hunting Regulations Checklist

A good regulation check starts before you buy gear. Work through this list for the exact hunt you are planning, not for a general state or species page you read weeks earlier.

  • Species: Confirm the exact animal, sex, age class, and any antler or size rule.
  • Season: Check opening and closing dates, including youth, archery, muzzleloader, firearm, and special seasons.
  • Zone: Verify the unit, county, zone, wildlife management area, or refuge boundary.
  • License and tags: Confirm what you need before hunting and whether tags are limited, draw-only, over-the-counter, or landowner-specific.
  • Method: Check legal weapons, ammunition, broadheads, draw weights, magazine restrictions, baiting, dogs, lights, calls, and electronic devices.
  • Reporting: Know whether harvest reporting, check stations, tagging, telecheck, or biological sampling is required.
  • Land rules: Separate statewide rules from public-land, private-land, federal refuge, and local access rules.

Where to Verify Rules

Your state fish and wildlife agency should be the first source for seasons, bag limits, licenses, and harvest reporting. Federal lands may add separate rules, so check the managing agency for national wildlife refuges, national forests, military lands, and other special areas. The U.S. Fish and Wildlife Service hunting page is a useful starting point for refuge-related hunting information.

Do Not Rely on Old Screenshots

Regulation screenshots, social media posts, forum comments, and old PDF downloads can be outdated. Save the current official PDF or page for your hunt, but also check for emergency changes, closures, disease-related rules, fire restrictions, and access updates before you leave.

Call When a Rule Is Unclear

If a rule is confusing, contact the agency or local conservation officer before hunting. A quick call is better than guessing. This matters most for boundary questions, weapon rules, public-land access, baiting, night hunting, transport rules, and special permits.

Season Dates and Zones

Season dates can change between species, zones, and weapon types. A deer archery season may not match firearm season. A turkey spring season may have different dates from fall. Waterfowl seasons may be split by zone or flyway. Small-game seasons can also have exceptions by land type.

Pay attention to the map. A county line, river, highway, or refuge boundary can change what is legal. If you use a mapping app, confirm that its boundary data matches the official agency map for the current season.

Licenses, Tags, and Reporting

A license alone may not be enough. Many hunts require a species tag, permit, stamp, draw result, habitat validation, hunter education proof, or land access permit. Some states also require immediate tagging or electronic harvest reporting within a set time.

Keep Proof With You

Carry the proof required by your state, whether that is a paper license, mobile app, tag, permit, or confirmation number. If your phone is your proof, consider battery life and service. Some areas have poor reception, and you still need to follow the reporting rule.

Legal methods can include weapon type, caliber or gauge limits, archery equipment rules, crossbow rules, broadhead requirements, ammunition restrictions, suppressor rules, magazine limits, blaze orange, baiting, dogs, calls, drones, thermal devices, and night-hunting rules. Do not assume that legal gear in one state is legal in another.

General safety rules still apply even when the method is legal. Review the NSSF firearm safety rules for firearm hunts and complete the hunter education required by your state before going afield.

Public Land vs. Private Land

Public land may have special access hours, parking rules, quota permits, weapon restrictions, check-in requirements, closed areas, or species-specific rules. Private land may require written permission, landowner tags, or different access rules. Do not treat a statewide season as permission to hunt any property.

Ethical hunting includes legal access, safe shot selection, respect for other users, and a plan for recovery. Hunter education resources such as Hunter Ed can help newer hunters think beyond the minimum rulebook and prepare responsibly.

Day-Before Verification

Regulation checks should not happen only once at the start of the season. The day before a hunt, confirm the official page still shows the same season, boundary, access, and reporting information. Check for emergency closures, wildfire restrictions, flooding, road closures, disease-control zones, refuge notices, quota updates, and weather-related access changes.

If you hunt with a group, make sure every person has the same current information. One hunter using last year’s map or an old screenshot can create problems for everyone. Save the official page or PDF for reference, but treat the live agency notice as the stronger source when it has been updated.

Common Regulation Mistakes

The most common mistakes are preventable. Hunters often read last year’s rules, hunt the wrong zone, forget a tag, miss a reporting deadline, rely on a non-official app, or assume a weapon rule applies statewide. Another common mistake is checking rules at home but not checking local closures or access notices the day before the hunt.

Build a pre-hunt habit: official rulebook, official map, license and tags, legal method, land access, reporting requirement, and emergency changes. If the hunt involves another state, new public land, a new species, or a new weapon type, slow down and verify everything twice.

FAQ

Where can I find current hunting regulations?

Start with your official state fish and wildlife agency. For federal refuges or special public lands, also check the managing agency page for that property.

Do hunting regulations change every year?

They can. Dates, zones, bag limits, reporting rules, disease restrictions, and weapon rules may change. Check the current season before each hunt.

Can I trust hunting apps for regulations?

Use apps as planning tools, not final legal authority. Verify regulations, boundaries, and access rules with official agency sources before hunting.

What if the regulation book is confusing?

Contact the state wildlife agency, local conservation officer, or property manager before hunting. Do not guess when a rule affects legality or safety.

Final Takeaway

The best regulation habit is boring and reliable: check the official source, match the rule to your exact species and location, carry the required proof, and verify changes before you hunt. That protects you, the resource, and the future of legal hunting access.

Best Mobile Apps for Hunters and Shooters 2025 | Top Free Picks

Technology is revolutionizing the way we hunt and shoot. From GPS mapping and ballistics calculators to wind readings and shooting logs your smartphone has quietly become one of the most powerful tools in your hunting pack.

In 2025, mobile apps for hunters and shooters are smarter, faster, and more data-driven than ever before. Whether you’re chasing elk in rugged terrain or fine-tuning long-range accuracy at the range, the right app can mean the difference between success and frustration.

In this guide, we’ll explore the best mobile apps for hunters and shooters 2025, both free and premium, designed for Android and iOS users alike. We’ll also share expert insights, selection tips, and how to avoid common mistakes so you can make the most of your digital hunting companion.

Why Mobile Apps Matter for Modern Hunters and Shooters

The digital landscape has completely transformed hunting and shooting. A decade ago, shooters relied on paper maps, printed range cards, and handwritten logs. Today, mobile technology provides real-time data that improves accuracy, safety, and efficiency.

Here’s why mobile apps for hunters and shooters 2025 are game-changers:

  • Real-time ballistics & weather data: Adjust your aim based on precise wind, temperature, and elevation metrics.
  • Offline GPS tracking: Navigate remote hunting areas even without network coverage.
  • Digital shot logs: Track every session to improve consistency and marksmanship.
  • Community & learning tools: Connect with expert shooters, share data, and get training resources.

In short, these apps are no longer “nice to have.” They’re essential tools for serious outdoorsmen.

How to Choose the Right App for Your Needs

Not all apps are created equal. Whether you’re a hunter or precision shooter, your priorities may differ. Before downloading anything, consider these key factors:

1. Purpose

Are you looking for:

  • Hunting tools (maps, game tracking, moon phases)?
  • Shooting apps (ballistics calculators, wind meters, range logs)?
  • All-in-one solutions that combine both?

2. Device Compatibility

Most apps are optimized for Android and iOS, but some perform better on specific devices. Check the version compatibility before installing.

3. Offline Functionality

When you’re deep in the woods, signal is unreliable. Always look for apps with offline maps and tracking features.

4. Accuracy and Updates

Choose apps that offer regular updates, verified ballistics libraries, and community-verified accuracy reports.

5. User Interface

Hunting and shooting often happen in harsh conditions cold, rain, gloves on. A clean, simple interface is vital for quick, no-nonsense access.

Top Mobile Apps for Hunters and Shooters 2025

Below are the standout options based on performance, popularity, and expert testing covering both free and premium tools.

1. BallisticARC (Best Long Range Shooting App 2025)

Platform: Android & iOS
Price: Free version available; premium upgrade optional

Overview:
BallisticARC remains a favorite among competitive shooters and hunters who demand accuracy at long distances. This app combines ballistic solvers, wind meters, and GPS overlays in one sleek interface.

Key Features:

  • Advanced ballistic solver with G1/G7 drag models
  • Offline range cards and drop charts
  • Wind correction calculations based on real-time weather
  • Rangefinder integration (Kestrel, Leica, etc.)

Why It’s Great:
For anyone serious about long range shooting apps, BallisticARC delivers precise data that rivals dedicated handheld ballistics computers.

2. HuntStand 2025 (Best Overall Hunting App)

Platform: Android, iOS
Price: Free with optional subscription

Overview:
HuntStand is a powerhouse for hunters offering everything from mapping and stand placement to weather forecasts and property boundary data.

Top Features:

  • Detailed 3D satellite and topo maps
  • Real-time wind and weather overlays
  • Land ownership boundaries (US-only)
  • Hunt area sharing with groups

Why It’s Great:
It’s like carrying an entire hunt management system in your pocket. The 2025 update adds faster map loading and improved GPS accuracy.

3. Strelok Pro+ (Precision Ballistics App)

Platform: Android
Price: Paid (worth every cent)

Overview:
Strelok Pro+ continues to dominate the mobile apps for hunters and shooters 2025 Android category. It supports over 700 reticles and integrates with top optics brands.

Key Features:

  • Supports multiple ballistic coefficients and rifle profiles
  • Reticle visualization and zoom
  • Adjustable zeroing tools
  • Wind, spin drift, and Coriolis effect calculations

Why It’s Great:
If you value accuracy over aesthetics, this is the go-to ballistic calculator. Perfect for reloaders and competitive shooters.

4. onX Hunt (Best Mapping App for Hunters 2025)

Platform: Android, iOS
Price: Free trial; premium subscription

Overview:
onX Hunt has long been a staple for serious hunters. It provides offline GPS navigation, detailed land ownership info, and custom waypoint tracking.

Key Features:

  • High-resolution offline maps
  • Public and private land boundaries
  • Real-time GPS tracking and sharing
  • Waypoint marking and trail tracking

Why It’s Great:
Ideal for backcountry hunters who venture off the grid. The new 2025 version adds expanded map coverage across North America.

5. Shooter’s Diary (Best Free Mobile App for Tracking Progress)

Platform: Android
Price: Free

Overview:
A simple yet effective tool that helps shooters log every range session. You can track weapon configurations, ammunition, targets, and group size.

Top Features:

  • Custom rifle profiles
  • Range and accuracy statistics
  • Ammunition performance tracking
  • Visual charts for improvement

Why It’s Great:
If you want a free mobile app for hunters and shooters 2025 that focuses on skill improvement, Shooter’s Diary is perfect for beginners and advanced users alike.

6. Windy (Best App for Wind & Weather Data)

Platform: Android, iOS
Price: Free

Overview:
Accuracy starts with understanding your environment. Windy provides hyperlocal wind, temperature, and barometric data ideal for long-range shooting adjustments.

Key Features:

  • Live wind direction and speed mapping
  • Multi-layer radar visualization
  • Offline mode and customizable alerts

Why It’s Great:
Combining Windy with a ballistics app like Strelok or BallisticARC gives shooters unmatched precision.

Bonus: Other Notable Mentions

  • Geo Tracker: Reliable for hunters needing breadcrumb trails in remote zones.
  • BaseMap: Great for scouting new hunting territories with integrated topo layers.
  • Range Buddy: Ideal for precision shooters testing new ammunition.

Free vs. Paid Mobile Apps: What’s Worth It in 2025

There’s no shortage of mobile apps for hunters and shooters 2025 free download options, but are they as good as paid tools?

FeatureFree AppsPaid Apps
Offline AccessLimitedFull offline GPS, weather, ballistics
AccuracyGood for beginnersProfessional-grade precision
UpdatesLess frequentRegularly maintained
IntegrationStandaloneSupports devices (Kestrel, Garmin, Leica)

Pro Tip: Start with free apps like HuntStand or Shooter’s Diary, and upgrade once you identify your specific needs.

Essential Features to Look For in 2025 Apps

When downloading any app, prioritize these must-have features to ensure reliability in the field:

  • Offline mapping — For remote hunting areas
  • Ballistic calculator — Essential for accurate long-range shots
  • Weather data integration — Temperature, pressure, wind, and humidity
  • Custom rifle/ammo profiles — For precise shot predictions
  • GPS tracking & waypoint marking — To trace routes and stands
  • Cloud backup — Prevents data loss

Tips for Getting the Most Out of These Apps

  1. Keep your data updated: Regularly input your rifle zero, new loads, and environmental changes.
  2. Use external sensors: Pair with devices like Kestrel wind meters for enhanced precision.
  3. Test before the hunt: Don’t wait until game day familiarize yourself with the app’s layout and features.
  4. Download offline maps early: Always prepare for no-signal areas.
  5. Stay battery smart: Keep a power bank; mapping and GPS features drain your phone fast.

Common Mistakes Hunters Make with Mobile Apps

Even the best app won’t help if used incorrectly. Avoid these frequent pitfalls:

  • Relying solely on digital tools: Always carry a physical map and compass backup.
  • Ignoring calibration: Re-zero and calibrate your rifle data after every major weather change.
  • Using outdated versions: Apps evolve fast; outdated ones can produce errors.
  • Not testing offline mode: Always verify that key functions work without connectivity.

Expert Insights: What’s Next for Hunting & Shooting Apps

2025 marks a shift toward AI-assisted ballistics and augmented reality (AR) integration. Expect apps to:

  • Provide real-time AR overlays showing bullet trajectories through your phone camera.
  • Sync directly with smart scopes and wearable sensors.
  • Offer AI-based shooting recommendations (e.g., “Adjust 0.5 MOA left due to wind”).

The future of mobile shooting assistance is about merging data, precision, and accessibility right in your pocket.

Final Thoughts: The Smart Shooter’s Advantage

In 2025, the line between shooter and technologist is blurring fast. The best hunters and marksmen aren’t just relying on skill they’re leveraging data-driven tools that amplify their performance.

Whether you prefer the all-in-one management of HuntStand, the pinpoint ballistics of Strelok Pro+, or the navigation power of onX Hunt, today’s mobile apps for hunters and shooters 2025 can take your accuracy, safety, and success to new heights.

👉 Check out our latest gear reviews, tech breakdowns, and pro tips at TheShootingGears.com.

Or subscribe to our newsletter for exclusive updates on hunting technology, optics, and precision shooting equipment.

Quick Summary Table

CategoryBest AppKey Strength
OverallHuntStandAll-in-one hunting management
Long-RangeBallisticARCPrecision ballistic calculations
MappingonX HuntOffline GPS navigation
Android BallisticsStrelok Pro+Professional-grade solver
Free AppShooter’s DiaryShot tracking & improvement
WeatherWindyReal-time environmental insights

Conclusion

The evolution of mobile apps for hunters and shooters 2025 has completely changed how enthusiasts plan, shoot, and succeed in the field. These digital tools have become indispensable combining precision, convenience, and real-time intelligence to enhance every moment of your hunt or shooting session.

Whether you’re mapping terrain with onX Hunt, analyzing long-range ballistics through BallisticARC or Strelok Pro+, or logging your progress with Shooter’s Diary, each app gives you a tactical edge. The best part? Most of these tools are free or affordable, and many work seamlessly offline, making them perfect for any outdoor environment.

But remember technology is only as effective as the shooter using it. Spend time testing these apps, input accurate data, and practice regularly to build trust in your digital tools. When combined with skill and experience, they’ll help you shoot more precisely, hunt more efficiently, and stay safer in the wild.

As the 2025 season unfolds, don’t fall behind. Download one or two of these best mobile apps for hunters and shooters 2025, experiment with their features, and see how they elevate your performance.

Best Hunting Boots for Cold Weather

The best hunting boots for cold weather depend on how you hunt. If you sit still for hours in wet, freezing conditions, a tall insulated rubber boot usually makes more sense. If you hike, glass, climb, or cover uneven ground, an insulated leather lace-up gives better support and control. This guide keeps the list to seven boots because those are the rows with the strongest source and buyer-path evidence in this update.

Insulation grams are comparison points, not temperature guarantees. Your socks, circulation, activity level, wind, moisture, and how long you sit still all change how warm a boot feels. We do not claim current price, stock, Prime status, ratings, or review counts here because live Amazon availability could not be reliably refreshed during this pass.

Affiliate disclosure: As an Amazon Associate, TheShootingGears.com earns from qualifying purchases.

Quick Picks

  • Best active mountain boot: Kenetrek Mountain Extreme 400.
  • Best traditional leather lace-up: Irish Setter Elk Tracker XD.
  • Best cold, wet stand-sit boot: LaCrosse Alphaburly Pro 18-inch 1600G.
  • Best colder active mountain boot: Kenetrek Mountain Extreme 1000.
  • Best crossover utility boot: Muck Arctic Sport Mid.
  • Best women’s active lace-up: Irish Setter VaprTrek Women’s.
  • Best women’s cold/wet rubber boot: LaCrosse Women’s Alpha Agility 15-inch 1200G.

Comparison Table

BootBest ForInsulationHeightAmazon
Kenetrek Mountain Extreme 400Active mountain hunts400g Thinsulate10 inView
Irish Setter Elk Tracker XD 3983Leather lace-up terrain support400g PrimaLoft10 inView
LaCrosse Alphaburly Pro 18-inch 1600GCold, wet stand sits1600g Thinsulate Ultra18 inView
Kenetrek Mountain Extreme 1000Colder active mountain hunts1000g Thinsulate10 inView
Muck Arctic Sport MidWet/cold utility and lowland huntsFleece, 5mm neoprene, thermal foam12 inView
Irish Setter VaprTrek Women’s 3945Women’s active lace-up hunts400g PrimaLoft8 inView
LaCrosse Women’s Alpha Agility 15-inch 1200GWomen’s cold, wet rubber-boot use1200g Thinsulate Ultra15 inView

How We Chose

We built this update from manufacturer spec pages and a prior ASIN identity review, not from hands-on field testing. We prioritized cold-weather roles that readers actually need: active mountain lace-ups, traditional leather hunting boots, tall insulated rubber boots, wet-cold utility boots, and women’s-specific options.

We excluded old products from the previous live article when the row did not match the stronger seven-product route. We also excluded old product images because the current package does not document image rights or exact variant proof for those files. That is why this version uses direct Amazon CTAs and original non-branded editorial visuals instead of individual product photos.

Best Hunting Boots for Cold Weather

Best Active Mountain Boot: Kenetrek Mountain Extreme 400

Best for: active mountain and backcountry cold-weather hunts where lace-up support matters more than maximum insulation.

The Kenetrek Mountain Extreme 400 is the lighter-insulation mountain boot in this lineup. Manufacturer specs list 400 grams of Thinsulate insulation, a 2.8mm leather upper, Windtex waterproof and breathable membrane, K-Talon outsole, 10-inch height, and 4.2 pounds per pair. It also lists Medium, Narrow, and Wide width options, which helps when fit matters on long hikes.

This is the boot to consider when you move enough to generate heat but still need insulation, waterproofing, ankle support, and traction. It is not the best choice for a motionless all-day stand sit in deep cold because 400 grams is moderate insulation compared with the higher-gram rubber boots below.

  • Pros: supportive mountain build; multiple width options; waterproof/breathable membrane; strong terrain-control role.
  • Cons: premium, stiff, and break-in dependent; moderate insulation only.
  • Skip this if: you sit still for hours in deep cold and need maximum warmth more than hiking support.

Best Traditional Leather Lace-Up: Irish Setter Elk Tracker XD

Best for: hunters who want a traditional 10-inch leather lace-up with waterproofing, insulation, and rough-terrain support.

The Irish Setter Elk Tracker XD, Style 3983, is the more traditional leather boot in this group. Manufacturer specs list 400 grams of PrimaLoft insulation, UltraDry waterproofing, waterproof nubuck leather, a Vibram Bulls-Eye Air Bob Aggressive outsole, 10-inch height, and men’s sizes 8-14 in Regular D and Wide EE. Weight was not source-backed in this pass, so we are not listing one.

Compared with the Kenetrek Mountain Extreme 400, the Elk Tracker XD feels like the conventional hunting-boot lane: leather support, aggressive outsole, and wide sizing without the same mountain-stiff identity. It is still a 400-gram active-use boot, not a deep-cold stationary rubber boot.

  • Pros: traditional leather support; Wide EE option; waterproofing system; aggressive outsole.
  • Cons: no source-backed weight in this pass; no temperature guarantee; not a tall rubber boot.
  • Skip this if: you mostly hunt flooded fields, deep snow, or long stationary sits.

Best for Cold, Wet Stand Sits: LaCrosse Alphaburly Pro 18-inch 1600G

Best for: very cold, wet stand sits, muddy whitetail hunts, and tall rubber-boot coverage.

The LaCrosse Alphaburly Pro 18-inch Realtree Edge 1600G is the dedicated cold-and-wet rubber boot in this article. Manufacturer specs list 1600 grams of Thinsulate Ultra insulation, waterproof hand-laid premium natural rubber over insulating neoprene, Alpha Construction, jersey liner, Burly Pro outsole, 18-inch height, and 5.5 pounds per pair.

This boot is built for wet ground and still cold sits rather than long, steep hikes. The height and rubber build help with mud and snow, but the slip-on fit will not feel as precise as a lace-up on sidehills. Also remember that waterproof construction does not stop water from entering over the top or sweat from building inside.

  • Pros: high insulation; tall 18-inch coverage; waterproof rubber/neoprene construction; strong stand-sit role.
  • Cons: heavy; less precise fit than lace-up boots; too much boot for many active hunts.
  • Skip this if: you hike long distances or hunt milder conditions where heavy rubber becomes tiring.

Best Colder Active Mountain Boot: Kenetrek Mountain Extreme 1000

Best for: colder active mountain hunts where you still need lace-up support and terrain control.

The Kenetrek Mountain Extreme 1000 keeps the mountain-support role of the 400-gram model but steps insulation up to 1000 grams of Thinsulate. Manufacturer specs list a 2.8mm leather upper, Windtex waterproof and breathable membrane, K-Talon outsole, 10-inch height, 4.5 pounds per pair, and men’s Medium width in sizes 8-12, 13, and 14.

This is the Kenetrek choice when temperatures drop but you are still moving through mountain terrain. It is not as width-flexible as the 400-gram model in this source pass, and the added insulation can be too warm for mild days or constant uphill movement.

  • Pros: warmer than the 400g version; mountain-support build; waterproof/breathable membrane; durable leather role.
  • Cons: Medium-width-only verified; heavier and warmer; still not a tall rubber boot.
  • Skip this if: you need multiple width options or you overheat easily while hiking.

Best Crossover Utility Boot: Muck Arctic Sport Mid

Best for: mud, snow, chores, lowland hunts, and wet/cold utility use when you want easy on/off convenience.

The Muck Arctic Sport Mid is the crossover boot here. Manufacturer specs list fleece and warm lining, a 5mm neoprene bootie, 2mm thermal foam under the footbed, 100% waterproof and MUCKPROOF rubber/neoprene construction, MS-1 lug outsole, 12-inch full height, and average weight of 2.50 pounds for a men’s size 10. Muck lists a comfort range, but we treat that as manufacturer guidance rather than a TSG guarantee.

This boot makes sense when you want a wet/cold boot for mixed duties. It is easier than tall rubber boots for quick use, but it offers less height than 15- or 18-inch options and less fitted support than a leather lace-up.

  • Pros: easy on/off; waterproof rubber/neoprene construction; useful mid-height role; lighter than many tall rubber boots.
  • Cons: less coverage than tall boots; not a lace-up support boot; manufacturer comfort range is not a guarantee.
  • Skip this if: you need either maximum stand-sit warmth or mountain-boot ankle support.

Best Women’s Active Lace-Up: Irish Setter VaprTrek Women’s

Best for: women hunters who want a lighter lace-up boot for active cold-weather hunts.

The Irish Setter VaprTrek, Style 3945, is the women’s active lace-up row in this guide. Manufacturer specs list 400 grams of PrimaLoft insulation, UltraDry waterproofing, full-grain waterproof leather, abrasion-resistant nylon, Rubber Hex Lite outsole, 8-inch height, and women’s sizes 5-11 in Regular B and Wide D. Weight was not source-backed in this pass.

This boot fits the mobility lane: more precise than a slip-on rubber boot, easier for active walking, and available in women’s Regular and Wide widths. It does not have the height or heavy insulation of the tall rubber options, so it is not the best fit for long cold sits in wet ground.

  • Pros: women’s-specific sizing; Regular and Wide widths; active lace-up role; waterproof leather/nylon upper.
  • Cons: only 8-inch height; 400g insulation is moderate; no source-backed weight.
  • Skip this if: you need tall rubber coverage for deep mud, wet snow, or cold still sits.

Best Women’s Cold/Wet Rubber Boot: LaCrosse Women’s Alpha Agility 15-inch 1200G

Best for: women hunters who need a tall insulated rubber boot for cold, wet ground.

The LaCrosse Women’s Alpha Agility 15-inch 1200G is the women’s tall rubber option. Manufacturer specs list 1200 grams of Thinsulate Ultra insulation, waterproof premium hand-laid rubber over 5mm neoprene, jersey liner, Alpha Construction, and 15-inch height. Weight and exact width options were not resolved in this source pass, so verify fit on the live listing before buying.

This is the better women’s choice for cold wet grass, mud, shallow snow, and lower-movement hunts. It is not meant to replace a fitted leather lace-up for steep hikes or sidehill-heavy terrain.

  • Pros: tall 15-inch rubber coverage; 1200g insulation; waterproof neoprene/rubber build; women’s sizing lane.
  • Cons: width and weight unresolved; less terrain support than lace-ups; can be too warm for high-output days.
  • Skip this if: you need lace-up ankle support or a lighter active boot.

Buying Guide: How To Choose Cold-Weather Hunting Boots

Start with the way you hunt. A boot that is perfect for a tree stand can feel miserable on a mountain hike. A supportive lace-up that feels great while moving may not hold enough warmth when you sit still for hours.

Insulation

Lower insulation, such as 400 grams, usually fits active hunters better. Higher insulation, such as 1000 to 1600 grams, makes more sense for colder and lower-movement hunts. Treat the gram number as a comparison tool, not a comfort promise.

Rubber vs leather

Rubber boots are strong for wet ground, mud, and still sits. Leather lace-ups are better for sidehills, long walks, and precise fit. Many serious hunters eventually keep one of each because the roles are different.

Boot height

An 8- to 10-inch boot is easier to walk in and still gives ankle coverage. A 15- to 18-inch rubber boot is better for mud, snow, and shallow water, but it adds weight and bulk.

Fit and sock room

Cold-weather boots should leave room for your actual hunting socks without crushing your toes. Tight boots can reduce comfort and make feet feel colder. Width options matter, especially if you wear thicker socks or have wider feet.

For broader cold-weather planning, the CDC/NIOSH cold stress guidance explains why keeping extremities dry and protected matters in cold conditions. The National Shooting Sports Foundation is also a useful broader resource for responsible hunting and shooting-sports preparation.

Cold-Weather Foot Safety

Cold feet are a comfort and safety concern. Keep feet dry, avoid socks that bunch or crowd your toes, and carry spare dry socks on long wet hunts. If your feet become numb or painful, warm up and reassess instead of pushing through.

Waterproof boots reduce water entering through the boot material, but they do not make your feet dry in every situation. Water can enter over the top, and sweat can build inside during hard hiking. Boot choice, sock choice, and pacing all work together.

Frequently Asked Questions

How many grams of insulation do I need for cold-weather hunting?

Active hunters often do better with moderate insulation, while hunters who sit still in deep cold often prefer higher insulation. Use the gram rating to compare boots, not as a guaranteed temperature rating.

Are rubber boots or leather boots warmer?

Neither material is automatically warmer. Insulation, fit, sock system, and activity level matter more. Rubber boots shine in wet, stationary conditions; leather lace-ups shine when you need support and control while moving.

Do waterproof hunting boots keep feet completely dry?

Not always. Waterproof construction helps stop water from soaking through the boot, but water can still enter over the top, and sweat can collect inside. Carrying dry socks helps on long hunts.

Can one pair of boots work for both hiking and stand sits?

A crossover boot can work for mixed use, but no single boot is perfect for steep active hunts and long deep-cold sits. If you do both often, consider an active lace-up and a tall insulated rubber boot.

Should women choose a women’s-specific hunting boot?

If the fit is better, yes. Women’s-specific sizing and width options can help, but the same rules apply: match insulation, height, support, and waterproofing to the way you hunt.

Final Recommendation

For active mountain hunts, start with the Kenetrek Mountain Extreme 400, or step up to the Kenetrek Mountain Extreme 1000 when colder conditions call for more insulation. For traditional leather support, the Irish Setter Elk Tracker XD is the most familiar lace-up option here.

For cold, wet, lower-movement hunts, the LaCrosse Alphaburly Pro 18-inch 1600G is the strongest stand-sit choice. The Muck Arctic Sport Mid is the easiest crossover utility boot. Women hunters should compare the Irish Setter VaprTrek for active lace-up hunts against the LaCrosse Women’s Alpha Agility for cold, wet rubber-boot use.

Bipod vs Shooting Sticks for Hunters: How to Choose by Hunting Style

There is no single winner between a bipod and shooting sticks for hunting. The better support depends on your terrain, how far you carry your gear, how quickly you need to set up, and whether you normally shoot from prone, sitting, standing, a blind, or a stand. A bipod gives a low, rifle-mounted platform. Shooting sticks are a separate support that can work at sitting or standing height.

For many hunters, a bipod is the steadier choice when the ground is flat enough for prone or low bench-style shooting. Shooting sticks are usually more flexible in brush, tall grass, slopes, blinds, and elevated positions. Neither option makes a shot safe, legal, ethical, or guaranteed. Safe muzzle direction, target identification, a clear backstop, and current local rules still come first.

Table of Contents
  1. Quick Answer: Bipod vs Shooting Sticks
  2. What Is a Rifle Bipod?
  3. What Are Hunting Shooting Sticks?
  4. Bipod vs Shooting Sticks Comparison Table
  5. How They Affect Firearm Control
  6. Decision Matrix by Hunting Style
  7. Terrain and Carry Weight Notes
  8. Limitations to Keep in Mind
  9. Related Guides
  10. Frequently Asked Questions

Quick Answer: Bipod vs Shooting Sticks

Choose a bipod if you often shoot from prone, use flat ground or a bench, and want the support attached to the rifle. Choose shooting sticks if you hunt from seated or standing positions, move through brush, use blinds or stands, or need height adjustment. If your hunts change a lot, the best choice may be the one you will actually carry and practice with.

Bipods favor low stable positions; shooting sticks add height flexibility for seated and standing field setups.

What Is a Rifle Bipod?

A rifle bipod is a two-legged support that mounts to the rifle, usually near the front of the stock or rail. It folds against the rifle when not in use and deploys when you need a low rest. Many models have adjustable legs, and some allow cant or swivel so the rifle can be leveled on uneven ground.

Where a Bipod Works Best

A bipod works best when you can get low and build a stable position on firm ground, a bench, a mat, or a flat field edge. Because it is attached to the rifle, it is always available. The tradeoff is that it adds weight to the front of the rifle and may be awkward in tall grass, brush, tight blinds, or elevated windows.

What Are Hunting Shooting Sticks?

Shooting sticks are a separate support that you carry and set up in the field. Common styles include monopod, bipod stick, and tripod stick designs. Instead of attaching to the rifle, they give you a rest point where the fore-end can sit while your hands still control the firearm.

Where Shooting Sticks Work Best

Shooting sticks are useful when you need height. They can work from sitting, kneeling, or standing positions, which makes them practical in ground blinds, box blinds, elevated stands, brushy edges, and hilly terrain where prone is not realistic. Tripod sticks are usually the steadiest. Monopods are lighter and faster, but they give less side-to-side stability.

Bipod vs Shooting Sticks Comparison Table

FactorRifle bipodShooting sticks
Typical positionProne or low benchSitting, kneeling, or standing
StabilityVery steady when low and plantedVaries by style; tripod is usually steadiest
MobilityAlways attached to the rifleSeparate item to carry and deploy
Setup speedFast if you can get lowFast for monopod, slower for tripod
Terrain fitBest on flat, firm groundBetter in brush, grass, slopes, blinds, and stands
Weight feelAdds weight to the rifleAdds carried weight but keeps rifle lighter
Main limitationHard to use where prone is not possibleLess steady than a solid prone position

How They Affect Firearm Control

Both supports are meant to reduce wobble, not replace safe firearm handling. With a bipod, the rifle is attached to the legs, so the whole setup points where the muzzle points. With shooting sticks, the rifle rests on the support and can shift if you relax your hands. In both cases, stay deliberate when repositioning.

The basic safety rules still apply: keep the muzzle in a safe direction, keep your finger off the trigger until ready, know your target, and know what is beyond it. The NSSF firearm safety rules are a useful baseline, and hunter education resources such as Hunter-Ed firearm safety guidance reinforce the same point.

Decision Matrix by Hunting Style

Use this matrix as a starting point, not a rule. Your terrain, body position, comfort, and local regulations matter more than a generic label.

Hunting styleOften fitsWhyWatch out for
Ground blindTripod or bipod sticksSeated positions need adjustable heightLimited room inside small blinds
Box blindSticks or a stable rail/bag restWindow height usually sits above bipod heightHard surfaces can be noisy
Deer standBipod or tripod sticksElevated seated setups favor height controlManage support carefully at height
Predator callingTripod sticksSteady seated hold while scanningQuiet setup matters
Mountain or backcountryLightweight bipod or monopodCarry weight matters on long climbsThe lightest option may be less steady
Range practiceRifle bipodFlat benches and prone lanes suit low supportsConfirm range rules first

Terrain and Carry Weight Notes

Terrain often decides the choice before preference does. If you hunt flat fields, open cuts, or places where prone is possible, a bipod can be simple and stable. If the shot lane is blocked by grass, brush, snow, a blind wall, or uneven ground, shooting sticks may give you a usable position that a bipod cannot.

Weight on the Rifle vs Weight in the Pack

A bipod moves weight onto the rifle, usually toward the front. Some hunters like that because there is nothing separate to forget. Others dislike the nose-heavy feel during long carries. Shooting sticks keep the rifle lighter but add another item to pack, adjust, and manage quietly.

Limitations to Keep in Mind

Neither support fixes an unstable surface, poor target visibility, unsafe background, or lack of practice. A bipod is limited when you cannot get low. Shooting sticks are less steady than a solid prone rest and can shift if the legs are planted poorly. Test the position before relying on it, and pass on any shot where the setup does not feel controlled.

If you already own a bipod, our guide to the advantages of using a bipod explains where that setup shines. If you are working on rifle setup more broadly, the rifle scope sight-in guide is a useful next read. For bench support, compare the difference with our shooting bags guide.

Frequently Asked Questions

Is a bipod or shooting sticks better for hunting?

Neither is better for every hunt. A bipod is usually better for low, steady prone positions. Shooting sticks are usually better when you need a seated or standing rest in brush, blinds, stands, or uneven terrain.

Are shooting sticks steady enough for hunting?

Shooting sticks can be steady enough when properly planted and matched to the position. Tripod sticks are usually steadier than bipod or monopod sticks, but they also take more setup time.

Do bipods work in a ground blind or deer stand?

Sometimes, but many rifle bipods are too low for seated blind windows or stand positions. Adjustable-height shooting sticks, a stable rail, or a bag rest may fit those setups better.

Can I use both a bipod and shooting sticks?

Yes. Some hunters use a bipod for prone or range work and carry shooting sticks for seated or standing field positions. The downside is extra weight and more gear to manage.

How to Introduce Kids to Hunting Safely and Responsibly

The safest way to introduce kids to hunting is slowly: start with respect for wildlife, safe handling rules, age-appropriate learning, hunter education, and short outdoor experiences before any serious hunt. A child should understand the purpose of hunting, basic safety expectations, and their role in the field before they are placed near a firearm, bow, or live hunting situation.

This guide is for parents, guardians, mentors, and family members who want to build a responsible young hunter. Always check your state wildlife agency rules, minimum-age requirements, hunter education rules, youth-season rules, land-access rules, and supervision requirements before planning a hunt.

Table of Contents

Start With Readiness, Not Age

Look for Interest and Patience

A child who enjoys wildlife tracks, scouting, sitting quietly, learning calls, or helping with gear may be ready for early hunting lessons. A child who is bored, frightened, careless, or only interested in the shot may need more time outdoors before hunting is introduced.

Make Ethics Part of the First Conversation

Explain that hunting is not just about taking an animal. It includes conservation, legal seasons, clean decisions, respect for landowners, meat care, and knowing when not to shoot. Kids should hear early that passing on a shot can be the right decision.

Teach Safety Before Gear

Start With Universal Safety Rules

Before a child handles hunting equipment, teach simple safety rules in plain language. Keep the muzzle or arrow direction safe, keep fingers away from triggers until ready, know the target and what is beyond it, and treat every firearm or bow with respect. The NSSF firearm safety rules are a useful adult reference when teaching firearm basics.

Use Age-Appropriate Gear

Gear should fit the child, not the other way around. Oversized rifles, heavy bows, stiff triggers, poor eye relief, and adult-sized packs can create unsafe habits. If the equipment is too big, too loud, too heavy, or too hard to control, slow down and adjust the plan.

Separate Storage From Training

Children should understand that safe storage is not optional. Firearms, bows, ammunition, broadheads, and knives need adult-controlled storage. Project ChildSafe offers practical secure storage resources for families and firearm owners.

Fit, Comfort, and Communication

Fit the Gear to the Child

Kids should not be asked to “grow into” unsafe or uncomfortable gear in the field. Clothing should keep them warm and dry, boots should let them walk safely, and hearing/eye protection should fit well enough that they actually wear it when needed.

Agree on Stop Signals

Before leaving, agree on simple signals for cold, fear, fatigue, bathroom breaks, and wanting to stop. A child who knows they can speak up is less likely to hide discomfort or make rushed decisions.

Practice Quiet Skills First

Let kids practice whispering, walking quietly, watching wind, using binoculars, and identifying safe directions before the stakes feel high. Those small skills make the first real hunt calmer and safer.

Use Hunter Education and Mentors

Hunter education is one of the best ways to give kids a structured foundation. State rules vary, so check the official wildlife agency for your location. National resources such as Hunter-Ed and the International Hunter Education Association can help families understand what hunter education usually covers.

A good mentor should be calm, patient, safety-focused, and willing to end the hunt early if the child is tired or uncomfortable. The best mentor does not push a young hunter to perform for adults.

Plan a Calm First Hunt

Choose the Right Conditions

The first hunt should be short, legal, and realistic. Mild weather, easy access, safe terrain, and a clear exit plan matter more than trophy potential. A simple scouting walk, small-game outing, or observation sit may be better than a long all-day hunt.

Give the Child a Clear Role

Not every first trip needs the child to carry a firearm or bow. They can glass, track, listen, help with a checklist, observe wind, or learn field signs. Giving them a role keeps them involved without forcing responsibility too early.

Prioritize the Process

Celebrate safe decisions, patience, quiet movement, legal awareness, and respect for animals. A first hunt can be successful even without a harvest. That mindset builds better hunters than adult expectations or disappointment.

Youth hunting rules are not the same everywhere. Some states have apprentice licenses, youth seasons, hunter education exemptions, minimum ages, weapon restrictions, blaze-orange requirements, or direct-supervision rules. Check the current rulebook before buying tags or planning a trip.

Adult supervision should be active, not passive. The adult should know where the child is, where the muzzle or bow is directed, what is loaded or unloaded, and when the hunt should pause. A responsible adult also models calm decision-making when an animal appears.

For very young learners, the first step may be a scouting walk, wildlife observation sit, or range-safety lesson with no hunting tag involved. That still counts as progress because the child is learning field awareness without being rushed.

After the Hunt

After the hunt, talk through what went well and what felt difficult. Ask what the child noticed, what they enjoyed, and what they want to learn next. If an animal was harvested, explain field care, meat use, gratitude, and why ethical hunters avoid waste.

If the child felt scared, cold, bored, or overwhelmed, treat that honestly. A shorter next outing or more practice may be the right move. The goal is long-term confidence and responsibility, not rushing a milestone.

Common Mistakes To Avoid

  • Starting with a hunt that is too long, cold, or physically demanding.
  • Using gear that does not fit the child.
  • Skipping hunter education or state rule checks.
  • Letting excitement override safe muzzle or arrow direction.
  • Making harvest the only measure of success.
  • Ignoring the child’s fear, fatigue, or discomfort.
  • Talking about ethics after the shot instead of before the season.

Quick Parent Checklist

  • Check state youth hunting, hunter education, and supervision rules.
  • Teach safety rules before handling equipment.
  • Use properly fitted firearm, bow, clothing, and hearing/eye protection where appropriate.
  • Keep ammunition, firearms, bows, broadheads, and knives secured.
  • Plan short first outings in safe, comfortable conditions.
  • Give the child a clear role that matches readiness.
  • Debrief after every trip and adjust the next step.

FAQ

What age should kids start hunting?

There is no universal age. Laws vary by state, and readiness varies by child. Start with safety, outdoor skills, and hunter education before planning a live hunt.

Should a child carry a firearm on the first hunt?

Not necessarily. Many kids benefit from observing, scouting, or helping with simple tasks before carrying equipment. Follow state law and only move forward when the child is ready and supervised.

How do I keep the first hunt positive?

Keep it short, safe, warm, and calm. Bring snacks, explain what is happening, and let learning count as success.

What is the most important lesson for young hunters?

Safety and respect come first. A young hunter should learn that legal, ethical, safe decisions matter more than taking a shot.

Final Takeaway

Introducing kids to hunting works best when adults move slowly, model safe behavior, and keep ethics at the center. Start with readiness, education, secure storage, proper gear fit, and short low-pressure outings. A responsible young hunter is built through trust and repetition, not pressure.

Official Safety Resources

Bowhunting Whitetails In Thick Cover: Safety and Shot Discipline

Bowhunting whitetails in thick cover is mostly a discipline problem: confirm the rules, scout for safe visibility, plan entry and exit, and pass any shot that is obstructed or uncertain. Dense cover can hold deer, but it also shortens sight lines and makes poor decisions easier to justify in the moment.

This is a safety-first and ethics-first guide, not a guarantee of hunting success. Seasons, legal methods, hunter-orange rules, access rules, baiting, cameras, stands, and reporting requirements vary by state and property, so verify current official regulations before every hunt.

Table of Contents
  1. Quick Answer: How To Bowhunt Thick Cover Safely
  2. Check Rules Before Planning A Thick-Cover Hunt
  3. Scout For Visibility, Wind, And Safe Access
  4. Use Shot Discipline In Dense Cover
  5. Hunt Ethically Around Pressure And Habitat
  6. Thick-Cover Bowhunting Checklist
  7. Common Mistakes In Thick Cover
  8. Related Bowhunting And Deer Guides
  9. Frequently Asked Questions

Quick Answer: How To Bowhunt Thick Cover Safely

Bowhunting thick cover safely means checking current rules first, scouting for visibility and safe access, reading the wind honestly, and committing to pass on any obstructed, low-light, or low-confidence shot. The limited sight lines reward patience and clear identification, not aggressive tactics.

Think of thick cover as a place where small mistakes compound. A poor entry route bumps deer. A bad wind exposes your position. A narrow lane tempts a rushed shot. The solution is preparation before the hunt and restraint during the hunt.

Check Rules Before Planning A Thick-Cover Hunt

Rules come before tactics. Do not assume last year’s deer season dates, legal methods, access rules, hunter-orange requirements, or reporting rules still apply. Start with your state wildlife agency’s current regulations for the exact place and season you plan to hunt.

Seasons, Legal Methods, Hunter Orange, And Access

Season timing, legal equipment, blaze-orange requirements, public-land access, and tagging/reporting rules are location-specific. This article intentionally avoids state-specific claims because those details change. Use official current sources for your state and property, and use hunter education as your safety foundation. IHEA-USA is a helpful starting point for hunter-education context.

Baiting, Stands, Cameras, And Property Rules

Rules around baiting, attractants, trail cameras, treestands, ground blinds, trimming lanes, and vehicle access vary widely. Private land also requires clear permission and known boundaries. If you are unsure whether a practice is allowed, treat it as unapproved until an official source or landowner confirms it.

Scout For Visibility, Wind, And Safe Access

Good thick-cover scouting is less about finding a dramatic spot and more about finding a spot you can enter safely, hunt ethically, and leave without creating avoidable pressure. Look for a few workable lanes, a clear route, and wind conditions that do not force a bad setup.

Also think about recovery before you ever hunt the spot. Thick cover can make visibility and follow-up decisions harder, so your setup should leave you with clear landmarks, safe walking paths, and a conservative plan for when you will back out and seek help. A responsible hunt is planned around the shot you might pass as much as the shot you hope to take.

Entry And Exit Routes

Plan entry and exit before dark. Thick cover can become confusing in low light, so carry a light, navigation, and a plan someone else knows. A careful route reduces both safety risk and the chance of bumping bedded deer before you ever settle in.

Shooting Lanes Without Over-Clearing

A few clear lanes inside your practiced range are more useful than a large cleared opening. Over-clearing can change deer movement, violate property rules, or damage habitat. Your goal is to see and identify the deer clearly, not to turn thick cover into open ground.

Plan thick-cover hunts around rules, access, wind, visibility, and shot discipline before the sit begins.

Wind And Thermal Checks

Wind can swirl in cover, draws, creek bottoms, and terrain breaks. Check wind often and be honest about what it means. If the only good lane requires a bad wind, it is usually better to wait, shift, or choose a different sit than to force the hunt.

Use Shot Discipline In Dense Cover

Shot discipline is the most important thick-cover skill. Before drawing, identify the deer, the lane, the angle, and what is beyond. Never shoot at sound, movement, or a partial silhouette in brush. Hunter education resources such as Hunter-Ed’s hunter education overview reinforce the same safety-first mindset.

Pass on brushy, low-light, hurried, or low-confidence shots. Passing is not failure. In thick cover, passing is often the decision that protects the animal, the hunter, and the integrity of the hunt.

Hunt Ethically Around Pressure And Habitat

Thick cover often exists because deer use it for security. Hunt it with respect for the habitat and the other hunters who may share the area. Avoid crowding, leave minimal impact, follow property rules, and do not let pressure push you into unsafe shortcuts.

Ethical hunting is not just about whether something is legal. It is also about restraint, preparation, and respect for the resource. That matters even more when cover limits visibility and decision time.

Thick-Cover Bowhunting Checklist

Before The HuntWhat To ConfirmWhy It Matters
RulesSeason, legal method, orange, reporting, accessPrevents outdated or location-wrong assumptions
PropertyPermission, boundaries, trimming, cameras, standsKeeps the hunt legal and respectful
AccessSafe entry, exit, light, navigation, contact planReduces risk in dense terrain and low light
VisibilityClear identification and limited lanes in practiced rangePrevents obstructed or uncertain shots
WindWind and thermals fit the setupAvoids forcing a marginal sit
DisciplinePlan to pass low-confidence shotsProtects safety and hunting ethics

Common Mistakes In Thick Cover

The biggest mistakes are assuming rules, over-clearing lanes, ignoring wind, entering carelessly, and taking obstructed shots. Another common mistake is treating thick cover like open woods. It is not. You usually have less time, less visibility, and fewer clean options.

Do the boring work first: verify the rules, know the access, mark the safe lanes, and decide ahead of time what shots you will pass. That is the part that makes the hunt more responsible.

Frequently Asked Questions

How do you bowhunt whitetails in thick cover?

Start by checking current rules and access, then scout for safe entry, visibility, wind, and a few clear lanes inside your practiced range. During the hunt, pass on any obstructed, low-light, or uncertain shot.

Is thick cover good for deer hunting?

Thick cover can hold deer because it provides security and bedding, but it also limits visibility and safe shot options. That tradeoff makes planning and restraint especially important.

What is the most important rule for shooting in thick cover?

Clearly identify the deer and what is beyond before you draw. Never shoot at sound, movement, or a partial silhouette in brush. If you are not sure, do not shoot.

Do I need to clear shooting lanes in thick cover?

A few clear lanes can help, but do not over-clear. Confirm what trimming is allowed on the property, and keep lanes limited to places where you can clearly identify the deer and the background.

Are thick-cover hunting rules the same everywhere?

No. Seasons, legal methods, hunter-orange rules, baiting, cameras, stands, access, and reporting requirements vary by state and property. Always check current official regulations for the exact place you hunt.

Night Vision vs Thermal Scope for Hog Hunting: How to Choose


For hog hunting after dark, thermal scopes are usually better at finding hogs, and night vision is often better at clearly identifying what you are looking at. A thermal scope reads heat, so it can spot a warm-bodied hog through brush, in tall grass, and across open fields where a hog would be invisible to the eye. Night vision amplifies available light to give a more familiar picture that can make it easier to confirm exactly what an animal is before any shot. Many experienced hog hunters use both, scanning with thermal and confirming with night vision or a quality light. Before you choose, two things matter more than the gear: whether night hunting and thermal or night vision use are legal where you hunt, and whether you can positively identify your target and a safe background every time.

Contents

Detection vs Identification: The Core Difference

The single most useful way to frame this choice is detection versus identification. Detection means finding that something is there. Identification means confirming exactly what it is. Thermal scopes are detection tools first; they make a warm body stand out against a cooler background, even in cover, so you find hogs faster and at greater distance. Night vision is generally stronger for identification, because the amplified image looks more like a normal scene and shows detail that helps you tell a hog from another animal, a person, livestock, or a structure.

This distinction drives the whole comparison. If your problem is locating hogs across a field at night, thermal solves it well. If your problem is being certain of what you are about to shoot, night vision or a good light is often the better confirmation tool. The two technologies answer different questions.

How Each Technology Works

Thermal Imaging

A thermal scope detects infrared energy, meaning heat, and turns temperature differences into an image. It does not need any visible light, so it works in total darkness and can reveal a warm hog through light brush or tall grass where the animal’s outline would otherwise be hidden. The image is a heat map rather than a normal picture, so fine detail and exact identification can be harder, especially at distance.

Night Vision

Night vision amplifies the small amount of ambient light present, from stars, the moon, or an infrared illuminator, into a viewable image. The result looks more like a familiar scene, which helps with recognizing detail and confirming a target. Night vision needs at least some light or an IR illuminator, and heavy cover or total darkness without an illuminator limits it. For neutral background on the basic technology, compare general references on thermal imaging and night-vision devices before you shop.

Where Thermal Scopes Excel for Hogs

Hogs are warm, often active at night, and frequently in cover, which plays to thermal’s strengths. A thermal scope helps you detect hogs at distance, pick them out of grass and brush, and scan open ground quickly. For hunters whose main challenge is simply finding hogs in the dark across acreage, thermal is usually the faster, more capable detection tool.

The tradeoff is identification. Because the image is heat-based, telling exactly what a heat signature is can be harder, so thermal does not remove your duty to confirm the target by other means before shooting.

Where Night Vision Excels for Hogs

Night vision gives a more natural, detailed picture, which makes it the stronger tool for confirming what you are looking at and reading the scene around the animal. On nights with some ambient light, or with an IR illuminator, it can deliver a clear, recognizable image for the closer, deliberate shots common in hog hunting. Night vision is also often less expensive than comparable thermal at the entry level, though prices for both span a wide range.

The tradeoff is detection. Night vision will not reveal a hog hidden in heavy cover the way thermal can, and it depends on available light or an illuminator. This is why many hunters pair the two, using thermal to find and a night vision device or light to confirm.

Battery Life and Weather Limits

Both are electronic devices, so battery management is part of every hunt. Thermal scopes tend to draw significant power because of the sensor and display, so plan for the unit’s rated runtime and carry spare batteries or a power bank if supported. Night vision power demands vary by type, with digital night vision and any IR illuminator adding draw. Always check the manufacturer’s stated battery life and bring backups; a dead optic ends a hunt.

Weather affects performance too. Thermal can be degraded by heavy rain, fog, and high humidity, and by conditions that flatten temperature differences, since it works on heat contrast. Night vision is limited by very dark, no-light conditions without an illuminator and can be affected by precipitation. Neither sees perfectly through dense obstacles. Match your expectations to the conditions you actually hunt, and follow each maker’s guidance on operating temperatures and water resistance.

Ethical Shots and Positive Target Identification

No optic removes your responsibility to positively identify the target and what lies beyond it before you ever take the safety off. This matters even more at night, when mistakes are easier and a heat signature or dim shape can be misread. Confirm that the animal is a hog, that your background is safe, and that you have a clean, ethical shot angle within a distance where you can place the shot reliably.

The basic firearm safety rules apply fully in the dark. Treat every firearm as loaded, keep the muzzle in a safe direction, keep your finger off the trigger until ready, and be sure of your target and beyond, as summarized by the National Shooting Sports Foundation. If you cannot positively identify the target and a safe background, do not shoot.

Legality: Check Before You Hunt

Whether you can legally hunt hogs at night, and whether you can use thermal or night vision to do it, depends entirely on where you hunt. Rules vary widely by state and sometimes by county or land type, and they cover night hunting, allowed equipment, light and optic restrictions, public versus private land, and how feral hogs are classified. Some states are permissive about hog control at night; others restrict it. These rules change, and this article cannot tell you the current law for your location. It is not legal advice.

Confirm the current regulations directly with your state wildlife agency before you buy gear for night hog hunting and again before each hunt. You can locate your state agency and federal land rules through the U.S. Fish and Wildlife Service, then verify specifics with the state authority and any landowner requirements. When in doubt, do not hunt until you have confirmed it is legal.

Choosing Between Them

PriorityLeaningWhy
Finding hogs fast across open or brushy groundThermalDetects heat through cover, no light needed
Confirming exactly what you are looking atNight visionMore natural, detailed image aids identification
Total darkness with no ambient lightThermalWorks without any visible light
Lower entry costOften night visionEntry thermal usually costs more, though ranges overlap
Rain, fog, or high humidity commonVerify bothConditions can degrade either; check maker specs
Best all-around capabilityBoth, used togetherThermal to detect, night vision or light to confirm
Any night huntConfirm legality firstLocal law decides what is allowed, not the gear

If budget forces one choice and your main problem is finding hogs, many hunters favor thermal for detection and pair it with a quality light or night vision for confirmation as budget allows. If confirmation and a clear picture matter most for your situation, night vision can be the better single tool. Let your terrain, your typical distances, and your local rules decide.

Frequently Asked Questions

Is thermal or night vision better for hog hunting?

Thermal is usually better for detecting hogs, especially in cover or across open ground, because it reads heat. Night vision is often better for identifying exactly what you see. Many hunters use both. The best choice depends on your terrain, distances, budget, and local law.

Can thermal scopes identify a target as well as night vision?

Generally not as clearly. Thermal shows a heat-based image that is excellent for detection but can make precise identification harder, especially at distance. Night vision’s more natural picture usually aids identification. Either way, you must confirm the target and background before any shot.

Do I need both a thermal and a night vision device?

Not necessarily, but many experienced hog hunters use thermal to find and night vision or a light to confirm. If you can only buy one, choose based on whether your main challenge is finding hogs or confirming targets, and what your budget allows.

Is it legal to hunt hogs at night with thermal or night vision?

It depends entirely on your state and sometimes your county or land type, and the rules change. Some places allow it, others restrict or prohibit it. Confirm current regulations with your state wildlife agency before buying gear or hunting. This is not legal advice.

How does weather affect these optics?

Thermal can be degraded by heavy rain, fog, humidity, and conditions that reduce temperature contrast. Night vision struggles in total darkness without an illuminator and can be affected by precipitation. Check each manufacturer’s specs for operating conditions and water resistance.

Which has better battery life?

It varies by model, but thermal scopes often draw significant power for the sensor and display, and any IR illuminator on night vision adds draw too. Always check the rated runtime for the specific unit and carry spare batteries or a supported power source.

Final Takeaway

Think detection versus identification. Thermal finds hogs fast, even in cover and total darkness, and is the stronger scanning tool. Night vision gives a more natural, detailed image that helps you confirm what you see. Many hunters pair the two. Plan for battery life, respect weather limits, and never let any optic substitute for positively identifying your target and a safe background. Above all, confirm with your state wildlife agency that night hunting and your chosen optic are legal where you hunt before you buy or head out, because the law, not the gear, decides what is allowed.

Exit mobile version