How to Improve Shooting Accuracy Safely

Improving shooting accuracy starts with safe handling and repeatable fundamentals: a stable position, correct sight alignment and sight picture, smooth trigger control, steady breathing, follow-through, and accountable practice. No technique promises a specific result, because accuracy depends on the shooter, firearm, ammunition, conditions, and practice quality.

This guide is for sport and recreational range shooting. It stays at the fundamentals level and does not cover advanced field methods. Always follow your range rules, firearm manual, and qualified instructor guidance first.

Safety Comes Before Accuracy

Safe gun handling is the foundation of every accuracy session. Treat every firearm as if it is loaded, keep your finger off the trigger until your sights are on target and you intend to fire, keep the muzzle in a safe direction, and be sure of your target and what is beyond it. The NSSF firearm safety rules are a useful public reference for these fundamentals.

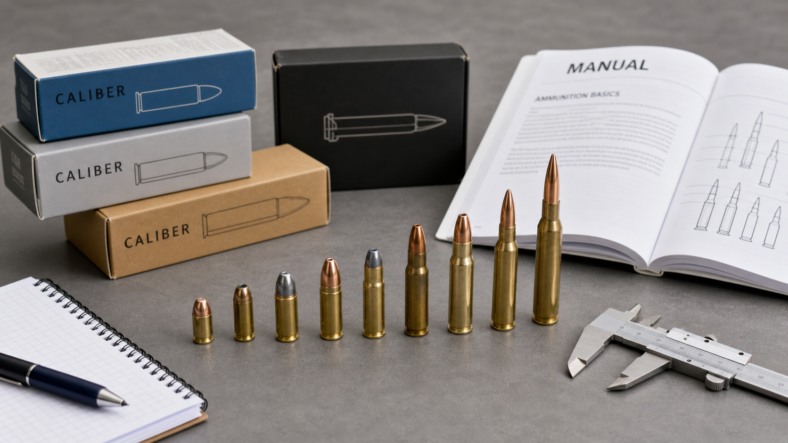
Accuracy practice also requires the correct ammunition for your firearm, eye and ear protection, clear range procedures, and awareness of the backstop. If you are unsure about loading, unloading, clearing, or checking your firearm, stop and ask qualified help before continuing.

Core Accuracy Fundamentals

A small set of fundamentals drives accuracy across most firearm disciplines. They work together, so consistency across the whole process matters more than chasing one trick.

FundamentalBeginner FocusWhy It Matters
Position or stanceStable, repeatable body supportReduces unnecessary movement
Sight alignmentConsistent relationship between sights and targetHelps aim stay repeatable
Trigger controlSmooth press without disturbing sightsReduces pulled shots
BreathingCalm, natural rhythmReduces body tension
Follow-throughMaintain position after the shotPrevents relaxing too early

Position or stance

A stable position gives every other fundamental something to build on. For standing range work, many shooters start with a balanced stance, feet about shoulder-width apart, weight slightly forward, and a relaxed but firm hold. Our shooting stance for beginners guide covers that foundation in more detail.

Sight alignment and sight picture

Sight alignment is the relationship between the sights, and sight picture is that alignment placed on the target. A consistent sight picture makes shot placement easier to evaluate over time.
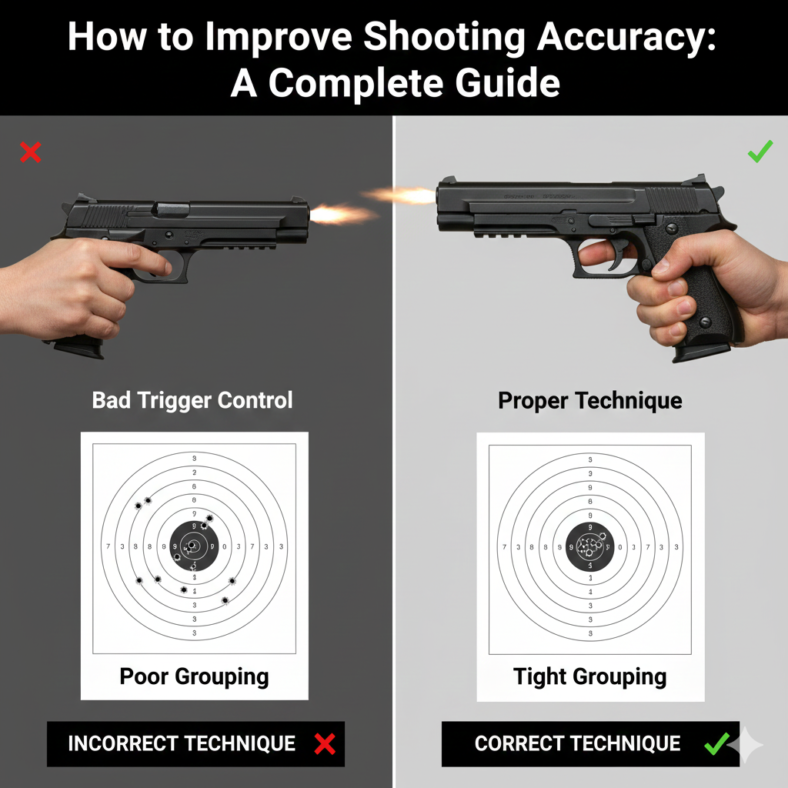
Trigger control

Trigger control means pressing smoothly without disturbing the sights. Jerking, slapping, or anticipating recoil can move the firearm before the shot breaks. For more detail, read our guide on the importance of trigger control for shooting accuracy.

Follow-through

Follow-through means holding your position, grip, and focus for a moment after the shot rather than relaxing immediately. It helps make each shot part of the same repeatable process.

Rifle, Handgun, and Shotgun Differences

Accuracy fundamentals overlap, but rifle, handgun, and shotgun shooting differ enough that general advice should stay cautious. Treat these notes as orientation, not discipline-specific instruction.

  • Rifles: Stability, support, cheek placement, and consistent shoulder position matter.
  • Handguns: Grip consistency, stance, trigger control, and sight management carry extra weight.
  • Shotguns: Smooth mount, target focus, movement, and follow-through are common themes.

The NSSF shooting resources are a helpful starting point for understanding organized shooting activities and safety context.

Practice Plans and Training Classes

Accountable practice usually helps more than equipment changes for newer shooters. Work slowly, record what you are doing, and compare targets over several sessions instead of judging from one group. Add distance, speed, or complexity only when the basics are consistent.

A qualified instructor can spot habits that are hard to feel on your own, such as flinch, uneven grip pressure, or inconsistent trigger movement. If practice at home ever becomes part of your routine, review secure storage and safe handling resources such as Project ChildSafe, and follow your firearm manual.

Common Accuracy Mistakes

  • Trying to shoot faster than the fundamentals allow.
  • Changing equipment before checking technique.
  • Using an inconsistent stance, grip, or support position.
  • Anticipating recoil and disturbing the firearm before the shot breaks.
  • Relaxing before follow-through is complete.
  • Ignoring range safety while focusing too hard on the target.

Before each range session, review our shooting range safety rules guide so safety remains the first habit, not an afterthought.

Frequently Asked Questions

What improves shooting accuracy the most?

No single factor improves accuracy by itself. For many newer shooters, consistent position and smooth trigger control are common areas where careful practice can help.

Are accuracy fundamentals the same for rifle, handgun, and shotgun?

The core ideas overlap, but each firearm type has different emphasis. Rifles reward stability, handguns reward grip and trigger consistency, and shotguns reward mount and movement.

Will better equipment make me more accurate?

Equipment can matter, but technique is usually the larger variable for newer shooters. Work on fundamentals with qualified guidance before assuming a firearm or accessory is the limiting factor.

How long does it take to improve shooting accuracy?

It varies by shooter, firearm, ammunition, and practice quality. Consistent, safe, accountable sessions are more useful than occasional unfocused practice.

Final Range Takeaway

Better accuracy starts with safety, repeatability, and honest practice. Keep the muzzle in a safe direction, follow range commands, use the correct ammunition and protective gear, and build fundamentals slowly with qualified help when needed.

What Is Gun Caliber? A Simple Beginner Explanation

Gun caliber usually describes bullet or bore diameter, but cartridge names are not always simple measurements. That is why beginners can see names like 9mm, .22 LR, .308 Winchester, or 7.62x39mm and feel like the system is harder than it should be. The most important rule is simple: the ammunition must match the firearm markings, the ammunition packaging, and the owner’s manual.

This guide explains caliber in plain language. It is not a recommendation guide, not a technical ammunition-building guide, and not a substitute for firearm markings, manufacturer instructions, range rules, or qualified instruction.

Quick Beginner Summary

  • Caliber usually refers to bullet or bore diameter.
  • A cartridge is the complete round of ammunition, not just the diameter.
  • Cartridge names mix measurement, history, and naming conventions.
  • Similar names are not automatically interchangeable.
  • Always verify ammunition against the firearm markings, packaging, and manual.

Caliber vs Cartridge

People often use caliber and cartridge as if they mean the same thing, but they are different ideas. Caliber generally refers to diameter. A cartridge is the complete round of ammunition, including the case, primer, propellant, and bullet. A cartridge name may include a caliber figure, but the full name matters because it identifies the specific ammunition type.

For terminology, the SAAMI glossary is a useful authority because SAAMI publishes firearm and ammunition industry standards and definitions. For a beginner, the practical point is this: caliber gives part of the story, but cartridge designation tells you much more.

TermPlain MeaningBeginner Takeaway
CaliberA diameter measurement or naming conventionHelpful, but not enough by itself
CartridgeThe complete round of ammunitionThe full cartridge designation must match the firearm
Firearm markingThe designation marked on the firearmUse it with the manual and ammunition box before loading

Why Caliber Names Can Confuse Beginners

Caliber names developed over a long time. Some names come from bullet diameter, some from case design, some from older conventions, and some from manufacturer or military naming history. That is why the number in a name is not always a simple literal measurement.

This is also why similar-looking names can be risky for beginners. A name that looks close on a shelf is not proof that the ammunition is correct for your firearm. Compatibility is a manual-and-marking question, not a guess from memory.

Metric vs Inch-Based Names

You will see cartridge names in metric measurements and inch-based measurements. Metric names often use millimeters, such as 9mm or 7.62mm. Some metric names include another number for case length. Inch-based names use decimals such as .22, .30, .357, or .45.

The measurement system is only part of the label. Do not assume that two cartridges are the same because their numbers seem close, and do not assume that one naming system translates neatly into the other. The correct source is still the firearm marking, owner’s manual, and ammunition packaging.

Why Matching Ammunition Matters

A firearm is designed around a specific cartridge or a clearly stated set of compatible cartridges. Using the wrong ammunition can damage equipment and injure people. A cartridge that appears similar, or even one that seems to fit, is not automatically safe.

Safety organizations make this point directly. The NSSF rules of safe gun handling include using only the correct ammunition for your firearm. SAAMI also publishes firearm safety rules that reinforce the same manual-first mindset.

For more on this specific safety check, read our guide to choosing the right ammunition for your firearm.

Common Beginner Mistakes

  • Relying on memory: A remembered caliber name is not enough. Check the marking and box.
  • Assuming close names match: Similar numbers or similar words do not prove compatibility.
  • Using fit as a test: A cartridge appearing to fit is not proof that it is safe.
  • Ignoring the manual: The owner’s manual and manufacturer guidance are part of the safety check.
  • Mixing loose ammunition: Keep ammunition organized and clearly identified.

How to Check the Right Ammunition Safely

Start with the cartridge designation marked on the firearm. Depending on the firearm, that marking may be on the barrel, slide, frame, or receiver. Then compare that exact designation with the owner’s manual and the ammunition box. If the markings and packaging do not clearly match, do not use that ammunition.

If anything is unclear, stop and ask a qualified range officer, instructor, gunsmith, or the firearm manufacturer. This is not a place to guess. A few minutes of verification is much better than trying to solve a compatibility question at the firing line.

Where Caliber Fits in Safe Shooting

Caliber knowledge helps you understand ammunition labels, compare terminology, and ask better questions. It does not replace the rest of firearm safety. You still need safe handling, safe storage, range commands, eye and ear protection, and clear ammunition organization.

If you are new to shooting, pair this article with our shooting range safety rules overview before live-fire practice.

Frequently Asked Questions

What does caliber mean in simple terms?

Caliber usually refers to bullet or bore diameter, expressed in inches or millimeters. It is part of how ammunition is described, but it is not always the complete cartridge designation.

Is caliber the same as cartridge?

No. Caliber is a diameter-related term. A cartridge is the complete round of ammunition, including the case, primer, propellant, and bullet.

Why are caliber names confusing?

Names come from different measurement systems, historical conventions, case designs, and manufacturer naming habits. That is why a cartridge name is not always a literal measurement.

Are similar cartridge names interchangeable?

Not unless your firearm markings or manual clearly state that they are compatible. Similar names, close numbers, or physical fit do not prove safety.

How do I know which ammunition my firearm uses?

Read the cartridge designation marked on the firearm, confirm it in the owner’s manual, and match it to the ammunition box and headstamp. If you are unsure, ask a qualified professional before loading or firing.

Final Safety Reminder

Caliber is a useful term, but it is not enough by itself. Cartridge names can be historical and confusing, so the safest habit is to verify the exact ammunition designation every time. Match the firearm marking, manual, ammunition packaging, and headstamp, and ask for qualified help whenever something is unclear.

Pistol Parts Explained: A Beginner-Friendly Guide

A pistol has a frame, slide, barrel, chamber, trigger, sights, magazine, grip, recoil system, extractor, ejector, and safety-related controls. Those parts work together to load, fire, extract, eject, and prepare the next round, but the exact layout depends on the pistol design. This guide explains the common parts in plain language so beginners can understand terminology without treating it like a repair manual.

Before handling any firearm, keep it pointed in a safe direction, keep your finger off the trigger, remove the magazine if applicable, open the action, and verify the chamber is clear according to the firearm manual. If you are unsure, stop and ask a qualified instructor, range officer, gunsmith, or the manufacturer.

Table of Contents

How Pistol Parts Work Together

Most modern pistols are designed around a simple sequence: the magazine holds cartridges, the action feeds one cartridge into the chamber, the firing system ignites it when the trigger is pressed, the slide or action cycles, the spent case is extracted and ejected, and the next round is prepared.

That broad sequence is useful for understanding terminology, but it is not a substitute for your owner’s manual. Different pistols use different locking systems, safeties, takedown procedures, and maintenance requirements. The NSSF firearm safety rules are the baseline before any inspection or cleaning: treat every firearm carefully, control muzzle direction, and keep your finger away from the trigger until ready to shoot.

For new shooters, part names are most useful when they make range instruction easier to follow. If an instructor says to lock the slide open, check the chamber, seat the magazine, or align the front sight, you should know the area they mean before live fire begins.

Major External Pistol Parts

Frame

The frame is the main body of the pistol. It supports the grip, trigger area, slide rails, and many controls. On many pistols, the frame is the serialized firearm component, although legal definitions can vary by country and jurisdiction.

Slide

The slide is the moving upper portion on many semi-automatic pistols. It houses or supports the barrel, firing system parts, extractor, sights, and recoil system. During firing, it cycles rearward and forward to help eject the spent case and chamber the next round.

Barrel and Chamber

The barrel directs the bullet as it leaves the firearm. The chamber is the rear part of the barrel area where the cartridge sits before firing. Always verify the chamber is clear when unloading or inspecting a pistol; do not rely only on removing the magazine.

Grip

The grip is where the shooter holds the pistol. Grip size, texture, backstrap shape, and angle affect control and comfort. A pistol should let the shooter reach the trigger safely without shifting the hand into an unstable position.

Internal and Moving Parts

Trigger

The trigger starts the firing sequence, but it should not be treated casually. Trigger weight, travel, reset, and safety design vary widely. Do not modify trigger parts unless you are qualified and the work follows the manufacturer’s guidance.

Firing Pin or Striker

The firing pin or striker is the part that helps ignite the cartridge primer. Hammer-fired pistols and striker-fired pistols use different systems, but both rely on precise timing and proper maintenance. Light strikes, repeated misfires, or unusual trigger behavior should be inspected by a qualified person.

Extractor and Ejector

The extractor helps pull the spent case from the chamber. The ejector helps kick it out of the firearm as the action cycles. If cases fail to extract or eject, the cause may be ammunition, fouling, magazine issues, worn parts, or technique. Repeated failures deserve inspection, not guesswork.

Recoil Spring and Guide Rod

The recoil system helps control slide movement and return the slide forward after cycling. Springs are wear items. The correct replacement interval depends on the pistol model, caliber, ammunition, and round count, so follow the manual rather than a universal schedule.

Magazine and Ammunition Path

The magazine stores cartridges and presents them for feeding. It commonly includes a magazine body, spring, follower, feed lips, and base plate. A weak spring, damaged feed lips, dirty magazine, or incorrect magazine can cause feeding problems.

Use the correct ammunition for the firearm and follow the manufacturer’s instructions. SAAMI firearm safety information is a useful authority for understanding why correct ammunition matching, inspection, and safe handling matter.

Sights, Controls, and Safety Features

Sights

Most pistols use front and rear sights, though some accept optics. Sights help align the pistol with the target, but safe shooting still depends on training, backstop awareness, trigger control, and knowing what is beyond the target.

Magazine Release and Slide Stop

The magazine release lets the magazine be removed. The slide stop or slide lock can hold the slide open on many pistols. Controls may be ambidextrous, reversible, or model-specific. Beginners should learn them with an unloaded firearm under qualified supervision.

Manual and Passive Safeties

Some pistols have manual thumb safeties, grip safeties, trigger safeties, firing-pin blocks, or other internal systems. A safety feature is not a replacement for safe handling. The user is still responsible for muzzle direction, trigger discipline, secure storage, and following the manual.

Maintenance and Inspection Boundaries

Basic cleaning and inspection help keep a pistol reliable, but there is a line between owner maintenance and gunsmithing. Field-strip only as the manual allows. Do not polish, file, bend, or replace critical parts unless you are qualified and the work follows manufacturer guidance.

Secure storage is also part of responsible ownership. Project ChildSafe provides firearm storage resources designed to reduce unauthorized access. Understanding pistol parts is useful, but safe storage and handling are the higher priority.

If a pistol has repeated malfunctions, visible cracks, abnormal wear, a stuck case, a possible bore obstruction, or controls that do not work normally, stop using it and get qualified help.

FAQ

What is the most important pistol part to understand first?

Start with the chamber, magazine, muzzle, and trigger. Those terms connect directly to loading, unloading, muzzle control, and trigger discipline, which are the safety basics every beginner needs.

Is the magazine the same thing as the clip?

No. A magazine feeds cartridges into the firearm. A clip is a different loading aid used with some firearm designs. Most modern pistols use detachable magazines.

Can I replace pistol parts myself?

Only do owner-level maintenance allowed by your manual. Parts that affect firing, safety, lockup, extraction, or trigger function should be handled by a qualified gunsmith or manufacturer support unless you are properly trained.

Why does the slide lock open?

On many semi-automatic pistols, the slide locks open after the last round because the magazine follower engages the slide stop. Some malfunctions or magazine issues can also affect this behavior.

Do all pistols have the same parts?

No. Semi-automatic pistols, revolvers, hammer-fired pistols, striker-fired pistols, rimfire pistols, and competition designs can differ. Use this guide for terminology, then rely on the manual for your exact firearm.

Final Takeaway

Learning pistol parts helps you understand safety instructions, range commands, maintenance language, and malfunction descriptions. Keep the focus practical: know the frame, slide, barrel, chamber, magazine, trigger, sights, and controls, then let the firearm manual and qualified instruction guide anything beyond basic identification.

Shooting Range Etiquette: Safety Rules, Ceasefires, and Lane Courtesy

Shooting range etiquette is the set of safety habits and respectful behaviors that keep a shared range calm, predictable, and safe. Good etiquette means you follow the range rules, control your muzzle, keep your finger off the trigger until ready to shoot, listen to the range officer, handle firearms only at the right time, and respect the people shooting around you.

The short version: treat every firearm as loaded, keep the muzzle pointed in a safe direction, keep your finger off the trigger until your sights are on target, know your target and what is beyond it, and never handle firearms during a ceasefire. Etiquette is not extra polish. At a range, etiquette is part of safety.

Table of contents

Quick Answer

Good shooting range etiquette means being safe, predictable, and respectful. Keep firearms pointed downrange, keep actions open when required, obey ceasefires immediately, do not touch guns while people are downrange, wear eye and ear protection, ask before handling anyone else’s firearm, and clean up your lane before leaving.

If you are unsure about a rule, ask the range officer before acting. No one expects a beginner to know everything. What experienced shooters do expect is honesty, calm behavior, and willingness to follow instructions. A safe beginner is welcome at most ranges; an overconfident unsafe shooter is not.

Before You Go to the Range

Good etiquette starts before you arrive. Read the range rules, confirm hours, check whether the range allows your firearm or ammunition type, and bring required safety gear. Some ranges restrict steel-core ammunition, shotguns, rapid fire, holster work, drawing from concealment, or certain target types. Knowing those rules early prevents awkward or unsafe surprises.

Pack Required Safety Gear

Bring eye protection and hearing protection for everyone in your group. For indoor ranges or loud firearms, many shooters use ear plugs under earmuffs. Our guide on how to double up ear protection at indoor ranges explains why that extra layer is useful. A simple range bag should also include targets, tape or stapler if allowed, ammunition, chamber flags if required, basic tools, and identification or membership items.

Transport Firearms Safely

Follow your local laws and the range’s arrival procedure. Firearms should arrive unloaded unless the range rules say otherwise, and cases should stay closed until you are at the proper handling area or firing lane. If you are new, ask staff where and when to uncase your firearm.

Arriving at the Range

When you arrive, slow down. Check in, read posted rules, and watch how the range operates. Some ranges are controlled by a range safety officer. Others rely more on shooters coordinating with each other. Either way, your first job is to understand whether the range is hot or cold before touching gear.

Do Not Rush to the Bench

Rushing causes mistakes. Place bags where they belong, keep muzzles controlled, and wait for the proper time to set up. If other shooters are already present, give them space and avoid stepping in front of the firing line unless the range is cold and everyone has agreed.

Ask Before Taking Photos or Video

Some shooters do not want to be recorded, and some ranges have policies about cameras. Ask first. Never distract someone who is loading, firing, clearing, or receiving instruction.

Muzzle and Trigger Discipline

Muzzle and trigger discipline are the heart of range etiquette. The NSSF firearm safety rules are a helpful reference because they keep the core habits simple and repeatable. At the range, those habits should be visible in everything you do.

Muzzle Direction

Keep the muzzle pointed in a safe direction, usually downrange, whenever a firearm is uncased. Do not sweep other people while turning, setting a firearm down, loading, clearing, or showing it to someone. If you need to move with a firearm, ask the range officer or follow the posted procedure.

Trigger Finger

Keep your finger outside the trigger guard until you are ready to fire. This includes when you are loading, unloading, clearing a malfunction, talking, adjusting your stance, or setting the firearm down. A straight trigger finger is one of the simplest signs that a shooter is paying attention.

Ceasefire and Cold-Range Behavior

A ceasefire means stop shooting immediately. Depending on the range, you may need to unload, open the action, insert a chamber flag, step back from the bench, and wait for instructions. During a cold range, people may be downrange changing targets. That is the wrong time to handle firearms, ammunition, magazines, or anything on the shooting bench unless the range officer says otherwise.

Hands Off Means Hands Off

Many ranges require shooters to step behind a line during ceasefire. Respect that rule even if your firearm is unloaded. Other shooters cannot always see your chamber, but they can see whether you are touching the gun. Predictable behavior builds trust.

Call Problems Clearly

If you see an unsafe condition, call it out calmly and clearly. If someone is downrange, if an animal enters the impact area, if a target frame falls, or if a shooter appears confused during a hot range, get the range officer’s attention or call for a ceasefire according to local rules.

Bench and Lane Etiquette

Your lane is not a private island. Brass, noise, muzzle blast, smoke, targets, bags, and conversations can affect the shooters beside you. Keep your gear contained, control where your brass goes when possible, and avoid crowding another shooter’s bench.

Respect Other Shooters’ Gear

Do not touch another person’s firearm, ammunition, optic, suppressor, target, or range bag without permission. If someone offers to let you inspect or shoot a firearm, wait for them to show you its condition and explain how they want it handled.

Watch Muzzle Blast and Ejection

Large brakes, short barrels, and certain shooting positions can be unpleasant for nearby lanes. If the range is not crowded, leave space when possible. If your brass is hitting someone, adjust if safe and practical, or apologize and coordinate.

Communication and Range Commands

Good communication keeps a range calm. Listen for commands, repeat important calls when needed, and avoid loud side conversations while people are shooting or receiving instruction. If you do not understand a command, ask before acting.

Common Commands

Commands vary by range, but common examples include “range is hot,” “range is cold,” “ceasefire,” “make safe,” “commence fire,” and “all clear.” Treat every command as important. The exact wording matters less than immediate attention and safe response.

Teaching or Helping Others

If you bring a new shooter, stay close and keep the session simple. Explain safety rules before arriving, start with one firearm, and avoid overwhelming them. Our shooting stance guide for beginners can help new shooters understand basic body position before they try to go fast.

Etiquette for New Shooters

New shooters should not feel embarrassed about asking questions. The safest approach is to tell the range officer or instructor that you are new. Most problems happen when someone pretends to know a procedure and guesses wrong.

Start Slow

Load fewer rounds at first, use a simple target distance, and focus on safety habits instead of speed. Learn how to load, unload, clear, bench, and case the firearm before worrying about tight groups. For a broader safety checklist, see our essential range gear checklist.

Accept Corrections Well

If staff or another responsible shooter corrects a safety issue, take it seriously. A calm correction is not an insult. It is part of keeping everyone safe.

Cleanup and Shared-Space Habits

Leaving a clean lane is basic range respect. Pick up targets, tape, boxes, loose trash, and brass according to range policy. Some ranges allow shooters to keep their own brass. Others collect brass or separate calibers. Follow the local rule.

Leave Targets and Frames Usable

Use approved targets and place them where the backstop can safely catch rounds. Do not shoot posts, target frames, hangers, signs, lights, cameras, or range equipment. Damaging shared equipment raises costs for everyone and can create safety hazards.

Respect Time Limits

If the range is busy and lanes are limited, be efficient. Shoot your session, clean your area, and move gear out of the way before long conversations. Courtesy keeps the line moving and makes the range better for everyone.

FAQ

What is the most important shooting range etiquette rule?

The most important rule is safe firearm handling: keep the muzzle in a safe direction, keep your finger off the trigger until ready to shoot, and obey ceasefire commands immediately. Respectful behavior starts with safety.

Can I touch my gun during a ceasefire?

Usually no. At many ranges, you must not touch firearms, ammunition, magazines, or bench gear during a cold range while people are downrange. Follow the range officer’s instructions and posted rules.

Should beginners tell the range officer they are new?

Yes. Telling the range officer you are new is smart, not embarrassing. It helps staff explain the local rules and prevent mistakes before they happen.

Is it rude to give another shooter advice?

Unasked advice can be distracting, especially if someone is actively shooting. If there is a safety issue, speak up or notify the range officer. For non-safety advice, ask politely first or leave them alone.

Do I need both ear plugs and earmuffs at the range?

Not always, but doubling up is a good idea for many indoor ranges and loud firearms. Ear plugs plus earmuffs can improve comfort and add backup protection when one layer shifts.

Final Thoughts

Shooting range etiquette is really about making safety easy for everyone to see. Be predictable, listen carefully, control your muzzle, respect ceasefires, wear proper protection, and leave the range cleaner than you found it. When shooters follow those habits, the range becomes safer, calmer, and more welcoming for beginners and experienced shooters alike.

How to Grip a Handgun Correctly

A correct handgun grip should let you control the pistol without fighting it. In simple terms, place the firing hand high on the backstrap, keep the wrist firm, wrap the support hand into the open space on the grip, angle both thumbs safely forward along the frame area, and press the trigger without changing muzzle direction. Grip should feel secure, repeatable, and safe, not painful or forced.

This guide explains the beginner fundamentals of handgun grip for range practice and training language. It is not a replacement for qualified instruction, your firearm manual, or live supervision. Before handling any firearm, keep the muzzle directed safely, keep your finger off the trigger until ready to shoot, and verify the firearm condition according to the manual and range rules.

Table of Contents

Why Handgun Grip Matters

Grip is one of the first skills a handgun shooter should learn because it affects control, sight movement, trigger press, and follow-up shots. A poor grip can make the pistol shift in the hand, push shots off target, or make the shooter overcorrect after recoil.

Good grip does not mean squeezing as hard as possible. It means building stable contact with the firearm so the sights return consistently and the trigger can move without dragging the muzzle away from the target. The foundation still starts with safety. The NSSF firearm safety rules are worth reviewing before any grip work because muzzle control and trigger discipline come before technique.

Basic Two-Hand Handgun Grip

Start With the Firearm Safe and Clear

Practice grip only under safe conditions. At a range, follow the range officer’s commands. At home, use only the unloaded handling procedure allowed by your manual, remove ammunition from the room, and avoid practicing if you are tired, distracted, or unsure.

Use a High, Stable Grip

The firing hand should sit high on the backstrap so the pistol is aligned with the forearm. A high grip helps manage recoil because the pistol has less room to rotate upward. Do not place the hand so high that it contacts the slide or moving parts.

Fill the Open Space With the Support Hand

After the firing hand is placed, the support hand should fill the open space on the grip panel. The support hand is not decoration; it helps control the pistol, stabilize the wrists, and reduce unnecessary movement during the trigger press.

Firing-Hand Position

Backstrap Contact

The web of the firing hand should contact the backstrap firmly. This makes the pistol feel seated in the hand rather than balanced loosely in the fingers. If the pistol shifts after every shot, the grip may be too low, too loose, or not matched well to hand size.

Trigger Finger Independence

The trigger finger should be able to move without the rest of the hand clenching. If pressing the trigger causes the whole hand to tighten, shots may move off target. Beginners often improve by focusing on steady grip pressure while the trigger finger moves straight to the rear.

Thumb Placement

Thumb placement depends on pistol design and shooter anatomy. Many modern semi-automatic shooters use forward thumbs, but thumbs should never interfere with the slide, controls, cylinder gap on revolvers, or safe operation. If a grip causes discomfort or contact with moving parts, stop and adjust with qualified help.

Support-Hand Position

Palm Contact

The support-hand palm should make meaningful contact with the grip and firing hand. Empty space usually means less control. Rotate the support hand slightly forward so the palm presses into the available grip area without crossing in front of the muzzle.

Finger Wrap

The support-hand fingers usually wrap over the firing-hand fingers. The goal is to create a secure, repeatable two-hand structure. Avoid placing the support-hand fingers near the trigger guard in a way that pulls the pistol sideways or interferes with controls.

Wrist Stability

Both wrists should feel firm and aligned. Loose wrists can make the pistol move more than necessary and may contribute to cycling problems with some semi-automatic pistols. Do not lock the body into a painful position; stable is the goal, not stiff.

Trigger Control and Grip Pressure

Grip pressure should be consistent before, during, and after the trigger press. Many shooters miss low or sideways because they tighten the whole hand at the same moment the trigger breaks. A useful range cue is to build the grip first, then move only the trigger finger.

Different instructors describe pressure differently, so do not get stuck on a single percentage rule. The real test is whether the sights stay stable, the pistol tracks predictably, and your hands can repeat the same grip every time. If recoil control feels erratic, ask an instructor to watch your hands from a safe position.

Common Grip Mistakes

  • Low firing-hand grip: leaves more leverage for muzzle flip and makes the pistol shift.
  • Weak support-hand contact: leaves empty space and reduces control.
  • Milking the grip: tightening all fingers during the trigger press.
  • Thumbs interfering with controls: can prevent normal slide lock or safe manipulation.
  • Practicing too fast: hides basic problems and builds sloppy habits.
  • Ignoring firearm fit: a pistol that is too large or too small may make a good grip harder.

If the issue is firearm fit, do not force a grip that puts your finger, wrist, or thumbs in unsafe positions. A qualified instructor can often tell whether the problem is technique, hand size, grip texture, or an unsuitable pistol.

Safe Practice Boundaries

Grip practice should stay inside safe handling rules. Use live ammunition only at a proper range or legal training setting. Keep muzzle direction safe at all times. Avoid mirrors, cameras, or online advice if they distract you from basic safety discipline.

For general ammunition and firearm safety context, SAAMI firearm safety information is a reliable reference. For secure storage and access-control reminders, Project ChildSafe is useful, especially if firearms are stored in a home with other people.

FAQ

Should I grip a handgun as hard as possible?

No. Grip firmly enough to control the pistol, but not so hard that your hands shake, your trigger finger drags, or the pistol becomes painful to manage. Consistency matters more than brute force.

Where should my thumbs go?

On many semi-automatic pistols, thumbs point generally forward along the frame area, but placement depends on the firearm and your hands. Keep thumbs away from the slide, muzzle, cylinder gap, and controls unless the manual/instructor says otherwise.

Why do my shots move when I press the trigger?

The grip may be changing during the trigger press. Watch for clenching, pushing, wrist movement, or support-hand pressure changing at the same time the trigger breaks.

Can handgun grip fix all accuracy problems?

No. Grip matters, but accuracy also depends on sight alignment, trigger control, stance, breathing, vision, firearm fit, ammunition, and training quality.

Should beginners practice grip at home?

Only if they can follow safe unloaded-handling procedures exactly and keep ammunition separate. Beginners are usually better served by practicing under a qualified instructor until the safety process is automatic.

Final Takeaway

A good handgun grip is high, stable, repeatable, and safe. Build the firing-hand grip first, fill the open space with the support hand, keep wrists firm, and press the trigger without changing grip pressure. Above all, keep safety rules ahead of technique and get qualified feedback before turning practice into habit.

How Often to Clean Your Gun

How often you should clean your gun depends on the firearm manual, ammunition, weather, storage conditions, and how the firearm was used. A simple rule is to inspect after every range trip, clean after heavy use or exposure to moisture, and follow the manufacturer’s maintenance schedule instead of relying on one universal round-count rule.

Table of Contents
  1. Quick Answer
  2. Gun Cleaning Frequency Checklist
  3. What Changes Cleaning Frequency
  4. After Range Use
  5. After Hunting, Carry, or Storage
  6. Can You Clean Too Often?
  7. Common Mistakes
  8. FAQ
  9. Final Takeaway

Quick Answer

Clean your gun when the manual recommends it, after exposure to moisture, dirt, sweat, rain, snow, or heavy fouling, before long-term storage, and anytime inspection shows residue, corrosion risk, or unreliable function. For ordinary range use, many owners inspect after each session and clean as needed, but the safest answer is always firearm-specific.

A safe cleaning schedule starts with the firearm manual, inspection notes, weather exposure, ammunition type, and secure storage habits.

Gun Cleaning Frequency Checklist

  • Manual first: Use the firearm maker’s maintenance schedule and warnings.
  • After live fire: Inspect the bore, chamber, action, and exterior surfaces.
  • After moisture: Clean and dry promptly after rain, snow, sweat, condensation, or wet storage.
  • After dirty ammunition: Check more often when ammunition leaves heavy fouling.
  • Before storage: Clean, lightly protect, and store securely according to the manual.
  • When function changes: Stop and inspect if feeding, extraction, trigger feel, or cycling changes.
  • With chemicals: Use ventilation, gloves, eye protection, and product labels.

Cleaning is part of safe ownership, but safety comes first. The NSSF firearm safety rules are a useful reminder before any maintenance session. Range residue and lead exposure also deserve attention; CDC/NIOSH range guidance explains why residue control matters around shooting environments.

What Changes Cleaning Frequency

Cleaning frequency changes with use. A firearm fired in dry indoor conditions may need a different routine than one carried in rain, dust, snow, or humid woods. Ammunition, suppressor use, storage location, and firearm design can also change how quickly residue builds up.

Ammunition and Fouling

Some ammunition leaves more residue than others. If you notice heavy carbon, unburned powder, sticky residue, or unusual smell, inspect more carefully. Do not assume a fixed round count covers every firearm and ammunition combination.

Firearm Type Matters

A bolt-action hunting rifle, a semi-automatic pistol, a shotgun, and a rimfire rifle can all need different maintenance rhythms. Actions with more moving parts may collect residue in different places, while rimfire ammunition can leave noticeable fouling. Use the same decision process for all of them: inspect, compare what you see to the manual, and clean the areas the maker tells you to maintain.

Weather and Corrosion Risk

Moisture changes the schedule quickly. Rain, snow, sweat, wet cases, and condensation can all create corrosion risk. After wet exposure, dry the firearm safely, clean as the manual recommends, and inspect exterior metal, bore, chamber, and storage case.

After Range Use

After a normal range session, start with inspection. Unload and clear the firearm, remove ammunition from the bench, then check bore, chamber, action, feed areas, magazines, exterior surfaces, and optic mounts if relevant. If residue is light and the manual does not call for full cleaning, a wipe-down and light maintenance check may be enough.

If the firearm had a high round count, dirty ammunition, malfunctions, or unusual residue, clean more fully. If anything looks damaged, obstructed, cracked, badly worn, or unsafe, stop and contact a qualified gunsmith or the manufacturer.

After Hunting, Carry, or Storage

Hunting and field use can expose firearms to moisture, dust, vegetation, temperature swings, and body oils. Even if you did not fire, inspect and wipe down after field use. Pay attention to slings, cases, and foam-lined storage that may hold moisture against metal.

Before long-term storage, clean and protect the firearm according to the manual, then store it securely. General safety programs such as Project ChildSafe are useful reminders that maintenance and secure storage should work together.

Storage Checkups

A stored firearm can still need inspection. Humidity, temperature swings, old oil, and case materials can affect condition. Periodic checkups help catch corrosion or dryness before they become bigger problems.

If you rotate firearms seasonally, add a calendar reminder before and after the season. That keeps the routine tied to actual use: pre-season inspection, post-season cleaning, and storage checks during long gaps. The reminder is not a universal cleaning command; it is a prompt to inspect condition and decide what the manual-based routine requires.

Can You Clean Too Often?

Careful maintenance is good; careless over-cleaning is not. Problems come from wrong-size tools, rough rods, forcing brushes, taking apart more than the manual recommends, using too much oil, or mixing chemicals. The goal is not maximum scrubbing. The goal is safe, manual-based maintenance.

Keep simple notes: date, round count if known, weather exposure, ammunition type, products used, and any issues noticed. Over time, your notes will tell you more about your firearm than a generic online interval.

A maintenance log also helps you avoid duplicate work. If the firearm was cleaned, lightly protected, and stored after the last trip, the next check may only require inspection. If the notes show rain, dusty carry, a malfunction, or heavy fouling, that same log tells you to slow down and do a more careful cleaning session.

Common Mistakes

  • Using one fixed cleaning interval for every firearm.
  • Cleaning with ammunition still on the bench.
  • Skipping inspection after rain, snow, sweat, or humid storage.
  • Using too much oil before storage.
  • Mixing chemicals or ignoring product labels.
  • Forcing tools through the bore.
  • Assuming storage means no future checkups.

FAQ

Should I clean my gun after every range trip?

You should at least inspect it after every range trip. Whether it needs full cleaning depends on the manual, round count, ammunition, fouling, weather exposure, and how the firearm will be stored.

Should I clean a gun if I did not fire it?

Sometimes. Field carry, sweat, rain, dust, fingerprints, and humid storage can justify inspection and wipe-down even when no shots were fired.

Can too much oil cause problems?

Yes. Excess oil can collect debris, migrate into places it does not belong, and become sticky over time. Use the amount recommended by the firearm manual or product label.

What is the safest cleaning schedule?

The safest schedule is firearm-specific: follow the manual, inspect after use or exposure, clean before long-term storage, and get qualified help when function or condition seems questionable.

Final Takeaway

There is no single cleaning interval that fits every gun. Inspect regularly, clean after heavy use or exposure, follow the manual, respect chemical safety, and store securely. A simple, consistent maintenance routine is better than guessing from a universal round-count rule.

What Is a Misfire and How to Prevent It

A misfire happens when you press the trigger, the firing system tries to ignite the cartridge, and the round does not fire. The safest response is not to rush, not to look into the action, and not to assume the round is harmless. Keep the muzzle pointed in a safe direction, keep your finger off the trigger, follow your range or firearm manual procedure, and treat the event as a possible delayed ignition until it is cleared safely.

Misfires are usually caused by ammunition, firearm condition, or the firearm not being fully in battery. This guide explains the difference between a misfire, hang fire, and squib load, what to do in the moment, and how to reduce the chance of it happening again without giving risky shortcut advice.

Table of Contents

What Is a Misfire?

A misfire is a failure to fire. In a typical centerfire or rimfire firearm, the trigger is pressed, the firing pin or striker hits the primer or rim, but the cartridge does not ignite. You may hear a click, feel the trigger break, and see no shot fired.

The important safety point is uncertainty. In the first moment after a click, you do not know whether the cartridge is truly dead, whether ignition is delayed, or whether another malfunction has occurred. That is why the basic response starts with muzzle control and patience, not immediate inspection.

The NSSF firearm safety rules are a useful foundation here: always keep the muzzle pointed in a safe direction and keep your finger off the trigger until you are ready to shoot. Those rules matter even more when the firearm does something unexpected.

Misfire vs. Hang Fire vs. Squib Load

People often use these terms together, but they are not the same problem. Knowing the difference helps you respond with the right level of caution.

Misfire

A misfire means the cartridge does not fire when struck. The cause may be a bad primer, damaged ammunition, light firing-pin strike, dirty firing-pin channel, weak spring, or a firearm that was not fully closed or locked.

Hang Fire

A hang fire is delayed ignition. The trigger is pressed, nothing happens immediately, and then the round may fire after a delay. Because a hang fire can look like a misfire at first, do not open the action instantly after a click. Follow your range rules, instructor guidance, and firearm manual.

Squib Load

A squib load is different because the round may fire weakly and leave a bullet or obstruction in the barrel. Warning signs can include an unusually quiet report, light recoil, smoke, or a shot that feels wrong. If you suspect a squib, stop shooting immediately and have the firearm inspected before firing again.

What To Do After a Misfire

If the firearm clicks instead of firing, keep the muzzle pointed downrange or in another safe direction. Keep your finger away from the trigger. Do not turn the firearm sideways to look into the chamber, and do not point it toward yourself or another person while trying to diagnose the problem.

Many range procedures use a short waiting period before clearing the firearm because of the possibility of a hang fire. Your firearm manual, range officer, instructor, or club rules should control the exact procedure. When in doubt, slow down and ask for qualified help.

After the waiting period required by your setting, open the action carefully while maintaining safe muzzle direction. Remove the cartridge if it can be removed safely. Keep the suspect cartridge separate, do not try to fire it again, and follow local range or manufacturer guidance for disposal.

If the firearm does not open normally, the cartridge is stuck, the bolt or slide feels jammed, or you are unsure what happened, stop. Forcing parts can make the situation worse. Let a qualified range officer, instructor, gunsmith, or manufacturer support channel guide the next step.

Common Causes of Misfires

Most misfires come from one of three areas: ammunition, firearm condition, or handling/setup. The cause is not always obvious from a quick glance, so avoid guessing if the malfunction repeats.

Ammunition Problems

Old, wet, corroded, contaminated, or damaged ammunition can fail to ignite. Ammunition stored in high humidity, extreme heat, vehicle trunks, damp hunting bags, or unsealed boxes may become less reliable over time. A primer that is damaged, improperly seated, or defective can also fail even when the firearm is functioning normally.

Use ammunition that matches the firearm marking and manual, and inspect cartridges before loading. If a round looks swollen, corroded, cracked, dented, or contaminated with oil or solvent, do not use it.

Firearm Condition

A dirty firing-pin channel, worn spring, damaged firing pin, heavy fouling, or neglected action can reduce ignition reliability. Cold weather, rain, dust, and heavy lubricant can also affect function, especially if the firearm has not been cleaned and inspected after use.

For technical ammunition and firearm safety context, SAAMI firearm safety information is a strong reference because it focuses on safe ammunition/firearm matching and handling principles.

Not Fully in Battery

Some firearms may not fire correctly if the bolt, slide, or action is not fully closed. This can happen from riding the slide, dirt in the chamber, damaged magazines, improper loading, or mechanical wear. If a firearm repeatedly fails to go fully into battery, stop using it until the cause is identified.

How To Prevent Misfires

You cannot prevent every defective cartridge, but you can reduce avoidable misfires with better storage, inspection, and maintenance habits.

  • Use the correct ammunition. Match caliber/gauge and cartridge type to the firearm manual and barrel markings.
  • Inspect before loading. Avoid cartridges with corrosion, dents, cracked cases, loose bullets, or moisture damage.
  • Store ammunition properly. Keep it cool, dry, stable, and away from oils, solvents, and long-term humidity.
  • Clean on a schedule that fits use. Range sessions, hunting in rain, dusty travel, and defensive-practice training all justify inspection and cleaning afterward.
  • Follow the manual. Maintenance points, lubrication amount, replacement intervals, and approved ammunition vary by firearm.
  • Stop repeated malfunctions early. If more than one misfire occurs with the same firearm or ammunition lot, pause and investigate before continuing.

Safe storage also matters beyond misfire prevention. Project ChildSafe has practical secure-storage resources for keeping firearms inaccessible to unauthorized users, especially children. Reliable equipment and responsible access control belong together.

When To Stop and Get Help

Stop shooting and get qualified help if the firearm will not open normally, the cartridge is stuck, the action feels damaged, the report sounded weak, the bore may be obstructed, or the same problem happens again. Do not keep firing to “test it out.” A repeated misfire can point to a mechanical issue, ammunition lot issue, or unsafe condition that needs inspection.

For beginners, the safest help source is a certified instructor, range officer, gunsmith, firearm manufacturer, or the official firearm manual. Online advice can help you understand terms, but it should not replace qualified inspection when a live-round malfunction or possible barrel obstruction is involved.

FAQ

Can a misfired round go off later?

It is possible for a delayed ignition, called a hang fire, to look like a misfire at first. That is why you should keep the firearm pointed in a safe direction and follow your range or firearm-manual procedure before opening the action.

Should I try to fire the same round again?

No. Treat the cartridge as suspect. Keep it separate and follow range, manufacturer, or local disposal guidance instead of trying to fire it again.

Is a misfire always caused by bad ammunition?

No. Ammunition is one common cause, but a weak firing-pin strike, dirty action, worn part, or firearm not being fully in battery can also cause a misfire.

What is the most dangerous mistake after a misfire?

The biggest mistake is moving the muzzle in an unsafe direction or immediately opening the action while assuming nothing can happen. Keep the muzzle safe first, then clear the firearm according to proper procedure.

When should a gunsmith inspect the firearm?

Use a qualified gunsmith or manufacturer support if misfires repeat, the action feels abnormal, parts appear worn or damaged, the bore may be obstructed, or you cannot confidently identify the cause.

Final Takeaway

A misfire is not just a failed shot. It is a safety event. Keep the muzzle pointed safely, wait and clear the firearm according to proper procedure, separate the suspect cartridge, and investigate the cause before continuing. Good ammunition storage, regular maintenance, and manual-first habits reduce risk without encouraging shortcuts.

How To Clean A Handgun Properly: Safe Basic Maintenance

To clean a handgun properly, start by unloading it, verifying it is clear, and removing all ammunition from the workspace. Then follow the owner manual for your exact handgun. The manual controls how far to field strip it, which surfaces to clean, where lubricant belongs, and how to reassemble it.

This guide covers safe, manual-led basics only. It does not provide model-specific takedown steps, gunsmithing, trigger work, modifications, or repair instructions. If anything is unclear or a part looks damaged, stop and consult the manual, the manufacturer, a qualified instructor, or a gunsmith.

Safety Checks Before Cleaning A Handgun

Every cleaning session begins with confirming the firearm is unloaded and safe. Treat the handgun as if it is loaded until you have personally verified otherwise.

  • Point the muzzle in a safe direction at all times.
  • Remove the magazine, then visually and physically check the chamber to confirm it is empty.
  • Remove all ammunition from the cleaning area so live rounds and cleaning are never mixed.
  • Keep your finger off the trigger and follow basic firearm safety rules throughout.

The National Shooting Sports Foundation’s firearm safety rules are a useful baseline before, during, and after cleaning. Confirming a clear condition is the most important step, and it is worth repeating if you are interrupted.

A safe cleaning setup starts with a clear-first checklist, the owner manual, ventilation, and no ammunition on the bench.

Tools And Supplies You Need

Basic handgun cleaning uses a small set of general supplies. Match sizes and products to your owner manual and to the cleaning-product labels.

  • Cleaning patches and a patch holder or jag.
  • A correctly sized bore brush.
  • A cleaning rod or cable.
  • Bore solvent and a light firearm oil or lubricant.
  • A cleaning mat to protect the surface and catch debris.
  • Disposable gloves and eye protection.

Use solvents and oils according to their labels and safety data sheets. This is not a product ranking, so choose supplies that match your handgun, your manual, and your workspace.

Basic Handgun Cleaning Process

The basic order is simple: confirm the gun is clear, field strip per the manual, clean the major parts, then lubricate and reassemble. Keep the work at a routine-maintenance level unless a qualified gunsmith or the manufacturer tells you otherwise.

Clear The Firearm And Remove Ammunition From The Workspace

Before any disassembly, confirm again that the magazine is out and the chamber is empty. Keep all ammunition in a separate location. This separation prevents the most serious cleaning mistakes.

Follow The Manual For Field Stripping

Field stripping differs by handgun, so your owner manual is the authority. Follow the manual for slide removal, recoil spring handling, barrel removal, and reassembly. Do not force parts, and do not disassemble farther than the manual describes for routine cleaning.

Clean The Barrel, Slide, Frame, And Magazines At A High Level

With the handgun field stripped per the manual, clean the major surfaces. Use a solvent-dampened patch and an appropriately sized brush as the manual recommends, then follow with clean patches. Wipe the slide, frame rails, and contact surfaces according to the manual. Wipe magazines only as the manual allows, and avoid soaking them with solvent or oil.

Lubrication And Reassembly

Lubrication and reassembly should follow the exact points and amounts your manual lists. Apply a light film of oil only where the manual indicates, since too much oil can attract debris. Reassemble in the manual’s order, then perform any function check the manual describes with the firearm unloaded and pointed in a safe direction. If reassembly does not feel right, stop and recheck the manual.

Solvent, Lead, And Workspace Safety

Cleaning solvents and oils are chemicals, so handle them according to their labels and safety data sheets. Work in a ventilated area, wear gloves and eye protection when appropriate, and keep solvents away from food, drink, and children. OSHA hazard communication resources explain why labels and SDS information matter when chemicals are used.

Firing-range and cleaning residue can include lead, so basic hygiene matters. Avoid eating or drinking while cleaning, and wash your hands afterward. CDC/NIOSH firing range guidance provides background on range-related lead awareness. This is general safety context, not medical advice.

Common Handgun Cleaning Mistakes

The most common mistakes are skipping the safety check, over-lubricating, and going beyond the manual’s instructions. Other frequent problems include using the wrong brush size, forcing tools through the bore, mixing solvents, using unlabeled chemicals, and trying to repair a damaged part during a routine cleaning session.

If a part is worn, damaged, or behaving abnormally, do not try to modify it yourself. Take the handgun to a qualified gunsmith or contact the manufacturer.

Frequently Asked Questions

How often should I clean my handgun?

Cleaning frequency depends on how often you shoot, ammunition type, conditions, storage, and your manual’s guidance. Many owners clean after range sessions and inspect periodically during storage, but your owner manual should guide the routine.

Can I use any solvent or oil on my handgun?

Use products labeled for firearm cleaning, follow the product label and SDS, and check your manual for product cautions. Avoid improvised chemical mixes and do not combine solvents.

Do I need to fully disassemble my handgun to clean it?

No. Routine cleaning usually only requires field stripping to the level described in your owner manual. Going farther than the manual covers can create reassembly problems and is better left to a qualified gunsmith.

What should I do if a part looks damaged?

Stop and do not fire or force the firearm. Note the issue and take the handgun to a qualified gunsmith or contact the manufacturer. Cleaning is routine maintenance, not repair.

Is a 3-9x Rifle Scope Still Good for Deer Hunting?

Yes, a 3-9x rifle scope is still a very practical choice for deer hunting when your shots are close to moderate range and you want a simple, familiar optic. It gives enough magnification for many woods, field-edge, and stand-hunting situations without the weight and complexity of larger scopes.

The honest answer depends on your terrain. A 3-9x scope makes sense for many deer hunters, but it is not the best optic for every hunt. Open-country shots, very low light, or precision work at longer ranges may call for a different magnification range or better glass.

Table of Contents

Quick Verdict

A 3-9x rifle scope is still good for deer hunting because it covers the most common field needs: low magnification for closer shots, higher magnification for more careful aiming, manageable size, and a simple setup that many hunters already understand. It is a balanced choice, not a magic answer.

A 3-9x scope remains useful when its magnification, reticle, glass quality, and mounting setup match your actual deer-hunting distances.

3-9x Deer Scope Decision Checklist

Use this checklist before deciding whether a 3-9x is enough for your rifle. The goal is to match the optic to the hunt, not to chase a spec sheet.

  • Typical distance: Most shots are close to moderate rather than extreme range.
  • Terrain: You hunt timber, field edges, food plots, or mixed cover.
  • Light: You need useful dawn/dusk performance but not maximum detail at very high power.
  • Weight: You prefer a scope that does not make the rifle feel top-heavy.
  • Simplicity: You want a familiar optic with fewer settings to manage under pressure.
  • Ethical shot limit: You are willing to pass shots when the target is not clear enough.

What 3-9x Means

A 3-9x scope adjusts from 3x to 9x magnification. At 3x, it gives a wider field of view and is easier to use at closer distances. At 9x, it gives more target detail for careful aiming. For general background on scope design, this telescopic sight overview explains the basic concept of optical sights.

Why Hunters Like the Range

The range is useful because deer hunting rarely happens at one fixed distance. A deer may step out close in timber or appear farther across a field edge. A 3-9x scope lets you keep the scope low while scanning and turn it up only when the shot requires more detail.

Where a 3-9x Scope Works Well

A 3-9x scope is strongest in mixed terrain. It is at home in eastern hardwoods, farm country, food plots, ladder stands, box blinds, and general rifle setups where shots are usually reasonable and the hunter wants speed plus enough magnification for shot placement.

Woods and Field Edges

In woods, lower magnification helps you find the deer faster in the scope. On field edges, 6x to 9x may give enough detail for a more deliberate shot. The exact setting should follow the distance, light, and how clearly you can identify the target and what is beyond it.

Lightweight Rifle Setups

Many 3-9x scopes are lighter and simpler than larger long-range optics. That can help a rifle carry better and shoulder more naturally. Weight matters most for still-hunting, long walks, steep terrain, and hunters who do not want a bulky optic on a compact rifle.

Low-Light Strengths and Limits

Low-light performance is not only about magnification. Glass quality, coatings, objective size, exit pupil, reticle visibility, and your eye position all matter. A good 3-9x hunting scope can be very usable at dawn and dusk, but a cheap scope at 9x may look dim or fuzzy.

The safety rule is simple: if you cannot clearly identify the deer and what is beyond it, do not shoot. The NSSF firearm safety rules are a useful reminder that every optics choice still sits under basic target-identification and backstop responsibility.

Where It Falls Short

A 3-9x scope may not be ideal for hunters who regularly shoot across large open country, need detailed antler evaluation at distance, or want exposed turrets and reticles built for dialing. It may also be less flexible than a lower-power optic for very close, fast shots in thick cover.

That does not make the 3-9x outdated. It means the scope should match the hunt. A western rifle, a thick-woods carbine, and a farm-country deer rifle may all benefit from different optics.

Setup Matters More Than Hype

A well-mounted, properly zeroed 3-9x scope beats a poorly mounted expensive optic. Ring height, eye relief, level reticle, torque, bore-sighting, zero confirmation, and real practice all matter. If the scope does not come to your eye naturally, fix the setup before blaming the magnification range.

Practice at Realistic Distances

Practice at the distances and positions you expect to hunt from. A 3-9x scope can feel easy from a bench and different from a stand, kneeling position, or field rest. Confirm your zero and know where your confidence ends before the hunt.

Ethical Shot Fit

The right scope is the one that helps you identify the animal, pick a clean aiming point, and understand the background before the shot. A 3-9x scope may be plenty for a short field lane, but it may not give enough detail across a wide cutover or open hillside. If magnification, light, or reticle clarity leaves doubt, pass the shot.

Optics do not replace hunting judgment. Hunter education resources such as Hunter Ed emphasize preparation, safe decisions, and knowing your target. Treat the scope as one part of that system, along with rifle fit, ammunition, zero, shooting position, local laws, and the hunter’s real skill.

FAQ

Is a 3-9x scope enough for deer hunting?

Yes, for many deer hunters. It is especially useful in woods, food plots, and mixed terrain where shots are close to moderate range.

Is a 3-9x scope outdated?

No. Newer optics offer more choices, but a clear, reliable 3-9x scope still fits many deer rifles very well.

What magnification should I use in the woods?

Keep it on the low end, often around 3x, so you can find the deer quickly. Turn it up only when distance and time allow.

Should I buy more than 9x for deer?

Consider more magnification if you hunt open country or need more detail at distance. For many common deer setups, 9x is still enough when the shot is ethical and clear.

Final Takeaway

A 3-9x rifle scope is still a smart deer-hunting optic when your terrain and shot distances fit it. Choose clear glass, mount it correctly, practice at real hunting distances, and pass shots when the target is not clear enough. That matters more than chasing a bigger magnification number.

Hunting Rifle Maintenance Checklist

A good hunting rifle maintenance checklist starts with safety, then moves through unloading, inspection, cleaning, lubrication, optic/mount checks, ammunition storage, field protection, and post-hunt care. The goal is not to over-clean or modify the rifle; it is to keep the rifle reliable, protected, and ready for the next legal hunt or range session.

This guide is written for hunters who want a simple routine. Always follow your rifle manual, ammunition guidance, and local range rules. If you find damage, abnormal wear, stuck parts, a blocked bore, or repeated malfunctions, stop using the rifle and get help from a qualified gunsmith or manufacturer support.

Table of Contents

Safety-First Check

Unload and Verify

Before any maintenance, point the rifle in a safe direction, remove the magazine if applicable, open the action, and verify the chamber is clear according to the manual. Do not rely on memory or assume the rifle is unloaded because it was stored that way.

Separate Ammunition

Move live ammunition away from the cleaning bench. This keeps maintenance work focused and reduces the chance of a handling mistake. The NSSF firearm safety rules are a useful baseline before cleaning or inspecting any firearm.

Before the Hunt

Check the Bore and Action

Confirm the bore is clear, the action cycles normally, and the safety/control functions feel normal. If mud, snow, water, oil, or debris enters the bore, stop and clear it safely before firing.

Confirm Zero

A rifle can shift zero after travel, bumps, new ammunition, or mount changes. Confirm zero at the range before the season when possible. Do not discover an issue on a live animal.

Inspect Ammunition

Use ammunition that matches the rifle markings and manual. Avoid cartridges with corrosion, dents, loose bullets, oil contamination, or moisture damage. SAAMI’s firearm safety information is a good reference for safe ammunition matching and handling principles.

After the Hunt

Dry Moisture First

Rain, snow, sweat, and condensation can create rust risk. After a wet hunt, unload safely, wipe exterior metal, dry the stock and sling area, and let the rifle return to room temperature before long-term storage.

Look for Damage

Check for loose screws, cracked stock areas, damaged sling studs, shifted optic mounts, rust spots, and unusual marks on the bolt or cycling parts. If anything looks abnormal, stop and get qualified help.

Cleaning and Lubrication

Clean for the Conditions

A rifle used in dry, clean conditions may not need the same cleaning as one exposed to rain, dust, mud, salt air, or heavy shooting. Follow the manual for bore cleaning, solvent use, and parts that should or should not be lubricated.

Use Light Lubrication

Too much oil can attract dust, migrate into places it does not belong, or affect ammunition if stored carelessly. Use the correct lubricant sparingly and wipe away excess according to the manufacturer’s guidance.

Avoid Unneeded Disassembly

Field-stripping or basic owner cleaning is different from gunsmithing. Do not remove trigger components, bedding parts, or safety-related parts unless the manual allows it and you are qualified.

Optic and Mount Checks

Check that the scope, rings, bases, and lens covers are secure. Do not guess torque values. If screws are loose or mounts have shifted, follow the optic/ring instructions or ask a gunsmith. After any mount adjustment, confirm zero again.

Clean lenses with lens-safe tools only. Shirt sleeves, rough cloth, dirt, and paper products can scratch coatings. Keep caps closed during rough travel and wet weather.

Seasonal Maintenance Plan

Pre-Season

Before the season, inspect the rifle slowly instead of waiting until the night before opening day. Check screws, sling, optic, bore condition, ammunition, and zero. If you changed ammo, rings, bases, or scope settings, schedule range time before the hunt.

In-Season

During the season, keep the routine simple: protect the muzzle from debris, wipe off moisture, check the optic, and inspect the rifle after rough travel. A quick inspection after every outing prevents small problems from becoming field problems.

Post-Season

After the season, do a more complete cleaning and inspection before storage. Look for rust beginning under sling swivels, around scope mounts, near the muzzle, and in areas touched by wet hands or clothing. Store the rifle only after it is dry and protected.

Storage and Transport

Store the rifle unloaded, protected from unauthorized access, and in conditions that reduce rust risk. Project ChildSafe provides practical secure storage resources for firearm owners. Use a case for transport, but avoid leaving a damp rifle sealed in a soft case for long periods.

Common Maintenance Mistakes

  • Cleaning while rushed: hurried work leads to missed chamber checks, spilled solvent, and skipped inspection steps.
  • Using too much oil: excess lubricant can collect grit and move into places where it is not wanted.
  • Skipping the optic: loose rings or a shifted scope can ruin an otherwise good rifle setup.
  • Forgetting the sling and stock: water can hide around sling studs, stock inlets, and soft-case contact points.
  • Changing ammunition without checking zero: a new load can shift point of impact.
  • Storing after wet weather: a rifle that looks dry outside can still have moisture in hidden areas.

The best habit is to keep maintenance boring and repeatable. Use the same safe order every time: unload, verify, separate ammunition, inspect, clean only as needed, lubricate lightly, and store securely. A short written checklist can help you avoid skipping steps when travel or weather makes the day hectic.

Quick Checklist

  • Unload and verify chamber clear.
  • Move ammunition away from the cleaning bench.
  • Inspect bore, crown, action, and safety/control feel.
  • Check optic, rings, bases, sling, and stock condition.
  • Wipe moisture and dirt after every field outing.
  • Clean bore and action based on use and conditions.
  • Lubricate lightly according to the manual.
  • Inspect ammunition before loading for range or hunt use.
  • Confirm zero after travel, bumps, mount work, or ammo changes.
  • Store unloaded and secured from unauthorized access.

FAQ

Should I clean my hunting rifle after every hunt?

At minimum, inspect and wipe it down after every hunt. A full bore cleaning depends on weather, dirt, moisture, number of shots, and the rifle manual.

Can over-cleaning hurt accuracy?

Aggressive or improper cleaning can damage crowns, bores, or finishes. Use correct tools and follow the manual instead of scrubbing blindly.

When should I confirm zero?

Confirm zero before hunting season, after travel, after hard bumps, after scope/mount work, and when changing ammunition.

Should I oil the inside of the barrel for storage?

Follow the rifle manual and product instructions. If a bore is stored with oil, clear and inspect it according to the manual before firing.

What if my rifle gets soaked?

Unload safely, dry exterior surfaces, inspect for water in the bore or action, and clean/lubricate according to the manual. If you suspect hidden water, rust, or damage, get qualified help.

Final Takeaway

Hunting rifle maintenance is mostly about safe habits and regular inspection. Keep the rifle unloaded during maintenance, protect it from moisture and dirt, clean according to use, confirm zero when needed, and store it securely. A simple routine done consistently is better than rushed cleaning right before the hunt.

Exit mobile version