Is a 1-4×24 LPVO Good for Hunting?

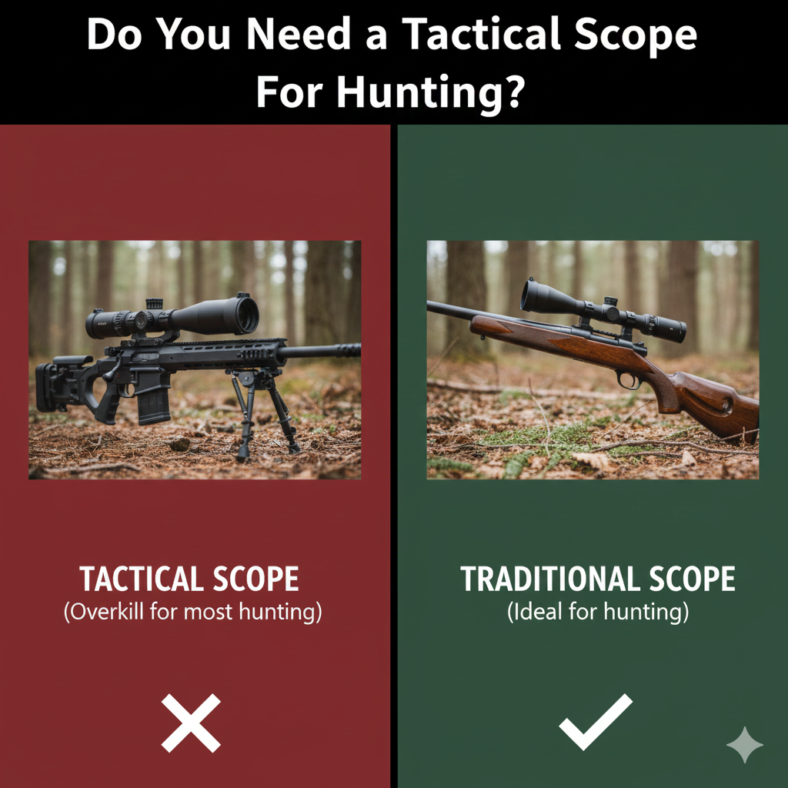
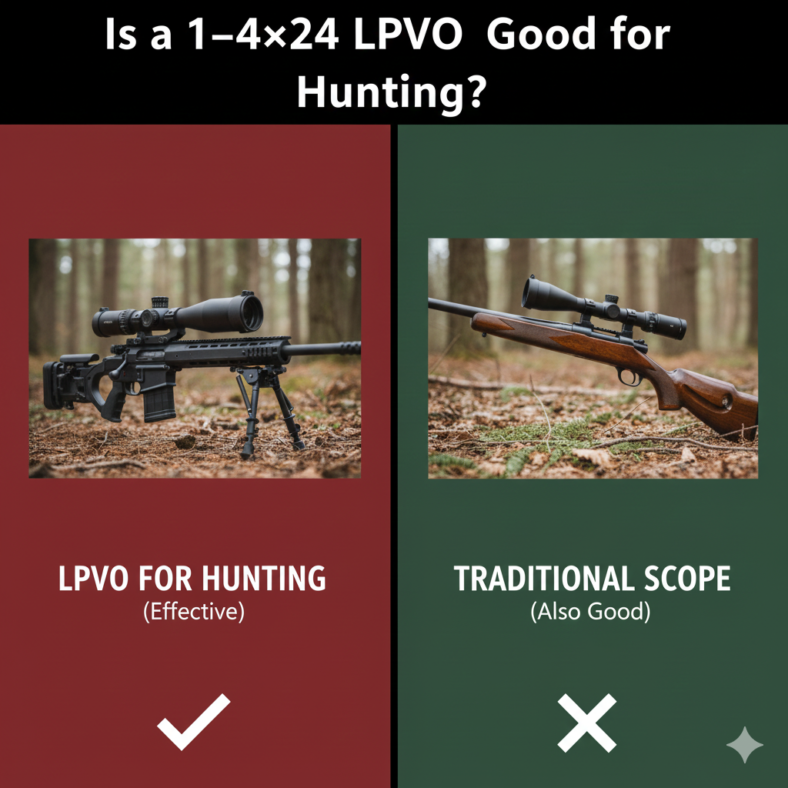
A 1-4×24 LPVO can be good for hunting when most shots are close to moderate range, the cover is thick, and you value fast target acquisition more than high magnification. It is not the best choice for long open-country shots, tiny targets, or hunters who need strong low-light detail at higher magnification.

The short answer: use a 1-4×24 LPVO for woods hunting, driven hunts, hogs, coyotes at closer ranges, and general rifles where speed matters. Choose a higher-magnification scope if your hunting regularly stretches beyond the range where 4x gives you enough target detail for an ethical shot.

Table of Contents

Quick Verdict

A 1-4×24 LPVO is best when your hunting is built around quick shots, brush, timber, food plots, stands, or short lanes. At 1x, it can feel much faster than a traditional high-power scope. At 4x, it gives enough precision for many realistic short-to-mid-range hunting shots. The limitation is simple: it gives up magnification and some low-light performance compared with larger scopes.

A 1-4×24 LPVO makes the most sense when close range, eye relief, reticle visibility, weight, and ethical shot distance all match your hunt.

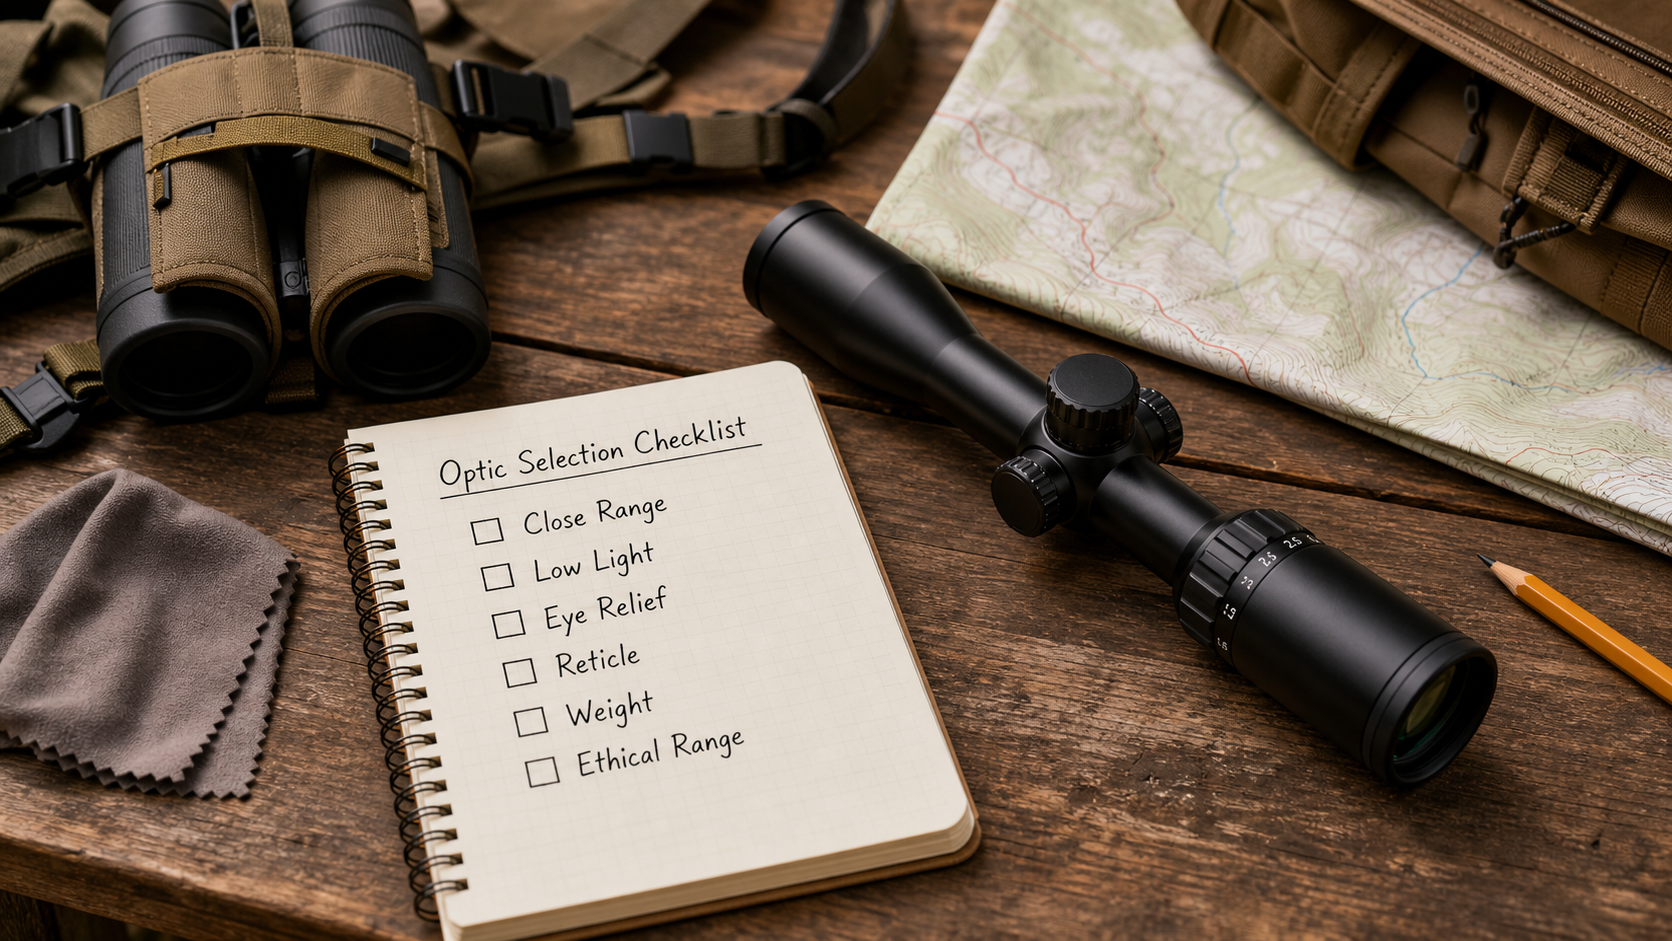
LPVO Hunting Selection Checklist

Before choosing a 1-4×24 LPVO, answer these questions. If most answers fit your hunting style, the optic makes sense. If several answers point toward longer distances or low-light identification, consider a 2-10x, 3-9x, 3-12x, or similar hunting scope instead.

  • Range: Are most shots close enough that 4x gives clear target detail?
  • Cover: Are you hunting timber, brush, stands, hog blinds, or short shooting lanes?
  • Speed: Do you need fast target acquisition more than high magnification?
  • Light: Do you hunt mostly legal daylight with enough visibility to identify the animal clearly?
  • Reticle: Can you see the aiming point quickly at 1x and precisely enough at 4x?
  • Ethical range: Can you pass shots when the target is too small or unclear at 4x?

What 1-4×24 Means

The “1-4x” part means the optic can adjust from roughly 1x to 4x magnification. The “24” refers to a 24 mm objective lens. In plain terms, it is a low-power variable optic designed for speed at the low end and modest precision at the high end. For background on how telescopic sights work, the telescopic sight overview is a useful general reference.

Why 1x Matters

At or near 1x, the optic can be faster for close targets because the image appears less zoomed-in. This can help when an animal steps out quickly at close range or when you are tracking movement through brush. It still requires safe firearm handling and target identification; speed is only useful after you know exactly what you are aiming at.

Why 4x Can Be Limiting

Four-power magnification is enough for many close and moderate shots, but it does not show the same detail as a higher-power hunting scope. If you need to judge small antler points, pick a precise spot at longer distance, or see through dim timber at the edge of legal light, 4x may feel limiting.

Where a 1-4×24 LPVO Works Well

This optic class works best when the hunting environment rewards quick handling. Thick woods, hog hunting, short food-plot lanes, and compact rifles are all natural fits. It can also make sense for hunters who keep shots conservative and want one optic that feels fast up close while still offering more precision than a red dot at distance.

Close-Range Deer and Hog Hunting

For close-range deer or hog hunting, a 1-4×24 LPVO can be comfortable because you can leave it low while scanning a lane, then turn up magnification if the animal stops and the shot is still inside your confident range. It is especially useful when targets may appear quickly and high magnification would make it harder to find the animal in the scope.

Compact Rifles and Field Carry

Many 1-4x optics are relatively compact compared with larger hunting scopes. That can help rifle balance, especially on carbines or lightweight field rifles. Balance still depends on the mount, rings, rifle, and optic weight, so check the full setup rather than judging by magnification alone.

Where It Falls Short

A 1-4×24 LPVO is not ideal for every hunt. If you hunt large fields, mountain country, crop edges with long shots, or small varmints, the top-end magnification may be too low. It also may not be the best choice if your biggest need is late-evening brightness and target detail.

The ethical answer is to match the optic to the shot you can clearly identify and place. Hunter education resources emphasize planning and preparation before the hunt; the same idea applies to optics. Use resources such as Hunter Ed for broader hunting safety and planning context, then match your scope to your real conditions.

Low-Light Reality

A 24 mm objective is not automatically bad in low light, but it has limits. Glass quality, coatings, reticle visibility, exit pupil, eye position, and magnification all matter. At lower magnification, the image may still look usable. At 4x, you may notice the difference compared with a larger-objective hunting scope in dim conditions.

Do not use magnification to compensate for poor target identification. If you cannot identify the animal and what is beyond it, do not shoot. The NSSF firearm safety rules are a good reminder that every hunting optics decision still sits under basic safety rules.

Reticle and Eye Relief

The reticle can make or break a 1-4x hunting optic. A center aiming point that is easy to find at low power is helpful for close shots, while enough detail at 4x helps with more deliberate shots. Illumination can help in some light, but it should not be your only way to see the reticle.

Eye Box and Mounting

Eye relief and eye box matter because hunting shots are not always taken from a perfect bench position. The optic should come up naturally when you shoulder the rifle. If you have to crawl the stock or shift your head to see a full image, the scope may be mounted poorly or may not fit your setup.

Who Should Use One

Choose a 1-4×24 LPVO if you hunt close cover, value quick sight acquisition, keep shots inside a conservative range, and want a compact optic with some magnification flexibility. Skip it if your hunts require frequent long shots, detailed antler judging at distance, or stronger low-light performance than a small objective can provide.

A good rule is this: if you would be comfortable with a red dot but want a little magnification, a 1-4x LPVO may be a smart upgrade. If you often wish for more detail than 4x can provide, choose a higher magnification hunting scope instead.

FAQ

Is a 1-4×24 LPVO good for deer hunting?

Yes, for close-range deer hunting in woods, brush, or short lanes. It is less ideal for long fields or situations where you need more magnification for detail.

How far is a 1-4x LPVO good for hunting?

There is no universal distance. It depends on the animal, light, reticle, rifle, shooter skill, and whether you can identify the target clearly. Use 4x only inside your confident ethical range.

Is a 1-4×24 LPVO good in low light?

It can be usable in reasonable light, especially at low magnification, but a larger hunting scope may show more detail in dim conditions. Never shoot if the target is not clearly identified.

Is an LPVO better than a 3-9x scope?

It depends on the hunt. A 1-4x LPVO is faster up close. A 3-9x scope is usually better when you need more magnification and target detail at distance.

Final Takeaway

A 1-4×24 LPVO is a strong hunting choice for close cover, fast shots, and compact rifle setups. It is not a do-everything optic. Buy it when your real hunting distances fit the 1-4x range, and pass on it when low-light detail or longer-range precision matters more.

Do You Need a Tactical Scope for Hunting?

Choosing the right rifle scope is one of the most important decisions a hunter can make. With the growing popularity of long-range shooting and military-inspired optics, many hunters now ask an important question: Do you really need a tactical scope for hunting, or is it overkill?

Tactical scopes are packed with advanced features like exposed turrets, complex reticles, and first focal plane designs. While these features are highly effective in precision shooting environments, they may not always be necessary or even practical for hunting. This article breaks down what a tactical scope is, how it differs from traditional hunting scopes, and whether it truly adds value in real-world hunting scenarios.

What Is a Tactical Scope?

A tactical scope is designed primarily for precision shooting, military, law enforcement, and long-range target applications. These scopes emphasize accuracy, repeatability, and precise adjustments rather than simplicity.

Key characteristics of tactical scopes include exposed elevation and windage turrets, detailed reticles with holdover markings, higher magnification ranges, and rugged construction. Many tactical scopes are built to handle constant dialing of adjustments and harsh environments without losing zero.

In contrast, traditional hunting scopes are designed for quick target acquisition, lightweight handling, and simplicity, focusing more on ethical shot placement than extreme precision.

Common Features of Tactical Scopes

Exposed Turrets for Precise Adjustments

Tactical scopes use large, exposed turrets that allow shooters to dial elevation and windage adjustments accurately. Each click corresponds to a precise movement, often measured in MOA or MIL.

While this is excellent for long-range shooting, most hunters rarely dial adjustments in the field. Hunting shots are often taken quickly, and dialing turrets can slow down the process.

Advanced Reticles

Tactical reticles include hash marks, grids, or “Christmas tree” designs that help estimate range, wind drift, and bullet drop. These reticles are invaluable for long-distance precision shooting.

However, in low-light hunting situations such as dawn or dusk complex reticles can appear cluttered and make it harder to place a clean shot on game.

First Focal Plane (FFP) Optics

Many tactical scopes use a first focal plane reticle, which changes size as magnification increases or decreases. This ensures that reticle measurements remain accurate at any zoom level.

For hunters, this feature can be useful at longer ranges, but it also means the reticle can become very thin at low magnification, reducing visibility in poor lighting conditions.

Higher Magnification Ranges

Tactical scopes often start at 5x or higher and extend beyond 20x magnification. While this is ideal for extreme long-range shooting, most hunting scenarios occur inside 300 yards, where lower magnification provides better field of view and faster target acquisition.

What Hunters Actually Need From a Scope

Before deciding whether a tactical scope is right for hunting, it’s important to understand what matters most in the field.

Hunters typically need a scope that is lightweight, reliable, easy to use, and effective in low-light conditions. Shots may need to be taken quickly, sometimes from awkward positions, and often without time to adjust turrets or analyze complex reticles.

In many cases, simplicity beats sophistication.

When a Tactical Scope Makes Sense for Hunting

Although tactical scopes are not essential for most hunters, there are situations where they can be beneficial.

Long-Range Hunting

If you regularly hunt in wide-open terrain such as mountains, plains, or deserts, where shots exceed 400 yards, a tactical scope can provide a real advantage. The ability to dial precise elevation adjustments and compensate for wind can increase shot accuracy at extended distances.

Precision-Focused Hunters

Some hunters enjoy a technical, data-driven approach to shooting. If you practice long-range shooting, know your ballistic data, and are comfortable using turret adjustments and advanced reticles, a tactical scope may suit your hunting style.

Dual-Purpose Rifles

If your rifle is used for both hunting and long-range target shooting, a tactical scope can serve both purposes, eliminating the need to switch optics.

When a Tactical Scope Is Not Necessary

For many hunters, a tactical scope may add more complexity than value.

Short to Medium Range Hunting

In dense woods or brush, shots are often under 200 yards. In these situations, a simple 2-7x or 3-9x hunting scope is faster, lighter, and easier to use.

Weight Considerations

Tactical scopes are usually heavier due to their reinforced construction and larger components. Carrying extra weight over long distances can lead to fatigue, especially during backcountry hunts.

Low-Light Performance

Traditional hunting scopes often have simpler reticles and superior low-light clarity. In critical moments at dawn or dusk, a clean reticle and bright image can be more valuable than advanced tactical features.

Cost vs. Benefit

Tactical scopes are generally more expensive. If you’re not using their advanced features regularly, you may be paying for capabilities you don’t need.

Tactical Scope vs Hunting Scope: Key Differences

The biggest difference between tactical and hunting scopes lies in their intended use. Tactical scopes prioritize precision, adjustability, and repeatability. Hunting scopes prioritize speed, clarity, and simplicity.

A hunting scope is often lighter, easier to operate, and optimized for real-world hunting conditions. Tactical scopes excel in controlled environments where time and precision matter more than speed.

Practical Questions to Ask Before Choosing

Before buying a tactical scope for hunting, ask yourself:

How far do I realistically shoot game?
Do I regularly dial turrets in the field?
Do I hunt in low-light conditions often?
Is weight a concern on long hunts?
Do I understand and practice using advanced reticles?

Honest answers to these questions will guide you toward the right optic.

Final Verdict: Do You Need a Tactical Scope for Hunting?

Most hunters do not need a tactical scope. A high-quality hunting scope will meet the needs of the majority of hunting situations, offering better usability, lighter weight, and faster target acquisition.

However, if you hunt at long distances, enjoy precision shooting, and fully understand how to use tactical features, a tactical scope can be a valuable tool.

In the end, the best scope is the one that matches your hunting style, environment, and skill level—not the one with the most features.

How to Improve Shooting Accuracy Safely

Improving shooting accuracy starts with safe handling and repeatable fundamentals: a stable position, correct sight alignment and sight picture, smooth trigger control, steady breathing, follow-through, and accountable practice. No technique promises a specific result, because accuracy depends on the shooter, firearm, ammunition, conditions, and practice quality.

This guide is for sport and recreational range shooting. It stays at the fundamentals level and does not cover advanced field methods. Always follow your range rules, firearm manual, and qualified instructor guidance first.

Safety Comes Before Accuracy

Safe gun handling is the foundation of every accuracy session. Treat every firearm as if it is loaded, keep your finger off the trigger until your sights are on target and you intend to fire, keep the muzzle in a safe direction, and be sure of your target and what is beyond it. The NSSF firearm safety rules are a useful public reference for these fundamentals.

Accuracy practice also requires the correct ammunition for your firearm, eye and ear protection, clear range procedures, and awareness of the backstop. If you are unsure about loading, unloading, clearing, or checking your firearm, stop and ask qualified help before continuing.

Core Accuracy Fundamentals

A small set of fundamentals drives accuracy across most firearm disciplines. They work together, so consistency across the whole process matters more than chasing one trick.

FundamentalBeginner FocusWhy It Matters
Position or stanceStable, repeatable body supportReduces unnecessary movement
Sight alignmentConsistent relationship between sights and targetHelps aim stay repeatable
Trigger controlSmooth press without disturbing sightsReduces pulled shots
BreathingCalm, natural rhythmReduces body tension
Follow-throughMaintain position after the shotPrevents relaxing too early

Position or stance

A stable position gives every other fundamental something to build on. For standing range work, many shooters start with a balanced stance, feet about shoulder-width apart, weight slightly forward, and a relaxed but firm hold. Our shooting stance for beginners guide covers that foundation in more detail.

Sight alignment and sight picture

Sight alignment is the relationship between the sights, and sight picture is that alignment placed on the target. A consistent sight picture makes shot placement easier to evaluate over time.

Trigger control

Trigger control means pressing smoothly without disturbing the sights. Jerking, slapping, or anticipating recoil can move the firearm before the shot breaks. For more detail, read our guide on the importance of trigger control for shooting accuracy.

Follow-through

Follow-through means holding your position, grip, and focus for a moment after the shot rather than relaxing immediately. It helps make each shot part of the same repeatable process.

Rifle, Handgun, and Shotgun Differences

Accuracy fundamentals overlap, but rifle, handgun, and shotgun shooting differ enough that general advice should stay cautious. Treat these notes as orientation, not discipline-specific instruction.

  • Rifles: Stability, support, cheek placement, and consistent shoulder position matter.
  • Handguns: Grip consistency, stance, trigger control, and sight management carry extra weight.
  • Shotguns: Smooth mount, target focus, movement, and follow-through are common themes.

The NSSF shooting resources are a helpful starting point for understanding organized shooting activities and safety context.

Practice Plans and Training Classes

Accountable practice usually helps more than equipment changes for newer shooters. Work slowly, record what you are doing, and compare targets over several sessions instead of judging from one group. Add distance, speed, or complexity only when the basics are consistent.

A qualified instructor can spot habits that are hard to feel on your own, such as flinch, uneven grip pressure, or inconsistent trigger movement. If practice at home ever becomes part of your routine, review secure storage and safe handling resources such as Project ChildSafe, and follow your firearm manual.

Common Accuracy Mistakes

  • Trying to shoot faster than the fundamentals allow.
  • Changing equipment before checking technique.
  • Using an inconsistent stance, grip, or support position.
  • Anticipating recoil and disturbing the firearm before the shot breaks.
  • Relaxing before follow-through is complete.
  • Ignoring range safety while focusing too hard on the target.

Before each range session, review our shooting range safety rules guide so safety remains the first habit, not an afterthought.

Frequently Asked Questions

What improves shooting accuracy the most?

No single factor improves accuracy by itself. For many newer shooters, consistent position and smooth trigger control are common areas where careful practice can help.

Are accuracy fundamentals the same for rifle, handgun, and shotgun?

The core ideas overlap, but each firearm type has different emphasis. Rifles reward stability, handguns reward grip and trigger consistency, and shotguns reward mount and movement.

Will better equipment make me more accurate?

Equipment can matter, but technique is usually the larger variable for newer shooters. Work on fundamentals with qualified guidance before assuming a firearm or accessory is the limiting factor.

How long does it take to improve shooting accuracy?

It varies by shooter, firearm, ammunition, and practice quality. Consistent, safe, accountable sessions are more useful than occasional unfocused practice.

Final Range Takeaway

Better accuracy starts with safety, repeatability, and honest practice. Keep the muzzle in a safe direction, follow range commands, use the correct ammunition and protective gear, and build fundamentals slowly with qualified help when needed.

What Is Gun Caliber? A Simple Beginner Explanation

Gun caliber usually describes bullet or bore diameter, but cartridge names are not always simple measurements. That is why beginners can see names like 9mm, .22 LR, .308 Winchester, or 7.62x39mm and feel like the system is harder than it should be. The most important rule is simple: the ammunition must match the firearm markings, the ammunition packaging, and the owner’s manual.

This guide explains caliber in plain language. It is not a recommendation guide, not a technical ammunition-building guide, and not a substitute for firearm markings, manufacturer instructions, range rules, or qualified instruction.

Quick Beginner Summary

  • Caliber usually refers to bullet or bore diameter.
  • A cartridge is the complete round of ammunition, not just the diameter.
  • Cartridge names mix measurement, history, and naming conventions.
  • Similar names are not automatically interchangeable.
  • Always verify ammunition against the firearm markings, packaging, and manual.

Caliber vs Cartridge

People often use caliber and cartridge as if they mean the same thing, but they are different ideas. Caliber generally refers to diameter. A cartridge is the complete round of ammunition, including the case, primer, propellant, and bullet. A cartridge name may include a caliber figure, but the full name matters because it identifies the specific ammunition type.

For terminology, the SAAMI glossary is a useful authority because SAAMI publishes firearm and ammunition industry standards and definitions. For a beginner, the practical point is this: caliber gives part of the story, but cartridge designation tells you much more.

TermPlain MeaningBeginner Takeaway
CaliberA diameter measurement or naming conventionHelpful, but not enough by itself
CartridgeThe complete round of ammunitionThe full cartridge designation must match the firearm
Firearm markingThe designation marked on the firearmUse it with the manual and ammunition box before loading

Why Caliber Names Can Confuse Beginners

Caliber names developed over a long time. Some names come from bullet diameter, some from case design, some from older conventions, and some from manufacturer or military naming history. That is why the number in a name is not always a simple literal measurement.

This is also why similar-looking names can be risky for beginners. A name that looks close on a shelf is not proof that the ammunition is correct for your firearm. Compatibility is a manual-and-marking question, not a guess from memory.

Metric vs Inch-Based Names

You will see cartridge names in metric measurements and inch-based measurements. Metric names often use millimeters, such as 9mm or 7.62mm. Some metric names include another number for case length. Inch-based names use decimals such as .22, .30, .357, or .45.

The measurement system is only part of the label. Do not assume that two cartridges are the same because their numbers seem close, and do not assume that one naming system translates neatly into the other. The correct source is still the firearm marking, owner’s manual, and ammunition packaging.

Why Matching Ammunition Matters

A firearm is designed around a specific cartridge or a clearly stated set of compatible cartridges. Using the wrong ammunition can damage equipment and injure people. A cartridge that appears similar, or even one that seems to fit, is not automatically safe.

Safety organizations make this point directly. The NSSF rules of safe gun handling include using only the correct ammunition for your firearm. SAAMI also publishes firearm safety rules that reinforce the same manual-first mindset.

For more on this specific safety check, read our guide to choosing the right ammunition for your firearm.

Common Beginner Mistakes

  • Relying on memory: A remembered caliber name is not enough. Check the marking and box.
  • Assuming close names match: Similar numbers or similar words do not prove compatibility.
  • Using fit as a test: A cartridge appearing to fit is not proof that it is safe.
  • Ignoring the manual: The owner’s manual and manufacturer guidance are part of the safety check.
  • Mixing loose ammunition: Keep ammunition organized and clearly identified.

How to Check the Right Ammunition Safely

Start with the cartridge designation marked on the firearm. Depending on the firearm, that marking may be on the barrel, slide, frame, or receiver. Then compare that exact designation with the owner’s manual and the ammunition box. If the markings and packaging do not clearly match, do not use that ammunition.

If anything is unclear, stop and ask a qualified range officer, instructor, gunsmith, or the firearm manufacturer. This is not a place to guess. A few minutes of verification is much better than trying to solve a compatibility question at the firing line.

Where Caliber Fits in Safe Shooting

Caliber knowledge helps you understand ammunition labels, compare terminology, and ask better questions. It does not replace the rest of firearm safety. You still need safe handling, safe storage, range commands, eye and ear protection, and clear ammunition organization.

If you are new to shooting, pair this article with our shooting range safety rules overview before live-fire practice.

Frequently Asked Questions

What does caliber mean in simple terms?

Caliber usually refers to bullet or bore diameter, expressed in inches or millimeters. It is part of how ammunition is described, but it is not always the complete cartridge designation.

Is caliber the same as cartridge?

No. Caliber is a diameter-related term. A cartridge is the complete round of ammunition, including the case, primer, propellant, and bullet.

Why are caliber names confusing?

Names come from different measurement systems, historical conventions, case designs, and manufacturer naming habits. That is why a cartridge name is not always a literal measurement.

Are similar cartridge names interchangeable?

Not unless your firearm markings or manual clearly state that they are compatible. Similar names, close numbers, or physical fit do not prove safety.

How do I know which ammunition my firearm uses?

Read the cartridge designation marked on the firearm, confirm it in the owner’s manual, and match it to the ammunition box and headstamp. If you are unsure, ask a qualified professional before loading or firing.

Final Safety Reminder

Caliber is a useful term, but it is not enough by itself. Cartridge names can be historical and confusing, so the safest habit is to verify the exact ammunition designation every time. Match the firearm marking, manual, ammunition packaging, and headstamp, and ask for qualified help whenever something is unclear.

How a Semi-Automatic Pistol Works

A semi-automatic pistol is one of the most widely used firearms in the modern world, yet its internal operation remains a mystery to many people. Whether used for self-defense, law enforcement, military service, or recreational shooting, this type of handgun relies on a carefully engineered mechanical cycle that allows it to fire a single round with each trigger pull while automatically loading the next cartridge. Understanding how a semi-automatic pistol works is essential for safety, responsible handling, and a deeper appreciation of firearm engineering.

Unlike revolvers or manual-action firearms, a semi-automatic pistol uses the energy created by firing a round to reset itself. This process happens extremely fast, often in milliseconds, but it involves multiple mechanical steps occurring in perfect sequence. From the moment the trigger is pulled to the instant a new round is chambered, the pistol performs a complex series of actions designed to be reliable, repeatable, and safe.

What Is a Semi-Automatic Pistol?

A semi-automatic pistol is a handgun that automatically cycles the firing mechanism, extracts and ejects the spent cartridge case, and chambers a fresh round from the magazine after each shot. The term “semi-automatic” means the firearm fires only one bullet per trigger pull, even though the reloading process happens automatically. This is a crucial distinction that separates semi-automatic pistols from fully automatic firearms, which continue firing as long as the trigger is held down.

Most modern pistols fall into this category because they offer a balance between control, efficiency, and capacity. The shooter remains in full command of each shot while benefiting from rapid follow-up fire without manual reloading between rounds.

Main Components of a Semi-Automatic Pistol

To understand how the pistol operates, it is necessary to understand its primary components and the roles they play in the firing cycle. The frame forms the foundation of the firearm and houses the trigger assembly, grip, and magazine well. The slide is the upper portion that moves back and forth during firing and contains the firing pin or striker, extractor, and ejection port. The barrel is the tube through which the bullet travels, and it contains rifling that stabilizes the projectile.

Inside the pistol is the recoil spring, which absorbs energy when the slide moves backward and then pushes the slide forward again. The magazine, typically located inside the grip, stores ammunition and feeds cartridges upward into the path of the slide. Each of these components must function precisely for the pistol to operate correctly.

How Ammunition Is Loaded and Chambered

The operation of a semi-automatic pistol begins before the first shot is fired. Ammunition is loaded into the magazine, and the magazine is inserted into the grip of the pistol until it locks into place. When the shooter pulls the slide backward and releases it, the recoil spring pushes the slide forward with force. As it moves forward, the slide strips the top cartridge from the magazine and guides it into the chamber of the barrel.

Once the cartridge is fully seated in the chamber, the barrel and slide lock together in most designs. At this point, the pistol is considered loaded and ready to fire, provided the trigger is pulled and all safety systems allow the firing mechanism to function.

Trigger Pull and Firing Mechanism

Pulling the trigger initiates the firing process. Depending on the pistol’s design, the trigger either releases a striker or drops a hammer. In striker-fired pistols, which are extremely common today, the trigger releases a spring-loaded firing pin assembly. In hammer-fired pistols, the trigger allows the hammer to strike the firing pin.

When the firing pin hits the primer at the rear of the cartridge, it ignites a small explosive compound. This ignition sets off the main gunpowder charge inside the cartridge casing. The burning powder rapidly expands into gas, creating extremely high pressure inside the sealed chamber.

Bullet Travel and Barrel Dynamics

The expanding gas generated by the ignited gunpowder forces the bullet forward out of the cartridge and into the barrel. As the bullet travels down the barrel, it engages the rifling, which consists of spiral grooves cut into the interior surface. These grooves cause the bullet to spin as it moves forward, stabilizing it during flight and improving accuracy.

Once the bullet exits the muzzle, the projectile continues toward the target, while the remaining energy inside the firearm begins the next phase of operation: recoil-driven cycling.

Recoil Energy and Slide Movement

At the moment the bullet is driven forward, an equal amount of force pushes backward against the pistol. This is the recoil force. In a semi-automatic pistol, this recoil energy is harnessed to move the slide rearward. In most designs, the barrel and slide are locked together briefly during the initial phase of recoil to ensure that chamber pressure drops to a safe level before the action opens.

After traveling a short distance together, the barrel unlocks, often tilting slightly downward, while the slide continues moving rearward on its own. This rearward motion compresses the recoil spring and sets the stage for extraction and ejection.

Extraction and Ejection of the Spent Cartridge

As the slide moves backward, the extractor, a small hooked component on the slide, grips the rim of the spent cartridge case and pulls it from the chamber. When the casing reaches the ejection port, it strikes the ejector, which causes the casing to pivot and be expelled out of the pistol. This ejection happens rapidly and clears the chamber so that a new round can be loaded.

Simultaneously, the rearward slide movement re-cocks the firing mechanism, resetting it so the pistol can fire again when the trigger is pulled the next time.

Feeding and Chambering the Next Round

Once the slide reaches its rearward limit, the recoil spring pushes it forward again. As the slide moves forward, it strips the next cartridge from the top of the magazine. The cartridge is guided up the feed ramp and into the chamber. The barrel and slide then lock together once more, sealing the chamber and preparing the pistol for the next shot.

This entire cycle—firing, extraction, ejection, reloading, and resetting takes place in fractions of a second and repeats every time the trigger is pulled, as long as there is ammunition in the magazine.

Trigger Reset and Controlled Fire

After a shot is fired, the trigger must be released forward slightly before it can be pulled again. This process is known as trigger reset. Trigger reset ensures controlled fire by preventing the pistol from discharging more than one round per trigger pull. Once the trigger resets, the shooter can fire the next shot, continuing the semi-automatic cycle.

Built-In Safety Mechanisms in Semi-Automatic Pistols

Modern semi-automatic pistols are designed with multiple internal safety features to prevent accidental discharge. These safeties often include firing pin blocks that prevent the firing pin from moving forward unless the trigger is pulled, drop safeties that stop the gun from firing if it is dropped, and trigger safeties that require deliberate finger pressure. Some models also include manual safeties, magazine disconnects, and loaded chamber indicators for added protection.

Why Semi-Automatic Pistols Are So Popular

The widespread adoption of semi-automatic pistols is driven by their efficiency, reliability, and capacity. Compared to revolvers, they typically hold more ammunition, reload faster, and offer slimmer profiles for easier carry. Advances in materials and engineering have made modern pistols highly durable and capable of functioning reliably under harsh conditions.

Conclusion

A semi-automatic pistol is a finely tuned mechanical system that transforms explosive force into controlled motion. Every trigger pull initiates a precise sequence of events that allows the firearm to fire, eject, reload, and reset automatically. Understanding how a semi-automatic pistol works improves safety awareness, handling confidence, and appreciation for the engineering behind modern firearms.

Pistol Parts Explained: A Beginner-Friendly Guide

A pistol has a frame, slide, barrel, chamber, trigger, sights, magazine, grip, recoil system, extractor, ejector, and safety-related controls. Those parts work together to load, fire, extract, eject, and prepare the next round, but the exact layout depends on the pistol design. This guide explains the common parts in plain language so beginners can understand terminology without treating it like a repair manual.

Before handling any firearm, keep it pointed in a safe direction, keep your finger off the trigger, remove the magazine if applicable, open the action, and verify the chamber is clear according to the firearm manual. If you are unsure, stop and ask a qualified instructor, range officer, gunsmith, or the manufacturer.

Table of Contents

How Pistol Parts Work Together

Most modern pistols are designed around a simple sequence: the magazine holds cartridges, the action feeds one cartridge into the chamber, the firing system ignites it when the trigger is pressed, the slide or action cycles, the spent case is extracted and ejected, and the next round is prepared.

That broad sequence is useful for understanding terminology, but it is not a substitute for your owner’s manual. Different pistols use different locking systems, safeties, takedown procedures, and maintenance requirements. The NSSF firearm safety rules are the baseline before any inspection or cleaning: treat every firearm carefully, control muzzle direction, and keep your finger away from the trigger until ready to shoot.

For new shooters, part names are most useful when they make range instruction easier to follow. If an instructor says to lock the slide open, check the chamber, seat the magazine, or align the front sight, you should know the area they mean before live fire begins.

Major External Pistol Parts

Frame

The frame is the main body of the pistol. It supports the grip, trigger area, slide rails, and many controls. On many pistols, the frame is the serialized firearm component, although legal definitions can vary by country and jurisdiction.

Slide

The slide is the moving upper portion on many semi-automatic pistols. It houses or supports the barrel, firing system parts, extractor, sights, and recoil system. During firing, it cycles rearward and forward to help eject the spent case and chamber the next round.

Barrel and Chamber

The barrel directs the bullet as it leaves the firearm. The chamber is the rear part of the barrel area where the cartridge sits before firing. Always verify the chamber is clear when unloading or inspecting a pistol; do not rely only on removing the magazine.

Grip

The grip is where the shooter holds the pistol. Grip size, texture, backstrap shape, and angle affect control and comfort. A pistol should let the shooter reach the trigger safely without shifting the hand into an unstable position.

Internal and Moving Parts

Trigger

The trigger starts the firing sequence, but it should not be treated casually. Trigger weight, travel, reset, and safety design vary widely. Do not modify trigger parts unless you are qualified and the work follows the manufacturer’s guidance.

Firing Pin or Striker

The firing pin or striker is the part that helps ignite the cartridge primer. Hammer-fired pistols and striker-fired pistols use different systems, but both rely on precise timing and proper maintenance. Light strikes, repeated misfires, or unusual trigger behavior should be inspected by a qualified person.

Extractor and Ejector

The extractor helps pull the spent case from the chamber. The ejector helps kick it out of the firearm as the action cycles. If cases fail to extract or eject, the cause may be ammunition, fouling, magazine issues, worn parts, or technique. Repeated failures deserve inspection, not guesswork.

Recoil Spring and Guide Rod

The recoil system helps control slide movement and return the slide forward after cycling. Springs are wear items. The correct replacement interval depends on the pistol model, caliber, ammunition, and round count, so follow the manual rather than a universal schedule.

Magazine and Ammunition Path

The magazine stores cartridges and presents them for feeding. It commonly includes a magazine body, spring, follower, feed lips, and base plate. A weak spring, damaged feed lips, dirty magazine, or incorrect magazine can cause feeding problems.

Use the correct ammunition for the firearm and follow the manufacturer’s instructions. SAAMI firearm safety information is a useful authority for understanding why correct ammunition matching, inspection, and safe handling matter.

Sights, Controls, and Safety Features

Sights

Most pistols use front and rear sights, though some accept optics. Sights help align the pistol with the target, but safe shooting still depends on training, backstop awareness, trigger control, and knowing what is beyond the target.

Magazine Release and Slide Stop

The magazine release lets the magazine be removed. The slide stop or slide lock can hold the slide open on many pistols. Controls may be ambidextrous, reversible, or model-specific. Beginners should learn them with an unloaded firearm under qualified supervision.

Manual and Passive Safeties

Some pistols have manual thumb safeties, grip safeties, trigger safeties, firing-pin blocks, or other internal systems. A safety feature is not a replacement for safe handling. The user is still responsible for muzzle direction, trigger discipline, secure storage, and following the manual.

Maintenance and Inspection Boundaries

Basic cleaning and inspection help keep a pistol reliable, but there is a line between owner maintenance and gunsmithing. Field-strip only as the manual allows. Do not polish, file, bend, or replace critical parts unless you are qualified and the work follows manufacturer guidance.

Secure storage is also part of responsible ownership. Project ChildSafe provides firearm storage resources designed to reduce unauthorized access. Understanding pistol parts is useful, but safe storage and handling are the higher priority.

If a pistol has repeated malfunctions, visible cracks, abnormal wear, a stuck case, a possible bore obstruction, or controls that do not work normally, stop using it and get qualified help.

FAQ

What is the most important pistol part to understand first?

Start with the chamber, magazine, muzzle, and trigger. Those terms connect directly to loading, unloading, muzzle control, and trigger discipline, which are the safety basics every beginner needs.

Is the magazine the same thing as the clip?

No. A magazine feeds cartridges into the firearm. A clip is a different loading aid used with some firearm designs. Most modern pistols use detachable magazines.

Can I replace pistol parts myself?

Only do owner-level maintenance allowed by your manual. Parts that affect firing, safety, lockup, extraction, or trigger function should be handled by a qualified gunsmith or manufacturer support unless you are properly trained.

Why does the slide lock open?

On many semi-automatic pistols, the slide locks open after the last round because the magazine follower engages the slide stop. Some malfunctions or magazine issues can also affect this behavior.

Do all pistols have the same parts?

No. Semi-automatic pistols, revolvers, hammer-fired pistols, striker-fired pistols, rimfire pistols, and competition designs can differ. Use this guide for terminology, then rely on the manual for your exact firearm.

Final Takeaway

Learning pistol parts helps you understand safety instructions, range commands, maintenance language, and malfunction descriptions. Keep the focus practical: know the frame, slide, barrel, chamber, magazine, trigger, sights, and controls, then let the firearm manual and qualified instruction guide anything beyond basic identification.

Shooting Range Etiquette: Safe & Responsible Guide

Shooting ranges are shared environments where safety, discipline, and mutual respect must always come first. Regardless of whether you are a beginner handling a firearm for the first time or an experienced shooter refining your skills, understanding and practicing proper shooting range etiquette is essential. Etiquette goes beyond written rules; it reflects awareness, responsibility, and consideration for everyone present. A shooter who follows proper etiquette not only protects lives but also contributes to a positive and professional range culture.

At its core, shooting range etiquette exists to prevent accidents, reduce misunderstandings, and ensure that every person at the range feels safe and respected. Firearms are powerful tools, and even a small lapse in judgment can have serious consequences. Ranges bring together individuals with different experience levels, and etiquette helps create an environment where those differences do not become safety risks.

Understanding the Importance of Safety-First Behavior

Every shooting range is built on a foundation of safety. Before any etiquette considerations come into play, a shooter must fully understand that firearms must be treated with constant caution. This mindset begins the moment you step onto range property. Even when a firearm is unloaded, it must always be handled as if it were capable of firing. This attitude prevents careless handling and reinforces muscle memory that keeps both you and others safe.

Muzzle awareness is one of the most critical elements of range behavior. A firearm should always be pointed in a safe direction, usually downrange toward the targets. Turning around with a firearm in your hands, even briefly, can cause panic and lead to serious consequences. Good etiquette demands that shooters remain mindful of where their firearm is pointed at all times.

Trigger discipline is equally important. Keeping your finger off the trigger until you are actively ready to fire reduces the risk of unintentional discharges. Experienced shooters treat this as second nature, and new shooters are expected to learn and follow it immediately.

Respecting the Authority of the Range Officer

Range officers play a vital role in maintaining order and enforcing safety standards. Their instructions are not optional, and proper etiquette requires shooters to listen carefully and comply without hesitation. A range officer’s job is to observe potential hazards before they turn into accidents, which means their commands must be followed promptly.

Arguing with a range officer, ignoring instructions, or continuing to shoot after a command has been given demonstrates poor etiquette and unsafe behavior. If a shooter is confused or unsure about a rule, the appropriate action is to ask politely for clarification. Respectful communication with range staff helps create a cooperative environment and shows maturity as a responsible firearm owner.

Proper Conduct on the Firing Line

The firing line is where etiquette matters most because it is where active shooting takes place. When you are on the firing line, your attention should be focused on your firearm, your target, and the commands being given. Casual conversations, distractions, or unnecessary movement can interfere with other shooters’ concentration and increase risk.

Firearms should only be loaded at the firing line when the range is declared hot. Handling firearms behind the line without permission is unsafe and typically against range rules. Shooters are also expected to use the correct ammunition for their firearm, as using the wrong caliber can cause equipment failure or injury.

Controlled shooting behavior is another aspect of firing line etiquette. Even if rapid fire is permitted, shooters must remain in control of their firearm and ensure that rounds are hitting the intended target safely. Reckless or uncontrolled shooting is not only dangerous but also disruptive to others.

Cease Fire Awareness and Discipline

One of the most important moments where etiquette is tested is during a cease fire. When a cease fire is called, all shooters must immediately stop firing, unload their firearms, and make them safe according to the range’s procedures. This usually includes locking the action open and stepping away from the firing line.

During a cease fire, shooters should not touch their firearms for any reason. Even minor adjustments can make others nervous and create unsafe conditions. Good etiquette means respecting the pause and allowing everyone to check targets or move downrange without concern.

Handling Firearm Malfunctions Calmly

Malfunctions are a normal part of shooting, but how they are handled reflects a shooter’s experience and etiquette. When a malfunction occurs, the firearm should remain pointed downrange. The shooter should not rush, panic, or turn around while holding the firearm. If assistance is needed, signaling to the range officer and waiting for guidance is the safest course of action.

Calm and controlled behavior during malfunctions reassures others and prevents small issues from turning into dangerous situations.

Courtesy Toward Other Shooters

Shooting ranges are shared spaces, and good etiquette means being considerate of those around you. Standing too close to another shooter, leaning over their bench, or watching them shoot without permission can make people uncomfortable. Everyone deserves personal space and the ability to focus.

Offering advice to other shooters should be done cautiously. While some may appreciate help, unsolicited advice can be distracting or unwelcome. Etiquette suggests that advice should only be given when requested or when there is an immediate safety concern.

Noise management is another often-overlooked aspect of etiquette. Loud conversations, phone calls, or unnecessary movement behind the firing line can break concentration. Quiet, respectful behavior contributes to a safer and more enjoyable environment for everyone.

Caring for Targets and Range Property

Ranges provide specific target systems, backstops, and equipment designed to handle gunfire safely. Shooters must use only approved targets and place them at designated distances. Shooting target frames, carriers, or other range equipment is both dangerous and disrespectful.

After finishing a shooting session, proper etiquette includes removing used targets and cleaning up your area. Leaving debris behind creates additional work for staff and reflects poorly on the shooting community as a whole.

Indoor vs. Outdoor Range Etiquette

Indoor ranges often require stricter discipline due to confined space, amplified noise, and controlled ventilation. Shooters must wear eye and ear protection at all times and strictly follow ammunition restrictions. Awareness of surroundings is critical because mistakes indoors carry greater risk.

Outdoor ranges may feel more relaxed, but etiquette remains just as important. Weather conditions, uneven ground, and longer distances demand heightened awareness and adherence to cold and hot range procedures.

Introducing New Shooters to the Range

When experienced shooters bring beginners to a range, etiquette includes taking responsibility for their safety and behavior. New shooters should be taught safety rules before handling firearms, not after a mistake occurs. Close supervision and patient guidance help ensure a positive introduction to the sport.

Representing Responsible Gun Ownership

Shooting range etiquette is a reflection of character. A shooter who acts responsibly helps strengthen public trust in shooting sports and firearm ownership. Poor behavior, on the other hand, damages the reputation of the entire community.

By demonstrating discipline, awareness, and respect, shooters help ensure that ranges remain open, welcoming, and safe for future generations.

Conclusion

Shooting range etiquette is not about limiting enjoyment or enforcing unnecessary rules. It is about creating an environment where everyone can safely pursue their interest in shooting sports. When shooters respect safety principles, follow commands, and show courtesy to others, the range becomes a place of learning, focus, and shared responsibility.

How to Grip a Handgun Correctly

A correct handgun grip should let you control the pistol without fighting it. In simple terms, place the firing hand high on the backstrap, keep the wrist firm, wrap the support hand into the open space on the grip, angle both thumbs safely forward along the frame area, and press the trigger without changing muzzle direction. Grip should feel secure, repeatable, and safe, not painful or forced.

This guide explains the beginner fundamentals of handgun grip for range practice and training language. It is not a replacement for qualified instruction, your firearm manual, or live supervision. Before handling any firearm, keep the muzzle directed safely, keep your finger off the trigger until ready to shoot, and verify the firearm condition according to the manual and range rules.

Table of Contents

Why Handgun Grip Matters

Grip is one of the first skills a handgun shooter should learn because it affects control, sight movement, trigger press, and follow-up shots. A poor grip can make the pistol shift in the hand, push shots off target, or make the shooter overcorrect after recoil.

Good grip does not mean squeezing as hard as possible. It means building stable contact with the firearm so the sights return consistently and the trigger can move without dragging the muzzle away from the target. The foundation still starts with safety. The NSSF firearm safety rules are worth reviewing before any grip work because muzzle control and trigger discipline come before technique.

Basic Two-Hand Handgun Grip

Start With the Firearm Safe and Clear

Practice grip only under safe conditions. At a range, follow the range officer’s commands. At home, use only the unloaded handling procedure allowed by your manual, remove ammunition from the room, and avoid practicing if you are tired, distracted, or unsure.

Use a High, Stable Grip

The firing hand should sit high on the backstrap so the pistol is aligned with the forearm. A high grip helps manage recoil because the pistol has less room to rotate upward. Do not place the hand so high that it contacts the slide or moving parts.

Fill the Open Space With the Support Hand

After the firing hand is placed, the support hand should fill the open space on the grip panel. The support hand is not decoration; it helps control the pistol, stabilize the wrists, and reduce unnecessary movement during the trigger press.

Firing-Hand Position

Backstrap Contact

The web of the firing hand should contact the backstrap firmly. This makes the pistol feel seated in the hand rather than balanced loosely in the fingers. If the pistol shifts after every shot, the grip may be too low, too loose, or not matched well to hand size.

Trigger Finger Independence

The trigger finger should be able to move without the rest of the hand clenching. If pressing the trigger causes the whole hand to tighten, shots may move off target. Beginners often improve by focusing on steady grip pressure while the trigger finger moves straight to the rear.

Thumb Placement

Thumb placement depends on pistol design and shooter anatomy. Many modern semi-automatic shooters use forward thumbs, but thumbs should never interfere with the slide, controls, cylinder gap on revolvers, or safe operation. If a grip causes discomfort or contact with moving parts, stop and adjust with qualified help.

Support-Hand Position

Palm Contact

The support-hand palm should make meaningful contact with the grip and firing hand. Empty space usually means less control. Rotate the support hand slightly forward so the palm presses into the available grip area without crossing in front of the muzzle.

Finger Wrap

The support-hand fingers usually wrap over the firing-hand fingers. The goal is to create a secure, repeatable two-hand structure. Avoid placing the support-hand fingers near the trigger guard in a way that pulls the pistol sideways or interferes with controls.

Wrist Stability

Both wrists should feel firm and aligned. Loose wrists can make the pistol move more than necessary and may contribute to cycling problems with some semi-automatic pistols. Do not lock the body into a painful position; stable is the goal, not stiff.

Trigger Control and Grip Pressure

Grip pressure should be consistent before, during, and after the trigger press. Many shooters miss low or sideways because they tighten the whole hand at the same moment the trigger breaks. A useful range cue is to build the grip first, then move only the trigger finger.

Different instructors describe pressure differently, so do not get stuck on a single percentage rule. The real test is whether the sights stay stable, the pistol tracks predictably, and your hands can repeat the same grip every time. If recoil control feels erratic, ask an instructor to watch your hands from a safe position.

Common Grip Mistakes

  • Low firing-hand grip: leaves more leverage for muzzle flip and makes the pistol shift.
  • Weak support-hand contact: leaves empty space and reduces control.
  • Milking the grip: tightening all fingers during the trigger press.
  • Thumbs interfering with controls: can prevent normal slide lock or safe manipulation.
  • Practicing too fast: hides basic problems and builds sloppy habits.
  • Ignoring firearm fit: a pistol that is too large or too small may make a good grip harder.

If the issue is firearm fit, do not force a grip that puts your finger, wrist, or thumbs in unsafe positions. A qualified instructor can often tell whether the problem is technique, hand size, grip texture, or an unsuitable pistol.

Safe Practice Boundaries

Grip practice should stay inside safe handling rules. Use live ammunition only at a proper range or legal training setting. Keep muzzle direction safe at all times. Avoid mirrors, cameras, or online advice if they distract you from basic safety discipline.

For general ammunition and firearm safety context, SAAMI firearm safety information is a reliable reference. For secure storage and access-control reminders, Project ChildSafe is useful, especially if firearms are stored in a home with other people.

FAQ

Should I grip a handgun as hard as possible?

No. Grip firmly enough to control the pistol, but not so hard that your hands shake, your trigger finger drags, or the pistol becomes painful to manage. Consistency matters more than brute force.

Where should my thumbs go?

On many semi-automatic pistols, thumbs point generally forward along the frame area, but placement depends on the firearm and your hands. Keep thumbs away from the slide, muzzle, cylinder gap, and controls unless the manual/instructor says otherwise.

Why do my shots move when I press the trigger?

The grip may be changing during the trigger press. Watch for clenching, pushing, wrist movement, or support-hand pressure changing at the same time the trigger breaks.

Can handgun grip fix all accuracy problems?

No. Grip matters, but accuracy also depends on sight alignment, trigger control, stance, breathing, vision, firearm fit, ammunition, and training quality.

Should beginners practice grip at home?

Only if they can follow safe unloaded-handling procedures exactly and keep ammunition separate. Beginners are usually better served by practicing under a qualified instructor until the safety process is automatic.

Final Takeaway

A good handgun grip is high, stable, repeatable, and safe. Build the firing-hand grip first, fill the open space with the support hand, keep wrists firm, and press the trigger without changing grip pressure. Above all, keep safety rules ahead of technique and get qualified feedback before turning practice into habit.

How Often to Clean Your Gun

How often you should clean your gun depends on the firearm manual, ammunition, weather, storage conditions, and how the firearm was used. A simple rule is to inspect after every range trip, clean after heavy use or exposure to moisture, and follow the manufacturer’s maintenance schedule instead of relying on one universal round-count rule.

Table of Contents
  1. Quick Answer
  2. Gun Cleaning Frequency Checklist
  3. What Changes Cleaning Frequency
  4. After Range Use
  5. After Hunting, Carry, or Storage
  6. Can You Clean Too Often?
  7. Common Mistakes
  8. FAQ
  9. Final Takeaway

Quick Answer

Clean your gun when the manual recommends it, after exposure to moisture, dirt, sweat, rain, snow, or heavy fouling, before long-term storage, and anytime inspection shows residue, corrosion risk, or unreliable function. For ordinary range use, many owners inspect after each session and clean as needed, but the safest answer is always firearm-specific.

A safe cleaning schedule starts with the firearm manual, inspection notes, weather exposure, ammunition type, and secure storage habits.

Gun Cleaning Frequency Checklist

  • Manual first: Use the firearm maker’s maintenance schedule and warnings.
  • After live fire: Inspect the bore, chamber, action, and exterior surfaces.
  • After moisture: Clean and dry promptly after rain, snow, sweat, condensation, or wet storage.
  • After dirty ammunition: Check more often when ammunition leaves heavy fouling.
  • Before storage: Clean, lightly protect, and store securely according to the manual.
  • When function changes: Stop and inspect if feeding, extraction, trigger feel, or cycling changes.
  • With chemicals: Use ventilation, gloves, eye protection, and product labels.

Cleaning is part of safe ownership, but safety comes first. The NSSF firearm safety rules are a useful reminder before any maintenance session. Range residue and lead exposure also deserve attention; CDC/NIOSH range guidance explains why residue control matters around shooting environments.

What Changes Cleaning Frequency

Cleaning frequency changes with use. A firearm fired in dry indoor conditions may need a different routine than one carried in rain, dust, snow, or humid woods. Ammunition, suppressor use, storage location, and firearm design can also change how quickly residue builds up.

Ammunition and Fouling

Some ammunition leaves more residue than others. If you notice heavy carbon, unburned powder, sticky residue, or unusual smell, inspect more carefully. Do not assume a fixed round count covers every firearm and ammunition combination.

Firearm Type Matters

A bolt-action hunting rifle, a semi-automatic pistol, a shotgun, and a rimfire rifle can all need different maintenance rhythms. Actions with more moving parts may collect residue in different places, while rimfire ammunition can leave noticeable fouling. Use the same decision process for all of them: inspect, compare what you see to the manual, and clean the areas the maker tells you to maintain.

Weather and Corrosion Risk

Moisture changes the schedule quickly. Rain, snow, sweat, wet cases, and condensation can all create corrosion risk. After wet exposure, dry the firearm safely, clean as the manual recommends, and inspect exterior metal, bore, chamber, and storage case.

After Range Use

After a normal range session, start with inspection. Unload and clear the firearm, remove ammunition from the bench, then check bore, chamber, action, feed areas, magazines, exterior surfaces, and optic mounts if relevant. If residue is light and the manual does not call for full cleaning, a wipe-down and light maintenance check may be enough.

If the firearm had a high round count, dirty ammunition, malfunctions, or unusual residue, clean more fully. If anything looks damaged, obstructed, cracked, badly worn, or unsafe, stop and contact a qualified gunsmith or the manufacturer.

After Hunting, Carry, or Storage

Hunting and field use can expose firearms to moisture, dust, vegetation, temperature swings, and body oils. Even if you did not fire, inspect and wipe down after field use. Pay attention to slings, cases, and foam-lined storage that may hold moisture against metal.

Before long-term storage, clean and protect the firearm according to the manual, then store it securely. General safety programs such as Project ChildSafe are useful reminders that maintenance and secure storage should work together.

Storage Checkups

A stored firearm can still need inspection. Humidity, temperature swings, old oil, and case materials can affect condition. Periodic checkups help catch corrosion or dryness before they become bigger problems.

If you rotate firearms seasonally, add a calendar reminder before and after the season. That keeps the routine tied to actual use: pre-season inspection, post-season cleaning, and storage checks during long gaps. The reminder is not a universal cleaning command; it is a prompt to inspect condition and decide what the manual-based routine requires.

Can You Clean Too Often?

Careful maintenance is good; careless over-cleaning is not. Problems come from wrong-size tools, rough rods, forcing brushes, taking apart more than the manual recommends, using too much oil, or mixing chemicals. The goal is not maximum scrubbing. The goal is safe, manual-based maintenance.

Keep simple notes: date, round count if known, weather exposure, ammunition type, products used, and any issues noticed. Over time, your notes will tell you more about your firearm than a generic online interval.

A maintenance log also helps you avoid duplicate work. If the firearm was cleaned, lightly protected, and stored after the last trip, the next check may only require inspection. If the notes show rain, dusty carry, a malfunction, or heavy fouling, that same log tells you to slow down and do a more careful cleaning session.

Common Mistakes

  • Using one fixed cleaning interval for every firearm.
  • Cleaning with ammunition still on the bench.
  • Skipping inspection after rain, snow, sweat, or humid storage.
  • Using too much oil before storage.
  • Mixing chemicals or ignoring product labels.
  • Forcing tools through the bore.
  • Assuming storage means no future checkups.

FAQ

Should I clean my gun after every range trip?

You should at least inspect it after every range trip. Whether it needs full cleaning depends on the manual, round count, ammunition, fouling, weather exposure, and how the firearm will be stored.

Should I clean a gun if I did not fire it?

Sometimes. Field carry, sweat, rain, dust, fingerprints, and humid storage can justify inspection and wipe-down even when no shots were fired.

Can too much oil cause problems?

Yes. Excess oil can collect debris, migrate into places it does not belong, and become sticky over time. Use the amount recommended by the firearm manual or product label.

What is the safest cleaning schedule?

The safest schedule is firearm-specific: follow the manual, inspect after use or exposure, clean before long-term storage, and get qualified help when function or condition seems questionable.

Final Takeaway

There is no single cleaning interval that fits every gun. Inspect regularly, clean after heavy use or exposure, follow the manual, respect chemical safety, and store securely. A simple, consistent maintenance routine is better than guessing from a universal round-count rule.

What Is a Misfire and How to Prevent It

A misfire happens when you press the trigger, the firing system tries to ignite the cartridge, and the round does not fire. The safest response is not to rush, not to look into the action, and not to assume the round is harmless. Keep the muzzle pointed in a safe direction, keep your finger off the trigger, follow your range or firearm manual procedure, and treat the event as a possible delayed ignition until it is cleared safely.

Misfires are usually caused by ammunition, firearm condition, or the firearm not being fully in battery. This guide explains the difference between a misfire, hang fire, and squib load, what to do in the moment, and how to reduce the chance of it happening again without giving risky shortcut advice.

Table of Contents

What Is a Misfire?

A misfire is a failure to fire. In a typical centerfire or rimfire firearm, the trigger is pressed, the firing pin or striker hits the primer or rim, but the cartridge does not ignite. You may hear a click, feel the trigger break, and see no shot fired.

The important safety point is uncertainty. In the first moment after a click, you do not know whether the cartridge is truly dead, whether ignition is delayed, or whether another malfunction has occurred. That is why the basic response starts with muzzle control and patience, not immediate inspection.

The NSSF firearm safety rules are a useful foundation here: always keep the muzzle pointed in a safe direction and keep your finger off the trigger until you are ready to shoot. Those rules matter even more when the firearm does something unexpected.

Misfire vs. Hang Fire vs. Squib Load

People often use these terms together, but they are not the same problem. Knowing the difference helps you respond with the right level of caution.

Misfire

A misfire means the cartridge does not fire when struck. The cause may be a bad primer, damaged ammunition, light firing-pin strike, dirty firing-pin channel, weak spring, or a firearm that was not fully closed or locked.

Hang Fire

A hang fire is delayed ignition. The trigger is pressed, nothing happens immediately, and then the round may fire after a delay. Because a hang fire can look like a misfire at first, do not open the action instantly after a click. Follow your range rules, instructor guidance, and firearm manual.

Squib Load

A squib load is different because the round may fire weakly and leave a bullet or obstruction in the barrel. Warning signs can include an unusually quiet report, light recoil, smoke, or a shot that feels wrong. If you suspect a squib, stop shooting immediately and have the firearm inspected before firing again.

What To Do After a Misfire

If the firearm clicks instead of firing, keep the muzzle pointed downrange or in another safe direction. Keep your finger away from the trigger. Do not turn the firearm sideways to look into the chamber, and do not point it toward yourself or another person while trying to diagnose the problem.

Many range procedures use a short waiting period before clearing the firearm because of the possibility of a hang fire. Your firearm manual, range officer, instructor, or club rules should control the exact procedure. When in doubt, slow down and ask for qualified help.

After the waiting period required by your setting, open the action carefully while maintaining safe muzzle direction. Remove the cartridge if it can be removed safely. Keep the suspect cartridge separate, do not try to fire it again, and follow local range or manufacturer guidance for disposal.

If the firearm does not open normally, the cartridge is stuck, the bolt or slide feels jammed, or you are unsure what happened, stop. Forcing parts can make the situation worse. Let a qualified range officer, instructor, gunsmith, or manufacturer support channel guide the next step.

Common Causes of Misfires

Most misfires come from one of three areas: ammunition, firearm condition, or handling/setup. The cause is not always obvious from a quick glance, so avoid guessing if the malfunction repeats.

Ammunition Problems

Old, wet, corroded, contaminated, or damaged ammunition can fail to ignite. Ammunition stored in high humidity, extreme heat, vehicle trunks, damp hunting bags, or unsealed boxes may become less reliable over time. A primer that is damaged, improperly seated, or defective can also fail even when the firearm is functioning normally.

Use ammunition that matches the firearm marking and manual, and inspect cartridges before loading. If a round looks swollen, corroded, cracked, dented, or contaminated with oil or solvent, do not use it.

Firearm Condition

A dirty firing-pin channel, worn spring, damaged firing pin, heavy fouling, or neglected action can reduce ignition reliability. Cold weather, rain, dust, and heavy lubricant can also affect function, especially if the firearm has not been cleaned and inspected after use.

For technical ammunition and firearm safety context, SAAMI firearm safety information is a strong reference because it focuses on safe ammunition/firearm matching and handling principles.

Not Fully in Battery

Some firearms may not fire correctly if the bolt, slide, or action is not fully closed. This can happen from riding the slide, dirt in the chamber, damaged magazines, improper loading, or mechanical wear. If a firearm repeatedly fails to go fully into battery, stop using it until the cause is identified.

How To Prevent Misfires

You cannot prevent every defective cartridge, but you can reduce avoidable misfires with better storage, inspection, and maintenance habits.

  • Use the correct ammunition. Match caliber/gauge and cartridge type to the firearm manual and barrel markings.
  • Inspect before loading. Avoid cartridges with corrosion, dents, cracked cases, loose bullets, or moisture damage.
  • Store ammunition properly. Keep it cool, dry, stable, and away from oils, solvents, and long-term humidity.
  • Clean on a schedule that fits use. Range sessions, hunting in rain, dusty travel, and defensive-practice training all justify inspection and cleaning afterward.
  • Follow the manual. Maintenance points, lubrication amount, replacement intervals, and approved ammunition vary by firearm.
  • Stop repeated malfunctions early. If more than one misfire occurs with the same firearm or ammunition lot, pause and investigate before continuing.

Safe storage also matters beyond misfire prevention. Project ChildSafe has practical secure-storage resources for keeping firearms inaccessible to unauthorized users, especially children. Reliable equipment and responsible access control belong together.

When To Stop and Get Help

Stop shooting and get qualified help if the firearm will not open normally, the cartridge is stuck, the action feels damaged, the report sounded weak, the bore may be obstructed, or the same problem happens again. Do not keep firing to “test it out.” A repeated misfire can point to a mechanical issue, ammunition lot issue, or unsafe condition that needs inspection.

For beginners, the safest help source is a certified instructor, range officer, gunsmith, firearm manufacturer, or the official firearm manual. Online advice can help you understand terms, but it should not replace qualified inspection when a live-round malfunction or possible barrel obstruction is involved.

FAQ

Can a misfired round go off later?

It is possible for a delayed ignition, called a hang fire, to look like a misfire at first. That is why you should keep the firearm pointed in a safe direction and follow your range or firearm-manual procedure before opening the action.

Should I try to fire the same round again?

No. Treat the cartridge as suspect. Keep it separate and follow range, manufacturer, or local disposal guidance instead of trying to fire it again.

Is a misfire always caused by bad ammunition?

No. Ammunition is one common cause, but a weak firing-pin strike, dirty action, worn part, or firearm not being fully in battery can also cause a misfire.

What is the most dangerous mistake after a misfire?

The biggest mistake is moving the muzzle in an unsafe direction or immediately opening the action while assuming nothing can happen. Keep the muzzle safe first, then clear the firearm according to proper procedure.

When should a gunsmith inspect the firearm?

Use a qualified gunsmith or manufacturer support if misfires repeat, the action feels abnormal, parts appear worn or damaged, the bore may be obstructed, or you cannot confidently identify the cause.

Final Takeaway

A misfire is not just a failed shot. It is a safety event. Keep the muzzle pointed safely, wait and clear the firearm according to proper procedure, separate the suspect cartridge, and investigate the cause before continuing. Good ammunition storage, regular maintenance, and manual-first habits reduce risk without encouraging shortcuts.

Exit mobile version