High Power Air Rifle for Hunting: Complete Expert Guide

The world of airgun hunting has changed dramatically in recent years. What was once limited to low-powered backyard rifles for plinking and pest control has evolved into a serious hunting discipline supported by advanced engineering, powerful pre-charged pneumatic systems, and precision projectiles capable of delivering humane, ethical kills. Today’s high power air rifles can generate energy levels that rival small-caliber firearms, yet they remain quieter, more affordable to operate, and legal in many areas where traditional rifles are restricted.

For hunters who value stealth, accuracy, and efficiency, a high power air rifle offers a unique balance of power and control. Whether you are targeting small game such as rabbits and squirrels or pursuing larger animals like coyotes and wild hogs in regions where airgun hunting is permitted, choosing the right air rifle and understanding its capabilities is essential.

What Defines a High Power Air Rifle?

A high power air rifle is typically classified by its muzzle energy rather than its velocity alone. While entry-level airguns may produce under 12 foot-pounds of energy, hunting-grade air rifles usually start at around 18 to 20 foot-pounds for small game and can exceed 100 foot-pounds in large-caliber PCP models designed for big game. These rifles rely on advanced propulsion systems such as pre-charged pneumatic (PCP), gas piston, or magnum spring-piston mechanisms, each offering different advantages in terms of consistency, power, and maintenance.

PCP air rifles dominate the high-power category because they store compressed air in an onboard cylinder and release it in a precisely metered burst with every shot. This results in exceptional accuracy, high shot-to-shot consistency, and the ability to fire heavy pellets or slugs at lethal energy levels. Gas piston and spring-piston rifles, while generally less powerful than PCP systems, still provide enough energy for small to medium game and are valued for their self-contained operation without the need for external air tanks.

Why Hunters Choose High Power Air Rifles

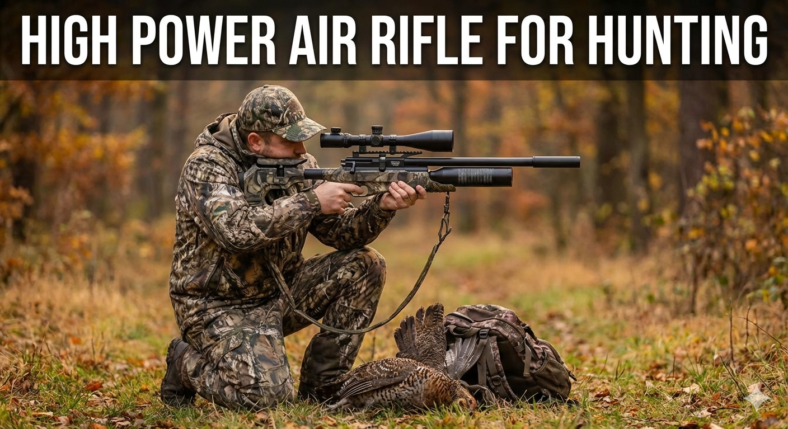
One of the biggest advantages of using a high power air rifle for hunting is reduced noise. Even powerful PCP rifles are far quieter than rimfire or centerfire firearms, especially when equipped with integrated moderators. This allows hunters to operate discreetly, making them ideal for pest control around farms, orchards, and semi-rural properties where noise restrictions apply.

Accuracy is another major factor. Modern air rifles are capable of exceptional precision, often achieving sub-inch groups at 50 yards when paired with quality optics and ammunition. The low recoil and smooth firing cycle of PCP rifles allow for precise shot placement, which is critical for ethical hunting.

Cost efficiency also plays an important role. Pellets and slugs are significantly cheaper than firearm ammunition, and air rifles do not require gunpowder or primers. Over time, this makes airgun hunting far more economical, especially for hunters who practice regularly.

Choosing the Right Caliber for Hunting

Caliber selection is one of the most important decisions when choosing a high power air rifle. The ideal caliber depends on the size of the game, the typical shooting distance, and the legal requirements in your region.

The .177 caliber is extremely fast and flat-shooting, making it suitable for small pests such as birds, rats, and squirrels. However, its lighter weight limits penetration on larger animals.

The .22 caliber is the most popular hunting choice because it offers an excellent balance between speed, energy, and penetration. With sufficient power, it is effective for rabbits, raccoons, foxes, and similar-sized game.

The .25 caliber delivers significantly more impact energy and better wind resistance, making it ideal for larger small game and medium predators. It is commonly used for coyotes and large raccoons where legal.

For big-game airgun hunting, calibers such as .30, .35, and even .45 are available in powerful PCP platforms. These rifles fire heavy slugs rather than traditional pellets and are capable of producing energy levels exceeding 150 foot-pounds, making them suitable for wild hogs and deer in regions where airgun hunting regulations allow it.

Power Requirements and Ethical Shot Placement

Power alone does not guarantee a humane kill. Ethical hunting with an air rifle depends on delivering sufficient energy to vital organs combined with precise shot placement. For small game, 18 to 25 foot-pounds of energy is generally adequate when the shot is placed in the brain or heart-lung area. Medium game may require 40 to 60 foot-pounds, while large game demands even higher energy levels and heavy, high-penetration slugs.

Because air rifle projectiles travel at lower velocities than firearm bullets, hunters must be especially mindful of trajectory and wind drift. Understanding your rifle’s ballistic performance and limiting shots to ethical distances is essential.

Pellet and Slug Selection

Ammunition choice plays a crucial role in hunting success. Traditional diabolo pellets are ideal for small to medium game because they expand on impact, transferring energy efficiently and minimizing over-penetration. Hollow point and soft-point designs are particularly effective for humane kills.

For high-power PCP rifles and larger calibers, solid slugs offer superior penetration and long-range stability. Their higher ballistic coefficient allows them to retain energy better at extended distances, making them the preferred choice for big-game airgun hunting.

Effective Range of High Power Air Rifles

The effective hunting range of an air rifle depends on caliber, power, and shooter skill. Most .177 and .22 rifles are best kept within 50 to 70 yards for ethical kills, while .25 and larger calibers can extend that range to 100 yards or more under ideal conditions. Beyond these distances, energy loss and wind drift significantly reduce the likelihood of a clean, humane shot.

Optics and Accessories

A high-quality scope designed for airgun use is essential for precision hunting. Air rifles, particularly spring-piston models, produce a unique recoil pattern that can damage standard firearm scopes. Airgun-rated optics with adjustable parallax and mil-dot or MOA reticles allow for accurate range estimation and holdover adjustments.

Other useful accessories include rangefinders, bipods, and suppressor-equipped barrels for noise reduction. For PCP rifles, a reliable air source such as a hand pump or high-pressure compressor is also necessary.

Legal Considerations

Before using a high power air rifle for hunting, it is crucial to understand local laws and regulations. Some regions classify high-powered airguns as firearms, while others allow their use for specific game species. Minimum caliber and energy requirements may apply, and certain animals may be restricted to firearm hunting only. Always verify legal guidelines and obtain the necessary permits before heading into the field.

Conclusion

High power air rifles have transformed the hunting landscape by offering a quiet, accurate, and highly effective alternative to traditional firearms. With modern PCP technology, advanced projectiles, and precision optics, today’s airgun hunter can ethically harvest game with confidence and consistency.

Success in air rifle hunting depends on choosing the right caliber, understanding power requirements, selecting proper ammunition, and practicing disciplined shot placement. When used responsibly and within legal limits, a high power air rifle is not just a substitute for a firearm it is a sophisticated hunting tool in its own right, capable of delivering clean, humane results while preserving the stealth and enjoyment that make airgun hunting such a rewarding experience.

Universal Gun Cleaning Kit for All Calibers

A universal gun cleaning kit for all calibers is best understood as a broad firearm-maintenance kit, not proof that one box covers every firearm you may own. A good kit gives you rods or cables, brushes, jags, patches, picks, oil, and solvent options for common pistols, rifles, and shotguns. The safest choice is still the kit that matches your firearm manual, bore size, cleaning direction, and storage habits.

Table of Contents
  1. Quick Answer
  2. Universal Gun Cleaning Kit Checklist
  3. What Universal Really Means
  4. Core Tools to Look For
  5. Caliber Fit and Compatibility
  6. Solvent, Oil, and Safety Basics
  7. Storage and Organization
  8. Common Mistakes to Avoid
  9. FAQ
  10. Final Takeaway

Quick Answer

The best universal gun cleaning kit is one that covers your actual firearms, includes caliber-marked tools, uses non-damaging rods or pull-through cables, stores parts clearly, and leaves room for firearm-specific extras. Before buying, check the listed bore brushes, jags, patch loops, shotgun adapters, rod material, case layout, and whether you still need separate solvent, oil, chamber brushes, or specialty tools.

A useful universal cleaning kit should organize rods, brushes, patches, solvent, oil, eye protection, gloves, and a simple maintenance checklist.

Universal Gun Cleaning Kit Checklist

  • Firearm safety first: Unload and clear the firearm before any cleaning session.
  • Manual match: Confirm the kit works with your firearm model and manufacturer cleaning instructions.
  • Caliber coverage: Check the exact brushes, jags, loops, and adapters included.
  • Rod or cable quality: Avoid rough, poorly threaded, or misaligned tools that can damage finishes or crowns.
  • Solvent/oil plan: Use products that match your firearm materials and cleaning environment.
  • Ventilation and skin protection: Use good airflow, gloves, and eye protection when working with chemicals.
  • Storage: Keep brushes, patches, small adapters, and chemical products organized and labeled.

Start with the safety basics. The NSSF firearm safety rules are a good reminder that every maintenance task begins with safe handling. If you clean after range sessions, also pay attention to residue exposure; CDC/NIOSH guidance for firing ranges explains why lead and residue control matter around shooting environments.

What Universal Really Means

In cleaning-kit language, universal usually means broad compatibility across common calibers and firearm types. It does not mean every tool fits every gun. A kit may include pistol, rifle, and shotgun brushes, but still miss a specialty chamber brush, muzzle-device tool, bore guide, or brand-specific accessory your firearm needs.

This is why the word all should be treated carefully. If you own only a few common calibers, a universal kit may be efficient. If you own unusual calibers, precision rifles, older firearms, suppressor-host setups, or specialized shotguns, you may need dedicated add-ons.

Good Fit For

  • Owners with several common pistol, rifle, or shotgun calibers.
  • Beginners who want one organized starter kit.
  • Range users who need basic cleaning tools in one case.
  • People who want a kit they can upgrade over time.

Weak Fit For

  • Very specific match-rifle maintenance routines.
  • Firearms that require manufacturer-specific tools.
  • Owners who already have high-quality caliber-specific tools.
  • Anyone expecting one kit to replace the firearm manual.

Core Tools to Look For

A useful kit should include cleaning rods or a pull-through cable, bore brushes, jags or patch loops, cotton patches, a nylon utility brush, picks, a cleaning cloth, and a compact case. For shotguns, look for correct gauge brushes and mops. For rifles and pistols, look for clearly marked caliber brushes so you are not guessing during cleaning.

Rod quality is one of the biggest differences between cheap kits and better kits. Poorly finished or badly aligned rods can be frustrating and may risk unnecessary wear if used carelessly. Coated rods, brass rods, or pull-through systems each have tradeoffs. The right choice depends on the firearm, manual instructions, and your cleaning style.

Useful Extras

  • A bore guide for compatible rifles.
  • A chamber brush when the firearm manual recommends one.
  • Extra patches in the sizes you actually use.
  • Disposable gloves and eye protection for solvent work.
  • A small notebook for round count, cleaning date, and maintenance notes.

Caliber Fit and Compatibility

Do not assume that a brush is correct because it is close. A too-small brush may not clean well, and a too-large brush can bind or cause unnecessary force. Use the firearm manual and the cleaning-kit chart together. If the kit chart is vague, that is a buying red flag.

Also check thread compatibility. Some rods and accessories use different thread standards, which can make replacement brushes and adapters annoying later. If you expect to use the kit for years, replacement-part availability matters as much as the number of pieces in the box.

Solvent, Oil, and Safety Basics

Cleaning chemicals deserve respect. Use solvents and oils according to their labels, keep the area ventilated, avoid mixing chemicals, and wash hands after handling residue. Eye protection and gloves are simple habits that make cleaning less messy and more controlled.

Residue management matters too. Range dust and firearm residue can contain lead or other contaminants, so avoid eating or drinking while cleaning and keep cleaning supplies away from children. For storage, keep chemicals capped, upright, and away from heat sources.

Storage and Organization

A universal kit is only useful if you can find the right part quickly. Look for a case with marked slots, labeled compartments, or enough space to add your own labels. Loose brushes and adapters in a big plastic tray become frustrating fast, especially when several calibers look similar.

Keep chemicals separate from patches and cloths if leakage is possible. Replace dirty patches, worn brushes, cracked jags, and bent rods before they cause problems. A small maintenance log helps you remember what was cleaned, when it was cleaned, and what parts may need attention next time.

After cleaning, return the firearm and cleaning chemicals to secure storage. General safety programs such as Project ChildSafe are useful reminders that maintenance routines and storage routines should work together, especially in homes with children or visitors.

Common Mistakes to Avoid

  • Buying by piece count instead of useful caliber coverage.
  • Using a brush or jag that does not match the bore.
  • Skipping the firearm manual before disassembly or cleaning.
  • Using too much oil and leaving parts wet or sticky.
  • Mixing cleaning chemicals or ignoring product labels.
  • Cleaning in a poorly ventilated space.
  • Forgetting to replace worn patches, bent rods, or damaged brushes.

FAQ

Does one universal cleaning kit really fit all calibers?

No. Universal usually means broad coverage, not perfect coverage. Always compare the included brush, jag, loop, and adapter sizes with the firearms you actually own.

Should I buy a universal kit or caliber-specific tools?

A universal kit is convenient for a mixed collection. Caliber-specific tools are better when you want higher-quality rods, exact brushes, or a more careful routine for one firearm.

What is the most important tool in a cleaning kit?

The most important part is the correct-size tool for the job. A quality rod or cable, proper brush, correct patches, and firearm-safe solvent matter more than a large piece count.

Can over-cleaning damage a firearm?

Careless cleaning can cause problems, especially if you use poor tools, force parts, skip manufacturer guidance, or use chemicals incorrectly. Follow the firearm maker’s maintenance guidance.

Do I still need separate solvent and oil?

Often, yes. Some kits include small bottles, but many users prefer separate solvent and oil that match their firearm, climate, and cleaning routine.

Final Takeaway

A universal gun cleaning kit is worth considering when it covers your real calibers, stores tools clearly, and leaves room for firearm-specific upgrades. Do not buy only by piece count. Buy for compatibility, safe handling, chemical care, and the parts you will actually use.

Trijicon ACOG vs VCOG — Side-by-Side Review

When it comes to combat-proven rifle optics, few brands command the same level of respect as Trijicon. For decades, Trijicon ACOG vs VCOG scopes have been trusted by military units, law enforcement, and professional shooters around the world. Among their most iconic products are the ACOG (Advanced Combat Optical Gunsight) and the VCOG (Variable Combat Optical Gunsight). While both are built for extreme durability and battlefield reliability, they are designed around very different optical philosophies.

This in-depth side-by-side review compares the Trijicon ACOG and VCOG across optical performance, magnification, reticle systems, durability, weight, use cases, and overall value, helping you decide which optic best suits your shooting needs.

Understanding the Trijicon ACOG

The Trijicon ACOG is a fixed-magnification prism scope originally developed for military use in the late 1980s. It was designed to provide fast target acquisition, crystal-clear glass, and unmatched ruggedness without relying on batteries. Over the years, the ACOG has become legendary for its ability to withstand harsh environments, heavy recoil, and continuous field use while maintaining zero and optical clarity.

One of the defining characteristics of the ACOG is its simplicity. Because it uses a fixed magnification—most commonly 4x, though other variants exist—the internal optical system contains fewer moving parts. This reduces mechanical complexity and increases long-term reliability. The reticle is typically illuminated using a combination of fiber optics for daylight and tritium for low-light conditions, allowing the scope to function without any external power source. This makes the ACOG especially attractive for military and survival applications where battery dependency is a concern.

Optically, the ACOG offers a wide field of view for its magnification level, excellent edge-to-edge sharpness, and high contrast. Its design supports the Bindon Aiming Concept, which allows shooters to keep both eyes open and use the illuminated reticle almost like a red dot at close range, while still benefiting from magnification for mid-range engagements.

Understanding the Trijicon VCOG

The Trijicon VCOG represents a more modern evolution of the combat optic. Instead of fixed magnification, it features a variable zoom system, commonly ranging from 1–6x or 1–8x depending on the model. This allows the shooter to transition seamlessly from close-quarters engagements at true 1x to precision shooting at extended distances with higher magnification.

The VCOG is built with the same durability standards as the ACOG but incorporates advanced features such as a first focal plane reticle, battery-powered illumination, and precision adjustment turrets. The first focal plane design means the reticle subtensions remain accurate across all magnification levels, which is particularly valuable for ranging targets and applying ballistic holds.

While the VCOG is heavier and more complex due to its variable lens system, it is engineered to withstand extreme recoil, shock, and environmental exposure. It is often described as one of the most rugged variable-power scopes on the market, combining the flexibility of a low-power variable optic with the toughness expected from a military-grade sighting system.

Optical Clarity and Image Quality

Both the ACOG and VCOG deliver excellent optical performance, but they achieve it in slightly different ways. The ACOG’s fixed-power design allows Trijicon to optimize the lens system for one specific magnification. This results in exceptional sharpness, minimal distortion, and a bright image even in challenging lighting conditions. The simplicity of the optical path also contributes to fast eye alignment and consistent performance.

The VCOG, with its variable magnification, must balance optical performance across a range of zoom levels. Despite this added complexity, Trijicon’s high-quality glass and coatings ensure that image clarity remains outstanding throughout the magnification range. At low power, the VCOG provides a wide field of view suitable for close-quarters situations, while at higher magnifications it offers the resolution needed for precise shot placement at distance.

Magnification and Versatility

The most fundamental difference between the ACOG and VCOG lies in their magnification systems. The ACOG uses fixed magnification, which means the shooter always views the target at a constant zoom level. This can be an advantage in scenarios where engagement distances are predictable and rapid response is critical. There is no need to adjust magnification, and the shooter can focus entirely on target acquisition and trigger control.

The VCOG, by contrast, offers adjustable magnification, making it far more versatile in dynamic environments. At 1x, it can function similarly to a red dot, allowing fast target transitions and situational awareness. As magnification increases, it becomes suitable for longer-range precision shooting. This adaptability makes the VCOG particularly well-suited for mixed-distance engagements, competition shooting, and tactical roles where a single optic must cover multiple scenarios.

Reticle Design and Illumination

ACOG reticles are typically etched and illuminated using fiber optics and tritium. During the day, ambient light gathered by the fiber optic brightens the reticle automatically. In low light, the tritium provides a constant glow. This system is extremely reliable and requires no batteries, but brightness control is limited and depends on environmental lighting conditions.

VCOG reticles, on the other hand, are usually first focal plane designs with battery-powered LED illumination. This allows precise control over brightness levels and ensures compatibility with night-vision devices. Because the reticle scales with magnification, holdovers and ranging marks remain accurate at any zoom setting, which is a significant advantage for precision shooting and long-range engagements.

Durability and Build Quality

Both optics are built to military specifications and are designed to survive extreme abuse. The ACOG’s fixed design contributes to its legendary durability, as there are fewer internal components that can shift or fail. Its housing is forged from high-strength aluminum and sealed against water and dust.

The VCOG, despite its variable zoom system, is equally robust. Its reinforced housing, integrated mount, and shock-resistant construction allow it to handle heavy recoil and harsh environmental conditions. While it contains more moving parts than the ACOG, it is engineered to maintain zero and optical alignment even under severe stress.

Weight and Handling

The ACOG is generally lighter and more compact than the VCOG, making it well-suited for lightweight rifle setups and extended carry. Its smaller footprint also contributes to better balance on shorter carbines.

The VCOG is heavier due to its larger lens system and zoom mechanism. While this adds some weight to the rifle, many shooters accept this trade-off for the increased capability and flexibility that variable magnification provides.

Side-by-Side Comparison Table

FeatureTrijicon ACOGTrijicon VCOG
MagnificationFixed (e.g., 3.5x, 4x, 5.5x)Variable (1–6x, 1–8x)
Reticle TypeEtched, fiber optic & tritiumFirst focal plane, LED illuminated
Power SourceNo battery (most models)Battery powered
WeightLighter, more compactHeavier, more robust
Best UseFast mid-range engagementsClose to long-range versatility
DurabilityExtremely ruggedExtremely rugged with modern design

Pros and Cons

Trijicon ACOG Pros

  • Battery-free illumination
  • Extremely durable and reliable
  • Fast target acquisition
  • Lightweight and compact
  • Proven military track record

Trijicon ACOG Cons

  • Fixed magnification limits versatility
  • Less control over reticle brightness
  • Not ideal for very close or very long-range precision work

Trijicon VCOG Pros

  • Variable magnification for multiple engagement distances
  • First focal plane reticle for accurate ranging and holds
  • Adjustable illumination
  • Outstanding optical clarity
  • Built to extreme durability standards

Trijicon VCOG Cons

  • Heavier and bulkier
  • More expensive
  • Requires batteries for illumination

Which One Is Right for You?

The choice between the ACOG and VCOG depends largely on your intended use. If your priority is simplicity, speed, and absolute reliability with minimal maintenance, the ACOG remains one of the best fixed-power combat optics ever made. It is ideal for users who operate primarily at medium ranges and value battery-free operation.

If you need a single optic capable of handling close-quarters engagements, mid-range shooting, and longer-range precision, the VCOG offers unmatched versatility. Its variable magnification, advanced reticle system, and modern features make it a strong choice for tactical professionals, competition shooters, and enthusiasts who demand adaptability.

Frequently Asked Questions

Is the ACOG better for military use than the VCOG?
Both are suitable for military use, but the ACOG is often preferred for its simplicity and battery-free operation, while the VCOG is chosen for missions requiring variable engagement distances.

Does the VCOG replace the ACOG?
Not entirely. The VCOG offers more versatility, but the ACOG remains relevant for roles where fixed magnification and extreme reliability are priorities.

Which optic is better for civilian shooters?
Civilian shooters who participate in competitions or varied-distance shooting may benefit more from the VCOG. Those who prefer a lighter, simpler setup may find the ACOG more suitable.

Final Verdict

The Trijicon ACOG and VCOG both represent the pinnacle of combat-grade optic design, each excelling in its own domain. The ACOG stands as a symbol of proven reliability and speed, while the VCOG embodies modern versatility and precision. Choosing between them is not a matter of which is superior overall, but which one aligns more closely with your shooting environment, mission requirements, and personal preferences.

Shooting Stance for Beginners: A Detailed Range-Safety Guide

A good beginner shooting stance is a stable, balanced body position that helps you support the firearm comfortably, manage recoil, and keep the muzzle pointed in a safe direction. For most new shooters at a supervised range, that means feet about shoulder-width apart, knees soft, weight slightly forward, and a relaxed but firm grip.

This guide explains stance basics in a range and sport-shooting context. It does not replace direct instruction from a certified instructor, range safety officer, firearm manual, or posted range rules.

Safety First

Safety comes before stance. Before thinking about footwork or grip, confirm that you are following the universal firearm safety rules and the posted rules of your range. The NSSF firearm safety rules are a useful starting point for reviewing the fundamentals.

  • Treat every firearm as if it is loaded.
  • Keep the muzzle pointed in a safe direction.
  • Keep your finger outside the trigger guard until you are ready to fire.
  • Be sure of your target and what is beyond it.
  • Follow instructions from the range safety officer.

New shooters benefit most from direct supervision. A qualified instructor or range safety officer can correct stance and handling errors in real time, which a written guide cannot do.

What a Shooting Stance Is

A shooting stance is the way you position your feet, legs, hips, torso, arms, head, and eyes while shooting. A consistent stance helps create a repeatable platform, reduces unnecessary movement, and helps you return to the sights between shots.

Stance is only one part of the fundamentals. Grip, sight alignment, sight picture, breathing, and trigger control all matter too. If you are working on accuracy, pair stance practice with our guide on the importance of trigger control for shooting accuracy.

Common Beginner Stances

Two handgun stances are commonly introduced to beginners: the isosceles stance and the Weaver stance. Rifle and shotgun positions are different, so confirm the correct setup for your firearm type with an instructor.

The Isosceles Stance

In the isosceles stance, the shooter faces the target squarely, with both arms extended evenly. Many beginners find it simple because the body position feels balanced and symmetrical.

The Weaver Stance

In the Weaver stance, the body is angled slightly, with the support-side foot forward and the firing-side foot back. Some shooters like the added tension and support, but it can take more coaching to learn comfortably.

Choosing Between Them

There is no single stance that fits every shooter. Body size, strength, mobility, firearm type, and range setup all matter. Try beginner stances under supervision and keep the one that feels stable, comfortable, and repeatable.

How to Build a Stable Stance Step by Step

Build stance from the ground up while keeping the muzzle in a safe direction. Small details matter, but the goal is not to look perfect. The goal is a repeatable position you can maintain safely.

AreaBeginner CueWhy It Helps
FeetAbout shoulder-width apartCreates a stable base
KneesSoft, not lockedReduces stiffness and fatigue
WeightSlightly forwardHelps manage recoil without leaning back
ShouldersRelaxed and levelReduces unnecessary tension
HeadUpright and naturalImproves comfort and sight alignment

For broader accuracy fundamentals after stance, see our guide on how to improve shooting accuracy.

Eye and Ear Protection

Eye and ear protection should be in place before you step to the firing line. Hearing protection helps reduce noise exposure, and eye protection helps guard against ejected cases, fragments, and other range hazards. The CDC/NIOSH noise and hearing loss prevention resources explain why hearing protection matters, and OSHA publishes guidance on eye and face protection.

Always follow your range’s specific PPE requirements. If your range requires a certain rating or style of protection, the range rule comes first.

Common Beginner Mistakes

  • Leaning backward instead of staying balanced and slightly forward.
  • Locking the knees and becoming stiff.
  • Over-tensing the shoulders, hands, or arms.
  • Letting the muzzle drift while adjusting foot placement.
  • Trying advanced positions before the basics are consistent.

Outside feedback helps. Ask a range safety officer or instructor to watch your stance during a supervised session. A small correction early can prevent a habit from becoming hard to change later.

Frequently Asked Questions

What is the best shooting stance for beginners?

Many beginners start with the isosceles stance because it is simple and symmetrical. The best stance is the one you can repeat safely and comfortably under supervision.

Does a good stance improve accuracy?

A stable stance supports accuracy, but it does not guarantee it. Accuracy comes from combining stance with grip, sight alignment, breathing, trigger control, and safe practice over time.

Should beginners learn stance from an instructor?

Yes, if possible. Written guidance can explain the basics, but an instructor or range safety officer can correct unsafe handling, balance problems, and posture issues in real time.

Is the stance the same for handguns and long guns?

No. Handgun stances such as isosceles and Weaver are different from rifle and shotgun positions. Confirm the right setup for your firearm type with a qualified instructor.

How long should I practice my stance?

Use short, focused, supervised sessions and stop when you become tired. Quality and safety matter more than long sessions.

Final Range-Safety Reminder

A good shooting stance should feel stable, repeatable, and safe. Keep the muzzle in a safe direction, wear proper eye and ear protection, follow range commands, and ask for qualified help whenever you are unsure. For more safety-first range basics, read our shooting range safety rules guide.

Legal Hunting Gear: A Complete Guide for Responsible Hunters

Hunting is a deeply rooted tradition that combines skill, patience, and respect for wildlife. However, beyond marksmanship and outdoor knowledge, every hunter must understand one critical responsibility: using legal hunting gear. Laws governing hunting equipment exist to ensure safety, promote ethical harvest, protect wildlife populations, and maintain fair chase principles. Failing to follow these laws can result in fines, loss of hunting privileges, or even permanent license revocation.

Legal hunting gear is not universal. What is allowed in one state, season, or species may be illegal in another. For this reason, hunters must stay informed and verify that their weapons, accessories, and tools comply with local wildlife regulations before entering the field.

Understanding What Makes Hunting Gear Legal

Hunting gear is considered legal when it meets the specific regulations set by state or regional wildlife authorities for a particular game animal and hunting season. These regulations are designed around conservation goals and safety concerns. A rifle that is legal for deer during firearm season may be illegal during archery season, and equipment approved for small game may be prohibited for big game.

Factors that determine legality include the type of animal being hunted, the method of take, the time of year, and the geographical location. Even minor details, such as magazine capacity or arrowhead design, can determine whether gear is lawful or prohibited.

Firearms and Legal Requirements for Hunting

Firearms are among the most regulated hunting tools. While rifles, shotguns, and handguns are commonly used for hunting across the United States, they are subject to strict rules. Most states specify minimum calibers for big game hunting to ensure humane kills. Using a caliber that is too small may be illegal even if the firearm itself is otherwise lawful.

Shotgun hunting often comes with additional restrictions. In many areas, hunters are required to use slugs rather than buckshot for deer. Magazine capacity limits are common, especially for waterfowl and upland bird hunting, where shotguns must be plugged to restrict the number of shells they can hold.

Automatic firearms are illegal for hunting everywhere, and some states also restrict semi-automatic rifles. Suppressors are legal for hunting in some states but banned in others, making it essential to confirm local laws before use.

Bowhunting Equipment and Legal Considerations

Bowhunting is widely accepted and often has its own dedicated seasons. Compound bows, recurve bows, and longbows are generally legal, provided they meet minimum draw weight requirements. These minimums are set to ensure sufficient penetration and ethical harvest.

Crossbows have become increasingly popular, but their legality varies significantly. Some states allow crossbows during archery season, others restrict them to firearm season, and some only permit their use for hunters with disabilities. Broadheads must usually have cutting edges, and mechanical broadheads may be restricted in certain states.

Poisoned arrows, explosive tips, and any broadheads designed to detonate on impact are universally illegal due to safety and ethical concerns.

Muzzleloaders and Primitive Weapon Seasons

Muzzleloader hunting seasons are typically regulated more strictly than modern firearm seasons. These seasons are designed to preserve traditional hunting methods and limit effective range. Many states require muzzleloaders to be single-shot and restrict ignition systems.

Powder type is another critical factor. Black powder or approved substitutes are generally legal, while smokeless powder is almost always prohibited. Optics may be restricted during primitive seasons, with some states allowing only iron sights.

Optics, Electronics, and Modern Technology

Optics such as rifle scopes, red dot sights, binoculars, and spotting scopes are legal in most hunting situations. Rangefinders are also commonly allowed, although models with advanced ballistic calculators may be restricted in some states.

The use of electronic devices is one of the most complex areas of hunting law. Thermal imaging and night vision optics are illegal for hunting big game in most states because they remove the element of fair chase. Electronic calls are often banned for deer and elk but may be legal for predators such as coyotes.

Drones are widely prohibited for scouting or locating game, as they provide an unfair advantage and disrupt wildlife behavior.

Ammunition and Arrow Regulations

Ammunition laws exist to ensure ethical harvest and reduce environmental harm. Expanding bullets, such as soft point or hollow point ammunition, are typically required for big game hunting. Full metal jacket bullets are often illegal because they do not expand reliably and increase the risk of wounding animals.

Lead ammunition has been banned in certain states and wildlife zones due to concerns about poisoning scavenger species. Hunters in these areas must use copper or other non-lead alternatives.

For archery hunters, arrow and broadhead specifications may include minimum cutting diameter and blade count. Lighted nocks are allowed in many states but restricted in others.

Clothing and Safety Gear Requirements

Hunting clothing is largely unrestricted, but safety visibility laws are common. During firearm seasons, many states require hunters to wear blaze orange or blaze pink to reduce hunting accidents. The required amount and placement vary by state, but it must be visible from all directions.

Camouflage clothing, insulated jackets, gloves, and boots are all legal, and there are typically no restrictions on materials or patterns outside of visibility rules.

Accessories and Field Equipment

Most basic hunting accessories are legal, including backpacks, knives, GPS units, and headlamps. However, how and when they are used can matter. Artificial light may be prohibited for spotting or shooting game but allowed for tracking wounded animals.

Tree stands are legal in most states but may require landowner permission on private property or special permits on public land. Baiting equipment is heavily regulated and often illegal for deer hunting due to disease concerns.

Commonly Illegal Hunting Gear

Certain types of gear are widely prohibited across the country. These include fully automatic firearms, explosive ammunition, poison-tipped weapons, and any equipment designed to herd or harass animals using vehicles or aircraft. Shooting from a vehicle is illegal in almost all cases.

Using artificial light, thermal optics, or night vision for big game hunting is one of the most common violations and carries severe penalties.

Ensuring Your Gear Is Legal Before Every Hunt

The most reliable way to ensure legality is to review your state’s official hunting regulations each season. Laws can change annually, and relying on outdated information can lead to violations. When unsure, contacting a local game warden is often the best course of action.

Responsible hunters double-check their equipment before every hunt and understand that ignorance of the law is not a valid defense.

Why Legal Hunting Gear Matters

Using legal hunting gear is about more than avoiding penalties. It supports wildlife conservation, ensures humane harvest, and preserves the integrity of hunting as a respected outdoor tradition. Ethical hunters understand that following regulations protects access to hunting land and seasons for future generations.

Final Thoughts

Legal hunting gear forms the foundation of responsible and ethical hunting. While regulations can seem complex, they exist to balance human participation with wildlife conservation. Every hunter has a duty to stay informed, prepared, and compliant.

Before stepping into the field, take the time to confirm that every piece of your gear is legal. Doing so protects you, the wildlife, and the future of hunting itself.

Shooting Range Safety Rules: A Beginner-Friendly Guide

Shooting range safety comes down to a small set of rules followed every single time: keep the muzzle pointed in a safe direction, keep your finger off the trigger until you are ready to fire, treat every firearm as loaded, know your target and what is beyond it, and follow the range officer’s commands without exception. These habits do not change with experience level. A first-time shooter and a lifelong competitor follow the same core rules because range safety depends on consistency, not skill.

This guide explains the universal handling rules, how range commands work, what to do before and during a cease-fire, why eye and ear protection matter, and the hygiene steps that reduce lead exposure at indoor ranges. Range rules vary by facility, so always read and follow the posted rules and the range officer’s instructions at the range you are using.

The Core Firearm Safety Rules

The core firearm safety rules are the foundation of every range, and they apply whether you are handling a rifle, pistol, or shotgun. Most range incidents trace back to breaking one of these basics, so they are worth knowing before you ever step up to the firing line. The National Shooting Sports Foundation’s firearm safety rules are a useful authority reference for these habits.

Always Point the Muzzle in a Safe Direction

A safe direction is one where an accidental discharge would not strike a person or cause unintended harm. At a range, that almost always means pointing the muzzle downrange toward the backstop or target line. Never let the muzzle cross your body or another person, including while picking up, setting down, or carrying a firearm.

Keep Your Finger Off the Trigger Until Ready to Fire

Rest your trigger finger straight along the frame or receiver, outside the trigger guard, until your sights are on the target and you have decided to shoot. This single habit prevents many unintentional discharges and pairs naturally with safe stance and grip practice.

Treat Every Firearm as If It Is Loaded

Handle every firearm as though it can fire, even one you believe is empty. Visually and physically confirm the chamber is clear when you pick one up, and do not rely only on someone else’s word that it is unloaded.

Know Your Target and What Is Beyond It

Be sure of your target and the area behind and around it before firing. At a supervised range the backstop handles this, but you are still responsible for placing shots where the range allows and not firing at anything other than your authorized target.

How Range Commands Work

Range commands are verbal instructions a range safety officer uses to control what everyone on the line does at the same time. Following them immediately is one of the most important safety behaviors at any supervised range because they keep all shooters synchronized.

Common Commands You May Hear

  • Commence fire or the range is hot: shooters at the firing line may load and fire at authorized targets.
  • Cease fire: stop shooting immediately, take your finger off the trigger, and wait for the next instruction. Anyone may call a cease-fire if they see a hazard.
  • Make safe or unload and show clear: unload the firearm, remove the magazine if applicable, open the action, and confirm the chamber is empty.
  • The range is cold: no one handles firearms. This is when shooters may go forward of the line to set or retrieve targets.

Exact command wording can vary by facility, so the range officer and posted range rules always override generic online guidance.

Never Touch a Firearm During a Cold Range

When the range is cold and people may be downrange, do not touch any firearm for any reason, even to case it or move it. Step back from the bench and keep your hands away until the range is called hot again.

Before You Step to the Firing Line

Before you approach the firing line, confirm a few things so you arrive ready and do not create a hazard while setting up. Good preparation reduces fumbling on the line, which is where many handling mistakes happen.

  • Bring firearms to the range unloaded and cased unless the range directs otherwise.
  • Read posted rules, ammunition restrictions, target rules, and lane procedures.
  • Put on eye and ear protection before entering or approaching the active firing area.
  • Keep ammunition, magazines, and gear organized so you do not need to turn around with a firearm in hand.

Cease-Fire Behavior

A cease-fire means stop firing now, and it can be called by the range officer or by any shooter who sees a problem. Stop shooting, remove your finger from the trigger, keep the muzzle pointed in a safe direction, and wait for instructions.

Do not finish your shot, do not turn around with the firearm in hand, and do not ask why before making the firearm safe if instructed. Once the situation is resolved, the range officer will call the range hot again before anyone resumes.

Eye and Ear Protection

Eye and ear protection are required at most ranges because gunfire produces noise that can permanently damage hearing and debris that can injure unprotected eyes. The OSHA eye and face protection overview is a helpful source for understanding why eye protection matters, although range-specific rules still come from the facility.

Hearing Protection

Use earplugs, earmuffs, or both together for higher protection, especially indoors or next to large-caliber firearms. Hearing damage from impulse noise can be permanent and is not always noticeable right away.

Eye Protection

Wear impact-rated safety glasses to guard against ejected casings, fragments, and unburned powder. Side coverage helps, and ordinary prescription glasses are not a substitute unless they meet an appropriate safety rating.

Indoor Range Lead and Noise Hygiene

Indoor ranges carry two extra considerations: lead exposure from primer residue and airborne particles, and concentrated noise in an enclosed space. The CDC/NIOSH indoor firing range guidance explains why ventilation, hygiene, and hearing protection matter in these spaces.

  • Wash your hands and face before eating, drinking, or leaving the range.
  • Avoid eating, drinking, or touching your face on the firing line.
  • Keep range clothing separate from other laundry when practical.
  • Use strong hearing protection indoors because reflected sound can make gunfire feel louder.

A Simple Range Safety Checklist

Use this quick checklist before and during a range trip. It is not a replacement for facility rules, but it helps keep the most important habits visible.

  • Firearm transported unloaded and cased.
  • Posted range rules and range officer instructions read and understood.
  • Eye protection on and appropriate for impact risk.
  • Ear protection on, doubled up indoors or near louder firearms when needed.
  • Muzzle always pointed downrange in a safe direction.
  • Finger off the trigger until ready to fire.
  • Every firearm treated as loaded.
  • Target and backstop confirmed before firing.
  • Immediate stop on any cease-fire call.
  • No firearm handling when the range is cold and people are downrange.
  • Hands and face washed before eating or leaving the range.

Frequently Asked Questions

What are the most important shooting range safety rules?

The most important rules are to keep the muzzle pointed in a safe direction, keep your finger off the trigger until ready to fire, treat every firearm as loaded, know your target and what is beyond it, and follow the range officer’s commands immediately.

Can anyone call a cease-fire at a shooting range?

Yes. Any shooter who sees a hazard can call cease-fire. Everyone on the line should stop firing immediately, remove their finger from the trigger, and wait for instructions.

Do I need both eye and ear protection at the range?

Yes. Eye protection guards against ejected casings and fragments, and ear protection helps reduce hearing risk from gunfire noise. Wear both whenever you are on or near an active firing line.

Why is lead hygiene important at indoor ranges?

Indoor shooting can produce airborne lead particles and residue from primers. Washing your hands and face, avoiding food and drink on the line, and separating range clothing help reduce exposure.

Are shooting range rules the same everywhere?

The core handling rules are consistent, but each range sets its own rules for calibers, rapid fire, holster use, targets, and procedures. Always follow the posted rules and the range officer at the facility you are using.

What to Pack for a Day Hunting: The Complete Field Checklist

For a one-day hunt, pack the gear that keeps you legal, visible, hydrated, oriented, warm enough, and able to handle small problems without overloading your pack. The exact list changes by species, season, state rules, weather, terrain, and how far you will be from the truck. Use this as a field checklist, then confirm current regulations and property rules before you leave.

Table of Contents
  1. Quick Answer
  2. Day Hunting Pack Checklist
  3. Legal and Safety Items
  4. Navigation and Communication
  5. Water, Food, and Weather Protection
  6. Field Care and Cleanup
  7. How to Organize the Pack
  8. Common Packing Mistakes
  9. FAQ
  10. Final Takeaway

Quick Answer

For a day hunt, pack your license and tags, required blaze orange or visibility gear, water, snacks, first aid, navigation, communication, weather layers, headlamp, knife or field-care items, gloves, bags, and any species-specific gear required by the hunt. Keep the pack light enough to carry all day, but do not cut safety, legal, or weather-preparation items just to save a few ounces.

A good day-hunting pack starts with legal items, visibility, water, navigation, first aid, weather layers, and field-care basics.

Day Hunting Pack Checklist

  • License, tags, permits, and ID: Keep them dry and easy to reach.
  • Current regulations: Save or print season dates, limits, legal methods, and property rules.
  • Visibility gear: Pack required blaze orange or other visibility items for your state and hunt type.
  • Water and snacks: Carry more water than you expect to need, especially in warm weather or steep terrain.
  • Navigation: Bring a charged phone, map, compass, GPS, or offline map plan.
  • Communication: Tell someone your plan and carry a way to contact help if coverage allows.
  • First aid and emergency items: Include blister care, bandages, medications, fire starter, and an emergency blanket.
  • Weather layer: Pack rain, wind, or insulation layers based on the forecast.
  • Headlamp: Carry a headlamp even for morning-only or afternoon-only hunts.
  • Field-care items: Gloves, bags, wipes, and a knife where appropriate and legal.

The National Park Service Ten Essentials framework is useful for thinking beyond hunting gear: navigation, light, sun/weather protection, first aid, shelter, water, food, and repair items all matter outdoors. Hunter education resources such as Hunter Ed are also helpful reminders that field preparation and safe decisions go together.

Start with what proves you are legal and what keeps you visible. A license, tag, permit, written permission where needed, and saved regulation summary should be packed before any comfort item. Do not rely on memory for season dates, legal methods, tagging rules, or public-land boundaries. Regulations can change by state, unit, species, season, and property type.

Visibility and Identification

Blaze orange or other visibility requirements vary, so check your state wildlife agency before hunting. Even where it is not required, visibility can matter around other hunters, access roads, and low-light movement. Keep tags, ID, and permission paperwork in a waterproof pouch or phone folder that works offline.

First Aid and Emergency Basics

A small first-aid kit should cover cuts, blisters, minor sprains, personal medication, and basic discomfort. Add a whistle, fire starter, emergency blanket, and a simple repair item such as tape or cord. The goal is not to pack for every disaster; it is to avoid turning a small problem into a long walkout problem.

If you are new or returning after a long break, hunter education organizations such as IHEA-USA are a useful starting point for safety mindset, responsible planning, and understanding why preparation matters before the hunt begins.

Carry a navigation plan that still works if cell service drops. Offline maps, a paper map, compass, GPS, or marked access points can keep a short hunt from becoming confusing after dark. If you use a phone, start with a full battery and consider a small power bank for cold weather or long sits.

Tell someone where you are going, where you plan to park, and when you expect to return. If your route changes, update that person when possible. This simple habit is one of the most valuable things in your pack even though it weighs nothing.

Water, Food, and Weather Protection

Water is easy to underpack because day hunts feel short. Bring enough for the weather, terrain, and distance from the vehicle. Add compact snacks that will not crush easily and that you will actually eat when cold, tired, or focused on the hunt.

Layer for the Worst Part of the Day

Pack for the coldest, wettest, or windiest part of the hunt, not just the weather at the truck. A light rain layer, gloves, warm hat, or insulating layer can make a long sit safer and more comfortable. Avoid cotton layers when wet weather or sweating is likely.

Field Care and Cleanup

If your hunt could involve field care, pack disposable gloves, game bags or legal transport materials, wipes, a sharp knife, and a small trash bag. Keep these items separate from food and clothing. Know the tagging, evidence-of-sex, transport, and check-in requirements before the hunt, because those rules are not the same everywhere.

For bird, small-game, or waterfowl hunts, your field-care kit may look different from a deer hunt. Keep the list species-specific rather than carrying every tool you own.

How to Organize the Pack

Put high-use and safety items where you can reach them without dumping the pack. License, tags, headlamp, first aid, gloves, water, and navigation should be easy to find. Less urgent gear can ride deeper in the pack. Use small pouches so loose items do not sink to the bottom.

Light but Not Bare

The best day-hunting pack is not the heaviest one or the emptiest one. It is the pack that covers likely needs without making you slow, noisy, or uncomfortable. After each hunt, remove what you did not use, replace what you did use, and keep the legal/safety core consistent.

Common Packing Mistakes

  • Forgetting tags, permits, or written permission.
  • Assuming last year’s regulations are still current.
  • Skipping water because the hunt is “only a few hours.”
  • Carrying a headlamp with weak or untested batteries.
  • Overpacking comfort gear while underpacking emergency basics.
  • Leaving field-care gloves or bags in another pack.
  • Failing to tell someone the hunt plan.

FAQ

What should every day hunter pack first?

Pack license, tags, required visibility gear, water, navigation, communication, first aid, weather protection, and a headlamp first. Then add species-specific items.

Do I need a full survival kit for a day hunt?

You do not need a huge pack, but you should carry basic emergency items for weather, darkness, injury, and navigation problems. A day hunt can still become longer than planned.

Should I pack different gear for public land?

Often, yes. Public land may require extra attention to boundaries, parking rules, hunter visibility, pack-out distance, and current agency regulations.

How much water should I bring?

Bring enough for the weather, terrain, and expected time out, with extra margin for a delayed return. Heat, steep terrain, and long walks increase the need quickly.

Final Takeaway

A good day-hunting pack is built around legal readiness, safety, weather, navigation, hydration, and field care. Keep it light, but do not make it fragile. Confirm current rules, tell someone your plan, and pack the items that help you come home safely even when the hunt changes.

Best Ear Protection for Shooting Range: Complete Buyer’s Guide

Spending time at a shooting range without proper ear protection can permanently damage your hearing. Firearms produce impulse noise that often exceeds 140–170 decibels, far above the safe hearing threshold. Even a single unprotected gunshot can cause irreversible hearing loss or tinnitus. That’s why choosing the best ear protection for shooting range use is not optional it’s essential.

In this in-depth guide, we’ll explore how shooting noise affects your ears, the different types of hearing protection available, what features matter most, and how to choose the right option based on your shooting style and environment.

Why Ear Protection Is Critical at a Shooting Range

Gunshots are classified as impulse noise, which is more damaging than continuous noise because it delivers a sudden, extremely loud sound wave. Indoor ranges are especially dangerous since sound reflects off walls and ceilings, amplifying exposure. Repeated exposure without adequate protection can lead to:

  • Permanent noise-induced hearing loss
  • Ringing in the ears (tinnitus)
  • Reduced ability to hear conversations or range commands
  • Increased sensitivity to everyday sounds

Quality ear protection reduces sound levels to safe ranges while still allowing situational awareness.

Understanding Noise Reduction Rating (NRR)

The Noise Reduction Rating (NRR) is one of the most important metrics when selecting ear protection for shooting. It indicates how many decibels of noise the device can reduce.

For shooting ranges:

  • Minimum recommended NRR: 22 dB
  • Ideal NRR for indoor ranges: 26–33 dB

Higher-caliber firearms and indoor environments require higher NRR values. Many experienced shooters even double up by wearing earplugs under earmuffs for maximum protection.

Types of Ear Protection for Shooting Ranges

Foam Earplugs

Foam earplugs are one of the most affordable and effective solutions when used correctly. They expand inside the ear canal to create a tight seal that blocks noise.

They are lightweight, disposable, and offer high NRR ratings often up to 33 dB. However, they must be inserted properly to be effective, and they don’t allow you to hear conversations or range commands clearly.

Foam earplugs are best suited for shooters who prioritize maximum noise reduction and don’t mind limited communication.

Reusable Earplugs

Reusable earplugs are typically made from silicone or rubber and are designed for long-term use. They are easier to insert than foam plugs and more environmentally friendly.

While their NRR is usually slightly lower than foam plugs, they are comfortable for extended sessions and ideal for shooters who visit the range frequently.

Some models include acoustic filters that reduce harmful noise while letting lower-level sounds pass through.

Passive Earmuffs

Passive earmuffs cover the entire ear and block noise through sound-dampening materials. They are easy to put on and take off, making them popular among beginners.

Most passive earmuffs offer NRR ratings between 22 and 30 dB. They work well at outdoor ranges but can interfere with cheek weld when using rifles or shotguns.

They are a solid choice for casual shooters and guests at the range.

Electronic Earmuffs (Best Overall Choice)

Electronic earmuffs are widely considered the best ear protection for shooting range use, especially for regular shooters. These muffs use built-in microphones to amplify low-level sounds like speech while instantly cutting off harmful gunshot noise.

This allows you to:

  • Hear range commands clearly
  • Communicate with other shooters
  • Maintain situational awareness

High-quality electronic earmuffs typically offer NRR ratings around 22–26 dB and are ideal for both indoor and outdoor shooting.

Custom Molded Ear Protection

Custom molded earplugs are created from impressions of your ears, providing a perfect fit and superior comfort. They offer consistent protection and are excellent for long shooting sessions.

Although more expensive, they are popular among competitive shooters, instructors, and professionals who spend hours at the range.

Some advanced versions include electronic sound enhancement similar to electronic earmuffs.

Best Ear Protection Based on Shooting Environment

Indoor Shooting Ranges

Indoor ranges are louder due to sound reflection. For these environments, the best option is double hearing protection foam earplugs combined with electronic or passive earmuffs.

This setup can provide a combined protection level suitable for high-caliber firearms and prolonged sessions.

Outdoor Shooting Ranges

Outdoor ranges disperse sound more effectively. High-quality electronic earmuffs or high-NRR earplugs are usually sufficient, depending on firearm caliber.

Electronic earmuffs are especially beneficial outdoors, where communication and awareness are important.

Key Features to Look for in Shooting Ear Protection

Comfort is critical, especially during long sessions. Look for padded ear cups, adjustable headbands, and lightweight designs.

Durability matters as well. Shooting ear protection should withstand frequent use, temperature changes, and minor impacts.

Low-profile ear cups are important for rifle shooters to avoid interference with stock positioning.

Battery life is another factor for electronic earmuffs. Models with automatic shutoff features help conserve power.

How to Properly Wear Ear Protection

Even the best ear protection won’t work if worn incorrectly. Foam earplugs should be rolled tightly, inserted deeply, and allowed to expand fully. Earmuffs must create a tight seal around the ears without gaps caused by glasses or hats.

For maximum safety, especially indoors, combining earplugs with earmuffs provides the highest level of hearing protection.

Final Thoughts

The best ear protection for shooting range activities depends on your shooting frequency, environment, and firearm type. For most shooters, electronic earmuffs paired with high-NRR earplugs offer the best balance of safety, comfort, and awareness.

Protecting your hearing is a lifelong investment. Unlike other gear, hearing loss cannot be repaired only prevented. Choosing the right ear protection ensures you can enjoy shooting sports safely for years to come.

Budget Rifle Scope for Beginners: What to Look For

Choosing your first rifle scope can feel overwhelming, especially when you are on a budget. The optics market is flooded with options that promise crystal-clear glass, extreme durability, and long-range precision often at prices that seem too good to be true. For beginners, the challenge is not finding a scope, but finding the right scope that balances performance, durability, and cost without sacrificing reliability.

A budget rifle scope does not mean a low-quality rifle scope. It means understanding which features truly matter for your shooting needs and which are simply marketing extras. This guide will walk you through everything a beginner needs to know before buying a budget rifle scope, helping you spend your money wisely and avoid common mistakes.

Understanding Your Purpose First

Before you even look at magnification numbers or reticle styles, you must be clear about how you plan to use the rifle scope. A scope suitable for casual range shooting may not perform well for hunting or tactical training. Beginners often make the mistake of buying the most powerful scope they can afford without considering whether it suits their actual use.

If you primarily shoot at the range within 50 to 200 yards, a simple low-to-mid magnification scope will be more than enough. For hunting, clarity in low-light conditions becomes more important than extreme zoom. For long-range target shooting, precision adjustments and reticle accuracy matter most. Identifying your primary purpose will immediately narrow down your options and prevent unnecessary spending.

Magnification: Why More Is Not Always Better

Magnification is one of the most misunderstood aspects of rifle scopes among beginners. Many new shooters assume that higher magnification automatically leads to better accuracy, but this is not true. Excessive magnification can actually make shooting more difficult by exaggerating movement and reducing field of view.

For beginners on a budget, variable scopes in the 2-7x, 3-9x, or 4-12x range offer the best balance of versatility and usability. A 3-9x scope, for example, is widely considered one of the most beginner-friendly options because it works well for both range shooting and hunting at moderate distances. Fixed-power scopes can be cheaper and more durable, but they lack flexibility, which most beginners benefit from.

Objective Lens Size and Light Transmission

The objective lens is the large lens at the front of the scope, and its size plays a key role in light transmission. Larger objective lenses allow more light to enter, resulting in a brighter image, especially in low-light conditions such as dawn or dusk.

However, larger lenses also make the scope heavier and require higher mounting, which can affect cheek weld and shooting comfort. For beginners, an objective lens size between 32mm and 40mm is usually ideal. This range provides sufficient brightness without adding unnecessary bulk or cost. Ultra-large objective lenses may sound appealing, but they rarely provide real benefits for beginner-level shooting.

Glass Quality Over Brand Names

When shopping for a budget rifle scope, glass quality matters far more than the brand logo. High-end scopes use premium glass and advanced coatings, but many budget-friendly scopes still offer surprisingly good clarity if they use proper multi-coated lenses.

Look for scopes labeled as fully multi-coated rather than simply coated. This improves light transmission, reduces glare, and enhances image contrast. While you may not get edge-to-edge clarity comparable to premium optics, a good budget scope should still provide a clear and usable sight picture under normal conditions. Avoid scopes that show heavy distortion, excessive blurriness at higher magnifications, or poor color accuracy.

Reticle Types: Keep It Simple

Reticles come in many designs, from simple crosshairs to complex tactical grids. For beginners, simplicity is key. A basic duplex or simple BDC (Bullet Drop Compensating) reticle is usually the best choice.

Complex reticles with excessive markings can be distracting and difficult to understand, especially for new shooters who are still learning fundamentals. A simple reticle allows you to focus on proper sight alignment, trigger control, and follow-through. As your skills improve, you can always upgrade to a more advanced reticle if needed.

Turret Quality and Adjustments

Turrets control elevation and windage adjustments, and their quality directly affects accuracy. In the budget category, you should not expect ultra-precise tracking, but the turrets should still be consistent and repeatable.

For beginners, capped turrets are often preferable because they protect against accidental adjustments during transport or field use. If you plan to dial frequently for distance, exposed turrets can be useful, but only if they are well-built. Cheap turrets that do not return to zero accurately can cause frustration and missed shots.

It is also important that turret clicks are tactile and audible. Soft or mushy clicks make it difficult to know whether your adjustment has registered correctly.

Durability and Build Quality

A rifle scope must withstand recoil, environmental exposure, and regular handling. Even budget scopes should be shockproof, waterproof, and fog-resistant. These features are not luxuries; they are essentials.

Most reliable budget scopes are made from aircraft-grade aluminum and sealed with O-rings to prevent moisture ingress. Nitrogen or argon purging helps prevent internal fogging. While a beginner may not subject their scope to extreme abuse, a poorly built scope can lose zero or fail internally after minimal use.

Eye Relief and Comfort

Eye relief refers to the distance between your eye and the scope where the image is clear. Insufficient eye relief can result in discomfort or even injury from recoil, especially on higher-caliber rifles.

Beginners should look for scopes offering at least 3.5 inches of eye relief. Consistent eye relief across magnification levels is also important. A comfortable shooting experience encourages proper technique and reduces fatigue during longer shooting sessions.

Weight and Balance Considerations

Budget scopes vary widely in weight, and beginners often overlook this factor. A heavy scope can throw off rifle balance, making it harder to hold steady and track targets.

For most beginners, a lightweight scope improves handling and overall shooting comfort. While heavier scopes may feel more robust, they are not always necessary for entry-level shooting. Balance is especially important for hunters and offhand shooters.

Warranty and Customer Support Matter

One of the best indicators of a trustworthy budget rifle scope is a solid warranty. Many reputable optics brands offer lifetime warranties even on their entry-level products. This provides peace of mind and protects your investment if something goes wrong.

A strong warranty often reflects the manufacturer’s confidence in their product. Beginners should avoid unknown brands with no clear warranty or customer support presence, as replacing or repairing a defective scope can be difficult or impossible.

Common Beginner Mistakes to Avoid

Many beginners overspend on magnification while ignoring glass quality. Others choose scopes designed for long-range shooting when their actual needs are basic. Another common mistake is buying the cheapest scope available without researching reviews or specifications.

A budget rifle scope should still meet fundamental performance standards. Saving money is important, but reliability and usability should never be compromised.

Final Thoughts

Buying your first rifle scope is an important step in your shooting journey. A well-chosen budget scope can provide years of reliable performance and help you develop solid shooting fundamentals. By focusing on practical magnification, decent glass quality, simple reticles, and proven durability, beginners can avoid costly mistakes and unnecessary upgrades.

Remember, accuracy comes from skill first and equipment second. A modest, reliable scope in capable hands will always outperform an expensive optic used incorrectly. Start with the right basics, and upgrade only when your experience truly demands it.

Military Sunglasses for Outdoor Shooting: Precision, Protection, and Performance

Outdoor shooting demands more than just skill and the right firearm it requires clear vision, eye protection, and comfort under changing light and weather conditions. This is where military sunglasses for outdoor shooting play a critical role. Designed to meet the rigorous standards of military and tactical professionals, these sunglasses provide unmatched durability, ballistic protection, and visual clarity that standard eyewear simply cannot offer.

In this in-depth guide, we’ll explore what makes military sunglasses essential for outdoor shooting, key features to look for, lens technologies, and how they enhance shooting performance in real-world environments.

Why Military Sunglasses Matter in Outdoor Shooting

Outdoor shooting environments are unpredictable. Dust, debris, wind, glare, and sudden light changes can all affect vision and safety. Military sunglasses are engineered specifically to handle these challenges.

Unlike regular sunglasses, military-grade shooting eyewear is designed to:

  • Protect against high-velocity debris and shell casings
  • Reduce glare without distorting targets
  • Enhance contrast for faster target acquisition
  • Maintain clarity during long shooting sessions

For both recreational shooters and professionals, the right eyewear can significantly improve accuracy and reduce eye fatigue.

Ballistic Protection: Safety Comes First

One of the most important features of military sunglasses is ballistic-rated eye protection. These glasses are tested against strict military standards such as ANSI Z87.1 and MIL-PRF-32432, ensuring they can withstand high-impact threats.

How Ballistic Protection Helps Shooters

  • Shields eyes from ricochets and fragments
  • Protects against ejected shell casings
  • Prevents dust and debris from entering the eyes
  • Reduces risk of serious eye injuries

For outdoor shooting ranges, tactical drills, or hunting in rugged terrain, ballistic protection is non-negotiable.

Advanced Lens Technology for Shooting Accuracy

Military sunglasses are equipped with specialized lenses that enhance vision rather than simply darken it.

Polarized vs Non-Polarized Lenses

  • Polarized lenses reduce glare from reflective surfaces like sand, water, or metal, making them ideal for bright outdoor environments.
  • Non-polarized lenses are often preferred for tactical shooting as they preserve depth perception and visibility of digital optics.

Lens Color Options and Their Benefits

  • Smoke/Grey lenses: Maintain natural color balance in bright sunlight
  • Brown/Bronze lenses: Enhance contrast and depth perception
  • Yellow/Amber lenses: Improve visibility in low-light or overcast conditions
  • Clear lenses: Perfect for dusk, dawn, or indoor-outdoor transitions

Many military sunglasses feature interchangeable lenses, allowing shooters to adapt quickly to changing light conditions.

Anti-Fog and Scratch-Resistant Coatings

Outdoor shooting often involves temperature changes, sweat, and humidity. Fogged lenses can compromise safety and performance.

Military-grade shooting sunglasses typically include:

  • Anti-fog coatings to maintain clear vision
  • Scratch-resistant surfaces for long-term durability
  • Hydrophobic coatings that repel water, sweat, and oil

These features ensure uninterrupted focus during extended shooting sessions.

Frame Design Built for Tactical Use

Military sunglasses are designed for comfort and stability, even during intense movement.

Key Frame Features

  • Lightweight materials like TR90 or ballistic polycarbonate
  • Wraparound design for full peripheral coverage
  • Rubberized nose pads and temple grips for slip resistance
  • Helmet and ear-protection compatibility

These design elements ensure the sunglasses stay securely in place without causing pressure points, even when worn for hours.

UV Protection for Long-Term Eye Health

Extended exposure to sunlight can cause eye strain and long-term damage. Military sunglasses offer 100% UVA and UVB protection, safeguarding your eyes during prolonged outdoor shooting activities.

This is especially important for shooters who train or hunt in open environments such as deserts, plains, or mountainous regions.

Military Sunglasses vs Regular Shooting Glasses

While standard shooting glasses may offer basic protection, military sunglasses provide a higher level of performance.

FeatureMilitary SunglassesRegular Sunglasses
Ballistic Impact ProtectionYesNo
Interchangeable LensesOftenRare
Tactical FitYesNo
Anti-Fog TechnologyAdvancedLimited
DurabilityExtremeModerate

For serious shooters, military sunglasses are a long-term investment in safety and performance.

Ideal Use Cases for Military Shooting Sunglasses

Military sunglasses are suitable for a wide range of outdoor shooting activities, including:

  • Tactical and defensive shooting
  • Military and law enforcement training
  • Competitive shooting sports
  • Hunting in bright or harsh environments
  • Range training with high round counts

Their versatility makes them a favorite among professionals and enthusiasts alike.

How to Choose the Right Military Sunglasses for Shooting

When selecting the best military sunglasses for outdoor shooting, consider the following:

  • Ballistic safety certifications
  • Lens interchangeability
  • Comfort and fit with hearing protection
  • Light conditions you shoot in most often
  • Durability and warranty

Choosing the right pair ensures optimal performance and eye protection in every scenario.

Final Thoughts

Military sunglasses for outdoor shooting are more than just protective eyewear they are precision tools designed to enhance vision, safety, and shooting performance. With ballistic protection, advanced lens technology, and tactical comfort, they offer a level of reliability that standard sunglasses cannot match.

Whether you’re a professional operator, competitive shooter, or outdoor enthusiast, investing in high-quality military sunglasses can significantly elevate your shooting experience while keeping your eyes protected in the most demanding environments.

Exit mobile version