Brass Catcher Benefits and Features: What to Know Before You Buy

A brass catcher is a mesh or bag accessory that collects spent cartridge cases as they eject. It can save cleanup time, help reloaders keep their brass together, and reduce the chance of cases rolling across a bench or into the dirt. The important catch is compatibility: a brass catcher must fit your firearm and must not interfere with ejection, controls, sight setup, or safe operation.

This guide explains what brass catchers do, who they help, and the checks to make before buying one. It is a benefits-and-features explainer, not a product roundup, and it does not claim any one catcher fits every firearm.

What a Brass Catcher Does

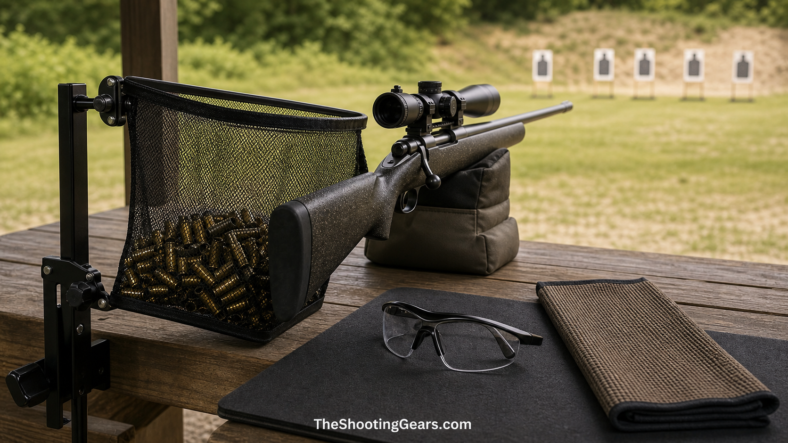
A brass catcher collects spent cases as the firearm ejects them, usually into a mesh basket or fabric bag mounted near the ejection port. Instead of brass scattering across the ground, a bench, or a neighboring lane, the cases land in the catcher for easier collection.

Manufacturers such as Caldwell treat brass catchers as a standard range-gear category, and designs vary by firearm type, attachment point, and ejection pattern.

Main Benefits of a Brass Catcher

The core benefit is convenience. A brass catcher reduces cleanup time, keeps your shooting area tidier, and helps prevent brass from rolling away or landing where it is hard to retrieve.

For shooters who reload, it also keeps spent cases together and cleaner than brass that has scattered across dirt, sand, or gravel. It can also reduce the nuisance of hot brass bouncing around a covered bench, though it does not replace eye protection, safe handling, or normal range awareness.

Where Brass Catchers Help Most

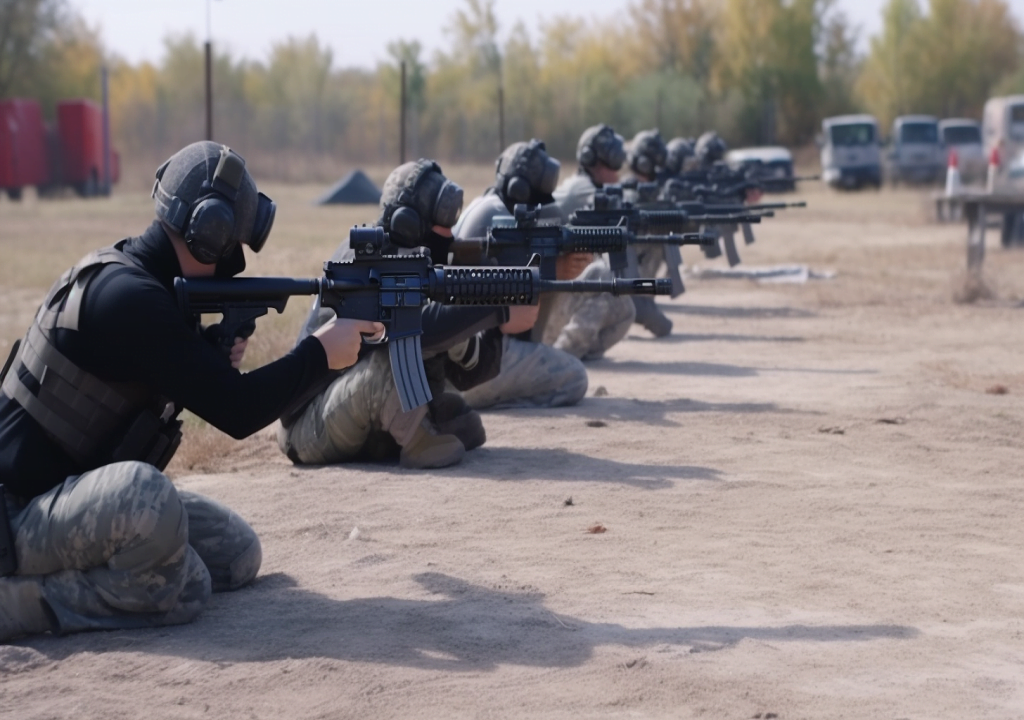
Brass catchers help most in a few specific situations. High-volume range shooters save the most cleanup time. Reloaders benefit from keeping their own cases separated and cleaner. Shooters at shared benches may also appreciate not sending brass into neighboring lanes.

If you only shoot a few rounds occasionally and do not reload, the convenience may matter less. In that case, the decision is mostly about range etiquette and cleanup preference rather than necessity.

Compatibility Checks Before Buying

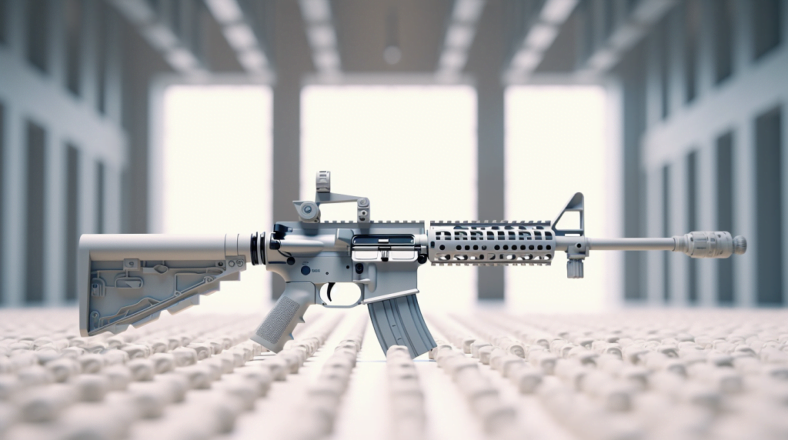
Compatibility is the most important thing to check because no brass catcher fits every firearm. Catchers are designed around specific attachment points and ejection patterns. Some mount to a rail, some attach around the receiver, and some are made for a narrower firearm family or ejection-port design.

Before buying, confirm the catcher is intended for your firearm type and that it will sit where your gun actually ejects. Check rail or mount type, optic clearance, charging-handle access, ejection pattern, and manufacturer guidance. When a listing is vague about fit, verify with the manufacturer instead of assuming it will work.

Safety and Function Checks

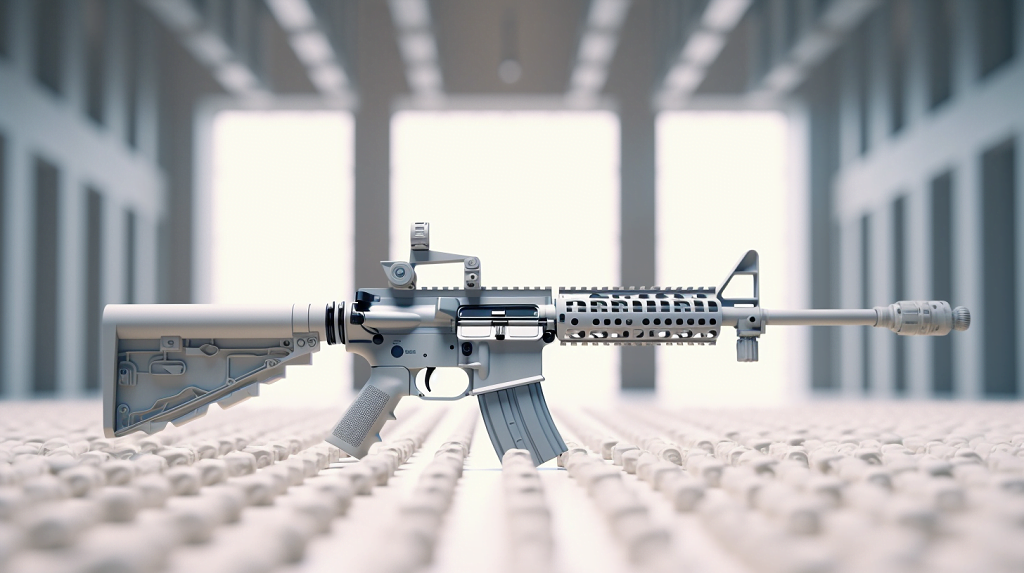
A brass catcher must not compromise how your firearm operates. Before relying on one, confirm at the range that it does not block ejection, interfere with controls, contact the optic or mount, or cause cases to bounce back toward the ejection port.

Follow your firearm manual, the brass catcher maker’s instructions, and the range’s rules. Basic firearm safety still applies whenever the catcher is attached; the NSSF firearm safety rules are a useful baseline. Stop using the catcher if it causes any ejection or handling problem.

Limitations and Common Problems

Brass catchers have real limitations. A poorly fitted catcher can cause cases to bounce back toward the ejection port, fail to clear, or collect in a way that creates a stoppage. Some designs fill up, sag, or shift and need to be emptied or adjusted during longer sessions.

A brass catcher does not improve firearm reliability, does not prevent every hot-brass issue, and will not catch every case in every condition. Treat it as a convenience accessory, not a performance upgrade or a safety device.

Brass Catchers for Reloaders

For reloaders, a brass catcher is mostly about recovery and case condition. Collecting brass directly from the ejection path keeps more of your cases together and cleaner than brass that lands in dirt, sand, gravel, or wet grass.

It does not make any case safe to reuse on its own. Reloading decisions still depend on your own inspection and process. This article does not provide reloading instructions, load data, pressure advice, or case-life claims.

Range Etiquette and Cleanup

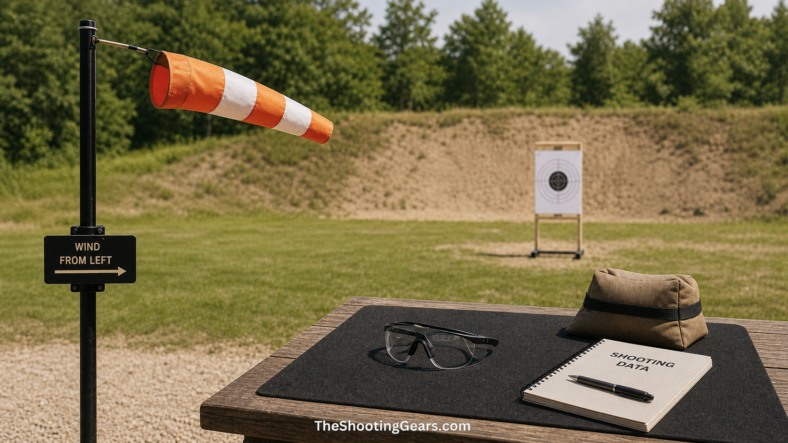
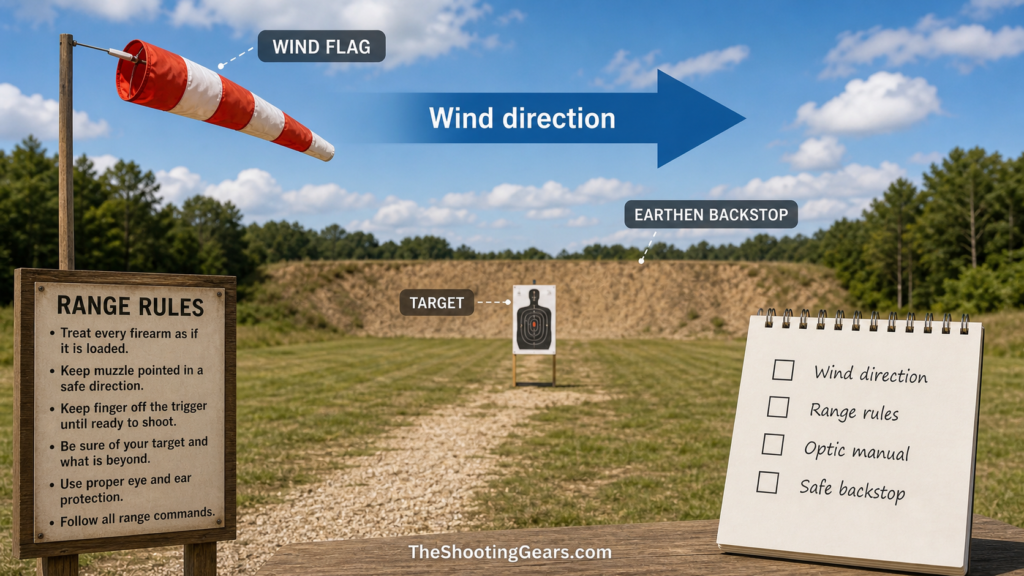
Brass catchers can also help with range etiquette. Some ranges ask shooters to clean up their brass, and some have specific rules about equipment on the firing line. A catcher can make cleanup easier where it is allowed, but posted range rules and range officer instructions always come first.

Eye and ear protection still matter around ejected brass and active firing lines. NSSF has a practical overview of why shooters should wear eye and ear protection when shooting. Leaving your bench clean and following commands is part of being a considerate shooter.

Frequently Asked Questions

What is the point of a brass catcher?

A brass catcher collects spent cases as they eject, saving cleanup time and keeping brass together. It is especially useful for high-volume shooters and reloaders who want to recover their cases.

Do brass catchers fit all firearms?

No. Brass catchers are designed around specific attachment points and ejection patterns. Confirm that the catcher is made for your firearm and that it mounts where your gun actually ejects.

Can a brass catcher cause malfunctions?

It can if it is poorly fitted or interferes with ejection. A catcher that blocks the ejection path or bounces cases back toward the port can cause a failure to clear. Stop using it if it interferes with safe operation.

Are brass catchers worth it for reloaders?

For many reloaders, yes, because they keep spent cases collected and cleaner than brass that scatters on the ground. They do not replace careful case inspection before reuse.

Will a brass catcher stop hot brass from burning me?

Not entirely. A catcher can reduce loose brass bouncing around, but it does not prevent every hot-brass issue and does not replace eye protection, safe handling, or attention to the firing line.

Final Recommendation

A brass catcher is a practical convenience for high-volume shooters and reloaders who want less cleanup and cleaner, collected brass. The key is fit: confirm the catcher is intended for your firearm, verify at the range that it does not interfere with ejection or controls, and stop using it if it causes any problem. Chosen and checked carefully, a brass catcher can make range days tidier without changing how your firearm performs.

Shooting With Your Non-Dominant Hand: Safe Practice Tips

Shooting with your non-dominant hand is a learnable range-practice skill, but the safe approach is to slow down, keep the fundamentals simple, and get help when your setup feels uncomfortable. People practice from the other side for many reasons: eye dominance, temporary hand limitations, reduced mobility, or a desire to build more balanced skills.

This guide is safety-first and beginner-friendly. It is not advanced-use, legal, or competitive coaching, and it does not claim that general tips will solve an injury, disability, vision change, or mobility issue. If pain, injury, disability, medication, vision changes, or reduced mobility are involved, work with the right professionals and a qualified instructor.

Quick Safety-First Checklist

Before changing hands or stance, keep these basics front and center.

  • Follow firearm safety rules at every step.
  • Start with unloaded, safe handling only where it is legal, appropriate, and allowed by the manual and range rules.
  • Check eye dominance before changing your shooting side.
  • Begin live fire slowly, close, and controlled at a safe range.
  • Stop if there is pain, confusion, unsafe handling, or discomfort you cannot explain.
  • Consider a qualified instructor or adaptive program for hands-on guidance.

When Non-Dominant-Hand Practice Makes Sense

There are several reasonable reasons to practice from the non-dominant side. Cross dominance, where your dominant eye is on the opposite side from your dominant hand, can make sight alignment from your usual side feel awkward. A temporary limitation may make your usual hand unavailable. Some shooters simply want more balanced range skills.

Adaptive shooting is also a recognized part of the sport, including Paralympic shooting at the highest levels. That does not mean a general article can replace coaching or adaptive support. It simply shows that shooting can be approached in different ways when the setup is safe, appropriate, and guided.

Start With Firearm Safety Basics

Changing hands, stance, or visual alignment makes the basic safety rules more important, not less. Keep the muzzle pointed in a safe direction, handle every firearm as if it is loaded, keep your finger off the trigger until you are ready to fire, and be sure of your target and what is beyond it.

These fundamentals from sources such as the NSSF firearm safety rules anchor everything else. When your hands are doing something unfamiliar, deliberate safety habits prevent sloppy movement from becoming unsafe movement.

Check Eye Dominance Before Changing Your Setup

Eye dominance often drives the decision to switch sides. Ocular dominance is the tendency to favor visual input from one eye. When the dominant eye is opposite the dominant hand, aligning sights from the usual side can feel less natural.

You can check eye dominance with a simple alignment test, but use the result as practical context rather than a formal assessment. Because eye dominance affects the whole setup, it is worth confirming with an instructor before making a major change.

Build Comfort Before Live Fire

Comfort comes before live fire. Where it is legal, safe, and consistent with your firearm manual and range rules, unloaded handling can help you get used to the new grip, mount, stance, and sight alignment. Keep the muzzle in a safe direction even during unloaded practice.

Focus on a relaxed, repeatable hold and a natural sight picture on the new side. The goal is familiarity, not speed. If the position feels painful, unstable, or confusing, stop and get help before adding live fire.

Practice Slow, Simple Fundamentals

When you move to live fire, start slow, close, and controlled. Use a safe range, follow the range officer, and keep the target distance manageable. Fire deliberately while focusing on consistent grip, stance, sight alignment, breathing, and a smooth trigger press.

The goal is safe, repeatable fundamentals, not speed or advanced drills. Progress only as comfort and consistency grow. A calm session with a few careful shots is more useful than a rushed session that teaches poor habits.

When to Work With an Instructor or Adaptive Program

Some situations call for qualified help, and there is no downside to asking for it. A certified instructor, range safety officer, or adaptive shooting program can provide hands-on feedback that an article cannot, especially when you are changing hands, adapting your stance, or working around a physical limitation.

If pain, injury, a medical condition, medication, vision changes, or reduced mobility are involved, get appropriate professional guidance first. The right goal is a safe, workable setup for your needs, not forcing yourself into a generic position.

Common Mistakes to Avoid

A few mistakes show up often. Rushing into live fire before the new position feels comfortable leads to poor habits and added risk. Pushing through pain instead of stopping can make a problem worse. Assuming one stance, grip, or eye technique works for everyone ignores real differences between shooters.

Another common mistake is skipping the eye-dominance check and fighting an alignment issue that could have been identified early. Slowing down, keeping the practice simple, and getting feedback addresses most of these problems.

Frequently Asked Questions

Should I shoot from the side of my dominant hand or dominant eye?

It depends on the shooter. Many cross-dominant shooters find that shooting from the side of the dominant eye improves alignment and comfort, but the best setup should be confirmed with safe handling and, ideally, an instructor.

How do I check my eye dominance?

A common method is a simple alignment test where you focus on a distant object through a small opening formed by your hands and note which eye keeps it centered. Because eye dominance affects the whole setup, confirm your results with an instructor when possible.

Is it hard to learn to shoot with my non-dominant hand?

It takes patience, but it is learnable. Start with safe unloaded handling where appropriate, then begin live fire slowly and close at a safe range. Focus on consistent fundamentals rather than speed.

Can I shoot if I have an injury or disability?

Many people participate in shooting sports with different physical needs, but a general article cannot evaluate your situation. If pain, injury, disability, medication, or vision changes are involved, get appropriate professional guidance and consider a qualified adaptive shooting program.

Should I take a lesson for this?

Yes, it is a strong idea. A qualified instructor or adaptive program can give hands-on feedback, watch muzzle direction and trigger discipline, and help you build a safe setup from the start.

Final Recommendation

Shooting with your non-dominant hand is achievable when you put safety first and build fundamentals slowly. Check eye dominance, get comfortable with safe unloaded handling where appropriate, start live fire slowly, and never push through pain. For anything involving injury, disability, vision changes, or persistent difficulty, a qualified instructor or adaptive program is the right next step.

Unleashing Your Potential: The Competition AR-15

Table of Contents

1. Introduction

The AR-15 is known for its versatility and adaptability. The competition AR-15 is specifically designed for competitive shooting matches, allowing shooters to maximize their potential. In this article, we’ll discuss the features, benefits, customization options, and factors to consider when selecting a competition AR-15.

2. Understanding the Competition AR-15

The competition AR-15 is designed specifically for various shooting competitions, such as 3-gun, USPSA (United States Practical Shooting Association), IPSC (International Practical Shooting Confederation), and other dynamic shooting events. It combines feature that enhance accuracy, ergonomics, and speed, allowing shooters to perform at their best.

3. Key Features of a Competition AR-15

3.1 Enhanced Ergonomics

Competition AR-15s often incorporate ergonomic enhancements such as adjustable stocks, extended charging handles, ambidextrous controls, and enlarged magazine releases. These features enable shooters to achieve a more comfortable and efficient shooting stance while facilitating faster and smoother manipulations.

3.2 Lightweight Construction

Weight reduction is a crucial aspect of competition shooting, as it allows for faster transitions between targets and reduces shooter fatigue. Many competition AR-15s feature lightweight materials such as aluminum or polymer receivers, carbon fiber handguards, and skeletonized components to achieve a lighter overall package.

3.3 Optics and Sights

Competition shooters often rely on optics or red dot sights for faster target acquisition and improved accuracy. Mounting options such as Picatinny or M-LOK rails on competition AR-15s allow for easy attachment of various optics, scopes, and sight systems based on the shooter’s preference and shooting discipline.

3.4 Upgraded Triggers

Trigger upgrades are commonly implemented in competition AR-15s in order to achieve a lighter, crisper, and more consistent trigger pull. Transitioning to single-stage or two-stage triggers with adjustable pull weights is a popular choice among competitors. These upgrades facilitate precise trigger control and, as a result, contribute significantly to improved shot placement.

3.5 Adjustable Stocks

Additionally, adjustable stocks offer shooters the flexibility to customize the length and height of their rifle’s stock, resulting in a comfortable and consistent shooting position. This level of customization allows shooters to fine-tune the fit and feel of their rifle, ensuring it perfectly matches their body size and shooting preferences.

4. Customization and Modifications

Customization plays a significant role in optimizing a competition AR-15 for individual preferences and shooting disciplines. Here are some common modifications:

4.1 Barrel and Handguard Upgrades

Various shooting styles may call for specific barrel lengths, shapes, and handguard setups. Opting for a high-quality barrel and a lightweight handguard can improve accuracy, reduce weight, and offer better support for accessories.

4.2 Muzzle Devices

Muzzle devices such as compensators or muzzle brakes can help mitigate recoil and muzzle rise, allowing for faster follow-up shots and quicker target transitions.

4.3 Trigger Upgrades

Adjusting the trigger can greatly enhance shot consistency. Installing a top-notch aftermarket trigger can decrease trigger weight, reduce creep and overtravel, and deliver a sharper break.

4.4 Optics and Red Dot Sights

Choosing the right optic or red dot sight for your shooting discipline is essential. Factors such as reticle type, magnification, and sight picture clarity should be considered when selecting an optic that meets your specific needs.

4.5 Accessories and Ergonomic Enhancements

Accessories such as angled foregrips, bipods, extended magazine releases, and ambidextrous charging handles can further enhance ergonomics, comfort, and ease of use.

5. Benefits of Using a Competition AR-15

5.1 Enhanced Accuracy and Performance

The ergonomic design, great triggers, and improved optics work together to enhance accuracy and overall shooting performance. This enables precise shots with less kickback and quicker follow-up shots.

5.2 Faster Target Acquisition

Optics or red dot sights mounted on competition AR-15s provide faster target acquisition and improved sight picture. This advantage enables shooters to quickly transition between targets and engage them with greater efficiency.

5.3 Customizability and Adaptability

The AR-15 platform is highly customizable, allowing shooters to personalize it to their liking for various shooting styles and personal preferences. They can customize their competition AR-15s to meet their specific needs, ensuring the best performance and comfort.

5.4 Competitive Edge in Shooting Matches

Using a competition-specific AR-15 gives you an advantage in shooting matches. With its special features, customization options, and improved performance, it can help you achieve higher scores and rankings.

6. Choosing the Right Competition AR-15

6.1 Consider Your Shooting Discipline

Each shooting discipline has its own requirements and restrictions. Make sure to research and understand the rules and regulations of your chosen shooting discipline to ensure that your competition AR-15 meets all the necessary criteria.

6.2 Quality and Reliability

Invest in a high-quality competition AR-15 from reputable manufacturers or trusted custom builders. Reliability is paramount in competitive shooting, as malfunctions or failures can significantly impact performance and match results.

6.3 Budgetary Considerations

Decide on a budget for your competition AR-15 build or purchase. Take into account the expenses of essential upgrades, accessories, and ammunition. Finding the right balance between quality, performance, and affordability is crucial when making buying choices.

7. Conclusion

A competition AR-15 is a specialized rifle that helps shooters excel in competitive shooting. It offers enhanced ergonomics, light weight, and customizable options, enabling shooters to perform their best. Choosing the right components, accessories, and modifications is crucial to match your shooting discipline and personal preferences, giving you the edge to succeed.

8. FAQs

Q1. Can I use a competition AR-15 for other shooting applications outside of competitions?
Ans. Absolutely. While they are optimized for competitive shooting, they can also be used for recreational shooting, training, and self-defense with appropriate modifications and adjustments.

Q2. Are competition AR-15s legal for civilian ownership?
Ans. Yes, They are legal for civilian ownership in most jurisdictions, provided they comply with local firearm regulations and restrictions.

Q3. Can I build my own competition AR-15, or should I buy a pre-built one?
Ans. Both options are viable. Building your own AR-15 allows for customization and tailoring it to your preferences, but it requires knowledge and experience in firearm assembly. Buying a pre-built competition AR-15 from reputable manufacturers ensures quality and reliability but may have fewer customization options.

Q4. Can I use a standard AR-15 for competitions?
Ans. While a standard AR-15 can be used for competitions, optimizing it with competition-specific features and modifications will provide a significant advantage in terms of ergonomics, accuracy, and performance.

Q5. What shooting disciplines are suitable for a competition AR-15?
Ans. Competition AR-15s are versatile and can be adapted to various shooting disciplines such as 3-gun, USPSA, IPSC, IDPA (International Defensive Pistol Association), and NRA High Power Rifle matches, among others. It’s essential to research and understand the requirements and rules of your chosen shooting discipline to ensure compliance.

AR-15 Parts Diagram: Understanding the Components of America’s Iconic Rifle

Introduction

Have you ever wondered what makes the AR-15 rifle so popular and versatile? Well, one of the keys to its success lies in the understanding of its parts and how they work together to create a reliable and accurate firearm. In this article, we will take a comprehensive look at the AR-15 parts diagram, dissecting each component and unraveling the inner workings of this iconic rifle.

Table of Contents

The Lower Receiver

At the heart of the AR-15 lies the lower receiver, which houses the rifle’s fire control group and serves as the foundation for the rest of the components. Let’s explore some key parts of the lower receiver:

The Receiver Extension (Buffer Tube)

The receiver extension, commonly known as the buffer tube, provides the attachment point for the stock and houses the recoil buffer and spring. It comes in various sizes and configurations to accommodate different stock options.

The Pistol Grip

The pistol grip is where the shooter’s hand grasps the rifle. It provides comfort and control while also housing the trigger mechanism. Pistol grips come in different shapes and sizes, allowing shooters to customize their grip based on personal preference.

The Trigger Assembly

In the AR-15 Parts Diagram, the trigger assembly plays a crucial role. It includes the trigger, hammer, and several springs and pins. When the trigger is pulled, the assembly releases the hammer, initiating the rifle’s firing process. The performance and trigger pull characteristics of the rifle are significantly influenced by the quality and design of the trigger assembly.

The Upper Receiver

Moving on to the upper receiver, let’s explore the components that complete the upper half of the AR-15:

The Barrel

The barrel is where the magic happens. It guides the bullet’s path and determines the rifle’s accuracy and range. AR-15 barrels come in various lengths, profiles, and chamberings to suit different shooting preferences and applications.

The Gas System

The gas system regulates the flow of gas from the barrel to operate the action. It consists of the gas block, gas tube, and gas key. The AR-15 primarily uses a direct impingement gas system, where gas is redirected through the gas tube to the bolt carrier group.

The Handguard

The handguard serves as a protective covering for the barrel and gas system while providing attachment points for accessories like grips, lights, and lasers. It comes in different lengths and styles, allowing users to customize their rifles for different purposes.

The Bolt Carrier Group

The bolt carrier group (BCG) is the heart of the AR-15’s action. It houses the bolt, firing pin, cam pin, and extractor. The BCG is responsible for chambering rounds, extracting spent casings, and cycling the rifle’s action.

The Fire Control Group

The fire control group (FCG) is where the magic of shooting happens. It consists of the trigger, hammer, disconnector, and springs. The FCG determines the trigger pull weight, reset, and overall feel of the rifle. Upgrading the FCG is a popular modification for those seeking improved shooting performance.

The Stock

The stock is what provides stability and support to the shooter. It comes in various designs, such as fixed, collapsible, and adjustable stocks. The right stock choice can greatly enhance comfort and control during shooting.

The Sights

Sights play a crucial role in aiming and target acquisition. AR-15s commonly feature two types of sights: the front sight and the rear sight. They can be iron sights, red dot sights, holographic sights, or magnified optics, depending on the shooter’s preferences and shooting style.

The Magazine

The magazine is where the ammunition is stored and fed into the rifle. AR-15s typically use detachable box magazines, which can hold varying capacities of rounds. Magazines come in different materials, designs, and capacities to suit different shooting needs.

The Charging Handle

The charging handle is used to manually cycle the rifle’s action, chambering a round or clearing malfunctions. It is located at the rear of the upper receiver and is an essential component for ensuring the rifle is ready to fire.

The Forward Assist

The forward assist is a small button located on the upper receiver. Its purpose is to help close the bolt fully in case of a malfunction or if the bolt doesn’t close smoothly. While not commonly used, it serves as a valuable tool in certain situations.

The Muzzle Device

The muzzle device is attached to the end of the barrel and serves multiple purposes. It helps mitigate recoil, reduce muzzle rise, and direct muzzle gases away from the shooter. Muzzle devices can be flash hiders, compensators, muzzle brakes, or a combination of these features.

The Gas Block

The gas block is a crucial component of the gas system. It is located at the front of the barrel and houses the gas port, which redirects gas from the barrel into the gas tube. Gas blocks come in different styles, such as low-profile or adjustable, allowing shooters to fine-tune their rifles’ performance.

The Buffer System

The buffer system, which includes the buffer, recoil spring, and buffer spring, is responsible for controlling the recoil and cyclic action of the rifle. Moreover, by customizing the weight and configuration of the buffer system, shooters can optimize the rifle’s performance for specific shooting purposes. Transitioning between different shooting objectives becomes smoother and more efficient with these adjustable components in place.

The Dust Cover

The dust cover is a small hinged door located on the upper receiver. It helps keep dust, debris, and dirt out of the rifle’s action when the rifle is not in use. It is a simple but essential component for maintaining the rifle’s reliability in harsh environments.

The Ejection Port

The ejection port is where spent casings are ejected from the rifle after each shot. It is located on the side of the upper receiver and allows for the smooth and consistent ejection of spent casings.

The Safety Selector

The safety selector is a switch located on the lower receiver. It allows the shooter to engage or disengage the rifle’s safety mechanism. It is a critical component for ensuring safe handling and preventing unintentional discharges.

The Magazine Release

The magazine release is a button or lever located on the lower receiver. When pressed or activated, it allows for the quick and easy removal of the magazine. A well-designed and ergonomic magazine release can significantly enhance the rifle’s usability.

Conclusion

By exploring the AR-15 parts diagram, we have gained a deeper understanding of the components that make up this iconic rifle. Each part plays a vital role in the rifle’s overall function, performance, and customization options. Whether you are a seasoned AR-15 enthusiast or a newcomer to the platform, knowing the anatomy of this firearm is essential for both maintenance and modification.

FAQs (Frequently Asked Questions)

1. Can I easily swap out components on an AR-15 rifle?

Yes, one of the advantages of the AR-15 platform is its modularity. Most components can be easily replaced or upgraded with basic tools and knowledge.

2. Are all AR-15 parts compatible across different manufacturers?

In general, most AR-15 parts are interchangeable across different manufacturers. However, it is always advisable to double-check compatibility, especially with critical components.

3. What are some common upgrades for the AR-15?

Common upgrades for the AR-15 include aftermarket triggers, handguards, stocks, optics, and muzzle devices. These upgrades can enhance performance, ergonomics, and customization options.

4. Can I legally build my own AR-15 from individual parts?

When it comes to building your own AR-15 rifle using individual parts, it is important to note that in many jurisdictions, this practice is legal. However, it is of utmost importance to thoroughly understand and comply with local laws and regulations concerning firearm manufacturing. To ensure a smooth and lawful process, it is recommended to refer to an AR-15 Parts Diagram for a better understanding of the assembly and components involved.

5. How often should I clean and maintain my AR-15?

Regular cleaning and maintenance are essential for keeping your AR-15 in optimal condition. The frequency of cleaning will depend on factors such as usage, environmental conditions, and ammunition type.

Remember, understanding the AR-15 parts diagram is just the first step towards becoming a knowledgeable AR-15 owner. Always prioritize safety, follow local laws, and seek professional guidance when necessary. Happy shooting!

How Wind Affects Shooting Accuracy

Wind can affect shooting accuracy because moving air is one of several outside factors that can shift where a bullet lands. The effect generally becomes more noticeable as target distance increases and the bullet spends more time in flight. For beginners, the practical takeaway is simple: understand wind as a variable, learn what windage means on your own optic, and keep live-fire practice inside a lawful, controlled range with a safe backstop.

This is a beginner concept explainer, not a step-by-step wind-calling guide. It explains why wind matters, which factors change the result, and why readers should rely on qualified instruction, range rules, and their own equipment manuals for live-fire decisions.

Why Wind Can Move a Bullet

Once a bullet leaves the barrel, it is no longer being guided by the firearm. Moving air can push against the bullet during flight, which is one reason the point of impact can differ from the point of aim. For a beginner, the useful point is awareness: wind is real, variable, and worth respecting, but it is not something to precisely solve from a general article.

A Beginner’s View of the Variables

Several factors interact to determine how much wind matters. Distance, wind direction, gusts, bullet design, firearm setup, ammunition, and optic setup can all affect the result. This is why a simple one-size answer is not helpful for beginners.

FactorWhat It Changes ConceptuallyBeginner-Safe Takeaway
DistanceMore distance usually means more time in flight.Build fundamentals at safe, manageable distances first.
Wind directionCrossing wind can matter differently than head or tail wind.Treat wind as variable along the path.
GustsChanging wind can shift conditions shot to shot.Do not assume a single reading describes the whole range.
Firearm and ammunitionDifferent setups behave differently.Follow your firearm, ammunition, and optic manuals.
Optic setupWindage and reticle references are optic-specific.Use the manual for your exact optic.

Windage vs Elevation: What the Terms Mean

Windage and elevation are common sight and scope terms. Windage refers to horizontal adjustment or horizontal correction, while elevation refers to vertical adjustment. Optics makers define these terms in their own references, including the Leupold glossary.

This article explains the terms at a concept level. It does not teach adjustment methods because those depend on the exact optic, firearm, ammunition, range, and conditions.

Why Distance Makes Wind More Noticeable

Wind tends to matter more as distance increases because the bullet spends more time in flight. More time in moving air gives wind more opportunity to affect where the bullet lands. This is one reason beginners should start with manageable range practice before stretching distance.

Wind Direction, Speed, and Gusts

Wind is rarely steady. Direction, speed, and gusts can change from moment to moment, and wind near the firing line may not match wind near the target. A crosswind across your line can have a different effect than wind coming toward you or from behind, but the safer beginner mindset is to treat all wind as changing and imperfectly known.

Use wind direction as a concept to watch, not as a formula to memorize from a web page.

Why Bullet and Rifle Setup Change the Result

Different firearms, optics, and ammunition behave differently, so the same wind will not affect every setup identically. Rather than chase numbers from another setup, follow the manuals for your specific firearm, ammunition, and optic, then confirm how your equipment behaves under safe, supervised range conditions.

If you want to understand related optic setup basics, our guides to choosing the right rifle scope and rifle scope parallax adjustments are better next steps than guessing at wind corrections.

What Beginners Should Not Assume

It is easy to over-trust quick answers. Charts, apps, and online anecdotes are estimates, not certainty. Reticle marks and turret references are specific to your optic and should be checked against its manual. No reading, gear, or tool makes wind fully predictable.

Use Optic Manuals and Range Rules

Your equipment manuals and your range rules are the real authorities. Follow your firearm, ammunition, and optic manufacturer instructions, and follow basic firearm safety rules such as the NSSF firearm safety rules: keep the muzzle in a safe direction, be sure of your target and what is beyond it, and follow range commands.

Before working on accuracy at all, review your range’s posted rules and our shooting range safety rules overview.

Practice Safely in a Controlled Range Setting

Any live-fire learning should happen only in a lawful, controlled range with a safe backstop, clear target area, and proper supervision. Do not practice in informal areas without verified legal permission and a safe backstop. A qualified instructor can teach fundamentals and range process better than a general article can.

Common Wind Myths to Avoid

A few myths create confusion. One is that wind only pushes in one simple direction; real wind can vary along the path. Another is that an app or chart gives an exact answer; those tools still rely on assumptions. A third is that a certain scope or reticle automatically solves wind; equipment may help, but safe practice and instruction matter more.

What This Guide Does Not Cover

To keep this article beginner-appropriate, it does not cover advanced ballistic calculation, field correction methods, hunting shot-placement advice, or advanced live-fire instruction. For hands-on technique, work with a qualified instructor and your equipment manuals.

Frequently Asked Questions

Does wind always move a bullet sideways?

No, not in a simple constant way. A crosswind can create sideways movement, but real wind varies in direction and strength along the path. Treat wind as variable rather than predictable.

What does windage mean on a rifle scope?

Windage refers to horizontal adjustment or horizontal correction on a sight or scope. Elevation refers to vertical adjustment. The exact markings and adjustment system are specific to your optic, so check its manual.

Why does wind matter more at longer distances?

Because the bullet spends more time in flight, giving moving air more time to affect it. This is one reason beginners should build skills at manageable distances first.

Can a beginner use a wind chart or app?

You can read them for context, but treat their output as an estimate. They do not replace training, your optic manual, range confirmation, or safe range practice.

Is this article a wind-calling guide?

No. This is a conceptual overview of how wind can affect accuracy. It does not teach live-fire adjustment methods.

Final Safety-First Takeaway

Wind is one of several factors that can move a bullet, and its effect tends to grow with distance and time in flight. As a beginner, the goal is understanding, not calculation: respect wind as a variable, learn what windage means on your own optic, follow your equipment manuals, and practice only in a safe, controlled range environment.

How to Clean a Shotgun: A Step-by-Step Guide

Table of Contents

Introduction

Regular cleaning is essential to maintain the performance and longevity of your shotgun. Proper cleaning removes dirt, residue, and debris that can accumulate over time, ensuring smooth functioning and reliability. In this step-by-step guide, we will walk you through the process of cleaning your shotgun, covering barrel cleaning, action and receiver cleaning, lubrication, and reassembly. Let’s get started and learn how to clean your shotgun effectively.

2. Safety Precautions

Before cleaning your shotgun, it’s important to follow these safety precautions:

  • Ensure the shotgun is unloaded. Remove all ammunition from the chamber and magazine tube, and visually inspect to verify it is empty.
  • Choose a well-ventilated area to work in, preferably with a dedicated cleaning space or a cleaning mat.
  • Use eye protection and gloves to protect yourself from any chemicals or debris during the cleaning process.

3. Gather the Necessary Supplies

To clean your shotgun, gather the following supplies:

  • Cleaning rod or bore snake
  • Shotgun bore brush
  • Cleaning patches or cloth
  • Gun cleaning solvent
  • Gun oil or lubricant
  • Toothbrush or nylon brush
  • Cotton swabs
  • Cleaning jag or slotted tip
  • Microfiber cloth or gun cleaning mat

4. Field Stripping the Shotgun

Before cleaning, familiarize yourself with your shotgun’s manual to understand the field stripping process. Disassemble the shotgun as instructed, separating the barrel from the action and receiver. This will allow for easier access to different parts for cleaning.

5. Cleaning the Barrel

Follow these steps to clean the shotgun barrel:

  1. Attach a bore brush to the cleaning rod or use a bore snake.
  2. Apply a small amount of gun cleaning solvent to the brush or bore snake.
  3. Insert the brush or bore snake into the barrel from the chamber end.
  4. Run the brush or bore snake back and forth through the barrel several times to loosen and remove fouling and residue.
  5. Remove the brush or bore snake and attach a cleaning patch or cloth to the jag or slotted tip.
  6. Apply gun cleaning solvent to the cleaning patch or cloth.
  7. Insert the patch or cloth into the barrel and run it back and forth several times to remove any remaining residue.
  8. Repeat the process with clean patches or cloths until they come out clean.
  9. Use cotton swabs or a toothbrush dipped in cleaning solvent to clean the chamber area.

6. Cleaning the Action and Receiver

Follow these steps to clean the shotgun’s action and receiver:

  1. Apply gun cleaning solvent to a clean cloth or cotton swab.
  2. Wipe down the internal surfaces of the action and receiver, paying attention to areas where dirt and residue may accumulate.
  3. Use a toothbrush or nylon brush to scrub any stubborn dirt or residue.
  4. Ensure that the extractor, ejector, and other small components are clean and free of debris.
  5. Wipe down the external surfaces of the action and receiver with a clean cloth or microfiber cloth.

7. Lubricating the Shotgun

Proper lubrication is crucial to ensure smooth operation and protect against rust and corrosion. Follow these steps to lubricate your shotgun:

  1. Apply a small amount of gun oil or lubricant to a clean cloth or cotton swab.
  2. Apply a thin coat of lubricant to the moving parts of the action, including the bolt, slide, and any other contact points.
  3. Ensure Adequate Lubrication: Pay Attention to Areas Where Metal Rubs Against Metal
  4. Avoid over-lubricating, as excessive oil can attract dirt and debris.

8. Reassembling the Shotgun

Carefully reassemble the shotgun according to the manufacturer’s instructions. Ensure all parts are properly aligned and secured. Check that the action functions smoothly and that the shotgun is fully operational.

9. Storing the Shotgun

After cleaning, consider the following tips for storing your shotgun:

  1. Store the shotgun in a clean, dry, and well-ventilated area to prevent rust and moisture damage.
  2. Use a gun sock, silicone-treated cloth, or gun case to protect the shotgun from dust and scratches.
  3. Avoid storing the shotgun in a case that retains moisture, as it can lead to rust and corrosion.
  4. Check the shotgun periodically for any signs of rust or corrosion, and address them promptly if detected.

10. Conclusion

Regular cleaning and maintenance of your shotgun are crucial for optimal performance and longevity. By following these step-by-step instructions, you can effectively clean your shotgun, ensuring it remains in top condition. Remember to prioritize safety, use appropriate cleaning supplies, and consult your shotgun’s manual for specific instructions. With proper care and maintenance, your shotgun will continue to provide reliable performance and enjoyment for years to come.

FAQs (Frequently Asked Questions)

Q1: How often should I clean my shotgun?

A1: The frequency of cleaning depends on various factors, including usage, environmental conditions, and ammunition type. It’s generally recommended to clean your shotgun after each use or at least every few months if it’s not used regularly. However, if the shotgun is exposed to adverse conditions or fired extensively, more frequent cleaning may be necessary.

Q2: Can I use any cleaning solvent and lubricant for my shotgun?

A2: It’s best to use cleaning solvents and lubricants specifically designed for firearms. These products are formulated to effectively clean, protect, and lubricate the various components of a shotgun. Follow the manufacturer’s recommendations for the appropriate cleaning products to use.

Q3: Should I clean the choke tubes separately?

A3: Yes, choke tubes should be cleaned separately from the shotgun barrel. Remove the choke tubes and clean them using a dedicated choke tube cleaning brush or cloth. Apply a small amount of cleaning solvent and scrub them thoroughly to remove any residue or fouling.

Q4: Can I use compressed air to clean my shotgun?

A4: Compressed air can be used to blow away loose dirt and debris from certain parts of the shotgun. However, it’s important to exercise caution and avoid using excessive air pressure, as it can force debris deeper into the mechanism. Additionally, compressed air should not be directed towards the barrel or sensitive components.

Q5: Do I need to clean the stock and forend of my shotgun?

A5: It’s generally not necessary to clean the stock and forend unless they are visibly dirty or contaminated. However, wiping them down with a clean, damp cloth occasionally can help maintain their appearance and remove any surface dirt or grime.

Safety Rules of Archery: Tips for Safe Shooting

Table of contents

Introduction

Archery is a fun and exciting sport, but it can also be dangerous if proper safety rules are not followed. Whether you are a beginner or an experienced archer, it is essential to prioritize safety when handling a bow and arrow. In this article, we will go over the essential safety rules of archery to ensure that you have a safe and enjoyable shooting experience while also protecting yourself and others.

Understanding the Basics of Archery Safety

Always Check Your Equipment:

Before shooting, make sure your equipment is in good condition and properly adjusted.

Create a Safe Shooting Area:

Choose a designated area with a proper backstop and clear surroundings.

Proper Stance and Form:

Maintain a proper stance and form to prevent injury and improve accuracy.

Proper Arrow Handling:

Handle arrows with care, and never point a bow at anything other than the target.

Dress Appropriately:

Wear comfortable clothing and closed-toe shoes that won’t get caught on the bowstring.

Use a Bowstring Silencer:

A bowstring silencer can reduce noise and prevent distractions during shooting.

Communicate with Other Archers:

Be aware of other archers on the range and communicate clearly to prevent accidents.

The Importance of Safety Rules in Archery

Preventing Injuries:

Following safety rules can prevent serious injuries and accidents.

Protecting Your Equipment:

Proper safety measures can also protect your equipment from damage.

Creating a Safe Environment:

By following safety rules, you can create a safe and enjoyable shooting environment for everyone.

Building Good Habits:

Consistently following safety rules can help build good habits and prevent accidents.

Enhancing the Enjoyment of Archery:

By prioritizing safety, you can focus on enjoying the sport without worrying about injury.

Essential Safety Tips for Beginner and Advanced Archers

Take Lessons from a Professional:

Beginner archers should take lessons from a qualified instructor to learn proper form and safety.

Start with a Lower Draw Weight:

Beginners should start with a lower draw weight to build strength and prevent injury.

Use Protective Gear:

Advanced archers should use protective gear, including a chest protector, to prevent injury.

Inspect Your Equipment Regularly:

Advanced archers should inspect their equipment regularly to ensure it’s in good condition.

Focus on Form and Technique:

Both beginner and advanced archers should focus on proper form and technique to prevent injury and improve accuracy.

Always Be Aware of Your Surroundings:

Be aware of your surroundings and communicate clearly with other archers to prevent accidents.

Showing Respect for Others and the Sport

In addition to following safety rules, it’s important to practice good archery etiquette. This includes being respectful to other archers on the range, not interfering with their shooting, and cleaning up after yourself. You should also never shoot an arrow into an animal or anything that could be damaged, and always respect the laws and regulations regarding archery in your area.

Sharing the Importance of Safety with Others

As an archer, it’s important to also share the importance of safety with others. This includes teaching beginner archers the proper safety rules and etiquette, as well as reminding more experienced archers of the importance of following these guidelines. By working together to create a safe and respectful archery community, we can all enjoy the sport we love without risking injury to ourselves or others.

Conclusion

By following these essential safety rules and tips, you can ensure that you have a safe and enjoyable archery experience while also protecting yourself and others. Remember to always prioritize safety when handling a bow and arrow, whether you are a beginner or an experienced

A Beginner’s Guide to outdoor shooting range equipment

Explore the thrilling world of outdoor shooting sports and range equipment with our beginner’s guide. Learn about the essential gear and equipment necessary for a successful and enjoyable time at the shooting range. Arm yourself with knowledge and confidence as you dive into this exciting hobby, enhancing your skills with outdoor shooting range equipment.

Table of contents

Essential Gear for New Shooters

Firearms and Ammunition

At the heart of any shooting sport is the firearm itself. As a beginner, it’s crucial to choose a firearm that suits your needs, whether it’s a rifle, shotgun, or handgun. Research the different types of firearms and calibers available, and consider visiting a local range to try out various models. Don’t forget to also stock up on appropriate ammunition for your chosen firearm.

Eye and Ear Protection

Safety should be your top priority when engaging in shooting sports. Proper eye and ear protection are essential to protect against potential damage from debris and loud noise. Invest in high-quality shooting glasses and earmuffs or earplugs to ensure you’re well protected on the range.

Supportive Shooting Accessories

Beyond the basics of firearms and safety gear, there are numerous accessories available to improve your shooting experience and enhance your skills.

Holsters and Slings

Holsters for handguns and slings for rifles or shotguns are essential for comfortable and secure firearm carry. These accessories allow you to keep your hands free while ensuring your firearm is readily accessible when needed.

Shooting Rests and Bipods

Shooting rests and bipods can help stabilize your firearm, providing a steady platform and improving accuracy. These accessories are particularly useful for beginners learning proper shooting techniques and fundamentals.

Maintenance and Storage

Proper firearm maintenance and storage are crucial for ensuring the longevity and reliability of your shooting gear.

Cleaning Kits

To ensure proper maintenance and optimal functionality of your firearm, it is essential to invest in a high-quality cleaning kit. This kit should include brushes, cleaning rods, patches, and cleaning solvents specifically formulated for your particular firearm. By regularly cleaning your firearm, you can effectively prevent the accumulation of debris and ensure its reliable performance over time.

Gun Cases and Safes

Proper storage of your firearms is essential for safety and protection against damage. Gun cases provide portable protection, while gun safes offer secure storage at home, safeguarding your firearms from unauthorized access.

Conclusion

As a beginner in the world of shooting sports, understanding the essential gear and equipment is key to a safe and enjoyable experience. By investing in the right firearms, safety gear, accessories, and maintenance supplies, you’ll be well-prepared for a successful foray into the exciting world of shooting.

How To Use a Rifle Scope for Accuracy and Precision

Using a rifle scope well means more than seeing the target clearly. The shooter still has to mount the scope correctly, set eye relief, understand the reticle, confirm zero, manage parallax, and verify every adjustment at the range before trusting the setup in the field.

This guide focuses on safe, practical scope use for accuracy. Always follow firearm safety rules, your optic manual, your firearm manual, and local range rules. The NSSF firearm safety rules are the starting point before any live-fire scope work.

Table of Contents
  1. Quick Scope Accuracy Checklist
  2. Start With Safe Setup
  3. Set Eye Relief and Focus
  4. Understand Reticle and Turrets
  5. Zero and Confirm
  6. Manage Parallax
  7. Field Use Habits
  8. Related Guides
  9. FAQ
  10. Final Recommendation

Quick Scope Accuracy Checklist

CheckWhat to confirmWhy it matters
Safe firearmUnload and clear before setup; follow range commands during live fireOptic work never comes before safety.
Mount fitBase, rings, tube diameter, ring height, and torque are correctA loose or stressed scope will not hold zero.
Eye reliefFull sight picture from your real shooting positionReduces scope bite risk and improves consistency.
Diopter/focusReticle appears sharp to your eyeA fuzzy reticle makes precise aiming harder.
ZeroConfirmed with the exact ammunition you will useDifferent loads can shift point of impact.
ParallaxAdjusted for distance when the scope has parallax controlHelps reduce aiming error at longer distances.
DataRecord distance, ammo, group size, and adjustmentsGood notes prevent repeat mistakes.

Start With Safe Setup

Before using a rifle scope, confirm the scope is mounted correctly. The rings should match the tube diameter, the base should match the rifle, and screws should be tightened to the manufacturer’s inch-pound specs. If the scope shifts under recoil, every other accuracy step becomes unreliable.

Use a stable bench or rest when setting up and zeroing. Keep the muzzle pointed in a safe direction and follow every range command. Scope work often involves repeated adjustments, so slow handling is better than rushing between shots.

Set Eye Relief and Focus

Eye relief is the distance from your eye to the scope where the full image appears. Set it from a real shooting position, not just from a bench posture that you will never use again. A consistent cheek weld and relaxed head position make scope use much more repeatable.

Next, adjust the diopter so the reticle looks sharp. Do this by looking briefly through the scope at a plain background, then adjusting until the reticle is crisp. Avoid staring through the scope while adjusting because your eye may compensate and hide a poor setting.

Understand the Reticle and Turrets

Know whether your scope uses MOA, MIL, BDC marks, or a simpler duplex reticle. Also know how much each turret click moves point of impact at 100 yards or meters. Guessing at clicks wastes ammunition and can make zeroing confusing.

Reticle and turret systems should match your shooting needs. A simple hunting scope may be faster for close field shots, while a more detailed reticle can help with distance work if you practice enough to understand it.

Zero and Confirm With Your Ammunition

Boresighting can help get shots on paper, but it is not a finished zero. Fire careful groups, adjust based on group center, and confirm again. Use the same ammunition you plan to hunt or practice with because different bullet weights and loads can change point of impact.

For ammunition standards and technical terminology, SAAMI is a useful industry authority. For your own setup, the most important data still comes from live-fire confirmation with your rifle, scope, and ammunition.

Manage Parallax

Parallax error happens when the reticle appears to shift on the target as your eye moves behind the scope. Many hunting scopes are factory-set for a common distance, while some scopes have adjustable objective or side-focus controls. If your scope has parallax adjustment, set it for the target distance and verify that the reticle stays stable as your eye position changes slightly.

Parallax matters more as distance increases or targets get smaller. It does not replace a consistent cheek weld, but it helps reduce one more source of aiming error.

Field Use Habits

In the field, keep the scope on a sensible magnification for the terrain. Too much magnification can make close targets harder to find. Too little can make precision harder at distance. Practice changing magnification, checking reticle visibility, and mounting the rifle safely before relying on the optic under pressure.

For formal marksmanship pathways and competition learning, USA Shooting is a useful authority source. For hunting, pair scope skills with local regulations, ethical shot limits, and a clear backstop.

FAQ

What is the first thing to adjust on a rifle scope?

Start with safe mounting, eye relief, and reticle focus before live-fire zeroing. A scope that is uncomfortable or unfocused will be harder to use consistently.

Is boresighting enough to use a rifle scope?

No. Boresighting is only a starting point. You still need to confirm zero with live fire and the ammunition you plan to use.

Why does my scope lose zero?

Common causes include loose mounts, incorrect torque, damaged rings, inconsistent ammunition, scope damage, or shooter technique. Start by checking the mount and confirming groups from a stable position.

Do I need parallax adjustment?

It depends on distance and target size. Many basic hunting scopes work fine within normal ranges, but adjustable parallax can help with longer-distance precision or smaller targets.

Final Recommendation

A rifle scope improves accuracy only when the whole system is verified: safe firearm handling, correct mounting, clear focus, confirmed zero, understood adjustments, and repeatable shooting fundamentals. Take notes, confirm changes at the range, and do not trust an unverified setting in the field.

The History of Guns in America: From Colonial Times to Today

Guns have played a significant role in the history of the United States. From the Revolutionary War to the Wild West, guns have been an essential part of American culture. In this article, we will explore the history of guns in America, from colonial times to today.

Early History of Guns in America

The first guns in America were brought over by European colonizers in the early 1600s. These guns were primarily muskets and were used for hunting and self-defense. As the colonies grew, so did the demand for guns. Gunsmiths began to emerge, and by the mid-1700s, the colonies were producing their own firearms.

Guns and the American Revolution

During the American Revolution, firearms played a crucial role in securing American independence. The colonists heavily relied on guns to fight the British. Some of the most famous guns from this time period include the Kentucky Long Rifle, which American sharpshooters used, and the Brown Bess musket, which the British army used.

Guns in the Wild West

The Wild West is known for its gunfights and cowboys, and guns played a significant role during this time. Guns were necessary for protection, and many cowboys carried revolvers on their hips. Famous guns from this era include the Colt Single Action Army revolver and the Winchester Model 1873 rifle.

Guns and the Civil War

The Civil War was fought from 1861 to 1865, and guns played a critical role in this conflict. Both the Union and Confederate armies relied heavily on firearms. The most commonly used guns during this time were muskets and rifles, such as the Springfield Model 1861 and the Enfield 1853.

Guns in the 20th Century

The 20th century saw a significant shift in gun technology, with the introduction of semiautomatic and automatic firearms. Guns became more prevalent in American culture, with many people owning guns for self-defense or hunting. The most famous guns from this time period include the M1911 pistol, the Thompson submachine gun, and the M16 rifle.

The Gun Control Debate

As guns became more prevalent in American culture, the issue of gun control became increasingly important. The debate over gun control has been ongoing for decades and remains a controversial topic in American politics. Some argue that stricter gun laws are necessary to prevent gun violence, while others believe that gun ownership is a constitutional right.

Conclusion

The history of guns in America is complex and fascinating. From colonial times to the Wild West and beyond, guns have played a significant role in shaping American culture. As the debate over gun control continues, it’s essential to understand the history of guns in America and the role they have played in shaping our nation.

Exit mobile version