Is a 3-9x Rifle Scope Still Good for Deer Hunting?

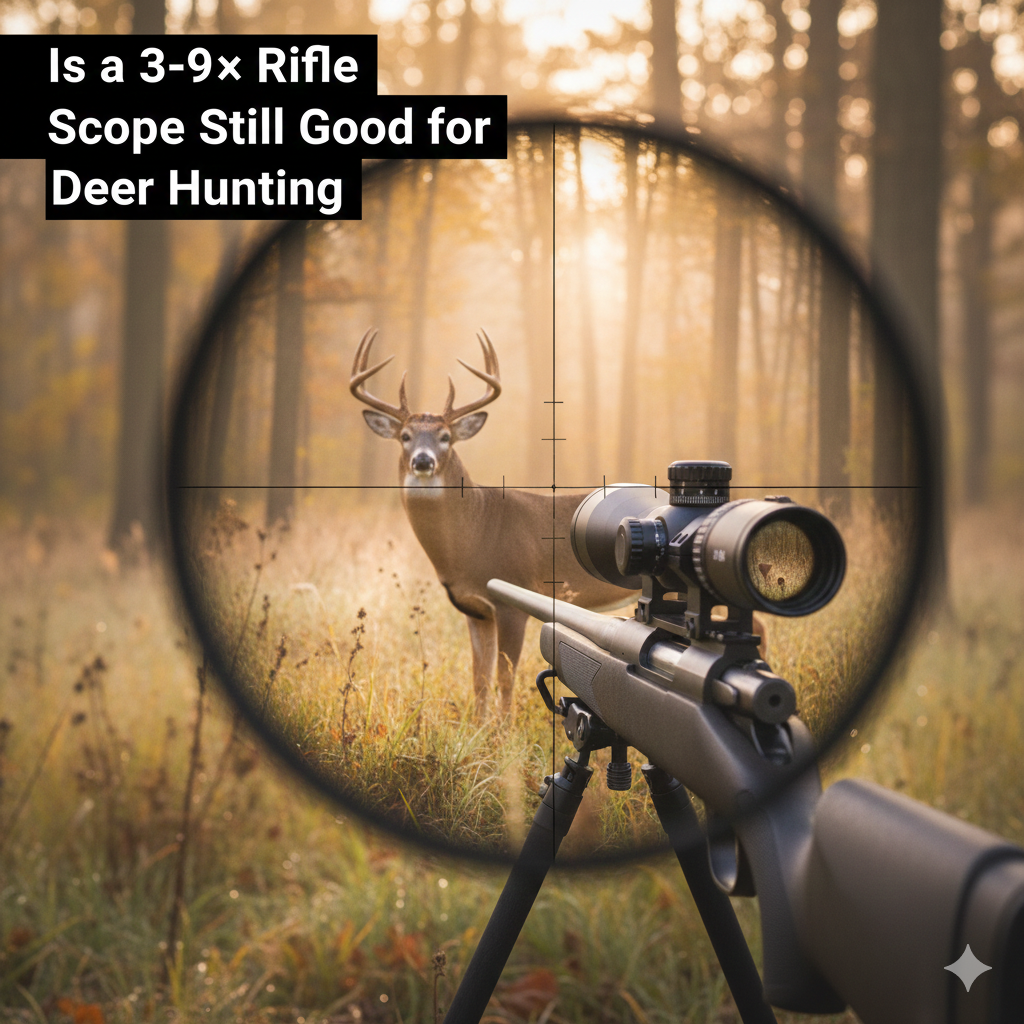
Yes, a 3-9x rifle scope is still a very practical choice for deer hunting when your shots are close to moderate range and you want a simple, familiar optic. It gives enough magnification for many woods, field-edge, and stand-hunting situations without the weight and complexity of larger scopes.

The honest answer depends on your terrain. A 3-9x scope makes sense for many deer hunters, but it is not the best optic for every hunt. Open-country shots, very low light, or precision work at longer ranges may call for a different magnification range or better glass.

Table of Contents

Quick Verdict

A 3-9x rifle scope is still good for deer hunting because it covers the most common field needs: low magnification for closer shots, higher magnification for more careful aiming, manageable size, and a simple setup that many hunters already understand. It is a balanced choice, not a magic answer.

A 3-9x scope remains useful when its magnification, reticle, glass quality, and mounting setup match your actual deer-hunting distances.

3-9x Deer Scope Decision Checklist

Use this checklist before deciding whether a 3-9x is enough for your rifle. The goal is to match the optic to the hunt, not to chase a spec sheet.

  • Typical distance: Most shots are close to moderate rather than extreme range.
  • Terrain: You hunt timber, field edges, food plots, or mixed cover.
  • Light: You need useful dawn/dusk performance but not maximum detail at very high power.
  • Weight: You prefer a scope that does not make the rifle feel top-heavy.
  • Simplicity: You want a familiar optic with fewer settings to manage under pressure.
  • Ethical shot limit: You are willing to pass shots when the target is not clear enough.

What 3-9x Means

A 3-9x scope adjusts from 3x to 9x magnification. At 3x, it gives a wider field of view and is easier to use at closer distances. At 9x, it gives more target detail for careful aiming. For general background on scope design, this telescopic sight overview explains the basic concept of optical sights.

Why Hunters Like the Range

The range is useful because deer hunting rarely happens at one fixed distance. A deer may step out close in timber or appear farther across a field edge. A 3-9x scope lets you keep the scope low while scanning and turn it up only when the shot requires more detail.

Where a 3-9x Scope Works Well

A 3-9x scope is strongest in mixed terrain. It is at home in eastern hardwoods, farm country, food plots, ladder stands, box blinds, and general rifle setups where shots are usually reasonable and the hunter wants speed plus enough magnification for shot placement.

Woods and Field Edges

In woods, lower magnification helps you find the deer faster in the scope. On field edges, 6x to 9x may give enough detail for a more deliberate shot. The exact setting should follow the distance, light, and how clearly you can identify the target and what is beyond it.

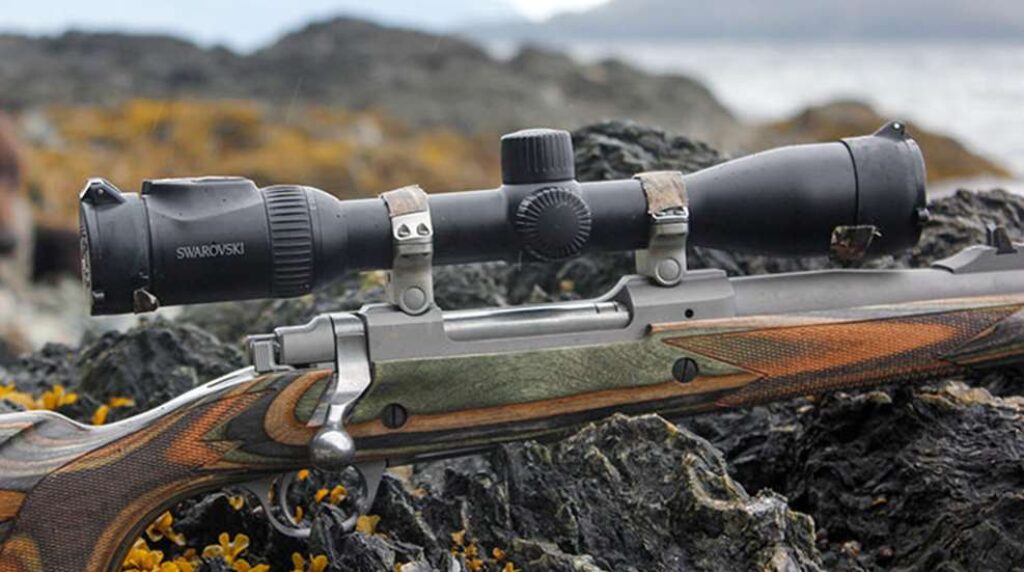
Lightweight Rifle Setups

Many 3-9x scopes are lighter and simpler than larger long-range optics. That can help a rifle carry better and shoulder more naturally. Weight matters most for still-hunting, long walks, steep terrain, and hunters who do not want a bulky optic on a compact rifle.

Low-Light Strengths and Limits

Low-light performance is not only about magnification. Glass quality, coatings, objective size, exit pupil, reticle visibility, and your eye position all matter. A good 3-9x hunting scope can be very usable at dawn and dusk, but a cheap scope at 9x may look dim or fuzzy.

The safety rule is simple: if you cannot clearly identify the deer and what is beyond it, do not shoot. The NSSF firearm safety rules are a useful reminder that every optics choice still sits under basic target-identification and backstop responsibility.

Where It Falls Short

A 3-9x scope may not be ideal for hunters who regularly shoot across large open country, need detailed antler evaluation at distance, or want exposed turrets and reticles built for dialing. It may also be less flexible than a lower-power optic for very close, fast shots in thick cover.

That does not make the 3-9x outdated. It means the scope should match the hunt. A western rifle, a thick-woods carbine, and a farm-country deer rifle may all benefit from different optics.

Setup Matters More Than Hype

A well-mounted, properly zeroed 3-9x scope beats a poorly mounted expensive optic. Ring height, eye relief, level reticle, torque, bore-sighting, zero confirmation, and real practice all matter. If the scope does not come to your eye naturally, fix the setup before blaming the magnification range.

Practice at Realistic Distances

Practice at the distances and positions you expect to hunt from. A 3-9x scope can feel easy from a bench and different from a stand, kneeling position, or field rest. Confirm your zero and know where your confidence ends before the hunt.

Ethical Shot Fit

The right scope is the one that helps you identify the animal, pick a clean aiming point, and understand the background before the shot. A 3-9x scope may be plenty for a short field lane, but it may not give enough detail across a wide cutover or open hillside. If magnification, light, or reticle clarity leaves doubt, pass the shot.

Optics do not replace hunting judgment. Hunter education resources such as Hunter Ed emphasize preparation, safe decisions, and knowing your target. Treat the scope as one part of that system, along with rifle fit, ammunition, zero, shooting position, local laws, and the hunter’s real skill.

FAQ

Is a 3-9x scope enough for deer hunting?

Yes, for many deer hunters. It is especially useful in woods, food plots, and mixed terrain where shots are close to moderate range.

Is a 3-9x scope outdated?

No. Newer optics offer more choices, but a clear, reliable 3-9x scope still fits many deer rifles very well.

What magnification should I use in the woods?

Keep it on the low end, often around 3x, so you can find the deer quickly. Turn it up only when distance and time allow.

Should I buy more than 9x for deer?

Consider more magnification if you hunt open country or need more detail at distance. For many common deer setups, 9x is still enough when the shot is ethical and clear.

Final Takeaway

A 3-9x rifle scope is still a smart deer-hunting optic when your terrain and shot distances fit it. Choose clear glass, mount it correctly, practice at real hunting distances, and pass shots when the target is not clear enough. That matters more than chasing a bigger magnification number.

How To Tune A Compound Bow At Home: Safe Checks and Pro-Shop Limits

Tuning a compound bow at home safely means checking the basics that do not require a bow press: draw weight and draw length fit, arrow spine, nocking-point awareness, rest alignment, and consistent shooting form. These checks can help you understand your setup without getting into risky adjustments.

Anything that needs a bow press, cam timing, string or cable work, module changes, or uncertain limb-bolt procedures belongs at a qualified bow shop. This guide is a safe boundary map for home checks, not an advanced tuning manual.

What Compound Bow Tuning Can And Cannot Fix At Home

At home, you can verify fit and alignment basics. You can check whether draw length feels controllable, whether your arrows match the setup, whether the nocking point looks reasonable, and whether the rest appears aligned. You should not attempt press-dependent work, cam synchronization, cable or string twisting, or advanced setup changes unless you have the correct tools and training.

The point is not to turn every archer into a bow technician. The point is to spot simple setup issues, document what you see, and know when the next step belongs to a pro shop.

Safety Checks Before You Start

Before any tuning, inspect the bow and confirm it is safe to draw. Do not draw or shoot a bow with visible damage, abnormal noise, or questionable string, cable, limb, or cam condition.

  • Inspect the limbs, cams, string, and cables for cracks, fraying, separation, or unusual wear.
  • Confirm your draw weight and draw length are set to a level you can control comfortably.
  • Shoot only into a proper target with a safe backstop.
  • Never dry-fire the bow.
  • Stop immediately if the bow feels wrong, sounds wrong, or shows damage.

USA Archery safety guidance is a useful baseline for range habits and equipment awareness. Manufacturer manuals and safety warnings still control your specific bow.

Keep home tuning limited to safe checks: inspect the bow, check arrow spine, change one thing at a time, and stop for a pro shop when work becomes press-dependent.

Tools For Basic Home Bow Tuning

Basic at-home checks use simple reference tools, not press equipment. Useful items include a bow square, manufacturer arrow chart, matched arrows, field points, a proper target, and a notebook for recording one change at a time.

This is not a product list. Use tools that match your bow, arrow setup, and manual. If a task requires a press or manufacturer-specific procedure, stop and route the bow to a qualified technician.

Check Draw Length, Nocking Point, And Rest Alignment

The most useful home checks are confirming draw length fit, checking nocking-point reference with a bow square, and looking at whether the rest appears aligned with the arrow path. Make one change at a time and record what changed before shooting again.

Paper Tuning Basics

Paper tuning is a diagnostic method where an arrow is shot through paper so the tear can offer clues about arrow flight. Easton’s tuning guide is a useful reference for understanding the concept. Treat the tear as information, not as permission to make risky adjustments.

Broadhead And Field-Point Comparison

Comparing field-point and broadhead impact can show whether your setup needs attention, but it should only happen on a proper range with a safe backstop and legal, safe use. If broadheads and field points behave very differently, bring that information to a bow shop instead of chasing the problem with press-dependent changes.

When To Stop And Visit A Bow Shop

Stop and visit a qualified bow technician whenever a check points to press work, cam timing, string or cable issues, module changes, limb concerns, or damage. A technician can confirm whether the bow is in spec before you spend more time trying to tune around a mechanical issue.

Arrow Fit And Spine Checks

Arrow fit and spine should match your bow’s draw weight, draw length, arrow length, and point weight. Check a manufacturer chart or tool such as the Easton arrow selector rather than guessing. An arrow that is too stiff or too weak for the setup can fly poorly no matter how much you adjust the rest.

If you need the concept explained in plain language, our arrow spine guide is the best internal next step.

Common Tuning Mistakes

The most common mistakes are changing several things at once, ignoring arrow spine, continuing to shoot a bow that shows damage, and attempting press-dependent work at home. Chasing a perfect paper tear can also become a trap if the real problem is arrow fit, shooter form, or a bow that needs a technician.

Keep the process simple: inspect, make one safe check, record it, shoot a small group, and stop when the next step requires equipment or training you do not have.

Frequently Asked Questions

Can I tune a compound bow at home without a bow press?

You can do basic checks without a press, including draw-length fit, nocking-point reference, rest alignment observation, and arrow-spine verification. Press-dependent work should go to a bow shop.

Is paper tuning safe to do at home?

Paper tuning can be safe when you shoot into a proper target with a safe backstop and adequate space. Treat the paper tear as a diagnostic clue. If the result points to press work, cam timing, or damage, stop and visit a technician.

How do I know if my arrows are the right spine?

Use a manufacturer arrow chart or selector with your draw weight, draw length, arrow length, and point weight. If the chart suggests a different spine, solve the arrow-fit problem before chasing tuning adjustments.

When should I take my bow to a pro shop?

Take it to a pro shop for bow-press work, cam timing, string or cable changes, module changes, limb concerns, abnormal noise, visible damage, or anything your manual does not clearly authorize you to handle.

Hoyt vs Mathews Compound Bows: A Detailed Comparison for 2025

The world of compound bows is filled with innovation, craftsmanship, and brand loyalty. Among all manufacturers, two names consistently stand above the rest Hoyt and Mathews. These companies have built devoted followings over decades, producing bows that dominate both the hunting fields and competitive archery circuits. The comparison between Hoyt and Mathews has become a classic debate that resurfaces every year, especially when new flagship models are released.

But if you’re trying to decide which brand is right for your shooting style, it can be overwhelming. Both offer premium features, precision engineering, and exceptional performance. To help you navigate this rivalry, this in-depth guide explores the history, performance characteristics, design philosophies, and real-world shooting experience of each brand.

Brand Identity and Design Philosophy

Although both Hoyt and Mathews produce high-performance compound bows, their philosophies and design priorities differ significantly.

Hoyt, founded in 1931, is one of the oldest and most respected names in archery. Their heritage is built on durability, engineering resilience, and high precision. Hoyt bows have a reputation for being tough, stable, and reliable—qualities that appeal strongly to target shooters and bowhunters who need equipment capable of surviving harsh environments and intense use. Hoyt approaches bow building with a performance-first mindset, emphasizing robust construction and advanced riser geometry.

Mathews, founded later in 1992, is driven by a different principle: smoothness, silence, and user-friendly performance. Every bow from Mathews reflects an obsession with comfort, balance, and quietness. Their design philosophy focuses on minimizing vibration, creating the smoothest possible draw cycle, and delivering consistent accuracy through simplicity. While Hoyt bows often feel like precision machines built for strength, Mathews bows feel refined, polished, and almost effortless to shoot.

These two identities shape everything the companies produce—and ultimately play a large role in determining which brand shooters prefer.

Build Quality and Craftsmanship

A major factor that separates Hoyt and Mathews is their riser construction. Hoyt is one of the only brands known for producing both aluminum and carbon risers at advanced engineering levels. Their carbon risers, in particular, are legendary for being lightweight, incredibly stiff, and resistant to temperature changes. Bowhunters who operate in cold weather environments appreciate that Hoyt carbon risers don’t hold cold like aluminum risers do. The bows feel solid in the hand, and this added rigidity contributes to long-range stability and accuracy.

Mathews, on the other hand, uses precision-machined aluminum risers that are renowned for their refinement and aesthetics. What Mathews may lack in carbon riser production, they more than make up for in flawless machining and finish quality. Their bows always look polished and premium, with smooth lines, ergonomic shapes, and advanced vibration-dampening built directly into the riser. While Hoyt leans into rugged strength, Mathews focuses on creating a bow that feels comfortable and controlled from the first draw.

Both brands offer exceptional craftsmanship but the tactile experience differs noticeably. A Hoyt bow feels solid, sturdy, and engineered to take abuse. A Mathews bow feels silky, balanced, and tuned for comfort.

The Draw Cycle Experience

The draw cycle is one of the most important factors in choosing a compound bow, and this is one area where differences between Hoyt and Mathews become immediately apparent.

Hoyt bows typically have what many shooters call a performance-focused” draw cycle. They often start with a bit more resistance early in the draw, with a firmer transition into the valley and a strong, definitive back wall. Hoyt’s cam systems are designed to maximize power and energy transfer, which often gives their bows slightly more aggressive characteristics. For experienced shooters who prioritize speed, efficiency, and control, this type of draw cycle is ideal. It gives the archer a sense of authority over the bow—there’s power behind every inch of movement.

Mathews bows are the opposite. Their draw cycles are famous for being extremely smooth, with a steady, comfortable pull from start to finish. The valley is typically deeper, and the transition to full draw feels natural. This smoothness reduces shooter fatigue, especially during long practice sessions or full days in the treestand. Mathews’ cam systems, such as the Crosscentric cam and SwitchWeight System, are engineered to deliver maximum efficiency while maintaining a silky draw. The overall feeling is more forgiving and pleasant, appealing to hunters and archers who prioritize comfort over raw aggression.

If your shooting style leans toward power, urgency, and performance, Hoyt’s draw cycle may suit you better. But if you want comfort, smoothness, and a bow that feels effortless to hold at full draw, Mathews has the advantage.

Performance, Accuracy, and Consistency

When it comes to accuracy, both brands offer elite-level performance. However, the way they achieve this accuracy differs.

Hoyt bows often feel incredibly stable in the hand due to their construction and balance. The riser stiffness, the grip geometry, and the overall weight distribution contribute to a steady hold on target. Many competitive archers appreciate Hoyt’s ability to remain solid during the aiming process. For shooters who like a heavier bow with a rigid platform, Hoyt delivers world-class consistency. The bow almost feels like it guides the arrow along a fixed path.

Mathews bows excel in forgiving accuracy. Because they produce very little vibration and almost no after-shot hand shock, the shooter experiences minimal disruption during the shot cycle. This silence and smoothness translate directly into improved accuracy, especially for hunters shooting from awkward positions. Mathews bows give the shooter more margin for error, making them ideal for real-world hunting situations where form isn’t always perfect.

Both bows can be tuned to incredible precision, but the way they feel during the shot is what sets them apart: Hoyt is firm and commanding, while Mathews is gentle and controlled.

Vibration and Noise Control

If quietness is your top priority especially for bowhunting Mathews has long been considered the industry leader. Their bows feature advanced dampening systems integrated into the riser and limbs, creating a nearly shock-free experience. When a Mathews bow fires, the shot feels dead in the hand. The lack of noise and vibration boosts shooter confidence and minimizes the chance of startling game animals.

Hoyt has made major strides in vibration reduction, especially in their latest models, but there is still a noticeable difference between the brands. Hoyt bows generally have slightly more feedback in the hand. This doesn’t necessarily mean they’re loud far from it but Mathews bows are simply engineered to be as quiet as modern technology allows.

For hunters who require absolute stealth, Mathews remains the top choice.

Speed, Power, and Energy Output

Hoyt has a reputation for producing bows with strong speed ratings and impressive energy transfer. Their cam systems are built for performance, often delivering fast arrow speeds and high kinetic energy values. This makes Hoyt a strong choice for shooters targeting long distances or hunting larger game such as elk or moose, where arrow penetration is crucial.

Mathews bows deliver excellent speeds as well, but their design philosophy prioritizes efficiency and smoothness over pure speed. While they may not always top Hoyt in IBO ratings, their real-world arrow speeds are extremely consistent and reliable. Their shot efficiency with minimal wasted energy often translates into more accuracy and a smoother shooting process.

If hitting maximum speed is important to you, Hoyt usually has a slight edge. If you prefer efficiency and smooth energy distribution, Mathews may be the better fit.

Tuning and Adjustability

Both Hoyt and Mathews offer bows that can be tuned very precisely, but their systems differ.

Hoyt bows tend to require a bit more tuning knowledge. Experienced archers who enjoy fine-tuning their setup appreciate this because it allows them to dial in the bow perfectly. Once a Hoyt is tuned, it holds its tune extremely well, reflecting the bow’s mechanical stability.

Mathews bows are known for their ease of tuning. The SwitchWeight Cam System allows archers to change draw weights simply by swapping mods without compromising cam performance or requiring a bow press. This user-friendly approach makes Mathews a favorite for beginners and for hunters who want quick adjustments without deep tuning experience.

Which Brand Should You Choose?

Choosing between Hoyt and Mathews ultimately depends on your priorities as a shooter.

If you prefer a bow that feels powerful, rugged, and engineered for long-term stability, and if you enjoy fine-tuning your setup, Hoyt is the ideal choice. Their bows are built for shooters who want something that feels strong and authoritative in hand.

If you value comfort, smooth performance, quiet shooting, and forgiving accuracy, Mathews is the better fit. Their bows provide an unmatched shooting experience, especially for hunters spending long hours in the field.

Both brands deliver exceptional quality and craftsmanship. Your decision should be based on how you prefer a bow to feel, draw, and perform in your hands.

Conclusion

The debate between Hoyt and Mathews compound bows is one that will likely continue for years, and for good reason both brands sit at the very top of the archery industry. They deliver exceptional craftsmanship, cutting-edge technology, and shooting performance that far exceeds the needs of most hunters and target shooters. Yet, their differences are what make this comparison meaningful.

Hunting Rifle Maintenance Checklist

A good hunting rifle maintenance checklist starts with safety, then moves through unloading, inspection, cleaning, lubrication, optic/mount checks, ammunition storage, field protection, and post-hunt care. The goal is not to over-clean or modify the rifle; it is to keep the rifle reliable, protected, and ready for the next legal hunt or range session.

This guide is written for hunters who want a simple routine. Always follow your rifle manual, ammunition guidance, and local range rules. If you find damage, abnormal wear, stuck parts, a blocked bore, or repeated malfunctions, stop using the rifle and get help from a qualified gunsmith or manufacturer support.

Table of Contents

Safety-First Check

Unload and Verify

Before any maintenance, point the rifle in a safe direction, remove the magazine if applicable, open the action, and verify the chamber is clear according to the manual. Do not rely on memory or assume the rifle is unloaded because it was stored that way.

Separate Ammunition

Move live ammunition away from the cleaning bench. This keeps maintenance work focused and reduces the chance of a handling mistake. The NSSF firearm safety rules are a useful baseline before cleaning or inspecting any firearm.

Before the Hunt

Check the Bore and Action

Confirm the bore is clear, the action cycles normally, and the safety/control functions feel normal. If mud, snow, water, oil, or debris enters the bore, stop and clear it safely before firing.

Confirm Zero

A rifle can shift zero after travel, bumps, new ammunition, or mount changes. Confirm zero at the range before the season when possible. Do not discover an issue on a live animal.

Inspect Ammunition

Use ammunition that matches the rifle markings and manual. Avoid cartridges with corrosion, dents, loose bullets, oil contamination, or moisture damage. SAAMI’s firearm safety information is a good reference for safe ammunition matching and handling principles.

After the Hunt

Dry Moisture First

Rain, snow, sweat, and condensation can create rust risk. After a wet hunt, unload safely, wipe exterior metal, dry the stock and sling area, and let the rifle return to room temperature before long-term storage.

Look for Damage

Check for loose screws, cracked stock areas, damaged sling studs, shifted optic mounts, rust spots, and unusual marks on the bolt or cycling parts. If anything looks abnormal, stop and get qualified help.

Cleaning and Lubrication

Clean for the Conditions

A rifle used in dry, clean conditions may not need the same cleaning as one exposed to rain, dust, mud, salt air, or heavy shooting. Follow the manual for bore cleaning, solvent use, and parts that should or should not be lubricated.

Use Light Lubrication

Too much oil can attract dust, migrate into places it does not belong, or affect ammunition if stored carelessly. Use the correct lubricant sparingly and wipe away excess according to the manufacturer’s guidance.

Avoid Unneeded Disassembly

Field-stripping or basic owner cleaning is different from gunsmithing. Do not remove trigger components, bedding parts, or safety-related parts unless the manual allows it and you are qualified.

Optic and Mount Checks

Check that the scope, rings, bases, and lens covers are secure. Do not guess torque values. If screws are loose or mounts have shifted, follow the optic/ring instructions or ask a gunsmith. After any mount adjustment, confirm zero again.

Clean lenses with lens-safe tools only. Shirt sleeves, rough cloth, dirt, and paper products can scratch coatings. Keep caps closed during rough travel and wet weather.

Seasonal Maintenance Plan

Pre-Season

Before the season, inspect the rifle slowly instead of waiting until the night before opening day. Check screws, sling, optic, bore condition, ammunition, and zero. If you changed ammo, rings, bases, or scope settings, schedule range time before the hunt.

In-Season

During the season, keep the routine simple: protect the muzzle from debris, wipe off moisture, check the optic, and inspect the rifle after rough travel. A quick inspection after every outing prevents small problems from becoming field problems.

Post-Season

After the season, do a more complete cleaning and inspection before storage. Look for rust beginning under sling swivels, around scope mounts, near the muzzle, and in areas touched by wet hands or clothing. Store the rifle only after it is dry and protected.

Storage and Transport

Store the rifle unloaded, protected from unauthorized access, and in conditions that reduce rust risk. Project ChildSafe provides practical secure storage resources for firearm owners. Use a case for transport, but avoid leaving a damp rifle sealed in a soft case for long periods.

Common Maintenance Mistakes

  • Cleaning while rushed: hurried work leads to missed chamber checks, spilled solvent, and skipped inspection steps.
  • Using too much oil: excess lubricant can collect grit and move into places where it is not wanted.
  • Skipping the optic: loose rings or a shifted scope can ruin an otherwise good rifle setup.
  • Forgetting the sling and stock: water can hide around sling studs, stock inlets, and soft-case contact points.
  • Changing ammunition without checking zero: a new load can shift point of impact.
  • Storing after wet weather: a rifle that looks dry outside can still have moisture in hidden areas.

The best habit is to keep maintenance boring and repeatable. Use the same safe order every time: unload, verify, separate ammunition, inspect, clean only as needed, lubricate lightly, and store securely. A short written checklist can help you avoid skipping steps when travel or weather makes the day hectic.

Quick Checklist

  • Unload and verify chamber clear.
  • Move ammunition away from the cleaning bench.
  • Inspect bore, crown, action, and safety/control feel.
  • Check optic, rings, bases, sling, and stock condition.
  • Wipe moisture and dirt after every field outing.
  • Clean bore and action based on use and conditions.
  • Lubricate lightly according to the manual.
  • Inspect ammunition before loading for range or hunt use.
  • Confirm zero after travel, bumps, mount work, or ammo changes.
  • Store unloaded and secured from unauthorized access.

FAQ

Should I clean my hunting rifle after every hunt?

At minimum, inspect and wipe it down after every hunt. A full bore cleaning depends on weather, dirt, moisture, number of shots, and the rifle manual.

Can over-cleaning hurt accuracy?

Aggressive or improper cleaning can damage crowns, bores, or finishes. Use correct tools and follow the manual instead of scrubbing blindly.

When should I confirm zero?

Confirm zero before hunting season, after travel, after hard bumps, after scope/mount work, and when changing ammunition.

Should I oil the inside of the barrel for storage?

Follow the rifle manual and product instructions. If a bore is stored with oil, clear and inspect it according to the manual before firing.

What if my rifle gets soaked?

Unload safely, dry exterior surfaces, inspect for water in the bore or action, and clean/lubricate according to the manual. If you suspect hidden water, rust, or damage, get qualified help.

Final Takeaway

Hunting rifle maintenance is mostly about safe habits and regular inspection. Keep the rifle unloaded during maintenance, protect it from moisture and dirt, clean according to use, confirm zero when needed, and store it securely. A simple routine done consistently is better than rushed cleaning right before the hunt.

How to Scout Upland Birds: Pheasant and Quail Habitat Guide

Scouting upland birds means learning where pheasant and quail find cover, food, water, and escape routes, then planning safe, legal field movement before the hunt. Good scouting is mostly habitat reading, access planning, and safety awareness. It never guarantees birds will be there, and it never replaces target identification.

This guide focuses on pheasant and quail habitat clues, safe movement with partners and dogs, and the regulation checks every hunter should make through current official sources. Season dates, bag limits, blaze-orange rules, licenses, access rules, and legal methods vary by state and year.

Upland Bird Scouting Basics

Scouting for upland birds is the process of identifying likely habitat, safe access points, and field boundaries before the hunt. The goal is to narrow a large area down to a few spots worth walking, based on cover quality, food, water, pressure, and safe shooting layout.

  • Cover: birds need protection from weather and predators.
  • Food: crop edges, weed seeds, insects, and waste grain can concentrate birds.
  • Water: moist low spots and water edges matter more in dry country.
  • Edges: transitions between cover and food often deserve extra attention.
  • Escape routes: birds need somewhere to run or fly when pressured.
  • Pressure: heavily walked areas may push birds into thicker or less obvious cover.

Treat these as clues, not promises. Regional habitat differs, so compare what you see with habitat guidance from groups such as Pheasants Forever and Quail Forever.

Pheasant Habitat and Sign

Pheasants favor dense nesting or loafing cover near reliable food, with thick escape cover close by. Look for grassy fields, cattail sloughs, shelterbelts, weedy fence lines, and the edges of standing or harvested crops.

Cover, food, water, and escape routes

The most useful spots usually combine thick cover, a nearby food source, and a way for birds to escape pressure. Grassy or weedy strips that connect larger cover blocks can act as travel lanes. In dry regions, low wet areas can also draw birds.

Pressure, weather, and time of day

Hunting pressure can push pheasants into the thickest cover and make them run before flushing. Early and late in the day, birds often move toward food. Midday, they may sit tighter in heavier cover. Wind, rain, and snow can change where birds shelter, so re-scout after major weather or pressure changes.

Quail Habitat and Sign

Quail are covey birds that favor a patchwork of low woody cover, open ground underneath, and seed-producing plants nearby. Brushy edges, field borders, fence rows, and shrubby draws are common places to start looking.

Covey cover and edge habitat

Quail need overhead cover for protection, room at ground level to move, and food close enough that they do not have to expose themselves for long. Edge habitat where brush meets field or grassland often provides that mix in a small area.

Regional differences to verify

Quail species and habitat vary widely by region. Before relying on one pattern, confirm what local quail habitat looks like through Quail Forever, local habitat programs, and your state wildlife agency. Good-looking cover improves odds, but it does not guarantee a covey is present.

Safe Field Movement and Shot Awareness

Safe upland hunting depends on muzzle control, partner awareness, dog awareness, and clear target identification. Follow established firearm safety rules from sources such as the NSSF firearm safety rules and your hunter education program.

  • Keep the muzzle pointed in a safe direction, including when crossing fences or ditches.
  • Agree on safe zones of fire before walking.
  • Identify the bird and confirm a safe background before mounting the gun.
  • Know where partners and dogs are before any shot.
  • Do not shoot at sound, movement, low birds, skylined birds, or unknown ground.
  • When in doubt, do not shoot.

For broader safety habits, review IHEA-USA hunter education resources and our beginner-friendly shooting range safety rules guide. Eye and ear protection also matter in the field; see our guide on shooting eye and ear protection.

Gear and Dog-Handling Considerations

Upland gear should support safe walking, clear communication, and comfort without turning the hunt into a heavy loadout. Common considerations include sturdy boots, brush-resistant clothing, hearing and eye protection, water, and a way to carry birds. Many states require hunter-orange clothing for upland hunting, but the exact rule must be checked through the current state source.

For dogs, plan around conditioning, water, weather, terrain, and clear handling. A dog can help locate birds, but the hunter remains responsible for target identification, safe zones of fire, and knowing what is beyond the bird. Plan shots around the dog’s position, not the other way around.

Season, Land Access, and Regulation Checks

Season dates, bag and possession limits, license and stamp requirements, blaze-orange rules, shooting hours, dog rules, and public/private land access all change by state and season. Check your current state wildlife agency pages before scouting or hunting.

For access planning context, our public land hunting guide is a useful companion, even though upland access rules still need to be verified for the exact state and property. For broader beginner hunting habits, see deer hunting tips for beginners.

Upland Bird Scouting Checklist

Scouting CheckWhat to Look For
CoverGrass, cattails, brush, shelterbelts, fence rows, and shrubby draws
FoodCrop edges, weed seeds, insects, waste grain, and seed-producing plants
WaterMoist low spots, nearby water, and cover close to water in dry country
EdgesTransitions where food, cover, and open ground meet
Escape routesThicker cover birds can run or fly into when pressured
Bird signTracks, droppings, dusting areas, feathers, flushes, and calls
Dog awarenessDog position, range, hydration, and safe zones of fire
Regulation checkSeason, license, limits, blaze orange, access, and legal methods
Use the checklist to plan the walk, then verify current rules and safe shooting lanes before hunting.

Frequently Asked Questions

When is the best time of day to scout upland birds?

Early morning and late afternoon are often useful because birds may move toward food. Midday scouting can still reveal cover, sign, and access points even when birds are sitting tight.

How do I find pheasant or quail without trespassing?

Start with public hunting lands and access programs listed by your state wildlife agency. For private land, get clear permission before scouting or hunting. Access rules vary, so verify them through official sources.

Does good habitat guarantee I will find birds?

No. Habitat tells you where birds are more likely to be, not that they are present. Pressure, weather, food availability, and season timing all affect whether birds are using a spot.

Do I still need to identify my target if I am hunting with a dog?

Yes. A dog can help locate and flush birds, but you must always identify the bird, confirm a safe background, and know where the dog and partners are before any shot.

What clothing color is required for upland hunting?

Many states require hunter orange or blaze orange for upland hunting, but the amount and placement vary. Check your state wildlife agency’s current rules before hunting.

Final Takeaway

Scout upland birds by reading cover, food, water, edges, escape routes, pressure, and bird sign, then layer in safe field movement and current regulation checks. Habitat can guide your plan, but safe target identification, dog awareness, partner communication, and official rules decide whether the hunt is responsible.

Hunting Rifle Maintenance Checklist: Safe Basic Care

A safe hunting rifle maintenance routine starts by unloading the rifle, opening the action, removing all ammunition from the cleaning area, and following your rifle’s manufacturer manual. Basic post-hunt care then means drying exterior metal, checking for moisture, cleaning the bore only as the manual directs, applying light lubrication only where specified, and storing the rifle unloaded in a secure place.

This checklist is for manual-led basic care and rust prevention. It does not cover trigger work, headspace, bedding, chamber work, or model-specific disassembly. If anything looks damaged, functions oddly, or is unclear in the manual, stop and take the rifle to a qualified gunsmith.

Safe Rifle Maintenance Starts Before Cleaning

Every maintenance session begins with making the rifle safe. Unload it, open the action, visually and physically confirm the chamber and magazine are clear, and move all ammunition away from the work surface before any cleaning tool comes out. Keep the muzzle pointed in a safe direction throughout the process.

Before you clean, review established firearm safety rules such as the NSSF firearm safety rules, then read the cleaning section in your rifle manual. The manual is the authority for what can be opened, what should be left alone, and how to handle your exact model.

A safe maintenance routine starts with an unloaded rifle, the manual, ventilation, dry metal, and secure storage.
  • Unload the rifle and open the action.
  • Confirm the chamber and magazine are empty.
  • Remove all ammunition from the cleaning area.
  • Keep the muzzle pointed in a safe direction.
  • Have the specific rifle manual on hand.
  • Set up in a ventilated area suitable for solvents.

Basic Post-Hunt Maintenance Checklist

Basic post-hunt maintenance focuses on moisture, fouling, visible wear, and safe storage. After confirming the rifle is unloaded and clear, work slowly through the checklist instead of rushing straight to the bore.

Unload, Clear, and Separate Ammunition

Confirm again that the rifle is unloaded and the action is open. Keep ammunition separated from the cleaning bench for the entire session. Never have live rounds near solvents, lubricants, or the cleaning surface, and never store the rifle loaded.

Dry Exterior Metal and Inspect for Moisture

Wipe down exterior metal to remove water, sweat, fingerprints, and field grime, especially after rain, snow, or humidity. Look for early rust or pitting, and check that the bore is free of obstructions before storage. Do not dry-fire or function-test unless the manual specifically allows it and all safety checks are complete.

Bore, Action, and Exterior Care

Bore, action, and exterior care should follow the rifle manual’s procedure for your model. Use proper tools, correct patch and brush sizes, and cleaning chemicals according to their labels. Do not force rods, brushes, or patches, and do not improvise procedures the manual does not describe.

Follow the Rifle Manual for Bore Cleaning

Clean the bore according to the manual using a proper rod or cable, jag or brush, and patches sized for the bore. Stop if a tool binds, a patch will not pass normally, or you suspect a bore obstruction. For cartridge and chamber terminology, SAAMI technical information is a useful standards reference, but your rifle manual still controls the actual cleaning method.

Use Solvents and Lubricants Carefully

Cleaning solvents and lubricants are chemicals. Use them only as directed, work with ventilation, avoid eating or drinking while cleaning, and wash your hands afterward. Lead residue can be part of shooting environments; the CDC/NIOSH publication on preventing lead and noise exposures at indoor firing ranges and OSHA hazard communication guidance are helpful references for why labels and safety data sheets matter.

Apply lubricant lightly and only where the manual specifies. Over-lubrication can attract debris, and using improvised chemicals can create avoidable problems. Never spray oil into ammunition.

Storage and Rust Prevention

Rust prevention depends on drying the rifle, applying a light protective film where the manual allows, storing it securely in a dry environment, and inspecting it periodically. Moisture is the main enemy after wet hunts, sweaty handling, or transport through changing temperatures.

  • Make sure the rifle is fully dry before storage.
  • Apply a light protective oil to exterior metal where the manual allows.
  • Store the rifle unloaded in a secure, dry, temperature-stable place.
  • Avoid sealed cases for long-term storage if they trap humidity.
  • Inspect stored firearms periodically for moisture or rust.
  • Use secure storage to keep firearms away from unauthorized users.

For secure storage practices, Project ChildSafe is a useful public safety resource. A cleaned and oiled rifle still needs periodic checks because storage conditions change with the seasons.

What to Leave to a Gunsmith

Anything beyond manual-led cleaning, light lubrication, and exterior care should be left to a qualified gunsmith, especially work involving internal parts, function, fit, or safety-critical adjustments. Trying model-specific disassembly without the right training and tools can create safety problems.

  • Damaged, worn, broken, or missing parts.
  • Failure to feed, extract, or eject.
  • A suspected bore obstruction.
  • Trigger feel that has changed or seems unsafe.
  • Disassembly the manual does not clearly describe.
  • Any uncertainty about whether the rifle is safe to use.

This guide does not cover trigger adjustment, bedding, headspace, chamber work, or model-specific disassembly. Cleaning is not a substitute for a professional safety inspection, so a gunsmith is the right call whenever something seems off.

Frequently Asked Questions

How often should I clean my hunting rifle?

Cleaning frequency depends on how much you shoot, the conditions you hunt in, and your manufacturer’s guidance. Many hunters do basic care after each hunt or range session, with more thorough cleaning as the manual recommends. Clean sooner if the rifle was exposed to rain, snow, mud, or saltwater.

What do I need to clean a rifle safely?

At a basic level, you need the rifle manual, a proper cleaning rod or cable, a jag or brush and patches sized for the bore, appropriate solvent, light lubricant, eye protection as appropriate, and a ventilated work area. Remove all ammunition before cleaning.

Can I store my rifle after oiling it without further checks?

No. Even a cleaned and oiled rifle should be inspected periodically because temperature and humidity changes can still cause moisture problems. Store the rifle unloaded, dry, and secure, then check it from time to time.

Is it safe to take apart my rifle for a deep clean?

Only to the extent your manufacturer manual clearly describes for your exact model. Disassembly beyond manual basics, along with trigger, bedding, headspace, and chamber work, is gunsmithing and should be left to a qualified professional.

Do I need eye protection and ventilation to clean a rifle?

Yes, as appropriate. Solvents and lubricants are chemicals, and residue from shooting can be present. Work in a ventilated area, use eye protection where appropriate, avoid eating or drinking while cleaning, follow product labels and safety data sheets, and wash your hands afterward.

Best Budget Tree Stands for Hunters

Choosing a budget tree stand is not only about finding the lowest current price. The better choice is the stand that fits how you hunt, how far you carry your gear, what kind of tree setup you use, and whether the full system can be used exactly the way the manufacturer describes.

This guide compares budget and value tree stands for hunters, including ladder and hang-on options with source-supported specs, buyer-fit notes, and safety reminders. Prices and stock can change quickly, so this page avoids static price claims and asks you to check the current Amazon listing before buying.

Affiliate disclosure: As an Amazon Associate, TheShootingGears.com may earn from qualifying purchases. This does not change your price or our product-selection standards.

Table of Contents

Quick Picks

PickProductStand typeBest fitCheck price
Best simple budget ladder standBig Game Striker XL Ladder StandLadder standHunters setting a planned stand near a field edge, food plot, or private-land locationAmazon
Best lightweight hang-onXOP Vanish EvolutionHang-onMobile hunters who want a lighter stand and already understand climbing-aid setupAmazon
Best roomy hang-onSummit Ledge XTHang-onHunters who want more platform and seat comfort from a hang-on standAmazon
Best larger ladder platformBig Game Hunter HD 1.5 Ladder StandLadder standHunters who want a larger ladder platform and shooting-rail setupAmazon

Comparison Table

ProductTypeStand weightWeight ratingPlatformBest-fit buyerMain limitation
Big Game Striker XLLadder stand54 lb300 lb17 in W x 22 in DHunter setting a simple planned stand locationHeavy compared with hang-on options
XOP Vanish EvolutionHang-on10.5 lb listed in copy; 10.9 lb in tech specs350 lb27 in x 19 inMobile hunter prioritizing lighter carry weightReal system cost includes climbing aids
Summit Ledge XTHang-on23 lb300 lb24 in W x 30 in platform frameHunter wanting a roomier hang-onHeavier than ultralight hang-ons
Big Game Hunter HD 1.5Ladder stand61 lb350 lb23.5 in W x 29 inHunter wanting a larger ladder platformTransport and setup burden

How We Chose

This roundup uses a research-based selection process, not hands-on field testing. A product was included only when the source-prep packet had enough manufacturer or source-supported data to describe the stand accurately, explain its buyer fit, and avoid stale price or stock claims.

The selection favors verified model identity, stand type, platform size, listed weight rating, setup limitations, and a clear role in a budget and value lineup. It also avoids hardcoded prices, because any fixed price ceiling can become stale between publication and your shopping session.

The main comparison split is ladder stand versus hang-on stand. A ladder stand can be a good fit for a semi-permanent location, but it is heavier and asks for careful assembly, stabilization, and tree selection. A hang-on stand is usually better for mobile hunting, but the stand is only part of the system, because climbing sticks, lifelines, straps, and setup method all matter.

Best Budget Tree Stands for Hunters

Best Simple Ladder Stand: Big Game Striker XL Ladder Stand

The Big Game Striker XL is the straightforward ladder-stand pick for hunters who want a source-supported value option without moving into a more complex mobile hang-on setup. It makes the most sense for private-land stands, food plot edges, field edges, or other locations where the extra ladder weight is not a dealbreaker.

Best for: Hunters who want a simple ladder stand for a planned location and do not need to carry the stand deep into public land.

  • Source-supported facts: BGM-LS0355 model, ladder stand, 17.5 ft height, steel construction, 17 in W x 22 in D foot platform, 20 in W x 13 in D flip-up seat, 20 in W x 19 in H backrest, 54 lb stand weight, 300 lb weight rating, and 9 in minimum tree size.
  • What stands out: The simple ladder format is easier to understand than a separate hang-on plus climbing-stick system, and the flip-up seat helps open the platform when you stand for a shot.
  • Safety notes: Read the current manual, use the included fall-arrest system as directed, inspect straps and fasteners, and count hunter plus gear against the total rating.

Skip this if: You need a stand for long public-land walks, frequent moves, or one-person run-and-gun hunting.

Pros

  • Simple ladder-stand format for planned locations.
  • Source-supported model identity and core specs.
  • Flip-up seat can create more standing room.
  • Includes a full-body fall arrest system according to the source packet.

Cons

  • Heavier and less mobile than hang-on options.
  • Smaller platform than the larger ladder pick in this guide.
  • Not a good fit for frequent long carries.
  • No individual product image is used because image rights were not approved.

Best Lightweight Hang-On: XOP Vanish Evolution

The XOP Vanish Evolution is the mobile-hunter pick, because it gives budget and value shoppers a lighter hang-on option with source-supported specs. It is a better fit for hunters who already understand that a hang-on stand is only one part of the elevated hunting system.

Best for: Mobile hunters who want a lighter hang-on and are prepared to pair it with appropriate climbing aids and fall-arrest gear.

  • Source-supported facts: Hang-on stand, cast aluminum, 350 lb weight rating, 27 in x 19 in platform, 21 in seat height, 14 in x 12 in seat, fully adjustable seat and platform, and listed weight shown as 10.5 lb in product copy with 10.9 lb in tech specs.
  • What stands out: The low listed stand weight is the main advantage over the ladder stands and the roomier Summit hang-on.
  • Safety notes: A hang-on setup requires a complete climbing and fall-arrest plan. Use approved climbing aids, stay connected during setup, and follow the manufacturer instructions.

Skip this if: You want one purchase that includes a ladder-style access system.

Pros

  • Lightest primary stand in this lineup.
  • Cast aluminum construction.
  • Higher listed weight rating than the 300 lb models in this guide.
  • Good fit for mobile hunters comparing hang-on platforms.

Cons

  • Climbing aids can raise the real total setup cost.
  • Weight is listed two ways in source data.
  • Requires more setup knowledge than a simple ladder stand.
  • No individual product image is used because image rights were not approved.

Best Roomy Hang-On: Summit Ledge XT

The Summit Ledge XT is the roomier hang-on choice for hunters who want more platform space and seat comfort than the lightest mobile setups usually provide. It is still a hang-on, so climbing aids and careful installation remain part of the buying decision.

Best for: Hunters who want a comfort-leaning hang-on stand and are willing to carry more weight for a larger platform.

  • Source-supported facts: SU82117 model, steel hang-on, 23 lb weight, 300 lb maximum weight limit, 24 in W x 30 in D platform frame, 21 in seat height, 18 in W x 15.5 in D seat bottom, 18 in W x 13 in H seat back, and 8 in to 20 in tree diameter range.
  • What stands out: The platform frame is larger than the XOP platform, and the fold-up Textilene seat with contoured backrest gives it a comfort-focused role.
  • Safety notes: The source packet says climbing aids are sold separately, so do not treat this as a complete elevated system by itself.

Skip this if: Your priority is the lightest possible mobile setup.

Pros

  • Larger platform frame than the lightweight hang-on pick.
  • Comfort-oriented fold-up seat with contoured backrest.
  • Tree diameter range is source-supported.
  • Good option when space matters more than minimum weight.

Cons

  • Heavier than ultralight hang-ons.
  • Climbing aids are sold separately.
  • Less appealing for long public-land carries.
  • No individual product image is used because image rights were not approved.

Best Larger Ladder Platform: Big Game Hunter HD 1.5 Ladder Stand

The Big Game Hunter HD 1.5 is the larger ladder-stand pick for hunters who want more platform and seat room than the simpler ladder option. It is best for planned setups where transport, assembly, and raising the stand can be handled safely.

Best for: Hunters who want a larger ladder stand platform and a shooting rail setup for a known stand location.

  • Source-supported facts: BGM-LS0550 model, steel ladder stand, 18 ft 6 in to shooting rail, 23.5 in W x 29 in D foot platform, 23 in W x 18 in D flip-up Flex-Tek seat, 20.5 in seat height, 23 in W x 18 in H backrest, 61 lb stand weight, and 350 lb weight rating.
  • What stands out: The platform, seat, and backrest dimensions are larger than the Striker XL, and the padded flip-back shooting rail gives it a different hunting feel.
  • Safety notes: Larger ladder platforms can still create serious fall risk during assembly, raising, ascent, descent, and the transition onto the platform.

Skip this if: You hunt alone and cannot safely assemble, raise, and stabilize a larger stand.

Pros

  • Largest ladder platform among the primary picks in this guide.
  • Higher listed rating than the Striker XL.
  • Flip-up seat and adjustable shooting rail add flexibility.
  • Better fit for a planned location than a frequent mobile setup.

Cons

  • Heavier and harder to transport than the other primary picks.
  • Not a public-land mobile stand for most hunters.
  • Setup may require help, tools, and careful planning.
  • No individual product image is used because image rights were not approved.

Tree Stand Buying Guide

A ladder stand is usually better for a planned location, while a hang-on is usually better for mobile hunting. Ladder stands include ladder access as part of the structure, but they are heavier and more involved to install. Hang-ons can be more mobile, but they require a complete climbing and fall-arrest system.

Stand weight matters most when you carry the stand often. A 10.5 lb hang-on and a 61 lb ladder stand are not solving the same problem. Before buying, picture the real route from vehicle to tree, the terrain, the dark return trip, and whether you will be carrying climbing sticks, a bow, a pack, or other gear.

Platform size affects how much room you have to stand, turn, and settle in for a longer sit. Seat size, backrest design, footrest, and shooting rail details also affect comfort. More room often means more weight, so choose the stand that matches your hunting pattern.

Treat the listed weight rating as total load. Count the hunter, clothing, weapon, pack, and other gear. Some manufacturer manuals state this directly, and it is the safer way to shop. If your clothing, pack, bow or firearm, and accessories put you near the limit, choose a different setup.

Use only live trees that meet the manufacturer’s diameter and condition requirements for the exact model. Public-land stand rules can also vary by state, property, season, and agency, so check current official wildlife-agency rules before placing or leaving any stand.

Tree Stand Safety Checklist

Tree stand safety starts before the hunt and continues until you are back on the ground. No ladder stand or hang-on stand is safe without correct setup, inspection, fall-arrest equipment, and manual-specific use. The Tree Stand Safety Awareness Foundation, CPSC tree stand safety guidance, and the Wisconsin DNR treestand safety page all reinforce the same basic idea: stay connected, inspect gear, and follow the instructions for the exact stand.

  • Read and follow the current manual for the exact stand model.
  • Wear a full-body fall arrest harness or fall-arrest system.
  • Stay connected from leaving the ground until returning to the ground.
  • Use a lifeline or lineman-style belt where appropriate for climbing and setup.
  • Keep three points of contact while climbing.
  • Use a haul line for unloaded firearms, bows, packs, and gear.
  • Inspect straps, chains, cables, welds, fasteners, platform, ladder sections, and harness components before use.
  • Count hunter plus gear against the total weight rating.
  • Install only on manufacturer-approved live trees within the stated diameter range.
  • Practice setup and harness use at ground level before hunting.
  • Have a rescue plan and tell someone the stand location and expected return time.

Frequently Asked Questions

What is the best budget tree stand for most hunters?

The best budget tree stand is the one that fits your hunting location, carry distance, tree type, and safety setup. For a planned ladder location, the Big Game Striker XL is the simpler ladder pick in this guide. For mobile hunting, the XOP Vanish Evolution is the lighter hang-on pick.

Should I buy a ladder stand or a hang-on stand?

Buy a ladder stand if you want a more planned setup and can handle the transport and installation burden. Buy a hang-on if you move more often and already have or plan to buy the correct climbing aids. Either way, follow the manual and use fall-arrest equipment.

Are hang-on stands cheaper than ladder stands?

Not always, once you count the whole system. A hang-on stand may look more budget-friendly as a stand-only purchase, but climbing sticks, a lifeline, straps, and other setup gear can change the total cost. Compare the full hunting setup before deciding.

Why does this guide avoid fixed prices?

This guide avoids fixed prices because online prices and stock can change quickly. A static price promise can become inaccurate after publication. The safer approach is to compare budget and value candidates and ask readers to check the current price before buying.

Do tree stand weight ratings include gear?

Treat the listed rating as total load, including the hunter and gear. This is the safer way to shop. If your clothing, pack, bow or firearm, and accessories put you near the limit, choose a different setup.

Can I leave a tree stand on public land?

Public-land stand rules vary by state, property, season, and agency. Some areas have placement dates, removal deadlines, labeling rules, or restrictions on damaging trees. Check current official state wildlife and property rules before placing or leaving a stand.

What safety gear should I use with a tree stand?

Use a full-body fall arrest harness or fall-arrest system, and stay connected from the ground up and back down. Use a lifeline or lineman-style belt where the setup requires it, and use a haul line for unloaded firearms, bows, packs, and gear. Practice the setup at ground level before hunting.

Are these tree stands tested by TheShootingGears?

No. This guide is based on source-checked manufacturer and product data, not TheShootingGears hands-on use. We do not use hands-on testing claims unless documented first-hand testing exists.

Final Recommendation

For a simple planned ladder setup, start with the Big Game Striker XL. For the lightest mobile hang-on option in this source-supported guide, start with the XOP Vanish Evolution. If you want a roomier hang-on and can carry more weight, compare the Summit Ledge XT. If you want the larger ladder platform and can safely handle the heavier setup, compare the Big Game Hunter HD 1.5.

The best overall choice depends on how you hunt. Ladder stands fit planned locations better. Hang-on stands fit mobile hunting better, but only when paired with the right climbing and fall-arrest system. Before buying, verify the current price, current availability, exact model identity, and the manual for the stand you choose.

Waterproof Hunting Clothing for Rainy Season | Stay Dry & Hunt Longer

When dark clouds roll in and rain starts falling, many hunters pack up their gear and call it a day. But experienced hunters know something most don’t rainy days can be some of the most productive times to hunt. The wet weather often dampens sound, masks scent, and encourages animals to move more freely without fear of predators.

However, there’s one thing that can make or break your hunt: your clothing. Without the right waterproof hunting gear, you’ll end up soaked, cold, and uncomfortable within minutes forcing you to leave the field early. On the other hand, high-quality waterproof hunting clothing allows you to stay dry, warm, and focused even during hours of steady rain.

In this guide, we’ll explore the best waterproof hunting clothing for the rainy season, how to choose the right materials, and how to layer effectively to stay comfortable no matter what Mother Nature throws your way.

Key Features to Look for in Waterproof Hunting Clothing

When it comes to hunting gear, “waterproof” doesn’t just mean keeping the rain off your shoulders. The ideal rain gear must repel water, allow breathability, and maintain silence all while providing comfort and flexibility for long days outdoors.

Let’s break down the must-have features.

1. Breathability and Waterproof Rating

One of the biggest mistakes hunters make is assuming all waterproof materials are equal. Some repel rain effectively but trap heat and sweat inside, leaving you just as wet from condensation. That’s why breathability is as important as waterproofing.

Modern hunting jackets and pants use laminated membranes like GORE-TEX®, eVent®, or Toray Dermizax®, which feature microscopic pores that block rain but allow vapor from sweat to escape.

When checking specs, you’ll often see a waterproof rating (in millimeters).

  • 10,000mm – Handles light to moderate rain.
  • 20,000mm or higher – Suitable for heavy downpours and long exposure.

For rainy-season hunting, aim for at least 15,000mm waterproofing and 15,000g breathability to stay comfortable through changing weather conditions.

2. Quiet Fabric Technology

Every hunter knows that noise kills opportunity. You could have the best rain protection in the world, but if your jacket sounds like a plastic bag every time you move, you’ll spook your prey instantly.

This is where quiet fabric technology becomes essential. Look for soft-shell or brushed polyester outer layers designed to be silent even in motion. Many premium brands like Sitka Gear and First Lite use specially engineered materials that combine waterproof membranes with ultra-quiet outer shells giving you stealth and protection simultaneously.

3. Camo Patterns That Work in Wet Conditions

The rainy season changes the environment. Greens turn darker, and reflective surfaces appear on leaves and mud. Choosing the right camouflage pattern can make all the difference in blending with your surroundings.

Some effective options include:

  • Realtree MAX-5®: Perfect for wetlands, marshes, and waterfowl hunting.
  • Mossy Oak Bottomland®: Ideal for wooded areas and forest floors.
  • Sitka Subalpine™: Great for stalking in open grasslands or mountain slopes.

When selecting your rain gear, match your camo pattern to the terrain you hunt most often it’s not just about looks, it’s about invisibility.

The Ideal Layering System for Wet Weather Hunts

Even the best rain jacket won’t perform well without a smart layering system underneath. Layering helps you regulate temperature, wick moisture, and stay dry inside and out.

Here’s how to layer effectively for rainy-season hunts.

Base Layer – The Moisture-Wicking Foundation

Your base layer is the clothing that sits directly against your skin. Its job is to pull sweat away from your body and keep you dry.

Avoid cotton at all costs once it gets wet, it stays wet and quickly chills your body. Instead, opt for materials like merino wool or synthetic blends (polypropylene or polyester). These fabrics wick away moisture while maintaining warmth, even when damp.

Brands like Icebreaker, Smartwool, and Under Armour Base 3.0 are excellent for moisture control and comfort during long hunts.

Mid Layer – The Insulating Core

The mid layer provides insulation, trapping body heat while still allowing moisture to escape. It’s your temperature control layer you can remove or add it as the weather changes.

Popular mid-layer options include fleece pullovers, lightweight down jackets, or synthetic insulated vests.

Pro Tip: Synthetic insulation like Primaloft® performs better than natural down in wet environments because it retains warmth even when damp.

Think of the mid layer as your “thermal buffer” it’s what keeps you comfortable when the temperature drops during a rainy morning hunt.

Outer Layer The Waterproof Shell

Your outer layer is your main defense against rain and wind. This is where waterproofing really matters.

A good hunting rain jacket should feature:

  • Fully sealed seams to prevent leaks
  • Adjustable cuffs, hoods, and waist to block out rain
  • Waterproof zippers for total protection

Look for options like:

  • Sitka Downpour Jacket: Lightweight, ultra-quiet, and highly breathable.
  • KUIU Chugach TR Rain Gear: Exceptional weather protection without bulk.
  • Frogg Toggs Pro Action Suit: Budget-friendly and surprisingly effective.
  • Cabela’s Space Rain Jacket: Packable, waterproof, and perfect for travel.

Your outer shell should allow flexibility while providing coverage long enough to overlap your pants, preventing rain from sneaking in.

Waterproof Hunting Pants and Bibs for the Rainy Season

Hunting Pants That Move with You

Hunting often involves crouching, crawling, or hiking over uneven terrain which means your pants must offer freedom of movement. Waterproof hunting pants should be stretchable, breathable, and reinforced at key wear points like the knees and seat.

A high-quality pair will also have side zippers or vents for airflow, keeping you from overheating during physical activity.

Top-rated waterproof hunting pants include:

  • Sitka Stormfront Pants: Rugged, quiet, and fully seam-sealed.
  • First Lite Seak Stormtight Pants: Designed for heavy rain and high activity.
  • Badlands Pyre Bibs: Ideal for extreme weather with built-in insulation.

Why Bibs Are Better for Wet Conditions

Waterproof bibs cover your torso and prevent water from seeping in between your jacket and pants a common problem during extended hunts.

Bibs also provide extra warmth and protection when sitting on damp ground or wading through brush. The shoulder straps keep them in place, so they never slide down or expose your lower back.

If you often hunt in heavy rain or wetlands, waterproof bibs are well worth the investment.

Waterproof Accessories Every Hunter Should Own

When you’re preparing for wet weather, don’t forget the smaller essentials. Accessories can make a huge difference in your comfort and endurance.

Waterproof Gloves

Cold, wet hands can ruin your accuracy and control. A good pair of waterproof gloves should provide insulation without sacrificing dexterity.

Some great options include:

  • Sitka Delta Deek GTX Gloves: Gore-Tex protection with grip and warmth.
  • Under Armour Storm Gloves: Lightweight, waterproof, and breathable.

Look for gloves with touchscreen fingertips, grip textures, and adjustable cuffs to seal out moisture.

Waterproof Hats and Hoods

Keeping your head dry is crucial for body temperature regulation. A wide-brim hat or waterproof hood prevents water from running down your face and neck.

Brands like Outdoor Research and Drake Waterfowl offer hunter-friendly designs with camo patterns and breathable fabric linings.

Pairing a hat with a neck gaiter also helps protect exposed skin from cold rain and wind.

Waterproof Boots

Nothing ends a hunt faster than soaked boots. Wet feet not only cause discomfort but can lead to blisters or hypothermia in colder climates.

Choose rubber or neoprene hunting boots with insulated linings and aggressive tread patterns for muddy terrain.

Top picks include:

  • Muck Boot Wetland Series: 100% waterproof and designed for marshy hunts.
  • LaCrosse Alphaburly Pro: Durable, comfortable, and scent-free.
  • Irish Setter VaprTrek Waterproof: Lightweight with superior traction.

Add a pair of wool socks for maximum moisture management and warmth.

Maintaining Your Waterproof Hunting Gear

High-end waterproof gear can last years if you take care of it properly. Here’s how to extend the life of your investment.

1. Clean with Care

Never throw your rain gear into the wash with regular detergent. Use a specialized cleaner like Nikwax Tech Wash or Granger’s Performance Wash.

Avoid bleach, softeners, or high-heat drying, as they can damage the waterproof membrane.

2. Reproof When Needed

Over time, rainwater may start soaking into your gear instead of beading off. This means it’s time to reproof. Apply a DWR (Durable Water Repellent) spray to restore your gear’s water-shedding capabilities.

3. Dry and Store Properly

After every hunt, hang your gear in a well-ventilated area to dry completely. Storing damp clothing can cause mildew and ruin the fabric. Keep everything in a cool, dry place until your next adventure.

Final Thoughts

Rainy days can offer some of the best hunting opportunities if you’re prepared. With the right waterproof hunting clothing, you’ll stay dry, warm, and focused no matter how hard it pours.

Invest in breathable, quiet, and durable rain gear, use smart layering, and don’t forget waterproof boots and gloves. The better your gear, the longer you can stay in the field and the greater your chances of success.

Competition Shooting Supplies: Gear Up for Success

Competitive shooting requires skill, precision, and the right equipment. Whether you’re a seasoned competitor or just starting your journey in the world of competitive shooting, having the right supplies is crucial for achieving your best performance. In this comprehensive guide, we will explore the essential competition shooting supplies that can help elevate your game. From firearms and ammunition to accessories and gear, we’ll cover everything you need to gear up for success on the competition range.

1. Introduction: The Thrill of Competitive Shooting

The Appeal of Competitive Shooting

Competitive shooting offers a unique blend of skill, precision, and adrenaline. It challenges shooters to push their limits, engage in friendly competition, and improve their shooting abilities. The thrill of the sport, combined with the camaraderie among fellow shooters, makes competitive shooting a captivating and rewarding pursuit.

The Importance of Quality Shooting Supplies

Having the right shooting supplies is essential for achieving success in competitive shooting. Quality firearms, ammunition, accessories, and gear can enhance your performance, improve accuracy, and provide a competitive edge. Investing in reliable and purpose-built equipment ensures that you can focus on honing your skills without compromising on functionality or reliability.

2. Firearms for Competitive Shooting

Choosing the Right Firearm for Your Discipline

Selecting the right firearm is crucial for competitive shooting. Different disciplines may require specific firearms, such as pistols for USPSA, rifles for precision shooting, or shotguns for 3-gun matches. Research the rules and requirements of your chosen discipline to determine the appropriate firearm for your competitive pursuits.

Customization and Upgrades

Customizing your firearm to suit your shooting style and preferences is common in competitive shooting. Upgrades such as match-grade barrels, adjustable triggers, improved sights, and ergonomic grips can enhance accuracy, ergonomics, and overall performance.

Handguns, Rifles, and Shotguns

Handguns are popular choices for disciplines like USPSA, IDPA, and Steel Challenge, offering a balance of speed and precision. Rifles, including AR-15 platforms or bolt-action rifles, excel in precision shooting events like PRS or F-Class. Shotguns, such as semi-automatic or pump-action models, are prevalent in 3-gun matches and shotgun sports like IPSC Shotgun.

3. Ammunition for Competitive Shooting

Selecting the Right Ammunition for Your Firearm

Choosing the right ammunition is crucial for consistent performance in competitive shooting. Match-grade or competition-grade ammunition is specifically engineered for precision and reliability. Consider factors such as bullet weight, velocity, and projectile design to find ammunition that suits your shooting discipline and firearm.

Match-Grade Ammunition

Match-grade ammunition is manufactured to strict tolerances, ensuring consistent performance and accuracy. It often features premium components, high-quality brass, and precise bullet seating. While match-grade ammunition can be more expensive, its reliability and consistency can significantly impact your performance in competition.

Reloading for Competitive Shooting

Reloading ammunition can offer cost savings and allow for fine-tuning loads to match your shooting needs. However, it requires knowledge, precision, and adherence to safety practices. If you choose to reload for competitive shooting, invest in quality reloading equipment, components, and follow reputable load data sources.

4. Optics and Sights

Red Dot Sights

Red dot sights provide a fast target acquisition and are popular in disciplines like USPSA, IPSC, and 3-gun matches. These sights offer a clear, illuminated dot reticle, allowing for quick and precise aiming.

Scopes for Precision Shooting

Scopes are essential for precision shooting disciplines like PRS, F-Class, and Benchrest. High-quality scopes with adjustable magnification, clear glass, and precise reticles are crucial for long-range accuracy and target engagement.

Iron Sights and Competition Sight Sets

Iron sights are still commonly used in many competitive shooting disciplines, especially in pistol shooting. Upgrading to competition sight sets with adjustable rear sights and fiber optic or tritium front sights can enhance sight picture and target acquisition.

5. Shooting Accessories

Holsters and Belt Systems

Holsters are essential for pistol shooting competitions, providing a safe and secure way to carry and draw your firearm. Belt systems, often incorporating magazine pouches and other accessories, allow for efficient reloading and gear organization.

Magazine Pouches and Carriers

Magazine pouches and carriers are critical for quick and smooth magazine changes in pistol and 3-gun matches. Choose pouches that securely hold your magazines, allow for easy access, and facilitate fast reloading.

Shooting Bags and Range Accessories

Shooting bags and range accessories, such as bipods, shooting rests, or barricade bags, can improve stability and support while engaging targets. They offer additional stability for precision shooting or positional shooting matches.

6. Apparel for Competitive Shooting

Shooting Jackets and Vests

Shooting jackets and vests provide stability and support, especially in precision shooting disciplines. They are designed to minimize body movement, reduce recoil impact, and offer additional padding for a steady shooting position.

Shooting Gloves

Shooting gloves offer enhanced grip, protection, and comfort during prolonged shooting sessions. They can improve weapon control and reduce hand fatigue, particularly in pistol shooting or high-volume shooting matches.

Eye and Ear Protection

Protecting your eyes and ears is paramount in competitive shooting. Invest in high-quality shooting glasses that provide impact protection and optimal visibility. Ear protection, such as earmuffs or earplugs, is essential to safeguard your hearing from the loud noise of firearms.

7. Maintenance and Cleaning Supplies

Cleaning Kits and Solvents

Regular firearm maintenance is crucial for reliable performance. Invest in quality cleaning kits that include brushes, cleaning rods, patches, and solvents designed for specific firearms. Proper cleaning and lubrication help extend the lifespan of your competition firearms.

Lubricants and Rust Preventatives

Using appropriate lubricants and rust preventatives on your competition firearms can protect against wear, reduce friction, and prevent corrosion. Choose lubricants specifically formulated for firearms and follow the manufacturer’s recommendations for application.

Tools for Firearm Maintenance

Having a selection of essential tools for firearm maintenance is invaluable. This includes screwdrivers, punches, sight adjustment tools, and torque wrenches for proper assembly, disassembly, and adjustment of various firearm components.

8. Range Equipment

Shooting Mats and Targets

Shooting mats provide comfort and protection while shooting from prone or kneeling positions. High-quality mats offer cushioning, water resistance, and storage options for essential accessories. Additionally, having a variety of targets suitable for your shooting discipline ensures accurate practice and training.

Chronographs and Shot Timers

Chronographs measure bullet velocity, helping you monitor ammunition performance and consistency. Shot timers are invaluable for measuring your shooting speed and analyzing split times for improved performance.

Range Bags and Gun Cases

Range bags and gun cases are essential for transporting and organizing your competition firearms, ammunition, accessories, and cleaning supplies. Look for bags with sturdy construction, padded compartments, and ample storage options for efficient organization.

9. Shooting Training Aids

Dry Fire Training Tools

Dry fire training tools allow you to practice shooting fundamentals without live ammunition. Devices like snap caps, laser training cartridges, and resetting triggers enable repetition, muscle memory development, and trigger control improvement.

Laser Training Systems

Laser training systems use laser-emitting cartridges or laser targets to simulate shooting scenarios and provide instant feedback on shot placement. These systems enhance accuracy, target acquisition, and speed, especially for indoor training sessions.

Recoil Management Devices

Recoil management devices, such as recoil pads or muzzle brakes, can help mitigate recoil and muzzle rise, allowing for faster follow-up shots and improved shooting performance. Experiment with different devices to find the right balance between recoil reduction and firearm control.

10. Where to Find Competition Shooting Supplies

Local Retailers and Gun Shops

Local firearms retailers and gun shops often carry a range of competition shooting supplies. Visit your local stores, consult with knowledgeable staff, and explore their selection to find the gear you need. They can provide valuable advice and recommendations based on your specific shooting discipline.

Online Shooting Supply Stores

Online shooting supply stores offer a wide range of competition shooting supplies and accessories. They provide the convenience of browsing a vast selection, comparing prices, and having products delivered directly to your doorstep. Read reviews, check ratings, and ensure you are purchasing from reputable and trusted online retailers.

Gun Shows and Shooting Events

Gun shows and shooting events often feature vendors specializing in competition shooting supplies. Attending these events provides an opportunity to handle and test different products, compare options, and take advantage of any show-exclusive deals or discounts.

11. Frequently Asked Questions (FAQs)

Q1: What gear do I need for my first competitive shooting match?

A1: The specific gear you need will depend on the shooting discipline. At a minimum, you’ll require a reliable firearm, appropriate ammunition, eye and ear protection, and a holster or gear to safely carry your firearm. Consult the rules and regulations of your chosen discipline for additional requirements.

Q2: Can I use my everyday carry firearm for competition?

A2: While it’s possible to use your everyday carry firearm for competition, it may not be optimized for competitive shooting. Depending on the discipline, modifications or upgrades may be necessary to enhance performance and meet specific rules. It’s recommended to consult experienced shooters or match officials for guidance.

Q3: How often should I clean and maintain my competition firearms?

A3: Regular cleaning and maintenance are essential for reliable performance. The frequency of cleaning depends on factors such as shooting volume, environmental conditions, and the specific firearm. As a general guideline, clean your firearms after each shooting session and perform more thorough maintenance periodically.

Q4: What accessories are allowed in different shooting disciplines?

A4: Shooting disciplines have specific rules regarding allowed accessories. For example, some disciplines may restrict the use of optics or limit the number of magazine rounds. Familiarize yourself with the rules of your chosen discipline to ensure compliance.

Q5: Are there any restrictions on ammunition in competitive shooting?

A5: Competitive shooting disciplines often have specific requirements for ammunition, including bullet type, weight, and power factor. Ensure that your ammunition meets the rules and regulations of your chosen discipline to avoid disqualification.

12. Conclusion

Congratulations! You now have a comprehensive understanding of the essential competition shooting supplies that can elevate your performance on the competition range. From firearms and ammunition to accessories and gear, investing in reliable and purpose-built equipment is crucial for achieving success in competitive shooting. Remember to research the rules and regulations of your chosen discipline, consult experienced shooters for guidance, and prioritize safety at all times. So gear up, practice diligently, and enjoy the thrill of competitive shooting!

Modern Bow Technology Innovations: What Actually Matters


Modern bow technology is useful only when it helps the archer shoot more consistently, tune more easily, or carry the bow more comfortably. The most important innovations are not flashy buzzwords; they are practical improvements in cam adjustment, riser stability, vibration control, grip design, accessory mounting, and setup repeatability.

This guide explains what those upgrades mean in plain language. It is not a ranking of specific bow models and it does not claim personal field use. Use it as a buyer and setup framework before you compare compound bows, target bows, hunting bows, or upgrades at a local pro shop.

Table of Contents

Quick Answer

The best bow technology upgrades are the ones that make the bow easier to fit and repeat. Adjustable cams help match draw length and draw feel. Better risers and limb systems help stability. Improved damping can reduce vibration after the shot. Integrated mounts can clean up accessories. None of those features replace proper draw length, safe setup, broadhead tuning, or coaching.

When comparing bow technology, focus on fit, adjustability, stability, noise control, and accessory integration before speed claims.

Bow Technology Checklist

Before you get excited about a new model, check whether the technology solves a real problem for your style of shooting. A hunting bow used from a blind, a compact saddle setup, and a target bow for long practice sessions may all prioritize different features.

  • Fit: Can the bow be set to your correct draw length and draw weight without awkward compromises?
  • Control: Does the grip encourage a repeatable hand position?
  • Stability: Does the riser length, weight balance, and stabilizer setup help you hold steady?
  • Tuning: Can a pro shop tune it cleanly for your arrow, rest, and broadhead setup?
  • Noise and vibration: Does the bow settle after the shot without harsh feedback?
  • Accessory fit: Do the sight, rest, quiver, stabilizer, and sling options mount cleanly?

Cam Adjustability and Draw Modules

Cam systems are one of the biggest areas where modern compound bows have improved. Many bows now offer module-based draw-length adjustment, let-off options, or tuning features that help a shop fit the bow without swapping major parts. That matters because a bow that fits badly will be harder to shoot well, even if it is fast on paper.

What It Means for Buyers

Look for adjustability that helps a real archer, not adjustability for its own sake. A youth archer, new adult archer, or hunter changing layers through the season may benefit from flexible settings. A serious target archer may care more about a very specific draw cycle, wall feel, and repeatable tune.

Where to Be Careful

Do not change cam timing, draw stops, modules, or cable settings casually. Use the bow manual and a qualified shop when the adjustment affects tune or safety. The Archery Trade Association is a useful industry starting point for understanding the archery market, but your specific bow manual is still the authority for your exact model.

Riser and Limb Design

Risers and limbs influence balance, stiffness, weight, and shot feel. Longer risers often feel steadier, while compact hunting bows may trade some stability for easier handling in tight spaces. Carbon and aluminum designs can both work well; the right choice depends on balance, budget, climate, and how the bow feels at full draw.

Stability Over Hype

A stable bow helps the sight picture settle and makes repeatable form easier. That does not mean heavier is always better. It means the bow should balance well with your sight, rest, quiver, stabilizer, and arrow setup. If the bow wants to tip or torque in your hand, the latest material label will not fix the fit problem by itself.

Vibration and Noise Control

Modern bows often use limb pockets, riser geometry, string stops, dampers, and accessories to reduce vibration and post-shot noise. For hunters, a quieter and smoother bow can be helpful. For target shooters, lower vibration can make the bow feel calmer through a long practice session.

Be careful with absolute claims. A bow is not quiet or smooth just because the marketing says it is. String condition, arrow weight, tune, accessories, and shooter form all affect sound and feel. Compare bows in person when possible, and ask a shop to set them close to your real draw length and draw weight before judging.

Grip Fit and Ergonomics

Grip design is easy to overlook, but it can affect left-right misses and long-term consistency. A good grip helps your bow hand settle into the same pressure point without forcing the wrist into a strange angle. Some modern bows use slimmer grips, modular grip panels, or warmer-feeling materials to improve repeatability and comfort.

Try Before You Decide

If possible, shoot or at least draw the bow before buying. A bow that looks perfect in a spec table can feel wrong in your hand. Your local archery shop can also check whether your draw length, peep height, and anchor position match the bow setup.

Accessory Integration

Accessory integration has become a practical upgrade area. Cleaner sight mounts, rest mounting systems, quiver options, stabilizer setups, and cable-management designs can reduce clutter and make the bow easier to carry. The best version of this technology improves function without locking you into accessories that do not fit your hunting or target setup.

Competition and organized archery may also have equipment limits. If you shoot events, check the current World Archery rulebook, your local club rules, or your league rules before adding electronic aids, unusual sight systems, or specialty accessories.

Speed vs. Shootability

Speed sells bows, but shootability keeps arrows in the middle. A very aggressive bow may deliver more speed, but it can also feel less forgiving to draw, hold, or tune. Many archers are better served by a bow they can control cleanly than by chasing the fastest number on a spec sheet.

Hunting vs. Target Priorities

Hunters often balance compact size, quietness, durability, and broadhead tune. Target archers often value stability, repeatability, and a smooth hold. New archers should prioritize fit, coaching, and safe practice over maximum speed. Bowhunter education resources such as Bowhunter Ed can also help frame equipment choices around safety and responsible use.

Who Benefits Most

Technology helps most when it solves a specific problem. A growing archer benefits from adjustability. A tree-stand hunter may benefit from compact handling and quiet setup. A western hunter may care about weight and stability. A target shooter may prioritize hold, grip, and repeatable tune. Start with the use case, then decide which technology is worth paying for.

The safest upgrade path is simple: get the bow fitted, confirm the draw weight is manageable, tune arrows correctly, practice with the exact setup you will use, and make changes one at a time. If a feature makes setup easier and shooting more repeatable, it is useful. If it only makes the spec sheet look exciting, treat it as optional.

FAQ

What bow technology matters most?

Fit and adjustability matter most for most archers. A bow with the right draw length, manageable draw weight, stable grip, and clean tune will usually help more than a bow chosen only for speed.

Are newer bows always better?

No. Newer bows may offer better adjustability or integration, but an older bow that fits well and is safely maintained can still shoot very well. Condition, setup, and tune matter.

Should beginners buy the fastest bow?

Usually not. Beginners should choose a bow they can draw smoothly, hold safely, and practice with consistently. Speed matters less than fit, control, and repeatable form.

Do integrated accessory mounts really matter?

They can, especially if they reduce clutter and improve balance. But they are not automatically better for every archer. Confirm your preferred sight, rest, quiver, and stabilizer options work with the bow before buying.

Final Takeaway

The best bow technology is practical, not just new. Choose features that improve fit, tune, stability, comfort, and safe repeatability. A bow that matches your body and use case will beat a flashier bow that fights your form.

Exit mobile version