Competition Shooting Supplies: Gear Up for Success

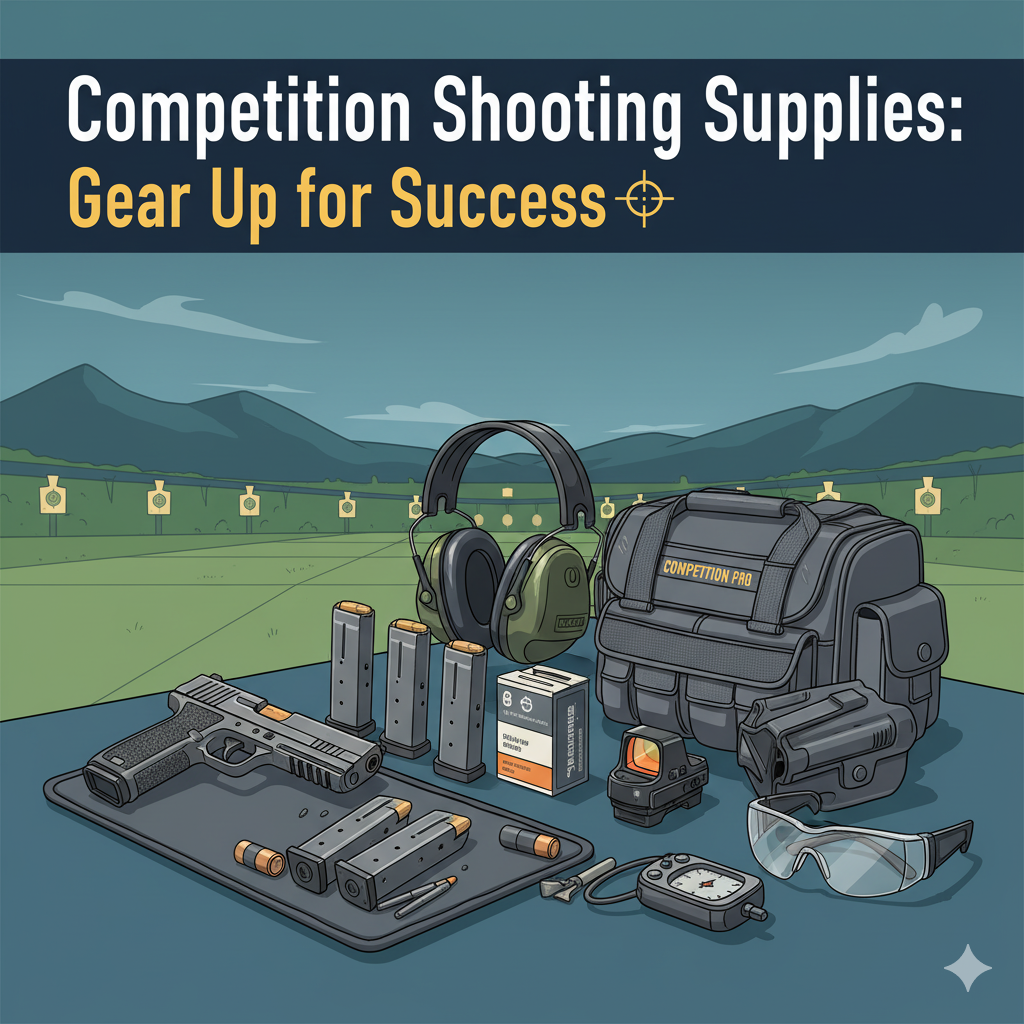
Competitive shooting requires skill, precision, and the right equipment. Whether you’re a seasoned competitor or just starting your journey in the world of competitive shooting, having the right supplies is crucial for achieving your best performance. In this comprehensive guide, we will explore the essential competition shooting supplies that can help elevate your game. From firearms and ammunition to accessories and gear, we’ll cover everything you need to gear up for success on the competition range.

1. Introduction: The Thrill of Competitive Shooting

The Appeal of Competitive Shooting

Competitive shooting offers a unique blend of skill, precision, and adrenaline. It challenges shooters to push their limits, engage in friendly competition, and improve their shooting abilities. The thrill of the sport, combined with the camaraderie among fellow shooters, makes competitive shooting a captivating and rewarding pursuit.

The Importance of Quality Shooting Supplies

Having the right shooting supplies is essential for achieving success in competitive shooting. Quality firearms, ammunition, accessories, and gear can enhance your performance, improve accuracy, and provide a competitive edge. Investing in reliable and purpose-built equipment ensures that you can focus on honing your skills without compromising on functionality or reliability.

2. Firearms for Competitive Shooting

Choosing the Right Firearm for Your Discipline

Selecting the right firearm is crucial for competitive shooting. Different disciplines may require specific firearms, such as pistols for USPSA, rifles for precision shooting, or shotguns for 3-gun matches. Research the rules and requirements of your chosen discipline to determine the appropriate firearm for your competitive pursuits.

Customization and Upgrades

Customizing your firearm to suit your shooting style and preferences is common in competitive shooting. Upgrades such as match-grade barrels, adjustable triggers, improved sights, and ergonomic grips can enhance accuracy, ergonomics, and overall performance.

Handguns, Rifles, and Shotguns

Handguns are popular choices for disciplines like USPSA, IDPA, and Steel Challenge, offering a balance of speed and precision. Rifles, including AR-15 platforms or bolt-action rifles, excel in precision shooting events like PRS or F-Class. Shotguns, such as semi-automatic or pump-action models, are prevalent in 3-gun matches and shotgun sports like IPSC Shotgun.

3. Ammunition for Competitive Shooting

Selecting the Right Ammunition for Your Firearm

Choosing the right ammunition is crucial for consistent performance in competitive shooting. Match-grade or competition-grade ammunition is specifically engineered for precision and reliability. Consider factors such as bullet weight, velocity, and projectile design to find ammunition that suits your shooting discipline and firearm.

Match-Grade Ammunition

Match-grade ammunition is manufactured to strict tolerances, ensuring consistent performance and accuracy. It often features premium components, high-quality brass, and precise bullet seating. While match-grade ammunition can be more expensive, its reliability and consistency can significantly impact your performance in competition.

Reloading for Competitive Shooting

Reloading ammunition can offer cost savings and allow for fine-tuning loads to match your shooting needs. However, it requires knowledge, precision, and adherence to safety practices. If you choose to reload for competitive shooting, invest in quality reloading equipment, components, and follow reputable load data sources.

4. Optics and Sights

Red Dot Sights

Red dot sights provide a fast target acquisition and are popular in disciplines like USPSA, IPSC, and 3-gun matches. These sights offer a clear, illuminated dot reticle, allowing for quick and precise aiming.

Scopes for Precision Shooting

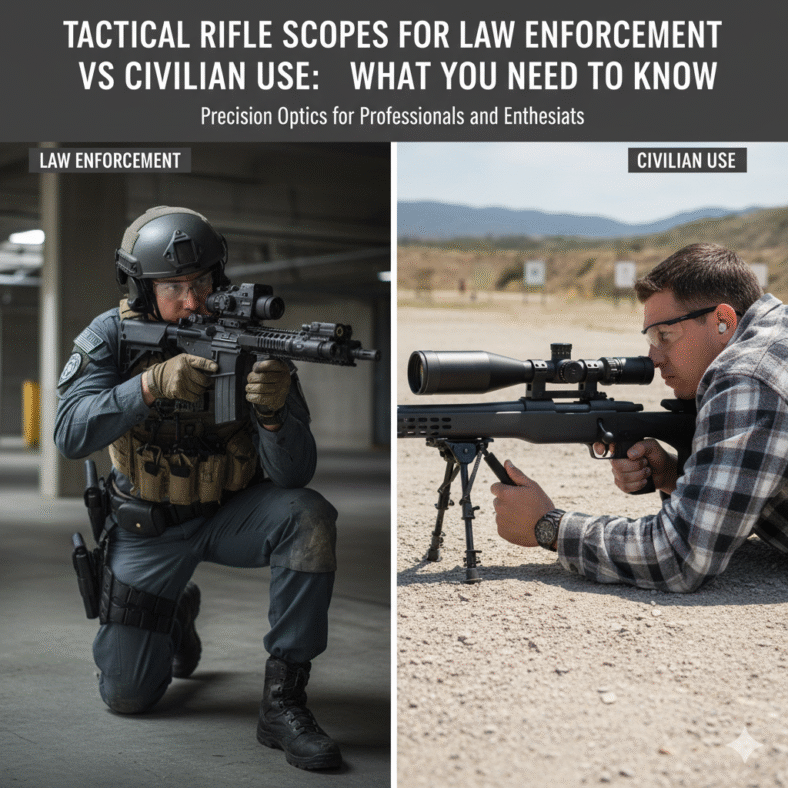
Scopes are essential for precision shooting disciplines like PRS, F-Class, and Benchrest. High-quality scopes with adjustable magnification, clear glass, and precise reticles are crucial for long-range accuracy and target engagement.

Iron Sights and Competition Sight Sets

Iron sights are still commonly used in many competitive shooting disciplines, especially in pistol shooting. Upgrading to competition sight sets with adjustable rear sights and fiber optic or tritium front sights can enhance sight picture and target acquisition.

5. Shooting Accessories

Holsters and Belt Systems

Holsters are essential for pistol shooting competitions, providing a safe and secure way to carry and draw your firearm. Belt systems, often incorporating magazine pouches and other accessories, allow for efficient reloading and gear organization.

Magazine Pouches and Carriers

Magazine pouches and carriers are critical for quick and smooth magazine changes in pistol and 3-gun matches. Choose pouches that securely hold your magazines, allow for easy access, and facilitate fast reloading.

Shooting Bags and Range Accessories

Shooting bags and range accessories, such as bipods, shooting rests, or barricade bags, can improve stability and support while engaging targets. They offer additional stability for precision shooting or positional shooting matches.

6. Apparel for Competitive Shooting

Shooting Jackets and Vests

Shooting jackets and vests provide stability and support, especially in precision shooting disciplines. They are designed to minimize body movement, reduce recoil impact, and offer additional padding for a steady shooting position.

Shooting Gloves

Shooting gloves offer enhanced grip, protection, and comfort during prolonged shooting sessions. They can improve weapon control and reduce hand fatigue, particularly in pistol shooting or high-volume shooting matches.

Eye and Ear Protection

Protecting your eyes and ears is paramount in competitive shooting. Invest in high-quality shooting glasses that provide impact protection and optimal visibility. Ear protection, such as earmuffs or earplugs, is essential to safeguard your hearing from the loud noise of firearms.

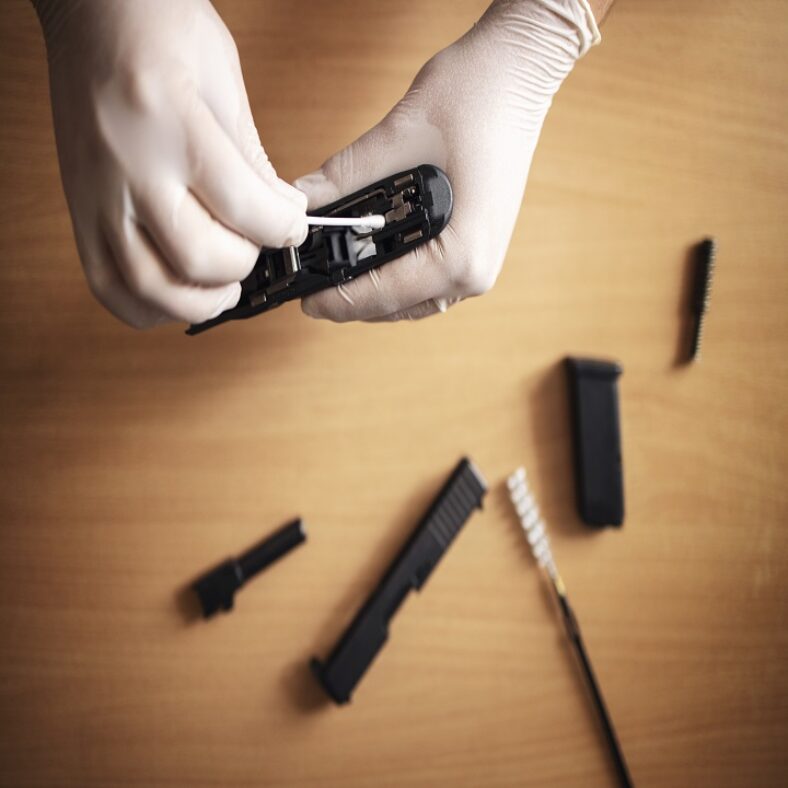
7. Maintenance and Cleaning Supplies

Cleaning Kits and Solvents

Regular firearm maintenance is crucial for reliable performance. Invest in quality cleaning kits that include brushes, cleaning rods, patches, and solvents designed for specific firearms. Proper cleaning and lubrication help extend the lifespan of your competition firearms.

Lubricants and Rust Preventatives

Using appropriate lubricants and rust preventatives on your competition firearms can protect against wear, reduce friction, and prevent corrosion. Choose lubricants specifically formulated for firearms and follow the manufacturer’s recommendations for application.

Tools for Firearm Maintenance

Having a selection of essential tools for firearm maintenance is invaluable. This includes screwdrivers, punches, sight adjustment tools, and torque wrenches for proper assembly, disassembly, and adjustment of various firearm components.

8. Range Equipment

Shooting Mats and Targets

Shooting mats provide comfort and protection while shooting from prone or kneeling positions. High-quality mats offer cushioning, water resistance, and storage options for essential accessories. Additionally, having a variety of targets suitable for your shooting discipline ensures accurate practice and training.

Chronographs and Shot Timers

Chronographs measure bullet velocity, helping you monitor ammunition performance and consistency. Shot timers are invaluable for measuring your shooting speed and analyzing split times for improved performance.

Range Bags and Gun Cases

Range bags and gun cases are essential for transporting and organizing your competition firearms, ammunition, accessories, and cleaning supplies. Look for bags with sturdy construction, padded compartments, and ample storage options for efficient organization.

9. Shooting Training Aids

Dry Fire Training Tools

Dry fire training tools allow you to practice shooting fundamentals without live ammunition. Devices like snap caps, laser training cartridges, and resetting triggers enable repetition, muscle memory development, and trigger control improvement.

Laser Training Systems

Laser training systems use laser-emitting cartridges or laser targets to simulate shooting scenarios and provide instant feedback on shot placement. These systems enhance accuracy, target acquisition, and speed, especially for indoor training sessions.

Recoil Management Devices

Recoil management devices, such as recoil pads or muzzle brakes, can help mitigate recoil and muzzle rise, allowing for faster follow-up shots and improved shooting performance. Experiment with different devices to find the right balance between recoil reduction and firearm control.

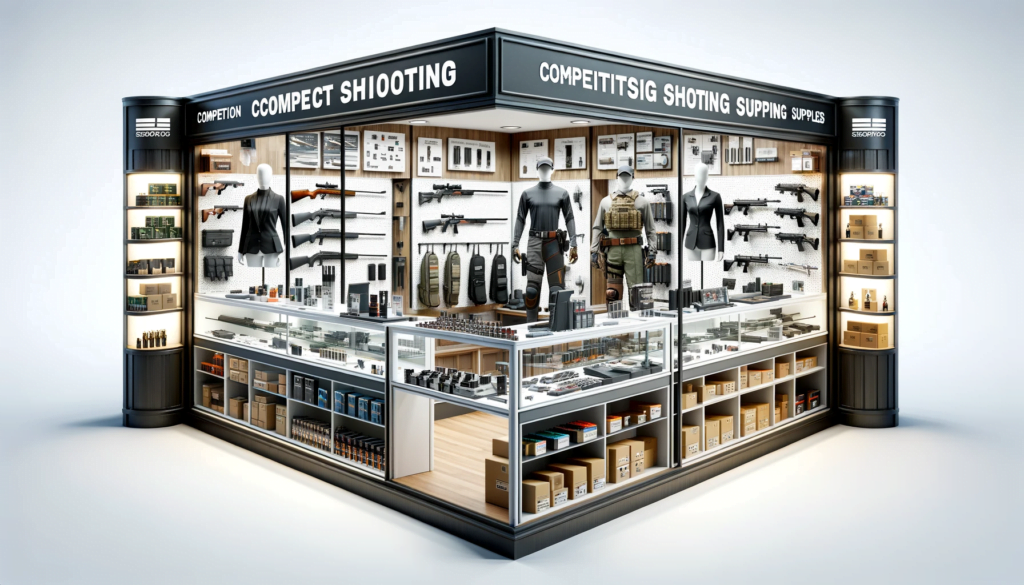
10. Where to Find Competition Shooting Supplies

Local Retailers and Gun Shops

Local firearms retailers and gun shops often carry a range of competition shooting supplies. Visit your local stores, consult with knowledgeable staff, and explore their selection to find the gear you need. They can provide valuable advice and recommendations based on your specific shooting discipline.

Online Shooting Supply Stores

Online shooting supply stores offer a wide range of competition shooting supplies and accessories. They provide the convenience of browsing a vast selection, comparing prices, and having products delivered directly to your doorstep. Read reviews, check ratings, and ensure you are purchasing from reputable and trusted online retailers.

Gun Shows and Shooting Events

Gun shows and shooting events often feature vendors specializing in competition shooting supplies. Attending these events provides an opportunity to handle and test different products, compare options, and take advantage of any show-exclusive deals or discounts.

11. Frequently Asked Questions (FAQs)

Q1: What gear do I need for my first competitive shooting match?

A1: The specific gear you need will depend on the shooting discipline. At a minimum, you’ll require a reliable firearm, appropriate ammunition, eye and ear protection, and a holster or gear to safely carry your firearm. Consult the rules and regulations of your chosen discipline for additional requirements.

Q2: Can I use my everyday carry firearm for competition?

A2: While it’s possible to use your everyday carry firearm for competition, it may not be optimized for competitive shooting. Depending on the discipline, modifications or upgrades may be necessary to enhance performance and meet specific rules. It’s recommended to consult experienced shooters or match officials for guidance.

Q3: How often should I clean and maintain my competition firearms?

A3: Regular cleaning and maintenance are essential for reliable performance. The frequency of cleaning depends on factors such as shooting volume, environmental conditions, and the specific firearm. As a general guideline, clean your firearms after each shooting session and perform more thorough maintenance periodically.

Q4: What accessories are allowed in different shooting disciplines?

A4: Shooting disciplines have specific rules regarding allowed accessories. For example, some disciplines may restrict the use of optics or limit the number of magazine rounds. Familiarize yourself with the rules of your chosen discipline to ensure compliance.

Q5: Are there any restrictions on ammunition in competitive shooting?

A5: Competitive shooting disciplines often have specific requirements for ammunition, including bullet type, weight, and power factor. Ensure that your ammunition meets the rules and regulations of your chosen discipline to avoid disqualification.

12. Conclusion

Congratulations! You now have a comprehensive understanding of the essential competition shooting supplies that can elevate your performance on the competition range. From firearms and ammunition to accessories and gear, investing in reliable and purpose-built equipment is crucial for achieving success in competitive shooting. Remember to research the rules and regulations of your chosen discipline, consult experienced shooters for guidance, and prioritize safety at all times. So gear up, practice diligently, and enjoy the thrill of competitive shooting!

Tactical Rifle Scopes for Law Enforcement vs Civilian Use: What You Need to Know

When it comes to tactical rifle scopes, not all optics are created equal. The differences between law enforcement scopes and civilian rifle optics go far beyond branding or price tags they reflect distinct missions, accountability standards, and operational environments.

Law enforcement officers rely on optics that perform flawlessly in life-or-death scenarios, where precision, durability, and speed matter most. Civilians including hunters, sport shooters, and competitors value versatility, affordability, and application-specific performance.

In this comprehensive guide, we’ll explore the key differences between tactical rifle scopes for law enforcement and civilian use, breaking down everything from magnification and reticle design to durability, legal standards, and training requirements. Whether you’re a professional or an enthusiast, this will help you make an informed decision before your next optic upgrade.

1. Mission Defines the Scope: How Purpose Shapes Optic Design

Law Enforcement Needs

Law enforcement rifles serve in unpredictable, high-pressure environments from urban settings and barricade situations to open-field operations. Officers may need to switch from close-quarters engagement to precision shots at 200–300 meters within seconds.

Key Requirements:

  • Rapid target acquisition
  • Low-light and night vision compatibility
  • Rugged reliability under stress
  • Repeatable zero and turret adjustments
  • Accountability through documentation and maintenance logs

A patrol rifle optic must be battle-ready every time, holding zero through rough handling, vehicle vibrations, and varied weather conditions. That’s why Low-Power Variable Optics (LPVOs) like 1–6x or 1–8x scopes have become the gold standard for law enforcement.

Civilian Needs

Civilians, on the other hand, have more diverse shooting applications:

  • Hunters need optics that perform well in dawn or dusk conditions.
  • Precision shooters need long-range accuracy and fine adjustments.
  • Home-defense owners need fast-acquisition, low-magnification scopes or red dots.

Key Requirements:

  • Versatility
  • Cost-effectiveness
  • Comfort and usability
  • Feature balance over extreme ruggedness

Civilians often seek scopes that deliver maximum value for their budget, with customizable features for their shooting style rather than strict duty specifications.

2. Magnification: Range vs Speed

Law Enforcement

Police and tactical units prioritize speed and clarity over extreme zoom.
Their typical engagement distances are within 300 meters sometimes less than 50. LPVOs (1–6x, 1–8x, 2–10x) provide:

  • A true 1x setting for both-eyes-open aiming (like a red dot).
  • Higher magnification for medium-range precision shots.

The result is a flexible optic that bridges close-quarters speed with enough reach for decisive accuracy.

Civilian Shooters

Civilians have the freedom to specialize.

  • Hunters benefit from 1–4x or 3–9x scopes, giving a balance of visibility and magnification.
  • Long-range shooters go for 4–16x, 5–25x, or even 6–24x scopes for target shooting beyond 600 yards.

👉 SEO Tip: For many readers, searching “best LPVO for civilians” or “best 1–8x tactical scope” — you can interlink to relevant gear reviews or buying guides.

3. Reticle Design: Simplicity vs Precision Data

Law Enforcement Reticles

Law enforcement reticles must be uncluttered and intuitive. Officers can’t waste time deciphering holdover lines in a high-stress situation.

Popular options include:

  • Illuminated center dot for quick target acquisition
  • Simple crosshair with hash marks for range estimation
  • BDC (Bullet Drop Compensator) reticles tailored to standard-duty ammo

Reticle illumination with NV-compatible brightness settings is also crucial for operations under night vision or low ambient light.

Civilian Reticles

Civilians have more freedom to experiment.

  • Hunters often prefer BDC reticles for common calibers like .308 or 6.5 Creedmoor.
  • Precision shooters choose MRAD or MOA reticles in a First Focal Plane (FFP) design, which maintains accuracy across magnification levels.
  • Plinkers or budget users may opt for standard duplex reticles simple, affordable, and effective.

4. Turrets & Adjustments: Locked vs Exposed

Law Enforcement Scopes

Duty-grade optics require precise, tactile turrets that are reliable even after rough use. Most teams prefer:

  • Locking or capped turrets to prevent accidental movement.
  • Mil or MOA markings for easy communication among trained officers.
  • Zero-stop features to instantly return to the baseline setting after adjustments.

This ensures that officers’ rifles maintain absolute consistency under field conditions a must for accountability and safety.

Civilian Scopes

Civilian shooters, especially long-range enthusiasts, love exposed turrets for quick windage and elevation adjustments.
Hunters may prefer capped turrets to avoid snagging in brush or while carrying rifles in the field.

Again, the civilian market emphasizes personal preference and scenario-specific design over standardized protocol.

5. Optical Quality: Clarity Counts for Both

Regardless of use, good glass makes or breaks an optic.

Law Enforcement:

  • Top-tier anti-reflective coatings to handle glare from headlights, flashlights, and streetlamps.
  • Reliable low-light transmission for night operations.
  • Edge-to-edge clarity to quickly identify threats.

Civilians:

  • Hunters demand bright glass during dawn and dusk when animals are most active.
  • Target shooters benefit from premium coatings to read mirage and wind indicators.

If your budget allows, investing in high-quality glass (Schott, ED, or HD lenses) will significantly improve accuracy, reduce eye strain, and last for years.

6. Durability & Environmental Sealing

Durability is where law enforcement scopes truly earn their price tags.
A duty optic must survive:

  • Drops
  • Recoil shock
  • Rain, snow, and extreme temperatures
  • Constant transport in patrol vehicles

Expect military-grade sealing (IPX7+), nitrogen or argon purging, and hard-anodized aircraft aluminum tubes.

For civilians, durability is still valuable but you can save by choosing mid-tier models if you’re not using your rifle daily in harsh conditions.

7. Legal & Accountability Considerations

Law Enforcement

Every piece of police equipment, including optics, is subject to chain-of-custody and policy documentation.

  • Officers must log zeroing procedures, adjustments, and maintenance.
  • Some agencies require optics with data-logging capability or body-cam integration for evidence.
  • Procurement often involves warranty, MIL-SPEC certification, and vendor reliability contracts.

Civilians

Civilians don’t face such strict oversight but must follow firearms regulations and ensure responsible storage and usage.
In some areas, accessories like night vision or thermal optics may be restricted — so always check local laws.

8. Training & Human Factors

No optic can replace training.

  • Law enforcement undergo standardized qualification courses that cover zeroing, range estimation, and low-light engagement.
  • Civilians should practice under realistic conditions not just at the bench.

Tips:

  • Practice transitions between magnification levels.
  • Train eye relief consistency and reticle holdovers.
  • Record your ballistic data (ammo, range, zero distance).

Consistent practice ensures the optic becomes a natural extension of your rifle.

9. Budgeting & Buying Advice

For Law Enforcement Agencies

  • Prioritize total lifecycle cost, not just initial price.
  • Ensure manufacturer support, spare parts, and service agreements.
  • Consider standardizing optics across departments for easier training and maintenance.

For Civilian Shooters

  • Define your primary shooting purpose before shopping.
  • Don’t overpay for features you won’t use (e.g., NV settings for daytime hunting).
  • Look for strong warranties — brands like Vortex, Trijicon, and Leupold offer lifetime coverage.

Pro Tip: Used optics from reputable sources can offer premium glass at a mid-tier price — just verify optical clarity and turret integrity.

10. Quick Comparison Table

FeatureLaw Enforcement ScopesCivilian Scopes
Magnification1–6x / 1–8x LPVO1–4x (hunting), 6–24x (long-range)
Reticle TypeSimple illuminated, NV-compatibleBDC, MRAD/MOA, duplex
TurretsLocking, zero-stop, MIL/MOAExposed or capped
DurabilityMIL-SPEC rugged, waterproofModerate to heavy-duty
Training RequirementStandardized qualificationSelf-directed
CostHigh (agency-grade)Wide range ($200–$2000+)
Legal OversightPolicy and evidence chainCivilian laws vary

11. Maintenance Tips

  1. Keep lenses clean using microfiber and optical solution.
  2. Record zero adjustments and environmental notes.
  3. Check mount torque and screws regularly.
  4. Store scopes in a cool, dry place with silica gel packs.
  5. For duty use, maintain inspection logs it’s not just about maintenance; it’s accountability.

Conclusion

When comparing tactical rifle scopes for law enforcement vs civilian use, it becomes clear that while the technology often overlaps, the purpose and application make all the difference.

For law enforcement, every optic must perform flawlessly under stress offering uncompromising durability, quick target acquisition, and absolute reliability in unpredictable environments. These scopes are engineered for professionals who need mission-ready precision and the assurance that every shot counts, no matter the conditions.

For civilian shooters, the focus shifts toward adaptability and personal preference. Whether it’s for hunting, home defense, or competitive long-range shooting, civilians can choose from a wider range of scopes that match their specific needs and budget. They enjoy more freedom in reticle design, magnification, and turret configuration often prioritizing versatility and value over military-grade ruggedness.

At the end of the day, both communities share the same ultimate goal: accuracy, confidence, and control behind the rifle. Whether you wear a badge or carry your rifle into the field, the right optic can make you a more efficient, responsible, and capable marksman.

So before making your next purchase, define your mission, understand your environment, and invest in an optic that’s not just powerful but purpose-built. Because in the world of tactical optics, clarity and reliability are what truly separate the good from the exceptional.

Bow Sight Setup & Adjustment Guide (Step-by-Step)

In archery whether for target shooting, bowhunting, or 3D competition the difference between a “good” shot and a great shot often comes down to your bow sight setup and adjustment. A poorly aligned sight can lead to frustration, inconsistent groups, and missed opportunities in the field. On the other hand, a finely tuned sight setup becomes an extension of your aim and lets you shoot with confidence.

In this guide, we’ll walk through everything from choosing a sight, mounting it properly, leveling the axes, sighting in pins, and fine adjustments for varying angles and distances. Whether you are a newcomer or a seasoned hunter looking for a refresher, this article will help you dial in your sight system for maximum accuracy.

Why Proper Sight Setup Matters

Before jumping into steps, it’s worth understanding why sight setup matters so much:

  • Parallax & alignment: Misalignment of sight housing or bubble levels can cause your aiming point to shift as distance increases.
  • Consistent reference: A stable, repeatable sight setup gives you the same reference point each shot.
  • Angle compensation: In bowhunting terrain (uphill/downhill), mis-adjusted axes result in error when aiming.
  • Efficiency in the field: You don’t want to fiddle mid-hunt a properly set sight works under stress.

As GoHunt emphasizes, many accuracy problems at longer range stem from poorly leveled axes, especially second and third axes of the sight.

Types of Bow Sights & Their Differences

Understanding your sight type is key to correct setup. Here are common types:

  1. Fixed-pin (multi-pin) sights – multiple pins (e.g. 3, 5, 7) each representing a distance (20, 30, 40, etc.).
  2. Single-pin adjustable (slider) sights – one pin that you adjust up/down for target distance.
  3. Digital/optical or “advanced” sights – with built-in range finders or electronic adjustment.

Each type demands the same fundamentals of alignment and leveling, though the process of “sighting in” differs. Many of the principles below apply to all.

Tools & Preparations You’ll Need

Before you begin, gather:

  • Allen wrench set (usually supplied with sight)
  • Long carpenter’s level (12″ to 36″ or more)
  • String level or small “bubble on line” level
  • Plumb bob (string + weight)
  • Bow vise or stable bow rest
  • Target and plenty of arrows
  • Tape, paper target, or line target
  • Optional: sight graph or chart for pin spacing

Having a stable platform and accurate levels is critical.

Step 1: Proper Mounting of the Sight

Start by mounting the sight to the bow riser:

  1. Center Shot & Rest Setup
    Before adjusting the sight, make sure your bow’s center shot (arrow rest alignment) is correct. The arrow shaft should pass properly with minimal clearance on both sides (left/right). This ensures the arrow path is straight. (Many tuning guides discuss rest alignment, which precedes sight work).
  2. Fit the Mounting Holes
    Use the manufacturer’s screws, snug them lightly — don’t fully tighten yet. Leave some room for adjustments.
  3. Approximate Vertical and Horizontal Position
    – Move the sight slightly up/down to center your pins along the arrow line.
    – Center it left/right relative to your riser face.
    – Use washers or shims if you need micro-adjustments for centering.

Once it’s roughly in position, tighten screws just enough for minor movement we’ll fine tune later.

Step 2: Leveling the Bow and First Axis Adjustment

Leveling the Bow Itself

Your bow must be plumb (vertical) before you level the sight:

  • Place the bow in a bow vise or stable rest.
  • Lay a long level on a flat “face” of the riser (inside limb pocket, limb pocket wall, etc.) and adjust until it reads level.
  • If you don’t have a vise, use shims, clamps, or a level against a wall to keep the bow steady.

First Axis (Cant or Plumb) Adjustment

The first axis addresses the “twist” or cant of the sight mounting.

  • On sliding/adjustable sights, the mounting bracket sometimes can lean left or right (i.e. not perfectly vertical). That is a first axis issue.
  • Remove or loosen the sight head, and with a string level or small level, ensure the slide rail or mounting bar is vertical.
  • Some fixed-pin sights don’t include first axis adjustment, but you can shim behind the bracket screws if needed to correct minor lean.

If first axis is off, your sight’s vertical motion will cause left/right drift of pins as you move the slider up/down. Getting first axis plumb is the foundation for accurate longitudinal aiming.

Step 3: Second Axis – Vertical Leveling of Pins

Often considered the most important axis, the second axis ensures your sight bar or pins are truly vertical with regard to gravity.

  • Use the sight’s built-in bubble, or mount a bubble level on your sight frame.
  • With your bow held perfectly vertical (i.e. your bow is level), adjust the second axis screw(s) so the bubble reads level.
  • If the bubble is off, gently turn the adjustment screws until it aligns.
  • Re-check after each turn, and ensure your bow is still level when doing so.

If the second axis is off, your arrows will drift left or right as distance increases (i.e. error magnifies). As GoHunt explains, second axis error is a frequent culprit in groups that shift horizontally at longer range.

Step 4: Third Axis – Angle Compensation

The third axis is often the most underutilized but critical when shooting at angles (uphill, downhill, steep terrain). It compensates for the sight housing tilting forward/backwards relative to the bow.

  • Setup a plumb bob (string + weight) so it hangs free near your target area.
  • Draw your bow to full draw in level (horizontal) shot position, align your pins to the string, and see if the bubble remains centered.
  • Now shift your aim angle (e.g. 45° uphill or downhill) while keeping your bow properly held. Watch the bubble; if it shifts during angled shots, your third axis is off.
  • Adjust the third axis screw(s) (usually a tilt adjustment on the sight) until the bubble stays centered throughout angled aiming motions.

If your sight lacks built-in third axis adjustment, you may shim the mounting plate (front/back) to approximate the needed correction. But ultimately, a sight with a proper third axis makes angled shots significantly more accurate.

After adjusting, test multiple angles and fine-tweak so that the bubble remains stable.

Step 5: Sighting-in (Zeroing) Your Pins

With your sight axes correctly leveled, it’s time to sight in your pins for specific distances.

Strategy: Use a “Line Target” or Graph Method

Using a line target helps maintain consistency when zeroing multiple pins. You tape a straight line (horizontal) on your target so you can adjust arrow impact precisely.

Here’s a typical workflow:

  1. Start Close (10-20 Yards)
    Begin with your top pin (e.g. 20 yard pin). From a close distance like 10–20 yards, shoot 2–3 arrows aiming at center. Adjust until your shots consistently hit the line.
  2. Back Up to 30 Yards
    Once the 20 yard pin is hitting, move to 30 yards with the 30 yard pin. Adjust until arrows land on the same line.
  3. Horizontal Alignment / Left-Right Adjustment
    Rotate your line target to vertical and use the 30 yard pin (or middle pin) to adjust left/right. Most sight systems allow rack adjustment (all pins shift left/right together).
    Adjust so that your entire pattern is centered.
  4. Set Further Pins (40, 50, 60, etc.)
    Using a sight graph or chart, plot your pin spacing and adjust the remaining pins accordingly. A sight graph helps extrapolate distances based on arrow flight curve.
  5. Return and Revalidate
    After setting all pins, go back to your 20 and 30 yard pins and verify that they still hit. Small adjustments may be needed.

Tips During Sighting

  • Use the same anchor point, draw length, and form each shot.
  • Fire small groups (2–3 arrows) before adjusting; avoid over-adjusting after one shot.
  • Use micro adjustments (small screw turns) rather than big jumps.
  • Keep notes on how much adjustment per distance change (helps future tuning).
  • Once sighted, lock down screws carefully (but don’t overtighten; recheck levels).

Fine-Tuning & Advanced Adjustments

Even after basic sighting, further fine-tuning can enhance performance.

Addressing Vertical Spread (Distance Compensation)

If your arrows tend to fall above or below pins at certain distances:

  • Adjust individual pins slightly up/down within the sight head (if allowed).
  • Recheck by shooting multiple distances and fine-tune pin spacing.

Corrections for Left/Right Drift

If arrows drift left or right:

  • Re-check your second axis bubble leveling.
  • Adjust “rack left/right” on the sight (shift all pins).
  • Reassess your rest and center shot; sometimes drift comes from arrow alignment or torque.

Verifying at Distance / Field Test

  • Move out to maximum yardage (e.g. 60, 70, 80 yards) and test your pins under real conditions.
  • Factor environmental influences (wind, arrow drop).
  • Note any consistent offsets and adjust accordingly.

Maintenance and Checking for Loosening

Over time and after many shots:

  • Check all screws (mounting, axis adjustment) for loosening.
  • Re-check bubble alignment (second/third axis) occasionally.
  • If you carry your bow in a pack, vibrations can shift small screws — revalidate before each hunt or competition.

Common Troubleshooting & Mistakes

ProblemSymptomLikely Cause & Fix
Arrows drift left/right as distance increasesSecond axis off; bubble misalignedRe-level second axis; adjust left/right rack shift
Arrows move diagonally (not purely vertical)First axis skew or third axis tiltRe-check first axis plumb; adjust third axis for tilt
Pins don’t correlate well with distancesPoor pin spacing or sight graph offRe-graph, adjust spacing, re-zero
Bubble shifts on angled shotsThird axis not adjustedAdjust third axis while simulating angle shots
Sight shifts after travel or heavy useScrews loosenedUse thread locker (low strength), re-tighten, verify levels
Canting the bow when shootingInconsistent shooter formUse a bow level or teach yourself to keep bow vertical

A well setup sight greatly reduces these issues but vigilance pays off.

Shooting Angles & Field Use Considerations

In the real world, you’ll often shoot uphill, downhill, or from uneven terrain. Here are tips:

  • Trust your third axis adjustment: when it’s well tuned, your bubble should remain stable even on angled shots.
  • Use the “cosine rule” approach: your effective horizontal distance is less than your line-of-sight. The sighting system should account for that.
  • Practice from elevated stands or slopes to train your eye and your equipment setup.
  • Document your pin offsets and usage under different slope angles; some archers carry supplemental charts.

Conclusion

A well-tuned bow sight setup is the foundation of accuracy, consistency, and confidence in archery. By carefully mounting the sight, adjusting first/second/third axes, and methodically sighting in your pins, you transform your sight into a reliable aiming tool. The small time investment during setup pays huge dividends in performance, especially during hunts or competitions.

If you found this guide helpful, try it with your own bow this weekend. Document your adjustments, groupings, and results. I’d love to hear your experiences — leave a comment below sharing your bow model, sight type, and how much your accuracy improved after following this method.

Also, check out our related posts on arrow tuning, rest alignment, and shooting form to elevate your full setup. Happy shooting, and may your groups tighten at every yardage!

Bushcraft Skills Every Hunter Should Know

Hunting is more than carrying a rifle or bow into the woods. True hunters develop a deep connection with the land, mastering survival and bushcraft skills that make the difference between a good day outdoors and a dangerous situation. Whether you’re chasing elk in the Rockies, stalking whitetails in the Midwest, or waiting on wild hogs in the South, the wilderness demands respect.

In this guide, we’ll cover the bushcraft skills every hunter should know—skills that not only keep you safe but also make you more effective, resourceful, and confident in the field.

Why Bushcraft Matters for Hunters

Many hunters today rely heavily on modern gear—GPS, rangefinders, synthetic clothing, and freeze-dried meals. While these tools are useful, batteries die, weather shifts, and unexpected challenges arise. Bushcraft is about self-reliance, using natural resources and traditional techniques to survive and thrive in the wild.

Key reasons bushcraft is essential for hunters:

  • Safety: Emergencies can happen. A twisted ankle, lost trail, or sudden storm requires survival skills.
  • Efficiency: Building shelters, making fire, and navigating with nature increase your adaptability.
  • Connection with Nature: Understanding the land sharpens your hunting instincts.
  • Ethics & Tradition: Bushcraft keeps alive the skills of our ancestors who lived off the land.

1. Shelter Building

When weather turns bad, a solid shelter can save your life. Even with modern tents, hunters should know how to build one from natural materials.

Types of Bushcraft Shelters:

  • Lean-to Shelter: Simple, effective, and fast to build using a ridgepole, branches, and foliage.
  • Debris Hut: Insulated with leaves, grass, and moss, perfect for cold conditions.
  • Tarp Shelter: Lightweight tarps combined with paracord make versatile setups.

Pro Tip: Always build with wind direction and drainage in mind. A poor shelter location can be worse than none.

2. Firecraft

A fire provides warmth, cooks food, purifies water, and boosts morale. Every hunter should master multiple fire-starting methods.

Essential Fire Skills:

  • Spark-Based Fire Starting: Using a ferro rod or flint and steel.
  • Friction Fire: Bow drill or hand drill—challenging but worth knowing.
  • Modern Backups: Waterproof matches and lighters as insurance.

Bushcraft Fire Tips:

  • Gather tinder (birch bark, dry grass, fatwood) before you need it.
  • Build a fire lay (teepee, log cabin, or lean-to) for efficient burning.
  • Always keep a small emergency fire kit in your hunting pack.

3. Water Procurement and Purification

Dehydration kills faster than hunger. Hunters can’t always rely on carrying gallons of water, especially during long backcountry hunts.

Finding Water:

  • Natural sources: streams, springs, and lakes.
  • Rainwater collection using tarps or leaves.
  • Solar stills in arid regions.

Purification Methods:

  • Boiling: Most reliable.
  • Filtration: Portable filters or improvised sand and charcoal filters.
  • Chemical Purification: Iodine tablets or chlorine drops.

SEO Keyword Integration: “bushcraft water purification techniques for hunters”

4. Navigation Without GPS

GPS devices are fantastic—until batteries die or satellites fail. Traditional navigation is a vital hunter’s skill.

Natural Navigation Skills:

  • Using the Sun: Shadows and position for east-west orientation.
  • Stars: The North Star as a guide in the Northern Hemisphere.
  • Landmarks: Rivers, ridges, and valleys as orientation points.

Tools to Master:

  • Compass and Map Reading: Still the gold standard for reliable navigation.
  • Pacing & Bearings: Estimating distance without electronics.

Pro Tip: Always carry a backup compass and mark mental landmarks when scouting or tracking game.

5. Tracking and Sign Reading

Bushcraft and hunting overlap strongly in tracking. Hunters who can “read the land” gain an advantage in finding game.

Tracking Skills:

  • Footprints & Hoof Prints: Identify species, size, and direction.
  • Scat: Reveals diet, freshness, and animal presence.
  • Feeding Signs: Bark stripping, grazed plants, and disturbed ground.

Practical Use: Even if game trails are faint, a skilled tracker can follow subtle clues to locate deer, elk, or other targets.

6. Foraging and Wild Food Knowledge

While hunters aim to harvest game, knowing edible plants and fungi increases survival odds and deepens wilderness knowledge.

Common Edibles:

  • Berries (blueberries, blackberries).
  • Nuts (acorns, walnuts).
  • Greens (dandelion, plantain, cattails).

Bushcraft Warning:

Never eat unknown plants—many are toxic. Use the “Universal Edibility Test” only as a last resort.

Hunters often find foraging handy while waiting in blinds or when extending hunting trips.

7. Knife and Tool Skills

A bushcraft knife is a hunter’s best friend. Beyond field dressing game, it can be used for shelter building, carving traps, and fire preparation.

Knife Bushcraft Skills:

  • Feather Sticks for tinder.
  • Batoning Wood for firewood.
  • Carving Stakes and Snares for trapping.

Other Essential Tools:

  • Hatchet or Axe: For splitting wood and shelter poles.
  • Paracord: Versatile for traps, repairs, and shelter.
  • Multi-tool: Adds modern convenience.

8. First Aid and Wilderness Safety

Accidents happen in hunting. A hunter without medical knowledge is vulnerable.

Must-Know First Aid Skills:

  • Treating cuts, blisters, and burns.
  • Splinting sprains and fractures.
  • Controlling bleeding with pressure and tourniquets.

Bushcraft Tip: Learn how to use natural resources—like moss as bandages or willow bark for pain relief.

9. Weather Reading

Modern forecasts help, but hunters must read nature’s signals.

Natural Weather Signs:

  • Red Sky at Night: Clear weather ahead.
  • Sudden Silence of Birds: Storm approaching.
  • Cloud Types: Wispy cirrus means fair weather; dark cumulonimbus means storms.

Hunters who anticipate weather changes avoid getting stranded or surprised.

10. Snares and Traps (Ethical Use)

In a survival situation, knowing how to set snares and traps provides backup food.

Simple Traps:

  • Figure-4 Deadfall
  • Spring Snare
  • Paiute Deadfall

Ethics Note: Use only in survival or where legal. Hunting should remain ethical and conservation-focused.

11. Campcraft and Cooking in the Wild

After a successful hunt, preparing meat in the field is crucial.

Skills to Learn:

  • Building a Spit or Rack: For smoking and drying meat.
  • Stone Boiling: Heating stones to boil water or soup.
  • Primitive Ovens: Cooking with heated clay or earth pits.

Not only does this preserve food, but it also connects you to ancient hunting traditions.

12. Mental Resilience & Bushcraft Mindset

Perhaps the most underrated bushcraft skill is mental toughness. Survival often comes down to attitude.

Key Traits:

  • Calm Under Stress: Panic kills faster than cold.
  • Problem-Solving: Use what you have, not what you wish for.
  • Adaptability: Weather, terrain, and wildlife don’t follow your plan.

Hunters with strong bushcraft skills approach the hunt with confidence and respect.

FAQs on Bushcraft for Hunters

Q1. What bushcraft skill is most important for hunters?
Firecraft and navigation are the top priorities—fire for survival, navigation for safety.

Q2. How do bushcraft skills improve hunting success?
They increase awareness, reduce reliance on gear, and make hunters better trackers and observers.

Q3. Do all hunters need bushcraft training?
Yes. Even weekend hunters benefit from knowing shelter, water, and fire basics.

Q4. What’s the difference between bushcraft and survival skills?
Bushcraft focuses on thriving and working with nature; survival is about emergency situations.

Final Thoughts

Bushcraft isn’t just about survival—it’s about mastery of the land, resourcefulness, and self-reliance. For hunters, these skills are invaluable. Whether you’re deep in the backcountry or a few miles from your truck, nature is unpredictable. By learning bushcraft skills every hunter should know, you ensure safety, success, and a stronger connection to the wild.

So, next time you head into the woods, don’t just bring your rifle or bow. Bring knowledge, resilience, and the bushcraft mindset. That’s what separates a true hunter from a weekend shooter.

How to Choose the Right Rifle Caliber for Moose, Elk, and Bear

Moose, Elk and Bear: Three Very Different Big Game Species It’s easy to lump moose, elk and bears together under the banner of “big game,” but hunters know these three species behave, move and live very differently.

A rifle and cartridge that excels for a Montana elk hunt may be less than ideal when you’re calling in a close‑range black bear, and the light, flat‑shooting round that drops mule deer at 350 yards may not deliver the energy required when a bull moose stands at 150 yards.

Understanding the differences between these animals – their average size, body structure, typical ranges and the terrain you hunt them in – is essential for choosing the right rifle caliber. In this article we’ll look at the anatomy and habits of moose, elk and bears, explain what makes an effective hunting cartridge, and recommend popular calibers that have proven reliable in the field.

By the end you’ll have a solid foundation for matching your rifle to the game you pursue while ensuring ethical kills and manageable recoil. Factors That Determine Rifle Caliber Choice Before diving into specific cartridges for each animal, it’s important to understand the broader factors that influence caliber selection: Size and anatomy of the animal. Moose and mature bull elk can weigh 800 pounds or more.

A cartridge that sends a bullet with enough mass and energy to reliably penetrate large bones and thick muscles is necessary. Black bears are usually smaller (200 to 400 pounds) but have dense shoulders and a reputation for soaking up poorly placed shots. Brown and grizzly bears can weigh well over 600 pounds, making bullet weight and construction critical. Bullet construction. Today’s controlled‑expansion bullets (like the Barnes TSX, Swift A‑Frame and Nosler Partition) retain weight and penetrate deeply without disintegrating on impact.

This allows hunters to choose slightly smaller calibers with confidence they’ll reach the vitals. For extremely large animals or when shots may be quartering, a heavier bullet with a bonded or monolithic design is a wise choice. Distance of the shot. In open country you might need to take a shot at 300 yards or more.

Flat‑shooting cartridges with high ballistic coefficients (BC) – such as the 6.5 Creedmoor and 7mm Remington Magnum – shine here. In tight timber or when calling, shots are often inside 100 yards, so a slower, heavier round like the .45/70 or a 12‑gauge slug can be very effective. Recoil and shooter comfort. A powerful rifle is useless if you can’t shoot it accurately. When choosing between two adequate cartridges, most hunters prefer the one they can practice with and shoot well. The .30/06 Springfield, for example, has decades of proven performance on big game yet remains relatively manageable for most shooters.

In contrast, cartridges like the .338 Winchester Magnum and .375 Ruger deliver tremendous energy but can produce sharp recoil that discourages practice. Legal requirements. Some jurisdictions specify minimum calibers or energy levels for hunting certain species. For example, a state might require at least a .270 caliber for elk or a .30 caliber for grizzly bear. Always check regulations before selecting your rifle.

With these factors in mind, let’s explore caliber options tailored to moose, elk and bear hunting. Choosing a Moose Rifle Caliber Moose are the largest members of the deer family. Adult bulls can exceed 1,800 pounds and stand six feet tall at the shoulder. They are less wary than elk but have enormous bone structure and thick muscles.

Because moose are often hunted in swampy or forested country, shots tend to be between 50 and 200 yards. Your rifle needs to hit hard and penetrate deeply; bullet weight should generally be 180 grains or more. The .30/06 Springfield – a versatile minimum Many experienced guides consider the .30/06 Springfield the minimum acceptable moose cartridge. When loaded with heavy 180–220 grain

The .30/06 Springfield – a versatile minimum

Many experienced guides consider the .30/06 Springfield the minimum acceptable moose cartridge. When loaded with heavy 180–220 grain bullets, this century ‑old round will break shoulders and reach the vitals reliably. Field & Stream notes that 185‑grain bullets like Browning’s BXC controlled‑expansion load give the .30/06 the punch needed for big bulls. Its recoil is moderate and ammunition is widely available. If you plan to hunt in bear country or want added margin, you can step up in power, but the .30/06 remains a proven workhorse.

Big‑bore lever guns: .45/70 Government

For hunters carrying a lever‑action rifle in thick cover, the .45/70 Government is hard to beat. Modern high‑pressure loads fire a 300–405 grain bullet at 1,800 feet per second, delivering tremendous energy at close range. Traditional 405 grain soft‑points will drop a moose inside 100 yards when placed correctly. Opt for controlled‑expansion bullets like the Hornady FTX or Remington Core‑Lokt to balance penetration and expansion. Because it is a straight‑wall cartridge, the .45/70 is legal in many states that allow only such rounds for hunting.

Modern mid‑bores: 6.5 Creedmoor and beyond

The 6.5 Creedmoor has become extremely popular for deer and antelope thanks to its mild recoil and long‑range accuracy. Some hunters wonder if it is adequate for moose. Field & Stream points out that a 6.5 Creedmoor loaded with a 140‑grain bullet will kill a moose, but only when the shot is perfectly placed and at moderate distance. Because a wounded moose can cover substantial ground before expiring, many guides hesitate to recommend it. If you prefer a modern mid‑bore, consider stepping up to a 7mm Remington Magnum or .280 Ackley Improved. These cartridges fire heavier 160‑175 grain bullets with higher velocity, delivering more energy and a flatter trajectory.

Heavy hitters: .338 Winchester Magnum and .375 Ruger

When you waou’re hunting in areas where grizzlies may appear, heavy magnums offer peace of mind. The .338 Winchester Magnum, introduced in 1958, sends a 250 grain bullet at over 2,700 feet per second and carries more than 4,000 foot‑pounds of energy, making it ideal for moose and bear. Recoil is significant, but effective muzzle brakes and modern recoil pads mitigate the punishment.

For true big‑game insurance, the .375 Ruger offers near‑dangerous‑game rifle performance in a standard‑length action. It can launch 270 or 300 grain bullets with over 4,600 foot‑pounds of energy. If you are comfortable with its substantial recoil, the .375 Ruger (or the similar .375 H&H Magnum) will anchor moose at any angle and provide protection in bear country.

Selecting a Caliber for Elk Hunting

Elk occupy a middle ground between deer and moose in terms of size. Mature bulls often weigh 700–800 pounds and have a tough, dense shoulder girdle. They inhabit mountainous terrain and large, open parks, so you may need to make shots from 50 yards in timber to 400 yards across a canyon. Your elk rifle must combine sufficient energy with manageable recoil and flat trajectory.

Classic elk cartridges in the .30‑caliber class

Experienced guides consistently recommend cartridges in the .30‑caliber range. Petersen’s Hunting notes that a Montana guide’s favorite elk guns include the .30/06 Springfield, .300 Winchester Magnum, .300 PRC and .30 Nosler. These cartridges strike a balance between recoil and authority.

The .30/06 loaded with a 180‑grain Nosler Partition will drive about 3,000 foot‑pounds of energy and works well to 300 yards. Stepping up to the belted .300 Winchester Magnum increases velocity to around 3,100 feet per second with a 190‑grain bullet and produces over 4,100 foot‑pounds of energy. Newer cartridges like the .300 PRC and .30 Nosler push long, heavy bullets at similar velocities with improved long‑range ballistics, but they require modern rifles and sometimes scarce ammunition.

Modern 6.5 and 7mm options

Hunds in the eastern hardwoods to over 400 pounds in Alaska. Brown and grizzly bears can reach 700 to more than 1,000 pounds. Bears have a thick layer of fat, dense bones and heavy muscles; poor shots may not pass through to vital organs. Additionally, bears are predators that can turn defensive if wounded, so many guides recommend erring on the side of more power. Mossberg’s roundup notes that a centerfire rifle or a 12‑gauge shotgun slug delivers the velocity and energy needed to stop a charging bear.

Traditional deer cartridges for black bear

If you are hunting average‑sized black bears over bait or with hounds, traditional deer rifles like the .30‑30 Winchester or .308 Winchester are adequate with the right bullets. The .30‑30 is a classic lever‑action round that fires a 160‑170 grain bullet around 2,400 feet per second, producing about 2,000 foot‑pounds of energy. Mossberg’s article notes that it maintains its popularity for black bear thanks to its moderate recoil and effective punch. The .308 Winchester offers similar bullet weights at higher velocity (~2,600 fps), resulting in roughly 2,400 foot‑pounds of energy and good penetration. For both cartridges, choose bonded or monolithic bullets designed for deep penetration.

The versatile .30/06 Springfield and .300 Winchester Magnum

ester Magnum. The .30/06, when loaded with a 180‑grain bullet at about 2,750 feet per second, produces around 3,000 foot‑pounds of energy. It is widely available and manageable for most shooters. The .300 Winchester Magnum takes a 190‑grain bullet to 3,100 fps and generates over 4,100 foot‑pounds of energy, making it effective on large black bears and adequate for grizzlies with proper bullets.

Big‑game assurance: .375 Ruger and .338 Winchester Magnum

When hunting brown or grizzly bears, most guides recommend a cartridge in the .338 class or larger. The .338 Winchester Magnum firing a 250‑grain bullet at 2,700 fps produces more than 4,000 foot‑pounds of energy. The .375 Ruger goes even further, sending a 300‑grain bullet at over 2,600 fps and generating more than 4,600 foot‑pounds. These cartridges deliver enough momentum to break heavy bone and still reach the vitals, and their larger diameter bullets create wider wound channels. However, recoil is substantial; use a rifle with a good muzzle brake and practice extensively.

Shotshells: 12‑Gauge Slug

Sometimes a rifle isn’t the best tool for bear hunting. When hunting over bait or in extremely thick cover, a 12‑gauge shotgun loaded with slugs can be devastating. A typical 602‑grain rifled slug leaving the muzzle at 1,500 feet

ugs are larger in diameter than rifle bullets, they create significant tissue damage and energy transfer. A pump‑action shotgun offers rapid follow‑up shots; just ensure you practice at the ranges you expect to shoot.

Bringing It All Together: Practical Recommendations

When evaluating rifle calibers, remember that shot placement, bullet design and hunting conditions are just as important as the cartridge itself. A premium 165‑grain bullet from a .308 Winchester placed perfectly through both lungs will kill an elk faster than a poorly placed 250‑grain .338 Magnum. The guidelines below provide a starting point, but always match your rifle to your personal skill, hunting style and local regulations.

– Moderate recoil: .30/06 Springfield with 180–200 grain controlled‑expansion bullets.
– Lever‑gun fans: .45/70 Government with 300–405 grain bullets for shots under 150 yards.
– Modern mid‑bores: 7mm Remington Magnum or .280 Ackley Improved with premium bullets.
– Heavy magnums: .338 Winchester Magnum or .375 Ruger when hunting the biggest bulls or in bear country.

Suggested Calibers for Elk

– All‑round: .30/06 Springfield with 180‑grain bullets; works to 300 yards and is easy to shoot.
– Long range: .300 Winchester Magnum or .300 PRC loaded with 180‑200 grain bullets; effective to 400 yards or more.
– Modern 6.5–7mm: 6.5 PRC, 6.8 Western, 7mm Remington Magnum and .280 Ackley; choose heavy, bonded bullets.
– Big bore: .338 Winchester Magnum for elk hunts in grizzly country.

Suggested Calibers for Bears

– Small‑medium black bears: .30‑30 Winchester or .308 Winchester with heavy controlled‑expansion bullets.
– Large black bears and mixed species: .30/06 Springfield or .300 Winchester Magnum.
– Brown/grizzly bears: .338 Winchester Magnum, .375 Ruger or a 12‑gauge slug.

Conclusion

Choosing the right rifle caliber for moose, elk and bear hunting isn’t simply about picking the biggest bullet; it’s about understanding the animals’ anatomy, the range you’ll be shooting, and your own ability to handle recoil and place shots accurately. Moose demand heavy, deep‑penetrating bullets to break massive bones and reach vital organs. Elk require a balance of energy and trajectory for shots that may stretch across open basins. Bears, particularly grizzlies, call for a cartridge that combines bone‑crushing power with controlled expansion to ensure a quick, ethical kill. In all cases, use high‑quality, bonded or monolithic bullets, practice until you can place shots confidently, and ensure your rifle is zeroed for the distances you expect. Whether you choose a time‑tested .30/06, a modern 6.8 Western or a thundering .375 Ruger, matching your caliber to the game and hunting conditions will lead to more enjoyable, successful and humane hunts.

Elevating Your Game: Essential Wingshooting Tips for Hunters

Introduction

Wingshooting, the art of hunting birds in flight, is one of the most challenging and rewarding experiences for a hunter. Mastering this skill requires not only precision and timing but also an understanding of bird behavior and effective shooting techniques. Whether you’re targeting ducks, pheasants, quail, or any other game birds, these essential tips will help elevate your wingshooting skills.

Understanding Bird Behavior

Study Your Quarry

  • Movement Patterns: Learn how different species fly, including their speeds and typical maneuvers, to anticipate their next move.
  • Habitat Preferences: Knowing where your target species likes to feed, rest, and roost can help you find the best hunting spots.

Shooting Techniques

Mastering the Mount

  • Consistent Mounting: Practice mounting your shotgun to your shoulder in one smooth motion. Consistency is key to ensuring your eye aligns with the barrel naturally.

Swing Through Method

  • Follow Through: Start your swing behind the bird, move through it, and continue swinging after pulling the trigger. This method helps maintain momentum and improves accuracy.

Lead and Timing

  • Understanding Lead: Develop a sense of how much lead to give a bird based on its distance and speed. This comes with experience and practice.
  • Rhythm and Timing: Coordinate your movements and trigger pull with the bird’s flight path. Smooth, timed shots are more successful than hurried ones.

Equipment and Gear

Choosing the Right Shotgun

  • Fit and Comfort: A shotgun that fits well and feels comfortable is crucial. Consider length of pull, drop at comb, and weight.
  • Choke Selection: Use chokes that match your hunting environment. Open chokes for close birds and tighter chokes for distant shots.

Ammunition

  • Shot Size and Load: Select the appropriate shot size and load for the game you’re hunting. Smaller shot for smaller birds and larger shot for bigger game.

Safety and Etiquette

Field Safety

  • Always Be Aware: Keep track of your hunting party and maintain a safe firing zone. Never swing your barrel towards your companions.

Respect for the Game

  • Ethical Shots: Only take shots you’re confident will result in a clean, humane kill. Respect the animals you’re hunting and the environment.

Practice Makes Perfect

  • Regular Practice: Frequent visits to the shooting range can significantly improve your wingshooting. Practice on clay pigeons to simulate hunting scenarios.

Wingshooting Tips Conclusion

Wingshooting is a skill that combines instinct, precision, and a deep appreciation for nature. By understanding bird behavior, refining your shooting techniques, and choosing the right equipment, you can enhance your hunting experience and success. Remember, the essence of wingshooting lies not just in the number of birds you take but in the challenge of the sport and the respect for the quarry.


Frequently Asked Questions (FAQs) About Wingshooting Tips

1. What is the best way to practice wingshooting?

Practicing at a shooting range with clay pigeons is highly effective. Try different angles and speeds to mimic real hunting scenarios.

2. How can I improve my accuracy in wingshooting?

Focus on mastering the swing through method, consistent shotgun mounting, and understanding lead and timing. Regular practice is essential.

3. What type of shotgun is best for wingshooting?

The “best” shotgun is subjective and depends on personal preference, but over-under and semi-automatic shotguns are popular choices for their balance, reliability, and ease of use.

4. How important is the choke in wingshooting?

Chokes are critical for controlling the spread of your shot. Choosing the right choke can significantly affect your success, especially at varying ranges.

5. Can wingshooting be self-taught, or should I seek instruction?

While many aspects of wingshooting can be self-taught, working with an experienced instructor can accelerate your learning curve and help correct any bad habits early on.

How to Properly Clean and Maintain Your Firearm: A Comprehensive Guide

Firearm cleaning and maintenance after use at shooting range.

Introduction

Firearm maintenance is an essential part of responsible gun ownership. Proper cleaning and care can ensure that your firearm functions safely and efficiently, while also extending its lifespan. In this informative article, we’ll walk you through the steps to clean and maintain your firearm, ensuring it remains in optimal condition. With a friendly tone and easy-to-follow instructions, you’ll soon become an expert in firearm care. Let’s get started!

The Importance of Regular Firearm Maintenance

Why Clean Your Firearm?

Regular firearm maintenance is crucial for several reasons. Firstly, cleaning helps remove fouling and residue that can accumulate over time, leading to reduced accuracy and potential malfunctions. Furthermore, proper care prevents corrosion and rust, which can damage the firearm’s components and weaken its structural integrity. Finally, regular inspection and maintenance allow you to identify any potential issues before they become more significant problems, ensuring your firearm remains safe and reliable.

Cleaning Supplies and Tools

What You’ll Need

To clean and maintain your firearm effectively, you’ll need a few essential supplies and tools. These include:

  1. Cleaning solvent: A solvent specifically designed for firearms will help remove fouling, residue, and other debris.
  2. Lubricant: A quality gun oil or lubricant helps protect your firearm from corrosion and ensures smooth operation.
  3. Bore brush: A brush designed for your firearm’s caliber or gauge will help clean the barrel effectively.
  4. Cleaning patches or cloth: These are used to apply solvent, lubricant, and to remove debris from the firearm.
  5. Cleaning rod: A rod helps you reach deep into the barrel, ensuring a thorough clean.
  6. Small brush or toothbrush: These are useful for cleaning hard-to-reach areas.
  7. Cotton swabs: Swabs can be used to apply lubricant in tight spaces.
  8. A clean, lint-free cloth: This is useful for wiping down the firearm after cleaning.

Optional Supplies

Some additional supplies can further enhance your firearm cleaning process. These may include:

  1. Cleaning mat or pad: A mat can protect your work surface and keep small parts organized.
  2. Bore snake: This tool can be used as an alternative to a cleaning rod and bore brush for a quick barrel cleaning.
  3. Gun vise or cradle: A vise or cradle can hold your firearm securely while you clean it.

The Cleaning Process

Disassembly

Before you begin cleaning your firearm, ensure it is unloaded and pointed in a safe direction. Next, consult your firearm’s manual for disassembly instructions. Most firearms require at least partial disassembly for cleaning, which may include removing the bolt, slide, or barrel. Always follow the manufacturer’s guidelines to avoid damaging your firearm or voiding any warranties.

Cleaning the Barrel

Once your firearm is disassembled, begin by cleaning the barrel. Apply some cleaning solvent to a bore brush or patch and run it through the barrel using a cleaning rod. Repeat this process several times to loosen and remove any fouling or debris. Next, use a dry patch to remove any remaining solvent and debris from the barrel. Finally, apply a thin layer of lubricant to a clean patch and run it through the barrel to protect it from corrosion.

Cleaning the Action and Other Components

Using a small brush or toothbrush and cleaning solvent, clean the action and other components of your firearm. Pay particular attention to areas where fouling or debris may accumulate, such as the bolt face, extractor, and chamber. Once the components are clean, use a dry cloth or patch to remove any remaining solvent. Apply a light coat of lubricant to the moving parts and any areas prone to friction or wear. Be sure not to over-lubricate, as this can attract dirt and debris, leading to malfunctions.

Reassembly and Final Inspection

After cleaning and lubricating all components, carefully reassemble your firearm according to the manufacturer’s instructions. Once reassembled, perform a function check to ensure everything is working correctly. This may include cycling the action, dry-firing (if safe for your firearm), and checking the safety mechanisms. If you encounter any issues, disassemble your firearm and inspect the components for damage or improper assembly.

Wiping Down the Exterior

Finally, use a clean, lint-free cloth to wipe down the exterior of your firearm. This removes any fingerprints or oil, which can cause corrosion over time. You can also apply a thin layer of lubricant or a silicone cloth to the exterior metal surfaces for added protection against rust and moisture.

Storing Your Firearm

Proper Storage Techniques

Proper storage is crucial in maintaining your firearm’s condition and ensuring its safety. Always store your firearm unloaded and in a secure location, such as a gun safe or lockbox. This prevents unauthorized access and protects your firearm from damage or theft. Additionally, store your ammunition separately from your firearm to further reduce the risk of accidents. Lastly, consider using a dehumidifier or moisture-absorbing packets in your storage area to prevent rust and corrosion.

Conclusion

In conclusion, properly cleaning and maintaining your firearm is essential for ensuring its longevity, performance, and safety. By following the steps outlined in this comprehensive guide, you can keep your firearm in optimal condition and enjoy a reliable, efficient shooting experience. Remember, responsible gun ownership includes regular maintenance and care – make it a priority, and you’ll reap the benefits for years to come.

Exit mobile version