Pistol Parts Explained: A Beginner-Friendly Guide

A pistol has a frame, slide, barrel, chamber, trigger, sights, magazine, grip, recoil system, extractor, ejector, and safety-related controls. Those parts work together to load, fire, extract, eject, and prepare the next round, but the exact layout depends on the pistol design. This guide explains the common parts in plain language so beginners can understand terminology without treating it like a repair manual.

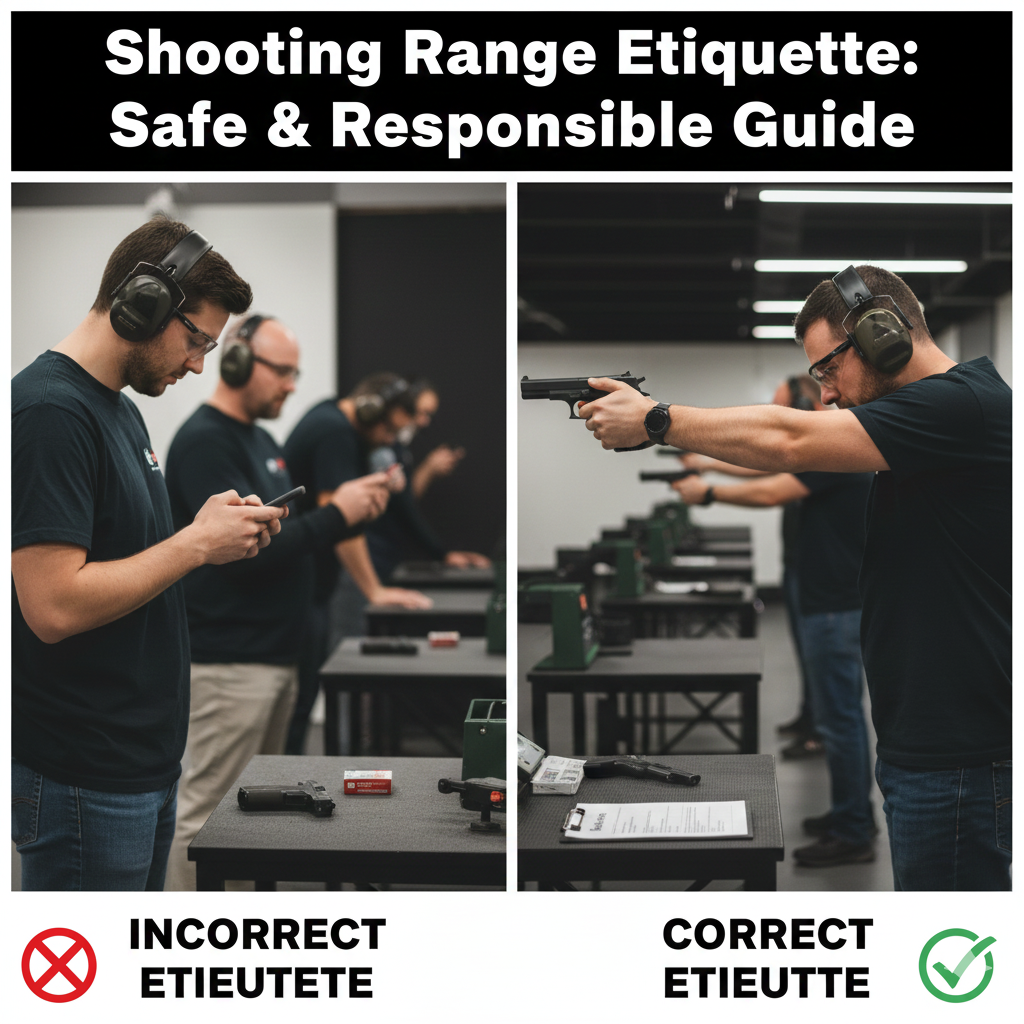
Before handling any firearm, keep it pointed in a safe direction, keep your finger off the trigger, remove the magazine if applicable, open the action, and verify the chamber is clear according to the firearm manual. If you are unsure, stop and ask a qualified instructor, range officer, gunsmith, or the manufacturer.

Table of Contents

How Pistol Parts Work Together

Most modern pistols are designed around a simple sequence: the magazine holds cartridges, the action feeds one cartridge into the chamber, the firing system ignites it when the trigger is pressed, the slide or action cycles, the spent case is extracted and ejected, and the next round is prepared.

That broad sequence is useful for understanding terminology, but it is not a substitute for your owner’s manual. Different pistols use different locking systems, safeties, takedown procedures, and maintenance requirements. The NSSF firearm safety rules are the baseline before any inspection or cleaning: treat every firearm carefully, control muzzle direction, and keep your finger away from the trigger until ready to shoot.

For new shooters, part names are most useful when they make range instruction easier to follow. If an instructor says to lock the slide open, check the chamber, seat the magazine, or align the front sight, you should know the area they mean before live fire begins.

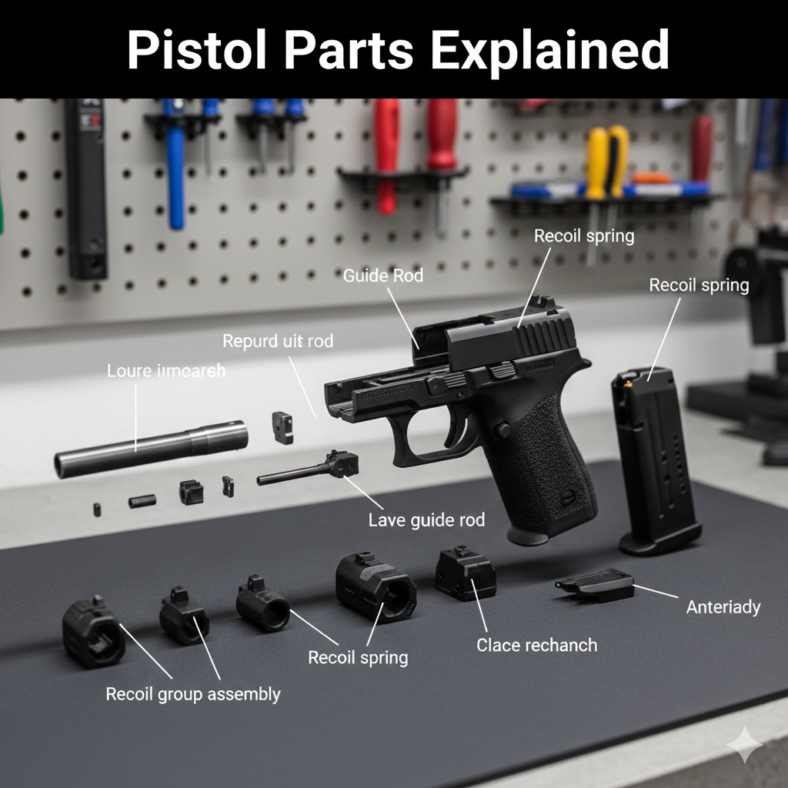
Major External Pistol Parts

Frame

The frame is the main body of the pistol. It supports the grip, trigger area, slide rails, and many controls. On many pistols, the frame is the serialized firearm component, although legal definitions can vary by country and jurisdiction.

Slide

The slide is the moving upper portion on many semi-automatic pistols. It houses or supports the barrel, firing system parts, extractor, sights, and recoil system. During firing, it cycles rearward and forward to help eject the spent case and chamber the next round.

Barrel and Chamber

The barrel directs the bullet as it leaves the firearm. The chamber is the rear part of the barrel area where the cartridge sits before firing. Always verify the chamber is clear when unloading or inspecting a pistol; do not rely only on removing the magazine.

Grip

The grip is where the shooter holds the pistol. Grip size, texture, backstrap shape, and angle affect control and comfort. A pistol should let the shooter reach the trigger safely without shifting the hand into an unstable position.

Internal and Moving Parts

Trigger

The trigger starts the firing sequence, but it should not be treated casually. Trigger weight, travel, reset, and safety design vary widely. Do not modify trigger parts unless you are qualified and the work follows the manufacturer’s guidance.

Firing Pin or Striker

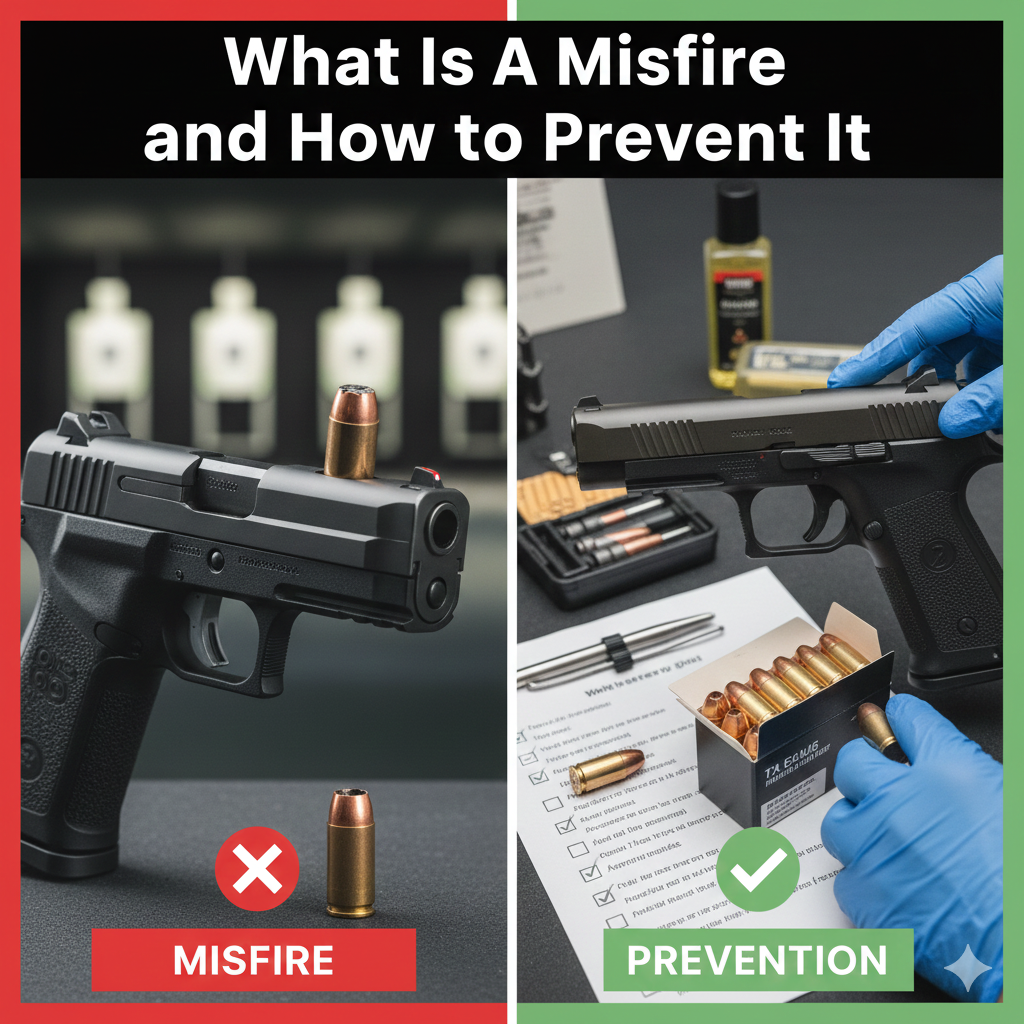
The firing pin or striker is the part that helps ignite the cartridge primer. Hammer-fired pistols and striker-fired pistols use different systems, but both rely on precise timing and proper maintenance. Light strikes, repeated misfires, or unusual trigger behavior should be inspected by a qualified person.

Extractor and Ejector

The extractor helps pull the spent case from the chamber. The ejector helps kick it out of the firearm as the action cycles. If cases fail to extract or eject, the cause may be ammunition, fouling, magazine issues, worn parts, or technique. Repeated failures deserve inspection, not guesswork.

Recoil Spring and Guide Rod

The recoil system helps control slide movement and return the slide forward after cycling. Springs are wear items. The correct replacement interval depends on the pistol model, caliber, ammunition, and round count, so follow the manual rather than a universal schedule.

Magazine and Ammunition Path

The magazine stores cartridges and presents them for feeding. It commonly includes a magazine body, spring, follower, feed lips, and base plate. A weak spring, damaged feed lips, dirty magazine, or incorrect magazine can cause feeding problems.

Use the correct ammunition for the firearm and follow the manufacturer’s instructions. SAAMI firearm safety information is a useful authority for understanding why correct ammunition matching, inspection, and safe handling matter.

Sights, Controls, and Safety Features

Sights

Most pistols use front and rear sights, though some accept optics. Sights help align the pistol with the target, but safe shooting still depends on training, backstop awareness, trigger control, and knowing what is beyond the target.

Magazine Release and Slide Stop

The magazine release lets the magazine be removed. The slide stop or slide lock can hold the slide open on many pistols. Controls may be ambidextrous, reversible, or model-specific. Beginners should learn them with an unloaded firearm under qualified supervision.

Manual and Passive Safeties

Some pistols have manual thumb safeties, grip safeties, trigger safeties, firing-pin blocks, or other internal systems. A safety feature is not a replacement for safe handling. The user is still responsible for muzzle direction, trigger discipline, secure storage, and following the manual.

Maintenance and Inspection Boundaries

Basic cleaning and inspection help keep a pistol reliable, but there is a line between owner maintenance and gunsmithing. Field-strip only as the manual allows. Do not polish, file, bend, or replace critical parts unless you are qualified and the work follows manufacturer guidance.

Secure storage is also part of responsible ownership. Project ChildSafe provides firearm storage resources designed to reduce unauthorized access. Understanding pistol parts is useful, but safe storage and handling are the higher priority.

If a pistol has repeated malfunctions, visible cracks, abnormal wear, a stuck case, a possible bore obstruction, or controls that do not work normally, stop using it and get qualified help.

FAQ

What is the most important pistol part to understand first?

Start with the chamber, magazine, muzzle, and trigger. Those terms connect directly to loading, unloading, muzzle control, and trigger discipline, which are the safety basics every beginner needs.

Is the magazine the same thing as the clip?

No. A magazine feeds cartridges into the firearm. A clip is a different loading aid used with some firearm designs. Most modern pistols use detachable magazines.

Can I replace pistol parts myself?

Only do owner-level maintenance allowed by your manual. Parts that affect firing, safety, lockup, extraction, or trigger function should be handled by a qualified gunsmith or manufacturer support unless you are properly trained.

Why does the slide lock open?

On many semi-automatic pistols, the slide locks open after the last round because the magazine follower engages the slide stop. Some malfunctions or magazine issues can also affect this behavior.

Do all pistols have the same parts?

No. Semi-automatic pistols, revolvers, hammer-fired pistols, striker-fired pistols, rimfire pistols, and competition designs can differ. Use this guide for terminology, then rely on the manual for your exact firearm.

Final Takeaway

Learning pistol parts helps you understand safety instructions, range commands, maintenance language, and malfunction descriptions. Keep the focus practical: know the frame, slide, barrel, chamber, magazine, trigger, sights, and controls, then let the firearm manual and qualified instruction guide anything beyond basic identification.

Shooting Range Etiquette: Safe & Responsible Guide

Shooting ranges are shared environments where safety, discipline, and mutual respect must always come first. Regardless of whether you are a beginner handling a firearm for the first time or an experienced shooter refining your skills, understanding and practicing proper shooting range etiquette is essential. Etiquette goes beyond written rules; it reflects awareness, responsibility, and consideration for everyone present. A shooter who follows proper etiquette not only protects lives but also contributes to a positive and professional range culture.

At its core, shooting range etiquette exists to prevent accidents, reduce misunderstandings, and ensure that every person at the range feels safe and respected. Firearms are powerful tools, and even a small lapse in judgment can have serious consequences. Ranges bring together individuals with different experience levels, and etiquette helps create an environment where those differences do not become safety risks.

Understanding the Importance of Safety-First Behavior

Every shooting range is built on a foundation of safety. Before any etiquette considerations come into play, a shooter must fully understand that firearms must be treated with constant caution. This mindset begins the moment you step onto range property. Even when a firearm is unloaded, it must always be handled as if it were capable of firing. This attitude prevents careless handling and reinforces muscle memory that keeps both you and others safe.

Muzzle awareness is one of the most critical elements of range behavior. A firearm should always be pointed in a safe direction, usually downrange toward the targets. Turning around with a firearm in your hands, even briefly, can cause panic and lead to serious consequences. Good etiquette demands that shooters remain mindful of where their firearm is pointed at all times.

Trigger discipline is equally important. Keeping your finger off the trigger until you are actively ready to fire reduces the risk of unintentional discharges. Experienced shooters treat this as second nature, and new shooters are expected to learn and follow it immediately.

Respecting the Authority of the Range Officer

Range officers play a vital role in maintaining order and enforcing safety standards. Their instructions are not optional, and proper etiquette requires shooters to listen carefully and comply without hesitation. A range officer’s job is to observe potential hazards before they turn into accidents, which means their commands must be followed promptly.

Arguing with a range officer, ignoring instructions, or continuing to shoot after a command has been given demonstrates poor etiquette and unsafe behavior. If a shooter is confused or unsure about a rule, the appropriate action is to ask politely for clarification. Respectful communication with range staff helps create a cooperative environment and shows maturity as a responsible firearm owner.

Proper Conduct on the Firing Line

The firing line is where etiquette matters most because it is where active shooting takes place. When you are on the firing line, your attention should be focused on your firearm, your target, and the commands being given. Casual conversations, distractions, or unnecessary movement can interfere with other shooters’ concentration and increase risk.

Firearms should only be loaded at the firing line when the range is declared hot. Handling firearms behind the line without permission is unsafe and typically against range rules. Shooters are also expected to use the correct ammunition for their firearm, as using the wrong caliber can cause equipment failure or injury.

Controlled shooting behavior is another aspect of firing line etiquette. Even if rapid fire is permitted, shooters must remain in control of their firearm and ensure that rounds are hitting the intended target safely. Reckless or uncontrolled shooting is not only dangerous but also disruptive to others.

Cease Fire Awareness and Discipline

One of the most important moments where etiquette is tested is during a cease fire. When a cease fire is called, all shooters must immediately stop firing, unload their firearms, and make them safe according to the range’s procedures. This usually includes locking the action open and stepping away from the firing line.

During a cease fire, shooters should not touch their firearms for any reason. Even minor adjustments can make others nervous and create unsafe conditions. Good etiquette means respecting the pause and allowing everyone to check targets or move downrange without concern.

Handling Firearm Malfunctions Calmly

Malfunctions are a normal part of shooting, but how they are handled reflects a shooter’s experience and etiquette. When a malfunction occurs, the firearm should remain pointed downrange. The shooter should not rush, panic, or turn around while holding the firearm. If assistance is needed, signaling to the range officer and waiting for guidance is the safest course of action.

Calm and controlled behavior during malfunctions reassures others and prevents small issues from turning into dangerous situations.

Courtesy Toward Other Shooters

Shooting ranges are shared spaces, and good etiquette means being considerate of those around you. Standing too close to another shooter, leaning over their bench, or watching them shoot without permission can make people uncomfortable. Everyone deserves personal space and the ability to focus.

Offering advice to other shooters should be done cautiously. While some may appreciate help, unsolicited advice can be distracting or unwelcome. Etiquette suggests that advice should only be given when requested or when there is an immediate safety concern.

Noise management is another often-overlooked aspect of etiquette. Loud conversations, phone calls, or unnecessary movement behind the firing line can break concentration. Quiet, respectful behavior contributes to a safer and more enjoyable environment for everyone.

Caring for Targets and Range Property

Ranges provide specific target systems, backstops, and equipment designed to handle gunfire safely. Shooters must use only approved targets and place them at designated distances. Shooting target frames, carriers, or other range equipment is both dangerous and disrespectful.

After finishing a shooting session, proper etiquette includes removing used targets and cleaning up your area. Leaving debris behind creates additional work for staff and reflects poorly on the shooting community as a whole.

Indoor vs. Outdoor Range Etiquette

Indoor ranges often require stricter discipline due to confined space, amplified noise, and controlled ventilation. Shooters must wear eye and ear protection at all times and strictly follow ammunition restrictions. Awareness of surroundings is critical because mistakes indoors carry greater risk.

Outdoor ranges may feel more relaxed, but etiquette remains just as important. Weather conditions, uneven ground, and longer distances demand heightened awareness and adherence to cold and hot range procedures.

Introducing New Shooters to the Range

When experienced shooters bring beginners to a range, etiquette includes taking responsibility for their safety and behavior. New shooters should be taught safety rules before handling firearms, not after a mistake occurs. Close supervision and patient guidance help ensure a positive introduction to the sport.

Representing Responsible Gun Ownership

Shooting range etiquette is a reflection of character. A shooter who acts responsibly helps strengthen public trust in shooting sports and firearm ownership. Poor behavior, on the other hand, damages the reputation of the entire community.

By demonstrating discipline, awareness, and respect, shooters help ensure that ranges remain open, welcoming, and safe for future generations.

Conclusion

Shooting range etiquette is not about limiting enjoyment or enforcing unnecessary rules. It is about creating an environment where everyone can safely pursue their interest in shooting sports. When shooters respect safety principles, follow commands, and show courtesy to others, the range becomes a place of learning, focus, and shared responsibility.

How to Grip a Handgun Correctly

A correct handgun grip should let you control the pistol without fighting it. In simple terms, place the firing hand high on the backstrap, keep the wrist firm, wrap the support hand into the open space on the grip, angle both thumbs safely forward along the frame area, and press the trigger without changing muzzle direction. Grip should feel secure, repeatable, and safe, not painful or forced.

This guide explains the beginner fundamentals of handgun grip for range practice and training language. It is not a replacement for qualified instruction, your firearm manual, or live supervision. Before handling any firearm, keep the muzzle directed safely, keep your finger off the trigger until ready to shoot, and verify the firearm condition according to the manual and range rules.

Table of Contents

Why Handgun Grip Matters

Grip is one of the first skills a handgun shooter should learn because it affects control, sight movement, trigger press, and follow-up shots. A poor grip can make the pistol shift in the hand, push shots off target, or make the shooter overcorrect after recoil.

Good grip does not mean squeezing as hard as possible. It means building stable contact with the firearm so the sights return consistently and the trigger can move without dragging the muzzle away from the target. The foundation still starts with safety. The NSSF firearm safety rules are worth reviewing before any grip work because muzzle control and trigger discipline come before technique.

Basic Two-Hand Handgun Grip

Start With the Firearm Safe and Clear

Practice grip only under safe conditions. At a range, follow the range officer’s commands. At home, use only the unloaded handling procedure allowed by your manual, remove ammunition from the room, and avoid practicing if you are tired, distracted, or unsure.

Use a High, Stable Grip

The firing hand should sit high on the backstrap so the pistol is aligned with the forearm. A high grip helps manage recoil because the pistol has less room to rotate upward. Do not place the hand so high that it contacts the slide or moving parts.

Fill the Open Space With the Support Hand

After the firing hand is placed, the support hand should fill the open space on the grip panel. The support hand is not decoration; it helps control the pistol, stabilize the wrists, and reduce unnecessary movement during the trigger press.

Firing-Hand Position

Backstrap Contact

The web of the firing hand should contact the backstrap firmly. This makes the pistol feel seated in the hand rather than balanced loosely in the fingers. If the pistol shifts after every shot, the grip may be too low, too loose, or not matched well to hand size.

Trigger Finger Independence

The trigger finger should be able to move without the rest of the hand clenching. If pressing the trigger causes the whole hand to tighten, shots may move off target. Beginners often improve by focusing on steady grip pressure while the trigger finger moves straight to the rear.

Thumb Placement

Thumb placement depends on pistol design and shooter anatomy. Many modern semi-automatic shooters use forward thumbs, but thumbs should never interfere with the slide, controls, cylinder gap on revolvers, or safe operation. If a grip causes discomfort or contact with moving parts, stop and adjust with qualified help.

Support-Hand Position

Palm Contact

The support-hand palm should make meaningful contact with the grip and firing hand. Empty space usually means less control. Rotate the support hand slightly forward so the palm presses into the available grip area without crossing in front of the muzzle.

Finger Wrap

The support-hand fingers usually wrap over the firing-hand fingers. The goal is to create a secure, repeatable two-hand structure. Avoid placing the support-hand fingers near the trigger guard in a way that pulls the pistol sideways or interferes with controls.

Wrist Stability

Both wrists should feel firm and aligned. Loose wrists can make the pistol move more than necessary and may contribute to cycling problems with some semi-automatic pistols. Do not lock the body into a painful position; stable is the goal, not stiff.

Trigger Control and Grip Pressure

Grip pressure should be consistent before, during, and after the trigger press. Many shooters miss low or sideways because they tighten the whole hand at the same moment the trigger breaks. A useful range cue is to build the grip first, then move only the trigger finger.

Different instructors describe pressure differently, so do not get stuck on a single percentage rule. The real test is whether the sights stay stable, the pistol tracks predictably, and your hands can repeat the same grip every time. If recoil control feels erratic, ask an instructor to watch your hands from a safe position.

Common Grip Mistakes

  • Low firing-hand grip: leaves more leverage for muzzle flip and makes the pistol shift.
  • Weak support-hand contact: leaves empty space and reduces control.
  • Milking the grip: tightening all fingers during the trigger press.
  • Thumbs interfering with controls: can prevent normal slide lock or safe manipulation.
  • Practicing too fast: hides basic problems and builds sloppy habits.
  • Ignoring firearm fit: a pistol that is too large or too small may make a good grip harder.

If the issue is firearm fit, do not force a grip that puts your finger, wrist, or thumbs in unsafe positions. A qualified instructor can often tell whether the problem is technique, hand size, grip texture, or an unsuitable pistol.

Safe Practice Boundaries

Grip practice should stay inside safe handling rules. Use live ammunition only at a proper range or legal training setting. Keep muzzle direction safe at all times. Avoid mirrors, cameras, or online advice if they distract you from basic safety discipline.

For general ammunition and firearm safety context, SAAMI firearm safety information is a reliable reference. For secure storage and access-control reminders, Project ChildSafe is useful, especially if firearms are stored in a home with other people.

FAQ

Should I grip a handgun as hard as possible?

No. Grip firmly enough to control the pistol, but not so hard that your hands shake, your trigger finger drags, or the pistol becomes painful to manage. Consistency matters more than brute force.

Where should my thumbs go?

On many semi-automatic pistols, thumbs point generally forward along the frame area, but placement depends on the firearm and your hands. Keep thumbs away from the slide, muzzle, cylinder gap, and controls unless the manual/instructor says otherwise.

Why do my shots move when I press the trigger?

The grip may be changing during the trigger press. Watch for clenching, pushing, wrist movement, or support-hand pressure changing at the same time the trigger breaks.

Can handgun grip fix all accuracy problems?

No. Grip matters, but accuracy also depends on sight alignment, trigger control, stance, breathing, vision, firearm fit, ammunition, and training quality.

Should beginners practice grip at home?

Only if they can follow safe unloaded-handling procedures exactly and keep ammunition separate. Beginners are usually better served by practicing under a qualified instructor until the safety process is automatic.

Final Takeaway

A good handgun grip is high, stable, repeatable, and safe. Build the firing-hand grip first, fill the open space with the support hand, keep wrists firm, and press the trigger without changing grip pressure. Above all, keep safety rules ahead of technique and get qualified feedback before turning practice into habit.

How Often to Clean Your Gun

How often you should clean your gun depends on the firearm manual, ammunition, weather, storage conditions, and how the firearm was used. A simple rule is to inspect after every range trip, clean after heavy use or exposure to moisture, and follow the manufacturer’s maintenance schedule instead of relying on one universal round-count rule.

Table of Contents
  1. Quick Answer
  2. Gun Cleaning Frequency Checklist
  3. What Changes Cleaning Frequency
  4. After Range Use
  5. After Hunting, Carry, or Storage
  6. Can You Clean Too Often?
  7. Common Mistakes
  8. FAQ
  9. Final Takeaway

Quick Answer

Clean your gun when the manual recommends it, after exposure to moisture, dirt, sweat, rain, snow, or heavy fouling, before long-term storage, and anytime inspection shows residue, corrosion risk, or unreliable function. For ordinary range use, many owners inspect after each session and clean as needed, but the safest answer is always firearm-specific.

A safe cleaning schedule starts with the firearm manual, inspection notes, weather exposure, ammunition type, and secure storage habits.

Gun Cleaning Frequency Checklist

  • Manual first: Use the firearm maker’s maintenance schedule and warnings.
  • After live fire: Inspect the bore, chamber, action, and exterior surfaces.
  • After moisture: Clean and dry promptly after rain, snow, sweat, condensation, or wet storage.
  • After dirty ammunition: Check more often when ammunition leaves heavy fouling.
  • Before storage: Clean, lightly protect, and store securely according to the manual.
  • When function changes: Stop and inspect if feeding, extraction, trigger feel, or cycling changes.
  • With chemicals: Use ventilation, gloves, eye protection, and product labels.

Cleaning is part of safe ownership, but safety comes first. The NSSF firearm safety rules are a useful reminder before any maintenance session. Range residue and lead exposure also deserve attention; CDC/NIOSH range guidance explains why residue control matters around shooting environments.

What Changes Cleaning Frequency

Cleaning frequency changes with use. A firearm fired in dry indoor conditions may need a different routine than one carried in rain, dust, snow, or humid woods. Ammunition, suppressor use, storage location, and firearm design can also change how quickly residue builds up.

Ammunition and Fouling

Some ammunition leaves more residue than others. If you notice heavy carbon, unburned powder, sticky residue, or unusual smell, inspect more carefully. Do not assume a fixed round count covers every firearm and ammunition combination.

Firearm Type Matters

A bolt-action hunting rifle, a semi-automatic pistol, a shotgun, and a rimfire rifle can all need different maintenance rhythms. Actions with more moving parts may collect residue in different places, while rimfire ammunition can leave noticeable fouling. Use the same decision process for all of them: inspect, compare what you see to the manual, and clean the areas the maker tells you to maintain.

Weather and Corrosion Risk

Moisture changes the schedule quickly. Rain, snow, sweat, wet cases, and condensation can all create corrosion risk. After wet exposure, dry the firearm safely, clean as the manual recommends, and inspect exterior metal, bore, chamber, and storage case.

After Range Use

After a normal range session, start with inspection. Unload and clear the firearm, remove ammunition from the bench, then check bore, chamber, action, feed areas, magazines, exterior surfaces, and optic mounts if relevant. If residue is light and the manual does not call for full cleaning, a wipe-down and light maintenance check may be enough.

If the firearm had a high round count, dirty ammunition, malfunctions, or unusual residue, clean more fully. If anything looks damaged, obstructed, cracked, badly worn, or unsafe, stop and contact a qualified gunsmith or the manufacturer.

After Hunting, Carry, or Storage

Hunting and field use can expose firearms to moisture, dust, vegetation, temperature swings, and body oils. Even if you did not fire, inspect and wipe down after field use. Pay attention to slings, cases, and foam-lined storage that may hold moisture against metal.

Before long-term storage, clean and protect the firearm according to the manual, then store it securely. General safety programs such as Project ChildSafe are useful reminders that maintenance and secure storage should work together.

Storage Checkups

A stored firearm can still need inspection. Humidity, temperature swings, old oil, and case materials can affect condition. Periodic checkups help catch corrosion or dryness before they become bigger problems.

If you rotate firearms seasonally, add a calendar reminder before and after the season. That keeps the routine tied to actual use: pre-season inspection, post-season cleaning, and storage checks during long gaps. The reminder is not a universal cleaning command; it is a prompt to inspect condition and decide what the manual-based routine requires.

Can You Clean Too Often?

Careful maintenance is good; careless over-cleaning is not. Problems come from wrong-size tools, rough rods, forcing brushes, taking apart more than the manual recommends, using too much oil, or mixing chemicals. The goal is not maximum scrubbing. The goal is safe, manual-based maintenance.

Keep simple notes: date, round count if known, weather exposure, ammunition type, products used, and any issues noticed. Over time, your notes will tell you more about your firearm than a generic online interval.

A maintenance log also helps you avoid duplicate work. If the firearm was cleaned, lightly protected, and stored after the last trip, the next check may only require inspection. If the notes show rain, dusty carry, a malfunction, or heavy fouling, that same log tells you to slow down and do a more careful cleaning session.

Common Mistakes

  • Using one fixed cleaning interval for every firearm.
  • Cleaning with ammunition still on the bench.
  • Skipping inspection after rain, snow, sweat, or humid storage.
  • Using too much oil before storage.
  • Mixing chemicals or ignoring product labels.
  • Forcing tools through the bore.
  • Assuming storage means no future checkups.

FAQ

Should I clean my gun after every range trip?

You should at least inspect it after every range trip. Whether it needs full cleaning depends on the manual, round count, ammunition, fouling, weather exposure, and how the firearm will be stored.

Should I clean a gun if I did not fire it?

Sometimes. Field carry, sweat, rain, dust, fingerprints, and humid storage can justify inspection and wipe-down even when no shots were fired.

Can too much oil cause problems?

Yes. Excess oil can collect debris, migrate into places it does not belong, and become sticky over time. Use the amount recommended by the firearm manual or product label.

What is the safest cleaning schedule?

The safest schedule is firearm-specific: follow the manual, inspect after use or exposure, clean before long-term storage, and get qualified help when function or condition seems questionable.

Final Takeaway

There is no single cleaning interval that fits every gun. Inspect regularly, clean after heavy use or exposure, follow the manual, respect chemical safety, and store securely. A simple, consistent maintenance routine is better than guessing from a universal round-count rule.

What Is a Misfire and How to Prevent It

A misfire happens when you press the trigger, the firing system tries to ignite the cartridge, and the round does not fire. The safest response is not to rush, not to look into the action, and not to assume the round is harmless. Keep the muzzle pointed in a safe direction, keep your finger off the trigger, follow your range or firearm manual procedure, and treat the event as a possible delayed ignition until it is cleared safely.

Misfires are usually caused by ammunition, firearm condition, or the firearm not being fully in battery. This guide explains the difference between a misfire, hang fire, and squib load, what to do in the moment, and how to reduce the chance of it happening again without giving risky shortcut advice.

Table of Contents

What Is a Misfire?

A misfire is a failure to fire. In a typical centerfire or rimfire firearm, the trigger is pressed, the firing pin or striker hits the primer or rim, but the cartridge does not ignite. You may hear a click, feel the trigger break, and see no shot fired.

The important safety point is uncertainty. In the first moment after a click, you do not know whether the cartridge is truly dead, whether ignition is delayed, or whether another malfunction has occurred. That is why the basic response starts with muzzle control and patience, not immediate inspection.

The NSSF firearm safety rules are a useful foundation here: always keep the muzzle pointed in a safe direction and keep your finger off the trigger until you are ready to shoot. Those rules matter even more when the firearm does something unexpected.

Misfire vs. Hang Fire vs. Squib Load

People often use these terms together, but they are not the same problem. Knowing the difference helps you respond with the right level of caution.

Misfire

A misfire means the cartridge does not fire when struck. The cause may be a bad primer, damaged ammunition, light firing-pin strike, dirty firing-pin channel, weak spring, or a firearm that was not fully closed or locked.

Hang Fire

A hang fire is delayed ignition. The trigger is pressed, nothing happens immediately, and then the round may fire after a delay. Because a hang fire can look like a misfire at first, do not open the action instantly after a click. Follow your range rules, instructor guidance, and firearm manual.

Squib Load

A squib load is different because the round may fire weakly and leave a bullet or obstruction in the barrel. Warning signs can include an unusually quiet report, light recoil, smoke, or a shot that feels wrong. If you suspect a squib, stop shooting immediately and have the firearm inspected before firing again.

What To Do After a Misfire

If the firearm clicks instead of firing, keep the muzzle pointed downrange or in another safe direction. Keep your finger away from the trigger. Do not turn the firearm sideways to look into the chamber, and do not point it toward yourself or another person while trying to diagnose the problem.

Many range procedures use a short waiting period before clearing the firearm because of the possibility of a hang fire. Your firearm manual, range officer, instructor, or club rules should control the exact procedure. When in doubt, slow down and ask for qualified help.

After the waiting period required by your setting, open the action carefully while maintaining safe muzzle direction. Remove the cartridge if it can be removed safely. Keep the suspect cartridge separate, do not try to fire it again, and follow local range or manufacturer guidance for disposal.

If the firearm does not open normally, the cartridge is stuck, the bolt or slide feels jammed, or you are unsure what happened, stop. Forcing parts can make the situation worse. Let a qualified range officer, instructor, gunsmith, or manufacturer support channel guide the next step.

Common Causes of Misfires

Most misfires come from one of three areas: ammunition, firearm condition, or handling/setup. The cause is not always obvious from a quick glance, so avoid guessing if the malfunction repeats.

Ammunition Problems

Old, wet, corroded, contaminated, or damaged ammunition can fail to ignite. Ammunition stored in high humidity, extreme heat, vehicle trunks, damp hunting bags, or unsealed boxes may become less reliable over time. A primer that is damaged, improperly seated, or defective can also fail even when the firearm is functioning normally.

Use ammunition that matches the firearm marking and manual, and inspect cartridges before loading. If a round looks swollen, corroded, cracked, dented, or contaminated with oil or solvent, do not use it.

Firearm Condition

A dirty firing-pin channel, worn spring, damaged firing pin, heavy fouling, or neglected action can reduce ignition reliability. Cold weather, rain, dust, and heavy lubricant can also affect function, especially if the firearm has not been cleaned and inspected after use.

For technical ammunition and firearm safety context, SAAMI firearm safety information is a strong reference because it focuses on safe ammunition/firearm matching and handling principles.

Not Fully in Battery

Some firearms may not fire correctly if the bolt, slide, or action is not fully closed. This can happen from riding the slide, dirt in the chamber, damaged magazines, improper loading, or mechanical wear. If a firearm repeatedly fails to go fully into battery, stop using it until the cause is identified.

How To Prevent Misfires

You cannot prevent every defective cartridge, but you can reduce avoidable misfires with better storage, inspection, and maintenance habits.

  • Use the correct ammunition. Match caliber/gauge and cartridge type to the firearm manual and barrel markings.
  • Inspect before loading. Avoid cartridges with corrosion, dents, cracked cases, loose bullets, or moisture damage.
  • Store ammunition properly. Keep it cool, dry, stable, and away from oils, solvents, and long-term humidity.
  • Clean on a schedule that fits use. Range sessions, hunting in rain, dusty travel, and defensive-practice training all justify inspection and cleaning afterward.
  • Follow the manual. Maintenance points, lubrication amount, replacement intervals, and approved ammunition vary by firearm.
  • Stop repeated malfunctions early. If more than one misfire occurs with the same firearm or ammunition lot, pause and investigate before continuing.

Safe storage also matters beyond misfire prevention. Project ChildSafe has practical secure-storage resources for keeping firearms inaccessible to unauthorized users, especially children. Reliable equipment and responsible access control belong together.

When To Stop and Get Help

Stop shooting and get qualified help if the firearm will not open normally, the cartridge is stuck, the action feels damaged, the report sounded weak, the bore may be obstructed, or the same problem happens again. Do not keep firing to “test it out.” A repeated misfire can point to a mechanical issue, ammunition lot issue, or unsafe condition that needs inspection.

For beginners, the safest help source is a certified instructor, range officer, gunsmith, firearm manufacturer, or the official firearm manual. Online advice can help you understand terms, but it should not replace qualified inspection when a live-round malfunction or possible barrel obstruction is involved.

FAQ

Can a misfired round go off later?

It is possible for a delayed ignition, called a hang fire, to look like a misfire at first. That is why you should keep the firearm pointed in a safe direction and follow your range or firearm-manual procedure before opening the action.

Should I try to fire the same round again?

No. Treat the cartridge as suspect. Keep it separate and follow range, manufacturer, or local disposal guidance instead of trying to fire it again.

Is a misfire always caused by bad ammunition?

No. Ammunition is one common cause, but a weak firing-pin strike, dirty action, worn part, or firearm not being fully in battery can also cause a misfire.

What is the most dangerous mistake after a misfire?

The biggest mistake is moving the muzzle in an unsafe direction or immediately opening the action while assuming nothing can happen. Keep the muzzle safe first, then clear the firearm according to proper procedure.

When should a gunsmith inspect the firearm?

Use a qualified gunsmith or manufacturer support if misfires repeat, the action feels abnormal, parts appear worn or damaged, the bore may be obstructed, or you cannot confidently identify the cause.

Final Takeaway

A misfire is not just a failed shot. It is a safety event. Keep the muzzle pointed safely, wait and clear the firearm according to proper procedure, separate the suspect cartridge, and investigate the cause before continuing. Good ammunition storage, regular maintenance, and manual-first habits reduce risk without encouraging shortcuts.

How to Stop Jerking the Trigger When Shooting a Pistol

If you jerk the pistol when you shoot, the usual cause is anticipation: your hands react to recoil before the shot breaks. The fix is not to “try harder” or grip the pistol randomly. The fix is to build a safer trigger press, a steadier grip, and honest feedback through dry practice, slow live fire, and drills that expose flinch without shaming the shooter.

Table of Contents
  1. Quick Answer
  2. Why Shooters Jerk the Trigger
  3. Safety First
  4. Grip and Stance
  5. Trigger Press
  6. How to Diagnose Flinch
  7. Dry Practice
  8. Live-Fire Practice
  9. Common Mistakes
  10. FAQ

Quick Answer

To stop jerking the pistol, slow down the shot, press the trigger straight to the rear, keep your sights steady through the break, and practice with strict safety rules. Most shooters improve faster by mixing dry practice, low-round-count live fire, and a ball-and-dummy style flinch check with qualified supervision.

What You Should Feel

A good trigger press should feel smooth and controlled. The sights may move slightly because humans are not machines, but they should not dip sharply, push sideways, or collapse as the shot breaks.

What You Should Avoid

Avoid slapping the trigger, tightening the whole firing hand at the last second, pushing the muzzle down to “fight recoil,” or rushing shots because the target looks good for half a second.

Why Shooters Jerk the Trigger

Trigger jerk is usually a reaction to noise, recoil, muzzle blast, or pressure to make the shot happen quickly. The shooter sees the sights on target and tries to force the shot before the sight picture changes. That last-second effort often moves the muzzle more than the recoil would have.

Anticipation

Anticipation happens when your body reacts before the gun fires. It may show up as a downward dip, a sideways push, a blink, or a full-body flinch. It is common, especially with lightweight pistols, snappy calibers, loud indoor ranges, or new shooters.

Grip Tension Changes

Many shooters start with a decent grip and then crush the pistol at the moment of firing. That sudden tension can steer the muzzle. A consistent grip matters more than a dramatic grip.

Safety First

Before doing any pistol practice, review the NSSF firearm safety rules. Keep the muzzle pointed in a safe direction, keep your finger off the trigger until ready to shoot, know your target and what is beyond it, and treat every firearm as loaded until you have personally verified otherwise.

Dry Practice Safety

Dry practice should only happen after the firearm is unloaded, ammunition is removed from the room, the backstop is safe, and the shooter follows the firearm manual. If you are unsure, get help from a qualified instructor. Secure firearms and ammunition when practice is finished; Project ChildSafe has storage resources for responsible owners.

Training Help Is Worth It

A good instructor can spot grip, stance, trigger, and safety issues faster than most shooters can diagnose themselves. If you feel stuck, seek supervised training instead of adding speed or recoil.

Grip and Stance

A stable grip gives the trigger finger permission to move without dragging the rest of the pistol with it. The support hand should help manage recoil while the firing hand keeps the trigger press clean.

Grip Pressure

Use firm, consistent pressure. Do not relax before the shot and then squeeze hard during the shot. A sudden change in pressure is one of the easiest ways to pull the muzzle off line.

Body Position

Stand balanced, with enough forward intent to manage recoil safely. Your stance should help you watch the sights lift and return, not make you brace so hard that you shove the muzzle down.

Trigger Press

A clean trigger press moves the trigger straight to the rear while the sights stay acceptably aligned. It does not need to be painfully slow forever, but learning it slowly helps your hands understand what “clean” feels like.

Press, Do Not Punch

Think of pressing through the trigger instead of punching it. If the shot surprises you slightly while the sights remain steady, you are closer to the right feel.

Follow Through

After the shot, keep looking through the sights and let the pistol return. Do not instantly relax, drop the muzzle, or look over the sights to check the target. Follow-through teaches you what happened.

How to Diagnose Flinch

The easiest way to diagnose trigger jerk is to watch the sights during a shot that does not fire. If the pistol dips, twists, or jumps before recoil happens, the shooter is moving it. This should be done safely and preferably with a qualified person supervising.

Ball-and-Dummy Concept

In a supervised range setting, mixed live and inert dummy rounds can reveal anticipation. When the inert round comes up, the pistol will not recoil. If the muzzle still dips, the shooter can see the flinch clearly. Only use inert training rounds that are appropriate for your firearm and follow range rules.

Video Feedback

A short video from a safe angle can show whether the shooter is blinking, tightening, dipping, or changing grip pressure. Keep cameras and people behind the firing line and follow range commands.

Dry Practice

Dry practice can help because it removes noise and recoil while keeping the trigger press visible. It must be treated as real firearm handling, not casual living-room play. Follow your firearm manual and all safety rules every time.

Simple Dry-Fire Goal

The goal is simple: press the trigger without moving the sights. Stop before fatigue. A few careful repetitions are better than a long session that becomes sloppy.

End Practice Deliberately

When dry practice ends, say it is over, store the firearm safely, and do not continue practice after ammunition returns to the area. That boundary matters.

Live-Fire Practice

Live fire should confirm the same trigger press you practiced dry. Start close enough that you can see results clearly. Use slow groups, reset between shots, and measure improvement by consistency, not speed.

Use Manageable Recoil

If the pistol or ammunition is making you flinch badly, consider training with a lower-recoil option under safe range conditions. Recoil management improves when the shooter can observe the sights instead of fearing the shot.

Slow Down Before You Speed Up

Speed should come after clean hits. If faster shooting brings the jerk back, slow down and rebuild the press. Good pistol shooting is repeatable, not rushed.

Common Mistakes

  • Trying to fix trigger jerk by gripping harder at the last second.
  • Practicing only fast shots before the trigger press is stable.
  • Ignoring noise and recoil sensitivity.
  • Looking at the target immediately after the shot instead of watching the sights.
  • Doing dry practice without a strict safety routine.
  • Using internet advice instead of getting instructor feedback when progress stalls.

FAQ

Why do I shoot low when I fire a pistol?

Low hits are often caused by anticipation, trigger jerk, or pushing the muzzle down before recoil. They can also come from grip, sight alignment, or zero issues, so diagnose carefully.

Can dry fire fix trigger jerk?

Dry fire can help if it is done safely and correctly. It lets you see whether the sights move during the trigger press. It does not replace live-fire confirmation or qualified instruction.

Should I change my pistol if I keep flinching?

Maybe, but do not start with gear. First check safety, grip, trigger press, recoil level, and instruction. If the pistol is too small, too snappy, or poorly fitted, a different setup may help.

How long does it take to stop jerking the trigger?

It depends on the shooter and practice quality. Some shooters improve quickly once they see the flinch. Others need repeated short sessions and instructor feedback to make the new habit reliable.

Final Takeaway

Trigger jerk is fixable. Build a safe practice routine, press the trigger without disturbing the sights, diagnose anticipation honestly, and keep live-fire practice slow enough to stay clean. If you are unsure, work with a qualified instructor; safe feedback is faster than guessing.

How To Clean A Handgun Properly: Safe Basic Maintenance

To clean a handgun properly, start by unloading it, verifying it is clear, and removing all ammunition from the workspace. Then follow the owner manual for your exact handgun. The manual controls how far to field strip it, which surfaces to clean, where lubricant belongs, and how to reassemble it.

This guide covers safe, manual-led basics only. It does not provide model-specific takedown steps, gunsmithing, trigger work, modifications, or repair instructions. If anything is unclear or a part looks damaged, stop and consult the manual, the manufacturer, a qualified instructor, or a gunsmith.

Safety Checks Before Cleaning A Handgun

Every cleaning session begins with confirming the firearm is unloaded and safe. Treat the handgun as if it is loaded until you have personally verified otherwise.

  • Point the muzzle in a safe direction at all times.
  • Remove the magazine, then visually and physically check the chamber to confirm it is empty.
  • Remove all ammunition from the cleaning area so live rounds and cleaning are never mixed.
  • Keep your finger off the trigger and follow basic firearm safety rules throughout.

The National Shooting Sports Foundation’s firearm safety rules are a useful baseline before, during, and after cleaning. Confirming a clear condition is the most important step, and it is worth repeating if you are interrupted.

A safe cleaning setup starts with a clear-first checklist, the owner manual, ventilation, and no ammunition on the bench.

Tools And Supplies You Need

Basic handgun cleaning uses a small set of general supplies. Match sizes and products to your owner manual and to the cleaning-product labels.

  • Cleaning patches and a patch holder or jag.
  • A correctly sized bore brush.
  • A cleaning rod or cable.
  • Bore solvent and a light firearm oil or lubricant.
  • A cleaning mat to protect the surface and catch debris.
  • Disposable gloves and eye protection.

Use solvents and oils according to their labels and safety data sheets. This is not a product ranking, so choose supplies that match your handgun, your manual, and your workspace.

Basic Handgun Cleaning Process

The basic order is simple: confirm the gun is clear, field strip per the manual, clean the major parts, then lubricate and reassemble. Keep the work at a routine-maintenance level unless a qualified gunsmith or the manufacturer tells you otherwise.

Clear The Firearm And Remove Ammunition From The Workspace

Before any disassembly, confirm again that the magazine is out and the chamber is empty. Keep all ammunition in a separate location. This separation prevents the most serious cleaning mistakes.

Follow The Manual For Field Stripping

Field stripping differs by handgun, so your owner manual is the authority. Follow the manual for slide removal, recoil spring handling, barrel removal, and reassembly. Do not force parts, and do not disassemble farther than the manual describes for routine cleaning.

Clean The Barrel, Slide, Frame, And Magazines At A High Level

With the handgun field stripped per the manual, clean the major surfaces. Use a solvent-dampened patch and an appropriately sized brush as the manual recommends, then follow with clean patches. Wipe the slide, frame rails, and contact surfaces according to the manual. Wipe magazines only as the manual allows, and avoid soaking them with solvent or oil.

Lubrication And Reassembly

Lubrication and reassembly should follow the exact points and amounts your manual lists. Apply a light film of oil only where the manual indicates, since too much oil can attract debris. Reassemble in the manual’s order, then perform any function check the manual describes with the firearm unloaded and pointed in a safe direction. If reassembly does not feel right, stop and recheck the manual.

Solvent, Lead, And Workspace Safety

Cleaning solvents and oils are chemicals, so handle them according to their labels and safety data sheets. Work in a ventilated area, wear gloves and eye protection when appropriate, and keep solvents away from food, drink, and children. OSHA hazard communication resources explain why labels and SDS information matter when chemicals are used.

Firing-range and cleaning residue can include lead, so basic hygiene matters. Avoid eating or drinking while cleaning, and wash your hands afterward. CDC/NIOSH firing range guidance provides background on range-related lead awareness. This is general safety context, not medical advice.

Common Handgun Cleaning Mistakes

The most common mistakes are skipping the safety check, over-lubricating, and going beyond the manual’s instructions. Other frequent problems include using the wrong brush size, forcing tools through the bore, mixing solvents, using unlabeled chemicals, and trying to repair a damaged part during a routine cleaning session.

If a part is worn, damaged, or behaving abnormally, do not try to modify it yourself. Take the handgun to a qualified gunsmith or contact the manufacturer.

Frequently Asked Questions

How often should I clean my handgun?

Cleaning frequency depends on how often you shoot, ammunition type, conditions, storage, and your manual’s guidance. Many owners clean after range sessions and inspect periodically during storage, but your owner manual should guide the routine.

Can I use any solvent or oil on my handgun?

Use products labeled for firearm cleaning, follow the product label and SDS, and check your manual for product cautions. Avoid improvised chemical mixes and do not combine solvents.

Do I need to fully disassemble my handgun to clean it?

No. Routine cleaning usually only requires field stripping to the level described in your owner manual. Going farther than the manual covers can create reassembly problems and is better left to a qualified gunsmith.

What should I do if a part looks damaged?

Stop and do not fire or force the firearm. Note the issue and take the handgun to a qualified gunsmith or contact the manufacturer. Cleaning is routine maintenance, not repair.

Traditional Bow vs Modern Compound Bow

A traditional bow and a modern compound bow can both be rewarding, but they fit different hunters. Traditional bows are simpler, lighter, and more instinctive, while compound bows are more efficient, adjustable, and forgiving for many hunting setups. The best choice depends on your draw weight, practice time, hunting distance, local rules, and whether you value simplicity or technical help.

Table of Contents
  1. Quick Answer
  2. Traditional Bow Basics
  3. Modern Compound Bow Basics
  4. Learning Curve
  5. Hunting Performance
  6. Fit and Draw Weight
  7. Maintenance and Tuning
  8. Legal and Ethical Checks
  9. Which Bow Fits You?
  10. Decision Checklist
  11. FAQ

Quick Answer

Choose a traditional bow if you want simplicity, lighter gear, close-range challenge, and a more instinctive archery experience. Choose a modern compound bow if you want more let-off, easier aiming with sights, better arrow speed, and a more forgiving hunting setup. For most new bowhunters, a properly fitted compound bow is usually easier to hunt with responsibly.

Best for Simplicity

Traditional bows have fewer parts, no cams, and a clean shooting feel. They reward consistent form and close-range practice.

Best for Hunting Forgiveness

Compound bows give most hunters more practical help through let-off, sights, releases, peep systems, stabilizers, and higher arrow speed.

Traditional Bow Basics

Traditional bows include longbows and recurves. They are usually shot with fingers, simple rests or shelves, and little or no sighting equipment. The archer holds the full draw weight at anchor, which makes strength and form especially important.

Strengths

  • Simple design with fewer mechanical parts.
  • Lightweight and easy to carry.
  • Quiet, close-range shooting experience.
  • Strong appeal for instinctive archery and traditional skills.

Tradeoffs

  • Requires more consistent form.
  • No let-off at full draw.
  • Shorter practical hunting range for most archers.
  • Can be less forgiving of draw-length and release mistakes.

Modern Compound Bow Basics

Compound bows use cams or wheels to reduce holding weight at full draw. That let-off helps hunters aim longer and more steadily. Compounds also support sights, rests, releases, stabilizers, quivers, and other accessories that can improve repeatability when properly set up.

Strengths

  • Let-off makes full draw easier to hold.
  • Higher arrow speeds with efficient energy transfer.
  • More precise aiming with sights and releases.
  • Adjustable options for draw length and draw weight on many models.

Tradeoffs

  • More parts to tune and maintain.
  • Heavier and bulkier than many traditional bows.
  • Can be expensive once accessories are included.
  • Setup mistakes can hurt accuracy and consistency.

Learning Curve

Traditional archery often has a steeper learning curve because the archer must control more of the shot with body mechanics and repeatable form. Compound bows still require good form, but accessories and let-off make it easier for many beginners to build repeatable groups.

Practice Commitment

If you choose a traditional bow for hunting, plan for close-range practice and honest limits. If you choose a compound, do not let the technology replace practice. Both systems demand repetition before hunting.

Hunting Performance

Compound bows usually offer more practical hunting performance for the average bowhunter because they are faster, easier to hold at full draw, and easier to aim with sights. Traditional bows can still be effective when used by a disciplined archer at close range.

Shot Distance

Your ethical distance is not the bow’s maximum distance. It is the distance where you can repeatedly place arrows in the vital area under realistic field conditions.

Animal Recovery

Bowhunting requires careful shot selection, sharp broadheads where legal, and patience after the shot. Do not take steep, rushed, or uncertain shots just because the bow is capable of launching an arrow farther.

Fit and Draw Weight

Bow fit matters for both styles. Draw length, draw weight, anchor point, grip, and arrow setup all affect accuracy and safety. For beginners and youth archers, an archery pro shop or qualified coach can prevent a lot of frustration.

Traditional Bow Fit

Do not overbow yourself. A traditional bow that is too heavy can damage form and make hunting shots less ethical. Start with a draw weight you can control smoothly.

Compound Bow Fit

A compound bow should match draw length and draw weight, and the cams should be tuned according to the bow manual. If timing, peep alignment, or arrow flight is off, get help before hunting.

Maintenance and Tuning

Traditional bows need string care, limb inspection, and arrow matching. Compound bows need those checks plus cams, cables, rests, sights, peeps, and fasteners. Follow the manufacturer’s manual and inspect gear before every hunt.

When To Get Help

If you see frayed strings, damaged limbs, loose hardware, poor arrow flight, or inconsistent groups, stop and get the setup checked. A bow that is out of tune can create bad hits and unsafe shooting.

Before hunting, check state wildlife agency rules for legal bow type, draw weight, broadhead requirements, crossbow rules, season dates, and tag requirements. General resources such as Hunter-Ed, the International Hunter Education Association, and USA Archery can support learning, but they do not replace current state regulations.

Ethical Bowhunting Rule

Use the bow that lets you make clean, repeatable shots inside your practiced range. A traditional bow is not more responsible simply because it is simple, and a compound bow is not more responsible simply because it is faster.

Which Bow Fits You?

If your goal is to hunt as soon as you can do it responsibly, a compound bow usually gives the smoother path. You can tune draw weight, use sights, hold with let-off, and build confidence from measured groups. If your goal is to learn traditional archery as a craft, a recurve or longbow may be more satisfying, but the hunting timeline should be slower and your distance limits should be stricter.

Choose Traditional If

You enjoy simple equipment, short-range shooting, instinctive practice, and a bigger skill challenge. You should also be willing to practice often and pass shots that a compound hunter might reasonably take.

Choose Compound If

You want a more adjustable hunting system, better holding comfort, more sighting help, and a setup that can be tuned around your body. A compound still requires practice, but it gives many hunters a more forgiving starting point.

Decision Checklist

  • Choose traditional if you want simplicity and accept a steeper practice curve.
  • Choose compound if you want let-off, sights, speed, and easier hunting repeatability.
  • Check state rules for legal bow type and draw-weight requirements.
  • Get draw length, draw weight, and arrows matched to your body and bow.
  • Practice from realistic hunting positions before setting your shot limit.
  • Inspect strings, limbs, cams, and arrows before every hunt.

FAQ

Is a compound bow better than a traditional bow for hunting?

For most hunters, a compound bow is easier to hunt with because it has let-off, sights, and more forgiving performance. Traditional bows can be effective with enough practice and close-range discipline.

Is a traditional bow harder to learn?

Usually, yes. Traditional bows require more form consistency and strength because there is no let-off at full draw.

Do compound bows require more maintenance?

Yes. Compound bows have cams, cables, rests, sights, and accessories that need inspection and tuning. Traditional bows are simpler but still need string, limb, and arrow checks.

Which bow should a beginner choose?

A beginner who wants to hunt soon will usually progress faster with a properly fitted compound bow. A beginner who wants traditional archery as a skill may prefer a recurve or longbow and a slower learning path.

Final Takeaway

Traditional bows offer simplicity and challenge. Modern compound bows offer efficiency and hunting forgiveness. Choose the bow that fits your body, your practice habits, your legal season, and your ability to make ethical shots.

Best Reticle for Long-Range Scope: MIL vs MOA

When you’re setting up a long-range rifle scope, one of the most important decisions you’ll make is choosing the reticle specifically whether to go with a MIL-based (or mil/radian) reticle or a MOA-based reticle. Both have pros and cons, and the “right” choice depends heavily on how you shoot (hunting, tactical, competition), what units you’re comfortable with (metric vs imperial), and what level of precision and speed you need.

In this post, we break down the differences between MIL and MOA how they work, when each shines, and which kind of shooter or scenario is likely to benefit more from each.

📐 What Are MOA and MIL (MRAD)? Basic Concepts

MOA — Minute of Angle

  • MOA stands for “Minute of Angle,” an angular measurement. It’s a subdivision of a degree (60 minutes per degree).
  • On a rifle scope calibrated in MOA: at 100 yards, 1 MOA equals roughly 1.047 inches (often rounded to 1 inch for simplicity).
  • As distance increases, the linear equivalent increases proportionally: e.g. at 500 yards, 1 MOA ≈ 5.235 inches; at 1000 yards, 1 MOA ≈ 10.47 inches.
  • Many scopes offer turret adjustments in fractional MOA (e.g. ¼ MOA, ½ MOA) for fine-tuning.

MIL (Milliradian / MRAD)

  • A “mil” (often technically “mrad”) is 1/1000th of a radian.
  • Reticles using mils may have mil-dots or hash marks to denote these angular intervals.
  • In practical terms: at 100 meters, 0.1 mil typically equals 10 cm (which makes metric-based calculations straightforward); at 100 yards, 0.1 mil ≈ 0.36 inches.
  • This angular measure, being metric and decimal-based, tends to simplify range estimation and holdover/wind compensation math.

🔎 MIL vs MOA: Core Differences & How They Affect Long-Range Use

Here’s how MIL and MOA compare across important aspects for long-range shooting:

Feature / ConsiderationMOAMIL (mrad)
Unit SystemAngular — traditional imperial; good for yards/inches.Angular — metric-rooted (radians), decimal-based; great for meters/centimeters.
Adjustment GranularityFine increments (e.g. ¼ MOA), useful for very precise, small corrections. Adjustments often in 0.1 mil steps; somewhat larger per click compared to MOA, but easier to do quick math.
Math & Ease of UseFamiliar if you think in yards/inches — straightforward for short-range or medium-range shooting.Base-10 math: easier for range estimation, wind-hold, and ballistic calculations, especially over long ranges or when using metric distances.
Reticle Clarity / ComplexityHash marks/dots can get dense; reticle may appear “busy,” especially with fine spacing at long range. Usually cleaner or more intuitive spacing for range-finding and holdovers; less cluttered at high magnification.
Speed of Use / Field ShootingSlightly slower when making bigger adjustments (many clicks needed).Faster to adjust for big corrections — useful for dynamic environments, long-range moves, or tactical shooting.
Precision PotentialHigh precision for small corrections, especially in controlled bench or precision shooting settings. Slightly coarser per unit, but still very accurate — especially effective for long-range precision with less mental math.

🏹 Which Reticle Works Best — By Use-Case

Depending on what you’re doing, here’s when one system might be better than the other:

Choose MOA if…

  • You primarily shoot at short to medium ranges. As some experts note, for typical hunting distances (especially within a few hundred yards), MOA’s simplicity and familiarity make it a solid choice.
  • You prefer very fine, incremental adjustments for example, in precision bench-rest shooting, or where minute corrections count.
  • You’re more comfortable thinking in imperial units (yards, inches), and don’t want to convert between metric and imperial.

Choose MIL (mrad) if…

  • You’re shooting at long range, where quick adjustments for elevation, wind, or moving targets matter. The base-10 mil system simplifies math and reduces error under pressure.
  • You prefer metric units (meters, centimeters), or frequently switch between meters and yards.
  • Speed and simplicity matter e.g. tactical shooting, dynamic ranges, varied engagement distances. Many long-range shooters and competitors are shifting to mil-based scopes for this reason.
  • Your reticle holds hash-marks or mil-dots, making range estimation, wind holds, and bullet-drop compensation more intuitive.

🎯 Why Long-Range Shooters (Often) Prefer MIL — Pros in Real-World Use

  • Faster ballistic math & conversions: With mil, many shooters find it easier to convert target size, distance, and required hold-over because the system is decimal-based. E.g. 0.1 mil ≈ 10 cm at 100 m or 0.36″ at 100 yd.
  • Cleaner reticle grid: For long-range scopes, mil-grids tend to be less cluttered, making it easier to use for ranging and adjustments without confusing the shooter.
  • Popularity among precision/tactical shooters: Many competitive and professional long-range shooters use mil-based scopes, which means more peer support, shared ballistic data, and universal references among shooters.
  • Efficient for windage and moving targets: At long range, conditions like wind, target movement, or mirage can change quickly mil’s coarser, faster-to-adjust increments give advantage in dynamic scenarios.

Conclusion

In the debate between MIL and MOA reticles, there’s no single system that universally outperforms the other the best choice ultimately depends on your shooting style, preferred units, and long-range needs. MOA excels in fine, precise adjustments and feels more natural for shooters who think in yards and inches, making it a strong option for hunters and precision bench-rest shooters. MIL, on the other hand, has become the preferred standard for most long-range and tactical shooters thanks to its simple decimal system, faster corrections, cleaner reticles, and compatibility with modern ballistic tools. Whether you choose MIL or MOA, consistency is key: understand your system, train with it, and stick to it. Mastery matters far more than the measurement system itself a well-practiced shooter will achieve excellent results with either reticle.

Does a Bigger Objective Lens Mean Better Image

For many shooters, the objective lens size is one of the first things they look at when buying a riflescope or binoculars. The common belief is simple: a bigger objective lens means more brightness, more clarity, and therefore a better overall image. At first glance, this sounds logical. After all, a larger piece of glass should naturally gather more light. But in reality, the relationship between objective lens size and image quality isn’t as straightforward as it seems.

There are several optical principles that influence the final image you see through a scope, and while objective lens diameter plays a role, it is far from the only factor that matters. In fact, bigger is not always better. Understanding why requires looking at concepts like light transmission, exit pupil, magnification, glass quality, coatings, and even ergonomics.

In this article, we will break down what an objective lens actually does, how it affects brightness and clarity, when a larger objective truly helps, and when it becomes unnecessary or even disadvantageous. By the end, you’ll be able to confidently choose the right scope for your shooting needs without falling for common misconceptions.

What the Objective Lens Actually Does

The objective lens is the large front lens of a scope. It serves one fundamental purpose: to collect light and send it to the rest of the optical system. The more light it gathers, the brighter and more detailed the image can potentially become. However, the key word here is “potentially.” The benefit depends heavily on the conditions you’re shooting in and how the rest of the scope is designed.

For example, a 56 mm objective lens naturally gathers more light than a 40 mm objective. But that increased light is only useful if your eye can actually make use of it. In many situations, especially in bright daylight, your eye simply doesn’t need the extra light, meaning the larger objective doesn’t provide any noticeable improvement in image quality.

Why a Bigger Objective Lens Doesn’t Always Mean Better Image

The belief that a bigger objective lens always gives a brighter, clearer image comes from an oversimplified understanding of optical physics. A larger lens does indeed capture more light, but the exit pupil determines how much of that light your eye can actually use. The exit pupil is calculated by dividing the objective lens diameter by the magnification. This means a 50 mm objective at 10x magnification provides a 5 mm exit pupil, while a 40 mm objective provides 4 mm.

However, the average adult human eye can only accept around 4–5 mm of light in normal lighting conditions. Even in very low-light situations, the eye’s maximum dilation is around 7 mm, and that applies mostly to young people. Therefore, unless the exit pupil exceeds what your eye can use and the lighting conditions require it the extra lens size doesn’t contribute to image quality.

In broad daylight, even a small objective can deliver more light than your eyes can handle. That’s why some of the clearest and sharpest optics in tactical environments, such as LPVOs, red dots, and prism scopes, use much smaller objective lenses.

How Magnification Changes the Importance of Objective Lens Size

Magnification has a major effect on whether a larger objective lens is useful. At higher magnifications, the exit pupil becomes smaller. This is why long-range shooters—who often work at 16x, 20x, or even higher—benefit more from larger objective lenses. A 56 mm lens at 20x provides a noticeably larger exit pupil than a 40 mm lens at the same magnification, which translates into a brighter, more usable image.

For hunters or mid-range shooters using low to moderate magnification (3x–12x), the difference between objective sizes can be negligible. The exit pupil remains large enough for the human eye regardless of whether the objective lens is 40 mm or 50 mm. The advantages of oversized objectives simply don’t show up until magnification increases dramatically.

The Role of Glass Quality and Coatings

A crucial fact often overlooked in the “bigger is better” debate is that glass quality matters far more than lens size. A high-quality scope with a 40 mm objective can easily outperform a cheap 56 mm scope. Superior coatings lead to better contrast, sharper edges, richer colors, and reduced glare.

Lens coatings determine how effectively light passes through the glass surfaces. Fully multi-coated surfaces can transmit significantly more usable light than single-coated or uncoated lenses. This is why premium optics with smaller objectives often outperform larger, budget-era scopes. The clarity you perceive has less to do with raw light entry and more to do with how efficiently that light is processed.

Where Larger Objective Lenses Truly Make a Difference

There are times when a larger objective lens genuinely offers improved performance. Shooters who spend time in deep woods, dense cover, or low-light situations benefit from the brightness boost a 50 mm or 56 mm lens provides. Dawn and dusk two of the most common hunting times are notorious for poor light conditions. In these moments, a larger objective allows shooters to identify targets and make ethical shots when smaller lenses struggle.

Long-range shooters also benefit because they calculate shots at high magnification. Under these conditions, a larger objective helps maintain a larger exit pupil, which results in a brighter and more stable image. When your magnification goes up, the brightness naturally goes down due to a shrinking exit pupil. Increasing the objective lens size is one way to counter this effect.

When a Bigger Objective Lens Becomes a Disadvantage

One of the least-discussed aspects of large objective lenses is how they impact the rifle’s ergonomics and handling. Bigger objectives require taller scope rings, which raises the optic higher above the bore line. This can force the shooter into an awkward cheek weld unless they use an adjustable cheek rest.

Larger lenses also add weight sometimes significantly. A 56 mm scope can feel top-heavy, especially on lightweight hunting rifles. This extra forward weight changes the balance of your firearm, making it harder to carry over long distances. Moreover, large scopes tend to be bulkier, making them less suitable for fast-moving or close-quarters shooting.

In addition to weight and mounting issues, a big objective lens can introduce more parallax sensitivity. Parallax adjustment becomes more critical as the objective grows, demanding more precise setup and potentially slowing the shooter down.

Real-World Usage Scenarios and Ideal Lens Sizes

The ideal objective lens size depends heavily on your shooting style. A hunter in thick forests who often shoots during sunrise or sunset might prefer a 50 mm lens. A long-range precision shooter working at 20x or more may require a 56 mm objective to maintain clarity at high zoom levels.

On the other hand, a tactical shooter using an AR-15 for home defense or competition typically gets no benefit from a large objective. For these shooters, a smaller, lighter optic improves speed, balance, and maneuverability. Likewise, mountain hunters and backpackers often choose scopes with 40 mm objectives because they offer enough brightness without the bulk.

Misconceptions About Objective Lens Size

Many shooters assume that a larger objective automatically means better magnification, a wider field of view, or superior image quality. In reality, magnification depends on the eyepiece, not the objective lens. Field of view is also determined by the internal optical design, not the front lens size. Clarity depends almost entirely on glass quality and coatings.

These misconceptions persist because objective size is easy to compare on paper, while the subtle factors that truly influence optical performance require more experience and understanding.

So, Does a Bigger Objective Lens Always Mean a Better Image?

The answer is no. A larger objective lens can provide better brightness, especially in low-light or high-magnification conditions, but it does not guarantee a better image. Many shooters will never fully benefit from anything larger than 40–50 mm, especially if they primarily shoot during the day or use low to moderate magnification.

The key is choosing an objective size that matches your real-world shooting conditions. If you regularly shoot at dawn, dusk, or extreme distances, a larger objective will help. If you value mobility, balance, and simplicity, a smaller objective may serve you better.

Conclusion

The idea that a bigger objective lens automatically leads to a better image is a myth. While larger lenses can provide real benefits in certain conditions, the overall quality of an optic depends far more on glass quality, lens coatings, magnification, and how the scope is matched to your shooting style. Rather than chasing the biggest lens, shooters should focus on selecting the right balance of size, weight, brightness, and optical performance for their specific needs.

Exit mobile version