How to Increase Draw Weight Safely

To increase your bow’s draw weight safely, make small, gradual changes inside the limits set by your bow’s manufacturer manual, build strength over time, and ask a pro shop or qualified coach to check anything you are unsure about. More draw weight is not automatically better. The right weight is the one you can draw, hold, aim, and release with controlled form.

This guide explains a cautious approach for compound and recurve bows. It does not replace your exact bow manual, a certified coach, or a qualified bow technician. Stop and reassess if you feel pain, lose control, or cannot repeat your shot sequence cleanly.

Table of Contents
  1. Why a Safe, Gradual Approach Matters
  2. Know Your Bow’s Limits First
  3. How Draw Weight Adjusts on Different Bows
  4. A Gradual Strength-Building Approach
  5. When to Stop or Get Help
  6. When to See a Pro Shop or Coach
  7. Related Archery Setup Guides
  8. Frequently Asked Questions

Why a Safe, Gradual Approach Matters

Increasing draw weight too quickly can create bad form, fatigue, and discomfort. Many archers call this overbowing: using more weight than you can draw and hold smoothly. When the weight is too high, the archer often raises the bow awkwardly, collapses at full draw, rushes the shot, or loses back tension.

Draw weight also affects equipment setup. Changing it can influence arrow spine match, tuning, and sight marks. That is why the safest path is gradual: change little, shoot enough to judge control, then recheck the setup before going higher.

Increase draw weight only inside the rated range, in small steps, with form and safety checks at every stage.

Know Your Bow’s Limits First

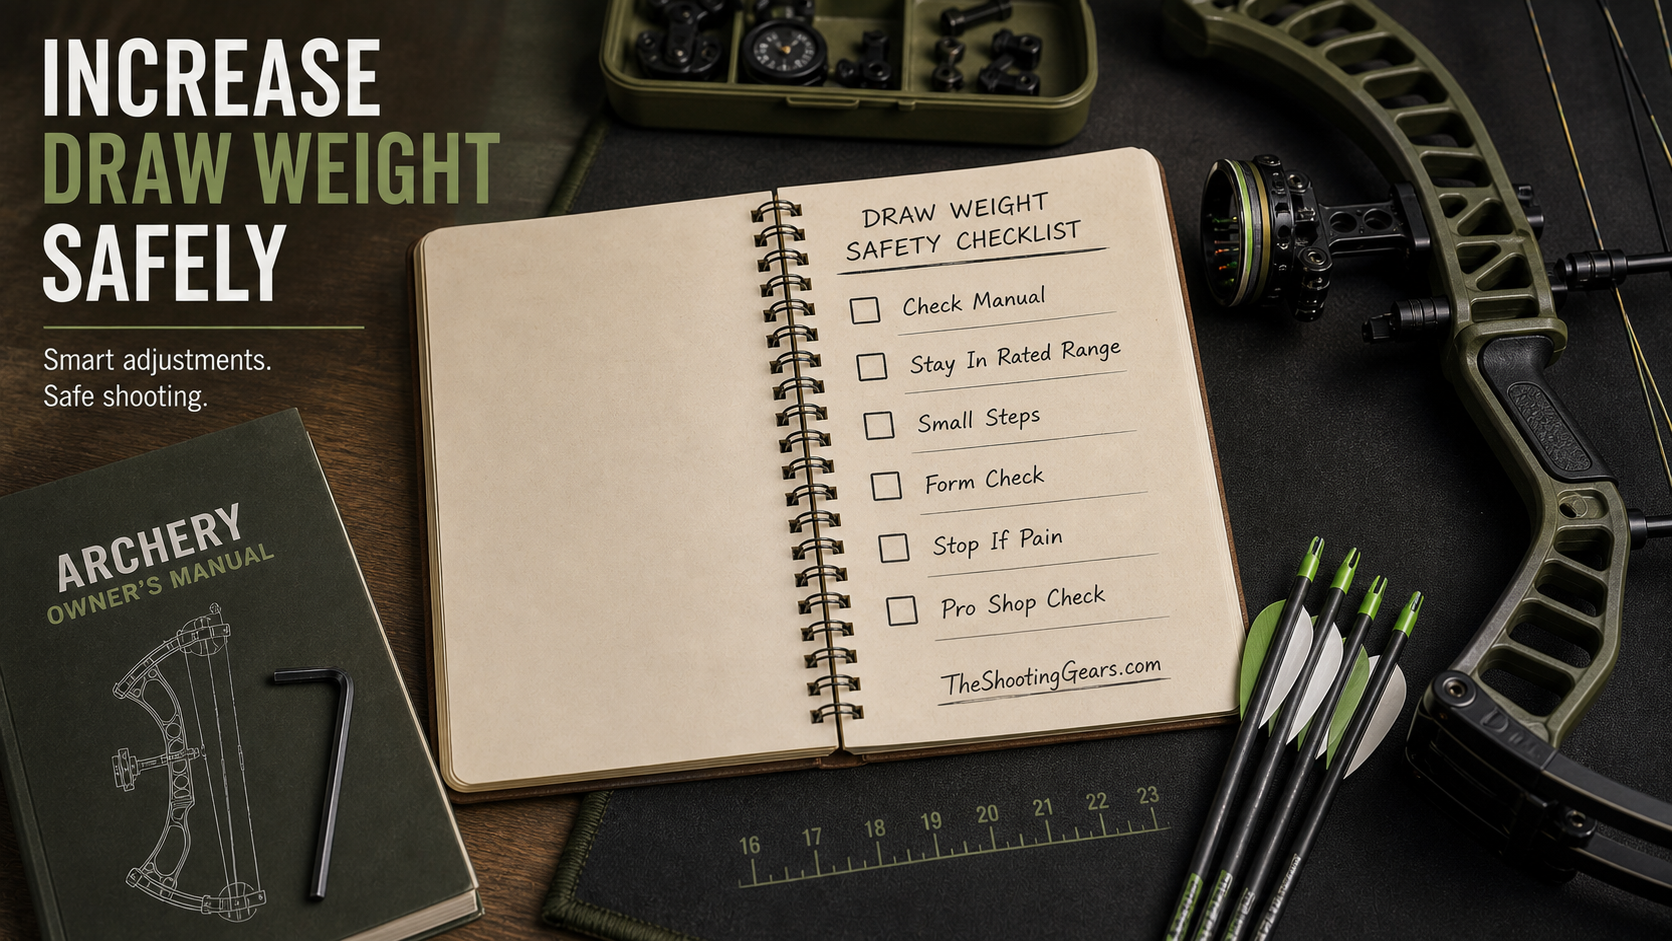
Every bow has a manufacturer-defined safe range. Your manual tells you the rated draw-weight range and the correct adjustment method for that exact model. Do not exceed those limits, do not improvise with tools, and do not follow a generic turn count from a different bow.

Before changing weightWhy it matters
Read the exact model manualLimits and methods vary by bow
Confirm current draw weightYou need a starting point before changing anything
Check arrow spineDraw-weight changes can affect arrow match
Inspect string, cables, limbs, and hardwareDo not adjust a damaged or questionable bow
Ask a pro shop if unsureGuessing around limb bolts or limbs is not worth the risk

For archery safety and participation context, organizations such as USA Archery and World Archery are useful references. For your actual bow, however, the manual and a qualified technician remain the authority.

How Draw Weight Adjusts on Different Bows

Compound Bows

Many compound bows adjust within a limited range through the limb bolts. The available range is not unlimited, and the safe number of turns depends on the exact model. Changing limb-bolt tension can also affect tune, timing, sight marks, and arrow match. If you are not completely sure, have a pro shop make or verify the change.

Recurve Bows

Recurve archers usually increase draw weight by changing limbs, especially on takedown recurves. That makes the step clearer: choose compatible limbs in a manageable weight jump, confirm the fit with the manufacturer or shop, and give your form time to adapt.

Work That May Require a Bow Press

This article does not give bow-press or disassembly instructions. If the change touches cams, string, cables, modules, or anything that requires special tools, take the bow to a pro shop. The goal is controlled progress, not risky mechanical work.

A Gradual Strength-Building Approach

Adding draw weight is partly an equipment change and partly a strength and form change. Make one small adjustment at a time, shoot at that setting for several sessions, and watch what happens to your draw cycle, anchor, hold, and release. If the shot sequence gets worse, the new weight is not helping yet.

Keep a simple log while you progress. Write down the date, the draw weight setting, arrow setup, how many arrows you shot, and whether your form stayed controlled. A short note helps you spot patterns before they become habits, and it gives a coach or technician better information if you need help.

Keep Form First

Good form should survive the increase. You should be able to draw without sky-drawing, settle into anchor, hold steady, and let down safely if needed. If you cannot let down under control, the weight is too much for that moment.

Recheck Arrows and Sight Marks

Draw-weight changes can change arrow behavior. If you increase weight, review your arrow spine and point setup. Our arrow spine guide explains why spine depends on the full setup, not one number.

When to Stop or Get Help

Stop a session and reassess if you feel shoulder, elbow, wrist, or back pain; if you shake heavily at full draw; if you cannot reach anchor smoothly; or if the bow makes a new noise. These are general safety cautions, not medical advice. For ongoing pain or suspected injury, talk with a qualified medical professional.

Do not push through pain to reach a number. A lighter draw weight with clean form is more useful than a heavier draw weight you cannot control. If you are working with a young archer, fit and comfort matter even more; do not rush strength development.

Also remember that hunting rules, target rules, and personal goals can differ. Choose the lowest draw weight that meets your real use case while keeping safe, repeatable control.

When to See a Pro Shop or Coach

  • You are unsure of the bow’s safe adjustment range.
  • The adjustment requires a bow press or tools not described in the manual.
  • Your form breaks down after the weight change.
  • Arrow flight changes and you are not sure whether spine or tuning is the issue.
  • The bow was damaged, dry fired, or hit hard.

A coach can help with form and strength progression. A pro shop can check the mechanical setup. Both are useful when you are increasing weight because they catch problems a generic article cannot see.

Draw weight connects directly to setup and safety. Read our bow tuning for beginners guide before changing hardware, review archery safety rules, and check how to choose arrow spine after any meaningful weight change.

Frequently Asked Questions

How much draw weight should I add at a time?

Add weight in small steps within your bow’s rated range, then shoot at the new setting long enough to judge control. Avoid universal turn counts or fixed pound jumps unless they come from your exact manual or a qualified technician.

What is overbowing?

Overbowing means using more draw weight than you can control with good form. It can cause shaky drawing, rushed shots, poor anchor, fatigue, and discomfort.

Can I adjust my compound bow draw weight myself?

Some compound bows allow limited limb-bolt adjustment, but only within the manufacturer’s stated range. If you are unsure, or if the work affects tuning or requires special tools, use a pro shop.

Should I stop if my shoulder hurts when I draw?

Yes. Stop, lower the weight or workload, and reassess. For ongoing pain or possible injury, consult a qualified medical professional.

How do recurve archers increase draw weight?

Most recurve archers increase draw weight by switching to heavier compatible limbs. Step up gradually and confirm limb compatibility with the riser, manufacturer, or a pro shop.

Shooting Stance for Beginners: A Detailed Range-Safety Guide

A good beginner shooting stance is a stable, balanced body position that helps you support the firearm comfortably, manage recoil, and keep the muzzle pointed in a safe direction. For most new shooters at a supervised range, that means feet about shoulder-width apart, knees soft, weight slightly forward, and a relaxed but firm grip.

This guide explains stance basics in a range and sport-shooting context. It does not replace direct instruction from a certified instructor, range safety officer, firearm manual, or posted range rules.

Safety First

Safety comes before stance. Before thinking about footwork or grip, confirm that you are following the universal firearm safety rules and the posted rules of your range. The NSSF firearm safety rules are a useful starting point for reviewing the fundamentals.

  • Treat every firearm as if it is loaded.
  • Keep the muzzle pointed in a safe direction.
  • Keep your finger outside the trigger guard until you are ready to fire.
  • Be sure of your target and what is beyond it.
  • Follow instructions from the range safety officer.

New shooters benefit most from direct supervision. A qualified instructor or range safety officer can correct stance and handling errors in real time, which a written guide cannot do.

What a Shooting Stance Is

A shooting stance is the way you position your feet, legs, hips, torso, arms, head, and eyes while shooting. A consistent stance helps create a repeatable platform, reduces unnecessary movement, and helps you return to the sights between shots.

Stance is only one part of the fundamentals. Grip, sight alignment, sight picture, breathing, and trigger control all matter too. If you are working on accuracy, pair stance practice with our guide on the importance of trigger control for shooting accuracy.

Common Beginner Stances

Two handgun stances are commonly introduced to beginners: the isosceles stance and the Weaver stance. Rifle and shotgun positions are different, so confirm the correct setup for your firearm type with an instructor.

The Isosceles Stance

In the isosceles stance, the shooter faces the target squarely, with both arms extended evenly. Many beginners find it simple because the body position feels balanced and symmetrical.

The Weaver Stance

In the Weaver stance, the body is angled slightly, with the support-side foot forward and the firing-side foot back. Some shooters like the added tension and support, but it can take more coaching to learn comfortably.

Choosing Between Them

There is no single stance that fits every shooter. Body size, strength, mobility, firearm type, and range setup all matter. Try beginner stances under supervision and keep the one that feels stable, comfortable, and repeatable.

How to Build a Stable Stance Step by Step

Build stance from the ground up while keeping the muzzle in a safe direction. Small details matter, but the goal is not to look perfect. The goal is a repeatable position you can maintain safely.

AreaBeginner CueWhy It Helps
FeetAbout shoulder-width apartCreates a stable base
KneesSoft, not lockedReduces stiffness and fatigue
WeightSlightly forwardHelps manage recoil without leaning back
ShouldersRelaxed and levelReduces unnecessary tension
HeadUpright and naturalImproves comfort and sight alignment

For broader accuracy fundamentals after stance, see our guide on how to improve shooting accuracy.

Eye and Ear Protection

Eye and ear protection should be in place before you step to the firing line. Hearing protection helps reduce noise exposure, and eye protection helps guard against ejected cases, fragments, and other range hazards. The CDC/NIOSH noise and hearing loss prevention resources explain why hearing protection matters, and OSHA publishes guidance on eye and face protection.

Always follow your range’s specific PPE requirements. If your range requires a certain rating or style of protection, the range rule comes first.

Common Beginner Mistakes

  • Leaning backward instead of staying balanced and slightly forward.
  • Locking the knees and becoming stiff.
  • Over-tensing the shoulders, hands, or arms.
  • Letting the muzzle drift while adjusting foot placement.
  • Trying advanced positions before the basics are consistent.

Outside feedback helps. Ask a range safety officer or instructor to watch your stance during a supervised session. A small correction early can prevent a habit from becoming hard to change later.

Frequently Asked Questions

What is the best shooting stance for beginners?

Many beginners start with the isosceles stance because it is simple and symmetrical. The best stance is the one you can repeat safely and comfortably under supervision.

Does a good stance improve accuracy?

A stable stance supports accuracy, but it does not guarantee it. Accuracy comes from combining stance with grip, sight alignment, breathing, trigger control, and safe practice over time.

Should beginners learn stance from an instructor?

Yes, if possible. Written guidance can explain the basics, but an instructor or range safety officer can correct unsafe handling, balance problems, and posture issues in real time.

Is the stance the same for handguns and long guns?

No. Handgun stances such as isosceles and Weaver are different from rifle and shotgun positions. Confirm the right setup for your firearm type with a qualified instructor.

How long should I practice my stance?

Use short, focused, supervised sessions and stop when you become tired. Quality and safety matter more than long sessions.

Final Range-Safety Reminder

A good shooting stance should feel stable, repeatable, and safe. Keep the muzzle in a safe direction, wear proper eye and ear protection, follow range commands, and ask for qualified help whenever you are unsure. For more safety-first range basics, read our shooting range safety rules guide.

Legal Hunting Gear: A Complete Guide for Responsible Hunters

Hunting is a deeply rooted tradition that combines skill, patience, and respect for wildlife. However, beyond marksmanship and outdoor knowledge, every hunter must understand one critical responsibility: using legal hunting gear. Laws governing hunting equipment exist to ensure safety, promote ethical harvest, protect wildlife populations, and maintain fair chase principles. Failing to follow these laws can result in fines, loss of hunting privileges, or even permanent license revocation.

Legal hunting gear is not universal. What is allowed in one state, season, or species may be illegal in another. For this reason, hunters must stay informed and verify that their weapons, accessories, and tools comply with local wildlife regulations before entering the field.

Understanding What Makes Hunting Gear Legal

Hunting gear is considered legal when it meets the specific regulations set by state or regional wildlife authorities for a particular game animal and hunting season. These regulations are designed around conservation goals and safety concerns. A rifle that is legal for deer during firearm season may be illegal during archery season, and equipment approved for small game may be prohibited for big game.

Factors that determine legality include the type of animal being hunted, the method of take, the time of year, and the geographical location. Even minor details, such as magazine capacity or arrowhead design, can determine whether gear is lawful or prohibited.

Firearms and Legal Requirements for Hunting

Firearms are among the most regulated hunting tools. While rifles, shotguns, and handguns are commonly used for hunting across the United States, they are subject to strict rules. Most states specify minimum calibers for big game hunting to ensure humane kills. Using a caliber that is too small may be illegal even if the firearm itself is otherwise lawful.

Shotgun hunting often comes with additional restrictions. In many areas, hunters are required to use slugs rather than buckshot for deer. Magazine capacity limits are common, especially for waterfowl and upland bird hunting, where shotguns must be plugged to restrict the number of shells they can hold.

Automatic firearms are illegal for hunting everywhere, and some states also restrict semi-automatic rifles. Suppressors are legal for hunting in some states but banned in others, making it essential to confirm local laws before use.

Bowhunting Equipment and Legal Considerations

Bowhunting is widely accepted and often has its own dedicated seasons. Compound bows, recurve bows, and longbows are generally legal, provided they meet minimum draw weight requirements. These minimums are set to ensure sufficient penetration and ethical harvest.

Crossbows have become increasingly popular, but their legality varies significantly. Some states allow crossbows during archery season, others restrict them to firearm season, and some only permit their use for hunters with disabilities. Broadheads must usually have cutting edges, and mechanical broadheads may be restricted in certain states.

Poisoned arrows, explosive tips, and any broadheads designed to detonate on impact are universally illegal due to safety and ethical concerns.

Muzzleloaders and Primitive Weapon Seasons

Muzzleloader hunting seasons are typically regulated more strictly than modern firearm seasons. These seasons are designed to preserve traditional hunting methods and limit effective range. Many states require muzzleloaders to be single-shot and restrict ignition systems.

Powder type is another critical factor. Black powder or approved substitutes are generally legal, while smokeless powder is almost always prohibited. Optics may be restricted during primitive seasons, with some states allowing only iron sights.

Optics, Electronics, and Modern Technology

Optics such as rifle scopes, red dot sights, binoculars, and spotting scopes are legal in most hunting situations. Rangefinders are also commonly allowed, although models with advanced ballistic calculators may be restricted in some states.

The use of electronic devices is one of the most complex areas of hunting law. Thermal imaging and night vision optics are illegal for hunting big game in most states because they remove the element of fair chase. Electronic calls are often banned for deer and elk but may be legal for predators such as coyotes.

Drones are widely prohibited for scouting or locating game, as they provide an unfair advantage and disrupt wildlife behavior.

Ammunition and Arrow Regulations

Ammunition laws exist to ensure ethical harvest and reduce environmental harm. Expanding bullets, such as soft point or hollow point ammunition, are typically required for big game hunting. Full metal jacket bullets are often illegal because they do not expand reliably and increase the risk of wounding animals.

Lead ammunition has been banned in certain states and wildlife zones due to concerns about poisoning scavenger species. Hunters in these areas must use copper or other non-lead alternatives.

For archery hunters, arrow and broadhead specifications may include minimum cutting diameter and blade count. Lighted nocks are allowed in many states but restricted in others.

Clothing and Safety Gear Requirements

Hunting clothing is largely unrestricted, but safety visibility laws are common. During firearm seasons, many states require hunters to wear blaze orange or blaze pink to reduce hunting accidents. The required amount and placement vary by state, but it must be visible from all directions.

Camouflage clothing, insulated jackets, gloves, and boots are all legal, and there are typically no restrictions on materials or patterns outside of visibility rules.

Accessories and Field Equipment

Most basic hunting accessories are legal, including backpacks, knives, GPS units, and headlamps. However, how and when they are used can matter. Artificial light may be prohibited for spotting or shooting game but allowed for tracking wounded animals.

Tree stands are legal in most states but may require landowner permission on private property or special permits on public land. Baiting equipment is heavily regulated and often illegal for deer hunting due to disease concerns.

Commonly Illegal Hunting Gear

Certain types of gear are widely prohibited across the country. These include fully automatic firearms, explosive ammunition, poison-tipped weapons, and any equipment designed to herd or harass animals using vehicles or aircraft. Shooting from a vehicle is illegal in almost all cases.

Using artificial light, thermal optics, or night vision for big game hunting is one of the most common violations and carries severe penalties.

Ensuring Your Gear Is Legal Before Every Hunt

The most reliable way to ensure legality is to review your state’s official hunting regulations each season. Laws can change annually, and relying on outdated information can lead to violations. When unsure, contacting a local game warden is often the best course of action.

Responsible hunters double-check their equipment before every hunt and understand that ignorance of the law is not a valid defense.

Why Legal Hunting Gear Matters

Using legal hunting gear is about more than avoiding penalties. It supports wildlife conservation, ensures humane harvest, and preserves the integrity of hunting as a respected outdoor tradition. Ethical hunters understand that following regulations protects access to hunting land and seasons for future generations.

Final Thoughts

Legal hunting gear forms the foundation of responsible and ethical hunting. While regulations can seem complex, they exist to balance human participation with wildlife conservation. Every hunter has a duty to stay informed, prepared, and compliant.

Before stepping into the field, take the time to confirm that every piece of your gear is legal. Doing so protects you, the wildlife, and the future of hunting itself.

Youth Archery Gear Recommendations: Safe Beginner Checklist

Youth archery gear should be chosen for fit, safety, and confidence first. The right beginner setup is not the most powerful bow or the longest accessory list; it is gear a young archer can draw comfortably, control safely, and use under adult supervision.

This guide is a parent-first checklist for youth bows, arrows, targets, protective gear, and practice setup. It is not a product roundup, and it does not replace coaching from a qualified archery instructor, club, school program, or local pro shop.

Table of Contents

Quick Answer

For a young beginner, start with a low-draw-weight bow that fits their draw length, arrows matched to that bow, a safe target and backstop, an arm guard, finger protection, and clear range rules. If the child struggles to draw, hold, or follow instructions safely, the setup is too advanced.

For youth archery, check fit, draw weight, arrow compatibility, protective gear, target setup, supervision, and range rules before practice.

Youth Archery Parent Checklist

Before buying, answer these questions. They matter more than brand names.

  • Fit: Can the child reach full draw without leaning, shaking, or overextending?
  • Draw weight: Is the bow light enough to draw repeatedly with control?
  • Arrows: Are the arrows the correct length and type for the bow and target?
  • Target: Is the target rated for the bow and placed in front of a safe backstop?
  • Protection: Does the archer have arm and finger protection?
  • Supervision: Is an adult or instructor controlling the range?
  • Rules: Does the child understand when to nock, shoot, retrieve, and stop?

Bow Fit Comes First

Bow fit is the foundation. A bow that is too heavy, too long, or too aggressive can teach poor form and create safety problems. Many kids do better with a simple recurve or youth compound set at a low draw weight than with a bow chosen for speed or adult-style features.

Recurve vs. Compound for Youth

A recurve bow can be excellent for learning basic form because it is simple and direct. A youth compound can help older kids or teens who need adjustability and a let-off feel. Neither is automatically better. The right choice is the one the young archer can control safely and practice with consistently.

Use a Pro Shop or Program When Possible

A local archery shop, club, school program, or instructor can help measure draw length, choose draw weight, and confirm arrow compatibility. Organizations such as USA Archery are useful starting points for learning about structured archery participation and coaching pathways.

Arrows and Compatibility

Arrows must match the bow, the archer, and the target. Do not guess based only on age. Arrow length, spine, point type, and target rating all matter. For beginners, the safest path is to buy arrows recommended by the bow manufacturer or fitted by a pro shop.

Use Practice Points for Youth Targets

Youth target practice should normally use field points and a proper target. Broadheads are not beginner practice tools and should not be mixed into youth gear unless a qualified adult is teaching a specific, legal, supervised hunting setup.

Targets and Practice Area

A safe target area is as important as the bow. Use a target rated for the bow’s draw weight and arrow type, then place it where missed arrows cannot create danger. A backstop, clear side area, and controlled shooting line are basic requirements.

Keep the range simple. One shooting direction, one clear command system, and one retrieval rule are easier for kids to follow. No one should walk forward until every bow is down and the adult in charge gives permission.

Safety Gear

Basic safety gear helps prevent small injuries and builds confidence. An arm guard protects the bow arm from string slap. A finger tab or glove protects the drawing fingers. A quiver keeps arrows organized and pointed safely when not in use.

Range Rules Are Gear Too

Rules are part of the setup. Teach the child to keep arrows unnocked until told, point only at the target, wait for commands, retrieve only together, and stop immediately when an adult calls stop. Hunter education resources such as Hunter Ed can also help families think about safety and responsibility around archery and hunting contexts.

Age-Based Guidance

Age ranges are only rough guidance. Strength, attention span, coordination, maturity, and coaching matter more than birthday.

Ages 4 to 7

Keep sessions short, close, and supervised. Very young archers need lightweight beginner gear, large targets, and simple commands. If attention fades, stop before safety fades.

Ages 8 to 12

This is often a good age for structured lessons, school programs, or club practice. Fit still matters. Avoid over-bowing just because the child is enthusiastic.

Teens

Teens may be ready for more adjustable bows and longer practice sessions, but they still need coaching, safe range habits, and gear that fits their current strength and purpose.

Common Buying Mistakes

The biggest mistake is buying too much bow. A bow that is too heavy makes practice frustrating and can encourage unsafe shortcuts. Other mistakes include mismatched arrows, targets that cannot stop the arrow, skipping arm protection, and practicing without a safe backstop.

Parents should also avoid buying gear only because it looks like adult hunting equipment. Youth archery should build form, confidence, and respect for range rules before power or hunting accessories enter the conversation.

For families still learning the sport, beginner education sites such as Archery 360 can help explain archery basics, range culture, and practice expectations before a child moves into specialized gear.

FAQ

What bow is best for a child beginner?

The best beginner bow is light enough to draw safely, sized to the archer, and simple enough to learn on. A coach or pro shop can help confirm fit.

Does my child need an arm guard?

Yes, an arm guard is a smart basic item. It helps prevent string slap and makes beginners more comfortable while learning form.

Can kids use compound bows?

Yes, if the bow fits and the draw weight is manageable. A youth compound should be set up by someone who understands draw length, draw weight, arrow match, and safety.

How do I make backyard archery safe?

Use a proper target, safe backstop, clear shooting line, adult supervision, and local rule compliance. If you cannot create a safe missed-arrow area, use a range or club instead.

Final Takeaway

Youth archery gear should make practice safer, easier, and more enjoyable. Start with fit, light draw weight, correct arrows, protective gear, a safe target setup, and adult supervision. When the basics are right, young archers can build skill without being pushed into gear they are not ready to control.

Pistol Crossbow Pros and Cons

Pistol crossbows, often called mini crossbows or hand crossbows, are compact projectile weapons designed for short-range use. They are significantly smaller and less powerful than traditional hunting crossbows, yet they continue to gain popularity among beginners, hobby shooters, and outdoor enthusiasts. Their appeal lies in their simplicity, affordability, and portability. However, like any tool, pistol crossbows have strengths and weaknesses that should be carefully considered before purchasing or using one.

What Is a Pistol Crossbow?

A pistol crossbow is a scaled-down version of a standard crossbow, featuring a short limb span, lightweight construction, and a simple trigger mechanism. Most models operate within a draw weight range of approximately fifty to eighty pounds and shoot short bolts rather than full-length arrows. These design choices make pistol crossbows easy to handle but limit their power and range. They are not intended for big-game hunting and are primarily used for recreational shooting, training, or light utility purposes.

Portability and Compact Design

One of the most notable advantages of a pistol crossbow is its compact size. Unlike full-size crossbows, which can be heavy and cumbersome, pistol crossbows are lightweight and easy to carry. Their small form factor allows them to fit comfortably into backpacks, vehicle emergency kits, or camping gear. This portability makes them particularly attractive to hikers, campers, and survivalists who prioritize lightweight equipment without sacrificing basic functionality.

Ease of Use and Beginner Accessibility

Pistol crossbows are exceptionally beginner-friendly. Their simple design requires minimal setup, and users can begin shooting with little prior experience. Loading and cocking the crossbow is straightforward, and there is no need for tuning, string adjustments, or complex sight calibration. This ease of use makes pistol crossbows an excellent introduction to archery-style weapons, allowing beginners to develop basic aiming skills and shooting discipline without the steep learning curve associated with traditional bows or advanced crossbows.

Affordability and Low Entry Cost

Another major benefit of pistol crossbows is their affordability. Compared to full-size crossbows or compound bows, which often require a significant financial investment, pistol crossbows are relatively inexpensive. This low entry cost makes them accessible to casual users who want to enjoy target shooting without committing to expensive gear. Replacement parts such as bolts and strings are also inexpensive, helping to keep long-term ownership costs low.

Quiet Operation and Discreet Use

Pistol crossbows operate quietly since they rely entirely on mechanical energy rather than combustion or compressed air. This quiet performance is beneficial for backyard target practice where permitted by local laws. In survival or emergency scenarios, low noise output can be advantageous, as it minimizes attention and disturbance. The quiet nature of pistol crossbows also creates a more controlled and less intimidating shooting experience for beginners.

Maintenance and Reliability

Maintenance requirements for pistol crossbows are minimal. Regular inspection of the string, occasional waxing, and checking bolts for damage are usually sufficient to keep the crossbow in working condition. The absence of complex mechanical or electronic components reduces the risk of malfunction, making pistol crossbows reliable tools in simple or remote environments where advanced maintenance is not possible.

Limited Power and Performance

Despite their advantages, pistol crossbows suffer from limited power. Their relatively low draw weight results in reduced kinetic energy, which significantly limits penetration and stopping capability. This makes them unsuitable for medium or large game and ethically questionable for most hunting applications. In many regions, hunting regulations explicitly prohibit the use of pistol crossbows due to their insufficient power.

Short Effective Range

The effective range of a pistol crossbow is another major limitation. Most models are accurate only within a short distance, typically between ten and twenty meters. Beyond this range, bolt drop becomes more pronounced, accuracy decreases sharply, and environmental factors such as wind have a greater impact. This restricts pistol crossbows to close-range shooting and makes them impractical for long-distance or precision-based activities.

Accuracy Challenges

Accuracy can also be an issue even within the effective range. The short limbs and compact frame provide less stability than larger crossbows, making the weapon more sensitive to hand movement and shooting posture. While some pistol crossbows include basic sights or allow for small optics, they cannot match the consistency and precision of full-size crossbows equipped with advanced targeting systems.

Manual Cocking and User Fatigue

Many pistol crossbows require manual cocking by pulling the string back with the hands. Over extended shooting sessions, this can lead to hand fatigue and reduced shooting comfort. For users with limited grip strength or joint issues, this process may become uncomfortable. Although some models feature cocking levers to reduce strain, this is not a universal feature across all designs.

Bolt Durability and Availability

Pistol crossbow bolts are shorter and lighter than standard arrows, which makes them more prone to bending, breaking, or getting lost. They are also not interchangeable with traditional archery arrows, limiting replacement options. Depending on the brand and region, sourcing replacement bolts locally may be difficult, requiring online purchases or reliance on specific manufacturers.

Legal and Safety Considerations

Legal regulations surrounding pistol crossbows vary widely by location. While they are often less regulated than firearms, some jurisdictions restrict their use in urban areas or prohibit their use for hunting altogether. Carrying a pistol crossbow in public spaces may also be subject to local laws or safety concerns. It is essential for users to understand and comply with applicable regulations before owning or operating one.

Final Verdict: Are Pistol Crossbows Worth It?

Pistol crossbows offer a unique combination of portability, affordability, and ease of use, making them ideal for recreational shooting, beginner training, and lightweight outdoor kits. However, their limited power, short range, and reduced accuracy mean they are not suitable for serious hunting or advanced shooting applications. When used responsibly and within their intended purpose, pistol crossbows can be enjoyable and practical tools, but understanding their limitations is key to making an informed decision.

If you want, I can expand this to 2,000+ words, SEO-optimize it for your niche, or rewrite it for a hunting or survival-focused blog.

Shooting Range Safety Rules: A Beginner-Friendly Guide

Shooting range safety comes down to a small set of rules followed every single time: keep the muzzle pointed in a safe direction, keep your finger off the trigger until you are ready to fire, treat every firearm as loaded, know your target and what is beyond it, and follow the range officer’s commands without exception. These habits do not change with experience level. A first-time shooter and a lifelong competitor follow the same core rules because range safety depends on consistency, not skill.

This guide explains the universal handling rules, how range commands work, what to do before and during a cease-fire, why eye and ear protection matter, and the hygiene steps that reduce lead exposure at indoor ranges. Range rules vary by facility, so always read and follow the posted rules and the range officer’s instructions at the range you are using.

The Core Firearm Safety Rules

The core firearm safety rules are the foundation of every range, and they apply whether you are handling a rifle, pistol, or shotgun. Most range incidents trace back to breaking one of these basics, so they are worth knowing before you ever step up to the firing line. The National Shooting Sports Foundation’s firearm safety rules are a useful authority reference for these habits.

Always Point the Muzzle in a Safe Direction

A safe direction is one where an accidental discharge would not strike a person or cause unintended harm. At a range, that almost always means pointing the muzzle downrange toward the backstop or target line. Never let the muzzle cross your body or another person, including while picking up, setting down, or carrying a firearm.

Keep Your Finger Off the Trigger Until Ready to Fire

Rest your trigger finger straight along the frame or receiver, outside the trigger guard, until your sights are on the target and you have decided to shoot. This single habit prevents many unintentional discharges and pairs naturally with safe stance and grip practice.

Treat Every Firearm as If It Is Loaded

Handle every firearm as though it can fire, even one you believe is empty. Visually and physically confirm the chamber is clear when you pick one up, and do not rely only on someone else’s word that it is unloaded.

Know Your Target and What Is Beyond It

Be sure of your target and the area behind and around it before firing. At a supervised range the backstop handles this, but you are still responsible for placing shots where the range allows and not firing at anything other than your authorized target.

How Range Commands Work

Range commands are verbal instructions a range safety officer uses to control what everyone on the line does at the same time. Following them immediately is one of the most important safety behaviors at any supervised range because they keep all shooters synchronized.

Common Commands You May Hear

  • Commence fire or the range is hot: shooters at the firing line may load and fire at authorized targets.
  • Cease fire: stop shooting immediately, take your finger off the trigger, and wait for the next instruction. Anyone may call a cease-fire if they see a hazard.
  • Make safe or unload and show clear: unload the firearm, remove the magazine if applicable, open the action, and confirm the chamber is empty.
  • The range is cold: no one handles firearms. This is when shooters may go forward of the line to set or retrieve targets.

Exact command wording can vary by facility, so the range officer and posted range rules always override generic online guidance.

Never Touch a Firearm During a Cold Range

When the range is cold and people may be downrange, do not touch any firearm for any reason, even to case it or move it. Step back from the bench and keep your hands away until the range is called hot again.

Before You Step to the Firing Line

Before you approach the firing line, confirm a few things so you arrive ready and do not create a hazard while setting up. Good preparation reduces fumbling on the line, which is where many handling mistakes happen.

  • Bring firearms to the range unloaded and cased unless the range directs otherwise.
  • Read posted rules, ammunition restrictions, target rules, and lane procedures.
  • Put on eye and ear protection before entering or approaching the active firing area.
  • Keep ammunition, magazines, and gear organized so you do not need to turn around with a firearm in hand.

Cease-Fire Behavior

A cease-fire means stop firing now, and it can be called by the range officer or by any shooter who sees a problem. Stop shooting, remove your finger from the trigger, keep the muzzle pointed in a safe direction, and wait for instructions.

Do not finish your shot, do not turn around with the firearm in hand, and do not ask why before making the firearm safe if instructed. Once the situation is resolved, the range officer will call the range hot again before anyone resumes.

Eye and Ear Protection

Eye and ear protection are required at most ranges because gunfire produces noise that can permanently damage hearing and debris that can injure unprotected eyes. The OSHA eye and face protection overview is a helpful source for understanding why eye protection matters, although range-specific rules still come from the facility.

Hearing Protection

Use earplugs, earmuffs, or both together for higher protection, especially indoors or next to large-caliber firearms. Hearing damage from impulse noise can be permanent and is not always noticeable right away.

Eye Protection

Wear impact-rated safety glasses to guard against ejected casings, fragments, and unburned powder. Side coverage helps, and ordinary prescription glasses are not a substitute unless they meet an appropriate safety rating.

Indoor Range Lead and Noise Hygiene

Indoor ranges carry two extra considerations: lead exposure from primer residue and airborne particles, and concentrated noise in an enclosed space. The CDC/NIOSH indoor firing range guidance explains why ventilation, hygiene, and hearing protection matter in these spaces.

  • Wash your hands and face before eating, drinking, or leaving the range.
  • Avoid eating, drinking, or touching your face on the firing line.
  • Keep range clothing separate from other laundry when practical.
  • Use strong hearing protection indoors because reflected sound can make gunfire feel louder.

A Simple Range Safety Checklist

Use this quick checklist before and during a range trip. It is not a replacement for facility rules, but it helps keep the most important habits visible.

  • Firearm transported unloaded and cased.
  • Posted range rules and range officer instructions read and understood.
  • Eye protection on and appropriate for impact risk.
  • Ear protection on, doubled up indoors or near louder firearms when needed.
  • Muzzle always pointed downrange in a safe direction.
  • Finger off the trigger until ready to fire.
  • Every firearm treated as loaded.
  • Target and backstop confirmed before firing.
  • Immediate stop on any cease-fire call.
  • No firearm handling when the range is cold and people are downrange.
  • Hands and face washed before eating or leaving the range.

Frequently Asked Questions

What are the most important shooting range safety rules?

The most important rules are to keep the muzzle pointed in a safe direction, keep your finger off the trigger until ready to fire, treat every firearm as loaded, know your target and what is beyond it, and follow the range officer’s commands immediately.

Can anyone call a cease-fire at a shooting range?

Yes. Any shooter who sees a hazard can call cease-fire. Everyone on the line should stop firing immediately, remove their finger from the trigger, and wait for instructions.

Do I need both eye and ear protection at the range?

Yes. Eye protection guards against ejected casings and fragments, and ear protection helps reduce hearing risk from gunfire noise. Wear both whenever you are on or near an active firing line.

Why is lead hygiene important at indoor ranges?

Indoor shooting can produce airborne lead particles and residue from primers. Washing your hands and face, avoiding food and drink on the line, and separating range clothing help reduce exposure.

Are shooting range rules the same everywhere?

The core handling rules are consistent, but each range sets its own rules for calibers, rapid fire, holster use, targets, and procedures. Always follow the posted rules and the range officer at the facility you are using.

FFP vs SFP Rifle Scopes: What Is the Difference?

The difference between a first focal plane (FFP) and second focal plane (SFP) rifle scope is how the reticle behaves when you change magnification. In an FFP scope, the reticle grows and shrinks with the image, so hold marks keep the same value at any power. In an SFP scope, the reticle stays the same visible size, so hold marks are exact only at one calibrated magnification, usually the highest.

That one behavior drives most of the practical choice. FFP is useful when you rely on reticle holds at changing magnification. SFP is often simple and visible for general hunting where many shots use a center aim. This article explains the tradeoffs without ranking products or recommending brands.

Table of Contents
  1. How a First Focal Plane (FFP) Scope Works
  2. How a Second Focal Plane (SFP) Scope Works
  3. FFP vs SFP for Hunting
  4. FFP vs SFP for Range and Target Shooting
  5. Reading Holdover and Ranging Marks Safely
  6. FFP vs SFP Comparison Table
  7. Related Rifle Scope Guides
  8. Frequently Asked Questions

How a First Focal Plane (FFP) Scope Works

In a first focal plane scope, the reticle is positioned so it scales with the target image as magnification changes. When you zoom in, the reticle appears larger. When you zoom out, it appears smaller. Because the reticle and image scale together, the spacing between the reticle marks stays correct relative to the target at every magnification.

What FFP Means in Practice

The main benefit is consistency for reticle holds. If a reticle mark represents a certain angular value, that value remains useful across the zoom range. The tradeoff is visibility. At low magnification the reticle can look very thin, while at high magnification it can look thick enough to cover small details.

That does not automatically make FFP the premium choice for every shooter. It simply means the scope is more forgiving when you change magnification and still want to use the reticle for wind or elevation holds. The best fit depends on whether you actually use those marks in the field or mostly dial, center-hold, and shoot at familiar distances.

How a Second Focal Plane (SFP) Scope Works

In a second focal plane scope, the reticle stays the same visible size while the target image grows and shrinks as you zoom. That makes the reticle look familiar at every power, but it also means the spacing between hold marks is exact only at one calibrated magnification.

What SFP Means in Practice

The practical benefit is a reticle that remains easy to see at low power and does not become overly thick at high power. The tradeoff is that holdover and ranging marks need the correct calibrated power. If you use those marks at the wrong magnification, they can mislead you.

This is why many hunting scopes still use SFP. A visible reticle at dawn, dusk, or inside cover can matter more than all-power hold accuracy. If you mostly use the center crosshair, or if you keep the scope on its highest calibrated power before using hold marks, SFP can be simple, predictable, and easier to read quickly.

For basic definitions, neutral references such as telescopic sight and reticle explain the terms at a high level. For your own scope, the manual is still the authority for calibrated magnification and reticle subtensions.

FFP reticles scale with magnification, while SFP reticles keep the same visible size.

FFP vs SFP for Hunting

For general hunting, SFP remains popular because the reticle is easy to see at low magnification, especially in timber, low light, and fast target-acquisition situations. If most shots use a center aim and happen at moderate distance, the calibrated-power limitation may not matter much.

When a Hunter Might Prefer FFP

A hunter who regularly uses holdover marks at changing distances may prefer FFP because the marks stay valid as magnification changes. The tradeoff is that the reticle can be harder to see on the lowest powers. If you hunt with LPVOs, our guide on whether a 1-4×24 LPVO is good for hunting adds more low-power context.

For woods hunting, short lanes, and quick shots, SFP often feels more natural because the reticle remains bold enough to pick up fast. For open-country hunting, mixed distances, or situations where you may hold for wind without touching the turrets, FFP can reduce mental steps. The practical question is not which focal plane is more advanced; it is which one gives you fewer mistakes under your normal shot conditions.

FFP vs SFP for Range and Target Shooting

For range work with varied distances, reticle holds, and target transitions, FFP can be easier to manage because the marks remain valid across the zoom range. You can choose the magnification that gives the best target view without changing what the marks mean.

When SFP Still Works Well at the Range

SFP can still work well for known-distance shooting, especially when you keep the scope at one magnification or use turret adjustments instead of reticle holds. If your magnification stays constant and your target distance is known, focal plane becomes less important than clear tracking, a good zero, and repeatable fundamentals.

Target size also matters. On small aiming points at high magnification, some shooters prefer the finer apparent reticle of an SFP scope. On varied target arrays where you move between magnifications, FFP can be easier because the reticle math does not change. Either way, confirm the scope on paper before trusting a reticle chart or ballistic app.

Reading Holdover and Ranging Marks Safely

Holdover and ranging marks are only useful when you know how your scope calibrates them. On an SFP scope, check the manual for the exact magnification where the reticle subtensions are correct. On an FFP scope, marks scale across magnification, but you still need to understand the reticle unit and confirm your zero.

Focal plane does not replace sight-in work. Zero the rifle normally and verify your setup before relying on any reticle mark. Our step-by-step rifle scope sight-in guide covers the zeroing side of the process.

Before buying, look for three details in the product manual or reticle guide: the reticle unit, the calibrated magnification if it is SFP, and whether the reticle design is visible enough at the lowest power you expect to use. Those details are more useful than marketing labels because two scopes can both be FFP or SFP and still feel very different behind the rifle.

FFP vs SFP Comparison Table

FeatureFirst Focal Plane (FFP)Second Focal Plane (SFP)
Reticle size as you zoomGrows and shrinks with magnificationStays the same visible size
Hold marks accurate atAny magnificationOne calibrated power, often highest
Low-power visibilityCan look thinUsually easier to see
High-power appearanceCan look thickStays fine and consistent
Common strengthVaried-distance holdover useSimple hunting visibility
Main cautionReticle visibility at extremesMarks can mislead at wrong power

Frequently Asked Questions

What is the main difference between FFP and SFP scopes?

FFP reticles scale with magnification, so reticle marks stay valid at any power. SFP reticles stay the same visible size, so reticle marks are exact only at one calibrated magnification.

Is FFP or SFP better for hunting?

Neither is always better. SFP is common for general hunting because the reticle stays easy to see. FFP can help hunters who use hold marks at changing magnification and varied distances.

Do SFP reticle marks work at all magnifications?

No. SFP hold and ranging marks are exact at the scope’s calibrated magnification. Check the manual for that power before relying on the marks.

Why does an FFP reticle look thin at low power?

Because an FFP reticle scales down as magnification decreases. That scaling keeps the marks valid, but it can make the reticle harder to see at the lowest powers.

Does focal plane affect my zero?

No. Focal plane affects reticle behavior as magnification changes. You still zero the scope normally and verify the setup with live-fire confirmation.

What to Pack for a Day Hunting: The Complete Field Checklist

For a one-day hunt, pack the gear that keeps you legal, visible, hydrated, oriented, warm enough, and able to handle small problems without overloading your pack. The exact list changes by species, season, state rules, weather, terrain, and how far you will be from the truck. Use this as a field checklist, then confirm current regulations and property rules before you leave.

Table of Contents
  1. Quick Answer
  2. Day Hunting Pack Checklist
  3. Legal and Safety Items
  4. Navigation and Communication
  5. Water, Food, and Weather Protection
  6. Field Care and Cleanup
  7. How to Organize the Pack
  8. Common Packing Mistakes
  9. FAQ
  10. Final Takeaway

Quick Answer

For a day hunt, pack your license and tags, required blaze orange or visibility gear, water, snacks, first aid, navigation, communication, weather layers, headlamp, knife or field-care items, gloves, bags, and any species-specific gear required by the hunt. Keep the pack light enough to carry all day, but do not cut safety, legal, or weather-preparation items just to save a few ounces.

A good day-hunting pack starts with legal items, visibility, water, navigation, first aid, weather layers, and field-care basics.

Day Hunting Pack Checklist

  • License, tags, permits, and ID: Keep them dry and easy to reach.
  • Current regulations: Save or print season dates, limits, legal methods, and property rules.
  • Visibility gear: Pack required blaze orange or other visibility items for your state and hunt type.
  • Water and snacks: Carry more water than you expect to need, especially in warm weather or steep terrain.
  • Navigation: Bring a charged phone, map, compass, GPS, or offline map plan.
  • Communication: Tell someone your plan and carry a way to contact help if coverage allows.
  • First aid and emergency items: Include blister care, bandages, medications, fire starter, and an emergency blanket.
  • Weather layer: Pack rain, wind, or insulation layers based on the forecast.
  • Headlamp: Carry a headlamp even for morning-only or afternoon-only hunts.
  • Field-care items: Gloves, bags, wipes, and a knife where appropriate and legal.

The National Park Service Ten Essentials framework is useful for thinking beyond hunting gear: navigation, light, sun/weather protection, first aid, shelter, water, food, and repair items all matter outdoors. Hunter education resources such as Hunter Ed are also helpful reminders that field preparation and safe decisions go together.

Start with what proves you are legal and what keeps you visible. A license, tag, permit, written permission where needed, and saved regulation summary should be packed before any comfort item. Do not rely on memory for season dates, legal methods, tagging rules, or public-land boundaries. Regulations can change by state, unit, species, season, and property type.

Visibility and Identification

Blaze orange or other visibility requirements vary, so check your state wildlife agency before hunting. Even where it is not required, visibility can matter around other hunters, access roads, and low-light movement. Keep tags, ID, and permission paperwork in a waterproof pouch or phone folder that works offline.

First Aid and Emergency Basics

A small first-aid kit should cover cuts, blisters, minor sprains, personal medication, and basic discomfort. Add a whistle, fire starter, emergency blanket, and a simple repair item such as tape or cord. The goal is not to pack for every disaster; it is to avoid turning a small problem into a long walkout problem.

If you are new or returning after a long break, hunter education organizations such as IHEA-USA are a useful starting point for safety mindset, responsible planning, and understanding why preparation matters before the hunt begins.

Carry a navigation plan that still works if cell service drops. Offline maps, a paper map, compass, GPS, or marked access points can keep a short hunt from becoming confusing after dark. If you use a phone, start with a full battery and consider a small power bank for cold weather or long sits.

Tell someone where you are going, where you plan to park, and when you expect to return. If your route changes, update that person when possible. This simple habit is one of the most valuable things in your pack even though it weighs nothing.

Water, Food, and Weather Protection

Water is easy to underpack because day hunts feel short. Bring enough for the weather, terrain, and distance from the vehicle. Add compact snacks that will not crush easily and that you will actually eat when cold, tired, or focused on the hunt.

Layer for the Worst Part of the Day

Pack for the coldest, wettest, or windiest part of the hunt, not just the weather at the truck. A light rain layer, gloves, warm hat, or insulating layer can make a long sit safer and more comfortable. Avoid cotton layers when wet weather or sweating is likely.

Field Care and Cleanup

If your hunt could involve field care, pack disposable gloves, game bags or legal transport materials, wipes, a sharp knife, and a small trash bag. Keep these items separate from food and clothing. Know the tagging, evidence-of-sex, transport, and check-in requirements before the hunt, because those rules are not the same everywhere.

For bird, small-game, or waterfowl hunts, your field-care kit may look different from a deer hunt. Keep the list species-specific rather than carrying every tool you own.

How to Organize the Pack

Put high-use and safety items where you can reach them without dumping the pack. License, tags, headlamp, first aid, gloves, water, and navigation should be easy to find. Less urgent gear can ride deeper in the pack. Use small pouches so loose items do not sink to the bottom.

Light but Not Bare

The best day-hunting pack is not the heaviest one or the emptiest one. It is the pack that covers likely needs without making you slow, noisy, or uncomfortable. After each hunt, remove what you did not use, replace what you did use, and keep the legal/safety core consistent.

Common Packing Mistakes

  • Forgetting tags, permits, or written permission.
  • Assuming last year’s regulations are still current.
  • Skipping water because the hunt is “only a few hours.”
  • Carrying a headlamp with weak or untested batteries.
  • Overpacking comfort gear while underpacking emergency basics.
  • Leaving field-care gloves or bags in another pack.
  • Failing to tell someone the hunt plan.

FAQ

What should every day hunter pack first?

Pack license, tags, required visibility gear, water, navigation, communication, first aid, weather protection, and a headlamp first. Then add species-specific items.

Do I need a full survival kit for a day hunt?

You do not need a huge pack, but you should carry basic emergency items for weather, darkness, injury, and navigation problems. A day hunt can still become longer than planned.

Should I pack different gear for public land?

Often, yes. Public land may require extra attention to boundaries, parking rules, hunter visibility, pack-out distance, and current agency regulations.

How much water should I bring?

Bring enough for the weather, terrain, and expected time out, with extra margin for a delayed return. Heat, steep terrain, and long walks increase the need quickly.

Final Takeaway

A good day-hunting pack is built around legal readiness, safety, weather, navigation, hydration, and field care. Keep it light, but do not make it fragile. Confirm current rules, tell someone your plan, and pack the items that help you come home safely even when the hunt changes.

Thermal Optics for Beginners

Thermal optics help you see heat differences, not visible light. Instead of showing color and detail the way a normal scope or binocular does, a thermal device creates an image from infrared energy. For beginners, the key idea is simple: thermal can help detect warm objects in darkness, brush, fog, or uneven light, but it does not identify everything perfectly and it does not replace safe target identification.

This guide explains thermal optics in plain language: what they do, where they help, where they struggle, and what beginners should understand before using one for hunting, observation, or range work. It is not a product roundup and it does not include affiliate links.

Table of Contents

What Thermal Optics Do

Thermal optics detect infrared radiation and translate heat differences into a visible image. Warm animals, people, vehicles, rocks, trees, and ground surfaces can appear differently depending on temperature, distance, weather, and the device settings.

The general technology is related to thermography, where temperature differences are turned into an image. In the hunting and shooting world, thermal optics are usually used for detection, scanning, and sometimes aiming where legal and appropriate.

Thermal vs. Night Vision

Thermal Imaging

Thermal imaging works from heat contrast. It can be useful in total darkness because it does not need visible light the same way traditional night vision does. It can also help spot warm objects against a cooler background.

Night Vision

Night vision amplifies available light or uses an infrared illuminator. It often shows more natural scene detail than thermal, but it may struggle more in complete darkness without illumination. It can also be affected by bright lights and reflective surfaces.

Which Is Better?

Neither is automatically better. Thermal is often stronger for detection, while night vision can be better for detail and navigation. Many serious users think of them as different tools rather than direct replacements.

Main Types of Thermal Optics

Thermal Monoculars

A thermal monocular is a handheld scanner. It is often the simplest beginner-friendly thermal tool because it can be used for observation without pointing a firearm at anything. For many hunters, scanning with a handheld device is safer and more practical than using a weapon-mounted optic for every look.

Thermal Scopes

A thermal scope is designed for aiming where legal. It must be mounted, zeroed, and used according to the firearm, optic, and local hunting laws. Beginners should not treat a thermal scope as a shortcut around target identification or backstop awareness.

Clip-On Thermal Devices

A clip-on thermal device mounts in front of another optic. These can be useful, but setup is more complex. Alignment, rail space, zero shift, optical compatibility, and weight all matter. For beginners, clip-ons usually require more guidance than handheld scanners.

Specs Beginners Should Understand

  • Sensor resolution: higher resolution usually means more detail, but lens quality and processing also matter.
  • Refresh rate: a smoother image can help when scanning or tracking movement.
  • Detection range: seeing heat at distance is not the same as identifying the target safely.
  • Base magnification: too much starting magnification can make scanning harder.
  • Field of view: wider field of view helps beginners find and follow objects.
  • Battery life: thermal devices use power quickly, especially in cold weather.
  • Weather rating: hunting and outdoor use demand realistic durability and water resistance.

Do not judge thermal optics by one big number. A balanced device with usable field of view, clear controls, good battery life, and realistic range can be more helpful than a high-spec device that is heavy, confusing, or poorly matched to your use case.

Where Thermal Optics Help

Thermal optics can help with detection in low light, locating animals against cooler backgrounds, scanning fields, recovering awareness after sunset where legal, and checking areas where visible-light optics struggle. They can also be useful for property observation, wildlife viewing, and some range-support tasks.

The best use is usually detection first, decision second. Seeing a heat signature should start a careful identification process, not end it.

Thermal Optics Limitations

Thermal does not show the world the way your eyes do. It may not show antlers clearly, may flatten background detail, and may struggle when the environment has similar temperatures. Heavy rain, humidity, warm rocks, recently driven vehicles, sun-heated ground, and thick cover can all make interpretation harder.

Beginners should be especially careful with detection range claims. A device might detect a heat source far away, but detection is not the same as recognition or safe identification. Ethical and legal decisions require more than a glowing shape on a screen.

First-Use Checklist

Before using thermal optics in the field, learn the controls in a safe, non-hunting setting. Adjust the focus, brightness, contrast, color palette, and calibration settings until you understand what each control changes. A beginner who cannot quickly adjust focus or brightness may misread the image when conditions change.

  • Charge the battery and carry a legal, safe backup lighting/navigation option.
  • Confirm whether the device is handheld, weapon-mounted, or clip-on and use it only as intended.
  • Check local hunting rules for species, season, public land, and nighttime use.
  • Practice identifying safe backgrounds and known objects before relying on field interpretation.
  • Do not use thermal detection alone as final target identification.

Thermal optics do not change the basic rules of firearm safety. Review safety guidance from sources like the NSSF, keep the muzzle in a safe direction, and never use an optic to “check” something you are not willing and legally allowed to aim at.

Thermal use for hunting varies by state, species, season, public land rules, and time of day. Always check the current wildlife agency rules for your location before using thermal gear in the field. If the law or situation is unclear, do not guess.

FAQ

Can thermal optics show objects behind walls?

No. Consumer thermal optics generally detect surface heat differences. Movie-style “wall vision” is not how normal hunting or observation thermal gear works.

Can thermal optics work in complete darkness?

Yes, thermal optics can work without visible light because they detect heat contrast. Performance still depends on the device, weather, distance, and the temperature contrast in the scene.

Is thermal better than night vision for hunting?

Thermal is often better for detection, while night vision may show more natural detail. The better choice depends on legal use, terrain, species, budget, and how you plan to identify the target safely.

Do beginners need a thermal scope?

Not always. A handheld thermal monocular can be a safer first thermal tool because it lets you scan without aiming a firearm. A thermal scope adds mounting, zeroing, legal, and safety responsibilities.

What is the biggest beginner mistake with thermal optics?

The biggest mistake is treating detection as identification. A heat signature tells you something warm is there. It does not automatically prove species, legality, backstop, or shot safety.

Final Takeaway

Thermal optics are powerful detection tools, but beginners should understand their limits. Choose the type that matches your use, learn the key specs, follow current laws, and treat every heat signature as the start of careful identification. Good thermal use is patient, legal, and safety-first.

Beginners Guide to Compound Bow Accessories

The most useful compound bow accessories for beginners are the ones that improve safety, fit, consistency, and simple practice habits: an arrow rest, bow sight, peep sight, release aid, stabilizer, quiver, wrist sling, string wax, bow case, and basic maintenance tools. You do not need every upgrade on day one. Start with the accessories that match your bow, your draw length, your arrows, and the type of shooting you plan to do.

This guide explains what each accessory does, which ones beginners should prioritize, and where to slow down and get help from a pro shop or coach. It is a support guide, not a product roundup, so there are no affiliate links or product CTAs.

Table of Contents

Start With Fit and Safety

Before buying accessories, make sure the bow itself fits. Draw length, draw weight, arrow spine, release style, and rest setup all affect whether an accessory helps or creates frustration. A beginner with a poorly fitted bow can spend money on upgrades and still shoot inconsistently.

For safety, follow range rules and use qualified instruction when possible. USA Archery’s safety resources are a good reminder that equipment setup and safe range behavior belong together. Never dry-fire a compound bow, and leave shop-level bow work, major disassembly, and cam/string tuning to people with the right tools and knowledge.

A good beginner setup should feel simple enough that the archer can focus on stance, anchor, sight picture, and release execution. If accessories make the bow heavier, noisier, more confusing, or harder to draw safely, they are probably not the right first upgrade.

Essential Compound Bow Accessories

Arrow Rest

The arrow rest supports the arrow before and during the shot. Common beginner options include containment rests and drop-away rests. A containment rest can be simpler for new shooters because it helps keep the arrow controlled while learning form.

Bow Sight

A bow sight gives the shooter a repeatable aiming reference. Beginners often start with a multi-pin sight because it is straightforward and affordable. The number of pins should match realistic practice distances rather than looking advanced.

Peep Sight

A peep sight sits in the bowstring and helps align the eye with the sight housing. Peep size, height, and rotation matter. A pro shop can help install it correctly so your anchor position stays natural.

Release Aid

A release aid helps activate the string more consistently than fingers on many compound setups. Wrist-strap releases are common for beginners. The release should fit the shooter’s hand and allow clean shot execution without punching or jerking.

Accuracy and Consistency Upgrades

Stabilizer

A stabilizer can reduce vibration and help the bow hold steadier. Beginners do not need an extreme target setup. A modest stabilizer can make the bow feel calmer without adding too much front weight.

Wrist Sling

A wrist sling helps the shooter avoid gripping the bow too tightly after the shot. It is a small accessory, but it can support better form because the shooter does not feel the need to grab the handle.

D-Loop

A D-loop gives the release aid a consistent connection point. It should be installed correctly and checked for wear. If the loop frays, shifts, or looks damaged, replace it before shooting.

Carrying, Storage, and Care

Quiver

A quiver holds arrows safely and keeps broadheads or field points organized. Hunters may prefer a bow-mounted quiver, while target shooters may like a hip quiver. Choose based on how you shoot, not only how the bow looks.

Bow Case

A case protects the bow, sight, rest, strings, and cams during travel. Even a budget bow can be knocked out of alignment if it is loose in a truck bed or closet. A case is boring, but it saves headaches.

String Wax and Basic Tools

String wax helps protect the bowstring, but it should be used according to the bowstring maker’s guidance. Basic tools may include Allen keys, a bow square, and serving-related items, but beginners should leave high-risk tuning and press work to a qualified shop.

What Beginners Can Wait To Buy

Beginners can usually wait on expensive target stabilizer systems, advanced sight tapes, lens kits, back-bar systems, hinge releases, specialty rests, and elaborate tuning tools. Those accessories can be useful later, but they make more sense after your draw length, anchor, release execution, arrows, and practice distances are consistent.

A compound bow is already a mechanical system with cams, cables, limbs, and a riser working together. Adding accessories before the base setup is right can make troubleshooting harder.

Use a simple priority order: safety and fit first, arrow support second, aiming reference third, release consistency fourth, then comfort and storage. If an accessory does not help one of those categories, it can probably wait until you have more range time.

Questions To Ask at the Pro Shop

A good pro shop visit can save a beginner from buying accessories that do not fit the bow or the archer. Bring the bow, arrows, and release if you already own them. Ask the technician to check draw length, draw weight, arrow spine, rest position, peep height, D-loop condition, and sight alignment.

Also ask which changes are urgent and which can wait. A shop may recommend a simple rest adjustment or peep correction before any new accessory. That kind of advice is often more valuable than another gadget, especially for a new archer still building repeatable form.

Simple Beginner Accessory Checklist

  • Bow fitted for draw length and manageable draw weight.
  • Correct arrows matched to the bow and use case.
  • Arrow rest installed and checked.
  • Bow sight set for realistic practice distances.
  • Peep sight aligned with natural anchor position.
  • Release aid that fits the shooter and supports clean execution.
  • Quiver or safe arrow-carrying method.
  • Bow case for transport and storage.
  • String care plan and routine inspection habit.
  • Pro-shop or coach support for tuning questions.

FAQ

What compound bow accessory should a beginner buy first?

Start with fit and safety essentials: correct arrows, a reliable rest, a simple sight, a properly installed peep, and a release aid that fits. A case is also important for protecting the setup.

Do beginners need a stabilizer?

A modest stabilizer can help, but it is not the first thing to chase if the bow does not fit or the shooter lacks consistent form. Fit, arrows, rest, sight, peep, and release matter more at the start.

Can I install compound bow accessories myself?

Some simple accessories are beginner-friendly, but peeps, D-loops, press-related work, tuning, and cam/string work are better handled by a qualified pro shop unless you have proper tools and training.

Are hunting accessories different from target accessories?

Yes. Hunting setups often prioritize durability, quietness, practical weight, and arrow carrying. Target setups may prioritize adjustability, balance, and precision at known distances.

Should youth archers use the same accessories?

Youth archers need fit-first accessories, manageable draw weight, safe supervision, and gear sized for their body. Avoid heavy stabilizers or complex setups that make learning harder.

Final Takeaway

The best compound bow accessories for beginners are practical, safe, and matched to the archer. Start with fit, arrows, rest, sight, peep, release, quiver, case, and basic care. Add advanced upgrades only after your form and setup are consistent enough to benefit from them.

Exit mobile version