What Magnification Do Snipers Use? Complete Guide

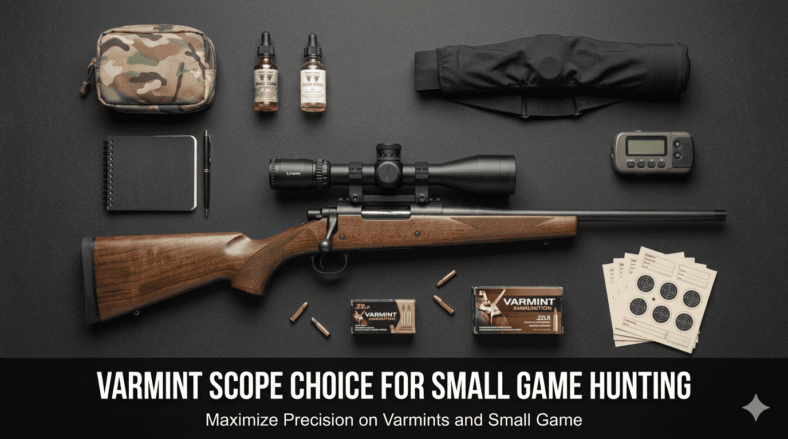
When people think about snipers, they often imagine extremely powerful scopes capable of zooming targets from miles away. Movies often show snipers using unrealistic magnification levels, but in real-world shooting, choosing the right scope magnification is far more practical and technical.

The truth is: professional snipers do not always use maximum zoom. Instead, they select magnification based on distance, mission type, environment, target size, and shooting conditions.

In this detailed guide, you’ll learn:

  • What magnification snipers actually use
  • Military vs police sniper scope preferences
  • Best magnification for different shooting distances
  • Fixed vs variable sniper scopes
  • Why too much magnification can hurt accuracy
  • Recommended scope ranges for long-range shooting

Understanding Scope Magnification

Scope magnification refers to how much closer the target appears through the optic.

For example:

  • A 10x scope makes the target appear 10 times closer
  • A 20x scope makes it appear 20 times closer

If a target is 1,000 yards away:

  • At 10x magnification, it appears like it’s 100 yards away
  • At 20x magnification, it appears like it’s 50 yards away

Most sniper scopes use variable magnification systems such as:

  • 3-15x
  • 5-25x
  • 7-35x

This allows shooters to adjust zoom depending on the situation.

What Magnification Do Military Snipers Use?

Most military snipers commonly use scopes in the range of:

3x to 25x Magnification

However, the “sweet spot” for many real-world sniper engagements is:

10x to 15x Magnification

Even at extremely long distances, many snipers avoid excessive zoom because it can reduce field of view and make tracking targets harder.

Common Military Sniper Scope Magnifications

Scope TypeTypical Magnification
Standard sniper scope3-15x
Long-range sniper scope5-25x
Extreme long-range7-35x
Designated marksman rifle (DMR)1-8x or 2-10x
Urban sniper setups3-12x

Why Snipers Don’t Always Use Maximum Zoom

Many beginners believe higher magnification automatically means better accuracy.

That is not true.

Professional snipers often lower magnification because:

1. Wider Field of View

Lower magnification helps shooters:

  • Spot movement
  • Track targets
  • Observe surroundings
  • Maintain situational awareness

At extremely high zoom levels, the visible area becomes very narrow.

2. Better Stability

Higher magnification exaggerates every tiny movement.

At 25x magnification:

  • Heartbeat movement becomes noticeable
  • Breathing appears amplified
  • Rifle wobble becomes more distracting

Lower magnification provides a steadier sight picture.

3. Faster Target Acquisition

In combat situations, speed matters.

Using excessive magnification can slow down:

  • Target identification
  • Scope alignment
  • Follow-up shots

That’s why many military snipers operate around 10x–15x instead of max power.

4. Mirage Problems

Heat waves and atmospheric distortion become much more visible at high magnification.

This is called mirage.

At long distances, especially in hot environments:

  • 20x+ magnification may produce blurry images
  • Target visibility can worsen
  • Precision becomes harder

Sometimes reducing magnification actually improves clarity.

What Magnification Do Police Snipers Use?

Police snipers usually engage targets at shorter distances compared to military snipers.

Typical law enforcement sniper shots happen within:

  • 50 to 200 yards

Because of this, police snipers often use:

3-12x or 4-16x Scopes

They prioritize:

  • Fast target acquisition
  • Wide field of view
  • Precision at moderate ranges

Urban environments rarely require extreme magnification.

Best Magnification for Different Shooting Distances

100–300 Yards

Recommended magnification:

3x–9x

Perfect for:

  • Hunting
  • Tactical shooting
  • Patrol rifles
  • Beginner long-range practice

300–600 Yards

Recommended magnification:

6x–12x

Ideal for:

  • Precision shooting
  • Mid-range sniper work
  • DMR platforms

600–1,000 Yards

Recommended magnification:

10x–20x

Most sniper systems operate effectively in this range.

This is where scopes like 5-25x excel.

1,000+ Yards

Recommended magnification:

15x–30x

Used for:

  • Extreme long-range shooting
  • Competitive precision rifle shooting
  • Anti-material rifles

However, many shooters still dial back magnification for better clarity.

Fixed Power vs Variable Power Sniper Scopes

Fixed Power Scopes

These scopes stay at one magnification level.

Example:

  • Fixed 10x scope

Advantages:

  • Simpler design
  • More durable
  • Often lighter
  • Reliable tracking

A famous example is the military use of fixed 10x scopes on sniper rifles like the M40.

Variable Power Scopes

These allow zoom adjustment.

Example:

  • 5-25×56 scope

Advantages:

  • Flexible for multiple distances
  • Better adaptability
  • Improved observation capability

Most modern sniper rifles now use variable optics.

Popular Sniper Scope Magnifications Used Today

5-25×56

One of the most popular long-range sniper configurations.

Used for:

  • Military applications
  • Precision rifle competitions
  • Long-range hunting

Excellent balance of:

  • Low-end usability
  • High-end precision

3-18×50

A versatile tactical setup.

Popular among:

  • Tactical shooters
  • Law enforcement
  • Designated marksmen

Good for both close and long-range engagements.

7-35×56

Designed for extreme long-range precision.

Typically used in:

  • PRS competitions
  • ELR (Extreme Long Range) shooting

Not always practical for combat use.

Does Higher Magnification Improve Accuracy?

Not directly.

Magnification only helps you see the target more clearly.

Accuracy actually depends on:

  • Rifle quality
  • Ammunition consistency
  • Shooter skill
  • Wind reading
  • Trigger control
  • Ballistic knowledge

A poor shooter with a 35x scope will still miss.

An experienced sniper can make accurate shots with moderate magnification.

What Magnification Did Famous Snipers Use?

Carlos Hathcock

Legendary U.S. Marine sniper.

Used a fixed:

8x Unertl Scope

Despite the relatively low magnification, he achieved incredible long-range accuracy.

Modern U.S. Army Snipers

Commonly use optics like:

  • 3-20x
  • 5-25x

Depending on rifle platform and mission.

Competitive Precision Shooters

Often use:

  • 7-35x
  • 8-40x

Because competition environments differ from combat situations.

Best Magnification for Beginners

If you are new to long-range shooting, a scope around:

4-16x or 5-25x

is usually ideal.

These provide:

  • Enough zoom for distance shooting
  • Practical low-end magnification
  • Flexibility for learning

Avoid starting with ultra-high magnification optics unless you specifically shoot extreme long range.

Choosing the Right Objective Lens Size

Magnification works together with objective lens size.

Examples:

  • 5-25×56
  • 3-18×50

The last number represents the objective lens diameter in millimeters.

Larger objective lenses:

  • Gather more light
  • Improve low-light performance
  • Increase image brightness

But they also:

  • Add weight
  • Require higher mounting positions

Most sniper scopes use:

  • 50mm
  • 56mm objectives

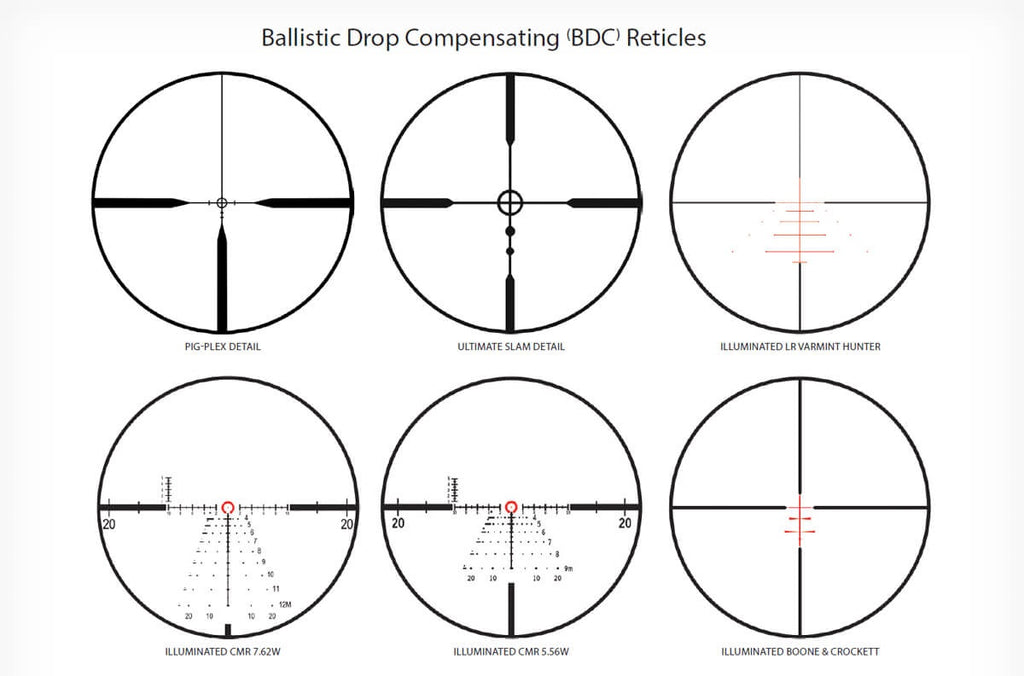
First Focal Plane vs Second Focal Plane

Many sniper scopes also differ in reticle design.

First Focal Plane (FFP)

The reticle scales with magnification.

Advantages:

  • Accurate holdovers at all zoom levels
  • Preferred for tactical shooting

Most professional sniper scopes use FFP.

Second Focal Plane (SFP)

The reticle stays the same size.

Advantages:

  • Easier reticle visibility
  • Often cheaper

Common in hunting scopes.

Realistic Sniper Engagement Distances

Despite Hollywood portrayals, most sniper engagements occur at moderate ranges.

Typical military sniper shots:

  • 300–800 yards

Most law enforcement sniper shots:

  • Under 100 yards

This is why practical magnification matters more than extreme zoom.

Common Myths About Sniper Magnification

Myth 1: More Zoom Is Always Better

False.

Too much zoom can reduce effectiveness.

Myth 2: Snipers Use 50x Scopes

Rarely.

Most professional sniper optics stay below 25x.

Myth 3: High Magnification Eliminates Skill Requirements

False.

Wind calls, breathing control, and fundamentals matter far more.

Recommended Magnification by Use Case

Use CaseRecommended Magnification
Hunting3-9x
Tactical shooting3-15x
Police sniper4-16x
Military sniper5-25x
PRS competition5-25x or 7-35x
ELR shooting7-35x+

Final Thoughts

In conclusion, snipers typically use scope magnifications ranging from 10x to 20x, depending on the mission, distance, and environment. While high magnification can help with long-range targeting, professional shooters prioritize clarity, stability, and field of view over extreme zoom. Choosing the right magnification is about balance, not simply using the highest power available.

Varmint Scope Choice for Small Game Hunting: The Complete Guide

Small game hunting is one of the most rewarding yet technically demanding forms of hunting. Unlike large game, where targets are bigger and more forgiving, small animals such as rabbits, squirrels, and prairie dogs require exceptional precision. That precision does not come only from your rifle or your shooting skillsit comes heavily from your scope. Choosing the right varmint scope is not just about buying an optic; it is about matching your equipment to the behavior of your target, the environment you hunt in, and the distances you shoot.

🎯 Why the Right Scope Makes All the Difference

When hunting small game, you are often dealing with animals that are quick, alert, and small in size. A squirrel’s vital zone, for example, is tiny compared to that of a deer. This means even slight inaccuracies can result in a miss or, worse, an unethical shot. A good scope helps you see clearly, aim precisely, and react quickly.

In dense forests, your target may appear suddenly and disappear just as fast. In open fields, you may be taking longer shots where bullet drop becomes a factor. A well-chosen scope bridges these different scenarios by giving you clarity, flexibility, and confidence. Without it, even a high-quality rifle cannot perform to its full potential.

🔍 Understanding Magnification in Real Hunting Situations

Magnification is often the first thing hunters focus on, but it is also one of the most misunderstood aspects of a scope. Many beginners assume that higher magnification automatically means better performance. In reality, magnification is about balance.

At lower magnification levels, such as 3x or 4x, your field of view is much wider. This makes it easier to locate and track moving animals, especially in wooded areas. It also allows for faster target acquisition, which is critical when hunting animals that rarely stay still.

As you increase magnification, you gain the ability to see fine details at longer distances. This is particularly useful in open terrain where targets may be 100 yards or more away. However, higher magnification narrows your field of view and can make it harder to find your target quickly. It can also amplify small movements, making your sight picture less stable.

For most small game hunters, a variable scope in the range of 3-9x or 4-12x provides the best versatility. It allows you to stay at low magnification when scanning for targets and then zoom in when you are ready to take a precise shot.

🎯 The Role of Objective Lens Size in Visibility

The objective lens, located at the front of the scope, plays a crucial role in how much light enters your optic. This directly affects how bright and clear your image appears, especially during low-light conditions such as early morning or late evening hunts.

A larger objective lens, such as 50mm, allows more light to enter, resulting in a brighter image. This can be beneficial when hunting at dawn or dusk. However, larger lenses also add weight and can make your rifle feel less balanced. They may also require higher mounting, which can affect your shooting comfort.

On the other hand, a 40mm objective lens strikes an excellent balance between brightness and practicality. It provides sufficient light for most hunting conditions while keeping your setup lightweight and easy to handle. For the majority of small game hunters, this size is more than adequate.

🧠 Reticle Choice and Its Impact on Accuracy

The reticle is your point of reference inside the scope, and its design can significantly influence your shooting experience. A simple duplex reticle, with its thicker outer lines and fine center crosshair, is often the preferred choice for beginners. It is easy to use and allows for quick target acquisition without unnecessary complexity.

More advanced reticles, such as mil-dot or BDC (bullet drop compensation), provide additional information that can be used for range estimation and holdover adjustments. These reticles become particularly useful when shooting at varying distances, as they help you compensate for bullet drop without adjusting your turrets.

While advanced reticles offer more functionality, they also require practice and understanding. For small game hunting, where shots are often taken within moderate distances, many hunters find that a simple reticle is more than sufficient. However, if you frequently hunt in open areas and take longer shots, a BDC reticle can be a valuable tool.

🔧 Parallax Adjustment and Why It Matters More Than You Think

Parallax is a phenomenon where the reticle appears to shift relative to the target when you move your eye behind the scope. This can lead to inaccuracies, especially when shooting at small targets.

Many basic scopes come with a fixed parallax setting, often set at 100 yards. While this may work reasonably well for general hunting, it is not ideal for small game, where shots may be taken at much shorter distances. In such cases, parallax error can become more noticeable and affect your accuracy.

Scopes with adjustable parallax, either through an adjustable objective (AO) or a side focus knob, allow you to fine-tune the focus for different distances. This not only improves clarity but also ensures that your reticle remains aligned with the target. For varmint hunting, where precision is critical, having parallax adjustment can make a significant difference.

💡 Glass Quality: The Hidden Factor Behind Performance

One of the most overlooked aspects of a scope is the quality of its glass. Two scopes may have the same magnification and lens size, but the difference in clarity can be dramatic.

High-quality glass with fully multi-coated lenses provides better light transmission, sharper images, and reduced glare. This is especially important when trying to identify small targets against complex backgrounds. Poor-quality optics can result in a blurry or dim image, making it difficult to distinguish your target clearly.

Investing in good glass does not necessarily mean buying the most expensive scope on the market. Many mid-range scopes offer excellent optical performance and represent great value for money. The key is to prioritize clarity and reliability over unnecessary features.

⚖️ Weight, Durability, and Real-World Use

When you are out in the field for hours, every ounce matters. A heavy scope can make your rifle cumbersome and tiring to carry, especially if you are moving frequently. Lightweight scopes are easier to handle and contribute to better overall balance.

Durability is equally important. Hunting conditions can be unpredictable, and your scope needs to withstand recoil, weather, and rough handling. Features such as waterproofing, fog-proofing, and shock resistance ensure that your optic performs reliably in all conditions.

A well-built scope not only lasts longer but also maintains its zero, which is essential for consistent accuracy.

🎯 Matching Your Scope to Your Hunting Style

Small game hunting is not a one-size-fits-all activity. The environment you hunt in plays a major role in determining the type of scope you need.

In dense forests, where shots are typically short and targets appear quickly, a lower magnification scope with a wide field of view is ideal. It allows you to acquire targets بسرعة and track movement بسهولة.

In open fields, where distances are greater, higher magnification becomes more useful. Here, the ability to zoom in and make precise adjustments can significantly improve your success rate.

For hunters who frequently switch between environments, a versatile variable scope provides the flexibility needed to adapt to different situations.

🏁 Final Thoughts

Choosing the right varmint scope for small game hunting is about understanding your needs and finding the right balance between performance and practicality. While it may be tempting to focus on specifications such as magnification and lens size, the true value of a scope lies in how well it performs in real hunting conditions.

A reliable scope with clear optics, appropriate magnification, and practical features will enhance your accuracy and overall hunting experience. It will allow you to take cleaner shots, reduce missed opportunities, and ultimately become a more effective hunter.

In the end, the best scope is not necessarily the most expensive one, but the one that fits your style, your environment, and your goals in the field.

Best Scope Magnification for 300 Yards

Selecting the best scope magnification for shooting at 300 yards is a decision that directly affects accuracy, comfort, and overall shooting performance. This distance represents a practical midpoint between short-range and long-range shooting, meaning the optic you choose must provide enough magnification for precise aiming while still maintaining a stable sight picture and a usable field of view. Many shooters assume that higher magnification always produces better accuracy, but real-world experience shows that balance is far more important than extreme zoom power.

At 300 yards, the target is distant enough that unaided vision or very low magnification makes precision difficult, yet it is still close enough that excessively high magnification can introduce problems such as visible reticle shake, reduced brightness, and slow target acquisition. Because of this, understanding how magnification interacts with clarity, stability, and shooting purpose is essential before choosing a scope.

Understanding the Importance of the 300-Yard Distance

Three hundred yards is a highly practical distance in real shooting scenarios. Many hunting shots occur within this range, rifle zeroing procedures are frequently confirmed around it, and range shooters commonly practice grouping at this distance to evaluate ammunition and rifle consistency. Environmental influences such as wind drift and bullet drop begin to matter noticeably here, so clear sight alignment and confident reticle placement become increasingly important. A properly selected magnification level helps the shooter read the target, hold steady, and execute a clean shot without unnecessary visual strain.

Ideal Magnification Range for 300-Yard Shooting

For most shooters and most applications, the ideal magnification range for 300-yard shooting falls roughly between six-power and twelve-power. Within this window, the shooter gains sufficient visual detail to place shots precisely while avoiding the instability and narrow viewing angle associated with very high magnification. Many experienced hunters and marksmen naturally settle around eight-power to ten-power at this distance because it offers a comfortable compromise between clarity and control.

Lower magnification levels can still be effective in certain situations. When shooting at large game animals, full-size steel plates, or other clearly visible targets, magnification in the three-to-five-power range may provide enough detail for ethical and accurate shooting. However, as target size decreases or precision requirements increase, limited magnification begins to restrict the shooter’s ability to refine aim.

Mid-range magnification—roughly six-power through nine-power—delivers the most balanced performance. Image clarity remains strong, the field of view is still practical, and reticle movement caused by natural body sway is not overly exaggerated. Because of this versatility, mid-range magnification is widely considered the most useful and forgiving choice for general 300-yard shooting.

Higher magnification between ten-power and twelve-power becomes helpful when the shooting task demands fine precision, such as paper-target grouping or benchrest stability. Beyond this level, the image often darkens, wobble appears exaggerated, and the field of view narrows, producing diminishing returns.

Fixed vs. Variable Power Scopes

Fixed-power optics, especially classic ten-power scopes, are valued for simplicity, durability, and often better optical clarity at the same price point. With fewer moving parts, they tend to provide consistent eye relief and long-term reliability. For shooters who frequently engage targets near 300 yards, a fixed ten-power scope can be an excellent dedicated solution.

Variable-power scopes offer flexibility across distances. Common ranges such as two-to-ten, three-to-nine, or four-to-twelve power allow shooters to dial down for closer shots and increase magnification for precision. This adaptability makes them especially useful for hunters and general-purpose rifle owners who encounter changing terrain and unpredictable shot opportunities.

1. Vortex Crossfire II 3‑9×40 Rifle Scope

This classic 3-9×40 scope is one of the most widely recommended all-around optics for 300-yard shooting. The range of magnification lets you clearly see targets without over-zooming, and the Dead-Hold BDC reticle helps with bullet drop compensation at mid-range.

Pros:

  • Excellent value and overall durability.
  • Good field of view and eye relief for faster target acquisition.
  • Reliable reticle for medium range holds.

Cons:

  • Slight chromatic aberration at higher power.
  • Turrets may feel softer compared with premium optics.

2. Leupold VX‑Freedom 3‑9×40 Rifle Scope

A trusted choice from one of the most established optics brands, this 3-9×40 offers clear glass, durable construction, and low-light performance — all important for accurate shooting at 300 yards and beyond.

Pros:

  • Crisp optics with near-edge clarity.
  • Very lightweight and rugged.
  • Lifetime warranty from Leupold.

Cons:

  • Reticle is not illuminated.
  • Basic reticle design not optimized for tactical holds.

3. UUQ 2.5‑10×40 Rifle Scope

This versatile 2.5-10×40 scope delivers flexibility from low magnification up to ten power, making it a good mid-range choice for shooting at 300 yards. It includes a red/green illuminated Mil-Dot reticle and is built to withstand moisture and shock.

Pros:

  • Illuminated reticle for dawn/dusk conditions.
  • Durable waterproof and fog-proof design.
  • Good value with included mounts.

Cons:

  • Illumination brightness levels are basic.
  • Not as crisp as premium glass brands.

4. Vortex Diamondback Tactical 4‑16×44 Rifle Scope

4.3•Attraction•Open

For shooters who want a larger magnification range, the 4-16×44 gives the option to dial into fine detail at 300 yards while maintaining a comfortable field of view. It’s a good all-purpose optic for both hunting and target work.

Pros:

  • Higher magnification helps with precision at distance.
  • Strong optical clarity for the price bracket.
  • Tactical turrets with solid feedback.

Cons:

  • Slightly heavier than lower-power scopes.
  • Overkill for close targets if not adjusted down.

5. Arken Optics SH4 GEN2 4‑16×50 Rifle Scope

This illuminated rifle scope offers a wide magnification range and a larger 50 mm objective lens to improve brightness — useful when shooting into late afternoon or shaded target areas. It’s often recommended as a value upgrade for shooters needing extra zoom and fine reticle detail.

Pros:

  • Illuminated reticle with zero stop option.
  • Strong light transmission from 50 mm objective.
  • Solid turret feel and first-focal-plane reticle option.

Cons:

  • Larger size adds weight.
  • May require careful mounting to balance the rifle.

Optical Features That Matter Beyond Magnification

Magnification alone does not determine shooting success. Glass quality strongly influences clarity, brightness, and contrast. A high-quality mid-power scope often performs far better than a poorly made high-magnification optic.

Objective lens size also plays a role. Lenses in the forty-to-fifty-millimeter range provide an effective balance of brightness, weight, and mounting comfort, making them ideal for 300-yard use.

Reticle design affects aiming precision and speed. Duplex reticles favor hunting simplicity, BDC reticles assist with distance holdover, and MIL or MOA reticles support precise measurement and adjustment. Parallax adjustment further enhances accuracy by ensuring the reticle and target remain aligned when eye position shifts, which becomes increasingly important beyond 100 yards.

Choosing Magnification Based on Shooting Purpose

Hunters generally benefit from scopes in the three-to-nine or four-to-twelve range, commonly using six-to-eight power for real hunting shots at 300 yards. Target shooters often prefer eight-to-twelve power for clearer bullseye definition and tighter grouping. Tactical and precision shooters may own higher-power optics but frequently dial back to around ten power at 300 yards to maintain stability and awareness.

Common Mistakes When Selecting Scope Magnification

One of the most frequent misconceptions is believing that maximum magnification guarantees maximum accuracy. In reality, excessive magnification magnifies movement, reduces brightness, and slows target acquisition. Another mistake is prioritizing high zoom numbers over optical quality and durability. Reliable construction and clear glass consistently provide better real-world performance than extreme magnification alone.

Final Verdict

The most effective magnification for 300 yards is not a single number but a balanced working range. For the majority of shooters, six-to-twelve power offers the ideal combination of clarity, stability, and control, with eight-to-ten power standing out as the most universally practical setting. Classic three-to-nine and four-to-twelve scopes, along with dependable fixed ten-power optics, continue to prove their value because they match real shooting needs rather than chasing unnecessary extremes.

Choosing magnification within this balanced range ensures clear target visibility, steady aiming, and confident shot placement exactly what shooters need for consistent accuracy at 300 yards.

Best Gun Cases for Travel — Complete Buying Guide (2026)

Traveling with a firearm whether for hunting, competitive shooting, professional training, or lawful personal protection requires serious responsibility, legal awareness, and proper storage.
Among all safety considerations, the travel gun case is the single most important piece of equipment protecting your firearm, ensuring compliance with airline rules, and preventing unauthorized access.

This complete 2026 buying guide explains:

  • Why a high-quality travel gun case truly matters
  • The difference between hard vs. soft gun cases
  • Critical features to evaluate before buying
  • Detailed insights on five trusted travel gun cases
  • Airline travel rules, packing checklists, and maintenance tips

By the end, you’ll know exactly which gun case fits your travel style, firearm type, and legal requirements.

✈️ Why Good Travel Gun Cases Matter

🔒 1. Safety & Unauthorized Access Prevention

A travel gun case is not just scratch protection—it’s your primary safety barrier.

A well-built case helps prevent:

  • Accidental exposure during baggage handling
  • Unauthorized handling or theft in transit
  • Child or untrained access at home, in vehicles, or hotels

Key safety features include rigid construction, reinforced latches, recessed lock holes, and tamper-resistant materials.
Responsible firearm ownership always begins with secure transport.

🧰 2. Protection From Damage During Travel

Air travel, road trips, and outdoor environments expose firearms to:

  • Sudden drops and crushing pressure
  • Moisture, dust, and temperature swings
  • Scratches to barrels, optics, and finishes

High-quality gun cases use:

  • Impact-resistant polymer or aluminum shells
  • Dense protective foam interiors
  • Weather-resistant sealing systems

This prevents mechanical misalignment, optic damage, and corrosion, preserving both performance and resale value.

⚖️ 3. Compliance With Airline & Legal Requirements

Most airlines require firearms to be transported in:

  • Hard-sided locked containers
  • Declared checked baggage only
  • Inaccessible during transport

Using a non-compliant case can cause:

  • Travel delays
  • Confiscation
  • Fines or denied boarding

A travel-ready gun case eliminates these risks before you even reach the airport.

🛠️ What to Look for in a Travel Gun Case

📏 1. Hard vs. Soft Gun Cases

Hard Gun Cases

Best for: Airline travel, long-distance trips, expensive firearms

Advantages:

  • Maximum impact protection
  • Fully lockable & airline-approved
  • Often waterproof and dust-sealed
  • Long service life

Drawbacks:

  • Heavier and bulkier
  • Higher upfront cost

➡️ Recommendation:
If you fly even occasionally, choose a hard case.

Soft Gun Cases

Best for: Local range trips, vehicle storage, lightweight carry

Advantages:

  • Lightweight and easy to store
  • Lower cost
  • Extra storage pockets

Drawbacks:

  • Minimal crush protection
  • Usually not airline-approved alone

➡️ Recommendation:
Great for short trips, but not for checked flights.

🔐 2. Locks & Security Features

Look for:

  • Multiple padlock points
  • Reinforced latches
  • Recessed lock areas to prevent cutting
  • TSA-compatible locks for U.S. travel

More locking points = greater pry resistance and theft deterrence.

🧠 3. Interior Protection & Foam Quality

Quality interiors should:

  • Prevent movement during transport
  • Support barrel, receiver, and stock separately
  • Protect optics and accessories

Common foam types:

  • Pick-and-pluck foam → customizable
  • Egg-crate foam → lightweight cushioning
  • Custom-cut foam → premium precision fit

For expensive setups, custom foam is worth the investment.

🌧️ 4. Water & Dust Resistance

Premium travel cases often include:

  • Rubber O-ring seals
  • Pressure equalization valves
  • Weather-resistant construction

These features protect against:

  • Rust and corrosion
  • Fogged optics
  • Dirt entering moving parts

📏 5. Size, Weight & Portability

Before buying:

  • Measure overall firearm length with attachments
  • Check internal case dimensions
  • Consider handles, wheels, and airline weight limits

➡️ Slightly larger is better than too tight, but oversize cases may increase baggage fees.

🏆 Top 5 Best Gun Cases for Travel (2026)

1. Plano All-Weather Tactical Gun Case

Best for: Budget-friendly hard protection

Why it stands out:

  • Durable all-weather seal
  • Customizable pluck foam interior
  • Airline-ready lockable design

Ideal user:
Occasional flyers needing reliable protection without premium pricing.

2. Pelican 1750 Rifle Case

Best for: Maximum durability & frequent travel

Key strengths:

  • Extremely rugged polymer shell
  • Waterproof seal + pressure valve
  • Lifetime manufacturer warranty

Ideal user:
Professionals, competitors, or anyone transporting high-value firearms.

➡️ Widely considered the gold standard in firearm transport.

3. VISM Dual Rifle Soft Case

Best for: Lightweight local transport

Highlights:

  • Thick padded interior
  • Multiple storage pockets
  • Comfortable carry straps

Limitations:
Not suitable alone for checked airline baggage.

Ideal user:
Range shooters needing affordable everyday carry.

4. Tuff Double Rifle Case With Wheels

Best for: Multi-gun airport travel

Features:

  • Heavy-duty hard shell construction
  • Built-in wheels for mobility
  • Lockable latches & foam padding

Ideal user:
Hunters or competitors carrying multiple firearms and gear through airports.

5. Bully Pro Series Rifle Case

Best for: Mid-range value protection

Advantages:

  • Strong locking latches
  • Comfortable dual handles
  • Customizable foam interior

Ideal user:
Travelers wanting solid protection at moderate cost.

✈️ Airline Travel Tips for Firearms

While policies vary, most airlines require:

✅ Declare at Check-In

Inform the airline agent you’re transporting an unloaded firearm in checked baggage.

🔐 Use a Locked Hard Case

Firearms must remain fully secured and inaccessible.

🧾 Package Ammunition Properly

Typically:

  • In original packaging or approved container
  • Stored according to airline policy

📄 Carry Proper Documentation

Bring:

  • Identification & permits
  • Ownership or competition paperwork
  • Confirmation of destination legality

Preparation prevents delays, confiscation, or legal trouble.

📏 How to Measure Your Firearm for the Right Case

  1. Measure overall length with stock extended
  2. Include optics, muzzle devices, bipods
  3. Compare with internal (not external) case dimensions
  4. Allow extra room for foam padding

Correct sizing ensures secure fit and maximum protection.

🧳 Packing & Maintenance Tips

Smart Packing

  • Wrap optics in microfiber cloths
  • Add silica gel packs to reduce moisture
  • Secure accessories in separate foam cutouts
  • Double-check firearm is unloaded before locking

Post-Travel Maintenance

After each trip:

  • Inspect for moisture or debris
  • Clean and lightly oil metal parts
  • Check latches, hinges, and wheels

Conclusion

In conclusion, choosing the best gun case for travel comes down to balancing security, durability, legal compliance, and practical convenience. Whether you are flying for a hunting trip, attending a shooting competition, or simply transporting your firearm responsibly, a well-built, lockable case provides essential protection against damage, unauthorized access, and regulatory issues. Hard-sided cases remain the safest choice for airline travel and long-distance transport, while padded soft cases can still serve well for local range use and short vehicle trips. By carefully measuring your firearm, evaluating protective features like foam quality and weather sealing, and understanding airline or regional laws before departure, you can travel with confidence and peace of mind. Ultimately, investing in a reliable travel gun case is not just about protecting equipment—it reflects a commitment to safe, responsible, and lawful firearm ownership wherever your journey takes you.

Tactical Scope for Hunting Reviews

Selecting the right tactical scope for hunting is one of the most important decisions a hunter can make. A rifle may provide the power and precision needed to take an ethical shot, but without a reliable optic, even the best firearm cannot reach its full potential. Tactical scopes are designed to enhance visibility, improve shot placement, and deliver consistent performance across different terrains and weather conditions. For hunters who value precision, durability, and adaptability, understanding how tactical scopes work and what features truly matter is essential before making an investment.

What Makes a Tactical Scope Different from a Standard Hunting Scope

Traditional hunting scopes are usually built for simplicity and lightweight handling. They often feature basic magnification ranges, simple reticles, and capped adjustment turrets that are rarely changed once the rifle is zeroed. Tactical scopes, in contrast, are engineered for precision shooting and real-time adjustments. They commonly include exposed turrets for dialing elevation and windage, advanced reticle systems for distance estimation, and rugged construction that can withstand recoil, moisture, dust, and extreme temperatures.

Although tactical scopes originated in military and law-enforcement environments, modern hunters increasingly rely on them, particularly when shooting at medium to long distances. Their ability to provide repeatable accuracy and flexible adjustments makes them valuable in open landscapes, mountainous regions, and wide agricultural fields where game animals may appear hundreds of yards away.

The Importance of Magnification and Optical Clarity in Hunting Situations

Magnification is often the first specification hunters notice when reviewing tactical scopes, yet it is only one part of overall optical performance. A well-designed scope balances magnification with clarity, brightness, and field of view. Lower magnification ranges are extremely useful in dense woodland environments because they allow faster target acquisition and a broader visual perspective. When animals move quickly through brush or appear suddenly at close range, excessive magnification can actually slow reaction time and reduce awareness of surroundings.

Higher magnification becomes valuable in open terrain where long-distance shots are possible. In these environments, the ability to clearly distinguish fine details such as shoulder placement or antler position is critical for ethical harvesting. However, clarity depends heavily on lens quality and coatings, not just magnification numbers. Premium glass with advanced coatings transmits more light, reduces glare, and preserves image sharpness during early morning and late evening hours when animals are most active. This low-light performance often separates average scopes from truly reliable hunting optics.

Understanding Reticles and Their Role in Shot Placement

Reticles serve as the aiming reference inside the scope, but modern tactical reticles provide far more functionality than simple crosshairs. Many include measurement markings that help estimate distance, compensate for bullet drop, and correct for wind drift. These systems allow hunters to make precise adjustments without guessing or relying solely on turret dialing.

Illuminated reticles add another layer of usability, especially in dim lighting. A subtle glow behind the reticle can prevent it from blending into dark backgrounds such as tree lines or shaded valleys. The key is adjustable brightness, because illumination that is too strong can create glare and obscure the target. A well-balanced illuminated reticle improves confidence during the critical low-light windows when successful hunts often occur.

Turret Precision and Real-World Accuracy

One defining characteristic of a tactical scope is the presence of exposed adjustment turrets. These turrets allow hunters to dial exact elevation and windage corrections based on distance, ammunition type, and environmental conditions. For long-range shooting, this precision is essential. Even small inconsistencies in turret tracking can cause significant misses at extended distances.

High-quality tactical scopes are engineered so that each click of the turret corresponds precisely to a predictable shift in point of impact. Many also include zero-stop mechanisms that let the shooter instantly return to the original zero after making adjustments. This feature becomes particularly useful during hunts where distances change quickly and there is little time to re-confirm settings.

Durability and Weather Resistance in Harsh Hunting Environments

Hunting rarely takes place in comfortable or predictable conditions. Rain, fog, freezing temperatures, and rough terrain all place stress on optical equipment. Tactical scopes are built with durability in mind, often using aircraft-grade aluminum housings and sealed internal components. Nitrogen or argon purging prevents internal fogging, ensuring a clear sight picture even during sudden temperature changes.

Shock resistance is equally important because repeated recoil from powerful hunting calibers can damage poorly constructed optics. A dependable tactical scope maintains zero after transport, recoil, and environmental exposure, allowing hunters to trust their equipment when the moment of truth arrives.

Matching Tactical Scope Features to Different Hunting Styles

Not every hunter requires extreme magnification or complex reticle systems. Woodland hunters typically benefit from compact scopes with lower magnification ranges that prioritize speed and field of view. These optics allow quick alignment on moving animals and reduce the chance of losing sight of the target in dense vegetation.

Hunters operating in mixed terrain often prefer mid-range magnification scopes that provide flexibility for both moderate and somewhat longer distances. This balance makes them suitable for common game such as deer or wild hogs, where shot opportunities vary depending on landscape and movement patterns.

Long-range hunters, particularly those in mountainous or open prairie environments, depend heavily on high-magnification tactical scopes with advanced adjustment systems. Ethical long-distance shooting requires not only quality optics but also strong ballistic knowledge and consistent practice. When used responsibly, these scopes enable precise shot placement even at challenging ranges.

Price Considerations and Long-Term Value

Budget plays a major role in scope selection, yet the cheapest option is rarely the most economical in the long run. Entry-level tactical scopes may function adequately in daylight conditions but often struggle with clarity, durability, and adjustment consistency. Mid-range scopes typically provide the best balance between cost and performance, offering dependable glass quality and mechanical reliability suitable for most hunters.

Premium tactical optics command higher prices because of superior materials, precision engineering, and advanced lens technology. For serious hunters who spend significant time in the field or pursue long-range accuracy, the long-term reliability of a premium scope can justify the investment. A dependable optic may last for many years, often outliving the rifle it is mounted on.

Common Mistakes Hunters Should Avoid

Many hunters focus too heavily on maximum magnification while ignoring usability in real hunting scenarios. Excessive magnification can narrow the field of view and make it difficult to locate animals quickly. Others overlook the importance of mounting systems, even though unstable or low-quality mounts can cause shifting zero and poor accuracy.

Weight is another frequently ignored factor. A heavy scope may feel manageable during sight-in sessions but becomes burdensome during long hikes or extended hunts. Balance between performance and portability is essential for comfort and endurance in the field.

Proper Care and Maintenance for Tactical Scopes

Maintaining a tactical scope is relatively simple but extremely important. Lenses should be cleaned gently with appropriate microfiber materials to prevent scratches. Protective covers help shield the glass from dust and moisture during transport. Hunters should also confirm zero periodically, especially after long travel or repeated recoil exposure.

Storing the rifle and optic in a dry, stable environment further protects internal components and ensures consistent performance season after season. With proper care, a quality tactical scope can remain reliable for many years of hunting use.

Final Thoughts on Choosing the Best Tactical Scope for Hunting

A tactical scope is more than an accessory; it is a critical tool that directly influences accuracy, confidence, and ethical shot placement. The ideal choice depends on hunting terrain, expected shooting distance, lighting conditions, and personal shooting style rather than simple specifications alone. Clear optics, reliable adjustments, rugged construction, and practical magnification should guide the decision-making process.

Hunters who invest time in understanding these elements are far more likely to select a scope that truly enhances their performance in the field. With the right tactical optic in place, every shot becomes more controlled, every target more visible, and every hunting experience more successful and responsible.

Rifle Scope vs Red Dot for Hunting: How to Choose by Scenario

No single optic is best for every hunt. A magnified rifle scope, an LPVO, and a red dot sight each fit different scenarios. A magnified scope gives reach and detail for open country. A red dot gives a fast, both-eyes-open aiming reference for close cover. An LPVO sits between them, offering a wide 1x view and modest magnification when needed.

The right choice depends on terrain, how far you need to identify game, low-light conditions, weight, battery needs, eye relief, and your exact firearm/optic setup. This comparison is general guidance, not a universal recommendation. Always follow safe handling rules, confirm target and backstop, and check your state hunting regulations before the hunt.

What Is a Magnified Rifle Scope?

A magnified rifle scope uses lenses to enlarge the target image and shows an aiming reticle. Magnification may be fixed or variable, such as a 3-9x range. Higher magnification helps you see detail at distance, while narrowing field of view and making head position more important.

Magnified scopes have defined eye relief, which is the distance your eye sits behind the scope to see a full image. See your exact optic manual for its magnification range, eye relief, reticle, and adjustment details. For related basics, read our guide to rifle scope magnification and our explanation of eye relief.

What Is a Red Dot Sight?

A red dot sight uses an illuminated aiming dot and is usually non-magnified. The main advantages are a wide view, fast aiming reference, and more forgiving head position than a magnified scope. That can help in close cover where speed and awareness matter.

The tradeoff is limited magnification for studying detail at distance. A red dot also depends on battery power and brightness settings, so check the optic before a hunt and carry a spare battery. If you want a related primer, see our reflex sights vs red dot guide.

What Is an LPVO?

An LPVO, or low-power variable optic, is a scope whose range starts at or near 1x and rises to a modest top end such as 1-4x, 1-6x, or 1-8x. At low power it can feel closer to a both-eyes-open optic, while higher power gives more detail than a non-magnified red dot.

LPVOs still have scope-style eye relief and are often heavier than red dots. The Vortex LPVO 101 guide explains the bridge concept well, but you should confirm exact weight, magnification, reticle, and eye relief against the specific model. Our article on 1-4×24 LPVOs for hunting also covers the practical tradeoffs.

Rifle Scope vs LPVO vs Red Dot: Comparison Matrix

This matrix summarizes typical traits. It is not a ranking, and it is not a performance promise. Confirm specs with the manufacturer, and use your own terrain and legal hunting conditions as the final filter.

FactorMagnified Rifle ScopeLPVORed Dot
MagnificationFixed or variable, mid to high1x to modest top endUsually non-magnified
Field of viewNarrows as power increasesWide at 1x, narrower zoomedWide, both eyes open
Eye reliefDefined; head position mattersDefined; head position mattersMore forgiving
Low-light identificationCan help study detail at distanceFlexible, depending on glass and magnificationFast dot, limited detail at distance
Battery dependenceUsually none unless illuminatedOften illumination optionalBattery required for dot
Typical terrain fitOpen country, longer identificationMixed terrainDense cover, closer shots
Use the matrix as a planning worksheet, then confirm the specifications and limits of your exact optic.

Field of View, Eye Relief, and Low-Light ID

Field of view, eye relief, and low-light identification often decide the optic choice. A red dot gives the widest and most forgiving close-cover view, but it does not magnify distant detail. A magnified scope gives reach for identification and observation, but it narrows the view as magnification increases. An LPVO offers a flexible middle ground.

In low light, magnification can help you study detail, but no optic guarantees identification. Glass quality, conditions, legal shooting light, and your own judgment all matter. The Leupold glossary is useful for checking optic terms, and our reticle guide explains reticle choices in more detail.

Comparison by Hunting Scenario

Use this scenario map as a starting point, not a rule. Your terrain, eyesight, firearm setup, and local rules matter more than any label.

ScenarioOften FitsWhyWatch Out For
Dense woodsRed dot or LPVO at 1xWide view and fast acquisitionLimited reach to study distant detail
Mixed terrainLPVOClose-view flexibility plus modest magnificationWeight and eye relief
Stand huntingMagnified scope or LPVOMore time to settle and identifyHead position and field of view
Open countryMagnified scopeMore reach for observation and identificationNarrower view at higher power
Low-light identificationMagnified scope or LPVOMagnification can help study detailNo optic replaces legal light or target ID
Battery simplicityNon-illuminated scopeUsable reticle without batteryLess illuminated aiming help

Weight, Battery, and Maintenance Notes

A red dot is usually the lightest and most compact, but it depends on a battery. A magnified scope varies widely by model and may work without a battery if the reticle is etched. An LPVO is flexible but often heavier than a red dot. Keep lenses clean, verify mounts are secure, and follow manufacturer torque and setup guidance.

Safe firearm handling still comes first. The NSSF primary firearm safety rules are worth reviewing before any range or hunting setup work.

Frequently Asked Questions

Is a rifle scope or red dot better for hunting?

Neither is better for all hunting. A magnified scope suits open country and longer identification, a red dot suits close cover and fast aiming, and an LPVO bridges the two.

Can you hunt with a red dot sight?

Yes, many hunters use red dots in dense woods or close cover. The main tradeoffs are limited magnification for distant detail and dependence on battery power.

Is an LPVO good for hunting?

An LPVO can work well in mixed terrain because it offers a wide low-power view and modest magnification. It also carries scope-style eye relief and is often heavier than a red dot.

Are red dot sights parallax-free?

Some manufacturers describe red dots as having minimal parallax across a usable range, but treat any parallax-free wording as a design-specific manufacturer claim, not an absolute. Check the specific optic documentation.

Which optic is best in low light for hunting?

No optic guarantees low-light identification. A magnified scope or LPVO can help you study detail, while a red dot gives a fast, wide view with limited magnification. Legal shooting light and target/backstop identification still control the decision.

Final Takeaway

Choose a hunting optic by scenario. Use a magnified rifle scope when distance and detail matter most, a red dot when close-cover speed and a wide view matter most, and an LPVO when you need flexibility between the two. Then verify the exact model’s specifications, mount setup, battery needs, and legal hunting rules before relying on it in the field.

How to Sight In a Rifle Scope Safely

Sighting in a rifle scope means confirming that your point of aim and point of impact match at a chosen distance. The safe way to do it starts with range rules, firearm safety, a stable rest, proper mounting, and careful confirmation. This guide is a practical overview, not a substitute for your rifle manual, scope manual, ammunition data, or qualified instruction.

If you are new to rifles or unsure about any step, work with a certified instructor, range officer, gunsmith, or experienced mentor. Do not troubleshoot a loaded firearm, force scope adjustments, or shoot at a distance where you cannot maintain a safe backstop and clear target identification.

Table of Contents

Quick Answer

To sight in a rifle scope safely, confirm the firearm is in good condition, follow range rules, use a stable rest, start at a close target to get on paper, make small scope adjustments according to the scope manual, then confirm the final zero at your intended distance. Record the rifle, ammunition, distance, conditions, and scope settings.

A safe sight-in session starts with range rules, a clear firearm, a stable rest, short-distance confirmation, final confirmation, and written settings.

Sight-In Safety Checklist

Run this checklist before live fire. It keeps the session focused and reduces avoidable mistakes.

  • Range rules: Follow all commands, target rules, and cease-fire procedures.
  • Firearm condition: Confirm the rifle is mechanically sound and properly assembled.
  • Scope mounting: Confirm mounts and rings are installed according to manufacturer guidance.
  • Safe backstop: Shoot only at a range or location with a safe backstop and legal permission.
  • Stable rest: Use a bench, bags, or rest that supports repeatable shooting.
  • Known ammunition: Use the exact ammunition you intend to zero with.
  • Record keeping: Write down distance, ammo, settings, and conditions.

Before You Go to the Range

Most sight-in frustration comes from preparation problems: loose mounts, wrong tools, mixed ammunition, unclear target distance, or a scope mounted with poor eye relief. Before live fire, read the rifle and scope manuals, gather the correct tools, confirm the reticle is level, and make sure the scope is not contacting the barrel or action incorrectly.

Review the NSSF firearm safety rules before any range session. Safe muzzle direction, trigger discipline, target identification, and backstop awareness matter more than any optic setting.

Boresighting Is Only a Starting Point

Boresighting can help get the rifle on paper, but it is not a final zero. Treat it as a rough alignment step. The final confirmation must happen with live fire at a safe range and with the ammunition you plan to use.

Build a Stable Setup

A stable shooting position makes scope adjustment easier to read. Use a solid bench, front and rear bags, or another stable rest that supports the rifle without forcing it. Keep your shoulder pressure, cheek weld, and trigger press as consistent as possible. If the rifle moves differently each shot, the group may reflect technique more than the scope.

Let the Barrel and Shooter Settle

Heat, rushing, and fatigue can open groups. Take your time, follow range commands, and avoid chasing every single shot. A small group tells you more than one rushed impact.

Start Close, Then Confirm Farther

Many shooters start close so the first rounds land on paper. Once the rifle is centered enough to adjust confidently, move to the intended zero distance and confirm again. The exact distance depends on your rifle, cartridge, optic, target use, and local range rules.

Do not assume another shooter’s zero distance is right for you. A hunting rifle, target rifle, rimfire, slug gun, and air rifle can all have different practical zero choices. For broader optics background, this telescopic sight reference explains how scopes are used as aiming devices.

Understand Scope Adjustments

Scopes adjust in clicks, but click value and direction should be confirmed from your scope manual. Do not force turrets or guess if the adjustment does not behave as expected. Move the group gradually, confirm with another group, and keep notes.

Do Not Chase Single Shots

One shot can be affected by trigger press, wind, rest movement, heat, or shooter error. Use groups to make decisions. If impacts move unpredictably, stop and check mounts, ammunition consistency, rest stability, and technique before continuing.

Confirm and Record Your Zero

After the rifle is zeroed, confirm it with the exact ammunition and conditions you care about. Let the rifle cool if needed, check that mounts remain secure, and record the final distance, ammunition, group, date, and any turret or reticle notes.

A simple zero card can save confusion later. Keep the rifle model, scope model, ammunition, sight-in distance, weather notes, and final adjustment notes together in your range notebook or phone. If the rifle is later cleaned, bumped, remounted, or switched to different ammunition, treat the old note as a reference point and confirm again at the range before relying on it.

For hunters, zero confirmation is part of responsible preparation. Hunter education resources such as Hunter Ed can help reinforce safe handling, field judgment, and knowing your equipment before hunting.

Common Mistakes

Common mistakes include loose rings, poor eye relief, skipping the manual, changing ammunition mid-session, shooting from an unstable rest, adjusting after every shot, ignoring wind, and failing to record the final zero. Another mistake is confirming from a bench but never practicing from realistic field positions.

If the rifle will be used for hunting, confirm it again after travel, hard knocks, major weather changes, scope removal, or ammunition changes. A zero is not a permanent promise; it is a confirmed condition.

FAQ

What distance should I sight in a rifle scope?

It depends on the rifle, cartridge, optic, target use, and range rules. Start close to get on paper, then confirm at the distance that matches your real use.

Is boresighting enough?

No. Boresighting is only rough alignment. You still need live-fire confirmation at a safe range.

Why is my zero moving?

Possible causes include loose mounts, inconsistent ammunition, unstable rest, shooter technique, heat, wind, or scope issues. Stop and diagnose instead of burning ammunition.

Should I clean the rifle before sighting in?

Follow your rifle manufacturer’s guidance. If the barrel condition changes significantly after cleaning, confirm zero again before relying on it.

Final Takeaway

A safe sight-in session is controlled, documented, and patient. Follow range rules, use a stable setup, start close, confirm at the intended distance, and record your final settings. If anything seems unsafe or unclear, stop and get qualified help.

Concealed Carry Holster for Everyday Use: The Complete Guide

Carrying a firearm daily is a commitment that blends personal safety, legal responsibility, and practical lifestyle choices. While many people focus heavily on choosing the right handgun, the concealed carry holster for everyday use is just as critical if not more so. The holster determines how safely your weapon is carried, how quickly you can access it in an emergency, how comfortable you feel throughout long hours of wear, and how discreetly the firearm remains hidden from public view.

An everyday carry holster must perform flawlessly under real-world conditions: long commutes, office work, physical movement, hot weather, and extended sitting or driving. A poorly designed holster can lead to discomfort, printing, slow draw speed, unsafe trigger exposure, and even accidental discharges. A properly selected holster, on the other hand, becomes almost unnoticeable while still allowing instant, reliable access when needed.

Understanding What “Everyday Carry” Really Means

Everyday carry, commonly referred to as EDC, implies wearing your firearm for many consecutive hours, often from morning until night. This means your holster must:

  • Remain comfortable during prolonged wear
  • Stay secure during walking, bending, and sitting
  • Keep the firearm completely concealed under normal clothing
  • Allow a consistent, repeatable draw stroke
  • Maintain strict safety standards

Unlike range holsters or tactical duty rigs, an EDC holster is designed for concealment, minimal bulk, and close body contact.

Holster Materials and Their Impact on Daily Comfort

Kydex Holsters

Kydex is a thermoplastic material molded precisely to the shape of your firearm. It provides excellent retention, audible click-in security, and consistent draw performance. For everyday use, Kydex holsters are popular because they do not collapse when the gun is drawn, allowing safe one-handed re-holstering. They are also moisture resistant, making them ideal for hot climates and long wear.

Leather Holsters

Leather offers superior comfort against the skin and conforms to the body over time. Many concealed carriers prefer leather for its flexibility and classic appearance. However, leather can soften with age, potentially reducing retention if not properly reinforced.

Hybrid Holsters

Hybrid holsters combine a rigid Kydex shell with a leather or neoprene backing. This design offers the retention and safety of Kydex with the comfort of soft materials against the body, making them an excellent choice for long daily wear.

Carry Positions and Their Suitability for Daily Life

Strong-Side IWB (3–4 o’clock)

This is one of the most traditional and widely used positions. It offers a natural draw motion, good concealment, and comfort for standing and walking. For everyday wear, especially for new carriers, this position provides a balance between accessibility and discretion.

Appendix Carry (AIWB)

Appendix carry places the firearm in front of the hip, usually between 12 and 2 o’clock. It is favored for its fast draw speed and excellent concealment, even under light clothing. Modern appendix holsters include wedges and claws to enhance comfort and reduce printing, making them suitable for long workdays and vehicle travel.

Outside the Waistband (OWB)

OWB holsters provide outstanding comfort and draw speed but require jackets, hoodies, or longer shirts to remain concealed. They are ideal for individuals who prioritize comfort and live in cooler climates where outer garments are worn daily.

Cross-Draw and Shoulder Carry

These positions are often chosen by people who spend long hours driving. They allow easier access while seated and reduce pressure on the hips and lower back.

Retention and Safety Mechanisms

Retention is the force that holds the firearm in the holster. For everyday concealed carry, passive retention (friction-based) is usually preferred because it allows a smooth, silent draw. Adjustable retention screws let users fine-tune the tension to match their activity level and comfort.

Trigger guard coverage is non-negotiable. A proper concealed carry holster must completely shield the trigger, preventing any foreign object, finger, or clothing from entering the trigger area.

Comfort Engineering for All-Day Wear

Everyday carry holsters are engineered with features such as:

  • Rounded edges to prevent skin irritation
  • Adjustable ride height to suit torso length
  • Cant adjustment for natural wrist alignment
  • Breathable backing materials for heat management
  • Sweat guards to protect the firearm and the user’s skin

These features become essential when the holster is worn for 8–12 hours or more.

Concealment and Clothing Compatibility

The effectiveness of a concealed carry holster is closely tied to wardrobe choices. Slim-profile holsters with concealment claws pull the grip inward, minimizing printing through shirts. Ride height adjustments allow the firearm to sit low enough for concealment while remaining high enough for a full firing grip.

For everyday wear under t-shirts, polos, or light jackets, a well-designed IWB or appendix holster offers the best balance of discretion and access.

Legal Considerations for Daily Concealed Carry

Before carrying daily, it is essential to understand your local concealed carry laws, including:

  • Permit requirements
  • Restricted locations
  • Transportation rules
  • Duty to inform law enforcement

A proper holster supports legal compliance by keeping the firearm secure, concealed, and under your direct control at all times.

Final Thoughts

A concealed carry holster for everyday use is a life-support tool, not just an accessory. It must combine safety, comfort, durability, and concealment in a single, reliable system. The right holster allows you to carry confidently, move naturally, and respond effectively if a defensive situation arises.

By carefully selecting a holster that matches your body type, daily activities, clothing style, and carry preference, you ensure that your everyday carry setup remains safe, discreet, and ready every hour of every day.

Common Rifle Scope Mistakes and How to Avoid Them

The most common rifle scope mistakes are mounting the scope at the wrong height, setting eye relief incorrectly, over-tightening the rings, skipping leveling checks, and zeroing without a stable process. Most of these problems come from rushing the setup or using generic advice instead of the instructions for the exact scope, rings, mount, and rifle.

This guide explains what to watch for and how to avoid the big mistakes without giving universal torque values or model-specific gunsmithing instructions. Always confirm the firearm is unloaded and follow safe handling rules before doing any setup work.

The Most Common Rifle Scope Mistakes

Most scope problems are setup problems, not necessarily optics problems. A scope that is mounted, leveled, and zeroed carefully is much more likely to perform as intended. A rushed install can create shifting impacts, eye strain, inconsistent cheek weld, or damaged hardware.

Mounting The Scope Too High Or Too Low

Scope height affects how naturally your eye lines up with the optic. If the rings are too high or too low for your rifle, face position, and scope objective, you may strain your neck or lift your head to see a full sight picture. Choose ring height based on your setup and confirm you can get a comfortable, repeatable cheek weld.

Ignoring Eye Relief

Eye relief is the distance between your eye and the scope where you see a full, clear image. Too little eye relief on a recoiling rifle can be uncomfortable or unsafe. Set eye relief in the position you actually shoot from, not just while the rifle sits on the bench, and follow the scope manufacturer’s stated range for that model.

Over-Tightening The Rings

Over-tightening ring and base screws can damage the scope tube or strip fasteners. Rings work through correct, even clamping, not maximum force. Use a proper torque tool and the value published by the ring or mount manufacturer. Do not apply a generic number from a different product.

Skipping Leveling And Tracking Checks

A scope that is not level with the rifle can make reticle cant harder to spot and can make adjustments less predictable. Follow the scope or mount maker’s setup guidance for leveling, and confirm the optic behaves consistently before relying on it.

Zeroing Without A Stable Process

Zeroing from an unstable position creates an unreliable zero. Use a safe range, a stable supported position, a consistent process, and enough shots to confirm a pattern before making final adjustments. Follow the scope manual for how its turrets move per click.

A careful scope setup checks ring height, eye relief, reticle level, manufacturer torque guidance, and a stable zeroing process.

How To Avoid Scope Setup Problems

You avoid most scope mistakes by slowing the setup down and treating it like a checklist. Before working around any firearm, follow basic safety rules such as those published by the National Shooting Sports Foundation.

  • Confirm the firearm is unloaded before setup work.
  • Read the manuals for the scope, rings or mount, and rifle.
  • Choose ring height that gives a natural cheek weld and full sight picture.
  • Set eye relief in your real shooting position.
  • Level the reticle using a method recommended by the optic or mount maker.
  • Tighten fasteners evenly to the manufacturer’s specified torque with a proper tool.
  • Zero from a stable, supported position at a safe range.
  • Recheck zero and fasteners after the first range session.

For a manufacturer example of the workflow, Vortex publishes a riflescope mounting guide. Use it as a setup reference, then defer to the manual for your exact scope, rings, and rifle.

When To Ask A Gunsmith Or Scope Technician

Some scope work is better handled by a qualified gunsmith or scope technician. Ask for help when ring height or fitment is unclear, fasteners do not seat correctly, the rifle lacks a suitable base, or the scope will not hold zero after a careful setup. This article covers general setup concepts, not machining, model-specific gunsmithing, or rifle modifications.

Frequently Asked Questions

What is the most common rifle scope mistake?

Incorrect eye relief and rushed mounting are among the most common mistakes. Setting eye relief in your actual shooting position and choosing ring height that gives a comfortable sight picture prevent many problems.

How tight should rifle scope rings be?

Tighten scope rings to the torque value specified by the ring or mount manufacturer, using a proper torque tool. The correct number depends on the exact hardware, so this article does not provide a universal value.

How do I set eye relief on a rifle scope?

Set eye relief by positioning the scope so you see a full, clear sight picture at a comfortable distance in your normal shooting position. Stay within the eye relief range listed by the scope manufacturer.

Why won’t my rifle scope hold zero?

A scope that will not hold zero often traces back to loose or unevenly torqued fasteners, a poor mount fit, an inconsistent zeroing process, or a mechanical issue. Recheck the setup against the manuals, then ask a gunsmith or scope technician if it still drifts.

Do I need a gunsmith to mount a rifle scope?

Many shooters can mount a scope by following the scope, ring, and rifle manuals with the right tools. Use a gunsmith or technician when fitment is unclear, the rifle needs base work, or the scope will not hold zero after careful setup.

Youth Archery Gear Recommendations: Safe Beginner Checklist

Youth archery gear should be chosen for fit, safety, and confidence first. The right beginner setup is not the most powerful bow or the longest accessory list; it is gear a young archer can draw comfortably, control safely, and use under adult supervision.

This guide is a parent-first checklist for youth bows, arrows, targets, protective gear, and practice setup. It is not a product roundup, and it does not replace coaching from a qualified archery instructor, club, school program, or local pro shop.

Table of Contents

Quick Answer

For a young beginner, start with a low-draw-weight bow that fits their draw length, arrows matched to that bow, a safe target and backstop, an arm guard, finger protection, and clear range rules. If the child struggles to draw, hold, or follow instructions safely, the setup is too advanced.

For youth archery, check fit, draw weight, arrow compatibility, protective gear, target setup, supervision, and range rules before practice.

Youth Archery Parent Checklist

Before buying, answer these questions. They matter more than brand names.

  • Fit: Can the child reach full draw without leaning, shaking, or overextending?
  • Draw weight: Is the bow light enough to draw repeatedly with control?
  • Arrows: Are the arrows the correct length and type for the bow and target?
  • Target: Is the target rated for the bow and placed in front of a safe backstop?
  • Protection: Does the archer have arm and finger protection?
  • Supervision: Is an adult or instructor controlling the range?
  • Rules: Does the child understand when to nock, shoot, retrieve, and stop?

Bow Fit Comes First

Bow fit is the foundation. A bow that is too heavy, too long, or too aggressive can teach poor form and create safety problems. Many kids do better with a simple recurve or youth compound set at a low draw weight than with a bow chosen for speed or adult-style features.

Recurve vs. Compound for Youth

A recurve bow can be excellent for learning basic form because it is simple and direct. A youth compound can help older kids or teens who need adjustability and a let-off feel. Neither is automatically better. The right choice is the one the young archer can control safely and practice with consistently.

Use a Pro Shop or Program When Possible

A local archery shop, club, school program, or instructor can help measure draw length, choose draw weight, and confirm arrow compatibility. Organizations such as USA Archery are useful starting points for learning about structured archery participation and coaching pathways.

Arrows and Compatibility

Arrows must match the bow, the archer, and the target. Do not guess based only on age. Arrow length, spine, point type, and target rating all matter. For beginners, the safest path is to buy arrows recommended by the bow manufacturer or fitted by a pro shop.

Use Practice Points for Youth Targets

Youth target practice should normally use field points and a proper target. Broadheads are not beginner practice tools and should not be mixed into youth gear unless a qualified adult is teaching a specific, legal, supervised hunting setup.

Targets and Practice Area

A safe target area is as important as the bow. Use a target rated for the bow’s draw weight and arrow type, then place it where missed arrows cannot create danger. A backstop, clear side area, and controlled shooting line are basic requirements.

Keep the range simple. One shooting direction, one clear command system, and one retrieval rule are easier for kids to follow. No one should walk forward until every bow is down and the adult in charge gives permission.

Safety Gear

Basic safety gear helps prevent small injuries and builds confidence. An arm guard protects the bow arm from string slap. A finger tab or glove protects the drawing fingers. A quiver keeps arrows organized and pointed safely when not in use.

Range Rules Are Gear Too

Rules are part of the setup. Teach the child to keep arrows unnocked until told, point only at the target, wait for commands, retrieve only together, and stop immediately when an adult calls stop. Hunter education resources such as Hunter Ed can also help families think about safety and responsibility around archery and hunting contexts.

Age-Based Guidance

Age ranges are only rough guidance. Strength, attention span, coordination, maturity, and coaching matter more than birthday.

Ages 4 to 7

Keep sessions short, close, and supervised. Very young archers need lightweight beginner gear, large targets, and simple commands. If attention fades, stop before safety fades.

Ages 8 to 12

This is often a good age for structured lessons, school programs, or club practice. Fit still matters. Avoid over-bowing just because the child is enthusiastic.

Teens

Teens may be ready for more adjustable bows and longer practice sessions, but they still need coaching, safe range habits, and gear that fits their current strength and purpose.

Common Buying Mistakes

The biggest mistake is buying too much bow. A bow that is too heavy makes practice frustrating and can encourage unsafe shortcuts. Other mistakes include mismatched arrows, targets that cannot stop the arrow, skipping arm protection, and practicing without a safe backstop.

Parents should also avoid buying gear only because it looks like adult hunting equipment. Youth archery should build form, confidence, and respect for range rules before power or hunting accessories enter the conversation.

For families still learning the sport, beginner education sites such as Archery 360 can help explain archery basics, range culture, and practice expectations before a child moves into specialized gear.

FAQ

What bow is best for a child beginner?

The best beginner bow is light enough to draw safely, sized to the archer, and simple enough to learn on. A coach or pro shop can help confirm fit.

Does my child need an arm guard?

Yes, an arm guard is a smart basic item. It helps prevent string slap and makes beginners more comfortable while learning form.

Can kids use compound bows?

Yes, if the bow fits and the draw weight is manageable. A youth compound should be set up by someone who understands draw length, draw weight, arrow match, and safety.

How do I make backyard archery safe?

Use a proper target, safe backstop, clear shooting line, adult supervision, and local rule compliance. If you cannot create a safe missed-arrow area, use a range or club instead.

Final Takeaway

Youth archery gear should make practice safer, easier, and more enjoyable. Start with fit, light draw weight, correct arrows, protective gear, a safe target setup, and adult supervision. When the basics are right, young archers can build skill without being pushed into gear they are not ready to control.

Exit mobile version