Understanding Ballistic Drop for Hunters: A Complete Guide to Accurate Long-Range Shooting

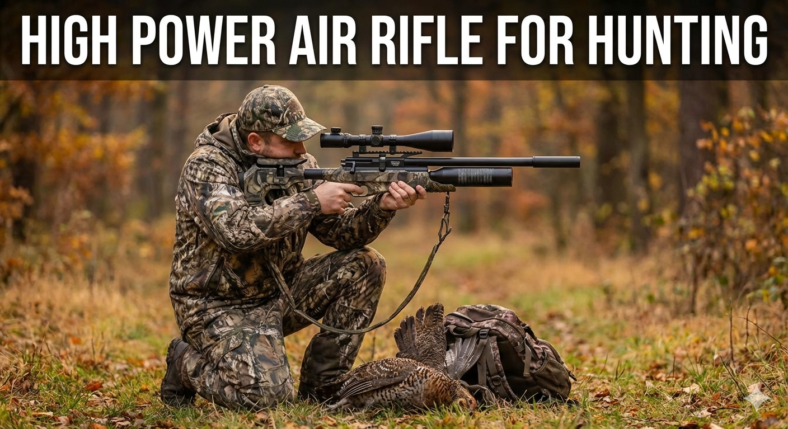
Accurate shot placement is the foundation of ethical and successful hunting. Whether you are pursuing deer in open plains, elk in the mountains, or varmints at extended distances, understanding ballistic drop is essential. Many missed or poorly placed shots are not caused by poor marksmanship, but by a misunderstanding of how gravity and distance affect a bullet’s flight path. This guide explains ballistic drop in detail and shows hunters how to compensate for it in real-world conditions.

What Is Ballistic Drop?

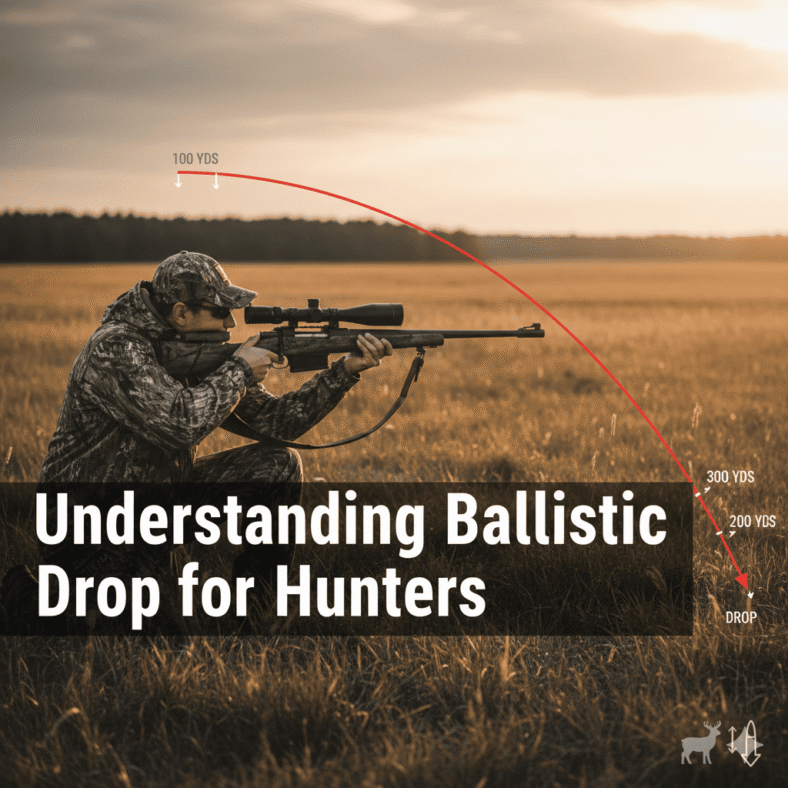
Ballistic drop, often called bullet drop, is the vertical distance a projectile falls due to gravity as it travels toward the target. The moment a bullet leaves the muzzle, gravity begins pulling it downward. Even though the bullet is traveling at extremely high speed, it is still subject to the same gravitational force as any other object.

The rifle barrel is angled slightly upward relative to the line of sight when a scope is zeroed. This allows the bullet’s curved trajectory to intersect the line of sight at a chosen distance, such as 100 or 200 yards. Beyond this zero distance, the bullet continues to fall, and the drop becomes increasingly pronounced as range increases.

Why Ballistic Drop Matters in Hunting

In hunting, precise shot placement is critical for clean, humane kills. A few inches of vertical error can mean the difference between a heart-lung hit and a wounded animal that escapes. As distance increases, bullet drop becomes more significant, and guessing holdover without understanding the physics can lead to missed shots or poor impacts.

Long-range hunting, in particular, demands a solid grasp of trajectory and drop. Even at moderate distances like 300 yards, many popular hunting calibers can experience a drop of 7 to 12 inches depending on velocity and bullet weight.

The Physics Behind Bullet Trajectory

Bullet trajectory is a curved path influenced by several forces. Gravity is the primary cause of vertical drop, but air resistance, also known as drag, slows the bullet and increases the time it spends in flight, allowing gravity more time to act on it. The longer the bullet is in the air, the more it drops.

The trajectory is not a straight line. It begins slightly upward, reaches a peak, crosses the line of sight at the zero distance, and then continues downward. The shape of this curve is affected by velocity, ballistic coefficient, and environmental conditions.

Key Factors That Affect Ballistic Drop

Muzzle Velocity

Higher muzzle velocity means the bullet reaches the target faster, reducing time under gravity’s influence and therefore reducing drop. A fast .243 Winchester will generally have less drop at 400 yards than a slower .45-70 Government.

Ballistic Coefficient (BC)

The ballistic coefficient describes how efficiently a bullet moves through the air. A high-BC bullet experiences less drag, retains velocity better, and drops less over long distances. Modern hunting bullets with sleek profiles are designed specifically to improve BC.

Bullet Weight

Heavier bullets often have higher BC but may start with lower velocity. The interaction between weight and shape determines how much drop occurs. A heavy, high-BC bullet can sometimes drop less at long range than a lighter, low-BC bullet.

Zero Distance

Your rifle’s zero has a major impact on how much holdover is required. A 100-yard zero will require more compensation at long range than a 200-yard zero. Many hunters prefer a 200-yard zero because it minimizes holdover within typical hunting distances.

Altitude and Air Density

Air is thinner at higher altitudes, reducing drag and flattening trajectory. A rifle zeroed at sea level will shoot slightly higher in the mountains. Temperature, humidity, and barometric pressure all play roles in altering ballistic drop.

Understanding Holdover and Scope Adjustments

Hunters compensate for ballistic drop in two main ways: holding over or dialing elevation.

Holdover involves aiming above the target by a known amount, often using reticle markings. This method is fast and effective for moderate ranges.

Dialing elevation means adjusting the scope’s turret to raise the point of impact. This is more precise for long-range shots, provided the shooter has accurate ballistic data and a reliable scope.

Both methods rely on knowing how much drop occurs at specific distances, which is typically measured in inches, minutes of angle (MOA), or milliradians (MIL).

Ballistic Charts and Range Cards

A ballistic chart shows the expected drop of a specific bullet at various distances. These charts are generated using velocity, BC, zero distance, and environmental conditions. Many hunters create a personalized range card and attach it to their rifle or stock for quick reference in the field.

Modern ballistic calculators and smartphone apps make it easy to generate accurate data, but it is still essential to confirm it by shooting at known distances.

Practical Example of Ballistic Drop

Consider a .308 Winchester zeroed at 200 yards. At 300 yards, the drop may be around 7 inches. At 400 yards, it may reach 18 to 20 inches. At 500 yards, the bullet could drop more than 40 inches. Without proper compensation, a hunter aiming dead center at 500 yards would completely miss the vital zone.

This illustrates how rapidly drop increases with distance and why estimating range accurately is just as important as understanding trajectory.

The Role of Rangefinders

A laser rangefinder is one of the most valuable tools for modern hunters. Since ballistic drop is directly tied to distance, knowing the exact range allows for precise holdover or turret adjustment. Guessing range, especially in open terrain, can easily result in several inches of vertical error.

Ethical Considerations

Understanding ballistic drop is not only about improving accuracy but also about ethical responsibility. Hunters must ensure they can place shots cleanly and consistently within the vital zone of the animal. Taking long-range shots without a solid understanding of trajectory and drop increases the risk of wounding.

Practicing at extended distances, learning your rifle’s behavior, and confirming ballistic data are essential steps for responsible hunting.

Training to Master Ballistic Drop

Regular range practice at multiple distances builds confidence and familiarity with your rifle’s trajectory. Shooting steel targets or paper at 300, 400, and 500 yards allows you to see real-world drop and compare it with predicted values. This experience is invaluable when conditions in the field are less than perfect.

Conclusion

Ballistic drop is a fundamental concept every serious hunter must understand. From the moment a bullet leaves the muzzle, gravity shapes its path, and the farther it travels, the more pronounced the effect becomes. By learning how velocity, bullet design, environmental factors, and zero distance influence trajectory, hunters can make accurate adjustments and place ethical, effective shots.

Mastering ballistic drop is not just about numbers and charts; it is about building the knowledge and confidence needed to make every shot count when it matters most.

How to Sight In a Rifle Scope Safely

Sighting in a rifle scope means confirming that your point of aim and point of impact match at a chosen distance. The safe way to do it starts with range rules, firearm safety, a stable rest, proper mounting, and careful confirmation. This guide is a practical overview, not a substitute for your rifle manual, scope manual, ammunition data, or qualified instruction.

If you are new to rifles or unsure about any step, work with a certified instructor, range officer, gunsmith, or experienced mentor. Do not troubleshoot a loaded firearm, force scope adjustments, or shoot at a distance where you cannot maintain a safe backstop and clear target identification.

Table of Contents

Quick Answer

To sight in a rifle scope safely, confirm the firearm is in good condition, follow range rules, use a stable rest, start at a close target to get on paper, make small scope adjustments according to the scope manual, then confirm the final zero at your intended distance. Record the rifle, ammunition, distance, conditions, and scope settings.

A safe sight-in session starts with range rules, a clear firearm, a stable rest, short-distance confirmation, final confirmation, and written settings.

Sight-In Safety Checklist

Run this checklist before live fire. It keeps the session focused and reduces avoidable mistakes.

  • Range rules: Follow all commands, target rules, and cease-fire procedures.
  • Firearm condition: Confirm the rifle is mechanically sound and properly assembled.
  • Scope mounting: Confirm mounts and rings are installed according to manufacturer guidance.
  • Safe backstop: Shoot only at a range or location with a safe backstop and legal permission.
  • Stable rest: Use a bench, bags, or rest that supports repeatable shooting.
  • Known ammunition: Use the exact ammunition you intend to zero with.
  • Record keeping: Write down distance, ammo, settings, and conditions.

Before You Go to the Range

Most sight-in frustration comes from preparation problems: loose mounts, wrong tools, mixed ammunition, unclear target distance, or a scope mounted with poor eye relief. Before live fire, read the rifle and scope manuals, gather the correct tools, confirm the reticle is level, and make sure the scope is not contacting the barrel or action incorrectly.

Review the NSSF firearm safety rules before any range session. Safe muzzle direction, trigger discipline, target identification, and backstop awareness matter more than any optic setting.

Boresighting Is Only a Starting Point

Boresighting can help get the rifle on paper, but it is not a final zero. Treat it as a rough alignment step. The final confirmation must happen with live fire at a safe range and with the ammunition you plan to use.

Build a Stable Setup

A stable shooting position makes scope adjustment easier to read. Use a solid bench, front and rear bags, or another stable rest that supports the rifle without forcing it. Keep your shoulder pressure, cheek weld, and trigger press as consistent as possible. If the rifle moves differently each shot, the group may reflect technique more than the scope.

Let the Barrel and Shooter Settle

Heat, rushing, and fatigue can open groups. Take your time, follow range commands, and avoid chasing every single shot. A small group tells you more than one rushed impact.

Start Close, Then Confirm Farther

Many shooters start close so the first rounds land on paper. Once the rifle is centered enough to adjust confidently, move to the intended zero distance and confirm again. The exact distance depends on your rifle, cartridge, optic, target use, and local range rules.

Do not assume another shooter’s zero distance is right for you. A hunting rifle, target rifle, rimfire, slug gun, and air rifle can all have different practical zero choices. For broader optics background, this telescopic sight reference explains how scopes are used as aiming devices.

Understand Scope Adjustments

Scopes adjust in clicks, but click value and direction should be confirmed from your scope manual. Do not force turrets or guess if the adjustment does not behave as expected. Move the group gradually, confirm with another group, and keep notes.

Do Not Chase Single Shots

One shot can be affected by trigger press, wind, rest movement, heat, or shooter error. Use groups to make decisions. If impacts move unpredictably, stop and check mounts, ammunition consistency, rest stability, and technique before continuing.

Confirm and Record Your Zero

After the rifle is zeroed, confirm it with the exact ammunition and conditions you care about. Let the rifle cool if needed, check that mounts remain secure, and record the final distance, ammunition, group, date, and any turret or reticle notes.

A simple zero card can save confusion later. Keep the rifle model, scope model, ammunition, sight-in distance, weather notes, and final adjustment notes together in your range notebook or phone. If the rifle is later cleaned, bumped, remounted, or switched to different ammunition, treat the old note as a reference point and confirm again at the range before relying on it.

For hunters, zero confirmation is part of responsible preparation. Hunter education resources such as Hunter Ed can help reinforce safe handling, field judgment, and knowing your equipment before hunting.

Common Mistakes

Common mistakes include loose rings, poor eye relief, skipping the manual, changing ammunition mid-session, shooting from an unstable rest, adjusting after every shot, ignoring wind, and failing to record the final zero. Another mistake is confirming from a bench but never practicing from realistic field positions.

If the rifle will be used for hunting, confirm it again after travel, hard knocks, major weather changes, scope removal, or ammunition changes. A zero is not a permanent promise; it is a confirmed condition.

FAQ

What distance should I sight in a rifle scope?

It depends on the rifle, cartridge, optic, target use, and range rules. Start close to get on paper, then confirm at the distance that matches your real use.

Is boresighting enough?

No. Boresighting is only rough alignment. You still need live-fire confirmation at a safe range.

Why is my zero moving?

Possible causes include loose mounts, inconsistent ammunition, unstable rest, shooter technique, heat, wind, or scope issues. Stop and diagnose instead of burning ammunition.

Should I clean the rifle before sighting in?

Follow your rifle manufacturer’s guidance. If the barrel condition changes significantly after cleaning, confirm zero again before relying on it.

Final Takeaway

A safe sight-in session is controlled, documented, and patient. Follow range rules, use a stable setup, start close, confirm at the intended distance, and record your final settings. If anything seems unsafe or unclear, stop and get qualified help.

Concealed Carry Holster for Everyday Use: The Complete Guide

Carrying a firearm daily is a commitment that blends personal safety, legal responsibility, and practical lifestyle choices. While many people focus heavily on choosing the right handgun, the concealed carry holster for everyday use is just as critical if not more so. The holster determines how safely your weapon is carried, how quickly you can access it in an emergency, how comfortable you feel throughout long hours of wear, and how discreetly the firearm remains hidden from public view.

An everyday carry holster must perform flawlessly under real-world conditions: long commutes, office work, physical movement, hot weather, and extended sitting or driving. A poorly designed holster can lead to discomfort, printing, slow draw speed, unsafe trigger exposure, and even accidental discharges. A properly selected holster, on the other hand, becomes almost unnoticeable while still allowing instant, reliable access when needed.

Understanding What “Everyday Carry” Really Means

Everyday carry, commonly referred to as EDC, implies wearing your firearm for many consecutive hours, often from morning until night. This means your holster must:

  • Remain comfortable during prolonged wear
  • Stay secure during walking, bending, and sitting
  • Keep the firearm completely concealed under normal clothing
  • Allow a consistent, repeatable draw stroke
  • Maintain strict safety standards

Unlike range holsters or tactical duty rigs, an EDC holster is designed for concealment, minimal bulk, and close body contact.

Holster Materials and Their Impact on Daily Comfort

Kydex Holsters

Kydex is a thermoplastic material molded precisely to the shape of your firearm. It provides excellent retention, audible click-in security, and consistent draw performance. For everyday use, Kydex holsters are popular because they do not collapse when the gun is drawn, allowing safe one-handed re-holstering. They are also moisture resistant, making them ideal for hot climates and long wear.

Leather Holsters

Leather offers superior comfort against the skin and conforms to the body over time. Many concealed carriers prefer leather for its flexibility and classic appearance. However, leather can soften with age, potentially reducing retention if not properly reinforced.

Hybrid Holsters

Hybrid holsters combine a rigid Kydex shell with a leather or neoprene backing. This design offers the retention and safety of Kydex with the comfort of soft materials against the body, making them an excellent choice for long daily wear.

Carry Positions and Their Suitability for Daily Life

Strong-Side IWB (3–4 o’clock)

This is one of the most traditional and widely used positions. It offers a natural draw motion, good concealment, and comfort for standing and walking. For everyday wear, especially for new carriers, this position provides a balance between accessibility and discretion.

Appendix Carry (AIWB)

Appendix carry places the firearm in front of the hip, usually between 12 and 2 o’clock. It is favored for its fast draw speed and excellent concealment, even under light clothing. Modern appendix holsters include wedges and claws to enhance comfort and reduce printing, making them suitable for long workdays and vehicle travel.

Outside the Waistband (OWB)

OWB holsters provide outstanding comfort and draw speed but require jackets, hoodies, or longer shirts to remain concealed. They are ideal for individuals who prioritize comfort and live in cooler climates where outer garments are worn daily.

Cross-Draw and Shoulder Carry

These positions are often chosen by people who spend long hours driving. They allow easier access while seated and reduce pressure on the hips and lower back.

Retention and Safety Mechanisms

Retention is the force that holds the firearm in the holster. For everyday concealed carry, passive retention (friction-based) is usually preferred because it allows a smooth, silent draw. Adjustable retention screws let users fine-tune the tension to match their activity level and comfort.

Trigger guard coverage is non-negotiable. A proper concealed carry holster must completely shield the trigger, preventing any foreign object, finger, or clothing from entering the trigger area.

Comfort Engineering for All-Day Wear

Everyday carry holsters are engineered with features such as:

  • Rounded edges to prevent skin irritation
  • Adjustable ride height to suit torso length
  • Cant adjustment for natural wrist alignment
  • Breathable backing materials for heat management
  • Sweat guards to protect the firearm and the user’s skin

These features become essential when the holster is worn for 8–12 hours or more.

Concealment and Clothing Compatibility

The effectiveness of a concealed carry holster is closely tied to wardrobe choices. Slim-profile holsters with concealment claws pull the grip inward, minimizing printing through shirts. Ride height adjustments allow the firearm to sit low enough for concealment while remaining high enough for a full firing grip.

For everyday wear under t-shirts, polos, or light jackets, a well-designed IWB or appendix holster offers the best balance of discretion and access.

Legal Considerations for Daily Concealed Carry

Before carrying daily, it is essential to understand your local concealed carry laws, including:

  • Permit requirements
  • Restricted locations
  • Transportation rules
  • Duty to inform law enforcement

A proper holster supports legal compliance by keeping the firearm secure, concealed, and under your direct control at all times.

Final Thoughts

A concealed carry holster for everyday use is a life-support tool, not just an accessory. It must combine safety, comfort, durability, and concealment in a single, reliable system. The right holster allows you to carry confidently, move naturally, and respond effectively if a defensive situation arises.

By carefully selecting a holster that matches your body type, daily activities, clothing style, and carry preference, you ensure that your everyday carry setup remains safe, discreet, and ready every hour of every day.

Top Shooting Bags for Range Days in 2026 — Ultimate Guide & Best Picks

If you’re serious about improving accuracy and consistency on range days, one of the most overlooked upgrades you can make is adding quality shooting bags — also called rifle rest bags or sandbags. These versatile supports help stabilize your firearm, reduce unwelcome movement, and give you tighter shot groups from every position.

Whether you’re zeroing a scope, practicing marksmanship, or prepping for competition, the right shooting bag can make all the difference — and in this guide we’ll break down the top choices you can buy on Amazon (front/rest bags, combo sets, and accessory weight bags), along with how to choose the perfect one for your needs.

1. Front & Rear Rifle Rest Sandbags (Adjustable Oxford Fabric)

Description:
This front and rear rifle rest bag set is built with rugged Oxford fabric for durability and weather resistance, making it a solid choice for outdoor range days. The duo of bags lets shooters support both the forearm and buttstock of their rifle, aiding stability for benchrest and field positions.

Pros:
✔ Tough, water-resistant fabric holds up in outdoor conditions
✔ Includes both front and rear bags for complete support
✔ Adjustable fill lets you tailor density for stability

Cons:
✖ Sold unfilled — you’ll need to add sand or pellets
✖ Bulkier than single-bag setups

2. OXPANG Shooting Tactical Sandbag Set (Unfilled)

Description:
A classic unfilled shooting rest set that provides front and rear sandbags for supporting rifles during range practice. The unfilled design gives you flexibility in choosing the weight and stability that match your shooting style. These bags are ideal for hunters, target shooters, or anyone wanting better control over their rifle’s positioning.

Pros:
✔ Customizable weight depending on your fill choice
✔ Simple setup works for multiple shooting positions
✔ Good balance of size and support

Cons:
✖ Requires you to purchase and fill the bags manually
✖ No built-in handles for easy transport

3. Fouos Front & Rear Rifle Shooting Rest Sandbag Support (Unfilled)

Description:
This shooting rest support set comes with two sandbags — one for the front and one for rear support. Made from heavy-duty material, these bags provide a stable rest point that helps reduce movement and improve accuracy shots on the range.

Pros:
✔ Durable construction for rugged use
✔ Helps steady aim and absorb recoil
✔ Versatile for bench and prone positions

Cons:
✖ Doesn’t come with fill material
✖ Slight learning curve to get desired firmness

4. OneTigris Pre-Filled Shooting Rest Bag (Front & Rear)

Description:
This pre-filled shooting rest bag set comes ready to use straight out of the box. Designed to provide stable support for rifles on range days, the heavier pre-fill makes it ideal for shooters who don’t want the hassle of filling bags themselves. It’s suitable for both novices and experienced shooters seeking extra steadiness.

Pros:
✔ Ready to use without filling
✔ Comfortable and firm support for recoil control
✔ Good weight balance for stability

Cons:
✖ Heavier to carry in field use
✖ Fixed fill means no customization

5. Caldwell Universal Rear Shooting Bag

Description:
A quality rear shooting bag designed to support the rifle’s buttstock and help with elevation control and recoil management. Its compact size makes it a flexible option that works alone or paired with a front rest bag for enhanced stability.

Pros:
✔ Sturdy rear support for leveling and recoil reduction
✔ Compact and easy to use
✔ Can pair with front stands for full support

Cons:
✖ Only rear support — front support sold separately
✖ Needs fill if purchased unfilled

🧠 Quick Comparison Table

ProductTypeFillBest ForPrice
Front & Rear Oxford Rest BagsFront + Rear SetUnfilledBench & field shooting$$
OXPANG Sandbag SetFront + RearUnfilledCustom fill choice$$
Fouos Shooting Rest SupportFront + RearUnfilledStable range support$$
OneTigris Pre-Filled SetFront + RearPre-filledReady to use$$$
Caldwell Universal Rear BagRear OnlyUnfilled/FillableRear support$

🔎 Why Shooting Bags Matter

Shooting bags help stabilize your firearm by providing solid contact points under the rifle’s forearm and buttstock. They reduce shake and recoil, helping you achieve tighter shot groups and more consistent accuracy on range days — whether you’re zeroing optics or practicing long distance.

Conclusion

Choosing the right shooting bag can make a noticeable difference in your accuracy, comfort, and overall performance on range days. Whether you prefer a complete front-and-rear rest set for maximum stability, a pre-filled option for convenience, or a simple rear bag to fine-tune elevation and recoil control, the right support system helps you maintain a steady shooting platform and achieve tighter, more consistent groups.

The products covered above offer a range of options to suit different shooting styles, budgets, and experience levels. By focusing on build quality, fill type, stability, and ease of use, you can select a shooting bag that complements your rifle setup and shooting position. Investing in a reliable shooting bag is a small upgrade that delivers big results helping you get the most out of every range session and improving your precision shot after shot.

High Power Air Rifle for Hunting: Complete Expert Guide

The world of airgun hunting has changed dramatically in recent years. What was once limited to low-powered backyard rifles for plinking and pest control has evolved into a serious hunting discipline supported by advanced engineering, powerful pre-charged pneumatic systems, and precision projectiles capable of delivering humane, ethical kills. Today’s high power air rifles can generate energy levels that rival small-caliber firearms, yet they remain quieter, more affordable to operate, and legal in many areas where traditional rifles are restricted.

For hunters who value stealth, accuracy, and efficiency, a high power air rifle offers a unique balance of power and control. Whether you are targeting small game such as rabbits and squirrels or pursuing larger animals like coyotes and wild hogs in regions where airgun hunting is permitted, choosing the right air rifle and understanding its capabilities is essential.

What Defines a High Power Air Rifle?

A high power air rifle is typically classified by its muzzle energy rather than its velocity alone. While entry-level airguns may produce under 12 foot-pounds of energy, hunting-grade air rifles usually start at around 18 to 20 foot-pounds for small game and can exceed 100 foot-pounds in large-caliber PCP models designed for big game. These rifles rely on advanced propulsion systems such as pre-charged pneumatic (PCP), gas piston, or magnum spring-piston mechanisms, each offering different advantages in terms of consistency, power, and maintenance.

PCP air rifles dominate the high-power category because they store compressed air in an onboard cylinder and release it in a precisely metered burst with every shot. This results in exceptional accuracy, high shot-to-shot consistency, and the ability to fire heavy pellets or slugs at lethal energy levels. Gas piston and spring-piston rifles, while generally less powerful than PCP systems, still provide enough energy for small to medium game and are valued for their self-contained operation without the need for external air tanks.

Why Hunters Choose High Power Air Rifles

One of the biggest advantages of using a high power air rifle for hunting is reduced noise. Even powerful PCP rifles are far quieter than rimfire or centerfire firearms, especially when equipped with integrated moderators. This allows hunters to operate discreetly, making them ideal for pest control around farms, orchards, and semi-rural properties where noise restrictions apply.

Accuracy is another major factor. Modern air rifles are capable of exceptional precision, often achieving sub-inch groups at 50 yards when paired with quality optics and ammunition. The low recoil and smooth firing cycle of PCP rifles allow for precise shot placement, which is critical for ethical hunting.

Cost efficiency also plays an important role. Pellets and slugs are significantly cheaper than firearm ammunition, and air rifles do not require gunpowder or primers. Over time, this makes airgun hunting far more economical, especially for hunters who practice regularly.

Choosing the Right Caliber for Hunting

Caliber selection is one of the most important decisions when choosing a high power air rifle. The ideal caliber depends on the size of the game, the typical shooting distance, and the legal requirements in your region.

The .177 caliber is extremely fast and flat-shooting, making it suitable for small pests such as birds, rats, and squirrels. However, its lighter weight limits penetration on larger animals.

The .22 caliber is the most popular hunting choice because it offers an excellent balance between speed, energy, and penetration. With sufficient power, it is effective for rabbits, raccoons, foxes, and similar-sized game.

The .25 caliber delivers significantly more impact energy and better wind resistance, making it ideal for larger small game and medium predators. It is commonly used for coyotes and large raccoons where legal.

For big-game airgun hunting, calibers such as .30, .35, and even .45 are available in powerful PCP platforms. These rifles fire heavy slugs rather than traditional pellets and are capable of producing energy levels exceeding 150 foot-pounds, making them suitable for wild hogs and deer in regions where airgun hunting regulations allow it.

Power Requirements and Ethical Shot Placement

Power alone does not guarantee a humane kill. Ethical hunting with an air rifle depends on delivering sufficient energy to vital organs combined with precise shot placement. For small game, 18 to 25 foot-pounds of energy is generally adequate when the shot is placed in the brain or heart-lung area. Medium game may require 40 to 60 foot-pounds, while large game demands even higher energy levels and heavy, high-penetration slugs.

Because air rifle projectiles travel at lower velocities than firearm bullets, hunters must be especially mindful of trajectory and wind drift. Understanding your rifle’s ballistic performance and limiting shots to ethical distances is essential.

Pellet and Slug Selection

Ammunition choice plays a crucial role in hunting success. Traditional diabolo pellets are ideal for small to medium game because they expand on impact, transferring energy efficiently and minimizing over-penetration. Hollow point and soft-point designs are particularly effective for humane kills.

For high-power PCP rifles and larger calibers, solid slugs offer superior penetration and long-range stability. Their higher ballistic coefficient allows them to retain energy better at extended distances, making them the preferred choice for big-game airgun hunting.

Effective Range of High Power Air Rifles

The effective hunting range of an air rifle depends on caliber, power, and shooter skill. Most .177 and .22 rifles are best kept within 50 to 70 yards for ethical kills, while .25 and larger calibers can extend that range to 100 yards or more under ideal conditions. Beyond these distances, energy loss and wind drift significantly reduce the likelihood of a clean, humane shot.

Optics and Accessories

A high-quality scope designed for airgun use is essential for precision hunting. Air rifles, particularly spring-piston models, produce a unique recoil pattern that can damage standard firearm scopes. Airgun-rated optics with adjustable parallax and mil-dot or MOA reticles allow for accurate range estimation and holdover adjustments.

Other useful accessories include rangefinders, bipods, and suppressor-equipped barrels for noise reduction. For PCP rifles, a reliable air source such as a hand pump or high-pressure compressor is also necessary.

Legal Considerations

Before using a high power air rifle for hunting, it is crucial to understand local laws and regulations. Some regions classify high-powered airguns as firearms, while others allow their use for specific game species. Minimum caliber and energy requirements may apply, and certain animals may be restricted to firearm hunting only. Always verify legal guidelines and obtain the necessary permits before heading into the field.

Conclusion

High power air rifles have transformed the hunting landscape by offering a quiet, accurate, and highly effective alternative to traditional firearms. With modern PCP technology, advanced projectiles, and precision optics, today’s airgun hunter can ethically harvest game with confidence and consistency.

Success in air rifle hunting depends on choosing the right caliber, understanding power requirements, selecting proper ammunition, and practicing disciplined shot placement. When used responsibly and within legal limits, a high power air rifle is not just a substitute for a firearm it is a sophisticated hunting tool in its own right, capable of delivering clean, humane results while preserving the stealth and enjoyment that make airgun hunting such a rewarding experience.

80 lb Pistol Crossbow for Target Shooting Guide

An 80 lb pistol crossbow can be a compact target-shooting tool, but it should be treated as real archery equipment, not a toy. For safe target practice, use a rated target, a clear backstop, eye protection, compatible bolts, and a shooting area where crossbow use is allowed. This guide is for target practice only, not hunting, weapon-use advice, or legal advice.

Table of Contents
  1. Quick Answer
  2. 80 lb Pistol Crossbow Safety Checklist
  3. What an 80 lb Pistol Crossbow Is Best For
  4. Before You Shoot
  5. Target and Backstop Setup
  6. Bolts, Strings, and Basic Accessories
  7. Simple Target-Practice Plan
  8. Common Mistakes to Avoid
  9. FAQ
  10. Final Takeaway

Quick Answer

An 80 lb pistol crossbow is usually best for short-range target practice, backyard-range learning where legal, and basic crossbow handling practice. It is not automatically suitable for hunting, long-range shooting, or non-target use. The most important buying and use checks are bolt compatibility, cocking effort, target rating, backstop safety, local rules, and whether the shooter can load and control the crossbow without unsafe shortcuts.

Use an 80 lb pistol crossbow only with a safe shooting lane, compatible bolts, a rated target, eye protection, and a clear backstop.

80 lb Pistol Crossbow Safety Checklist

  • Legal location: Confirm crossbow target practice is allowed where you plan to shoot.
  • Clear backstop: Use a safe backstop behind the target so missed or pass-through shots do not leave the shooting area.
  • Rated target: Use a target designed for crossbow bolts, not a thin archery bag that cannot stop them reliably.
  • Compatible bolts: Match bolt length, nock style, and weight to the crossbow manual.
  • Eye protection: Wear eye protection and keep bystanders behind the shooting line.
  • No dry firing: Do not fire without a compatible bolt loaded unless the manual specifically says otherwise.
  • Manual first: Follow the exact cocking, loading, safety, and maintenance instructions from the manufacturer.

General archery organizations such as World Archery publish formal rule and range-control concepts, while hunter education resources such as Hunter Ed reinforce safe handling and awareness. Use those as safety context, but always follow your actual crossbow manual and local rules.

What an 80 lb Pistol Crossbow Is Best For

The main advantage of an 80 lb pistol crossbow is compact size. It is easier to store and carry than many full-size crossbows, and the lower draw weight can make short target sessions less intimidating for some adults. It can also help new users learn basic crossbow habits: keeping fingers below the rail, pointing only at the target lane, loading carefully, and checking the target area before every shot.

The limitation is that compact does not mean harmless. A pistol crossbow can still damage property or injure someone if used casually. Short limbs, short bolts, and simple sights also make it less forgiving than a larger target bow or full-size crossbow. Treat it as a close-distance practice tool and build your setup around control, not power claims.

Best For

  • Short-distance target practice where crossbow use is allowed.
  • Learning safe loading, aiming, and unloading habits.
  • Casual archery practice with a proper target and backstop.
  • Adults who want a compact crossbow for controlled range use.

Not Best For

  • Hunting unless your state rules, equipment specs, and ethics all support it.
  • Any non-target-use framing.
  • Long-distance accuracy work.
  • Unsupervised youth use.
  • Backyards without a safe target lane and backstop.

Before You Shoot

Before the first shot, inspect the string, limbs, rail, safety, trigger, and bolt retainer. Look for cracks, fraying, loose screws, or anything that feels rough or uncertain. If the crossbow is new, read the manual instead of guessing. If it is used or has been stored for a long time, consider having it checked by a knowledgeable archery shop before shooting.

Also check the shooting location. Many neighborhoods, parks, and public areas restrict projectile use even when the equipment is small. If rules are unclear, do not assume backyard practice is allowed. Crossbow legality and hunting rules can vary by state, city, range, and property type.

Cocking and Loading

Cocking effort matters. An 80 lb draw weight may sound light compared with full-size crossbows, but the short pistol grip can still be awkward. Keep hands, fingers, and loose clothing away from the string path. Load only when pointed safely downrange, and unload according to the manual or range procedure.

Target and Backstop Setup

The target is not the whole safety system. A safe setup includes the target, the area behind the target, the side boundaries, and a shooting line that keeps people behind the shooter. A crossbow bolt that misses, skips, or passes through a worn target can travel farther than a beginner expects.

Use a target rated for crossbow bolts and inspect it often. Replace or rotate targets that no longer stop bolts reliably. Place the target in front of a safe backstop, not in front of fences, roads, windows, pets, livestock, or areas where people may walk unexpectedly.

Bolts, Strings, and Basic Accessories

Do not choose bolts only by price. Use the bolt length, nock type, and weight range listed by the crossbow maker. Short pistol-crossbow bolts can look similar across brands, but small differences in nock shape, diameter, or length can affect safety and reliability. The neutral definition of a crossbow is simple, but compatibility is model-specific.

Basic accessories should support safety, not clutter. A few compatible bolts, a rated target, eye protection, string wax if the manual recommends it, and a simple notebook are enough for most short practice sessions. Avoid modifying the trigger, limbs, string path, or safety mechanism.

Simple Target-Practice Plan

Start close enough that every shot stays in the target face and the backstop is still doing its job. Focus on repeatable setup: same stance, same grip pressure, same sight picture, same safe loading routine. Do not chase speed. A slow, controlled session teaches more than rushing through bolts.

After each group, pause and inspect the target, bolts, and crossbow. Bent bolts, cracked nocks, damaged vanes, loose hardware, or a frayed string are stop signs. Record what distance you used and what worked well. That kind of note is more useful than guessing from memory next time.

Common Mistakes to Avoid

  • Using a target that is not rated for crossbow bolts.
  • Shooting without a real backstop.
  • Letting fingers rise into the string path.
  • Using random bolts because they appear to fit.
  • Dry firing or testing the trigger without following the manual.
  • Practicing in a backyard or public area without checking rules.
  • Treating an 80 lb pistol crossbow as a toy because it is small.

FAQ

Is an 80 lb pistol crossbow good for beginners?

It can be good for careful adult beginners who want short-range target practice, but only with a safe target, backstop, compatible bolts, and manual-based handling. It is not a toy or a shortcut around archery safety.

Can you hunt with an 80 lb pistol crossbow?

Do not assume so. Hunting rules, draw-weight requirements, equipment definitions, and ethical shot limits vary by state and species. Check your current state wildlife agency rules before using any crossbow for hunting.

What target should I use?

Use a target specifically rated for crossbow bolts and inspect it often. If bolts are passing through too easily or the target is badly worn, stop and replace or rotate the target.

Are pistol crossbow bolts universal?

No. Bolt length, diameter, nock style, weight, and tip design should match the crossbow manual. If you are unsure, contact the manufacturer or an archery shop before shooting.

How far should I practice?

Practice at a distance where you can keep every shot safely on the target with the backstop behind it. Increase distance only after your setup, target, and shooting lane remain safe and controlled.

Final Takeaway

An 80 lb pistol crossbow is best treated as a compact target-practice tool. The right setup is simple: legal location, compatible bolts, rated target, clear backstop, eye protection, careful loading, and patient practice. If the location, target, bolt fit, or handling step is uncertain, pause and solve that problem before shooting.

Universal Gun Cleaning Kit for All Calibers

A universal gun cleaning kit for all calibers is best understood as a broad firearm-maintenance kit, not proof that one box covers every firearm you may own. A good kit gives you rods or cables, brushes, jags, patches, picks, oil, and solvent options for common pistols, rifles, and shotguns. The safest choice is still the kit that matches your firearm manual, bore size, cleaning direction, and storage habits.

Table of Contents
  1. Quick Answer
  2. Universal Gun Cleaning Kit Checklist
  3. What Universal Really Means
  4. Core Tools to Look For
  5. Caliber Fit and Compatibility
  6. Solvent, Oil, and Safety Basics
  7. Storage and Organization
  8. Common Mistakes to Avoid
  9. FAQ
  10. Final Takeaway

Quick Answer

The best universal gun cleaning kit is one that covers your actual firearms, includes caliber-marked tools, uses non-damaging rods or pull-through cables, stores parts clearly, and leaves room for firearm-specific extras. Before buying, check the listed bore brushes, jags, patch loops, shotgun adapters, rod material, case layout, and whether you still need separate solvent, oil, chamber brushes, or specialty tools.

A useful universal cleaning kit should organize rods, brushes, patches, solvent, oil, eye protection, gloves, and a simple maintenance checklist.

Universal Gun Cleaning Kit Checklist

  • Firearm safety first: Unload and clear the firearm before any cleaning session.
  • Manual match: Confirm the kit works with your firearm model and manufacturer cleaning instructions.
  • Caliber coverage: Check the exact brushes, jags, loops, and adapters included.
  • Rod or cable quality: Avoid rough, poorly threaded, or misaligned tools that can damage finishes or crowns.
  • Solvent/oil plan: Use products that match your firearm materials and cleaning environment.
  • Ventilation and skin protection: Use good airflow, gloves, and eye protection when working with chemicals.
  • Storage: Keep brushes, patches, small adapters, and chemical products organized and labeled.

Start with the safety basics. The NSSF firearm safety rules are a good reminder that every maintenance task begins with safe handling. If you clean after range sessions, also pay attention to residue exposure; CDC/NIOSH guidance for firing ranges explains why lead and residue control matter around shooting environments.

What Universal Really Means

In cleaning-kit language, universal usually means broad compatibility across common calibers and firearm types. It does not mean every tool fits every gun. A kit may include pistol, rifle, and shotgun brushes, but still miss a specialty chamber brush, muzzle-device tool, bore guide, or brand-specific accessory your firearm needs.

This is why the word all should be treated carefully. If you own only a few common calibers, a universal kit may be efficient. If you own unusual calibers, precision rifles, older firearms, suppressor-host setups, or specialized shotguns, you may need dedicated add-ons.

Good Fit For

  • Owners with several common pistol, rifle, or shotgun calibers.
  • Beginners who want one organized starter kit.
  • Range users who need basic cleaning tools in one case.
  • People who want a kit they can upgrade over time.

Weak Fit For

  • Very specific match-rifle maintenance routines.
  • Firearms that require manufacturer-specific tools.
  • Owners who already have high-quality caliber-specific tools.
  • Anyone expecting one kit to replace the firearm manual.

Core Tools to Look For

A useful kit should include cleaning rods or a pull-through cable, bore brushes, jags or patch loops, cotton patches, a nylon utility brush, picks, a cleaning cloth, and a compact case. For shotguns, look for correct gauge brushes and mops. For rifles and pistols, look for clearly marked caliber brushes so you are not guessing during cleaning.

Rod quality is one of the biggest differences between cheap kits and better kits. Poorly finished or badly aligned rods can be frustrating and may risk unnecessary wear if used carelessly. Coated rods, brass rods, or pull-through systems each have tradeoffs. The right choice depends on the firearm, manual instructions, and your cleaning style.

Useful Extras

  • A bore guide for compatible rifles.
  • A chamber brush when the firearm manual recommends one.
  • Extra patches in the sizes you actually use.
  • Disposable gloves and eye protection for solvent work.
  • A small notebook for round count, cleaning date, and maintenance notes.

Caliber Fit and Compatibility

Do not assume that a brush is correct because it is close. A too-small brush may not clean well, and a too-large brush can bind or cause unnecessary force. Use the firearm manual and the cleaning-kit chart together. If the kit chart is vague, that is a buying red flag.

Also check thread compatibility. Some rods and accessories use different thread standards, which can make replacement brushes and adapters annoying later. If you expect to use the kit for years, replacement-part availability matters as much as the number of pieces in the box.

Solvent, Oil, and Safety Basics

Cleaning chemicals deserve respect. Use solvents and oils according to their labels, keep the area ventilated, avoid mixing chemicals, and wash hands after handling residue. Eye protection and gloves are simple habits that make cleaning less messy and more controlled.

Residue management matters too. Range dust and firearm residue can contain lead or other contaminants, so avoid eating or drinking while cleaning and keep cleaning supplies away from children. For storage, keep chemicals capped, upright, and away from heat sources.

Storage and Organization

A universal kit is only useful if you can find the right part quickly. Look for a case with marked slots, labeled compartments, or enough space to add your own labels. Loose brushes and adapters in a big plastic tray become frustrating fast, especially when several calibers look similar.

Keep chemicals separate from patches and cloths if leakage is possible. Replace dirty patches, worn brushes, cracked jags, and bent rods before they cause problems. A small maintenance log helps you remember what was cleaned, when it was cleaned, and what parts may need attention next time.

After cleaning, return the firearm and cleaning chemicals to secure storage. General safety programs such as Project ChildSafe are useful reminders that maintenance routines and storage routines should work together, especially in homes with children or visitors.

Common Mistakes to Avoid

  • Buying by piece count instead of useful caliber coverage.
  • Using a brush or jag that does not match the bore.
  • Skipping the firearm manual before disassembly or cleaning.
  • Using too much oil and leaving parts wet or sticky.
  • Mixing cleaning chemicals or ignoring product labels.
  • Cleaning in a poorly ventilated space.
  • Forgetting to replace worn patches, bent rods, or damaged brushes.

FAQ

Does one universal cleaning kit really fit all calibers?

No. Universal usually means broad coverage, not perfect coverage. Always compare the included brush, jag, loop, and adapter sizes with the firearms you actually own.

Should I buy a universal kit or caliber-specific tools?

A universal kit is convenient for a mixed collection. Caliber-specific tools are better when you want higher-quality rods, exact brushes, or a more careful routine for one firearm.

What is the most important tool in a cleaning kit?

The most important part is the correct-size tool for the job. A quality rod or cable, proper brush, correct patches, and firearm-safe solvent matter more than a large piece count.

Can over-cleaning damage a firearm?

Careless cleaning can cause problems, especially if you use poor tools, force parts, skip manufacturer guidance, or use chemicals incorrectly. Follow the firearm maker’s maintenance guidance.

Do I still need separate solvent and oil?

Often, yes. Some kits include small bottles, but many users prefer separate solvent and oil that match their firearm, climate, and cleaning routine.

Final Takeaway

A universal gun cleaning kit is worth considering when it covers your real calibers, stores tools clearly, and leaves room for firearm-specific upgrades. Do not buy only by piece count. Buy for compatibility, safe handling, chemical care, and the parts you will actually use.

Trijicon ACOG vs VCOG — Side-by-Side Review

When it comes to combat-proven rifle optics, few brands command the same level of respect as Trijicon. For decades, Trijicon ACOG vs VCOG scopes have been trusted by military units, law enforcement, and professional shooters around the world. Among their most iconic products are the ACOG (Advanced Combat Optical Gunsight) and the VCOG (Variable Combat Optical Gunsight). While both are built for extreme durability and battlefield reliability, they are designed around very different optical philosophies.

This in-depth side-by-side review compares the Trijicon ACOG and VCOG across optical performance, magnification, reticle systems, durability, weight, use cases, and overall value, helping you decide which optic best suits your shooting needs.

Understanding the Trijicon ACOG

The Trijicon ACOG is a fixed-magnification prism scope originally developed for military use in the late 1980s. It was designed to provide fast target acquisition, crystal-clear glass, and unmatched ruggedness without relying on batteries. Over the years, the ACOG has become legendary for its ability to withstand harsh environments, heavy recoil, and continuous field use while maintaining zero and optical clarity.

One of the defining characteristics of the ACOG is its simplicity. Because it uses a fixed magnification—most commonly 4x, though other variants exist—the internal optical system contains fewer moving parts. This reduces mechanical complexity and increases long-term reliability. The reticle is typically illuminated using a combination of fiber optics for daylight and tritium for low-light conditions, allowing the scope to function without any external power source. This makes the ACOG especially attractive for military and survival applications where battery dependency is a concern.

Optically, the ACOG offers a wide field of view for its magnification level, excellent edge-to-edge sharpness, and high contrast. Its design supports the Bindon Aiming Concept, which allows shooters to keep both eyes open and use the illuminated reticle almost like a red dot at close range, while still benefiting from magnification for mid-range engagements.

Understanding the Trijicon VCOG

The Trijicon VCOG represents a more modern evolution of the combat optic. Instead of fixed magnification, it features a variable zoom system, commonly ranging from 1–6x or 1–8x depending on the model. This allows the shooter to transition seamlessly from close-quarters engagements at true 1x to precision shooting at extended distances with higher magnification.

The VCOG is built with the same durability standards as the ACOG but incorporates advanced features such as a first focal plane reticle, battery-powered illumination, and precision adjustment turrets. The first focal plane design means the reticle subtensions remain accurate across all magnification levels, which is particularly valuable for ranging targets and applying ballistic holds.

While the VCOG is heavier and more complex due to its variable lens system, it is engineered to withstand extreme recoil, shock, and environmental exposure. It is often described as one of the most rugged variable-power scopes on the market, combining the flexibility of a low-power variable optic with the toughness expected from a military-grade sighting system.

Optical Clarity and Image Quality

Both the ACOG and VCOG deliver excellent optical performance, but they achieve it in slightly different ways. The ACOG’s fixed-power design allows Trijicon to optimize the lens system for one specific magnification. This results in exceptional sharpness, minimal distortion, and a bright image even in challenging lighting conditions. The simplicity of the optical path also contributes to fast eye alignment and consistent performance.

The VCOG, with its variable magnification, must balance optical performance across a range of zoom levels. Despite this added complexity, Trijicon’s high-quality glass and coatings ensure that image clarity remains outstanding throughout the magnification range. At low power, the VCOG provides a wide field of view suitable for close-quarters situations, while at higher magnifications it offers the resolution needed for precise shot placement at distance.

Magnification and Versatility

The most fundamental difference between the ACOG and VCOG lies in their magnification systems. The ACOG uses fixed magnification, which means the shooter always views the target at a constant zoom level. This can be an advantage in scenarios where engagement distances are predictable and rapid response is critical. There is no need to adjust magnification, and the shooter can focus entirely on target acquisition and trigger control.

The VCOG, by contrast, offers adjustable magnification, making it far more versatile in dynamic environments. At 1x, it can function similarly to a red dot, allowing fast target transitions and situational awareness. As magnification increases, it becomes suitable for longer-range precision shooting. This adaptability makes the VCOG particularly well-suited for mixed-distance engagements, competition shooting, and tactical roles where a single optic must cover multiple scenarios.

Reticle Design and Illumination

ACOG reticles are typically etched and illuminated using fiber optics and tritium. During the day, ambient light gathered by the fiber optic brightens the reticle automatically. In low light, the tritium provides a constant glow. This system is extremely reliable and requires no batteries, but brightness control is limited and depends on environmental lighting conditions.

VCOG reticles, on the other hand, are usually first focal plane designs with battery-powered LED illumination. This allows precise control over brightness levels and ensures compatibility with night-vision devices. Because the reticle scales with magnification, holdovers and ranging marks remain accurate at any zoom setting, which is a significant advantage for precision shooting and long-range engagements.

Durability and Build Quality

Both optics are built to military specifications and are designed to survive extreme abuse. The ACOG’s fixed design contributes to its legendary durability, as there are fewer internal components that can shift or fail. Its housing is forged from high-strength aluminum and sealed against water and dust.

The VCOG, despite its variable zoom system, is equally robust. Its reinforced housing, integrated mount, and shock-resistant construction allow it to handle heavy recoil and harsh environmental conditions. While it contains more moving parts than the ACOG, it is engineered to maintain zero and optical alignment even under severe stress.

Weight and Handling

The ACOG is generally lighter and more compact than the VCOG, making it well-suited for lightweight rifle setups and extended carry. Its smaller footprint also contributes to better balance on shorter carbines.

The VCOG is heavier due to its larger lens system and zoom mechanism. While this adds some weight to the rifle, many shooters accept this trade-off for the increased capability and flexibility that variable magnification provides.

Side-by-Side Comparison Table

FeatureTrijicon ACOGTrijicon VCOG
MagnificationFixed (e.g., 3.5x, 4x, 5.5x)Variable (1–6x, 1–8x)
Reticle TypeEtched, fiber optic & tritiumFirst focal plane, LED illuminated
Power SourceNo battery (most models)Battery powered
WeightLighter, more compactHeavier, more robust
Best UseFast mid-range engagementsClose to long-range versatility
DurabilityExtremely ruggedExtremely rugged with modern design

Pros and Cons

Trijicon ACOG Pros

  • Battery-free illumination
  • Extremely durable and reliable
  • Fast target acquisition
  • Lightweight and compact
  • Proven military track record

Trijicon ACOG Cons

  • Fixed magnification limits versatility
  • Less control over reticle brightness
  • Not ideal for very close or very long-range precision work

Trijicon VCOG Pros

  • Variable magnification for multiple engagement distances
  • First focal plane reticle for accurate ranging and holds
  • Adjustable illumination
  • Outstanding optical clarity
  • Built to extreme durability standards

Trijicon VCOG Cons

  • Heavier and bulkier
  • More expensive
  • Requires batteries for illumination

Which One Is Right for You?

The choice between the ACOG and VCOG depends largely on your intended use. If your priority is simplicity, speed, and absolute reliability with minimal maintenance, the ACOG remains one of the best fixed-power combat optics ever made. It is ideal for users who operate primarily at medium ranges and value battery-free operation.

If you need a single optic capable of handling close-quarters engagements, mid-range shooting, and longer-range precision, the VCOG offers unmatched versatility. Its variable magnification, advanced reticle system, and modern features make it a strong choice for tactical professionals, competition shooters, and enthusiasts who demand adaptability.

Frequently Asked Questions

Is the ACOG better for military use than the VCOG?
Both are suitable for military use, but the ACOG is often preferred for its simplicity and battery-free operation, while the VCOG is chosen for missions requiring variable engagement distances.

Does the VCOG replace the ACOG?
Not entirely. The VCOG offers more versatility, but the ACOG remains relevant for roles where fixed magnification and extreme reliability are priorities.

Which optic is better for civilian shooters?
Civilian shooters who participate in competitions or varied-distance shooting may benefit more from the VCOG. Those who prefer a lighter, simpler setup may find the ACOG more suitable.

Final Verdict

The Trijicon ACOG and VCOG both represent the pinnacle of combat-grade optic design, each excelling in its own domain. The ACOG stands as a symbol of proven reliability and speed, while the VCOG embodies modern versatility and precision. Choosing between them is not a matter of which is superior overall, but which one aligns more closely with your shooting environment, mission requirements, and personal preferences.

Common Rifle Scope Mistakes and How to Avoid Them

The most common rifle scope mistakes are mounting the scope at the wrong height, setting eye relief incorrectly, over-tightening the rings, skipping leveling checks, and zeroing without a stable process. Most of these problems come from rushing the setup or using generic advice instead of the instructions for the exact scope, rings, mount, and rifle.

This guide explains what to watch for and how to avoid the big mistakes without giving universal torque values or model-specific gunsmithing instructions. Always confirm the firearm is unloaded and follow safe handling rules before doing any setup work.

The Most Common Rifle Scope Mistakes

Most scope problems are setup problems, not necessarily optics problems. A scope that is mounted, leveled, and zeroed carefully is much more likely to perform as intended. A rushed install can create shifting impacts, eye strain, inconsistent cheek weld, or damaged hardware.

Mounting The Scope Too High Or Too Low

Scope height affects how naturally your eye lines up with the optic. If the rings are too high or too low for your rifle, face position, and scope objective, you may strain your neck or lift your head to see a full sight picture. Choose ring height based on your setup and confirm you can get a comfortable, repeatable cheek weld.

Ignoring Eye Relief

Eye relief is the distance between your eye and the scope where you see a full, clear image. Too little eye relief on a recoiling rifle can be uncomfortable or unsafe. Set eye relief in the position you actually shoot from, not just while the rifle sits on the bench, and follow the scope manufacturer’s stated range for that model.

Over-Tightening The Rings

Over-tightening ring and base screws can damage the scope tube or strip fasteners. Rings work through correct, even clamping, not maximum force. Use a proper torque tool and the value published by the ring or mount manufacturer. Do not apply a generic number from a different product.

Skipping Leveling And Tracking Checks

A scope that is not level with the rifle can make reticle cant harder to spot and can make adjustments less predictable. Follow the scope or mount maker’s setup guidance for leveling, and confirm the optic behaves consistently before relying on it.

Zeroing Without A Stable Process

Zeroing from an unstable position creates an unreliable zero. Use a safe range, a stable supported position, a consistent process, and enough shots to confirm a pattern before making final adjustments. Follow the scope manual for how its turrets move per click.

A careful scope setup checks ring height, eye relief, reticle level, manufacturer torque guidance, and a stable zeroing process.

How To Avoid Scope Setup Problems

You avoid most scope mistakes by slowing the setup down and treating it like a checklist. Before working around any firearm, follow basic safety rules such as those published by the National Shooting Sports Foundation.

  • Confirm the firearm is unloaded before setup work.
  • Read the manuals for the scope, rings or mount, and rifle.
  • Choose ring height that gives a natural cheek weld and full sight picture.
  • Set eye relief in your real shooting position.
  • Level the reticle using a method recommended by the optic or mount maker.
  • Tighten fasteners evenly to the manufacturer’s specified torque with a proper tool.
  • Zero from a stable, supported position at a safe range.
  • Recheck zero and fasteners after the first range session.

For a manufacturer example of the workflow, Vortex publishes a riflescope mounting guide. Use it as a setup reference, then defer to the manual for your exact scope, rings, and rifle.

When To Ask A Gunsmith Or Scope Technician

Some scope work is better handled by a qualified gunsmith or scope technician. Ask for help when ring height or fitment is unclear, fasteners do not seat correctly, the rifle lacks a suitable base, or the scope will not hold zero after a careful setup. This article covers general setup concepts, not machining, model-specific gunsmithing, or rifle modifications.

Frequently Asked Questions

What is the most common rifle scope mistake?

Incorrect eye relief and rushed mounting are among the most common mistakes. Setting eye relief in your actual shooting position and choosing ring height that gives a comfortable sight picture prevent many problems.

How tight should rifle scope rings be?

Tighten scope rings to the torque value specified by the ring or mount manufacturer, using a proper torque tool. The correct number depends on the exact hardware, so this article does not provide a universal value.

How do I set eye relief on a rifle scope?

Set eye relief by positioning the scope so you see a full, clear sight picture at a comfortable distance in your normal shooting position. Stay within the eye relief range listed by the scope manufacturer.

Why won’t my rifle scope hold zero?

A scope that will not hold zero often traces back to loose or unevenly torqued fasteners, a poor mount fit, an inconsistent zeroing process, or a mechanical issue. Recheck the setup against the manuals, then ask a gunsmith or scope technician if it still drifts.

Do I need a gunsmith to mount a rifle scope?

Many shooters can mount a scope by following the scope, ring, and rifle manuals with the right tools. Use a gunsmith or technician when fitment is unclear, the rifle needs base work, or the scope will not hold zero after careful setup.

Long Range Scope Settings for Windy Conditions Guide

Long-range shooting in calm weather already demands precision, but when wind enters the equation, accuracy becomes far more complex. Wind is invisible, constantly shifting, and rarely uniform from the shooter to the target. Unlike elevation, which can be dialed once and trusted, wind must be continuously read, interpreted, and corrected. Proper scope setup and intelligent use of reticles and turrets allow the shooter to manage this unpredictable force and achieve consistent hits at extended distances.

How Wind Influences Bullet Flight at Long Range

A bullet traveling hundreds or thousands of yards is exposed to airflow for a significant amount of time. Even a light crosswind can push it several inches off target, while stronger winds can cause feet of horizontal drift. The effect grows with distance and depends on bullet speed, weight, ballistic coefficient, and air density. Wind also changes along the bullet’s path, meaning the air near the shooter may not be the same as the air halfway to the target or near the impact point. This is why wind correction is never a single fixed number but a continuously refined estimate.

Importance of Proper Scope Mounting and Zero

Before any wind correction can be trusted, the scope must be perfectly mounted and zeroed. A level scope is critical because even slight cant can create horizontal error when elevation is dialed, making wind corrections appear incorrect. A true mechanical zero, accurate turret tracking, and properly set parallax ensure that every adjustment you make is real and repeatable. Without this foundation, it becomes impossible to distinguish between wind error and equipment error.

Choosing the Right Reticle for Wind Holds

The reticle is the shooter’s primary tool for managing wind in real time. First focal plane reticles are especially valuable because their subtensions remain accurate at all magnifications. Reticles with multiple horizontal reference marks or full “Christmas tree” designs allow precise wind holds while also compensating for elevation. This makes it possible to hold into the wind rather than constantly dialing the turret, which is faster and more adaptable in changing conditions.

Dialing Windage Versus Holding in the Reticle

Wind can be corrected either by dialing the windage turret or by holding using the reticle. Dialing is precise and clean when the wind is steady and consistent across the entire range, but it becomes slow and risky when the wind is switching or gusting. Holding with the reticle allows instant adjustment shot to shot, making it the preferred method for most long-range shooters in real-world conditions. By shifting the aiming point left or right along the reticle’s scale, the shooter can respond immediately to changes in wind speed or direction.

Using Ballistic Data to Set Initial Wind Values

Accurate wind correction starts with ballistic calculations. By inputting distance, muzzle velocity, ballistic coefficient, and estimated wind speed into a ballistic solver, the shooter obtains an initial wind drift value in mils or MOA. This value is then applied either by dialing or holding. It serves as a starting point rather than a final answer, as real-world conditions often differ slightly from calculated models. Observing bullet impact and trace allows the shooter to refine this value for maximum precision.

Reading Wind Through Mirage and Visual Cues

The scope itself becomes a wind-reading instrument when observing mirage. When mirage rises straight up, wind is minimal. When it flows at an angle, wind is present, and the flatter the angle, the stronger the wind. By focusing the scope at different distances, the shooter can identify changes in wind speed and direction along the bullet’s path. This helps determine whether stronger wind exists mid-range or near the target, where its influence may be greater than at the firing position.

Managing Variable Winds with Bracketing and Averaging

In unstable conditions, it is often impossible to assign a single exact wind value. Instead, the shooter estimates a low and high wind speed and chooses a hold between them. This bracketing approach increases first-round hit probability and allows quick correction after observing the impact. Reticles with fine horizontal markings make this method especially effective, as small adjustments can be made without touching the turrets.

Role of Turret Precision and Click Values

Fine turret resolution is essential for precise wind correction. Click values such as 0.1 mil or 0.25 MOA allow small, accurate adjustments after spotting impacts. Coarse adjustments can lead to overcorrection and wasted shots. Smooth, repeatable turret tracking ensures that any dialed correction matches the reticle’s subtensions and ballistic data exactly.

Understanding Wind Zones Along the Bullet Path

Wind rarely behaves the same from muzzle to target. Terrain, vegetation, and temperature differences create multiple wind layers or zones. A bullet may pass through calm air, then strong crosswind, and finally a different direction near the target. By observing mirage and environmental indicators in each zone, the shooter can mentally average the conditions and apply a more realistic overall wind hold.

Final Thoughts

Long-range scope settings for windy conditions are not about a single perfect adjustment but about creating a reliable system. A level and accurately zeroed scope, a reticle designed for precise wind holds, dependable ballistic data, and skilled wind reading all work together. Wind will always be the most unpredictable variable in long-range shooting, but with proper scope setup and disciplined technique, it becomes a controllable factor rather than a mystery. Mastery comes from continuous observation, correction, and confidence in both equipment and method.

Exit mobile version