The Best Headlamps for Hunting of 2025

Welcome to your definitive guide on choosing the best headlamps for hunting. Whether you’re a seasoned hunter who treks through the woods at dawn or someone who enjoys the occasional night-time hunt, having the right headlamp can make a significant difference.

In this guide, we’ll explore the essential features of hunting headlamps, review some of the top products on the market, and provide practical tips to enhance your night-time hunting experience.

Why Use a Headlamp for Hunting?

Advantages Over Traditional Flashlights

Using a headlamp offers several advantages over a traditional flashlight. The most notable is the ability to use both hands freely without compromising your visibility.

This is crucial when you need precision and stability like when navigating rough terrains or aiming your weapon.

Additionally, headlamps typically provide a broader and more consistent field of light, which is essential for spotting wildlife and navigating the wilderness safely.

Situational Benefits for Hunters

Headlamps shine in scenarios where lighting conditions are less than ideal. They allow hunters to track animals during the twilight hours, set up camp in the dark, or handle equipment without additional light sources.

More importantly, a reliable headlamp contributes to safety by illuminating potential hazards and helping hunters stay aware of their surroundings.

Key Features to Consider When Choosing a Hunting Headlamp

Brightness and Light Modes

Brightness, measured in lumens, is critical. For hunting, a headlamp with adjustable brightness settings is ideal.

The ability to switch between high, low, strobe, and red light is advantageous for various hunting needs red light modes are particularly beneficial for preserving night vision and staying discreet.

Battery Life and Power Options

Consider the battery type and life expectancy of the headlamp. Rechargeable batteries can be economical and convenient, while disposable ones are great for longer trips where charging might not be possible.

It’s also important to choose a headlamp that offers long battery life, especially in its lowest settings, to avoid being left in the dark at critical moments.

Comfort and Adjustability

A good hunting headlamp should be comfortable and adjustable. Look for options with elastic, sweat-resistant bands, and those that offer a balanced weight distribution to avoid neck strain during prolonged use.

Durability and Weather Resistance

Durability is crucial for any hunting gear. A headlamp with a high waterproof rating and robust construction can withstand harsh weather conditions and accidental drops, making it a reliable choice for any hunting expedition.

Additional Features

Consider headlamps that offer extra features like adjustable beam distance, peripheral lighting, and emergency modes such as SOS signaling. These features can enhance practicality and safety in the field.

Top 5 Best Headlamps for Hunting in 2024

Our selection is based on thorough testing and feedback from seasoned hunters. Each headlamp has been evaluated for brightness, battery life, comfort, durability, and additional features relevant to hunting.

1. DanForce Camouflaged Headlamp

The DanForce Camouflaged Headlamp Ultra Bright USB Rechargeable LED Headlamp is crafted for tactical use, especially suited for outdoor activities like hunting and fishing.

It features a robust design with an aluminum body and IPX45 rating, ensuring it stands up to water, dust, and damage.

Offering 1080 lumens across four lighting modes (high, medium, low, and strobe), and a secondary red light for night vision preservation, this headlamp combines functionality with high performance.

Its adjustable 90-degree tilt and focus capability make it perfect for any situation that requires precise, directed lighting. Additionally, the headlamp comes with a 5000 mAh rechargeable battery, ensuring long-lasting use on a single charge.

Pros

  • Durability and Resistance
  • Custom Comfort
  • Rechargeable Battery

Cons

  • Heavy for users
  • Limited Water Resistance

Overall, the DanForce Camouflaged Headlamp is a high-quality, versatile option for anyone needing a reliable light source while engaging in outdoor activities, tactical tasks, or any situation requiring a durable, powerful headlamp.

2. LHKNL Headlamp Flashlight

The LHKNL Headlamp Flashlight is an ultra-light, bright LED rechargeable headlight designed to enhance your outdoor experiences.

Weighing just 1.87 ounces, this headlamp features a 1200 lumen output and offers white and red lighting options to suit various conditions.

It boasts eight different lighting modes, including a motion sensor mode that allows for hands-free operation by simply waving your hand. The headlamp is pivotable up to 60 degrees, providing targeted illumination where it’s needed.

Designed to be both waterproof and versatile, it’s suitable for a wide range of outdoor activities, from running and hiking to camping and fishing. Each package includes two headlamps, making it a perfect gift for adventure enthusiasts.

Pros

  • High Brightness and Multi-Mode Functionality
  • Motion Sensor Control

Cons

  • Complexity in Controls

The LHKNL Headlamp Flashlight is a highly functional, user-friendly option for those who need reliable, adjustable lighting in a compact, lightweight design. It’s especially suitable for

3. Zoomable, Super Bright & Comfortable Outdoor Head Lamp

The Headlamp Flashlight is designed to light up the darkest nights with its powerful 9500 Lux LED and a custom round lens that magnifies and directs light efficiently.

Engineered in Germany, this headlamp offers zoomable features, allowing users to illuminate wide areas or focus on distant targets. Its design includes a convex lens that can be tilted to aim the light precisely where needed.

The headlamp is mounted on three soft, adjustable straps that ensure a comfortable, slip-free fit, making it ideal for outdoor enthusiasts engaged in hiking, fishing, hunting, or camping.

Unlike rechargeable models, this headlamp is powered by 3 AA batteries (included), providing reliable and long-lasting illumination.

Its robust construction uses aero aluminum alloy and ABS, and it boasts an IP44 waterproof rating, ensuring durability in various weather conditions.

Pros

  • Super Bright Illumination
  • Comfortable and Secure Fit:

Cons

  • Weight and Bulk

This Headlamp Flashlight is a practical choice for anyone needing robust, reliable lighting in outdoor settings. Its powerful beam, adjustable focus, and comfortable fit make it a valuable tool for a wide range of outdoor activities.

4. AMAKER LED Rechargeable Headlamp

The AMAKER LED Rechargeable Headlamp stands out with its incredible 900,000 lumens of brightness and a beam reach of up to 3280 feet (1000 meters), making it one of the most powerful headlamps available for outdoor enthusiasts.

It features a robust design with an adjustable 90° tilt and six versatile lighting modes, including high, low, strobe, enlarge, zoom, and a red backlight.

This headlamp is equipped with a large 7500mAh rechargeable battery, ensuring extended use up to 10 hours on high and 45 hours on low.

Additionally, it includes USB charging and power output capabilities, allowing you to charge your devices on the go.

Built to endure tough environments, it boasts an IPX6 waterproof rating, making it suitable for all weather conditions, from heavy rain to extreme temperatures.

Pros

  • Exceptional Brightness
  • Long Battery Life and Rechargeable
  • Versatile Lighting Modes

Cons

  • Overpowering for Basic Needs

The AMAKER LED Rechargeable Headlamp is an excellent choice for those who require a high-performance, versatile lighting solution for outdoor adventures, especially in challenging conditions.

Its advanced features and powerful illumination make it a top contender in the high-end headlamp market.

5. Victoper Rechargeable Headlamp

The Victoper Rechargeable Headlamp is a high-performance, versatile outdoor lighting tool designed for a wide range of activities, from cave exploring to night running and camping.

It features eight powerful LED lights that emit up to 18,000 lumens, providing brilliant illumination to ensure clear visibility in the darkest environments.

This lightweight headlamp is comfortable for prolonged use, weighing just 5.3 ounces, and offers eight different lighting modes to suit any situation, including strong and warm beams, red light for night vision, and various SOS strobe settings.

It’s equipped with two rechargeable batteries and supports USB charging, offering 3-6 hours of runtime depending on the mode used.

With an IPX5 waterproof rating, the headlamp is ready for all weather conditions, making it a reliable companion for any adventure.

Pros

  • Superior Brightness
  • Multiple Lighting Modes

Cons

  • Limited Battery Life on High Mode

Overall, the Victoper Rechargeable Headlamp is a robust, feature-rich headlamp designed for anyone who needs reliable, bright, and adaptable lighting for their outdoor adventures.

Whether used for hiking, camping, or emergency situations, it promises to be an essential gear item for both casual outdoor enthusiasts and serious adventurers.

How to Maximize Your Headlamp’s Performance

Maintenance Tips

To ensure your headlamp remains in top condition, regularly clean the lens and body after use. Store it in a cool, dry place and always remove the batteries if it will not be used for an extended period.

For rechargeable models, maintain the battery by following the manufacturer’s guidelines.

Usage Tips

Adjust the settings to suit your environment lower settings for close-up tasks and higher settings for long-distance visibility. Always test your headlamp before heading out, and carry spare batteries or a backup light source if possible.

Conclusion

Choosing the right headlamp can elevate your hunting experience by providing safety, convenience, and efficiency. By considering the features discussed and reviewing some of the best models on the market, you’re well on your way to finding the perfect.

Best Hunting Blinds: A Comprehensive Buyer’s Guide

When it comes to hunting, having the right gear is as crucial as possessing sharp instincts and patience. Among the essential pieces of equipment is the hunting blind, a staple for concealment and strategic advantage.

This article dives deep into the world of hunting blinds, exploring different types, essential features, and the top models available on the market today. Whether you’re a novice or an experienced hunter, finding the best hunting blind can significantly enhance your hunting success.

Understanding Hunting Blinds

Definition and Purpose

A hunting blind is a cover device for hunters, designed to reduce the chance of detection by game. It provides concealment by blending into the environment, shielding movement, and minimizing human scent.

Advantages of Using Hunting Blinds

Using a hunting blind offers several benefits:

  • Concealment: Keeps the hunter out of sight, making it easier to observe and target wildlife.
  • Protection: Shields from environmental elements like wind, rain, and snow, improving comfort during long waits.
  • Noise Reduction: Helps dampen sound, allowing hunters to remain undetected as they prepare for the shot.

Types of Hunting Blinds

Ground Blinds

Ground blinds are a popular choice among hunters for their versatility, ease of use, and effective concealment capabilities. These types of blinds are particularly favored by both bow and rifle hunters for their ability to blend seamlessly into a variety of environments from wooded areas to open fields.

Box Blinds

Box blinds, also known as tower or deer stands, are a favored choice among hunters who value comfort, extended field visibility, and durability in their hunting setups. These structures are particularly well-suited for use in open fields, along food plots, or in other expansive terrains where an elevated view provides a strategic advantage.

Portable Blinds

Portable blinds are a popular choice among hunters who need the flexibility to move quickly and adapt to various hunting environments. These blinds are designed for easy transport and rapid deployment, making them ideal for hunters who track game over large areas or those who hunt on public lands where permanent setups are not feasible.

List of list of top 5 Best Hunting Blinds

1.Ameristep Caretaker Blind Overview

Key Features:

  • Durability: Constructed with weather-resistant fabric that stands up well in various environmental conditions.
  • Concealment: Features a Realtree Edge camo pattern that blends seamlessly into most woodland environments.
  • Versatility: Suitable for both bow and firearm hunting.
  • Design: Comes with a hub-style design, which allows for quick and easy setup and takedown.
  • Visibility: Equipped with shoot-through mesh windows and a shadow guard to eliminate shadows and silhouettes.

Pros

  • Easy to Set Up
  • Portability
  • Affordable

Cons

  • Wind Stability
  • Noise

The Ameristep Caretaker Blind is a solid choice for hunters looking for an affordable, easy-to-set-up hunting blind that offers good space and effective concealment in woodland environments.

While it does have some drawbacks, such as noise and issues with high winds, its overall value and performance make it a popular choice among both novice and experienced hunters.

2.RHINO Blinds R75 2 Person Hunting Ground Blind Overview

Key Features:

  • Material Strength: Made from true 150 denier polyester, providing robust fabric strength in both horizontal and vertical weaves.
  • Size and Capacity: Spacious enough to comfortably fit 2 people with a 60″ x 60″ floor space and a 66″ center height.
  • Easy Setup and Takedown: Designed for efficiency, it can be set up quickly, typically in as little as 60 seconds after being removed from the carry bag.
  • Durability Treatments: The blind is UV treated, DWR (durable water repellent) treated, and antimicrobial treated to resist fading, dry rot, mold, and other common issues.
  • Professional Endorsement: Supported by hunting professionals and guides, adding credibility to its quality and effectiveness.

Pros

  • All-Weather Use
  • Rapid Deployment
  • Reliability

Cons

  • Limited visibility

The RHINO Blinds R75 2 Person Hunting Ground Blind is an excellent choice for both novice and experienced hunters who value quick setup, durability, and all-weather reliability.

Its endorsements by professionals and its robust feature set make it a top pick for regular use. While it has some minor drawbacks, such as potential noise during setup, its overall design and functionality make it a formidable tool for successful hunting.

3.Ameristep Throwdown Ground Blind Overview

Key Features:

  • Compact and Portable Design: The blind features a patented hub design with an integrated stake system, making it a single compact unit easy to carry and track.
  • Quick Setup: Ideal for run-and-gun hunting, especially turkey hunting, it sets up quickly, providing immediate concealment.
  • Lightweight Construction: Weighing only 1.8 lbs, it’s designed to be easily transported and stowed in a turkey vest.
  • Effective Concealment: Despite its small size, it features three panels with realistic 3D leafy die-cuts, offering significant concealment for two hunters.
  • Durable Materials: Constructed from high-quality, durable polyester and ZS3 fabric, which minimizes noise and sheen, enhancing stealth.

Pros

  • Ease of Use
  • High Mobility
  • Sturdy in Various Conditions

Cons

  • Limited Space
  • Limited Coverage

The Ameristep Throwdown Ground Blind is tailored for hunters who require a blend of mobility, quick setup, and effective concealment. Its lightweight, compact design makes it an ideal choice for turkey hunting or similar activities where speed and flexibility are paramount.

While it offers excellent portability and ease of use, its smaller size and lower height may be limiting for some hunting situations. However, for those needing a minimalistic, easy-to-deploy hunting blind, it presents a solid option.

4.Barronett Blinds RA200BW Radar Pop Up Portable Blind Overview

Key Features:

  • Material Quality: Constructed from HD 150 denier fabric, ensuring durability and resistance to wear.
  • Design and Color: Features a Bloodtrail Backwoods Camo pattern, designed for optimal concealment in a variety of woodland environments.
  • Size: Spacious interior with dimensions of 67″D x 71″W x 71″H, allowing enough room for multiple hunters and gear.
  • Frame Material: Built with a sturdy iron frame to withstand outdoor conditions.
  • Windows: Equipped with zipperless windows for noise-free adjustment, and shoot-through mesh suitable for broadhead use.
  • Additional Features: Includes a rear peek window for enhanced field view, and is water-resistant with a black interior coating to minimize light and glare inside the blind.

Pros

  • Zipperless window design allows for quiet adjustments
  • Concealment
  • Ease of Transport

Cons

  • Shoot-Through Mesh Limitation

The Barronett Blinds RA200BW Radar Pop Up Portable Blind is well-suited for hunters looking for a reliable, spacious, and easy-to-use option with effective concealment capabilities.

Its robust construction and thoughtful features like noise-free windows and additional viewing options make it a solid choice for serious hunters.

While it’s a bit heavier, its durability and roominess justify the extra weight, making it a great investment for those who prioritize comfort and utility in a hunting blind.

5.HUNTSEN Pop-Up Hunting Blind Overview

Key Features:

  • Visibility and Concealment: Features three full panels of one-way see-through mesh that provides a 270-degree view, allowing for broad visibility while remaining concealed.
  • Design for Stealth: Equipped with silent-sliding windows on each side, enhancing the ability to stay unnoticed by game.
  • Camouflage: The realistic camo pattern and brushed-in loops are designed to blend seamlessly with various natural environments.
  • Size and Comfort: Offers a spacious interior with dimensions of 65″ height, hub to hub 75″ x 75″, and a floor space of 55″ x 55″, comfortably accommodating 2-3 persons.
  • Material and Construction: Made of high-quality polyester fabric, with strong metal hubs, reinforced corners, and durable straps to withstand diverse weather conditions.

Pros

  • Lightweight and Portable
  • Durable

Cons

  • Visibility Limitations
  • Noise Potential

The HUNTSEN Pop-Up Hunting Blind is a versatile choice for hunters seeking ease of use, excellent visibility, and effective camouflage. It’s particularly suited for those who appreciate a quick setup and the ability to move stealthily in the field.

The blind’s construction and features make it a robust option for various hunting excursions, whether targeting deer, turkey, or elk. However, hunters should consider the potential for noise and the limitations of the mesh during colder seasons.

Overall, this blind offers a compelling mix of functionality and convenience for both novice and experienced hunters.

Key Features to Consider When Choosing a Hunting Blind

Material and Durability

Opt for blinds made from durable, weather-resistant materials like polyester or nylon to withstand the elements.

Size and Capacity

Consider the number of people and the equipment you plan to accommodate. Compact blinds are great for solo hunts, while larger options like the Barronett Blinds Big Cat Pop Up Portable offer ample space for groups.

Visibility and Concealment

Look for blinds with camouflage patterns appropriate for your hunting environment. Features like shoot-through mesh windows also enhance concealment while allowing for visibility.

Ease of Setup and Transportation

Ease of setup is critical, especially for mobile hunters. Choose blinds that can be assembled quickly and are light enough to transport easily.

Conclusion

Choosing the right hunting blind is about understanding your needs, the specific game you’re targeting, and the typical environments you hunt in. With the right blind, you can enjoy increased comfort, better concealment, and ultimately, more successful hunts. Remember to maintain your blind well and adapt it as needed to ensure it serves you

Top 7 Best Airsoft Snipers For the Budget

Airsoft sniping is an exhilarating aspect of airsoft sports that combines precision, patience, and skill. For many enthusiasts, finding the right best airsoft snipers rifle is a gateway to mastering the art of long-range shooting.

However, for budget-conscious enthusiasts, it’s crucial to find a model that offers the best value without compromising on performance. In this article, we’ll explore the top 7 best airsoft snipers that won’t break the bank.

What Are Airsoft Snipers?

Airsoft snipers are specialized airsoft guns designed for long-range shooting. They are typically equipped with high-precision barrels and powerful springs to achieve greater accuracy and range compared to standard airsoft rifles.

Importance of Precision and Range in Sniping

Precision and range are the heartbeats of successful airsoft sniping. A good sniper rifle must be capable of hitting targets at long distances with minimal shots, making these features paramount, especially for players who participate in competitive and tactical airsoft matches.

Key Features of Budget Airsoft Snipers

Accuracy and Range

For a budget airsoft sniper, maintaining high accuracy and an effective range is essential. These features ensure that the player can compete on equal footing with opponents wielding more expensive gear.

Build Quality and Durability

Durability is crucial as it determines how well the rifle will hold up in various playing conditions. A well-built sniper rifle can withstand the rigors of frequent use, which is particularly important for players who participate in regular matches.

Upgradeability

Many budget snipers come with basic setups that are highly upgradeable. This allows players to enhance their rifles as their skills improve or as funds become available, making it a practical long-term investment.

Top 7 Best Budget Airsoft Snipers

Here are the top 7 budget-friendly airsoft snipers that offer the best balance between cost and performance:

1.The BBTac Airsoft Sniper Rifle M62

The BBTac Airsoft Sniper Rifle M62 is a bolt action, powerful spring airsoft gun designed to provide high performance in airsoft skirmishes. It shoots 0.20g BBs with high power, ensuring a strong presence on the field.

The rifle is constructed from ABS polymer, enhancing its durability while maintaining a light weight of 4 pounds. It features a precision-made barrel for increased accuracy and a fast-loading clip system for efficient reloading during battles.

The realistic bolt action mechanism adds to the authenticity of the sniping experience.

This rifle is a good choice for those looking for a budget-friendly airsoft sniper rifle that offers a balance of performance, realism, and durability. It’s particularly suitable for beginners to intermediate players in airsoft sniping.

Pros

  • Durable
  • Reliable under various conditions
  • Great value

Cons

  • Heavier than some models

2.MB4411G Bolt Action Spring Sniper Rifle (OD)

The Well MB4411G Bolt Action Sniper Rifle is a formidable choice for airsoft enthusiasts seeking a high-performance, spring-powered sniper rifle.

Inspired by the L96 sniper model, this rifle features a fluted metal outer barrel and a polymer body equipped with a quad rail system for attaching tactical accessories.

It comes with a foldable stock that includes an adjustable cheek riser, enhancing comfort for long-distance shooting. The ergonomic pistol grip is designed for optimal handling and comfort. The sniper does not come with an optic, allowing users to customize their scope choice.

The Well MB4411G is an excellent choice for serious airsoft players who value precision and reliability in their sniper rifle and are willing to invest in a high-powered, well-built model.

Its heavy, solid construction and high customizability make it a versatile and formidable weapon in airsoft sniping.

Pros

  • Includes accessories
  • Easy to upgrade

Cons

  • Initial calibration may be needed

3.L96 AWP Spring Airsoft Sniper Gun OD

The L96 AWP Spring Airsoft Sniper Gun is a replica of the iconic L96 sniper rifle, renowned for its use in military and tactical applications.

This airsoft version is designed for precision shooting in airsoft sports, featuring a spring-powered mechanism that ensures reliable performance and consistency.

The sniper gun is often praised for its accuracy and long-range capabilities, making it a popular choice among airsoft enthusiasts. It usually comes in an olive drab (OD) color, which adds to its military aesthetic.

The L96 AWP Spring Airsoft Sniper Gun is an excellent choice for players who enjoy the role of a sniper in airsoft games and appreciate the blend of realism and performance.

Its design and capabilities make it ideal for those looking for an authentic and effective long-range airsoft rifle.

Pros

  • Superior range
  • Excellent in competitive settings

Cons

  • Basic stock scope

4. L96 AWP Spring Airsoft Sniper Gun OD

The Double Eagle Field Marksman Bolt Action Spring Airsoft Sniper Rifle is designed for airsoft enthusiasts who value precision and reliability.

This model features a high-strength ABS polymer stock paired with a full metal barrel, bolt, and trigger, offering a robust construction and consistent performance. It achieves a velocity of 400-420 FPS with 0.20g BBs, making it one of the more powerful sniper rifles in the budget category.

The adjustable hop-up system allows for better accuracy and range customization, enhancing its effectiveness in various airsoft scenarios.

Overall, the Double Eagle Field Marksman Bolt Action Spring Airsoft Sniper Rifle is a solid choice for those entering the world of airsoft sniping.

It offers a good mix of performance, durability, and affordability, though it does require some additional investment in accessories and regular maintenance to ensure optimal performance.

Pros

  • Strong Performance
  • Durability

Cons

  • Scope and Accessories Not Included

5.Zm51 Spring Airsoft Gun Sniper Rifle fps-400 w/bipod

The ZM51 Spring Airsoft Sniper Rifle is a full-scale replica designed for airsoft enthusiasts who appreciate a powerful and precise sniping experience. This spring-powered rifle boasts a powerful bolt action mechanism and achieves a velocity of 400 FPS when using 0.12g BBs.

It features heavy-duty ABS plastic construction along with a precision, one-piece aluminum barrel. The rifle is equipped with an integrated top R.I.S. rail, allowing for easy attachment of the included tactical accessories like a red dot scope and a folding bi-pod. The package also includes a speed loader and a gun sling, enhancing its value.

The ZM51 Spring Airsoft Sniper Rifle is an appealing choice for novice airsoft players and those on a budget, offering a complete package that allows for immediate field use.

Its powerful shooting capability and included accessories make it a compelling option, though upgrading certain components like the scope may be necessary for enhanced performance.

Pros

  • High Velocity
  • Accessories Included
  • Durable Construction

Cons

  • Regular maintenance is needed to ensure consistent performance

6. BBTacAirsoft Gun

The BBTac Airsoft Gun is a comprehensive sniper rifle package that boasts high precision and power. It’s designed for serious airsoft enthusiasts looking for a reliable, ready-to-play solution.

This full-metal APS SR-2 modular bolt action sniper rifle comes with a robust spring-piston system, delivering an impressive 470 FPS using 0.2g BB pellets.

The package includes a 3-9×32 zoom scope for long-distance targeting and a metallic adjustable bipod for stable shooting. The rifle is built with a metal barrel and frame, ensuring durability and a realistic sniper experience.

This BBTac Airsoft Sniper Rifle is ideal for airsoft players who need a high-performance rifle with precision shooting capabilities for competitive scenarios.

Its comprehensive package is particularly appealing for those who want a significant upgrade from beginner or intermediate models.

Pros

  • High Precision and Power
  • Quality Scope Included
  • Durable Construction

Cons

  • Expensive than simpler airsoft guns
  • Plastic Components

7.UKARMS P1147 AK47 Tactical Airsoft Spring Rifle with Laser & Flashlight

The UKARMS P1147 AK47 Tactical Airsoft Spring Rifle is a 1:1 scale replica of the AK-47, designed for airsoft enthusiasts who appreciate the iconic look and feel of this legendary rifle.

It’s equipped with a laser sight and flashlight, enhancing functionality and playability in various lighting conditions. This model is manually operated, which means it does not require batteries, adding to its appeal for those who prefer the reliability of spring action.

The rifle is made with lightweight, durable materials, making it suitable for outdoor airsoft battles.

The UKARMS P1147 AK47 Tactical Airsoft Spring Rifle is a solid choice for those new to airsoft or younger players looking for a fun, straightforward airsoft gun with tactical features.

While it offers great aesthetics and additional accessories, its performance and durability are more suited to casual play rather than serious tactical airsoft engagements.

Pros

  • Authentic Design
  • Lightweight Construction Easy to handle
  • Cost-Effective

Cons

  • Lack of Upgradability

Conclusion

Choosing the right airsoft sniper rifle doesn’t have to be an expensive endeavor. With the right information and a clear understanding of your needs, you can select a budget-friendly model that offers great performance and potential for growth.

The Best Trail Hiking Shoes in 2025

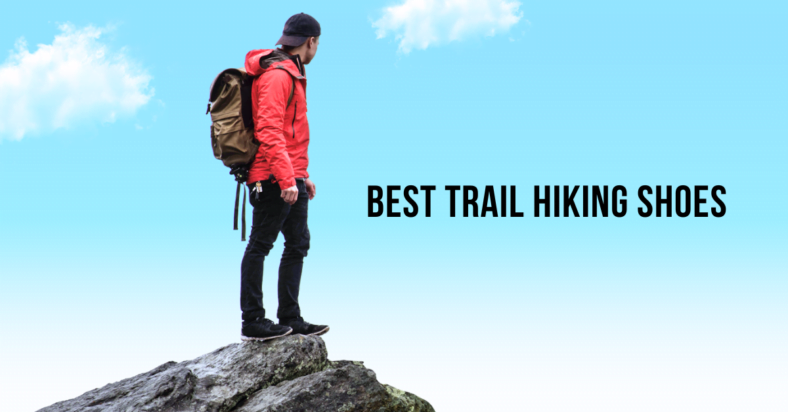
When you’re gearing up for a hike, the right pair of trail hiking shoes can make all the difference. Whether you’re trekking through rugged mountains, crossing streams, or just enjoying a casual day out on local trails, your footwear plays a pivotal role in your adventure.

It not only affects your comfort but also impacts your performance and safety. Let’s delve into what makes some trail hiking shoes stand out from the rest, ensuring your next hike is as enjoyable as possible.

What Makes a Great Trail Hiking Shoe?

Key Features to Consider

Selecting the perfect trail hiking shoe involves understanding the key features that contribute to a reliable and comfortable experience:
Durability: Look for shoes that can withstand varied and rough terrain.
Comfort and Fit: A snug, yet comfortable fit prevents blisters and discomfort.
Grip and Traction: Essential for maintaining stability on slippery or uneven surfaces.
Weight: Lighter shoes reduce fatigue on longer hikes.
Water Resistance: Keeps your feet dry in wet conditions, enhancing overall comfort.

Materials and Technology

Modern hiking shoes utilize a variety of materials and advanced technologies to enhance performance:
Materials: Synthetic fabrics for breathability and leather for durability are commonly used.
Technology: Innovations like cushioned midsoles for shock absorption and reinforced toe caps for protection are key developments enhancing hiker experience.

1.The Salomon Men’s Speedcross 4 Trail Running Shoe

The Salomon Men’s Speedcross 4 is a highly regarded trail running shoe designed specifically for tackling tough terrains. Known for its exceptional grip and robust design, it is tailored to enhance performance in soft, muddy, or rugged conditions.

The Speedcross 4 features an aggressive lug pattern on the outsole which provides unparalleled traction, and it is equipped with a precise-fit SensiFit system that cradles the foot securely, offering a snug and supportive fit.

Pros:

Exceptional Traction: The shoe is equipped with a Wet Traction Contagrip outsole that delivers superior grip in muddy, wet, or slippery conditions, making it ideal for technical trails.
Snug and Secure Fit: Features Salomon’s SensiFit system which wraps the foot for a precise and secure fit, minimizing in-shoe movement and reducing the risk of blisters.
Lightweight Protection: Despite its robust build, the shoe remains relatively lightweight and includes a protective mudguard around the base of the foot, as well as a reinforced toe cap for additional protection against debris.
Quicklace System: Comes with Salomon’s Quicklace system which allows for easy adjustments and a secure fit, making it quick and conven ient to put on and take off the shoes.

Cons:

Less Breathable: The heavy-duty construction can compromise breathability, potentially leading to warmer feet in hot weather conditions.
Narrow Fit: Some users find the fit a bit too narrow, which might not be suitable for those with wider feet.
Stiff Sole: The sole can feel stiff to some users, which might affect comfort during long runs or if used on very hard surfaces.

The Salomon Men’s Speedcross 4 Trail Running Shoe is highly recommended for trail runners who need a reliable, high-performance shoe that excels in adverse conditions and rough terrain.

Its drawbacks, such as breathability and fit, are important considerations but often outweighed by its benefits, especially for those prioritizing traction and durability in their trail running gear.

2.The Merrell Men’s Moab 2 Vent Hiking Shoe

The Merrell Men’s Moab 2 Vent Hiking Shoe is a staple in the outdoor footwear market, renowned for its comfort and durability. Designed for hikers who value breathability and stability, the Moab 2 Vent features a performance suede leather and mesh upper, along with a Vibram traction outsole.

It’s engineered to provide superior comfort right out of the box and is suitable for various hiking conditions, particularly in dry, warm environments due to its excellent ventilation.

Pros:

High Breathability: The mesh upper ensures your feet stay cool and dry in hot conditions, making it ideal for warm-weather hiking.
Comfort and Support: Includes a Merrell air cushion in the heel that absorbs shock and adds stability, along with a supportive footbed.
Durability: Constructed with performance suede leather that stands up well against wear and tear.
Excellent Traction: Equipped with a Vibram TC5+ outsole that provides high-performance durability, stability, and slip-resistance.
Versatility: These shoes are versatile enough for both casual day hikes and more demanding trails.

Cons:

Not Waterproof: The breathable mesh upper, while excellent for ventilation, does not provide protection against wet conditions.
Bulky for Some Users: Some users find the shoe a bit heavy and bulky, which might not be ideal for those who prefer lightweight footwear for fast hiking.
Break-in Period: Some users report a break-in period is necessary to achieve optimal comfort.
Dust and Debris Infiltration: The same mesh that provides breathability can allow fine dust and debris to enter the shoe in very dry, sandy conditions.

The Merrell Men’s Moab 2 Vent Hiking Shoe is an excellent choice for hikers looking for durable, breathable, and supportive footwear suitable for a variety of dry terrains.

While it may not be the best choice for wet conditions, its comfort, stability, and quality construction make it a favorite among many outdoor enthusiasts.

3.The Altra Lone Peak 5 Trail Running Shoe

The Altra Lone Peak 5 is a popular trail running shoe known for its zero-drop platform and a foot-shaped toe box that allows for a more natural foot position and toe splay.

This model is designed to provide a balance of comfort and stability on rugged terrains, featuring Altra’s signature cushioning and trail-specific features.

It’s built to accommodate the biomechanics of the human body more naturally, which promotes better alignment and reduces the risk of injury.

Pros:

Zero-Drop Platform: Encourages natural foot alignment and low-impact landing, which can be beneficial for maintaining stability and reducing fatigue on long runs.
FootShape Toe Box: Offers ample room for toes to spread naturally, enhancing balance and propulsion on uneven surfaces.
Excellent Traction: Equipped with MaxTrac™ outsole and TrailClaw™ canted lugs positioned strategically beneath the metatarsals to provide enhanced traction in uphill climbs and downhill descents.
Responsive Cushioning: Features Altra EGO™ midsole, which adapts to the ground and provides responsive yet soft cushioning.
Versatile Use: Performs well across a variety of trail conditions, from muddy to rocky paths, making it a versatile choice for different types of trail runners.

Cons:

Durability Concerns: Some users report that the durability of the upper mesh and the outsole may not stand up to extreme wear or very rugged terrain over long periods.
Sizing Issues: As with many specialized running shoes, getting the right fit can be tricky; some users suggest that it runs slightly larger than expected.
Adaptation Period: For those new to zero-drop footwear, there may be an adjustment period as the body adapts to the shoe’s structure, which could initially lead to discomfort or strain.
Water Resistance: While it handles light moisture well, it’s not fully waterproof, which might be a drawback for running in wet conditions.

The Altra Lone Peak 5 Trail Running Shoe is an excellent choice for trail runners who prioritize natural foot movement and comfort.

Its zero-drop design and spacious toe box make it stand out from traditional trail runners, offering a unique approach to foot mechanics on the trail.

However, prospective buyers should consider the adaptation period to zero-drop running and evaluate the shoe’s durability for their specific usage conditions.

4.The Adidas Outdoor Men’s Terrex Swift R2 GTX

The Adidas Outdoor Men’s Terrex Swift R2 GTX is a robust trail-running shoe that is engineered for fast movement over rugged terrain. Featuring a Gore-Tex waterproof membrane and a durable, grippy outsole, this shoe is designed to tackle diverse weather conditions and trail challenges.

The Terrex Swift R2 GTX blends lightweight construction with protective features, making it a preferred choice for outdoor enthusiasts who need reliable footwear for dynamic activities.

Pros:

Waterproof and Breathable: Equipped with a Gore-Tex lining that ensures waterproof performance while maintaining breathability to keep feet dry and comfortable in all conditions.
Superior Traction: Features a Traxion outsole that provides optimal grip in all directions, reducing slips and falls on wet and dry surfaces alike.
Durability: Constructed with ripstop materials and TPU overlays that offer enhanced durability and abrasion resistance, ideal for rough terrains.
Lightweight and Comfortable: Despite its rugged build, the shoe manages to remain relatively lightweight, and it includes a cushioned midsole for long-lasting comfort during extended wear.
Quick Lace System: Comes with a speed lacing system that allows for fast and secure lacing adjustments, making it easy to put on and take off.

Cons:

Stiff Sole: Some users may find the sole to be too stiff, which can impact comfort during longer hikes or runs, particularly on very hard surfaces.
Narrow Fit: The shoe tends to have a narrow fit, which might not be suitable for those with wider feet or who prefer a roomier toe box.
Breathability Limitations: While the Gore-Tex membrane offers excellent water resistance, it might limit breathability to some extent, especially in very hot weather.

The Adidas Outdoor Men’s Terrex Swift R2 GTX is a high-performance trail shoe that excels in providing protection, traction, and waterproofing, making it a solid choice for trekkers and trail runners who face unpredictable weather and challenging terrains.

Its quick lace system and durable construction are significant advantages, though potential buyers should consider the fit and flexibility according to their personal preferences and needs.

5.The Columbia Women’s Newton Ridge Plus Waterproof Hiking Boot

The Columbia Women’s Newton Ridge Plus Waterproof Hiking Boot is designed for female hikers who need a durable, supportive, and waterproof option for varied terrains.

This boot combines leather and synthetic materials for a balanced construction that offers both protection and comfort. Its waterproof performance, combined with a high-traction outsole, makes it a reliable choice for both amateur and seasoned hikers facing different weather conditions and rugged landscapes.

Pros:

Waterproof: Features a seam-sealed construction and waterproof materials that keep feet dry in wet conditions.
Durable Construction: Built with a combination of leather and mesh, providing durability without sacrificing breathability.
High Traction: The Omni-Grip non-marking traction rubber outsole offers stable and reliable grip on a variety of surfaces.
Lightweight: Despite its robust design, this boot is relatively lightweight, which helps in reducing fatigue during long treks.
Comfortable Fit: Includes a Techlite lightweight midsole for long-lasting comfort, superior cushioning, and high energy return.

Cons:

Break-In Period: Some users report a break-in period is necessary to achieve optimal comfort, which can be a drawback for those needing immediate ease of use.
Insulation Limitations: While waterproof, the boots are not heavily insulated, which might not make them the best choice for very cold weather hiking.
Sizing Issues: There can be inconsistencies in sizing, with some users finding the boots to run small or narrow, necessitating ordering a size up.
Aesthetic Design: Some users may find the design a bit bulky, which could impact preference for those seeking a more streamlined look.

The Columbia Women’s Newton Ridge Plus Waterproof Hiking Boot is a solid choice for hikers looking for a waterproof, durable, and comfortable boot at a reasonable price point.

It offers excellent support and traction, making it suitable for various hiking adventures. However, potential buyers should consider the break-in period and sizing issues when making their purchase. Overall, it’s a reliable boot that provides good value for its features.

6.La Sportiva Men’s Bushido II Trail Running Shoe

The La Sportiva Men’s Bushido II Trail Running Shoe is a highly technical and stable shoe designed for serious trail runners tackling tough terrains.

Known for its aggressive traction and precision fit, the Bushido II offers excellent stability and support without compromising on comfort.

This model features enhancements that improve on the original Bushido’s design, including added cushion and more responsive materials, making it a top choice for competitive trail running.

Pros:

Exceptional Stability and Support: The Bushido II is engineered with internal slip-on construction that wraps the foot like a sock, providing a snug fit and enhanced stability.
Superior Traction: Equipped with FriXion XT V-Groove2 soles that deliver impressive grip on various surfaces, including wet rocks and muddy trails.
Protective Features: Includes thermoplastic polyurethane (TPU) toe caps and a rock guard in the midsole for extra protection against trail debris.
Breathable and Lightweight: Despite its robust construction, the shoe manages to remain breathable and lightweight, which is crucial for long-distance running.
Enhanced Cushioning: The updated model features additional cushioning, providing better shock absorption and comfort during runs.

Cons:

Narrow Fit: The Bushido II has a narrow fit, which may not be suitable for runners with wider feet or those who prefer a roomier toe box.
Limited Cushion for Ultra Distances: While improved, the cushioning may still be insufficient for ultra-long distances, particularly for runners who prefer plush underfoot padding.
Stiffness: Some runners find the shoe to be somewhat stiff, which could require a break-in period to achieve optimal comfort.

The La Sportiva Men’s Bushido II Trail Running Shoe is ideal for trail runners who need a reliable, durable shoe with excellent traction and stability.

It performs well in technical terrains and offers significant protective features. However, potential buyers should be aware of its narrow fit and relative stiffness, which could affect comfort for some users.

Despite these considerations, its performance capabilities make it a standout choice in the competitive trail running shoe market.

7.KEEN Men’s Targhee II Mid Waterproof Hiking Boot

The KEEN Men’s Targhee II Mid Waterproof Hiking Boot is a robust and durable choice for hikers seeking reliable footwear for a variety of outdoor activities.

This mid-cut boot is designed to offer a high level of protection, support, and comfort, making it suitable for hiking, trekking, and other outdoor adventures.

Its waterproof construction ensures that your feet stay dry in wet conditions, while the aggressive outsole provides excellent traction on different terrains.

Pros:

Waterproof Performance: Features KEEN.DRY waterproof, breathable membrane that keeps moisture out and allows your feet to breathe, ideal for wet conditions.
Enhanced Traction: The boot includes a non-marking rubber outsole with 4mm multi-directional lugs, offering superior traction and grip on rocky and slippery surfaces.
Support and Comfort: Designed with a dual-density, compression-molded EVA midsole and a padded collar and tongue, it offers ample support and cushioning for long hikes.
Protection: The mid-cut height provides excellent ankle support, and the protective toe cap helps prevent injuries from rocks and roots.
Durability: Constructed with high-quality leather and performance mesh, the Targhee II is built to withstand rugged use.

Cons:

Fit and Sizing: Some users find the sizing to be off, with the boot running a half size smaller than usual. It is recommended to size up for a better fit.
Weight: Compared to some modern hiking boots, the Targhee II might feel slightly heavier, which could be a drawback for those preferring lightweight options.
Break-In Period: There may be a brief break-in period required to achieve optimal comfort, as reported by some users.
Breathability Issues: While the KEEN.DRY membrane offers good waterproofing, some hikers might find the boots less breathable in very hot and humid conditions.

The KEEN Men’s Targhee II Mid Waterproof Hiking Boot is a solid choice for outdoor enthusiasts who need a reliable, supportive, and protective boot for various terrains and conditions.

While it provides excellent waterproofing and traction, potential buyers should be mindful of the fit and weight to ensure it meets their specific hiking needs and preferences.

8.The Brooks Cascadia 15

The Brooks Cascadia 15 is a well-regarded trail running shoe known for its durability, comfort, and excellent traction on varied terrains. It’s designed for runners who need a reliable shoe that can handle long distances and rugged trails.

The Cascadia 15 features Brooks’ standard technologies, such as the BioMoGo DNA midsole for adaptive cushioning and the Pivot Post System for stable, secure footing in rough terrain.

Pros:

Superior Traction: Equipped with a TrailTack rubber outsole that provides exceptional grip and traction on both wet and dry surfaces.
Enhanced Durability: Features a rugged construction with a reinforced upper that protects against trail debris and extends the shoe’s lifespan.
Stability on Uneven Terrain: The Pivot Post System acts like a stabilizing suspension system, offering increased control and stability over uneven ground.
Comfortable Cushioning: Incorporates BioMoGo DNA midsole cushioning that dynamically adapts to every step and stride for comfort throughout the run.
Environmentally Conscious: The BioMoGo DNA material is biodegradable, adding an eco-friendly aspect to its advanced technological design.

Cons:

Weight: Some runners may find the Cascadia 15 slightly heavier than other trail running shoes, which could affect speed and agility.
Breathability: While the upper is durable, it may not be as breathable as some runners would like, potentially leading to discomfort in hot weather conditions.
Narrow Fit: The shoe tends to run narrow, which could be a concern for runners with wider feet or those who prefer a roomier toe box.
Stiffness: Some users report that the shoe feels a bit stiff, especially during the initial uses, which may require a break-in period.

The Brooks Cascadia 15 is a robust trail running shoe that excels in providing stability, traction, and durability on challenging terrains.

It’s well-suited for trail runners who require a shoe that can endure long distances and tough conditions. While it offers significant protective features and adaptive cushioning, potential buyers should consider its weight, breathability, and fit to ensure it meets their specific running needs and preferences.

9.The North Face Men’s Hedgehog Fastpack II WP

The North Face Men’s Hedgehog Fastpack II WP is a rugged, waterproof hiking shoe designed for hikers who need dependable footwear for moderate to difficult terrain.

This shoe combines a waterproof DryVent™ membrane with a durable leather and mesh upper, making it suitable for all-weather hikes. It’s crafted to offer a balance between comfort, protection, and agility, catering especially to those who prefer a lightweight yet protective hiking shoe.

Pros:

Waterproof Protection: Features a DryVent™ membrane that ensures excellent water resistance while maintaining breathability, keeping feet dry in wet conditions.
Durability: Constructed with a combination of PU-coated leather and abrasion-resistant mesh, providing a good balance of toughness and breathability.
Comfort: Equipped with an OrthoLite® footbed that offers long-lasting cushioning and comfort throughout the hike.
Traction: The Vibram® TS Trek outsole delivers superior grip and durability on various terrains, from slippery mud to rocky paths.
Lightweight Design: Despite its robust features, the shoe remains relatively light, enhancing mobility on long treks.

Cons:

Fit Issues: Some users report that the shoe runs small, suggesting a need to size up for a better fit.
Stiffness: The shoe may feel stiff initially, requiring a break-in period before achieving optimal comfort.
Insulation: While waterproof, the shoe does not provide substantial insulation, which might not make it suitable for cold weather conditions.
Breathability Limitations: Despite having a breathable membrane, in high temperatures, the shoes might not offer enough air circulation for some users.

The North Face Men’s Hedgehog Fastpack II WP is an excellent choice for hikers looking for a lightweight, waterproof, and durable hiking shoe. It’s well-suited for various outdoor conditions, providing reliable protection and comfort.

However, potential buyers should consider the shoe’s sizing and initial stiffness. Overall, it’s a dependable shoe for serious hikers who require performance and protection on their adventures.

10.The HOKA ONE ONE Speedgoat 4

The HOKA ONE ONE Speedgoat 4 is a high-performance trail running shoe that’s part of a line known for its exceptional cushioning and stability on rugged terrain.

Designed in collaboration with world-class ultrarunner Karl Meltzer, the Speedgoat 4 is built to handle technical trails, providing both comfort and aggressive grip.

This version continues to refine the features that have made the Speedgoat a favorite among trail runners, including a more breathable upper and a slightly wider forefoot for better stability.

Pros:

Exceptional Cushioning: Features a thick EVA midsole that provides significant shock absorption and underfoot protection, which is ideal for long-distance runs on rough trails.
Superior Traction: Equipped with Vibram® Megagrip rubber outsole that offers outstanding grip in both dry and wet conditions, enhancing safety and performance on slippery surfaces.
Enhanced Fit: The updated mesh upper provides increased breathability and a more accommodating fit, especially in the forefoot area, making it comfortable for wider feet.
Durability: Constructed with high-quality materials that hold up well against the demands of rugged terrain, ensuring longevity and reliability.
Stability: Despite its ample cushioning, the shoe maintains a stable ride, which is crucial on uneven trails.

Cons:

Weight: Some users might find the shoe slightly heavier compared to other trail runners, due to its robust construction and extensive cushioning.
Stiffness: Initially, some runners may experience stiffness, particularly around the forefoot, requiring a brief break-in period.
Price: As a high-end trail running shoe, the Speedgoat 4 comes at a premium price point, which might not be suitable for casual runners.
Aesthetic Design: The bulky appearance typical of HOKA shoes may not appeal to everyone, especially those who prefer a more traditional running shoe look.

The HOKA ONE ONE Speedgoat 4 is a standout trail running shoe that offers excellent cushioning, durability, and traction, making it ideal for runners tackling challenging terrains and long distances.

It’s well-suited for those who prioritize performance and comfort over a lightweight design. Prospective buyers should consider the fit and feel, particularly in terms of initial stiffness and the shoe’s overall bulk, to ensure it meets their specific needs and preferences.

Conclusion

Choosing the best trail hiking shoes is a critical step for any outdoor enthusiast. These shoes are more than just footwear; they are a tool that bridges the gap between you and the rugged beauty of nature. As you venture through various landscapes, from rocky paths to muddy trails, the right hiking shoes will provide the stability, comfort, and protection your feet need. It’s essential to consider factors like durability, support, and weather resistance when making your selection.


How Not to Introduce Kids to Guns: Parent Safety Mistakes to Avoid

The safest way to introduce kids to firearms starts with what not to do: do not rely on curiosity, secrecy, casual demonstrations, unsecured storage, movie myths, or one-time lectures. Children need clear rules, secure storage, age-appropriate conversations, and direct adult responsibility. A firearm in a home should be inaccessible to children unless a responsible adult is actively supervising a lawful, structured training setting.

This guide is for parents, guardians, and mentors who want a safer approach. It is not a shooting lesson and it is not legal advice. Firearm storage, transport, youth hunting, range access, and training rules vary by state, local law, and range policy. Use official safety resources, follow the law where you live, and choose professional instruction when a child is old enough and emotionally ready.

Table of contents

Quick Answer: What Is the Wrong Way to Introduce Kids to Guns?

The wrong way is to treat firearms as normal household objects, assume a child will remember one warning, or show a gun before you have secure storage and clear rules. The safer order is storage first, conversation second, professional or structured education later, and hands-on handling only when the child is mature enough, legally allowed, and directly supervised.

For younger children, the lesson may be simple: stop, do not touch, leave the area, and tell an adult. For older youth, the lesson can grow into safe handling, lawful range behavior, hunter education, or supervised sport shooting. The key is that the adult controls access, not the child’s interest level.

The Big Rule for Parents

Never use education as a substitute for secure storage. A child who has learned safety rules is still a child. Firearms should be locked, unloaded where appropriate, and stored so unauthorized people cannot access them. Ammunition should also be secured according to your household risk, local law, and manufacturer guidance.

Do Not Start Before Secure Storage Is Solved

The first mistake is introducing guns before the home is secure. If a child can access a firearm without adult permission, the household has a storage problem. Conversations matter, but they cannot carry the whole safety burden. Secure storage is the foundation.

Project ChildSafe emphasizes secure firearm storage as a core prevention step. The ATF also publishes firearm safety and security guidance for owners. Use those resources as starting points, then follow your state and local storage laws. If children visit your home, treat them as part of the safety plan even if they are not your children.

Storage Questions to Ask Yourself

  • Can any child, visitor, or unauthorized adult access a firearm?
  • Are keys, combinations, and backup access methods protected?
  • Is ammunition secured in a way that fits your household risk?
  • Are firearms stored according to local law and manufacturer instructions?
  • Would your storage still be secure if a curious child searched the room?

Do Not Let Curiosity Become the Teacher

Children are curious. If adults avoid the topic completely while firearms exist in the home, curiosity may fill the silence. That does not mean every child needs hands-on exposure. It means parents should provide clear, calm, age-appropriate rules before a child encounters a firearm unexpectedly.

A useful early message is simple: if you see a gun, do not touch it, leave the area, and tell an adult. Repeat the rule in normal conversation. Do not turn it into a scary performance or a challenge. The goal is to make the safe response automatic.

Avoid Secrecy and Avoid Showing Off

Secrecy can increase curiosity, but showing off can normalize unsafe attention. A better middle path is honest, boring safety language. Firearms are serious tools. They are not toys, props, or status symbols. Children should know that any firearm they find is an adult emergency, not an invitation to investigate.

Do Not Use Age Alone as Readiness

There is no universal age when every child is ready for firearm handling or youth hunting. Maturity, impulse control, emotional response, attention span, respect for rules, and legal requirements all matter. One child may be ready for a structured safety class earlier than another child of the same age, while another may need more time and no hands-on exposure.

Avoid saying a child is ready just because they are interested. Interest is not the same as responsibility. If a child treats safety rules as a game, argues with supervision, hides mistakes, acts impulsively, or seems fearful or overly fascinated, slow down and keep the lesson at the rule-and-storage level.

Readiness Signs Are Behavioral

  • The child follows instructions without repeated reminders.
  • The child can explain safety rules in their own words.
  • The child understands that mistakes can have permanent consequences.
  • The child accepts correction calmly.
  • The child is not trying to impress friends or siblings.

Do Not Make Firearms Seem Casual

Another mistake is treating a firearm like a conversation piece. Do not casually pass one around, use it as a prop, joke with it, or demonstrate it without a structured safety context. Adults set the emotional tone. If adults act careless, children learn carelessness.

When an older youth is ready for formal handling, the setting should be deliberate: unloaded verification by a responsible adult, muzzle direction control, finger off the trigger, clear instructions, no distractions, and a stop point if the child becomes nervous or careless. For many families, a certified instructor is the better first hands-on teacher.

Do Not Use Fear as the Whole Lesson

Fear can make a child freeze, hide mistakes, or avoid asking questions. Respect is better than panic. Be serious, direct, and calm. The message is not “guns are mysterious.” The message is “firearms require adult control, secure storage, and strict rules.”

Do Not Practice Without Structure and Supervision

Unstructured practice is a major risk. Do not let a child handle firearms alone, dry-fire without permission, use air guns unsupervised, or practice with friends as the audience. Even non-firearm trainers, toy guns, and air guns can teach bad habits if adults treat them casually.

If a youth is ready for range education, choose a controlled environment with proper eye and ear protection, one-on-one supervision, clear commands, and a stop rule. Review our shooting range safety rules guide before any range visit, and follow the range’s own rules above all else.

One Adult, One Learner Is Better

Group attention is hard for beginners. For a first supervised lesson, one responsible adult and one learner is usually safer than a crowd. Remove phones, jokes, competition, and pressure. The adult should be close enough to stop the session immediately.

Do Not Let Movies, Games, or Social Media Set Expectations

Many children first see firearms in games, movies, short videos, or social media. Those portrayals often skip storage, recoil, legal rules, backstops, hearing protection, and consequences. Parents should explain that entertainment is not training.

Keep the conversation practical. Real firearms are not reset buttons. Real bullets do not disappear when a game ends. Real handling rules apply every time, even when a firearm is believed to be unloaded. This is also a good time to discuss peer pressure and what to do if another child shows a firearm.

Give Children an Exit Script

Children should have simple words ready: “I am leaving,” “Do not touch that,” or “I am telling an adult.” They do not need to win an argument with another child. They need permission to leave immediately and get help.

Do Not Rush Youth Hunting or Range Time

Youth hunting and youth shooting sports can be positive when they are legal, supervised, structured, and matched to the child’s maturity. They can also be harmful if rushed. Do not make a child hunt, shoot, or pose with a firearm to satisfy adult expectations.

Before youth hunting, check state age rules, hunter education requirements, mentor rules, blaze-orange rules, legal equipment, tag requirements, and public-land restrictions. Our first-time hunting guide covers the broader planning side, while this page focuses specifically on child firearm safety and introduction mistakes.

Keep Youth Hunting About Learning

The first goal should be safe learning, not filling a tag. A child can learn by scouting, identifying sign, glassing, carrying water, practicing quiet movement, and watching ethical decisions. Hands-on firearm use is only one possible part of a much larger outdoor education.

Parent Safety Checklist Before Any Firearm Introduction

Use this checklist before moving beyond basic conversation. If any answer is uncertain, slow down and fix the gap before adding more exposure.

  • All firearms are secured from unauthorized access.
  • Ammunition is secured according to your household plan and local law.
  • The child knows what to do if they find a firearm.
  • The child is not pressured, fearful, or overly fascinated.
  • You have reviewed current state and local laws.
  • You have chosen a certified instructor, hunter education course, or structured range program if hands-on learning is appropriate.
  • You have eye and ear protection for any lawful range setting.
  • You have a stop rule: the session ends immediately if safety slips.

Authority Sources to Review

For a safety-first foundation, review Project ChildSafe secure storage guidance, the ATF firearm safety and security page, and the American Academy of Pediatrics’ parent-facing gun safety guidance on HealthyChildren.org. For youth hunting, use your state wildlife agency and approved hunter education program as the final authority.

FAQ

What is the first gun safety lesson for a child?

For many children, the first lesson should be: do not touch, leave the area, and tell an adult. The adult’s responsibility is secure storage and supervision, not expecting a child to manage the risk alone.

At what age should kids learn about guns?

There is no universal age. Basic safety rules can be age-appropriate for young children, while hands-on handling should wait until the child is mature, legally allowed, and directly supervised in a structured setting.

Should I show a child a firearm to remove curiosity?

Not casually. If a child is old enough for a structured lesson, use a controlled setting with a responsible adult or certified instructor. Never use a casual demonstration as a shortcut for storage and safety education.

Is a gun safe enough if my child knows the rules?

No. Rules help, but secure storage is still essential. Children can forget, act impulsively, respond to peer pressure, or misunderstand risk. Access control remains the adult’s job.

Can kids safely go to a shooting range?

Only when legal, allowed by the range, age-appropriate, and directly supervised. Choose a family-friendly range or professional instructor, use proper protection, and stop immediately if the child is uncomfortable or careless.

What should I ask before my child visits another home?

Ask whether firearms are in the home and how they are secured. The question can feel awkward, but it is a normal safety question, like asking about pools, pets, allergies, or supervision.

Final Thoughts

Introducing kids to firearms should never be rushed, casual, secretive, or built around adult pride. Start with secure storage, clear rules, calm communication, and professional guidance when appropriate. A child does not need access to understand respect. They need adults who take safety seriously every day, especially when no one is watching.

The 5 Best Antelope Cartridges: A Hunter’s Guide

Hunting antelope presents a unique set of challenges and rewards. Known for their keen eyesight and fleet-footedness, antelope can make for an exhilarating hunting experience.

An essential component to a successful hunt is selecting the right cartridge. This guide explores the top 5 cartridges for antelope hunting, offering insights into their ballistic capabilities, optimal uses, and why they stand out in the field.

What to Look for in an Antelope Cartridge

Ballistics for Antelope Hunting

The key to choosing an effective antelope cartridge lies in understanding the necessary ballistics. Ideal cartridges should offer a flat trajectory, high velocity, and sufficient energy to ensure a humane kill at distances typical in antelope hunting, which can vary significantly.The bullet must be capable of accurate, clean shots to handle the open terrains where antelope are often found.

Bullet Performance

When hunting antelope, bullet performance is crucial. A bullet that offers consistent expansion and deep penetration ensures that the animal is dispatched quickly and humanely.

Furthermore, since antelope are relatively light compared to other game like elk or bear, the bullet should not over-penetrate, which can spoil the meat.

Recoil Management

Recoil can affect shot accuracy and follow-up shot speed. Cartridges with manageable recoil are preferable, especially for hunters who may spend extended periods in the field or those sensitive to heavier kickbacks.

Top 5 Cartridges for Hunting Antelope

1.The Lee Precision 90235 .243 Winchester

The Lee Precision 90235 .243 Winchester Classic Loader is an excellent choice for those looking to begin reloading cartridges, particularly in the .243 Winchester caliber. This kit is tailored for hunters or shooters who want a straightforward, budget-friendly option for reloading.

Key Features

  • Complete Reloading Kit: The package comes with everything needed to start the reloading process, except for a rubber mallet. It includes key components such as a Sizing Die, Decapping Chamber, Bullet Seater and Priming Chamber, Priming Rod, Powder Measure, and comprehensive load data and instructions.
  • Ease of Use: Designed with simplicity in mind, this kit is ideal for beginners. The included instructions are clear, making the setup and reloading process manageable for those new to the craft.
  • Materials and Build: The loader parts are made of durable steel, while the powder dipper is crafted from plastic. This combination ensures longevity and reliability.
  • Portability: With item dimensions of 6 x 5 x 2 inches and a lightweight design (0.33 kilograms), this kit is portable, making it easy to take on hunting trips or move around your reloading area.

Specifications

  • Cartridge Compatibility: Specifically designed for .243 Winchester cartridges.
  • Material: Steel for the loader parts and plastic for the powder dipper.
  • Package Dimensions: 5.9 x 3.8 x 1.2 inches; weighs 15.2 ounces.
  • Model Year: 2012.

Considerations

  • Neck Sizes Only: It’s important to note that the Classic Lee Loader neck sizes only. This might not be suitable for semi-automatic, pump, and lever action guns, as these firearms often require full-length resizing for reliable cycling of reloaded ammunition.
  • Manual Operation: The reloading process with this kit is manual, requiring physical handling and measurement, which adds to the hands-on experience but might not be suited for those looking for quick or bulk reloading solutions.

The Lee Precision 90235 .243 Winchester Classic Loader is an affordable, efficient solution for individuals starting out in reloading. It offers a practical introduction to the reloading process with easy-to-follow instructions and a complete set of tools.

This loader is especially suitable for single-stage reloading and is a great way to understand the basics of cartridge reloading. Whether for hunting or target shooting, this kit provides an excellent starting point for .243 Winchester enthusiasts.

You can find this product on Amazon by searching for “Lee Precision 90235 .243 Winchester Classic Loader” to view current pricing and availability details.

2.The Lee Precision 90240 .270 Winchester Classic Loader

The Lee Precision 90240 .270 Winchester Classic Loader offers a comprehensive solution for hunters and shooters interested in reloading their own .270 Winchester cartridges. This kit is particularly designed for those who want a straightforward and cost-effective entry into the world of ammunition reloading.

Key Features

  • Complete Reloading Kit: This package provides all the necessary tools to start reloading the .270 Winchester, except a rubber mallet. The kit includes a Sizing Die, Decapping Chamber, Bullet Seater and Priming Chamber, Priming Rod, Powder Measure, as well as load data and a plastic case for storage.
  • User-Friendly: Aimed at beginners, the kit is accompanied by complete instructions that make the reloading process understandable and manageable. This is ideal for those who are new to reloading and need clear guidance.
  • Durability: Constructed with steel loader parts and a plastic powder dipper, the kit is built to last, ensuring many reloading sessions.
  • Compact and Portable: With dimensions of 6 x 4 x 2 inches and weighing only 0.4 kilograms, the loader is easy to transport and store, making it a practical choice for reloaders who might need to work in different settings.

Specifications

  • Cartridge Compatibility: Specifically designed for reloading .270 Winchester cartridges.
  • Material: Steel loader parts and plastic for the powder dipper.
  • Package Dimensions: 5.71 x 3.82 x 1.1 inches; weight of 0.5 kilograms.
  • Model Year: 2012.

Considerations

  • Neck Sizing Only: The kit is designed to neck size the brass only, which may not be suitable for use in semi-automatic, pump, and lever action guns. These firearms generally require full-length resized brass for optimal performance and reliability.
  • Manual Operation: As with other classic loaders, the operation is entirely manual, which enhances the hands-on experience but might not be ideal for those looking to quickly reload large batches of ammunition.

The Lee Precision 90240 .270 Winchester Classic Loader is an excellent starter kit for those venturing into the realm of reloading. It provides a hands-on approach to learning the reloading process with a simple and effective toolkit.

Designed for durability and ease of use, this kit is a great investment for hunters and shooters who want to personalize their ammunition loadouts without breaking the bank.

For purchase, you can search for “Lee Precision 90240 .270 Winchester Classic Loader” on Amazon or visit other firearm equipment retailers to check for availability and pricing.

3.The 6.5 Creedmoor

The RCBS Full-Length Die Set for the 6.5 Creedmoor cartridge is a comprehensive tool for reloaders who aim to produce high-quality, precise ammunition. Designed with precision and durability in mind, this die set is suited for both novice and experienced reloaders focusing on long-range or competition shooting.

Key Features

  • Full-Length Sizing Die: This die adjusts the entire case to SAAMI minimum cartridge dimensions. It sizes the case exterior, de-primes, and expands the neck to accept a new bullet, making it ready for reloading.
  • Bullet Seating Die: Accompanied by a built-in roll crimper, this die not only seats the bullet but also ensures it is crimped correctly, which is crucial for the consistency and performance of the ammunition.
  • Quality and Durability: Made from high-quality steel, the dies are built to last and withstand the rigors of frequent reloading sessions. This durability ensures long-term reliability and consistency in ammunition production.
  • Compatibility: These dies are compatible with most single-stage and progressive reloading presses, making them a versatile addition to any reloader’s toolkit.
  • Precision Engineered: RCBS is known for its high standards in manufacturing reloading equipment, and this die set is no exception. It includes features like vents to prevent case damage and tightly controlled headspace to maintain the integrity of the case dimensions.

Specifications

  • Material: High-quality steel construction.
  • Included Components: Full-Length Sizer Die with Expander-Decapping Unit, Seater Die with Bullet Seater Plug, shell holder, powder dipper, decapping pin, and retaining pin.
  • Package Dimensions: 5.91 x 4.45 x 1.69 inches.
  • Weight: 0.54 kilograms.
  • Model: Full-Length Die Set – Group A – Popular Rifle Cartridges.
  • Warranty: Limited Lifetime on materials and workmanship.

Considerations

  • Die Maintenance: Regular cleaning and proper maintenance of the dies are necessary to keep them in optimal condition and to ensure the quality of the reloaded rounds.
  • Learning Curve: While designed for ease of use, beginners might need some time to familiarize themselves with the full capabilities of the set.

The RCBS 6.5 Creedmoor Full-Length Die Set is an excellent choice for those looking to reload precise and reliable rounds for hunting or competitive shooting. With its robust construction and thoughtful design, it offers everything needed to start or enhance your reloading experience. Whether you are a seasoned reloader or just beginning, this set provides the tools necessary for producing top-quality ammunition in the popular 6.5 Creedmoor caliber.

To find this product, search for “RCBS 6.5 Creedmoor Full-Length Die Set” on retailers like Amazon or directly through hunting and shooting supply stores for pricing and availability.

4.The Lyman 7833024 Single Caliber Ammo Checker for .308 Winchester

The Lyman 7833024 Single Caliber Ammo Checker is an essential tool for shooters and reloaders who want to ensure the accuracy and safety of their .308 Winchester ammunition. This simple yet effective gauge helps verify that both factory-loaded and reloaded cartridges conform to SAAMI specifications, providing peace of mind before heading to the range.

Key Features

  • Quality Assurance: The ammo checker allows you to quickly confirm the quality and consistency of .308 Winchester ammunition by verifying that each round fits within SAAMI minimum chamber tolerances.
  • Ease of Use: To use, simply drop a cartridge into the gauge. If the cartridge fits without force, it’s assured to chamber smoothly in your firearm. This immediate feedback can be critical for avoiding malfunctions due to improperly sized ammo.
  • Durable Construction: Machined from solid 6061 T6 aircraft-grade aluminum, the Lyman Ammo Checker is built to withstand regular use without suffering from wear and tear. Its robust construction ensures long-term reliability.
  • High Visibility: Anodized in bright orange, the checker is easily visible on a cluttered reloading bench, reducing the risk of it being misplaced or overlooked.

Specifications

  • Caliber: Specifically designed for .308 Winchester cartridges.
  • Material: 6061 T6 Aircraft-grade aluminum.
  • Weight: Approximately 0.5 pounds.
  • Dimensions: The checker measures 8 x 2 x 2 inches, while the package dimensions are 6.77 x 1.69 x 1.34 inches, with a total package weight of 0.11 kilograms.

Considerations

  • Single Caliber Limitation: As a single caliber tool, this checker is only suitable for .308 Winchester. If you work with multiple calibers, additional checkers will be necessary.
  • No Moving Parts: The simplicity of the tool means no batteries or moving parts, minimizing anything that could break or fail, but also lacking the functionality of more complex measuring instruments.

The Lyman 7833024 Single Caliber Ammo Checker for .308 Winchester is a practical and valuable tool for any shooter or reloader. It combines straightforward functionality with durable construction to provide a reliable means of ensuring ammunition safety and performance.

5.TACFUN 7MM Remington Mag. Cartridge Red Laser Bore Sighter

The TACFUN 7MM Remington Mag. Cartridge Red Laser Bore Sighter is a specialized tool designed for hunters and shooters to quickly and accurately align the sights or scope of their rifle with the firearm’s barrel. This device is particularly useful for those who use the 7MM Remington Magnum, a popular choice for hunting big game.

Key Features

  • Precision Alignment: The bore sighter emits a red laser beam from the muzzle, providing a straightforward method for sighting in your rifle without the need to fire ammunition. This can significantly save on time and costs associated with live firing.
  • Material and Build: Crafted from durable brass, the bore sighter is designed to withstand the typical wear and tear of use in the field or at the range.
  • Compatibility: Despite an unusual description of compatibility with devices like iPads and iPods, this feature seems to be a mislisting. Typically, laser bore sighters do not interact with such devices and are solely used for firearm alignment.
  • Mounting: Designed to fit in the rifle chamber, not needing external mounts, but the product listing mentions a Picatinny mount type, which could indicate compatibility with additional tools or accessories for sighting purposes.
  • Portable and Easy to Use: With compact dimensions of 3 x 1 x 1 inches and a lightweight design (package weight of 0.05 kilograms), it is easy to transport and use anywhere.

Specifications

  • Objective Lens Diameter: 7 millimeters.
  • Sport Type: Hunting and Airsoft, indicating its utility in both real firearm practice and training scenarios in simulated environments.
  • Night Vision: Does not include night vision capabilities, focusing solely on daylight or well-lit use.
  • Package Dimensions: 5.35 x 3.15 x 0.63 inches.

Considerations

  • Battery Usage: Like most laser devices, it likely requires batteries, though this is not specified. Users should be prepared for additional maintenance like battery replacement.
  • Accuracy: While bore sighters provide a good initial alignment, fine adjustments should always be made with live firing to ensure precision under actual conditions.

The TACFUN 7MM Remington Mag. Cartridge Red Laser Bore Sighter is an efficient and practical tool for hunters and shooters looking to set up their rifles for accuracy.

Its easy-to-use design and durable construction make it a handy accessory for routine sighting checks and initial scope setups. This tool is invaluable for ensuring your firearm is accurately aligned, saving time and ammunition.

Choosing the Right Cartridge for You

Selecting the right cartridge involves considering your personal hunting style, the typical distance at which you’ll be shooting, and your comfort with recoil. Each hunter has unique preferences, and experimenting with different cartridges can help determine the best fit for your specific needs.

Conclusion

choosing the right cartridge for antelope hunting is not just about power; it’s about precision, effective range, and suitability to the terrain and typical engagement distances.

The 6.5 Creedmoor, .270 Winchester, .300 Winchester Magnum, .308 Winchester, and the 7mm Remington Magnum each offer unique advantages that cater to various hunting styles and preferences.

Whether you prioritize flat trajectory, minimal recoil, or stopping power, one of these cartridges is likely to meet your needs. Ultimately, the best cartridge is one that aligns with your personal hunting approach and ensures a humane, clean harvest of the animal.

With the right preparation and understanding of these top choices, you’re set for a successful and enjoyable antelope hunting experience.

Essential Primitive Survival Skills: Shelter, Fire, Water, Navigation, and Signaling

Primitive survival skills are the basic outdoor abilities that help you stay alive when modern gear fails or conditions change. The most important skills are shelter, fire, water, navigation, signaling, first aid, safe food judgment, tool use, and calm decision-making. These skills are useful for hunters, hikers, campers, and anyone who spends time away from easy help.

The key is not to romanticize survival. Real survival is cold, tiring, and unforgiving. Practice skills before you need them, carry modern safety gear when you can, follow local fire and wildlife rules, and make conservative decisions. Primitive skills should support safety, not replace planning.

Table of contents

Quick Answer

The essential primitive survival skills are building a simple shelter, starting and managing a fire safely, finding and treating water, staying oriented, signaling for help, handling minor first aid, making simple cordage or repairs, and avoiding risky food decisions. In most emergencies, shelter, water, warmth, and signaling matter more than trying to live off the land.

For hunters, survival skills are part of trip planning. A short evening hunt can become an overnight problem if weather changes, a trail is lost, or recovery takes longer than expected. Our beginner hunting trip planning guide covers the planning side that should come before field skills.

Survival Priorities

Survival priorities depend on conditions, but exposure usually becomes urgent quickly. Cold, wet, heat, injury, dehydration, and poor decisions create more danger than hunger in the early stages of most outdoor emergencies.

Stop and Think

When something goes wrong, stop moving unless staying put is more dangerous. Check injuries, weather, daylight, water, clothing, navigation, and communication. Panic wastes energy and leads to bad route choices. A calm plan is a survival tool.

Use the Rule of Priorities Carefully

Common survival rules about minutes, hours, and days are reminders, not exact science. Conditions matter. In cold rain, shelter and warmth can become urgent fast. In desert heat, shade and water may dominate. Match your action to the real risk in front of you.

Shelter Skills

Shelter protects you from wind, rain, snow, sun, and ground heat loss. It does not have to look impressive. A good emergency shelter is quick, safe, dry enough, and sized to conserve body heat.

Natural Shelter

Look for terrain and vegetation that reduce wind and precipitation without creating new hazards. Avoid dead trees, flood channels, avalanche terrain, unstable slopes, and animal dens. A natural windbreak plus an emergency blanket may be better than a complicated debris shelter.

Debris and Lean-To Shelters

A debris shelter uses branches, leaves, grass, or evergreen boughs for insulation. A lean-to can block wind or shed light rain. Both take time and energy, so build only what conditions require. Keep ventilation and fire safety in mind if using fire nearby.

Fire Skills

Fire can provide warmth, light, water treatment, cooking heat, and signaling. It can also start a wildfire. Before practicing primitive fire skills, check local rules and conditions. In many places, fire restrictions make open flames illegal or unsafe.

Fire Materials

Learn tinder, kindling, and fuel. Tinder catches first. Kindling builds flame. Fuel sustains heat. Dry inner wood, bark, grass, and prepared fire starters are more reliable than wet ground litter. Build small and feed gradually.

Fire Safety

Use an existing fire ring when possible, clear flammable debris, keep water or soil nearby, and fully extinguish the fire before leaving. The U.S. Forest Service campfire safety guidance is a strong reference for safe campfire habits. Our hunting fire-starting guide covers the hunting-specific version.

Water Finding and Purification

Water is critical, but unsafe water can make a bad situation worse. Clear water is not automatically safe. Streams, lakes, snowmelt, rain catchment, seepage, and dew can all be potential sources, but treatment is still important.

Finding Water

Follow terrain downhill, look for green vegetation, animal tracks, drainages, snow, and natural collection points. In cold conditions, melting snow requires fuel and time. In hot conditions, moving during cooler hours may reduce water loss.

Treating Water

Boiling is a common emergency method when fuel and container are available. Filters, chemical treatment, and UV devices can work when carried and used correctly. The CDC provides practical guidance on making water safe in emergencies.

Navigation starts before you get lost. Carry a map, compass, charged phone, offline map, and power bank when possible. Know the area, trailheads, roads, waterways, and boundaries before leaving the vehicle.

Stay Oriented

Mark your starting point and check direction often. Notice ridges, streams, roads, sun position, and major landmarks. If you are unsure, stop and reassess instead of wandering deeper.

Signal for Help

Whistles, mirrors, bright clothing, lights, smoke where legal and safe, and ground signals can help rescuers. Three repeated signals are commonly understood as distress. A phone or satellite communicator is not primitive, but it is often the smartest tool.

Food and Foraging Caution

Food is usually less urgent than exposure and water in short emergencies. Foraging mistakes can be dangerous. Many plants and mushrooms are hard to identify, and some toxic species resemble edible ones.

Do Not Guess

Do not eat plants, mushrooms, berries, or animals unless you have reliable identification and legal permission. Energy spent chasing uncertain food can be wasted. Carry emergency calories in your pack instead.

Cooking and Hygiene

If you are cooking game or emergency food, keep hands, tools, and surfaces as clean as conditions allow. Cook thoroughly and protect food from contamination. Hunting ethics also include meat care; see our ethical hunting practices guide.

Primitive Tools and Repairs

Primitive tool skills can help with shelter, fire, cordage, containers, and repairs. A knife, cordage, tape, and a small repair kit are still worth carrying. Primitive skills are stronger when supported by a few reliable modern basics.

Cutting Tools

A knife can help make tinder, stakes, notches, repairs, and food prep. Use controlled cuts away from the body. A hand injury in the field can become a serious survival problem.

Cordage and Simple Repairs

Natural fibers can be twisted into cordage, but it takes practice. In real trips, carry cordage too. Paracord, bank line, repair tape, and zip ties can save time and reduce risk.

How to Practice Safely

Practice survival skills in controlled conditions before relying on them. Start near home, in legal areas, with backup gear and a time limit. Tell someone where you are. Do not practice risky fire, water, plant, or trapping skills without proper instruction and permission.

Practice One Skill at a Time

Build a shelter in good weather before trying it in bad weather. Practice fire safety with modern ignition before trying friction fire. Learn map and compass basics before navigating off trail. Skill grows through repetition, not drama.

Keep Modern Safety Gear

Primitive skills are valuable, but modern safety gear is not cheating. A headlamp, water treatment, first-aid kit, emergency blanket, lighter, whistle, and map can prevent a small problem from becoming a survival story.

FAQ

What primitive survival skill should beginners learn first?

Start with shelter, fire safety, water treatment, navigation basics, and signaling. These skills address the most urgent outdoor risks and are useful for hunters, hikers, and campers.

Is primitive fire making necessary?

It is useful to understand, but carrying reliable modern ignition is smarter. Learn fire safety first. Primitive fire methods take practice and may be unsafe or illegal during fire restrictions.

Can you drink clear stream water?

Clear water can still contain harmful organisms. Treat water by boiling, filtering, chemical treatment, or another reliable method whenever possible.

Should beginners forage for survival food?

Beginners should avoid guessing with wild plants or mushrooms. Misidentification can be dangerous. Carry emergency food and learn foraging only from reliable local instruction.

Are primitive survival skills useful for hunters?

Yes. Hunters may face weather changes, long tracking jobs, late exits, or navigation problems. Shelter, fire, water, signaling, and calm decision-making can all matter in the field.

Final Thoughts

Primitive survival skills are valuable because they teach calm, practical problem-solving outdoors. Learn shelter, fire safety, water treatment, navigation, signaling, and basic repairs, but keep modern safety gear with you. The best survival skill is avoiding preventable emergencies in the first place.

Bear Baiting Laws: 10 Safety, Ethics, and Cleanup Checks

Bear baiting is legal in some places, restricted in others, and completely prohibited in many areas. Before thinking about bait, site setup, or hunting strategy, confirm the current rules for your state, province, public land unit, season, tag, bait materials, distance limits, trail cameras, cleanup, and reporting.

This guide is a law-first support article for hunters reviewing bear-baiting responsibilities. It is not legal advice, not a product roundup, and not permission to bait bears where the practice is restricted or illegal.

Table of contents

Bear Baiting: Quick Answer

Bear baiting should only be considered where it is legal and specifically allowed under current regulations. Check the exact rulebook first, then review land access, bait material limits, distance from roads/trails/camps, site registration, cleanup deadlines, and safety planning. If any rule is unclear, contact the wildlife agency before placing bait.

Do not start with bait choice

The first question is not what attracts bears. The first question is whether baiting is legal at that location, during that season, for your license, and under that land manager.

Avoid food-conditioning problems

Bait can change bear behavior if handled carelessly. BearWise explains why food and garbage attractants can create human-bear conflict risk.

Keep this support-only

This article does not recommend bait products, containers, scents, trail cameras, or hunting gear. Product choices require current legal and source verification.

Bear-baiting rules vary widely. Some jurisdictions allow it under detailed permit rules. Others ban it. Public land and private land may also differ.

Check official regulations

Use the current state or provincial wildlife agency rulebook. General hunting pages, forums, and old videos are not enough for a legal decision.

Check public-land rules

Federal, state, county, tribal, and private lands can have different access and bait rules. The U.S. Fish and Wildlife Service provides broad hunting information, but unit-level rules still matter.

Check bait definitions

Some regulations define bait broadly. Food, scent, minerals, processed products, animal parts, containers, and residue may be regulated differently.

Call before you guess

If the rulebook leaves any doubt, call the wildlife agency or the land manager before you act. Ask about the exact unit, tag type, season dates, bait materials, sign requirements, camera rules, and cleanup deadline. Write down the date, office, and answer you received. That note is not a replacement for the law, but it helps you avoid relying on memory or hearsay.

Permits and Site Rules

Where bear baiting is legal, it often comes with site-specific requirements. Read every detail before carrying anything into the field.

Site registration

Some areas require bait-site registration, visible tags, hunter identification, map coordinates, or limits on the number of active sites.

Distance limits

Rules may set minimum distances from roads, trails, campgrounds, dwellings, water, property lines, other bait sites, and public-use areas.

Timing rules

Regulations may control when bait can be placed, when hunting can happen, and when all bait and containers must be removed.

Written permission

On private land, get clear permission before setting a site. A casual conversation can create confusion later, especially if family members, lease holders, neighbors, or other hunters use the same property. Written notes should cover access routes, parking, site location, dates, cleanup expectations, and whether any non-hunting visitors may be nearby.

Human-Bear Conflict Risk

Bears that associate people, roads, camps, or homes with food can become dangerous and may be killed by wildlife agencies later. That risk should shape every baiting decision.

Keep sites away from people

Never place bait near homes, campgrounds, livestock areas, hiking trails, dumpsters, roads, or other places where bears may connect human activity with food.

Avoid spill and residue

Spilled food, wrappers, grease, and containers can attract bears and non-target animals after the hunt. Plan cleanup before you place anything.

Know local bear guidance

State wildlife agencies often publish bear-conflict guidance. Follow local recommendations for attractants, storage, and reporting problem bear behavior.

Report problem behavior

If a bear starts visiting homes, camps, livestock areas, dumpsters, or parking areas, stop thinking of the site as a hunting shortcut and treat it as a conflict warning. Follow local reporting rules and agency advice. The goal is to avoid teaching a bear that people and food belong together.

Site Safety

Bear bait sites can create close-range bear encounters. Safety planning should happen before the first visit.

Plan entry and exit

Choose routes that avoid surprising bears at close range. Tell someone where you are going and when you expect to return.

Carry legal safety tools

Bear spray, communication, first aid, navigation, and lighting may be appropriate where legal. The National Park Service has practical bear safety guidance for avoiding dangerous encounters.

Watch wind and visibility

Wind direction, thick cover, and low light can affect both bear behavior and hunter safety. Do not approach a site casually in poor visibility.

Do not work alone when risk is high

Remote sites, thick cover, fresh sign, poor cell service, bad weather, and evening visits all raise the safety burden. When conditions are questionable, use a partner where legal and practical, carry communication, and set a hard turnaround time. A bait site is not worth a rushed recovery, a surprise encounter, or a navigation problem after dark.

Non-Target Wildlife

Bait can attract more than bears. Raccoons, birds, deer, coyotes, livestock, and pets may visit depending on the site and bait material.

Check species restrictions

Some rules restrict bait types to reduce non-target impacts. Follow those rules exactly.

Reduce scattered food

Loose bait can spread beyond the site and increase non-target use. Follow legal container and cleanup rules.

Monitor responsibly

If cameras are legal, use them to understand site activity. Do not use photos to justify unsafe, illegal, or rushed decisions.

Know disease and carcass rules

Some areas restrict animal parts, carcasses, or other materials because of disease, livestock, or scavenger concerns. The USDA Animal and Plant Health Inspection Service publishes wildlife-disease information that can help hunters understand why agencies regulate attractants and animal material. Start with APHIS wildlife services resources, then follow the current local rulebook.

Cleanup and Closure

The end of baiting matters as much as the start. Leaving food or containers behind can create long-term problems.

Remove all materials

Remove bait, packaging, containers, straps, wire, trail markers, and trash by the legal deadline or sooner if you stop using the site.

Restore the area

Pick up spilled material where possible and leave the area cleaner than you found it.

Document closure

Take notes or photos showing that the site was closed. This can help if landowners or agencies ask questions later.

Return after weather

Heavy rain, snow, wind, and animal activity can scatter material after you think the site is clean. If rules and access allow, make a final return visit after bad weather or after the season closes. Look for wrappers, rope, wire, plastic, spilled material, and anything that could keep attracting animals.

Ethics and Fair Chase

Hunters disagree about baiting, and laws reflect different wildlife-management choices. Where baiting is legal, ethics still require restraint.

Respect fair chase debates

Do not dismiss hunters or land managers who oppose baiting. The ethical question deserves more than slogans.

Pass unsafe shots

A bear at bait is still a live animal requiring legal identification, safe backstop, proper distance, and responsible recovery.

Do not normalize nuisance behavior

Any method that teaches bears to seek human food should be handled with extra caution and strict cleanup.

Respect the public view of hunting

Bear baiting is one of the hunting topics many non-hunters notice. Sloppy sites, trash, poor photos, and careless talk can damage trust in hunters even where the practice is legal. Clean sites, lawful conduct, and honest explanations matter.

Common Mistakes

The biggest mistakes are legal assumptions, poor cleanup, and thinking attractants matter more than responsibility.

Using old rules

Bear regulations can change. Check the current season before placing bait.

Ignoring landowner permission

Private land requires permission. Public land may still require a permit or bait-site registration.

Leaving a site dirty

Trash, barrels, rope, and food residue can damage hunter reputation and create bear-conflict risk.

For bear encounter safety, read how to use bear spray. For broader ethics, see fair chase hunting ethics. For field preparation, review hunting safety tips.

FAQ

Is bear baiting legal everywhere?

No. Bear baiting rules vary by jurisdiction and land type. Always check current official regulations before placing bait.

Can baiting affect bear behavior?

Yes. Food conditioning can increase human-bear conflict risk if baiting or cleanup is handled poorly.

What should I check before setting a bear bait site?

Check legality, permit requirements, bait definitions, site distance rules, land access, timing, cleanup deadlines, and safety plans.

Should beginners use bear bait sites?

Beginners should first learn bear behavior, local rules, safety planning, and ethical shot selection with experienced guidance.

What matters most after a baiting season?

Remove all bait, containers, trash, and markers, then document that the site is clean and closed.

Extreme Angle Shooting: 8 Safety and Range Checks Before You Shoot

Extreme angle shooting means taking an uphill or downhill shot where the line-of-sight distance is different from the horizontal distance that affects bullet drop. The safe starting point is simple: confirm a legal shooting area, a clear backstop, a verified target, and a practiced angle-compensated hold before pressing the trigger.

This guide is for hunters and range shooters who want a safer way to think through steep terrain. It is not a replacement for firearm training, local laws, a range officer, or the manual for your rifle, optic, rangefinder, or ballistic app.

Table of contents

Extreme Angle Shooting: Quick Answer

For extreme angle shooting, use the horizontal or angle-compensated distance for elevation, not the straight line-of-sight distance by itself. Then check the backstop, target identity, wind, body position, and your practiced limit. If the angle, distance, rest, visibility, or backstop is uncertain, do not take the shot.

Keep safety first

Uphill and downhill shots can send a missed bullet into terrain you cannot fully see. The National Shooting Sports Foundation’s firearm safety rules still apply: keep the muzzle pointed safely, know your target, and know what is beyond it.

Use the right distance

A steep shot may require less elevation correction than the same line-of-sight distance on flat ground. That does not make the shot easy. It only changes the distance input you use for the hold or dial.

Pass on marginal shots

Steep terrain adds unstable footing, awkward body angles, limited target view, and harder follow-through. A clean pass is better than forcing a shot you have not practiced.

What Changes on Uphill and Downhill Shots

The main ballistic issue is distance geometry. Your rangefinder may show the direct line from you to the target, but gravity affects bullet drop across the horizontal part of that distance. Many modern rangefinders and ballistic apps can show an angle-compensated distance for this reason.

Uphill and downhill can behave similarly

Both uphill and downhill shots can require less drop correction than a flat shot at the same line-of-sight distance. The exact change depends on distance, angle, bullet, velocity, sight height, zero, and environmental inputs.

Rifle zero still matters

Your zero distance remains the base of the system. Do not assume angle compensation fixes a poor zero, loose scope mount, unverified ammunition, or a ballistic profile that was never checked on paper.

Close shots may not need much correction

At short hunting distances, the angle correction can be small. At longer distances or steeper slopes, the difference can matter more. Confirm this with your own rifle before relying on it in the field.

Line-of-Sight vs Horizontal Distance

The simplest way to explain angle compensation is this: line-of-sight distance is what the rangefinder sees directly to the target, while horizontal distance is the flatter distance used for drop correction. Many rangefinders label this as angle compensation, true ballistic range, horizontal component distance, or a similar mode.

Do not mix modes by accident

Some rangefinders can display both line-of-sight and angle-compensated readings. Know which number you are looking at before you dial or hold. A wrong display mode can lead to a wrong elevation decision.

Check the manual for your device

Optic and rangefinder brands use different names for angle modes. Read the manual for your exact model and test it at known distances before using it for a hunt or match.

Use ballistic data carefully

Ballistic calculators only help when the inputs are honest. Bullet velocity, ballistic coefficient, zero, sight height, temperature, and actual range all affect the result.

Rangefinder and Angle-Compensation Check

A rangefinder with angle compensation is useful, but it is still a tool that needs verification. Treat the reading as one part of the decision, not permission to shoot beyond your skill.

Verify at known distances

Before using angle compensation in the field, compare readings on a known-distance range or measured hillside target. Confirm which mode displays line-of-sight distance and which mode displays compensated distance.

Know the limits of the device

Rangefinders can struggle with brush, reflective surfaces, bad weather, low battery, and small targets. If the reading jumps or looks wrong, range again or pass.

Keep a simple backup

For normal hunting distances, a written dope card or verified hold chart can help you avoid overthinking in the field. Keep it conservative and based on shots you have practiced.

Safety and Backstop Check

Safety comes before the math. Hunter education guidance on firearm safety rules emphasizes target identification, muzzle control, and knowing what is beyond the target. Angle shots make those checks harder, not optional.

Check the backstop from your position

Do not rely on what the terrain looked like from the trail. From a steep shooting position, the bullet path may clear a ridge, skip past the target area, or point toward land you cannot inspect.

Watch for skyline risk

A target on a ridge, rock face, or skyline can be unsafe if there is no visible backstop. If you cannot identify a safe stop behind the target, do not shoot.

Respect legal and ethical limits

State rules, public-land rules, season rules, and hunter-orange requirements can affect whether a shot is legal. Check current regulations before the hunt, not after you reach the slope.

Stable Shooting Position

Steep angles can break a normal shooting position. Your feet may slip, your shoulder pressure can change, and the rifle may recoil differently from a steep rest.

Build the position before loading into the shot

Set your feet, knees, pack, bipod, tripod, or shooting sticks before you settle the reticle. If the position feels strained or unstable, move or pass.

Avoid awkward trigger pressure

Uphill and downhill body angles can pull your trigger finger and shoulder out of alignment. Dry practice only with an unloaded firearm, verified clear, pointed in a safe direction, and with a safe backstop area.

Control follow-through

A steep shot can tempt you to lift your head early. Keep your cheek weld and follow-through steady so you can see impact, spot a miss, and make a safer next decision.

Practice Before Hunting

Extreme angle shooting should be practiced before it is used on game. A flat-range group does not prove you are ready for a steep shot from a hillside, tree stand, canyon, or elevated blind.

Start with safe range drills

Use a legal range or supervised training area that allows angled targets. Follow the range officer’s rules and confirm the impact area before any drill.

Change one variable at a time

Test the same rifle, ammunition, zero, and optic setup before changing angle, distance, wind, or shooting position. Notes matter more than memory.

Set a personal field limit

Your limit should be the distance and angle you can repeat under realistic conditions, not the farthest hit from a bench. Build that limit from verified practice.

Field Decision Checklist

Use this quick checklist before taking an uphill or downhill shot. If any answer is weak, the safer choice is to wait, move, or pass.

Before the shot

  • Target is legal and clearly identified.
  • Backstop is visible and safe from your exact position.
  • Line-of-sight and angle-compensated distance are not confused.
  • Wind and light are good enough for the shot.
  • Rest, footing, and body position are stable.
  • The shot is inside your practiced field limit.

After the shot

Stay behind the rifle long enough to see the result. If hunting, follow your local rules and ethical recovery practices. Do not rush down a steep slope with a loaded firearm or unsafe footing.

When to pass

Pass if the animal is skylined, the backstop is uncertain, the angle is beyond your practice, the target is moving too much, your footing is unstable, or your rangefinder reading is inconsistent.

Common Mistakes

The mistakes below are common because angle shots make normal shooting habits feel slightly different. Slow down and confirm the basics.

Using line-of-sight distance for everything

Line-of-sight distance is useful, but elevation correction often needs the angle-compensated or horizontal distance. Confirm the mode before using the number.

Forgetting the backstop

The safest ballistic answer does not matter if the bullet path is unsafe. Backstop and target identification come first.

Trusting gear without practice

A rangefinder, scope turret, ballistic app, or reticle cannot replace live verification. Use gear to support a shot you have practiced, not to justify one you have not.

For broader range habits, read our shooting range safety rules. For target setup, see how to choose shooting targets. If your angle shooting depends on optics, review how to use a scope for long-range shooting and rifle scope parallax adjustments.

FAQ

Do uphill and downhill shots hit high?

They can hit higher than expected if you use only the line-of-sight distance for a steep shot. Use the angle-compensated or horizontal distance for elevation and verify it with your rifle.

Is a rangefinder required for extreme angle shooting?

No, but a rangefinder with angle compensation can reduce guessing. You still need safe target identification, a visible backstop, and verified practice.

Can I use the same scope zero for angle shots?

Yes, the same zero is normally the starting point, but your hold or dial may change when the angle is steep. Confirm your setup before hunting.

What is the safest rule for steep shots?

If you cannot confirm the target, backstop, angle-compensated distance, stable position, and legal setting, do not shoot. Move to a safer angle or wait for a better opportunity.

Should beginners practice extreme angle shooting?

Beginners should first build safe flat-range habits with a qualified instructor or range officer. Angle work should come later in a controlled and legal setting.

How to Set Up Your Bow: Fit, Safety, Rest, Sight, Arrows, and Tuning Checks

Set up your bow by starting with the manufacturer’s manual, confirming draw length and draw weight, checking string and limb condition, setting the rest and nocking point, aligning the sight, and testing everything safely at close range. If a step requires a bow press, major cam adjustment, or anything you are unsure about, use a qualified archery shop.

Table of contents

Quick Bow Setup Checklist

A basic bow setup should answer five questions: does the bow fit the shooter, is it safe to shoot, does the arrow match the bow, are the rest and sight aligned, and can the shooter repeat the same anchor and release? Work through those checks before chasing small tuning changes.

Confirm the bow type

Compound, recurve, and traditional bows have different setup steps. A compound bow may involve cams, modules, let-off, cables, and a peep sight. A recurve may focus more on brace height, nocking point, tiller, and arrow tune. Use the manual for the exact bow.

Use close-range testing first

Start close, usually at a safe blank-bale or short-range target, before moving back. Close-range testing helps catch rest contact, nock fit, peep position, grip problems, and inconsistent anchor without turning every shot into a long-distance miss.

Write down the baseline

Record draw weight, draw length, brace height where applicable, arrow model, point weight, rest position, sight marks, and any shop work. Notes make future tuning easier and help you avoid guessing later.

Safety and Manual Checks

Bow setup is equipment work, not a place for guessing. USA Archery offers safety and education resources at USAArchery.org, but the exact setup limits come from your bow manufacturer and a qualified technician.

Read the manual

Check the manual for draw-weight limits, module settings, arrow weight minimums, press requirements, limb-bolt limits, string specifications, and maintenance intervals. Do not assume one bow’s rules apply to another.

Inspect before shooting

Look for cracked limbs, frayed string strands, damaged serving, loose screws, worn cables, bent cams, missing clips, or rest contact marks. If anything looks damaged, stop and get it checked.

Know when to use a shop

Use a pro shop for press work, cam timing, cable changes, string replacement, major draw-length changes, limb concerns, or anything that feels unsafe. A small shop fee is cheaper than damaged gear or an injury.

Draw Length and Draw Weight

Fit comes before fine tuning. A bow that is too long, too short, or too heavy makes form inconsistent and tuning harder.

Draw length

Draw length should let the shooter anchor naturally without leaning back, reaching forward, or collapsing the bow arm. On compound bows, draw length may require module changes or cam settings. Follow the manual or shop guidance.

Draw weight

Draw weight should be controlled, not forced. If the shooter has to sky-draw, shake heavily, or cannot let down safely, the weight is too high. For hunting, also check your state’s minimum draw-weight rules where they apply.

Let-off and holding weight

Compound bow let-off affects how the bow feels at full draw. A comfortable holding weight helps with aim, but form and safety still matter. Do not choose a setup only because the peak draw weight sounds impressive.

String, Cables, Limbs, and Hardware

Before adjusting accessories, make sure the bow itself is in good condition. A worn string or loose part can make tuning results meaningless.

String and serving

Check for fraying, broken strands, separated serving, flattened nock fit, or unusual wear near cams and cable slides. Wax only as recommended and avoid hiding damage with wax.

Limbs and cams

Look for cracks, splinters, delamination, bent cams, and uneven cam movement. If a compound bow looks out of time or the cams are not tracking correctly, have a shop inspect it.

Accessory screws

Check sight, rest, stabilizer, quiver mount, and limb-driven rest hardware. Use proper tools and manufacturer torque guidance where available. Avoid overtightening small screws.

Arrow Rest and Nocking Point

The rest and nocking point control how the arrow starts its path. Small errors here can create broadhead flight problems, poor groups, and false tuning symptoms.

Set center shot as a baseline

Many compound setups start with the arrow running near the center of the riser and aligned with the string path. Exact values vary by bow and rest. Use the manual, rest instructions, or shop baseline.

Check nock fit

The nock should clip securely without pinching the string. A nock that is too tight can affect release and arrow flight. A nock that is too loose can be unsafe.

Watch for rest contact

Fletching contact with the rest, cables, riser, or shelf can cause erratic arrows. Use safe close-range testing and inspection to find contact before changing sight settings.

Sight, Peep, and Anchor

The sight system should match a repeatable anchor. If the shooter changes head position to find the peep, the setup is not helping.

Set anchor first

Find a natural anchor before moving the peep. The string should meet the face consistently, and the sight picture should appear without stretching the neck or rolling the head.

Align the peep safely

Peep work may require a bow press depending on the setup. If the peep twists, sits too high or low, or needs serving work, use a shop unless you are trained and have the right tools.

Start sight-in close

Begin close enough to keep arrows on the target safely. Move the sight in small steps and confirm groups before increasing distance. A poor group is usually a form or tune issue, not only a sight issue.

Arrow Fit and Spine

The arrow must match the bow. Draw weight, draw length, point weight, arrow length, and broadhead use all affect arrow spine and total weight.

Use a spine chart

Arrow makers publish spine charts and calculators. Easton’s arrow selection charts are a useful example of why draw weight, arrow length, and point weight matter together.

Check minimum arrow weight

Some compound bows list a minimum arrow weight. Shooting arrows below that limit can damage equipment and may be unsafe. Follow the bow manual.

Test hunting arrows separately

Field points and broadheads may not fly the same. Broadhead tuning should come after the basic bow setup is safe and repeatable. Use a proper target and safe backstop.

Basic Test Shots and Tuning

Tuning should be methodical. Change one thing at a time and confirm with groups, not one lucky shot.

Start with form

Grip torque, facial pressure, inconsistent anchor, and poor release can look like equipment problems. If groups are scattered, fix the shooter pattern before moving hardware.

Use paper tuning carefully

Paper tuning can show arrow tear, but it is not the only test. Follow safe range procedures and use it as one clue along with group tuning and broadhead testing.

Know the limit of home tuning

Rest adjustments and sight adjustments are reasonable for many shooters. Cam timing, limb concerns, press work, and string problems should go to a qualified shop.

Common Setup Mistakes

Most setup problems come from changing too much at once, using mismatched arrows, or ignoring fit.

Chasing sight pins before groups

If arrows do not group, moving the sight only moves a bad pattern. Build a consistent group first, then adjust the sight.

Using arrows that do not match the bow

Wrong spine, wrong length, damaged shafts, or poor nock fit can create tuning problems that no sight adjustment will fix. For more detail, see our guide on choosing arrow spine.

Skipping safety inspection

A setup that looks accurate but has damaged limbs, worn strings, or loose hardware is not ready. Inspect first, tune second.

For draw-weight decisions, read our compound bow draw weight guide. For bow fit and tuning habits, use the compound bow tuning guide. For field use, pair this with our bow maintenance tips.

FAQ

Can I set up a bow at home?

You can handle basic checks, sight movement, rest inspection, and close-range testing at home if you know the equipment. Use a pro shop for press work, strings, cams, modules, and anything unsafe.

What should I check first on a new bow?

Check the manual, draw length, draw weight, string and limb condition, arrow match, rest position, nock fit, and sight alignment before longer-distance shooting.

Do I need a bow press?

Some adjustments require a bow press, especially on many compound bows. Do not improvise press work. Use the correct equipment or a qualified shop.

Why are my arrows not grouping?

Common causes include inconsistent form, poor grip, wrong arrow spine, rest contact, loose hardware, peep problems, or tune issues. Change one variable at a time.

How often should I check my bow setup?

Check it before each season, after travel, after a hard bump, after string changes, and anytime groups or arrow flight change unexpectedly.

Exit mobile version