FFP vs SFP Rifle Scopes: What Is the Difference?

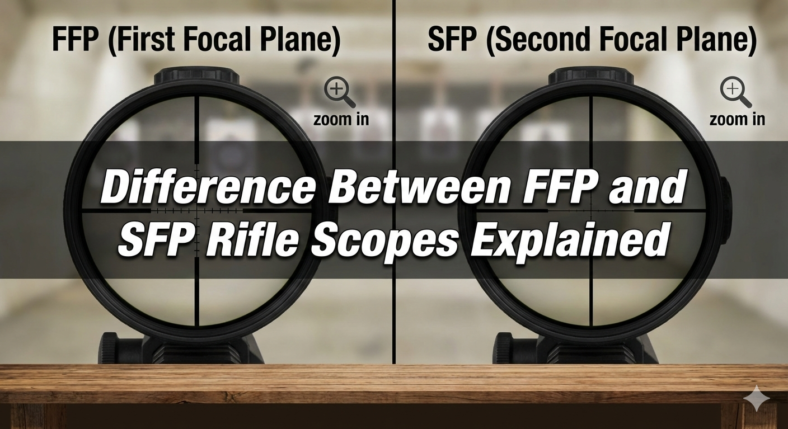
The difference between a first focal plane (FFP) and second focal plane (SFP) rifle scope is how the reticle behaves when you change magnification. In an FFP scope, the reticle grows and shrinks with the image, so hold marks keep the same value at any power. In an SFP scope, the reticle stays the same visible size, so hold marks are exact only at one calibrated magnification, usually the highest.

That one behavior drives most of the practical choice. FFP is useful when you rely on reticle holds at changing magnification. SFP is often simple and visible for general hunting where many shots use a center aim. This article explains the tradeoffs without ranking products or recommending brands.

Table of Contents
  1. How a First Focal Plane (FFP) Scope Works
  2. How a Second Focal Plane (SFP) Scope Works
  3. FFP vs SFP for Hunting
  4. FFP vs SFP for Range and Target Shooting
  5. Reading Holdover and Ranging Marks Safely
  6. FFP vs SFP Comparison Table
  7. Related Rifle Scope Guides
  8. Frequently Asked Questions

How a First Focal Plane (FFP) Scope Works

In a first focal plane scope, the reticle is positioned so it scales with the target image as magnification changes. When you zoom in, the reticle appears larger. When you zoom out, it appears smaller. Because the reticle and image scale together, the spacing between the reticle marks stays correct relative to the target at every magnification.

What FFP Means in Practice

The main benefit is consistency for reticle holds. If a reticle mark represents a certain angular value, that value remains useful across the zoom range. The tradeoff is visibility. At low magnification the reticle can look very thin, while at high magnification it can look thick enough to cover small details.

That does not automatically make FFP the premium choice for every shooter. It simply means the scope is more forgiving when you change magnification and still want to use the reticle for wind or elevation holds. The best fit depends on whether you actually use those marks in the field or mostly dial, center-hold, and shoot at familiar distances.

How a Second Focal Plane (SFP) Scope Works

In a second focal plane scope, the reticle stays the same visible size while the target image grows and shrinks as you zoom. That makes the reticle look familiar at every power, but it also means the spacing between hold marks is exact only at one calibrated magnification.

What SFP Means in Practice

The practical benefit is a reticle that remains easy to see at low power and does not become overly thick at high power. The tradeoff is that holdover and ranging marks need the correct calibrated power. If you use those marks at the wrong magnification, they can mislead you.

This is why many hunting scopes still use SFP. A visible reticle at dawn, dusk, or inside cover can matter more than all-power hold accuracy. If you mostly use the center crosshair, or if you keep the scope on its highest calibrated power before using hold marks, SFP can be simple, predictable, and easier to read quickly.

For basic definitions, neutral references such as telescopic sight and reticle explain the terms at a high level. For your own scope, the manual is still the authority for calibrated magnification and reticle subtensions.

FFP reticles scale with magnification, while SFP reticles keep the same visible size.

FFP vs SFP for Hunting

For general hunting, SFP remains popular because the reticle is easy to see at low magnification, especially in timber, low light, and fast target-acquisition situations. If most shots use a center aim and happen at moderate distance, the calibrated-power limitation may not matter much.

When a Hunter Might Prefer FFP

A hunter who regularly uses holdover marks at changing distances may prefer FFP because the marks stay valid as magnification changes. The tradeoff is that the reticle can be harder to see on the lowest powers. If you hunt with LPVOs, our guide on whether a 1-4×24 LPVO is good for hunting adds more low-power context.

For woods hunting, short lanes, and quick shots, SFP often feels more natural because the reticle remains bold enough to pick up fast. For open-country hunting, mixed distances, or situations where you may hold for wind without touching the turrets, FFP can reduce mental steps. The practical question is not which focal plane is more advanced; it is which one gives you fewer mistakes under your normal shot conditions.

FFP vs SFP for Range and Target Shooting

For range work with varied distances, reticle holds, and target transitions, FFP can be easier to manage because the marks remain valid across the zoom range. You can choose the magnification that gives the best target view without changing what the marks mean.

When SFP Still Works Well at the Range

SFP can still work well for known-distance shooting, especially when you keep the scope at one magnification or use turret adjustments instead of reticle holds. If your magnification stays constant and your target distance is known, focal plane becomes less important than clear tracking, a good zero, and repeatable fundamentals.

Target size also matters. On small aiming points at high magnification, some shooters prefer the finer apparent reticle of an SFP scope. On varied target arrays where you move between magnifications, FFP can be easier because the reticle math does not change. Either way, confirm the scope on paper before trusting a reticle chart or ballistic app.

Reading Holdover and Ranging Marks Safely

Holdover and ranging marks are only useful when you know how your scope calibrates them. On an SFP scope, check the manual for the exact magnification where the reticle subtensions are correct. On an FFP scope, marks scale across magnification, but you still need to understand the reticle unit and confirm your zero.

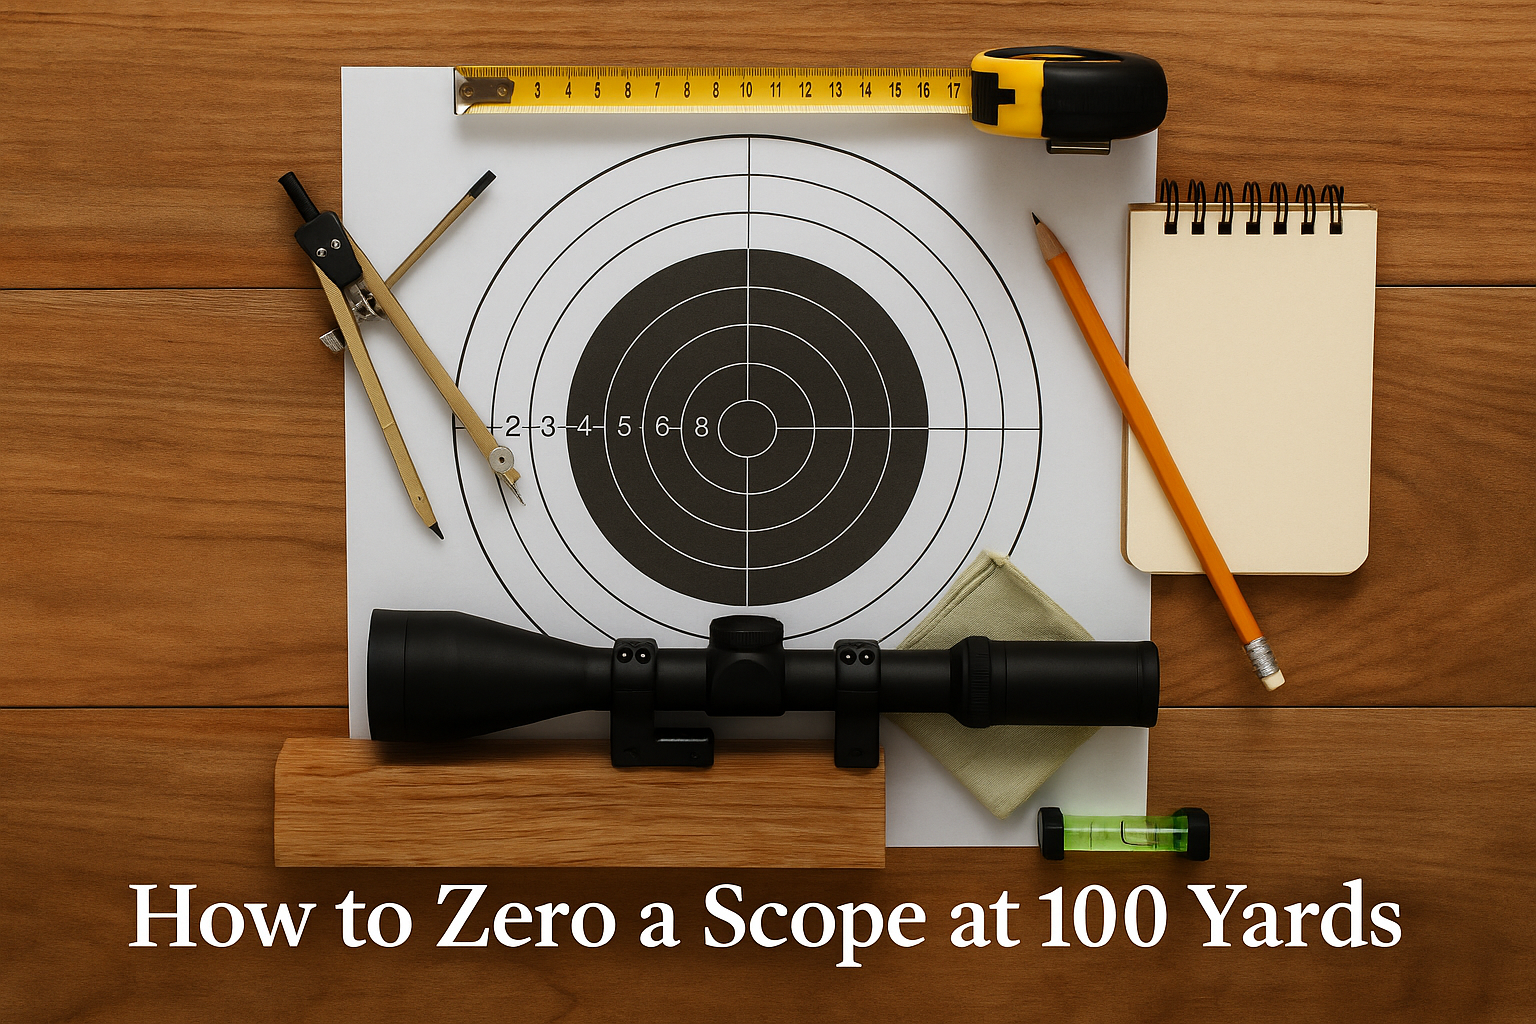
Focal plane does not replace sight-in work. Zero the rifle normally and verify your setup before relying on any reticle mark. Our step-by-step rifle scope sight-in guide covers the zeroing side of the process.

Before buying, look for three details in the product manual or reticle guide: the reticle unit, the calibrated magnification if it is SFP, and whether the reticle design is visible enough at the lowest power you expect to use. Those details are more useful than marketing labels because two scopes can both be FFP or SFP and still feel very different behind the rifle.

FFP vs SFP Comparison Table

FeatureFirst Focal Plane (FFP)Second Focal Plane (SFP)
Reticle size as you zoomGrows and shrinks with magnificationStays the same visible size
Hold marks accurate atAny magnificationOne calibrated power, often highest
Low-power visibilityCan look thinUsually easier to see
High-power appearanceCan look thickStays fine and consistent
Common strengthVaried-distance holdover useSimple hunting visibility
Main cautionReticle visibility at extremesMarks can mislead at wrong power

Frequently Asked Questions

What is the main difference between FFP and SFP scopes?

FFP reticles scale with magnification, so reticle marks stay valid at any power. SFP reticles stay the same visible size, so reticle marks are exact only at one calibrated magnification.

Is FFP or SFP better for hunting?

Neither is always better. SFP is common for general hunting because the reticle stays easy to see. FFP can help hunters who use hold marks at changing magnification and varied distances.

Do SFP reticle marks work at all magnifications?

No. SFP hold and ranging marks are exact at the scope’s calibrated magnification. Check the manual for that power before relying on the marks.

Why does an FFP reticle look thin at low power?

Because an FFP reticle scales down as magnification decreases. That scaling keeps the marks valid, but it can make the reticle harder to see at the lowest powers.

Does focal plane affect my zero?

No. Focal plane affects reticle behavior as magnification changes. You still zero the scope normally and verify the setup with live-fire confirmation.

Thermal Optics for Beginners: A Complete Guide

Thermal optics have transformed the way hunters, outdoor enthusiasts, and security professionals see the world in low-visibility conditions. Unlike traditional scopes or night vision devices that rely on ambient light, thermal optics detect heat signatures, allowing users to see living beings and objects even in complete darkness, fog, smoke, or dense vegetation.

For beginners, thermal optics can feel complex and expensive, but once you understand how they work and what to look for, choosing the right device becomes much easier. This guide explains thermal optics from the ground up so you can make an informed decision with confidence.

What Are Thermal Optics?

Thermal optics are imaging devices that detect infrared radiation (heat) emitted by objects. Every object above absolute zero emits heat, and thermal sensors convert this heat into a visible image. Warmer objects appear brighter, while cooler objects appear darker, creating a clear contrast that allows users to identify targets easily.

Unlike night vision, thermal optics do not amplify light. This means they work equally well during the day and night and are unaffected by shadows or low-light conditions.

How Thermal Optics Work

At the core of every thermal optic is a thermal sensor, also called a microbolometer. This sensor detects infrared radiation and converts it into electronic signals. These signals are processed and displayed as a digital image on a screen inside the optic.

The image you see is not a photograph but a heat map. Animals, humans, and running engines stand out clearly because they emit more heat than their surroundings. This is why thermal optics are so effective for detection and observation.

Thermal Optics vs Night Vision: Key Differences

Beginners often confuse thermal optics with night vision, but they serve different purposes.

Night vision devices amplify available light such as moonlight or starlight. They provide more detail, making it easier to recognize shapes, terrain, and objects. However, they struggle in complete darkness or heavy fog.

Thermal optics, on the other hand, detect heat rather than light. They excel at spotting targets quickly, even through light brush or mist. While they may not show fine details like facial features, they are unmatched for detection and awareness.

Many experienced users combine both technologies depending on their needs.

Common Types of Thermal Optics

Thermal optics come in several forms, each designed for specific use cases.

Thermal monoculars are handheld devices ideal for scanning and observation. They are lightweight, portable, and often the most affordable option for beginners.

Thermal scopes are designed to mount on firearms or air rifles. They allow users to aim and shoot using a thermal image, making them popular for hunting and pest control.

Thermal clip-ons attach in front of a traditional daytime scope. They allow users to switch between standard optics and thermal without re-zeroing, though they are typically more expensive.

Key Specifications Beginners Should Understand

Understanding technical specifications is crucial before buying your first thermal optic.

Sensor resolution determines image clarity. Higher resolution sensors provide sharper images and better target identification, but they also increase cost. Beginners often find mid-range resolutions sufficient.

Thermal sensitivity, measured as NETD, shows how well a device can detect small temperature differences. Lower NETD values mean better performance, especially in humid or warm environments.

Magnification affects how close objects appear. Lower base magnification provides a wider field of view and is better for scanning, while higher magnification is useful for long-range identification.

Detection range indicates how far the device can detect a heat source. Beginners should focus more on clarity and usability rather than extreme range claims.

Choosing the Right Thermal Optic as a Beginner

When starting out, it’s important to match the device to your actual needs rather than buying the most powerful option available.

If your primary goal is observation or scouting, a thermal monocular is usually the best entry point. It’s versatile, easy to use, and budget-friendly.

For beginners interested in hunting, a thermal scope with simple controls and reliable battery life is a practical choice. Avoid overly complex models until you gain experience.

Budget also matters. Entry-level thermal optics today are far more capable than older high-end models. Focus on reputable brands, warranty support, and real-world performance rather than marketing claims.

Legal and Ethical Considerations

Thermal optics are regulated differently depending on location. Some regions restrict their use for hunting certain animals, while others allow them freely. Beginners should always check local laws before purchasing or using thermal equipment.

Ethical use is equally important. Thermal optics provide a significant advantage, so responsible use and respect for wildlife and property boundaries are essential.

Maintenance and Care Tips

Thermal optics are advanced electronic devices and should be treated with care. Always use lens covers when not in use and avoid touching the sensor lens directly.

Keep batteries charged and store the device in a dry, protective case. Regular firmware updates from the manufacturer can also improve performance and fix bugs.

Proper care ensures your thermal optic performs reliably for years.

Conclusion

Thermal optics may seem intimidating at first, but once you understand the basics, they become an incredibly powerful tool. For beginners, the key is to focus on practical use, ease of operation, and reliable performance rather than chasing the highest specifications.

Whether you’re observing wildlife, enhancing nighttime awareness, or exploring advanced optics for hunting, thermal technology opens up a completely new way to see the world. Starting with the right knowledge ensures your first experience with thermal optics is both effective and rewarding.

How to Correct My Habit of Jerking My Pistol When I Shoot

Jerking the trigger is one of the most common accuracy problems pistol shooters face. Whether you are new to shooting or have years of experience, the habit often appears whenever stress, speed, or anticipation begins to affect your fundamentals. Trigger jerking causes the pistol to dip or twist the moment the shot breaks, which results in shots drifting low and left for right-handed shooters and low and right for left-handed shooters. The good news is that this problem is completely fixable. With the right understanding and consistent practice, you can eliminate trigger jerk and drastically improve your shooting accuracy.

Understanding What Trigger Jerk Really Is

Trigger jerk is simply an involuntary reaction that happens when your mind expects recoil and tries to compensate for it. That anticipation leads to sudden tension in the hands and fingers. Instead of pressing the trigger in a smooth, controlled way, the shooter pulls it abruptly or forcefully. This sudden movement disrupts sight alignment at the last moment, which is why even a perfectly aligned shot can land off-target. Many shooters assume the issue is with their sight picture or grip, but in reality, it starts in the brain. When the shooter knows a strong blast and recoil are coming, the body begins preparing for it too early, leading to flinching or jerking motions before the bullet even leaves the barrel.

Why Trigger Jerk Happens

The most common cause of jerking the trigger is recoil anticipation. Your brain senses that the shot will create noise and movement, so your hands try to counteract it before the gun fires. Over-gripping the pistol is another factor. When the dominant firing hand tightens too much, the trigger finger becomes stiff and loses the ability to move independently. Some shooters jerk the trigger because they are trying to shoot quickly and end up slapping the trigger instead of pressing it straight back. Poor finger placement is also a frequent issue; if the finger goes too deep into the trigger or sits too far out on the edge, it naturally pushes the gun sideways during the press. Even mental pressure—such as trying too hard to hit the bullseye or feeling rushed—can tighten your whole upper body and cause jerky, uneven trigger movement.

Correcting the Habit Through Grip and Finger Placement

Correcting trigger jerk begins with mastering the grip and trigger finger placement. Your goal is to hold the pistol firmly but not so tight that your hand becomes rigid. A relaxed but controlled grip allows the trigger finger to move independently without disturbing the rest of the gun. The pad of your index finger, not the joint, should rest on the trigger. This allows your finger to move straight back toward you instead of dragging sideways. If you notice the gun shifting left or right when you begin to press the trigger, it means your finger placement needs adjusting. Many shooters are surprised at how small changes in grip and finger position eliminate a large part of the jerking problem.

Learning a Smooth, Controlled Trigger Press

The key to eliminating trigger jerk is mastering a smooth, steady trigger press. Think of it less as “pulling the trigger” and more as “pressing the trigger straight to the rear.” A good trigger press should feel like a slow, consistent squeeze. When done correctly, the shot should almost surprise you with the moment it breaks. This is often referred to as the “surprise break,” and it prevents you from predicting the exact second the gun will fire. Predicting the moment of explosion is what causes the body to react prematurely, so breaking that link is essential. Your focus during the press should remain on the front sight. The more you train your eyes to stay locked on the sight through the entire press, the less room your mind has to think about the recoil that’s coming.

Seeing the Shot Through the Sights

One of the biggest contributors to jerking the trigger is the shooter’s urge to look at the target as soon as the shot fires. That quick head or eye movement disrupts the entire shot process. Instead of lifting your eyes or anticipating where the bullet will land, keep your focus on the front sight until the shot has already broken and the pistol has completed its recoil. Staying visually committed to the front sight helps your brain stay calm and prevents the timing-based reaction that leads to jerking the trigger. It also helps you diagnose whether your trigger press is affecting the sight alignment during the break.

Using the Wall Drill to Completely Reprogram Trigger Control

One of the most effective ways to fix trigger jerk is through dry-fire training, specifically using the wall drill. This exercise isolates the trigger press from everything else. To perform it, unload your pistol and stand just a few inches away from a blank wall so that the front sight is the only thing you can see clearly. Aim at the wall and slowly press the trigger while watching the front sight blade. When done properly, the front sight should remain perfectly still. If it moves, even slightly, you are jerking the trigger. Practicing this drill daily builds muscle memory for a smooth, controlled trigger press. Shooters who commit to fifty to one hundred repetitions a day often see dramatic improvements in their live-fire accuracy within one week.

Building Stability Through the Penny-On-Slide Drill

Another dry-fire drill that helps eliminate trigger jerk is the penny-on-slide method. Place a coin on top of your pistol’s slide, aim normally, and begin pressing the trigger. If the coin falls, it means your trigger press is still too abrupt or uneven. The goal is to press the trigger smoothly enough that the coin remains in place. This drill improves finger independence and forces you to slow down and focus on perfect trigger control.

Using Ball-and-Dummy Rounds to Expose Recoil Anticipation

Once you take your improved trigger technique to the range, the ball-and-dummy drill becomes incredibly useful. Load a magazine with a mix of live rounds and dummy rounds, or have a partner load it for you so you do not know the order. When you fire and the gun hits a dummy round, the gun should remain perfectly still. If you see the muzzle dipping, flinching, or jerking at that moment, it reveals exactly how much anticipation is affecting your shots. This drill highlights the problem instantly and helps retrain your brain to stay calm during the shooting process.

Slowing Down to Rebuild Fundamentals

Improving trigger control is not about speed. It starts with going slow. Begin by shooting at very close distances, around three to five yards, while taking slow, deliberate shots. Focus entirely on the feel of the trigger press and the movement of the sights. Only when you can consistently place tight, clean groups at close range should you gradually increase your distance. Shooting fast before mastering the fundamentals will only reinforce the same bad habits.

Enhancing Recoil Management to Reduce Anticipation

Many shooters jerk the trigger because they don’t feel confident in their ability to manage recoil. When recoil feels unpredictable, the brain overcompensates. A proper stance, a stable support-hand grip, locked wrists, and slight forward body lean can dramatically improve your recoil management. When you feel in control of the gun, you stop feeling the need to fight the recoil before it happens.

Using Optics or Laser Feedback to Identify Movement

If your pistol has a red-dot optic or if you use a laser-training device, these tools give immediate visual feedback on your trigger control. You will be able to see exactly how much the dot or beam moves during the trigger press. Your goal is not necessarily zero movement—every human hand has some natural motion—but to make sure there is no sudden dip or jerk as the trigger breaks. This visual feedback helps you refine your technique with precision.

Developing a Calm, Focused Shooting Mindset

Shooting accurately is as much a mental skill as a physical one. When you are tense, stressed, or rushing, your trigger finger will reflect that tension. Before each shot, take a deep breath, relax your shoulders, reset your grip naturally, and visualize a smooth trigger press. A calm mind translates into calm, controlled hand movements. Over time, this mental discipline becomes part of your natural shooting routine.

Final Thoughts

Jerking the trigger is incredibly common, but it is also one of the easiest shooting habits to correct when you approach it the right way. With consistent practice, especially through dry-fire drills, you can completely reprogram your trigger control. Focus on maintaining a proper grip, watching your sights through the entire press, and slowing down your shooting process. As your trigger control improves, you will see tighter groups, stronger confidence, and more predictable accuracy—whether you shoot for self-defense, competition, or personal improvement. With patience and daily practice, the habit of jerking your pistol will fade, and smooth, controlled shooting will become your new normal.

Best Reticle for Long-Range Scope: MIL vs MOA

When you’re setting up a long-range rifle scope, one of the most important decisions you’ll make is choosing the reticle specifically whether to go with a MIL-based (or mil/radian) reticle or a MOA-based reticle. Both have pros and cons, and the “right” choice depends heavily on how you shoot (hunting, tactical, competition), what units you’re comfortable with (metric vs imperial), and what level of precision and speed you need.

In this post, we break down the differences between MIL and MOA how they work, when each shines, and which kind of shooter or scenario is likely to benefit more from each.

📐 What Are MOA and MIL (MRAD)? Basic Concepts

MOA — Minute of Angle

  • MOA stands for “Minute of Angle,” an angular measurement. It’s a subdivision of a degree (60 minutes per degree).
  • On a rifle scope calibrated in MOA: at 100 yards, 1 MOA equals roughly 1.047 inches (often rounded to 1 inch for simplicity).
  • As distance increases, the linear equivalent increases proportionally: e.g. at 500 yards, 1 MOA ≈ 5.235 inches; at 1000 yards, 1 MOA ≈ 10.47 inches.
  • Many scopes offer turret adjustments in fractional MOA (e.g. ¼ MOA, ½ MOA) for fine-tuning.

MIL (Milliradian / MRAD)

  • A “mil” (often technically “mrad”) is 1/1000th of a radian.
  • Reticles using mils may have mil-dots or hash marks to denote these angular intervals.
  • In practical terms: at 100 meters, 0.1 mil typically equals 10 cm (which makes metric-based calculations straightforward); at 100 yards, 0.1 mil ≈ 0.36 inches.
  • This angular measure, being metric and decimal-based, tends to simplify range estimation and holdover/wind compensation math.

🔎 MIL vs MOA: Core Differences & How They Affect Long-Range Use

Here’s how MIL and MOA compare across important aspects for long-range shooting:

Feature / ConsiderationMOAMIL (mrad)
Unit SystemAngular — traditional imperial; good for yards/inches.Angular — metric-rooted (radians), decimal-based; great for meters/centimeters.
Adjustment GranularityFine increments (e.g. ¼ MOA), useful for very precise, small corrections. Adjustments often in 0.1 mil steps; somewhat larger per click compared to MOA, but easier to do quick math.
Math & Ease of UseFamiliar if you think in yards/inches — straightforward for short-range or medium-range shooting.Base-10 math: easier for range estimation, wind-hold, and ballistic calculations, especially over long ranges or when using metric distances.
Reticle Clarity / ComplexityHash marks/dots can get dense; reticle may appear “busy,” especially with fine spacing at long range. Usually cleaner or more intuitive spacing for range-finding and holdovers; less cluttered at high magnification.
Speed of Use / Field ShootingSlightly slower when making bigger adjustments (many clicks needed).Faster to adjust for big corrections — useful for dynamic environments, long-range moves, or tactical shooting.
Precision PotentialHigh precision for small corrections, especially in controlled bench or precision shooting settings. Slightly coarser per unit, but still very accurate — especially effective for long-range precision with less mental math.

🏹 Which Reticle Works Best — By Use-Case

Depending on what you’re doing, here’s when one system might be better than the other:

Choose MOA if…

  • You primarily shoot at short to medium ranges. As some experts note, for typical hunting distances (especially within a few hundred yards), MOA’s simplicity and familiarity make it a solid choice.
  • You prefer very fine, incremental adjustments for example, in precision bench-rest shooting, or where minute corrections count.
  • You’re more comfortable thinking in imperial units (yards, inches), and don’t want to convert between metric and imperial.

Choose MIL (mrad) if…

  • You’re shooting at long range, where quick adjustments for elevation, wind, or moving targets matter. The base-10 mil system simplifies math and reduces error under pressure.
  • You prefer metric units (meters, centimeters), or frequently switch between meters and yards.
  • Speed and simplicity matter e.g. tactical shooting, dynamic ranges, varied engagement distances. Many long-range shooters and competitors are shifting to mil-based scopes for this reason.
  • Your reticle holds hash-marks or mil-dots, making range estimation, wind holds, and bullet-drop compensation more intuitive.

🎯 Why Long-Range Shooters (Often) Prefer MIL — Pros in Real-World Use

  • Faster ballistic math & conversions: With mil, many shooters find it easier to convert target size, distance, and required hold-over because the system is decimal-based. E.g. 0.1 mil ≈ 10 cm at 100 m or 0.36″ at 100 yd.
  • Cleaner reticle grid: For long-range scopes, mil-grids tend to be less cluttered, making it easier to use for ranging and adjustments without confusing the shooter.
  • Popularity among precision/tactical shooters: Many competitive and professional long-range shooters use mil-based scopes, which means more peer support, shared ballistic data, and universal references among shooters.
  • Efficient for windage and moving targets: At long range, conditions like wind, target movement, or mirage can change quickly mil’s coarser, faster-to-adjust increments give advantage in dynamic scenarios.

Conclusion

In the debate between MIL and MOA reticles, there’s no single system that universally outperforms the other the best choice ultimately depends on your shooting style, preferred units, and long-range needs. MOA excels in fine, precise adjustments and feels more natural for shooters who think in yards and inches, making it a strong option for hunters and precision bench-rest shooters. MIL, on the other hand, has become the preferred standard for most long-range and tactical shooters thanks to its simple decimal system, faster corrections, cleaner reticles, and compatibility with modern ballistic tools. Whether you choose MIL or MOA, consistency is key: understand your system, train with it, and stick to it. Mastery matters far more than the measurement system itself a well-practiced shooter will achieve excellent results with either reticle.

Does a Bigger Objective Lens Mean Better Image

For many shooters, the objective lens size is one of the first things they look at when buying a riflescope or binoculars. The common belief is simple: a bigger objective lens means more brightness, more clarity, and therefore a better overall image. At first glance, this sounds logical. After all, a larger piece of glass should naturally gather more light. But in reality, the relationship between objective lens size and image quality isn’t as straightforward as it seems.

There are several optical principles that influence the final image you see through a scope, and while objective lens diameter plays a role, it is far from the only factor that matters. In fact, bigger is not always better. Understanding why requires looking at concepts like light transmission, exit pupil, magnification, glass quality, coatings, and even ergonomics.

In this article, we will break down what an objective lens actually does, how it affects brightness and clarity, when a larger objective truly helps, and when it becomes unnecessary or even disadvantageous. By the end, you’ll be able to confidently choose the right scope for your shooting needs without falling for common misconceptions.

What the Objective Lens Actually Does

The objective lens is the large front lens of a scope. It serves one fundamental purpose: to collect light and send it to the rest of the optical system. The more light it gathers, the brighter and more detailed the image can potentially become. However, the key word here is “potentially.” The benefit depends heavily on the conditions you’re shooting in and how the rest of the scope is designed.

For example, a 56 mm objective lens naturally gathers more light than a 40 mm objective. But that increased light is only useful if your eye can actually make use of it. In many situations, especially in bright daylight, your eye simply doesn’t need the extra light, meaning the larger objective doesn’t provide any noticeable improvement in image quality.

Why a Bigger Objective Lens Doesn’t Always Mean Better Image

The belief that a bigger objective lens always gives a brighter, clearer image comes from an oversimplified understanding of optical physics. A larger lens does indeed capture more light, but the exit pupil determines how much of that light your eye can actually use. The exit pupil is calculated by dividing the objective lens diameter by the magnification. This means a 50 mm objective at 10x magnification provides a 5 mm exit pupil, while a 40 mm objective provides 4 mm.

However, the average adult human eye can only accept around 4–5 mm of light in normal lighting conditions. Even in very low-light situations, the eye’s maximum dilation is around 7 mm, and that applies mostly to young people. Therefore, unless the exit pupil exceeds what your eye can use and the lighting conditions require it the extra lens size doesn’t contribute to image quality.

In broad daylight, even a small objective can deliver more light than your eyes can handle. That’s why some of the clearest and sharpest optics in tactical environments, such as LPVOs, red dots, and prism scopes, use much smaller objective lenses.

How Magnification Changes the Importance of Objective Lens Size

Magnification has a major effect on whether a larger objective lens is useful. At higher magnifications, the exit pupil becomes smaller. This is why long-range shooters—who often work at 16x, 20x, or even higher—benefit more from larger objective lenses. A 56 mm lens at 20x provides a noticeably larger exit pupil than a 40 mm lens at the same magnification, which translates into a brighter, more usable image.

For hunters or mid-range shooters using low to moderate magnification (3x–12x), the difference between objective sizes can be negligible. The exit pupil remains large enough for the human eye regardless of whether the objective lens is 40 mm or 50 mm. The advantages of oversized objectives simply don’t show up until magnification increases dramatically.

The Role of Glass Quality and Coatings

A crucial fact often overlooked in the “bigger is better” debate is that glass quality matters far more than lens size. A high-quality scope with a 40 mm objective can easily outperform a cheap 56 mm scope. Superior coatings lead to better contrast, sharper edges, richer colors, and reduced glare.

Lens coatings determine how effectively light passes through the glass surfaces. Fully multi-coated surfaces can transmit significantly more usable light than single-coated or uncoated lenses. This is why premium optics with smaller objectives often outperform larger, budget-era scopes. The clarity you perceive has less to do with raw light entry and more to do with how efficiently that light is processed.

Where Larger Objective Lenses Truly Make a Difference

There are times when a larger objective lens genuinely offers improved performance. Shooters who spend time in deep woods, dense cover, or low-light situations benefit from the brightness boost a 50 mm or 56 mm lens provides. Dawn and dusk two of the most common hunting times are notorious for poor light conditions. In these moments, a larger objective allows shooters to identify targets and make ethical shots when smaller lenses struggle.

Long-range shooters also benefit because they calculate shots at high magnification. Under these conditions, a larger objective helps maintain a larger exit pupil, which results in a brighter and more stable image. When your magnification goes up, the brightness naturally goes down due to a shrinking exit pupil. Increasing the objective lens size is one way to counter this effect.

When a Bigger Objective Lens Becomes a Disadvantage

One of the least-discussed aspects of large objective lenses is how they impact the rifle’s ergonomics and handling. Bigger objectives require taller scope rings, which raises the optic higher above the bore line. This can force the shooter into an awkward cheek weld unless they use an adjustable cheek rest.

Larger lenses also add weight sometimes significantly. A 56 mm scope can feel top-heavy, especially on lightweight hunting rifles. This extra forward weight changes the balance of your firearm, making it harder to carry over long distances. Moreover, large scopes tend to be bulkier, making them less suitable for fast-moving or close-quarters shooting.

In addition to weight and mounting issues, a big objective lens can introduce more parallax sensitivity. Parallax adjustment becomes more critical as the objective grows, demanding more precise setup and potentially slowing the shooter down.

Real-World Usage Scenarios and Ideal Lens Sizes

The ideal objective lens size depends heavily on your shooting style. A hunter in thick forests who often shoots during sunrise or sunset might prefer a 50 mm lens. A long-range precision shooter working at 20x or more may require a 56 mm objective to maintain clarity at high zoom levels.

On the other hand, a tactical shooter using an AR-15 for home defense or competition typically gets no benefit from a large objective. For these shooters, a smaller, lighter optic improves speed, balance, and maneuverability. Likewise, mountain hunters and backpackers often choose scopes with 40 mm objectives because they offer enough brightness without the bulk.

Misconceptions About Objective Lens Size

Many shooters assume that a larger objective automatically means better magnification, a wider field of view, or superior image quality. In reality, magnification depends on the eyepiece, not the objective lens. Field of view is also determined by the internal optical design, not the front lens size. Clarity depends almost entirely on glass quality and coatings.

These misconceptions persist because objective size is easy to compare on paper, while the subtle factors that truly influence optical performance require more experience and understanding.

So, Does a Bigger Objective Lens Always Mean a Better Image?

The answer is no. A larger objective lens can provide better brightness, especially in low-light or high-magnification conditions, but it does not guarantee a better image. Many shooters will never fully benefit from anything larger than 40–50 mm, especially if they primarily shoot during the day or use low to moderate magnification.

The key is choosing an objective size that matches your real-world shooting conditions. If you regularly shoot at dawn, dusk, or extreme distances, a larger objective will help. If you value mobility, balance, and simplicity, a smaller objective may serve you better.

Conclusion

The idea that a bigger objective lens automatically leads to a better image is a myth. While larger lenses can provide real benefits in certain conditions, the overall quality of an optic depends far more on glass quality, lens coatings, magnification, and how the scope is matched to your shooting style. Rather than chasing the biggest lens, shooters should focus on selecting the right balance of size, weight, brightness, and optical performance for their specific needs.

Why Use a Prism Scope in Your AR-Style Build

When you’re building or upgrading your AR-style rifle, one of the key decisions you’ll face is choosing the right optic. Red dots, holographic sights, and traditional rifle scopes each have their advantages but prism scopes have become increasingly popular among shooters looking for a balance between speed and precision.

In this article, we’ll explore what prism scopes are, how they work, and why they’re a great choice for many AR platforms. Whether you’re setting up a rifle for home defense, competition, or general range shooting, understanding the benefits of prism optics can help you make an informed decision.

What Is a Prism Scope?

A prism scope (short for prismatic scope) uses a glass prism to focus and flip the image, instead of the multiple lenses found in traditional scopes. This design allows for a more compact, durable, and optically efficient sighting system.

Here’s what makes it different:

  • Compact Design: Shorter and sturdier than traditional scopes.
  • Etched Reticle: The reticle is etched directly onto the glass—so even if your battery dies, you still have a usable aiming point.
  • Fixed Magnification: Most prism scopes offer 1x to 5x magnification, perfect for medium-range shooting.
  • Improved Eye Relief and Clarity: Clear image with minimal distortion, even for users with astigmatism.

In short, prism scopes combine the speed of red dots with the clarity and precision of magnified optics.

Why Prism Scopes Are Ideal for AR Builds

Your AR platform is versatile it can be tuned for close-quarters combat, target shooting, or mid-range accuracy. Prism scopes fit this flexibility perfectly. Let’s break down why they’re a great match.

1. Excellent for Shooters With Astigmatism

One of the biggest reasons to choose a prism scope over a red dot is astigmatism correction.
If you’ve ever looked through a red dot sight and noticed the dot looks blurry, star-shaped, or smeared, that’s likely due to astigmatism in your eyes.

A prism scope’s etched reticle doesn’t rely solely on a projected LED dot so it remains crisp and clear, even for shooters with eye conditions. The etched reticle is always visible, and the optional illumination simply enhances visibility in low-light conditions.

Key Benefit: Sharp, defined reticle regardless of vision issues.

2. Combines Speed and Precision

AR rifles are often used in situations where you need to transition quickly between close and mid-range targets. Prism scopes, especially 1x and 3x models, provide:

  • Quick target acquisition similar to red dots.
  • Magnification that helps you identify and engage targets out to 300–400 yards.

For instance, a 3x prism scope offers enough zoom to accurately hit steel plates or vital zones on targets without the bulk of a full-size scope.

Key Benefit: Versatile for both fast and accurate shooting.

3. Durable and Compact Design

Because prism scopes use a single internal prism instead of multiple moving lenses, they’re inherently more rugged and shock-resistant. They can take a beating and still hold zero, which is crucial for AR builds that might experience heavy recoil, rough handling, or outdoor conditions.

Many popular prism scopes like those from Primary Arms, Vortex, and Burris are built from aircraft-grade aluminum and sealed against water and dust.

Key Benefit: Built like a tank reliable under all conditions.

4. Battery Independence

Unlike red dot sights, which go completely dark when the battery dies, prism scopes feature an etched reticle that remains visible without illumination. This means:

  • You’re never left without an aiming point.
  • The battery life is extended because you don’t need illumination in bright conditions.

Key Benefit: Always ready, even with no power.

5. Clearer Reticle Designs

Prism scopes come with a variety of reticle options—ranging from simple crosshairs to advanced ACSS (Advanced Combined Sighting System) or BDC (Bullet Drop Compensator) reticles.
These designs allow you to:

  • Estimate range
  • Compensate for bullet drop
  • Lead moving targets

For example, the Primary Arms 3x SLx with ACSS reticle allows for quick holdovers from 100 to 600 yards ideal for .223/5.56 AR builds.

Key Benefit: Reticle intelligence helps improve shot accuracy and confidence.

6. Perfect Balance Between Red Dots and LPVOs

Let’s compare how prism scopes stack up:

FeatureRed Dot SightPrism ScopeLPVO (Low Power Variable Optic)
Magnification1x1x–5x (fixed)1x–10x (variable)
Battery DependenceYesOptionalOptional
WeightVery LightModerateHeavier
DurabilityGoodExcellentGood
Astigmatism FriendlyNoYesYes
Price RangeLow–MediumMediumMedium–High

As the table shows, prism scopes sit in the middle ground offering more precision and clarity than red dots, but without the bulk or price of an LPVO.

Key Benefit: The ideal middle ground for most AR shooters.

When to Use a Prism Scope on Your AR

Here are a few scenarios where a prism scope shines:

  • CQB to mid-range shooting (0–400 yards): Perfect for balancing speed and distance.
  • Rugged environments: Where durability and reliability matter.
  • Backup to battery-powered optics: Provides a visible reticle at all times.
  • Astigmatism or eye fatigue: Delivers crisp aiming points without distortion.
  • Tactical and defensive use: Quick target transitions with magnified precision.

If you often switch between short-range drills and longer-distance shots, a 3x or 5x prism scope might be your best all-around choice.

Recommended Prism Scopes for AR Builds

Here are some top-rated options to consider:

  1. Primary Arms SLx 3x Gen II Prism Scope (ACSS Reticle)
    • Excellent optical clarity
    • Reticle supports bullet drop and wind holds
    • Great value for AR platforms
  2. Vortex Spitfire 3x Prism Scope
    • Compact and durable
    • Crisp, bright reticle
    • Lifetime warranty
  3. Burris AR-332 3x Prism Scope
    • Reliable performance and clear optics
    • Built-in bullet drop compensation
    • Rugged, military-style build
  4. Monstrum 3x Ultra-Compact Prism Scope
    • Budget-friendly option
    • Solid performance for the price
    • Etched reticle with optional illumination

Final Thoughts

If you’re building an AR-style rifle, a prism scope offers one of the best combinations of clarity, reliability, and versatility.
It bridges the gap between red dots and full-sized scopes offering speed for close targets and accuracy for mid-range engagements.

For shooters with astigmatism, durability demands, or multi-purpose AR setups, prism scopes provide an unbeatable value.

So the next time you’re considering optics for your AR, give the prism scope a serious look it might just be the perfect optic for your build.

Smart Rifle Scopes with Ballistic Calculator

Smart rifle scopes have shifted from niche gadgetry into practical tools for hunters, competition shooters, and tactical marksmen. In 2025 the term smart scope usually means a riflescope (or optic system) that integrates sensors, digital processing, connectivity, or mechanical systems that automatically assist with aiming most commonly by calculating ballistic drop and suggesting (or applying) corrections in real time. This post unpacks how they work, what to expect in 2025, the best tech approaches, practical pros/cons, and an actionable buying checklist.

1) What exactly is a “smart rifle scope”?

A smart scope combines optics with electronics and software to give shooters data-driven aiming assistance. Typical features you’ll see in 2025:

  • Integrated ballistic calculator — uses inputs (ammo, muzzle velocity, zero distance, atmospheric data) to compute bullet trajectory and display holdover or aim points.
  • Laser rangefinder (LRF) — measures target distance and feeds the ballistic solver instantly.
  • Environmental sensors — barometer/thermometer/hygrometer/tilt sensors to correct for altitude, temperature, and shooting angle.
  • Digital elevation turrets / PĒK or electronic dialing — automates dialing elevation or gives dynamic holdovers on an electronic reticle. Burris’ PĒK / Veracity examples show this hybrid mechanical-digital approach.
  • Thermal / night capabilities or image sensors — for low-light / obscured-vision operation (many thermal scopes now also include ballistic calculators).
  • Apps & connectivity — smartphone/tablet apps let you build/load profiles, sync ammo tables, or push environmental data.

In short: the smart scope’s ballistic calculator is the brain sensors and rangefinder are its inputs, and the reticle/dial/app is how the system communicates the solution to you.

2) How ballistic calculators in scopes actually work (brief technical primer)

  1. User / System inputs: bullet BC (ballistic coefficient), muzzle velocity (or measured velocity), zero distance, sight height, chosen units (MOA/MIL), and environmental data (altitude, temperature, pressure, humidity, wind estimate). Some systems let you pick a specific cartridge from a database.
  2. Range measurement: LRF provides the slant or line-of-sight range; inclinometer corrects for uphill/downhill angle. Modern systems auto-convert slant to horizontal range for drop compensation.
  3. Ballistic solution: the solver computes time-of-flight, drop, and wind drift (if wind input provided). Advanced solvers incorporate drag curves and sometimes machine-learning adjustments or probability outputs.
  4. Output / correction: either shown as holdover marks on an electronic reticle / heads-up display, displayed as a turret/dial adjustment to apply, or in some systems actually commands a motorized turret to move. Burris’ PĒK is an example of a digitally-assisted dialing workflow rather than fully motorized turrets.

3) Why integrate the ballistic calculator into the scope (vs. phone app)?

Pros:

  • Speed & ergonomics: instant on-scope corrections without putting your eye down, especially critical for single-shot opportunities in hunting.
  • Fewer human errors: automated data fusion (range + sensors) reduces manual math and misreading.
  • All-weather operation: purpose-built optics and thermal/IR options keep functionality where phones or standalone apps might fail.

Cons:

  • Cost & complexity: smart scopes add price, battery dependence, and potential failure modes.
  • Repair / service: advanced electronics can be harder to field-repair than mechanical scopes.

4) Top smart-scope approaches and representative models (2025 snapshot)

Note: the market mixes purpose-built “smart scopes” that include ballistic solvers + LRFs, thermal scopes with calculators, and hybrid mechanical scopes that pair with smartphone apps/digital knobs.

A. Laser-rangefinding scopes with built-in solvers (classic smart-scope)

  • Burris Eliminator & similar models long-known concept: integrated LRF + solver that displays holdover. Burris’ newer Veracity/PĒK systems combine digital turret control and app-driven ballistic inputs. These remain a strong, proven direction.

B. Premium optical smart-scopes with configurability

  • Swarovski dS PL and other high-end digital-configurable optics premium glass + digital reticle/config apps; pricey but top-tier image quality with smart features.

C. Thermal / multimode scopes with ballistic calculators

  • Pulsar, ATN, GTGUARD, DNT thermal/night-capable optics that now include integrated ballistic solvers and LRFs in many mid/high-end models, making them viable for low-light hunting and surveillance.

D. App-first, digital-knob hybrid systems

  • Systems that store ballistic profiles in an app and then either instruct a digital elevation knob (PĒK-like) or display an electronic reticle overlay. Useful for shooters who want mechanical reliability with digital convenience.

E. Experimental / research

  • TrackingPoint-style precision-guided systems historically pushed the envelope, but their commercial status has fluctuated; other R&D projects explore ML-based probability-of-hit overlays.

5) Real-world buying guide — pick the right smart scope for your use

Choose by use case:

  • Big-game hunting (daylight): choose fast LRF + clear glass, light battery footprint, simple UI. Burris Eliminator-style or Veracity with app integration is ideal.
  • Low-light / hog / predator hunting: get thermal or low-light scope with calculator (Pulsar, ATN, GTGUARD). Thermal + LRF + solver is a powerful combo.
  • Precision long-range: premium glass + verified BC/muzzle velocity inputs + ability to fine-tune environmental inputs. Consider premium digital-configurable optics (Swarovski dS, high-end Burris).
  • Budget-conscious / tech-curious: use high-quality optical scope + phone app (Strelok, Ballistics Calculator 2025) + handheld LRF; lower complexity and cost.

Checklist before you buy:

  • Does it have an accurate LRF (range, reflectivity performance)?
  • How does the ballistic database/input work? Can you add custom loads and measured muzzle velocity?
  • Reticle/output style: electronic reticle overlay vs. mechanical turret vs. recommended dial steps. Which do you prefer?
  • Battery life & field-replaceable power: critical for multi-day hunts.
  • App & ecosystem: is the app reliable, updated, and easy to use? Can profiles be exported?
  • Repair & warranty — electronics need different service than optical glass.

6) Setup & field tips (practical)

  1. Chronograph your ammo — measured muzzle velocity beats factory numbers every time. Enter that into the ballistic profile. (Apps and smart scopes permit custom velocity input.)
  2. Zero method: zero carefully at a chosen range, then create ballistic profile for that zero. Confirm at known distances.
  3. Verify LRF accuracy: measure a known target distance when possible. LRF errors directly translate to drop errors.
  4. Account for wind: most on-scope solvers can’t magically measure wind train to estimate or use wind apps/devices and apply manual corrections.
  5. Backup plan: always have simple holdover charts printed or in your phone if electronics fail, you can still make the shot.

7) Legal, ethical & range-safety considerations

  • Local laws: some jurisdictions restrict “fire-control” electronics or certain guided systems. Before buying, check local/state/provincial rules for smart optics and for hunting-specific legality. (Regulations differ widely.)
  • Range policies & competitions: many competitions and some ranges restrict or ban electronically-assisted aiming. Know the rules before using on match day.
  • Ethics: understand that smart scopes can increase hit probability but do not replace shot-calling judgment (distance, wind, target behavior). The shooter still bears responsibility for humane, ethical shots.

8) Quick comparisons (high-level)

  • Burris Veracity / Eliminator family: proven LRF + solver integration; some models offer digital turret assistance (PĒK) — great for hunters wanting mechanical feel with digital math.
  • Swarovski dS series: premium glass with configurable digital options — expensive but elite optical performance for long-range hunting.
  • ATN / Pulsar / GTGUARD / DNT: thermal / digital scopes with ballistic calculators — best for low-light predation and technical thermal hunts.
  • App + LRF + analog scope: cheapest, most flexible combo for technicians on a budget; more manual but highly reliable if you know your load.

Conclusion

In conclusion, smart rifle scopes with ballistic calculators have transformed precision shooting in 2025. What was once reserved for elite marksmen or experimental prototypes is now accessible, durable, and practical for hunters, competitors, and tactical shooters alike. The fusion of laser rangefinding, environmental sensors, and onboard ballistic solvers eliminates the need for manual dope charts or guesswork, allowing shooters to focus entirely on fundamentals like wind reading and trigger discipline. Brands such as Burris, Swarovski, Pulsar, and ATN are leading this evolution, each catering to different needs from daylight big-game hunting to night-time thermal operations. However, technology doesn’t replace skill; it enhances it. Shooters should still invest time in verifying ballistic profiles, practicing real-world shots, and understanding environmental impacts. As innovation continues, we can expect smarter integration with apps, longer battery life, and AI-driven hit probability analytics but success will still depend on the human behind the trigger. In essence, the smart scope revolution represents a perfect balance between traditional marksmanship and cutting-edge technology, helping shooters achieve precision, confidence, and ethical accuracy like never before.

Rifle Scope Magnification Explained for Beginners

If you’re new to hunting or target shooting, choosing the right rifle scope can feel confusing especially when it comes to magnification. What does “3-9×40” really mean? How much magnification do you need for 100 yards, 300 yards, or even 1,000 yards? And what’s the difference between fixed and variable scopes?

In this beginner-friendly guide, we’ll break down everything you need to know about rifle scope magnification, so you can confidently pick a scope that matches your shooting style, target distance, and environment.

🎯 What Is Rifle Scope Magnification?

Magnification refers to how many times closer your target appears through the scope compared to what you’d see with the naked eye.

For example:

  • A magnification makes the target appear three times closer.
  • A magnification makes it appear nine times closer.

If you’re viewing a deer at 300 yards through a 3× scope, it will look like it’s only 100 yards away to your eye.

Magnification helps you see your target more clearly, but higher isn’t always better. The right power depends on distance, lighting, and shooting purpose.

🔢 Understanding Scope Numbers: “3-9×40” Explained

You’ve probably seen scope labels like 3-9×40 or 4-12×50. Let’s decode that.

ExampleMeaning
3-9×40The scope has a variable magnification from 3× to 9×, and an objective lens diameter of 40mm.
4×32A fixed magnification of , with a 32mm objective lens.
6-24×50A variable magnification from 6× up to 24×, with a 50mm objective lens for brighter image quality.

Breakdown:

  • First number (3-9) = magnification range (zoom power).
  • Second number (40) = diameter of the front (objective) lens, which affects light transmission and brightness.

So a 3-9×40 scope can zoom from 3× to 9×, and its 40mm lens helps gather enough light for clear, bright images—perfect for medium-range shooting.

⚙️ Fixed vs Variable Magnification Scopes

There are two main types of scopes when it comes to magnification:

1. Fixed Power Scopes

  • Example: 4×32
  • The magnification stays constant (4× in this case).
  • Simpler, lighter, and often more durable because fewer moving parts.
  • Great for beginners or hunters who shoot at a consistent distance.

Pros:

  • Less expensive
  • Easy to use
  • Reliable and shock-resistant

Cons:

  • Not flexible for varying shooting distances

2. Variable Power Scopes

  • Example: 3-9×40 or 4-16×50
  • Allows you to adjust magnification for different distances and targets.

Pros:

  • Versatile for both close and long ranges
  • Ideal for hunting, competitions, and tactical use

Cons:

  • Slightly heavier and costlier
  • More internal mechanics (potential for alignment drift over time)

If you’re a beginner, a variable scope like 3-9×40 is a great all-rounder it offers enough range flexibility for most hunting and range scenarios.

📏 Choosing the Right Magnification by Shooting Distance

One of the biggest beginner mistakes is over-magnification. You don’t need 25× zoom for deer hunting at 100 yards! Here’s a general guide:

Shooting DistanceRecommended MagnificationIdeal Usage
0–100 yards1× to 4×Close-range hunting, home defense, tactical shooting
100–300 yards4× to 9×Most hunting (deer, boar, coyote), mid-range targets
300–600 yards9× to 12×Long-range target shooting, varmint hunting
600–1000+ yards12× to 25×Extreme long-range precision, competition shooting

Example Scenarios:

  • Whitetail deer hunting (100–250 yards): 3-9× or 4-12× is perfect.
  • Coyote or varmint hunting (300–600 yards): 6-18× or higher helps you spot smaller targets.
  • Benchrest or long-range competition (800+ yards): 16-25× or more gives fine precision for small bullseyes.

Remember: higher magnification reduces your field of view, which can make it harder to track moving targets quickly.

👁️ Field of View (FOV) and Why It Matters

Field of View (FOV) means how wide an area you can see through the scope, usually measured in feet at 100 yards.

  • Lower magnification = Wider FOV
  • Higher magnification = Narrower FOV

For example:

  • At , you might see 30 feet of width at 100 yards.
  • At , you might only see 12 feet of width.

This trade-off means you should use lower power for scanning or tracking moving targets, and higher power for precise aiming on stationary ones.

🌅 The Role of the Objective Lens Size

The second number in a scope (like the 40 in 3-9×40) indicates objective lens diameter in millimeters.

Larger lenses (e.g., 50mm):

  • Gather more light
  • Brighter image in low-light (dawn/dusk)
  • Allow higher magnification clarity

Smaller lenses (e.g., 32mm):

  • Lighter, more compact
  • Less light-gathering capability

If you hunt in low-light conditions, choose a larger objective lens (44–50mm).
For daytime range shooting, 40mm or smaller is usually fine.

🧠 Understanding Exit Pupil and Eye Relief

Two terms you’ll often see in scope specs are exit pupil and eye relief.

🔸 Exit Pupil

It’s the diameter of the beam of light exiting the eyepiece, calculated as:

Objective Lens ÷ Magnification

For example:
A 3-9×40 scope at 3× gives:

40 ÷ 3 = 13.3mm exit pupil (bright image)

At 9×:

40 ÷ 9 = 4.4mm exit pupil (dimmer image)

Human pupils dilate to about 7mm in darkness—so a larger exit pupil = brighter view, especially in low light.

🔸 Eye Relief

This is the distance your eye must be from the scope to see a full image.

  • 3–4 inches of eye relief is ideal for most rifles.
  • Too short, and you risk a “scope bite” from recoil.
  • Too long, and you’ll struggle to get a clear sight picture.

Always choose a scope with generous, consistent eye relief for comfort and safety.

🎯 First Focal Plane (FFP) vs Second Focal Plane (SFP)

Modern scopes come in two optical designs depending on where the reticle (crosshair) is placed:

1. First Focal Plane (FFP)

  • Reticle zooms in and out with magnification.
  • Holds true across all power levels perfect for long-range shooters using holdovers.
  • More expensive but very precise.

2. Second Focal Plane (SFP)

  • Reticle stays the same size regardless of magnification.
  • Easier for beginners and hunters who shoot at a set distance.

If you’re just starting out, an SFP scope is usually simpler and more affordable.

🪶 The Impact of Magnification on Weight and Handling

Higher-powered scopes tend to:

  • Weigh more
  • Be longer
  • Require higher mounting rings
  • Affect rifle balance

For hunters who walk long distances, lighter 3-9× scopes are ideal.
Precision or competition shooters may prefer heavier 6-24× optics with better adjustment controls.

🪞How to Adjust Magnification Properly

On variable scopes, the power ring near the eyepiece controls magnification.
Here’s how to use it effectively:

  1. Start at the lowest power to locate your target quickly.
  2. Zoom in gradually once your crosshairs are centered.
  3. Avoid max zoom unless absolutely necessary—small hand movements become exaggerated, and image brightness may drop.

Tip: If your target looks shaky at high zoom, reduce magnification slightly it often improves overall visibility and steadiness.

🧭 Magnification and Parallax: The Hidden Factor

At higher magnification levels, parallax error can cause your reticle to shift off the target even if your head moves slightly.

What Is Parallax?

Parallax occurs when the reticle and target image aren’t on the same optical plane.

How to Fix It

  • Many mid-to-high-end scopes include a side parallax knob or adjustable objective (AO) to fine-tune focus for different distances (usually marked 50yds, 100yds, 300yds, ∞).
  • Adjust until the reticle stays fixed on target even if you move your head slightly.

For beginners shooting under 300 yards, a factory-set parallax (100 yards) scope is usually fine.

🧩 Balancing Magnification with Purpose

When picking your scope, think of these three questions:

  1. What distance will I shoot most often?
  2. What size are my targets?
  3. Do I prioritize speed, accuracy, or light gathering?

Here’s a quick summary:

Type of ShootingTypical RangeRecommended Scope
Deer / Hog Hunting50–300 yards3-9×40 or 4-12×44
Varmint / Predator200–600 yards6-18×44 or 6-24×50
Target / Benchrest500–1000 yards10-25×50 or higher
Tactical / 3-Gun0–200 yards1-6×24 or 1-8×30
Brush / Woods Hunting<100 yards1-4×24 or 2-7×32

🧰 Bonus: Other Factors to Consider When Buying a Scope

Magnification is just one piece of the puzzle.
Also consider:

1. Lens Coating

Look for fully multi-coated optics to reduce glare and increase brightness.

2. Tube Diameter

Most scopes are either 1-inch or 30mm.

  • 30mm tubes offer greater adjustment range and light transmission but require heavier mounts.

3. Reticle Type

Choose reticles based on your goal:

  • Duplex: Simple and clean for hunting
  • BDC (Bullet Drop Compensator): Great for long-range holdovers
  • Mil-Dot: Ideal for tactical and range estimation

4. Durability

Ensure it’s waterproof, fog-proof, and shock-resistant, especially for outdoor use.

5. Brand Reputation

Trusted brands include Vortex, Leupold, Bushnell, Nikon, Burris, and Primary Arms—each offering great entry-level scopes for beginners.

🪶 Common Beginner Mistakes with Magnification

  1. Over-zooming: Using 20× when 6× is enough—makes your view darker and shakier.
  2. Neglecting eye relief: Causes scope bite from recoil.
  3. Buying the biggest scope available: Adds unnecessary weight and cost.
  4. Ignoring mounting height: Large objective lenses may require higher rings, altering cheek weld.
  5. Forgetting lighting conditions: High magnification in dusk conditions = dim sight picture.

Remember: a clear, stable image at lower power beats a shaky, dim one at high power.

🧍‍♂️ Recommended Magnification for Beginners

If you’re starting out, here are tried-and-true configurations:

  • 3-9×40 → Classic all-rounder for hunting and target shooting.
  • 4-12×44 → Slightly more reach for longer shots.
  • 1-6×24 → Perfect for tactical or short-range rifles.
  • 6-24×50 → For serious long-range or precision shooters.

🏁 Conclusion: Finding Your Perfect Scope Magnification

Rifle scope magnification doesn’t have to be intimidating. The key is to match your magnification range to your target distance and shooting environment—not just to pick the highest numbers.

For most beginners, a 3-9×40 scope is the sweet spot: bright, versatile, affordable, and simple to use. As you gain experience and specialize in certain shooting styles, you can move up to higher magnifications with advanced features like parallax adjustment and FFP reticles.

Whether you’re tracking deer in thick woods or punching paper targets at 500 yards, understanding magnification helps you shoot smarter, safer, and more accurately.

5 Best Seat Back Gun Racks: Your Ultimate Guide

For hunters and shooting enthusiasts, having a secure and organized way to transport firearms is crucial. A well-designed gun rack not only keeps your guns safe but also ensures they are easily accessible when needed. Gun racks come in various designs, each catering to different needs and preferences. Among these, seat back gun racks have gained popularity for their convenience and practicality.

Understanding Seat Back Gun Racks

What is a Seat Back Gun Rack?

A seat back gun rack is a type of gun storage system that attaches to the back of a vehicle seat. These racks are designed to hold firearms securely, keeping them organized and easily accessible. They typically come with straps or hooks that can be adjusted to fit various types of vehicles and gun sizes.

Benefits of Using Seat Back Gun Racks

Safety and Accessibility

One of the primary benefits of seat back gun racks is the enhanced safety they provide. By securing firearms in a designated place, they prevent guns from moving around during transit, reducing the risk of accidental discharge or damage. Additionally, these racks keep guns easily accessible, allowing for quick retrieval when needed.

Organization and Space-Saving

Seat back gun racks help keep your vehicle organized by providing a specific place for your firearms. This not only frees up space in your vehicle but also makes it easier to locate your guns when needed. With seat back gun racks, you can avoid the clutter and confusion of having loose firearms and accessories scattered around your vehicle.

Ease of Installation and Removal

Most seat back gun racks are designed for easy installation and removal. They typically come with adjustable straps or hooks that can be quickly attached to the headrests and bottom of the seat. This makes them a convenient option for those who need a temporary or portable gun storage solution.

Key Features to Consider When Choosing a Seat Back Gun Rack

Material Quality

The quality of materials used in the construction of a gun rack is crucial for durability and safety. Look for gun racks made from high-quality materials such as heavy-duty nylon, polyester, or ABS plastic. These materials are not only durable but also resistant to wear and tear.

Compatibility with Different Vehicles

When choosing a seat back gun rack, it’s essential to ensure it is compatible with your vehicle. Most gun racks are designed to fit a wide range of vehicles, including SUVs, trucks, and sedans. However, it’s always a good idea to check the product specifications to ensure a proper fit.

Capacity and Security Features

Different gun racks have varying capacities, with some designed to hold multiple firearms. Consider how many guns you need to store and choose a rack that can accommodate them. Additionally, look for security features such as straps, buckles, and locks that will keep your guns secure during transit.

Top 5 Seat Back Gun Racks

1. MYDAYS Seat Back Gun Rack

The MYDAYS Seat Back Gun Rack is a versatile and practical solution for hunters and shooting enthusiasts. This gun rack is designed to hold rifles, shotguns, and other elongated items securely in place.

Key Features and Specifications

  • Material: Polyester
  • Color: Camo
  • Special Features: Portable, Foldable
  • Product Dimensions: 7.48″D x 1.57″W x 7.87″H
  • Unit Count: 1.0 Count
  • Number of Items: 2

Pros:

  • Versatile Storage: Can hold rifles, umbrellas, crutches, and other elongated items.
  • Easy to Install: No tools required, just hang the straps across the headrests.
  • Universal Fit: Compatible with most vehicles, including SUVs, sedans, jeeps, and mini-vans.
  • Easy to Store: Foldable design allows for easy storage when not in use.

Cons:

  • Limited Capacity: May not hold more than two rifles securely.
  • Material Concerns: Polyester may not be as durable as other materials like nylon.

2. Automotive Gun Racks Vehicle Seat Back Rifle Gun Holder

The Yawayda Automotive Gun Rack is designed specifically for hunters and shooting enthusiasts who need a reliable and sturdy gun holder for their vehicles. This rack combines durability with a practical design, making it a popular choice.

Key Features and Specifications:

  • Material: Nylon
  • Special Feature: U.S. Patent D931187S
  • Color: Black
  • Finish Type: Nylon Oxford
  • Product Dimensions: 2″D x 14.5″W x 22.5″H
  • Shape: Rectangular
  • Number of Items: 2

Pros:

  • Durable Material: Made from heavy-duty nylon, ensuring long-lasting use.
  • Patent-Approved Design: Features a unique design that has been patented, offering added reliability.
  • Spacious Storage: Large dimensions allow for the storage of multiple rifles and accessories.
  • Versatile Use: Can be used to store other hunting accessories and tools in addition to firearms.

Cons:

  • Complex Installation: Some users have reported that installation can be slightly challenging without clear instructions.
  • Limited Aesthetic Options: Available only in black, which might not suit everyone’s preference.

3. Automotive Gun Racks Vehicle Seat Back Rifle Gun Holder

This model from Yawayda is similar to the previously mentioned rack, with a few additional features that make it stand out. It’s designed to be a reliable companion for hunters, ensuring their rifles are safely stored and easily accessible.

Key Features and Specifications:

  • Material: Nylon
  • Special Feature: U.S. Patent D931187S
  • Color: Black
  • Finish Type: Nylon Oxford
  • Product Dimensions: 2″D x 14.5″W x 22.5″H
  • Shape: Rectangular
  • Number of Items: 2

Pros:

  • High Durability: Constructed from heavy-duty nylon for extended durability.
  • Patent-Protected Design: Features a unique, patented design for enhanced reliability.
  • Ample Storage: Can store multiple rifles and additional hunting gear.
  • Multi-Use: Suitable for storing various hunting accessories alongside firearms.

Cons

  • Installation Difficulty: Some users find the installation instructions unclear, making setup challenging.
  • Color Limitation: Only available in black, limiting aesthetic choices.

4. HXXF Car Seat Back Gun Rack (2‑Pack)

This is a dual-pack seat-back gun rack designed to fit in trucks, SUVs and other vehicles. The organizers are constructed from heavy-duty 900D Oxford cloth and feature MOLLE-style paneling plus storage pockets to hold rifles/shotguns and accessories while keeping the back-seat area tidy and accessible.

Key Features and Specifications:

  • Material: 900D Oxford cloth (durable and wear-resistant)
  • Pack quantity: 2 units (for front/back or both seats)
  • Storage features: MOLLE-panel rows for gear attachment + multiple storage pockets for accessories
  • Compatibility: Universal fit for most car seats, SUVs, pickups/trucks.
  • Intended for: Holding up to two rifles/shotguns and related gear in vehicle back-seat organizer format.

👍 Pros

  • Durable construction: The 900D Oxford cloth material offers ruggedness and longer service life.
  • Good value: Comes as a 2-pack, which increases utility (either two seats or twin vehicles).
  • Versatile storage: MOLLE panel provides flexibility for mounting accessories; storage pockets add organization.
  • Universal fit: Can adapt to many vehicles, which is convenient for users with trucks, SUVs, etc.
  • Helps tidy the vehicle’s rear seat area while securing gear in motion.

👎 Cons

  • Fit may be less ideal for very compact vehicles or sedans where back-seat space is limited.
  • While built for rifles/shotguns, bulky firearms with large scopes or unusual form-factors may not fit as neatly. Reviewers mention limitations.
  • Being fabric/strap-based rather than a rigid frame means there may be some movement/shift of firearms during driving unless securely fastened.
  • If used in family vehicles where children sit in back, this rack takes space and may interfere with passenger comfort or safety.
  • Installation might require adjustment to make sure the rack mounts firmly to the seat back to prevent sagging or movement.

5. Hunthor Truck Gun Rack (A Pair)

The Hunthor Truck Gun Rack is a two-piece seat-back storage system designed for vehicles like trucks, SUVs, jeeps and other off-road vehicles. Made from rugged 900D Oxford cloth, it features adjustable straps and pockets to securely hold up to two long guns and related gear while keeping the back-seat organized and accessible.

Key Features and Specifications:

  • Material: 900D Oxford cloth heavy duty yet lightweight fabric, scratch-proof for hunting or rugged use.
  • Pack: Includes two units (a “pair”) giving you flexibility for both driver and passenger seat backs (or both front seats) in many vehicles.
  • Fit / Compatibility: Universally designed to fit a wide variety of vehicles (sedans, SUVs, pickups, Jeeps) via headrest and back-strap mounting.
  • Gun Capacity & Support: Can hold two long guns; features double adjustable hook & loop straps to secure the firearms and prevent falling during transport.
  • Additional Storage: Includes one or more deep storage pockets for pistols, small hunting accessories or other gear.
  • Installation: Simple installation: upper strap around headrest, lower strap around seat-back.

Pros

  • Durable build quality: The 900D Oxford cloth material is robust and built to withstand rougher use (hunting vehicles, off-road) rather than delicate fabrics.
  • Good value with pair: Two units in the pack give flexibility to use both seats or an extra unit for another vehicle.
  • Universal vehicle fit: Because it uses straps and is adjustable, it works for many different seat shapes and vehicle types.
  • Secure support for firearms: Adjustable double hook & loop straps help keep the firearms from shifting during transit.
  • Extra storage for accessories: The pockets add utility beyond just holding guns — ideal for small gear, ammo boxes or other hunting accessories.

Cons

  • Fabric rather than rigid frame: Because it’s fabric/strap-based instead of a rigid mounting panel, there may be more movement or sag under heavy load or aggressive driving.
  • Limited to two guns & size constraints: While it holds up to two guns, very large firearms with long scopes or wide/long barrels may not fit as comfortably or may need custom arrangement.
  • Installation depends on seat and headrest design: Some vehicles’ headrest or seat-back geometry may make the fit less ideal (e.g., seats without removable headrests, or extremely contoured backs).
  • May occupy back-seat space: If used in a vehicle where passengers sit in the back, the rack will take up back-seat surface area and may interfere with passenger comfort.
  • Potential wear at straps/stitching: Some user reviews mention issues with stitching or strap wear over time (e.g., one review said “poor stitching … strap fell off”).

Conclusion: Choosing the Right Seat Back Gun Rack

When it comes to transporting your firearms safely and conveniently, a seat back gun rack is one of the most practical accessories for hunters, sport shooters, and tactical drivers alike. From premium modular panels like the Grey Man Tactical RMP to budget-friendly nylon organizers such as the Kolpin Tactical Holder, each option offers its own balance of security, accessibility, and versatility.

Before buying, consider your vehicle type, firearm size, and intended use whether that’s daily transport, hunting trips, or tactical readiness. Soft racks are ideal for quick, lightweight setups, while rigid systems provide superior stability and professional-grade organization.

Ultimately, the best gun rack is the one that keeps your firearms secure, discreet, and ready when you need them most. With the right choice, you’ll protect your gear, save space, and stay compliant with local transport laws all while traveling with confidence.

How to Zero a Scope at 100 Yards — Step-by-Step Guide

Zeroing your scope at 100 yards is one of the most important skills a shooter can master. Whether you’re a hunter dialing in your bolt-action, a competitive shooter prepping for a match, or an AR owner wanting reliable first-shot confidence, a proper 100-yard zero gives you a consistent reference point for holdovers, ballistic charts, and wind calls. This guide walks you through everything: the gear you need, step-by-step zeroing, turret math, troubleshooting common issues, and advanced tips to carry that zero out in the field.

Why zero at 100 yards?

A 100-yard zero is a familiar standard because it makes math simple, is practical for many hunting scenarios, and gives predictable ballistic references for mid-range shooting. From a ballistic perspective, 100 yards often places many hunting cartridges near their peak or on a predictable trajectory, allowing easier holdover estimates for typical shots. It’s also an excellent baseline: once your scope is truly zeroed at 100 yards, you can build ballistic tables for 200, 300 yards and beyond.

Gear checklist (what you’ll need)

  • Rifle with a mounted scope (rings properly torqued)
  • Stable rest (bipod, sandbags, or shooting bags)
  • Solid shooting bench or rest (bench rest preferred)
  • Paper target with clear aiming point (1″ grid or bullseye)
  • Bore sighter or laser bore sight (optional but speeds the process)
  • Quality ammunition (use the exact load you plan to shoot)
  • Wind meter (optional)
  • Ear and eye protection
  • Cleaning kit (if needed)
  • Notebook and pen (record adjustments / conditions)
  • Tools for turret adjustments (coin, flat screwdriver if needed)

Safety first range rules to follow

  1. Always treat the rifle as loaded until verified.
  2. Keep the muzzle pointed downrange at all times.
  3. Wear eye and ear protection.
  4. Confirm the range is clear before firing.
  5. Follow local range commands and regulations.

Step-by-step: Zeroing a scope at 100 yards

1. Prepare the rifle

  • Ensure the action is clean and the barrel free of obstructions.
  • Confirm scope mounts and rings are tight and torqued to manufacturer specs. Loose mounts = inconsistent zero.
  • Use the exact ammunition you intend to hunt or shoot with — different loads often have different points of impact (POI).

2. Initial bore-sighting (optional but recommended)

  • Use a bore-sighter or remove the bolt (for bolt-actions) and visually bore-sight to align the barrel with the target. This gets your first shots on paper and saves time and ammo.
  • If you don’t have a bore-sighter, start at a very close distance (e.g., 25 yards) to get on paper and then move back.

3. Set up the target at exactly 100 yards

  • Measure the distance accurately — 100 yards = 300 feet. Use a reliable rangefinder or measured range.
  • Mount the target on a sturdy target stand and ensure your aiming point is clearly visible.

4. Stabilize your rifle

  • Use a bench rest, bipod, and rear sandbag to minimize human error. A consistent, repeatable position matters more than raw skill when zeroing.

5. Fire a three-shot group (or five) for best results

  • Aim at the exact center of the target and fire a 3-shot group (or 5 if you want more data). Let the barrel cool between groups if you’re doing multiple strings.
  • Record the group center relative to the bullseye.

6. Measure the error (windage and elevation)

  • Measure how far (in inches) and in what direction your group center is from point of aim (POA). For example: 2.0″ high and 1.5″ left.

7. Convert inches to MOA and then to turret clicks

  • Important math refresher: At 100 yards, 1 MOA ≈ 1.047 inches, commonly rounded to 1 inch for easy field math.
  • If your turret adjusts 0.25 MOA per click:
    • Error of 2.0″ high → ≈2 MOA high → 8 clicks down (2 ÷ 0.25 = 8).
    • Error of 1.5″ left → ≈1.5 MOA left → 6 clicks right (1.5 ÷ 0.25 = 6).
  • Always move the turret in the direction you want the bullet strike to travel on the target (most modern scopes mark turret directions: “UP” lowers POI on the target).

8. Make the adjustments

  • Dial the turret the number of clicks calculated. If your scope has a zero stop or resettable turret, use the provided method to track your zero. If turrets are finger-tight, use the tool provided.

9. Confirm with another 3-shot group

  • Fire another group from the same rest and measure again. If the group center is within 0.5″ of POA, you’re essentially zeroed for most hunting purposes. For precision work, continue refining until you’re satisfied.

10. Final verification — and test different positions

  • Try a final 5-shot group and test from a field rest (bipod prone or kneeling) if you’ll be shooting from those positions in real life. Confirm POI consistency.

Turret math cheat sheet

  • 1 MOA ≈ 1.047″ @ 100 yards (approx 1″ for practical field use)
  • If turret = 1/4 MOA per click: 1 MOA = 4 clicks → 1″ = ~4 clicks
  • Example: To move 3 inches at 100 yards on a 1/4 MOA turret: 3 ÷ 1 ≈ 3 MOA → 3 × 4 = 12 clicks

Common zeroing mistakes (and how to avoid them)

  • Using different ammo for zeroing than in the field: Don’t do it. Different bullet weight/velocity shifts POI.
  • Loose scope rings: Always torque rings to spec. Loose rings = shifting zero.
  • Not stabilizing the rifle: Human error inflates group size — use rests for repeatability.
  • Not accounting for wind: Even small breezes can push groups at 100 yards — pick a calm day or use a wind flag.
  • Wrong math direction: Double-check turret directions — turning the wrong way wastes time and ammo.
  • Inconsistent cheek weld and trigger technique: Your position must be consistent between shots.

Ammo selection & consistency

Zero with the exact brand, bullet weight, and lot of ammo you intend to use. If you plan to use match loads for competition and hunting loads for the field, zero both and note the POI difference. Often hunting rounds shift POI slightly from match loads — record these offsets so you can quickly adjust in the field.

Boresight vs. live-fire: pros and cons

  • Bore-sighter: Fast, cheap, gets you on paper. Not a substitute for live-fire confirmation.
  • Live-fire: Required. Only live groups show real POI accounting for barrel harmonics, ammunition variation, and human factors.

Using ballistic reticles and BDC (bullet drop compensator)

Some scopes have BDC reticles or holdover marks calibrated for a specific cartridge and velocity. Once zeroed at 100 yards, you can use the reticle to hold for known distances, but you must confirm that the BDC lines match your chosen ammo and muzzle velocity. It’s best practice to verify holdovers with live fire before relying on them in the field.

Advanced tips — beyond the basic zero

  • Zero at the temperature and atmospheric conditions you’ll be shooting in (if extreme conditions are expected). Temperature and altitude affect velocity and point of impact.
  • Use a chronograph if you need precise ballistic tables — velocity variance directly impacts drop.
  • Record the zero: note rifle, scope, ring height, ammunition, date, range, and conditions in a logbook. This helps reproduce the zero later.
  • Check zero after any change: aftermarket stocks, retorquing rings, cleaning barrels (sometimes POI shifts after initial cleaning), or transport.
  • Consider 2-point zeroing: some shooters zero at 100 yards then confirm at 200 to match preferred ballistic trajectory for their cartridge.

Quick field adjustments and tricks

  • If you need a fast field-adjustment and you’re off by a few inches, convert inches to clicks using the turret math cheat sheet and adjust.
  • For tactical or AR platforms: confirm that the upper/lower receiver interface hasn’t shifted and that the rail mount is stable.
  • If your scope doesn’t have finger-adjustable turrets, carry the correct tool and mark your zero position on the turret with a permanent marker or tape.

Example zeroing log (sample entry)

Rifle: Remington 700
Scope: 3–9×40, 0.25 MOA clicks
Ammo: 168gr HPBT, Federal Match (lot #1234)
Date: Oct 8, 2025
Range: 100 yards, calm (2–3 mph)
Group 1: 3 shots, 2.5″ high, 1.0″ right → Adjustment: 2.5 MOA down (10 clicks), 1.0 MOA left (4 clicks)
Group 2: 5 shots, 0.2″ low, 0.1″ left → Zero confirmed

Troubleshooting stubborn zero issues

  • Group high/low inconsistency: recheck head position, cheek weld, and trigger pull.
  • Shots stringing vertically: might indicate inconsistent ammo, gas system issues (on semi-autos), or shooter anticipation.
  • Large groups off POA dramatically: suspect loose rings, loose base, or barrel problem. Re-torque mounts, reseat rings, and recheck.

FAQ — Fast answers

Q: Is 100 yards the “best” zero?
A: It’s a standard, great baseline for many cartridges and makes MOA math simple. Depending on your rifle and hunting needs, some prefer 50/200 or 200-yard zeros for flatter trajectories at typical hunting ranges.

Q: How many shots should I fire for a reliable zero?
A: At least a 3-shot group for initial checks; 5-shot groups are better for confirmation.

Q: Do I need a bore sighter?
A: No, but it speeds the process and reduces wasted ammo. Always confirm with live fire.

Q: Do turret clicks really equal 0.25 MOA?
A: They should — verify by moving the turret a known number of clicks and measuring actual change on target.

Conclusion

Zeroing a scope at 100 yards is a repeatable, logical process that brings consistency and confidence to your shooting. With the right gear, a steady rest, careful measurement, and the turret math above, you’ll be able to establish a reliable zero in minimal time. Record your settings, test different shooting positions, and always verify after any gear change. Practice the steps until they become muscle memory then your first shot at game or on the line will be a calm, predictable result.

If you’d like, I can create a printable 100-yard zero checklist, a turret-click calculator sheet, or a printable target sized for your preferred aiming point tell me which and I’ll generate it for you.

Exit mobile version