A Hunter’s First Experience: Embracing the Call of the Wild

Introduction

Embarking on your first hunting trip can be both exhilarating and daunting. This narrative delves into the essential preparation and emotional journey of a novice hunter stepping into the wilderness for the first time. From the anticipation and preparation to the actual experience in the great outdoors, each moment offers valuable lessons and unforgettable memories.


1. Preparation: The Foundation of Success

1.1 Learning the Ropes

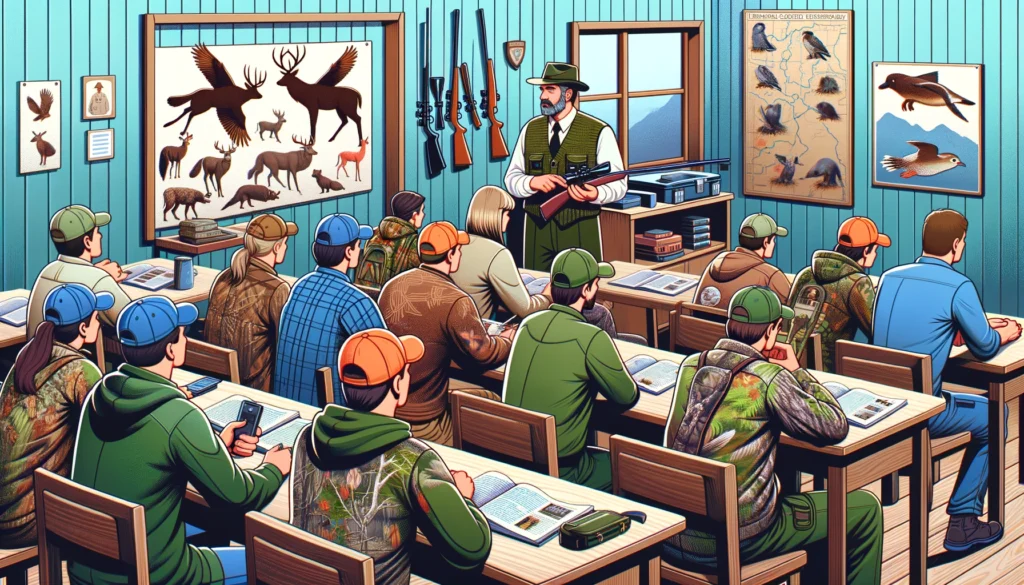
  • Educational Courses: Before venturing out, the novice hunter completed a mandatory hunter education course, gaining knowledge about safety, wildlife laws, and ethical hunting practices.

1.2 Gear and Equipment

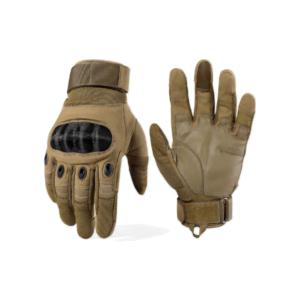
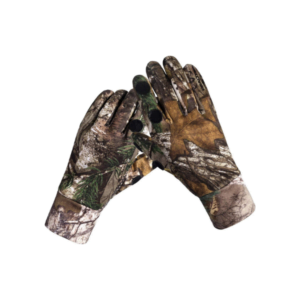
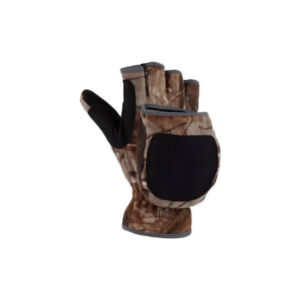
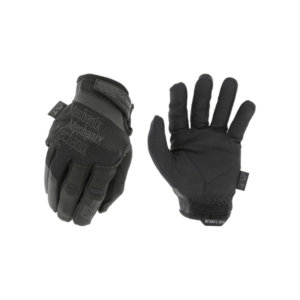
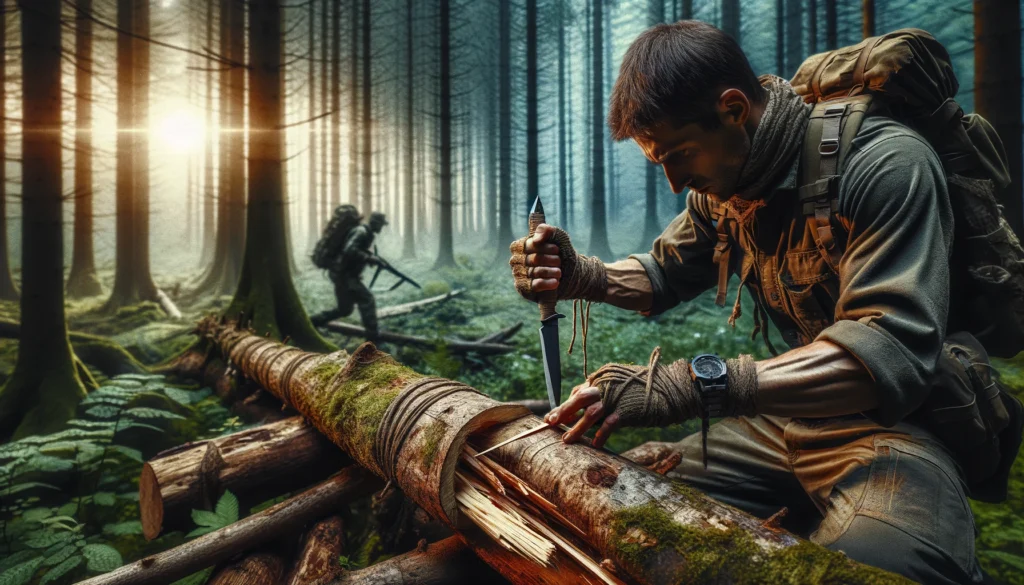
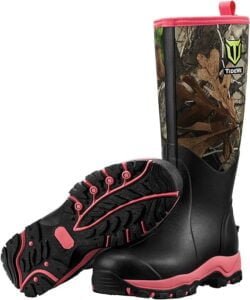
  • Essential Gear: Understanding the importance of the right equipment, the hunter meticulously gathered a reliable rifle, appropriate ammunition, a sturdy hunting knife, and weather-appropriate clothing.

1.3 Mental and Physical Readiness

  • Conditioning: Preparing physically through regular exercise and mentally by setting realistic expectations and objectives for the hunt.

2. The First Day in the Field

2.1 The Early Morning Start

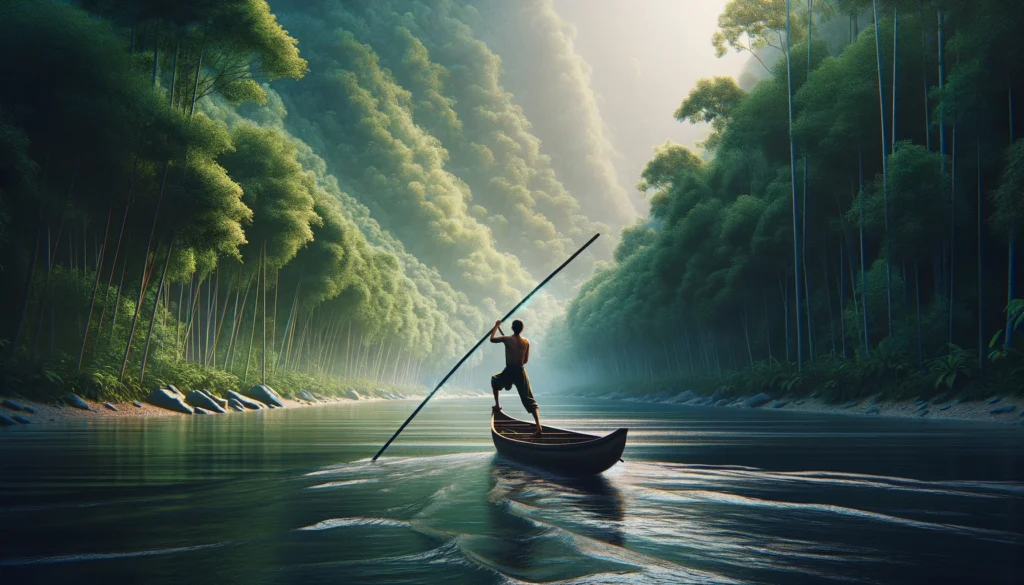
  • Awakening to Nature: The day began before dawn, with the novice hunter experiencing the serene beauty of the forest waking up, a profound moment that connected them deeply with nature.

2.2 Initial Challenges

  • Navigating the Terrain: The physical challenge of navigating through dense and unfamiliar terrain tested their stamina and determination.

3. The Hunt

3.1 Tracking and Patience

  • Skills in Practice: Hours of silently tracking game, learning to read animal signs, and understanding wind direction were crucial in getting closer to wildlife.

3.2 The Moment of Truth

  • Ethical Consideration: Faced with the opportunity, the hunter experienced the weight of the responsibility to make a clean and ethical shot, reflecting deeply on the significance of taking an animal’s life.

4. The Harvest

4.1 Processing the Game

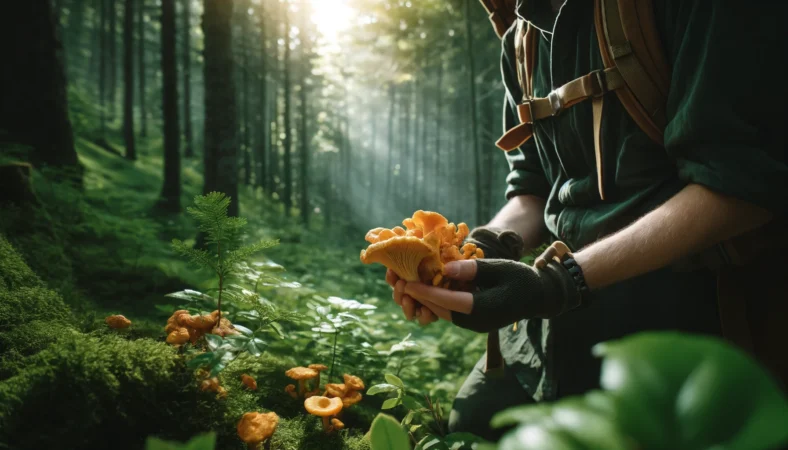
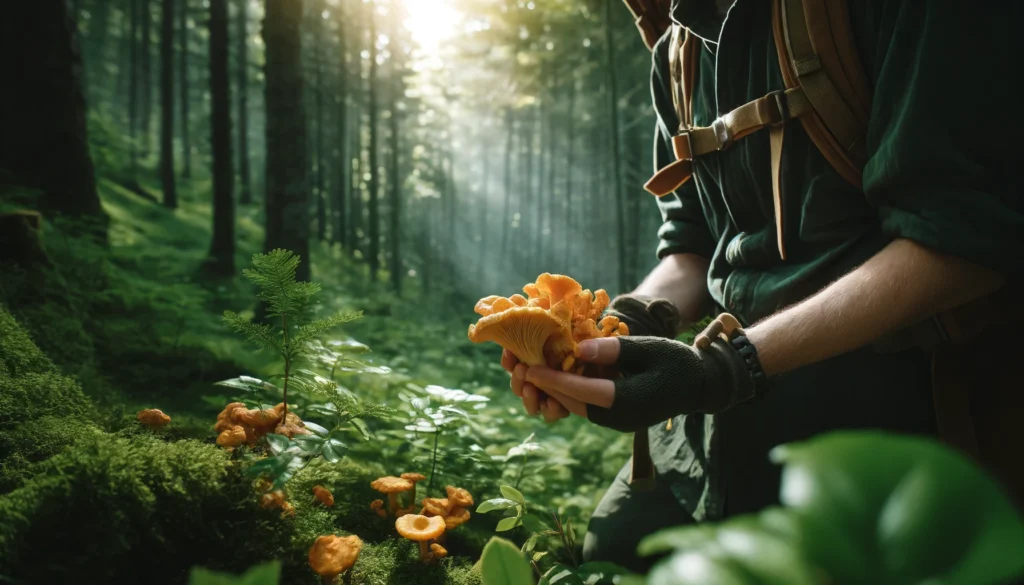
  • Respect for the Kill: The hunter learned to field dress the game, an essential skill that honors the animal by utilizing as much of it as possible.

4.2 Reflections on Sustainability

  • Conservation Awareness: Understanding the role of hunters in wildlife management and conservation, the novice felt a renewed respect for nature and the importance of sustainable practices.

5. Returning Home

5.1 Lessons Learned

  • Growth and Insight: The hunter returned with not just physical reminders of the hunt but also with a greater appreciation for the patience, skill, and respect required to hunt ethically.

5.2 Sharing the Story

  • Inspiring Others: Sharing their experiences with friends and family, the novice hunter inspired others with tales of challenge, success, and the raw beauty of nature.

6. Integration into the Hunting Community

6.1 Joining Local Clubs and Groups

  • Community Engagement: After their first hunt, the novice hunter sought out local hunting clubs and online forums to connect with more experienced hunters, enhancing their learning through shared experiences and tips.

6.2 Participating in Events

  • Learning Through Doing: Attending hunting workshops, conservation activities, and social events further solidified their understanding of the hunting culture and conservation ethics.

7. Advancing Skills and Techniques

7.1 Advanced Training

  • Continuous Improvement: To refine their skills, the novice hunter enrolled in advanced hunting courses focusing on specific techniques like bow hunting, tracking, and survival skills.

7.2 Specialty Hunts

  • Diversifying Experience: As confidence grew, exploring different types of hunting such as waterfowl, big game, and upland bird hunting provided new challenges and learning opportunities.

8. Contributing to Conservation

8.1 Volunteering for Wildlife Management

  • Giving Back: Engaging in local wildlife habitat restoration projects and participating in population control hunts to help maintain healthy wildlife ecosystems.

8.2 Advocacy and Education

  • Spreading Awareness: Becoming an advocate for ethical hunting and conservation, the novice hunter began to educate others on the importance of sustainable practices and responsible wildlife management.

9. Personal Reflections and Growth

9.1 Journaling and Documenting

  • Recording the Journey: Keeping a hunting journal helped the novice hunter reflect on personal growth, experiences, and the lessons learned from each outing.
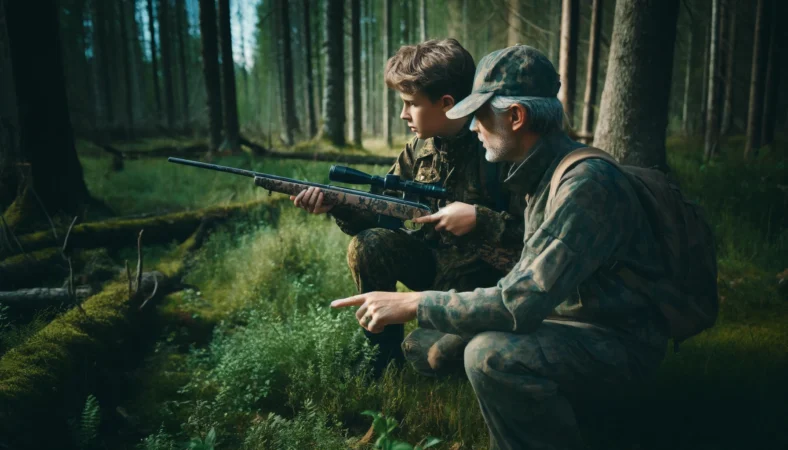
9.2 Mentorship Role

  • Passing on Knowledge: As skills developed, the novice hunter took on a mentorship role, helping guide other new hunters through their first experiences, sharing insights and fostering a supportive community.

10. Future Aspirations

10.1 Long-Term Goals

  • Setting Higher Goals: With foundational experience established, setting goals for more challenging hunts and perhaps competing in hunting competitions.

10.2 Integrating Technology

  • Utilizing Tools: Exploring the use of new technologies like GPS for hunting, trail cameras for wildlife monitoring, and modern gear to enhance efficiency and effectiveness in the field.

Conclusion

A hunter’s first experience is more than just a pursuit of game; it’s a profound journey that tests one’s skills, ethics, and connection to the natural world. It’s about entering the wilderness with respect and coming back with a deeper understanding of what it means to be part of the ecosystem. For many, it is the beginning of a lifelong passion and respect for hunting and conservation.


Frequently Asked Questions (FAQs)

What should I do if I don’t make a catch on my first hunt?

  • Perspective on Success: Understand that success in hunting is not only measured by the harvest but by the overall experience and the skills gained.

How can I ensure I’m practicing ethical hunting?

  • Continuous Education: Stay informed about ethical practices, participate in conservation efforts, and always adhere to regulations designed to sustain wildlife populations.

How can I balance hunting with wildlife conservation?

  • Ethical Balancing: Practice selective hunting, adhere to bag limits, and engage in conservation efforts that support habitat preservation and species sustainability.

What are some ways to stay updated with hunting technologies and techniques?

  • Staying Informed: Regularly read hunting publications, join online forums, and participate in industry expos to learn about the latest advancements and methodologies in hunting.

How to Obtain a Hunting License: A Step-by-Step Guide

Introduction

Obtaining a hunting license is a necessary step for anyone looking to hunt legally and ethically. This guide provides a comprehensive overview of the process to help ensure you meet all legal requirements and are prepared for a responsible hunting experience.


1. Understand the Requirements

1.1 Local Regulations

  • Jurisdiction Specifics: Hunting regulations can vary significantly by state, province, or country. It’s essential to familiarize yourself with the regulations that apply to the area where you plan to hunt.

1.2 Age and Residency

  • Minimum Age: Most regions have a minimum age requirement for obtaining a hunting license.
  • Residency: Licenses are typically categorized into resident and non-resident types, each with different fees and requirements.

2. Complete a Hunter Education Course

2.1 Course Requirement

  • Mandatory Training: Most states and countries require completion of a hunter education course before issuing a hunting license. The course covers safety, wildlife conservation, and local hunting laws.

2.2 Availability

  • Online and In-Person Options: Many places offer hunter education courses online, but some may require in-person attendance for practical examinations or field days.

3. Obtain the Application

3.1 Where to Apply

  • Wildlife Agency: Applications can usually be obtained from the local wildlife or natural resources agency.
  • Online Platforms: Many regions offer the convenience of online applications.

3.2 Documentation Needed

  • Identification and Proof of Course Completion: You will likely need to provide identification and proof that you have completed the required hunter education course.

4. Decide on the Type of License

4.1 Types of Licenses

  • Species-Specific Licenses: Some licenses are specific to certain types of game, such as deer, turkey, or waterfowl.
  • General Hunting Licenses: These allow the hunting of multiple species but may still have restrictions.

4.2 Consider Additional Tags or Permits

  • Big Game Tags: For hunting larger game like deer or elk, additional tags are often required and may be distributed through a lottery system.

5. Pay the Licensing Fee

5.1 Fee Structure

  • Variable Costs: Fees can vary based on the type of license, residency status, and whether additional tags or permits are needed.

5.2 Payment Methods

  • Online or In-Person: Most agencies accept multiple forms of payment, including credit cards, checks, and cash at physical locations.

6. Receive and Store Your License

6.1 Receiving Your License

  • Electronic or Physical Copy: Depending on the jurisdiction, you might receive a physical license card or an electronic version that you can print at home.

6.2 License Validity

  • Expiration Date: Be aware of the expiration date and any seasonal restrictions that may apply to your license.

7.1 Updates and Changes

  • Stay Updated: Hunting regulations can change. It’s important to stay informed about any changes to local laws or conditions that might affect your hunting activities.

7.2 Continuing Education

  • Advanced Courses: Consider taking advanced hunting courses or workshops that can provide deeper insights into specific types of hunting or game.

8. Ethics and Conservation Education

8.1 Importance of Ethical Hunting

  • Conservation Awareness: Ethical hunting practices contribute to wildlife conservation efforts and ensure sustainable use of natural resources. Understand the ethical guidelines set forth by wildlife agencies and conservation groups.

8.2 Community Engagement

  • Support Local Initiatives: Participate in local conservation programs and volunteer for wildlife habitat improvement projects. Engaging with the community helps promote a culture of responsible hunting.

9. Preparing for Your Hunting Trip

9.1 Equipment and Supplies

  • Essential Gear: Ensure you have all necessary equipment for a safe and legal hunting experience, including proper clothing, weapons, ammunition, and safety gear.

9.2 Planning and Research

  • Location Scouting: Research the areas you plan to hunt, including the types of game available and their population status. Understanding the terrain and animal behavior will improve your hunting success and safety.

10. Understanding Wildlife Management

10.1 Role of Hunters in Wildlife Management

  • Population Control: Hunters play a critical role in managing wildlife populations at healthy levels to prevent overpopulation and ensure ecological balance.

10.2 Impact on Ecosystems

  • Biodiversity Preservation: Responsible hunting helps maintain biodiversity by ensuring that no single species dominates the ecosystem, which can lead to detrimental effects on the environment.

11. Reporting and Compliance

11.1 Harvest Reporting

  • Mandatory Reporting: Some jurisdictions require hunters to report their game harvests, which helps wildlife agencies monitor population levels and make informed management decisions.

11.2 Legal Compliance

  • Adherence to Regulations: Always comply with local hunting laws and regulations. This includes respecting hunting season dates, bag limits, and weapon restrictions.

12. Recertification and License Renewal

12.1 Periodic Renewal

  • License Expiry: Be aware of when your hunting license expires and the process for renewal. Keeping your license current is essential for legal hunting.

12.2 Continuing Education

  • Ongoing Learning: Engage in continuous learning about hunting techniques, safety, and wildlife conservation. Many states offer refresher courses or advanced certifications that can enhance your skills and knowledge.

Conclusion

Obtaining a hunting license is just the first step in becoming a responsible hunter. By understanding and following local laws, completing the required education, and choosing the right type of license, you set the foundation for a respectful and ethical hunting practice. Always remember that hunting is a privilege that comes with significant responsibilities to wildlife and the environment.


Frequently Asked Questions (FAQs)

Can I use one state’s hunting license in another state?

  • License Reciprocity: Most states do not allow you to use a hunting license issued by another state. Non-residents usually need to obtain a separate license.

What if I lose my hunting license?

  • Replacement Process: Contact the issuing agency for a replacement. There may be a fee involved, and you might need to provide proof of the original license.

How can I find more information about local hunting courses?

  • Resources for Learning: Check with your state’s wildlife agency or visit their website for information about hunter education courses. Local hunting clubs and conservation groups are also good sources for course recommendations.

Are there age limits for hunting alone?

  • Supervised Hunting Requirements: Many states have age requirements for unsupervised hunting. Typically, young hunters must be accompanied by a licensed adult until they reach a certain age. Check local regulations for specifics.

Choosing the Best Hunting Gloves: A Complete Buyer’s Guide

Whether you’re perched in a tree stand in the brisk fall air or stalking game in the early spring, the right hunting gloves can make a significant difference. Not only do they protect your hands from harsh conditions, but they also enhance your grip and improve the overall hunting experience.

In this guide, we’ll explore the essential aspects of hunting gloves, from types and features to the best products on the market.

Importance of Hunting Gloves

Protection Against Elements

Hunting often exposes you to a variety of environmental factors, including extreme cold, rain, and rough terrain. Gloves shield your hands from injuries like scratches and provide a barrier against the cold, keeping you in the field longer.

Enhanced Performance

The right pair of gloves can significantly improve your handling of hunting gear. A good grip is crucial when handling firearms or bows, and gloves can prevent slippage, enhancing both safety and accuracy.

Comfort and Endurance

Long hours in the outdoors require comfort and endurance, which are greatly enhanced by wearing the right gloves. They help prevent blisters and reduce fatigue, allowing you to concentrate on the hunt rather than discomfort.

Types of Hunting Gloves

Insulated Gloves

These are a must-have for cold weather hunts, designed with materials that trap heat effectively while remaining breathable. Brands like Under Armour and Sitka offer models that balance insulation with dexterity.

Lightweight Gloves

Ideal for warmer conditions, these gloves are less about warmth and more about protection and grip. They’re typically made from thinner materials that maintain sensitivity and dexterity.

Specialized Gloves

Specific types of hunting call for specialized gloves. For example, camouflage gloves are essential for remaining undetected in the wilderness, while water-resistant gloves are indispensable for duck hunting.

Key Features to Consider When Buying Hunting Gloves

Material and Build

The durability and flexibility of hunting gloves depend greatly on their materials. Leather gloves are renowned for their durability, while synthetic gloves offer excellent flexibility and are generally quicker to dry.

Weather Suitability

Choosing the right gloves for the weather conditions you’ll face is crucial. Look for waterproof features for wet climates and breathable fabrics to prevent excessive sweating.

Fit and Comfort

Gloves should fit snugly without restricting movement. Many models come with adjustable cuffs or elastic materials that enhance fit and ensure comfort.

How to Choose the Right Hunting Gloves

Choosing the right hunting gloves is crucial for any hunter, as they not only protect your hands but also enhance your performance in the field.

Whether you’re facing cold weather, navigating rugged terrain, or needing better grip on your equipment, the right gloves can make a significant difference. Here’s a detailed guide on how to select the best hunting gloves that meet your specific needs.

Consider the Hunting Environment

Start by assessing the typical conditions you hunt in. Your environment will dictate the type of gloves you need:

  • Cold Weather: Look for insulated gloves that provide warmth without sacrificing dexterity. Materials like Thinsulate or Primaloft are excellent for insulation.
  • Wet Conditions: Waterproof or water-resistant gloves are essential if you hunt in rainy areas or wetlands. Gloves with a Gore-Tex layer can be particularly effective.
  • Warm Climates: In warmer conditions, choose lightweight and breathable gloves. These should offer protection and better weapon control without causing overheating.

Determine the Glove Type

There are several types of hunting gloves to consider, each serving different purposes:

  • Full-Finger Gloves: Offer complete protection and warmth. Best for cold weather hunting.
  • Fingerless Gloves: Provide better finger dexterity, suitable for intricate tasks like setting up equipment.
  • Mittens: Excellent for extreme cold. Some models convert to fingerless gloves for flexibility.
  • Camouflage Gloves: Essential for staying undetected in environments where concealment is crucial.

Assess Key Features

When selecting hunting gloves, pay attention to several important features:

  • Material: Durability and functionality depend on the material. Leather is tough and offers excellent protection, while synthetic materials might offer better waterproofing and breathability.
  • Fit and Mobility: Gloves should fit snugly but not restrict movement. Your fingers should move freely for shooting and handling gear.
  • Sensitivity: If you need to operate triggers or touch screens, look for gloves that offer tactile sensitivity.
  • Grip: Enhanced grip features help handle weapons safely, especially in wet conditions.

Top hunting sport gloves for 2024

Here are the top five hunting gloves for 2024, each excelling in specific conditions and uses:

1.The WTACTFUL Tactical Gloves

Key Features:

  • Microfiber Material: The gloves are constructed from durable microfiber, which provides a wear-resistant, lightweight, and fast-drying fabric. This material choice enhances the glove’s longevity and comfort during active use.
  • Touchscreen Compatibility: Equipped with specialized fingertips on the thumb and middle finger, these gloves allow users to operate touchscreen devices sensitively without needing to remove the gloves, making them convenient for modern technological needs.
  • Reinforced Protection: The palm area is reinforced, and the gloves include double stitching, features that offer robust protection against abrasion and ensure the gloves can withstand heavy-duty usage.

Pros

  • Protection
  • Comfort
  • Touchscreen Compatible

Cons

  • Size Limitation

2. KEMIMOTO Tactical Gloves for Men

Key Features:

  • Impact Resistant Material: The gloves are reinforced with durable microfiber, providing a strong protective barrier against abrasions and sharp objects, ideal for rough and tactical use.
  • Three-Finger Touchscreen Functionality: Equipped with touchscreen-capable material on the thumb, index, and middle fingers, allowing users to handle touchscreen devices without removing the gloves.
  • Enhanced Grip and Durability: Features double-stitched seams for longevity and reinforced double-layer synthetic leather palms with anti-slip mesh, offering improved grip and additional palm protection.

Pros

  • Impact Resistance
  • Touchscreen Compatibility

Cons

  • Limited Color and Style Options

3. EAmber Camouflage Hunting Gloves

Key Features:

  • Material: Constructed from soft polyester and thin fleece, these gloves offer a comfortable fit while ensuring hand warmth and flexibility.
  • Design: Features a fingerless design for the thumb and index finger, enhancing dexterity and ease of movement for precise tasks without needing to remove the gloves.
  • Anti-Slip: The palms and fingers are equipped with mesh anti-slip silicone, providing a firmer grip and making it easier to hold equipment securely.

Pros

  • Comfortable and Breathable
  • Enhanced Flexibility

Cons

  • Limited Cold Protection

4. Carhartt Men’s Hunt Fleece Camo Flip Mitten

Key Features:

  • Material: The mittens feature a Mossy Oak camo fleece shell with a synthetic palm and polyester lining, combining durability with comfort.
  • Design: Innovative flip mitt construction allows for the conversion between mitten and fingerless gloves, offering flexibility in how they are worn.
  • Grip and Durability: The palm and thumb areas are reinforced with synthetic material, enhancing grip and increasing durability.

Pros

  • Versatility
  • Comfort and Fit

Cons

  • Limited Dexterity When Covered
  • Thermal Insulation

5. Mechanix Wear Tactical Specialty Gloves

Key Features:

  • Material: Constructed with 0.5mm AX-Suede, offering a balance between durability and dexterity.
  • Design: Anatomically designed for a precision fit that conforms to the natural curvature of the hand, enhancing comfort and control.
  • Breathability: Features TrekDry material on the back of the hand for evaporative cooling, keeping hands cool and comfortable during extended use.

Pros

  • Machine Washable
  • Secure Fit

Cons

  • Durability Concerns

Conclusion

Selecting the right hunting gloves is essential for any serious hunter. They not only enhance your comfort and protection but also improve your performance. Consider your needs carefully and invest in gloves that will enhance your hunting experience.

Essential Survival Knife Skills: Techniques for the Outdoors

Introduction

A survival knife is one of the most versatile tools you can have in your outdoor gear arsenal. Whether you are camping, hiking, or in a survival situation, knowing how to effectively use a survival knife can greatly increase your ability to cope with various challenges. This guide will cover the essential skills and techniques for using a survival knife safely and efficiently.


1. Choosing the Right Knife

1.1 Knife Types

  • Fixed Blade vs. Folding Knife: A fixed blade is generally more durable and suitable for heavy-duty tasks, while a folding knife offers convenience and portability.

1.2 Blade Material and Design

  • Material: High-carbon steel is typically preferred for its strength and ease of sharpening.
  • Design: A full tang (the metal of the blade extends through the handle) adds strength and durability.

2. Basic Knife Handling Safety

2.1 Grip Techniques

  • Secure Grip: Hold the knife firmly with your thumb and fingers wrapped around the handle. Ensure your grip is stable but not overly tight to maintain control without fatigue.

2.2 Cutting Safely

  • Direction of Cut: Always cut away from your body. Ensure that no body parts are in the path of the blade.

3. Essential Knife Skills

3.1 Making a Feather Stick

  • Technique: Use the knife to shave thin curls from a piece of wood. These curls help in starting fires as they catch flame easily.

3.2 Batoning

  • Purpose: Splitting wood by batoning involves striking the back of a knife blade with a heavy object to drive the knife through wood. It’s useful for making kindling or processing wood when a hatchet isn’t available.

3.3 Creating Notches

  • Applications: Notches are used in constructing traps, shelters, or tools. Use the tip of the knife for precision in carving tasks.

4. Advanced Techniques

4.1 Constructing Tools and Utensils

  • Carving Skills: Use your survival knife to carve wooden spoons, forks, or makeshift hunting tools like spears.

4.2 Building Shelter

  • Cutting and Shaping Materials: Your knife will be essential in cutting branches and shaping them to create the framework of a shelter.

4.3 Preparing Food

  • Cleaning Game or Fish: A sharp survival knife is crucial for gutting and preparing fish or game for cooking.

5. Maintaining Your Knife

5.1 Regular Sharpening

  • Keeping a Fine Edge: Use a sharpening stone or honing rod to keep your knife sharp; a dull knife is more dangerous as it requires more force to cut.

5.2 Cleaning and Storing

  • Corrosion Prevention: Clean and dry your knife after use, especially if it’s made of carbon steel, to prevent rust. Store in a dry place.

6. Survival Situations

6.1 Signaling for Help

  • Using the Knife’s Reflective Surface: The polished, flat side of a knife can be used to reflect sunlight to signal rescuers.

6.2 First Aid

  • Emergency Tool: In dire situations, a knife can be sterilized and used to cut bandages or, if properly trained, to perform emergency medical procedures.

7. Knot Tying with a Knife

7.1 Technique

  • Using the Knife Handle: Wrap rope or cord around the handle to assist in pulling tight knots. Ensure the knife blade is securely sheathed to avoid injury.

7.2 Applications

  • Securing Gear: Useful for tightening knots when setting up camp or securing gear to your pack.

8. Self-Defense

8.1 Training

  • Proper Use: While a survival knife can be used for self-defense, proper training and caution are essential. Learn defensive techniques from a qualified instructor.

8.2 Legal Considerations

  • Understand the Law: Be aware of the laws regarding carrying and using a knife for self-defense in your area.

9. Fire Making

9.1 Striking a Fire Steel

  • Technique: Use the back of your knife blade to strike a fire steel rod, creating sparks to ignite tinder.

9.2 Preparing Tinder

  • Shaving Wood: Use your knife to create fine wood shavings that catch fire easily.

10. Hunting and Trapping

10.1 Crafting Spears and Other Tools

  • Spear Making: Sharpen a long stick into a point to create a simple spear for fishing or small game hunting.

10.2 Constructing Animal Traps

  • Trap Mechanisms: Use your knife to carve intricate parts needed for trigger mechanisms in animal traps.

11. Navigational Aids

11.1 Marking Trails

  • Safe Navigation: Use your knife to make small marks on trees to help navigate unfamiliar woods without getting lost.

11.2 Direction Finding

  • Sun Compass: Use your knife to create a sun compass by sticking it upright in the ground and marking the shadow’s tip to determine direction.

12. Tool and Gear Repair

12.1 Cutting and Shaping Repair Materials

  • Field Repairs: Use the knife to cut repair patches from available materials or to shape replacement parts for damaged gear.

12.2 Emergency Adjustments

  • Quick Fixes: Modify or adjust gear in the field to meet changing conditions or needs.

13. Culinary Uses

13.1 Preparing Meals

  • Cooking Preparations: Beyond cleaning game or fish, use your knife to chop vegetables, slice meat, and prepare ingredients for cooking.

13.2 Eating Utensil

  • Makeshift Cutlery: In the absence of regular cutlery, your knife can serve as a multipurpose eating tool.

14. Educational and Mentoring Opportunities

14.1 Teaching Others

  • Passing on Skills: Teach knife skills to others, enhancing safety and survival techniques within your community.

14.2 Organizing Workshops

  • Skill-Building Events: Lead workshops or outdoor excursions focused on survival knife skills, promoting safe and effective outdoor practices.

Conclusion

Mastering survival knife skills enhances your readiness for any outdoor adventure or unexpected situations. The versatility of a survival knife makes it indispensable in the wilderness, providing you with the capability to perform crucial tasks that ensure your survival and comfort.


Frequently Asked Questions (FAQs)

What is the best way to practice these skills?

  • Practice Safely: Begin practicing in controlled environments. Start with simple tasks like making feather sticks and progress to more complex skills as you gain confidence and precision.

How can I ensure my survival knife stays in optimal condition?

  • Regular Maintenance: Implement a consistent maintenance routine including cleaning, sharpening, and proper storage. Regular care will extend the life and functionality of your knife.

How do I choose the right size and type of survival knife?

  • Knife Selection: Consider your main activities and choose a knife size and type that best fits those needs. Larger knives are better for chopping and batoning, while smaller knives offer more precision and ease of carry.

Can a survival knife be used for building shelters?

  • Shelter Building: Absolutely, a sturdy survival knife can be instrumental in cutting and shaping materials for shelter construction, from clearing branches to precision cuts for fitting parts together.

Keeping Your Sleeping Bag Warm and Dry: Field Tips That Work

Keeping your sleeping bag warm and dry comes down to three habits: protect it from ground moisture, manage condensation before it soaks the insulation, and avoid sleeping in damp clothing. A sleeping bag works by trapping warm air around your body, and that trapped air disappears when insulation is compressed, dirty, or wet. This guide explains the practical steps that help campers, hunters, and backpackers sleep warmer without damaging the bag or carrying unnecessary gear.

Table of contents

Quick Warm-and-Dry Checklist

  • Use a sleeping pad with enough insulation for the temperature.
  • Keep the bag off bare ground, wet tent floors, and snow.
  • Vent the shelter enough to reduce condensation.
  • Change into dry base layers before getting in the bag.
  • Do not breathe into the bag; moisture from breath can dampen insulation.
  • Air the bag when the weather gives you a safe dry window.
  • Store the bag loose at home, not compressed in its stuff sack.

If you remember only one thing, remember this: your sleeping pad and dry clothing matter almost as much as the sleeping bag itself. A good bag on cold wet ground can still feel miserable, while a modest bag on a warm pad with dry layers can perform much better.

Why Sleeping Bags Get Cold or Damp

A sleeping bag does not create heat. Your body creates heat, and the bag slows heat loss by trapping air in lofted insulation. When that loft is compressed under your body, soaked by moisture, or filled with damp air, it insulates less effectively. That is why cold ground, condensation, sweat, rain, snow, and poor storage all make a bag feel colder than its temperature rating suggests.

Temperature ratings are also not personal guarantees. Metabolism, fatigue, food, wind exposure, shelter choice, pad insulation, clothing, and humidity all affect comfort. Treat the rating as a planning tool and build a sleep system that includes the bag, pad, shelter, clothing, and site choice.

Block Ground Moisture and Cold

The ground pulls heat away quickly, especially when it is damp, frozen, or covered in snow. Your sleeping bag compresses underneath you, so the insulation below your body does little compared with the pad. That makes a sleeping pad one of the most important parts of staying warm.

Use the right sleeping pad

Choose a pad with enough insulation for the season. Closed-cell foam pads are durable and moisture resistant, while inflatable insulated pads can be warmer and more comfortable. In cold conditions, some campers stack a foam pad under an inflatable pad to add insulation and protect against punctures.

Add a ground barrier when needed

A tent footprint, tarp, bivy groundsheet, or dry natural surface can help keep moisture away from the tent floor and bag. Do not place the sleeping bag directly on wet vegetation or bare ground. If you are hunting from a spike camp, clear sharp sticks and wet debris before laying out the sleep system.

Manage Condensation Inside Shelter

Condensation forms when warm humid air meets colder surfaces. In a tent, tarp, blind, or small shelter, moisture from breathing, damp clothes, and wet ground can collect on walls and drip or brush onto the sleeping bag. This is one reason a bag can feel damp even when it never rained.

Vent before sealing everything tight

It is tempting to close every vent when the night gets cold, but trapping moisture can make the shelter wetter. Use the shelter vents, leave a small opening when conditions allow, and pitch the shelter to encourage airflow while still blocking wind-driven rain or snow.

Keep wet gear away from the bag

Rain jackets, boots, gaiters, and sweaty layers should not touch the sleeping bag if you can avoid it. Put wet gear near the shelter door, inside a separate bag, or under a vestibule where it will not transfer moisture to insulation. For wet-weather clothing planning, see our guide to waterproof hunting clothing.

Sleep in Dry Layers

Dry base layers help your sleeping bag work. If you crawl into the bag wearing damp socks, sweaty thermals, or the same clothes you hiked in, the bag has to absorb that moisture. Change into dedicated sleep socks and a dry base layer when possible. In cold camps, keep those sleep layers in a dry bag during the day.

Do not overdress inside the bag

Warm layers are useful, but bulky layers can compress insulation or cause sweating. If you sweat during the night, that moisture can chill you later. Use breathable dry layers, adjust the zipper for ventilation, and add a hat or hood before piling on heavy clothing.

Protect the footbox

The footbox often touches tent walls or damp gear. Keep spare socks dry, avoid putting wet boots near the bag, and make sure your feet are not pressing the bag against a wet tent wall. A small dry bag with sleep socks can make a big difference on multi-day trips.

Store and Pack the Bag Correctly

Compression is useful for travel but bad for long-term storage. At home, store the sleeping bag loose in a large storage sack or hang it in a dry space. Long-term compression reduces loft, especially in down bags, and less loft means less warmth.

Pack it dry and protect it in your bag

Use a waterproof stuff sack, pack liner, or heavy-duty dry bag when rain, river crossings, snow, or wet brush are realistic. The sleeping bag should be one of the most protected items in your pack. For backcountry planning, pair this with a basic emergency and navigation kit; our wilderness signaling guide covers another part of that safety system.

Dry a Damp Bag in the Field

If the bag picks up moisture, dry it whenever the weather gives you a safe chance. Shake it out, expose it to dry air, and avoid letting direct intense heat damage the shell or insulation. In camp, drape it over a clean line, branch, tent, or pack surface where it will not pick up dirt or sparks.

Never dry a sleeping bag too close to a stove, fire, heater, or lantern. Heat, sparks, and flame can damage fabric and insulation quickly. A slow dry in moving air is safer than trying to force the process next to a heat source.

Cold-Weather Safety Notes

Cold, wet conditions can become serious when fatigue and wind stack up. The National Weather Service cold-safety guidance is a useful reminder that wind chill, wet clothing, and prolonged exposure all increase risk. If you are shivering hard, confused, unusually clumsy, or unable to warm up, treat it as more than a comfort problem and take action.

This article is general outdoor education, not medical advice. For hunting camps, also plan around local weather, route difficulty, daylight, and the distance back to the vehicle or trailhead.

Frequently Asked Questions

Should I wear clothes inside a sleeping bag?

Yes, but they should be dry and breathable. A dry base layer, clean socks, and a warm hat can help. Avoid sleeping in damp hiking or hunting clothes because that moisture can reduce warmth and make the bag clammy.

Why is my sleeping bag wet in the morning?

Common causes include condensation inside the shelter, damp clothing, breath moisture, a wet tent wall touching the bag, ground moisture, or storing the bag in a wet pack. Ventilation and better separation from wet gear usually help.

Can I breathe into my sleeping bag to warm it up?

It is better not to. Your breath adds moisture inside the bag, and that moisture can make insulation less effective over the night. Use the hood, collar, hat, and zipper instead of breathing into the insulation.

How do I keep a down sleeping bag dry?

Use a waterproof stuff sack or pack liner, keep wet clothing away from it, vent your shelter, and dry the bag during safe weather windows. Down is warm for its weight, but it needs careful moisture management.

Final Takeaway

A warm dry sleeping bag starts before bedtime. Pick a protected campsite, use an insulated pad, vent the shelter, change into dry layers, keep wet gear away from the bag, and store the bag loose at home. Those habits protect loft, reduce moisture, and make the bag’s rating more realistic in the field. For hunters and campers, that means better rest and a safer next day outdoors.

Arrow Setups for Archery: Spine, Weight, and Tuning Basics

A good arrow setup matches your bow, draw length, draw weight, point weight, and intended use. The safest starting point is to follow the bow manufacturer’s minimum arrow-weight guidance, use an arrow spine chart from the arrow maker, and confirm the finished setup with careful tuning. Arrow weight matters, but it should never be chosen by speed alone. A setup that is correctly spined, consistent, and safe for your bow will shoot better than one built around a single number.

Table of contents

Quick Answer

For most archers, the right arrow setup is not the lightest or heaviest arrow available. It is the arrow that matches the bow’s draw weight and draw length, has the correct spine, meets the bow maker’s minimum weight requirement, and tunes cleanly with your rest, nock, vanes, and point or broadhead. If you are unsure, start with the arrow manufacturer’s spine chart and have a pro shop confirm the setup before shooting broadheads or hunting.

Archery gear is safest when it is fitted and used correctly. For general participation and safety context, USA Archery is a useful starting point for formal instruction and program resources.

Arrow Setup Terms

Before changing arrows, it helps to know the terms. Spine describes how much the arrow shaft flexes. GPI means grains per inch and describes shaft weight before components. Total arrow weight includes the shaft, point, insert, nock, vanes, and any wrap. Point weight is the weight at the front, such as a field point or broadhead. Front of center describes how much weight is forward of the arrow’s midpoint.

Total arrow weight

Total arrow weight is the finished arrow, not just the shaft. A shaft may look light on paper, but heavier inserts, wraps, vanes, and points can change the final number. Weigh a finished arrow if you need a real figure.

Arrow length

Arrow length affects spine and safety. Cutting an arrow shorter makes it act stiffer, and an arrow that is too short can be dangerous. Arrow length should be set with your draw length, rest, broadhead clearance, and bow setup in mind.

Why Arrow Spine Comes First

Arrow spine is one of the biggest setup decisions because it affects how the arrow flexes during the shot. Too weak or too stiff can cause poor flight, inconsistent groups, tuning frustration, and broadhead problems. Draw weight, draw length, arrow length, point weight, and cam aggressiveness all influence the needed spine.

Do not guess spine from a forum comment or a friend’s setup. Use the arrow maker’s current spine chart and enter your actual bow specs. If your setup is near the edge between two spine categories, ask a pro shop or experienced coach before buying a full dozen.

Arrow Weight and Grains Per Inch

Arrow weight affects speed, trajectory, sound, and energy transfer. A lighter arrow usually flies faster and flatter, but it can be louder and may be harder on the bow if it falls below the manufacturer’s minimum weight. A heavier arrow usually flies slower, may be quieter, and can carry momentum well, but it requires better range judgment because the trajectory drops more.

Light setups

Light setups can help target archers or 3D shooters who want flatter trajectory within rules and equipment limits. The risk is going too light for the bow or building a setup that is fast but difficult to tune. Never go below the bow maker’s minimum arrow weight.

Moderate setups

A moderate setup is the best starting point for many archers. It balances speed, tuning, trajectory, and forgiveness. If you are new, start with a safe middle-ground arrow that matches the spine chart rather than chasing the extreme ends.

Heavy setups

Heavy setups are popular with some bowhunters because they can be quieter and can carry momentum well. They also drop more with distance, so the archer needs accurate range knowledge and consistent shot discipline. A heavier arrow is not automatically better if it is poorly spined or badly tuned.

Front of Center and Point Weight

Front of center, often called FOC, describes the balance point of the finished arrow. Adding point weight or a heavier insert moves more weight forward. That can improve stability for some setups, but it also changes dynamic spine and may require a stiffer shaft.

Change point weight carefully. Going from a light field point to a much heavier broadhead can change tune and impact. If you hunt, make sure field points and broadheads are matched and tested before the season.

Target vs Hunting Setups

Target and practice arrows

Target arrows are often chosen for consistency, straightness, spine match, and repeatable grouping. For many casual target shooters, durability and cost matter too. A consistent dozen that fits your bow is better than a premium shaft chosen with the wrong spine.

Hunting arrows

Hunting arrows need to be safe, consistent, and tuned with the exact broadhead or point system you will use. Broadheads reveal tuning problems faster than field points, so do not assume a field-point group means your hunting setup is ready. Keep shots inside your practiced ethical range and follow current state equipment rules.

Tuning and Consistency Checks

After choosing a safe spine and weight, tune the bow and arrows together. Check nock fit, vane clearance, rest position, cam timing if relevant, and paper or bare-shaft feedback if you know how to use those methods. If the process feels confusing, a pro shop can save time and prevent unsafe trial-and-error.

  • Use the same arrow length across the set.
  • Weigh finished arrows if consistency matters.
  • Spin-test broadheads and inserts for wobble.
  • Check vanes for damage and clearance marks.
  • Confirm broadhead and field-point impact before hunting.

For broader bow setup work, see our bow tuning for beginners guide and our recurve vs compound bow comparison.

Safety Rules Before Changing Arrows

Every arrow setup change should stay inside the bow and arrow maker’s published limits. Do not shoot cracked shafts, arrows that are too short, mismatched nocks, loose inserts, or arrows below the bow’s minimum weight. Inspect arrows after impacts, especially carbon shafts, and discard damaged arrows rather than trying to save a few dollars.

Archery setup advice online should be treated as general education, not a substitute for hands-on fitting. A qualified pro shop can measure draw length, verify draw weight, check arrow clearance, and make sure the setup is safe before you shoot broadheads.

Frequently Asked Questions

What arrow weight should I use for archery?

Use an arrow that matches your bow specs, correct spine, and manufacturer minimum weight. Many archers do best with a moderate setup instead of the lightest or heaviest option.

Is a heavier arrow better for hunting?

Not automatically. A heavier arrow can be quieter and carry momentum well, but it also drops more and still needs correct spine and tuning. A poorly tuned heavy arrow is not a good hunting setup.

Can I use the same arrows for target and hunting?

You can practice with the same shaft family, but hunting setups must be tested with the actual broadheads or points you will use. Confirm broadhead flight before hunting.

What happens if my arrow spine is wrong?

The arrow may flex poorly, group inconsistently, show tuning problems, or fly badly with broadheads. Use the arrow maker’s spine chart and get help if your setup falls between recommendations.

Final Takeaway

Arrow setups work best when spine, finished weight, point weight, length, and bow tune all agree. Start with the manufacturer’s charts, stay above the bow’s minimum arrow weight, inspect every shaft, and test the finished setup before relying on it. For most archers, the best arrow is not the fastest or heaviest. It is the arrow that is safe, consistent, and tuned for the bow in your hands.

Best Hunting Boots for Women in 2025

Selecting the right hunting boots is crucial, especially for women who brave the rugged outdoors. Not only must these boots be durable and capable of confronting various weather conditions and terrains, but they also need to provide the comfort and fit tailored to women’s specific physiological needs.

This guide explores key features, reviews top models, and offers essential tips to help you find the perfect pair of women’s hunting boots for your next adventure.

Why Choosing the Right Hunting Boots Matters

Comfort on the Trail

The correct pair of hunting boots is your best ally against the rugged terrain. Well-designed boots help prevent foot fatigue and blisters, ensuring that long hours on the trail don’t take a toll on your feet. A good fit means better support, reducing the risk of ankle injuries and other foot-related ailments.

Weather and Environmental Adaptability

Whether you’re traversing wet marshlands or dry, rocky mountains, the right boots will handle it all. High-quality hunting boots are designed to provide protection against harsh elements, ensuring that your feet stay dry and comfortable regardless of the weather conditions.

Enhanced Performance and Safety

A sturdy pair of boots enhances your stability and grip on slippery or uneven surfaces, crucial for maintaining balance and precision during a hunt. The right boots not only improve your mobility but also contribute significantly to your safety outdoors.

Key Features to Look for in Women’s Hunting Boots

Material and Build Quality

The best hunting boots are typically made from high-quality materials such as full-grain leather, nylon, and advanced synthetic fabrics. These materials offer a great balance of durability, water resistance, and breathability, making them ideal for hunting footwear.

Waterproofing

Waterproof boots are essential, especially in environments where you might encounter dew, rain, or crossing water bodies. Look for boots with a reliable waterproof barrier like Gore-Tex, which provides excellent protection while allowing your feet to breathe.

Insulation

If you’re planning to hunt in colder climates, insulation is key. Insulated boots will help retain heat and keep your feet warm in freezing temperatures, enhancing comfort and focus.

Fit and Comfort

Women’s hunting boots should offer a snug fit that doesn’t compromise on space for movement. Look for boots with adjustable features, such as lacing systems that enhance fit and support. Padded insoles and cushioned footbeds can also contribute greatly to the overall comfort of the boot.

Top Women’s Hunting Boots for 2024

1.Manfen Women’s Hiking Boots

Manfen’s Thermator Women’s Hiking Boots are designed specifically for female outdoor enthusiasts who need lightweight, durable, and stylish footwear. Here’s a comprehensive breakdown of the key features, pros, and cons of this product.

Key Features of Manfen Women’s Hiking Boots

  • Material & Build: The boots are crafted with a rubber sole and feature a variety of color options including Black, Gray, Camouflage, and Gray/Sky Blue.
  • Insulation: Equipped with 200 Grams Thinsulate Insulation, these boots are rated for temperatures as low as -13°F, making them suitable for cold weather conditions.
  • Waterproof Technology: The boots incorporate X-DRY Membrane and a waterproof mesh upper paired with a moisture-wicking mesh lining, ensuring that your feet remain dry and warm.

Pros

  • Enhanced Comfort
  • High Traction Grip
  • Effective Waterproofing

Cons

  • Size Issues
  • Warmth Overload

The Manfen Women’s Hiking Boots, model Thermator, provide an excellent option for women seeking reliable, protective, and comfortable footwear for various outdoor adventures. The boots are particularly suited for cold and wet conditions.

However, potential buyers should be aware of sizing issues and consider their specific climate needs when selecting these boots. Overall, these boots are a solid investment for serious hikers and outdoor enthusiasts looking for high-performance footwear tailored to women’s needs.

2.XPETI Women’s Thermator Mid High-Top Waterproof Outdoor Hiking Boot

The XPETI Women’s Thermator Mid High-Top Waterproof Outdoor Hiking Boot is crafted for women who engage in a variety of outdoor activities.

This boot combines durable construction with advanced technology to ensure comfort, protection, and traction in diverse environments. Below, we delve into the key features, pros, and cons of this hiking boot.

Key Features of XPETI Women’s Thermator Hiking Boot

  • Material & Build: The sole is made from a combination of Ethylene Vinyl Acetate (EVA) and rubber, while the outer material is rubber, designed to withstand rough terrains.
  • Waterproof & Insulation: Features Hydroshield Membrane waterproof technology along with a waterproof mesh upper, making these boots highly resistant to water ingress. They also include 200 grams of Thinsulate insulation for cold weather, rated for temperatures as low as -13°F.
  • Durable Construction: Includes a molded TPU heel stabilizer that enhances the boot’s stability and longevity, providing a supportive fit for rigorous outdoor activities.

Pros

  • Robust Waterproofing
  • Cold Weather Suitability

Cons

  • Sizing Issues

The XPETI Women’s Thermator Mid High-Top Waterproof Outdoor Hiking Boot offers a robust set of features that cater to serious hikers looking for a durable, protective, and comfortable boot.

Suitable for a range of activities and weather conditions, these boots are particularly advantageous for adventurers who encounter cold and wet environments. However, buyers should be mindful of sizing and the potential for overheating in milder conditions to ensure the best fit and comfort.

3.TIDEWE Waterproof Sturdy Women’s Hunting Boot

The TIDEWE Hunting Boot for Women combines functionality and innovative features designed specifically for the outdoor enthusiast. Engineered for performance in tough environments, this boot provides comfort, durability, and protection.

Let’s delve into the key features, along with the pros and cons, to better understand how these boots might perform in the field.

Key Features of TIDEWE Hunting Boot for Women

  • Material & Construction: Utilizes 6mm Neoprene uppers, which provide exceptional toughness, shock absorption, and heat retention, ensuring 100% waterproof capabilities.
  • Flexibility & Temperature Regulation: Features flexible Neoprene with a breathable mesh, allowing for better air circulation inside the boot. The design also permits the boot to be rolled down to cool the feet or dry more quickly.
  • Anti-Slip & Protection: The boot is equipped with a self-cleaning ribbed outsole that wraps around the perimeter, providing maximum stability and effective performance in mud and snow. The protective rubber exterior also resists punctures while offering flexibility.

Pros

  • Enhanced Waterproof and Warmth
  • Stable and Secure Traction

Cons

  • Limited Breathability
  • Stiffness

The TIDEWE Hunting Boot for Women is specifically designed to meet the demands of female hunters seeking a reliable, warm, and waterproof boot for various outdoor activities.

The innovative features such as the roll-down flexibility, lightweight design, and exceptional traction make it a strong contender in its category. However, prospective buyers should consider the potential for limited breathability and the need for a break-in period.

Overall, these boots are a solid choice for those who need sturdy, all-weather boots for hunting and other outdoor adventures.

4.TIDEWE Hunting Boot for Women

The TIDEWE Hunting Boot for Women is designed to offer comfort, flexibility, and protection for hunters and outdoor enthusiasts. Below, I detail the key features, advantages, and potential drawbacks of this product to help you make an informed purchasing decision.

Key Features of TIDEWE Hunting Boot for Women

  • Waterproof & Warm: Constructed with 6mm Neoprene uppers, these boots ensure complete waterproofing, excellent shock absorption, and superior heat retention properties, making them suitable for cold weather conditions ranging from -4°F/-20°C to 50°F/ 10°C.
  • Comfort & Flexibility: The boots feature flexible Neoprene integrated with a breathable mesh for enhanced air circulation and temperature regulation within the boot. This design allows the wearer to roll down the boot to cool off or dry faster, adapting to changing environmental temperatures.
  • Strong Yet Lightweight: These boots leverage a durable and insulating polyurethane design rather than a traditional heavy rubber shell, offering a lightweight alternative that does not compromise on strength or insulation.

Pros

  • Versatile Weather Protection
  • Enhanced User Comfort

Cons

  • Limited Breathability in Warmer Conditions

The TIDEWE Hunting Boot for Women is an excellent choice for outdoor enthusiasts looking for a durable, versatile, and cost-effective solution for their footwear needs.

It offers comprehensive protection from the elements, comfort for long wears, and a set of features that enhance its usability in diverse terrains and conditions.

While considering these boots, potential buyers should be mindful of sizing and the specific climate they plan to use them in to ensure they meet their personal needs and preferences.

5.TIDEWE Rubber Boots for Women

TIDEWE Rubber Boots for Women are designed for versatile outdoor use, from rainy seasons to muddy terrains, ensuring durability and comfort. Here’s an in-depth look at their features, advantages, and potential disadvantages.

Key Features of TIDEWE Rubber Boots for Women

  • Waterproof & Anti-Slip: The boots are crafted with 6mm neoprene uppers and natural rubber, creating a robust 100% waterproof design. A deep tread in the rubber soles offers excellent non-slip traction, suitable for diverse and rough terrains.
  • Comfort & Flexibility: The neoprene uppers are not only durable but also flexible, allowing the boot to flex with the foot’s movements. Combined with a breathable mesh, these boots promote superior air circulation and temperature regulation.
  • Multi-Use Functionality: These boots are ideal for a variety of conditions, including flooded areas, snow, and mud. They are versatile for activities such as working, hunting, fishing, camping, or playing in the rain. They are comfort rated for temperatures ranging from -4°F to 68°F (-20°C to 20°C).

Pros

  • Versatile Weather Protection
  • Enhanced Safety Features

Cons

  • Potential for Overheating

TIDEWE Rubber Boots for Women are a solid choice for those needing reliable, multi-season outdoor footwear. They offer excellent protection, versatility, and comfort for a variety of outdoor settings and weather conditions.

While they excel in functionality, potential buyers should consider the fit and seasonal appropriateness of the boots to fully benefit from their features. These boots blend practicality with style, making them a great addition to an outdoor enthusiast’s wardrobe.

Conclusion

Choosing the best hunting boots for women involves balancing functionality, comfort, and durability. By considering the specific features and recommendations outlined, you’re well on your way to finding a pair that will enhance your hunting experience, keeping you safe and comfortable in any environment.

Safest Edible Mushrooms Found in the Forest: A Guide for Foragers

Introduction

Foraging for mushrooms can be a rewarding activity, offering both culinary delights and a deeper connection to nature. However, correct identification is crucial, as many mushrooms can be toxic. This guide highlights some of the safest and most commonly recognized edible mushrooms that foragers might encounter in forested areas.


1. Morel (Morchella spp.)

1.1 Identification

  • Appearance: Distinctive honeycomb-like appearance on the cap. Colors range from tan to dark brown.
  • Season: Spring.

1.2 Foraging Tips

  • Habitat: Often found in wooded areas, particularly under deciduous trees and in areas that have recently burned.

1.3 Culinary Uses

  • Preparation: Excellent when sautéed, these mushrooms are highly prized for their earthy and nutty flavors.

2. Chanterelle (Cantharellus cibarius)

2.1 Identification

  • Appearance: Golden-yellow to orange, with a funnel-shaped cap and wavy margins.
  • Season: Late summer to fall.

2.2 Foraging Tips

  • Habitat: Found in both coniferous and deciduous woods, often near moss and leaf litter.

2.3 Culinary Uses

  • Preparation: Renowned for their delicate flavor and slightly peppery taste, perfect for sauces and sautés.

3. Giant Puffball (Calvatia gigantea)

3.1 Identification

  • Appearance: Large, white, globe-shaped mushrooms that can grow to be very large.
  • Season: Late summer to fall.

3.2 Foraging Tips

  • Habitat: Open grasslands, meadows, and forest edges.

3.3 Culinary Uses

  • Preparation: The flesh should be pure white. When cooked, they have a marshmallow-like texture, ideal for baking or frying.

4. Oyster Mushroom (Pleurotus ostreatus)

4.1 Identification

  • Appearance: Fan-shaped, usually growing in layers on dead or dying trees. Colors vary from white to grey or tan.
  • Season: All year, but primarily in cooler months.

4.2 Foraging Tips

  • Habitat: Common on hardwoods like beech and oak.

4.3 Culinary Uses

  • Preparation: Versatile in cooking, known for their delicate texture and mild flavor, suitable for stir-fries, soups, and baking.

5. Hen of the Woods (Grifola frondosa)

5.1 Identification

  • Appearance: Large, multi-layered mushroom with a central base and branching, leaf-like fronds.
  • Season: Fall.

5.2 Foraging Tips

  • Habitat: At the base of oak trees, sometimes around other hardwoods.

5.3 Culinary Uses

  • Preparation: Has a rich, earthy flavor and can be used in a variety of dishes from grilling to soups.

6. Birch Polypore (Fomitopsis betulina)

6.1 Identification

  • Appearance: Easily recognized by its smooth, brownish or whitish upper surface and its preference for growing on birch trees.
  • Season: Can be found year-round, but fresher specimens are better.

6.2 Foraging Tips

  • Habitat: Exclusively grows on birch trees, often on dead or dying wood.

6.3 Culinary Uses

  • Preparation: While not as commonly eaten due to its tough texture, it can be used to make teas or tinctures reputed for medicinal benefits.

7. Shaggy Mane (Coprinus comatus)

7.1 Identification

  • Appearance: Tall, cylindrical cap that is white with shaggy scales. The cap dissolves into a black ink-like substance as it ages.
  • Season: Spring through fall.

7.2 Foraging Tips

  • Habitat: Commonly found in urban areas, lawns, and along dirt roads.

7.3 Culinary Uses

  • Preparation: Must be cooked shortly after harvesting, before they begin to auto-digest. Excellent when sautéed and known for a delicate flavor.

8. Lions Mane (Hericium erinaceus)

8.1 Identification

  • Appearance: Unique for its long, white, icicle-like spines hanging from a single clump.
  • Season: Late summer to fall.

8.2 Foraging Tips

  • Habitat: Grows on dead or dying hardwood trees, especially beech and oak.

8.3 Culinary Uses

  • Preparation: Has a seafood-like flavor, often compared to lobster or crab, making it excellent for a variety of dishes that mimic seafood recipes.

9. Safety and Ethical Foraging Practices

9.1 Respect Nature

  • Sustainable Harvesting: Only take what you need and leave enough behind to allow the fungus to continue reproducing.

9.2 Avoid Contamination

  • Safe Collection: Use mesh bags when collecting mushrooms to allow spores to disperse as you walk, which helps propagate more mushrooms.

10. Learning and Community Involvement

10.1 Join Local Foraging Groups

  • Community Learning: Enhance your knowledge by joining local mycological societies or foraging groups where experienced foragers can guide you.

10.2 Attend Workshops and Seminars

  • Educational Opportunities: Participate in workshops that offer education on local mushroom species, safety practices, and culinary tips.

Conclusion

While these mushrooms are among the safest to forage, it is crucial to go mushroom hunting with an experienced forager when starting out or consult reliable resources and local experts. Remember, some edible mushrooms have toxic look-alikes. Always be 100% certain of the mushroom’s identity before consuming it.


Frequently Asked Questions (FAQs)

What should I do if I’m unsure about a mushroom’s identity?

  • If in doubt, throw it out. Only consume mushrooms you are absolutely sure are safe to eat.

How should I prepare wild mushrooms?

  • Always cook wild mushrooms thoroughly; do not eat them raw. Cooking helps break down any potential irritants or mild toxins.
  • Check local laws and regulations, as some areas may require permits or have restrictions on foraging, especially in state and national parks.

How can I verify the freshness of wild mushrooms?

  • Fresh mushrooms should be firm, not slimy or overly soft. Avoid mushrooms with obvious spots or an off-putting smell.

Can mushroom foraging impact local ecosystems?

  • Yes, irresponsible foraging can deplete local populations. Always forage responsibly and follow local guidelines to minimize your impact on the ecosystem.

Are there any tools I should bring while foraging for mushrooms?

  • A good knife, a brush for cleaning dirt, a compass or GPS device for navigation, and a basket or breathable bag for storing mushrooms are essential for any foraging trip.

Ultimate Guide to the Best Wind Meters for Shooting

Accuracy in shooting isn’t just about skill and precision instruments; it’s also heavily influenced by natural elements, particularly the wind. Understanding and adapting to wind conditions can significantly enhance your shooting accuracy.

This guide will explore the best wind meters for shooting, crucial tools for any marksman aiming to improve their performance. Here, we’ll delve into what makes a great wind meter and review some of the top models on the market in 2024.

What is a Wind Meter and Why is it Essential for Shooting?

A wind meter, also known as an anemometer, is a device that measures wind speed and direction. For shooters, wind is a critical factor as it affects the bullet’s trajectory over long distances.

A reliable wind meter provides essential data that can help shooters make accurate adjustments to their aim, ensuring that wind conditions don’t hinder their shot’s precision.

Top Features to Look for in a Wind Meter for Shooting

Accuracy and Sensitivity

The primary attribute of a wind meter is its accuracy. Precision in wind measurement is vital because even the slightest breeze can alter a bullet’s path. Look for a meter that offers high sensitivity to detect minimal wind speeds and provides readings in real-time.

Durability and Build

Since shooting often occurs outdoors, the wind meter must withstand various environmental conditions. A durable, weather-resistant design ensures longevity and consistent performance, regardless of weather conditions.

Portability

A compact and lightweight wind meter is advantageous for shooters who travel or need to carry multiple pieces of equipment. Portability ensures that the device can be easily transported and set up quickly when needed.

Ease of Use

The best wind meters have user-friendly interfaces that allow shooters to obtain and interpret data without complications. Quick setup and clear displays are essential for effective use in the field.

Connectivity Options

Modern wind meters often feature connectivity options such as Bluetooth, enabling data transfer to other devices like smartphones or ballistic calculators, enhancing the shooting experience and accuracy.

Review of the Top 5 Wind Meters for Shooting in 2024

1. HoldPeak 866B Digital Anemometer Review

The HoldPeak 866B Digital Anemometer is a versatile tool designed for those who need accurate weather readings in a portable format. This device stands out for its precision in measuring wind speed, temperature, and wind chill.

Equipped with sensitive dual temperature sensors, an 8-vane system, and a smooth fan shaft, it promises a wind speed measurement range of 0.67 to 67.1 mph with an accuracy of +/- 2% of readings, making it a reliable companion for various outdoor activities.

Pros

  • Highly Accurate Measurements
  • Multifunctional Capabilities
  • User-Friendly Design

Cons

  • Accuracy Limitations at Very Low Speeds

The HoldPeak 866B Digital Anemometer is an excellent tool for anyone engaged in outdoor activities or needing precise weather measurements. Its design caters to both amateurs and professionals, making it a valuable investment for various environmental assessments.

However, potential users should be aware of its complexity and battery reliance, which could impact its convenience and usage duration.

2. TopTes TS-301 Digital Anemometer Review

The TopTes TS-301 Digital Anemometer is a compact and versatile tool designed for both outdoor enthusiasts and professionals needing to measure wind velocity, humidity, and temperature. Launched in mid-2022, this device has quickly become a reliable instrument for a range of activities from sailing to HVAC assessments.

Pros

  • Clear Display
  • Versatile Measurement Units
  • Energy Efficient

Cons

  • Sensor Adjustment Time Long

The TopTes TS-301 Digital Anemometer is a commendable tool for measuring wind speed, humidity, and temperature across a variety of settings. Its design and functionality cater well to both hobbyists and professionals.

However, prospective users should be aware of its sensor adjustment requirements and the slight compromises in humidity accuracy. Overall, its benefits, like the clear LCD screen and energy-saving features, provide substantial value, reinforced by a 3-year warranty and lifetime technical support.

3. BTMETER BT-100 Handheld Anemometer Review

The BTMETER BT-100 is a robust and versatile handheld anemometer designed for a variety of outdoor and industrial applications, from HVAC monitoring to recreational use like drone flying and shooting.

This digital wind speed gauge offers a combination of precision, ease of use, and portability, making it a suitable choice for professionals and hobbyists alike.

Pros

  • User-Friendly Features

Cons

  • Compact and Lightweight

The BTMETER BT-100 stands out for its accuracy, ease of use, and adaptability to a range of environmental measurements. It’s well-suited for anyone needing reliable wind measurements in field conditions.

However, potential users should consider the environmental limitations and the physical durability of the device based on their specific needs.

This anemometer offers excellent value for its price, making it a practical choice for both amateur and professional purposes.

4. AOPUTTRIVER AP-816B Handheld Anemometer Review

The AOPUTTRIVER AP-816B is a compact handheld anemometer that caters to a variety of applications, from recreational outdoor activities such as sailing and mountain climbing to more technical uses like HVAC system testing.

Its small size and high precision make it an appealing choice for those needing a portable device to measure wind speed and temperature accurately.

Pros

  • High Precision Measurements
  • Versatile Measurement Modes
  • User-Friendly Features

Cons

  • Limited Temperature Range

The AOPUTTRIVER AP-816B offers a blend of accuracy, portability, and user-friendly features, making it suitable for both leisurely and technical applications.

It provides valuable data for various outdoor and industrial scenarios, though potential buyers should consider the environmental and physical limitations of the device based on their specific needs.

5. Review of the AOPUTTRIVER AP-816B High Precision Mini Anemometer

The AOPUTTRIVER AP-816B is a highly functional and portable anemometer designed to provide precise measurements of wind speed, temperature, and wind chill.

Tailored for both outdoor enthusiasts and professionals, it offers a range of features that enhance its utility for activities such as windsurfing, sailing, fishing, and even technical applications like HVAC assessments.

Pros

  • High Precision Measurement
  • Compact and Portable Design

Cons

  • Constructed primarily of plastic

The AOPUTTRIVER AP-816B anemometer is a valuable tool for anyone needing accurate and real-time data on wind conditions. It suits a variety of applications, from recreational activities to professional settings, offering precision and ease of use in a compact package.

However, users should consider the potential limitations related to material durability and environmental adaptability based on their specific needs.

How to Use a Wind Meter Effectively While Shooting

To maximize the effectiveness of a wind meter, start by placing it in a location that accurately represents the wind conditions affecting your shooting line.

Always calibrate the device according to the manufacturer’s instructions before use. Interpret the data focusing on both wind speed and direction, and adjust your aim based on these measurements to counteract wind effects accurately.

The Impact of Wind Meters on Shooting Sports

Wind meters have become indispensable in many shooting sports, particularly those involving long-range targets. Professional shooters rely heavily on these devices to provide real-time, accurate environmental data, greatly enhancing their performance in competitions.

Conclusion

Choosing the right wind meter is essential for anyone serious about improving their shooting accuracy. By considering features like accuracy, durability, and ease of use, you can select a device that not only fits your needs but also enhances your shooting skills.

Whether you’re a competitive shooter or a recreational enthusiast, the right wind meter can make a significant difference in your performance.

The Art of Canoe Poling: Mastering Traditional River Navigation

Introduction

Canoe poling is a traditional method of propelling and navigating a canoe using a long pole, often in shallow waters where paddling is less effective. This technique not only offers a unique way to explore river environments but also enhances balance and coordination. This guide will delve into the fundamentals of canoe poling, offering insights and tips to help you master this classic skill.


1. Understanding Canoe Poling

1.1 The Basics

  • Definition: Canoe poling involves standing in a canoe and using a long, sturdy pole to push against the riverbed or riverbanks to move and steer the canoe.
  • Historical Significance: Traditionally used by fur traders and explorers to navigate North American rivers, poling is celebrated for its efficiency in shallow and tricky waters.

1.2 Equipment Needed

  • Canoe Pole: Typically 10 to 12 feet long, made from aluminum, wood, or composite materials.
  • Canoe: A flat-bottom canoe is preferable for stability when standing.

2. Choosing the Right Pole

2.1 Material Considerations

  • Wood: Traditional, offers flexibility and good water resistance.
  • Aluminum and Composite: Lightweight and durable, often preferred for their resistance to warping.

2.2 Length and Weight

  • Custom Fit: The pole’s length should be about double the depth of the shallowest waters you plan to navigate, providing sufficient reach while maintaining maneuverability.

3. Basic Techniques

3.1 The Forward Stroke

  • Procedure: Plant the pole close to the canoe at about a 45-degree angle to the direction of travel. Push off the riverbed firmly and glide forward.
  • Tip: Keep your movements smooth to maintain balance and momentum.

3.2 Steering and Turning

  • Pry Stroke: Insert the pole into the water near the stern and pry outward to turn the canoe.
  • Draw Stroke: Place the pole farther from the canoe and pull inward to make sharper turns.

4. Poling Strategies

4.1 Reading the River

  • Current Analysis: Learn to read the water’s current, depth, and surface conditions. Identify the path of least resistance to conserve energy.

4.2 Positioning and Balance

  • Foot Placement: Stand slightly staggered for stability, keeping your knees slightly bent to absorb movements.
  • Weight Distribution: Shift your weight as needed to adapt to the canoe’s response to river conditions.

5. Safety Considerations

5.1 Personal Safety Gear

  • Life Jacket: Always wear a life jacket while poling.
  • Footwear: Wear sturdy, water-appropriate footwear to protect and provide grip.

5.2 Environmental Awareness

  • Obstacle Navigation: Be aware of underwater obstacles and overhanging branches. Use the pole to navigate safely around them.

6. Advanced Techniques

6.1 Poling Against the Current

  • Challenge: Poling upstream requires greater strength and precision. Use short, quick strokes for better control.

6.2 Using the Environment

  • Bank Pushes: When close to riverbanks, use the pole to push off the bank for a quick change of direction or speed boost.

7. Practice and Training

7.1 Regular Practice

  • Consistency is Key: Like any skill, regular practice is crucial in mastering canoe poling. Start in calm, shallow waters and gradually progress to more challenging conditions.

7.2 Training Drills

  • Skill Building Exercises: Practice different strokes and maneuvers in a controlled environment. Set up courses with markers to navigate around to simulate real-world obstacles and currents.

8. Joining a Community

8.1 Local Canoe Clubs

  • Community Engagement: Joining a canoe club or group can provide opportunities for guided practice, tips from experienced polers, and community events.
  • Group Outings: Participate in group poling outings to learn from more experienced polers and to practice your skills in a supportive environment.

8.2 Workshops and Clinics

  • Professional Instruction: Look for workshops and clinics that focus on traditional canoe skills, including poling. These are great for receiving professional instruction and feedback.

9. Competitions and Events

9.1 Participating in Poling Competitions

  • Skill Showcase: Once you have developed proficiency, consider participating in canoe poling competitions. Competitions are excellent for testing your skills and learning from peers.
  • Event Types: Events can range from races in calm waters to technical courses in challenging river conditions.

9.2 Organizing Events

  • Community Leadership: If no local events exist, consider organizing a canoe poling day or race. This can stimulate interest and growth in the local poling community.

10. Environmental Stewardship

10.1 Responsible Poling

  • Minimizing Impact: Practice Leave No Trace principles while poling. Be mindful of the environment and avoid damaging riverbeds with the pole.
  • Wildlife Protection: Be aware of wildlife and their habitats. Use poling to quietly move through their environment without causing stress or harm.

11. Advancing Your Skills

11.1 Combining Poling with Other Techniques

  • Hybrid Navigation: Combine poling with traditional paddling techniques to navigate diverse waterways effectively.
  • Skill Integration: Use poling in conjunction with map reading and GPS navigation for comprehensive wilderness travel skills.

11.2 Mentorship Opportunities

  • Becoming a Mentor: As you advance, consider mentoring newcomers to share your knowledge and help grow the sport.
  • Skill Transmission: Teach others about the intricacies and joys of canoe poling, enhancing both safety and enjoyment for the next generation of paddlers.

Conclusion

Canoe poling is more than just a method of propulsion; it’s a skill that connects you to the history of river navigation and demands a deep engagement with the environment. By mastering the art of canoe poling, you gain a powerful tool for exploring and interacting with riverine landscapes in a profound and personal way.


Frequently Asked Questions (FAQs)

What are the best conditions for canoe poling?

  • Ideal conditions are shallow waters where the depth is consistent and the bottom is firm enough to support the pole push without sinking too deep.

Can I pole in any type of canoe?

  • While you can pole in most canoes, those designed for flat water and stability, such as those with flatter bottoms, tend to perform better for poling.

Is canoe poling difficult to learn?

  • Canoe poling can be challenging at first, especially maintaining balance. However, with practice, most people can become proficient and enjoy the unique advantages it offers in river navigation.

How do I handle strong river currents while poling?

  • In strong currents, maintain a stable, wide stance and use quick, forceful strokes to keep control. Position your canoe at an angle to the current to reduce resistance and enhance maneuverability.

Are there specific safety concerns while poling in cold water conditions?

  • In cold water, the risk of hypothermia is significant if you fall in. Wear appropriate cold-water gear, always canoe with a buddy, and ensure you have a quick way to warm up if you get wet.
Exit mobile version