High Country Hydration: Essential Tips for Staying Hydrated in the Mountains

Introduction

Venturing into high-altitude environments presents unique challenges, not least of which is staying properly hydrated. The thin air, lower oxygen levels, and physical exertion required for mountain trekking can quickly lead to dehydration if not carefully managed. This guide offers vital tips for maintaining hydration in the high country, ensuring that your mountain adventures are both enjoyable and safe.


1. Understanding the Risks

1.1 Increased Dehydration Rate

  • High Altitude Effects: At higher elevations, the body loses water through respiration at an accelerated rate. The cool, dry air also increases evaporation of sweat, often without you realizing how much fluid you’re losing.

1.2 Recognizing Dehydration Symptoms

  • Early Detection: Symptoms can include thirst, dry mouth, fatigue, dizziness, and headache. Recognizing these early signs is crucial to preventing more severe dehydration effects.

2. Pre-Hydration Strategies

2.1 Begin Well-Hydrated

  • Advance Preparation: Start increasing your fluid intake several days before your high-country excursion. Arriving well-hydrated can give you a significant advantage.

2.2 Electrolyte Balance

  • Essential Minerals: High-altitude activity can deplete your body’s electrolytes. Consider adding an electrolyte supplement to your water to help maintain balance.

3. Hydration During the Hike

3.1 Consistent Water Intake

  • Regular Sips: Drink small amounts of water at regular intervals, regardless of whether you feel thirsty. Thirst is an unreliable indicator of dehydration at altitude.

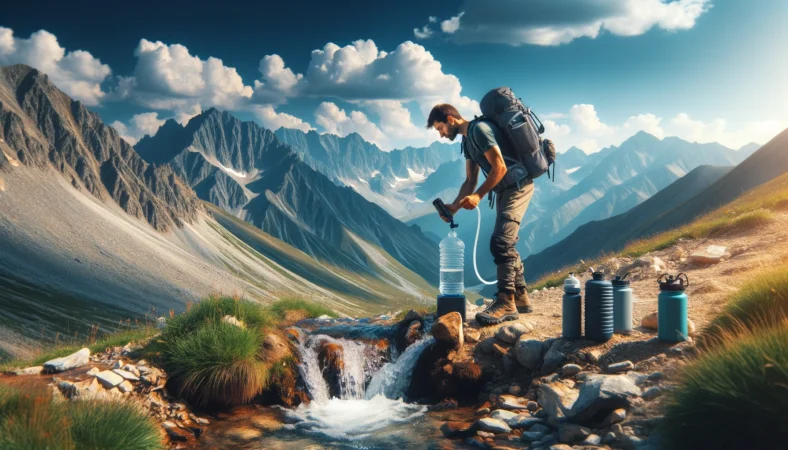
3.2 Access to Safe Water

  • Planning Ahead: Know the locations of water sources on your route and carry a portable water filter or purification tablets to ensure the water is safe to drink.

4. Monitoring Fluid Loss

4.1 Keep Track of Intake

  • Use Marked Bottles: Use water bottles with measurements or mark your hydration bladder to keep track of how much you’re drinking throughout the day.

4.2 Assessing Hydration Status

  • Physical Checks: Monitor the color of your urine as a quick hydration status check; light yellow indicates good hydration, while darker colors suggest you need to drink more water.

5. Avoiding Over-Hydration

5.1 Recognize Hyponatremia

  • Balancing Act: Drinking excessive amounts of water can lead to hyponatremia, a condition where blood sodium levels become dangerously low. Balance your water intake with electrolyte replenishment.

6. Adaptation to Altitude

6.1 Acclimatization

  • Gradual Exposure: Spend time at moderate altitudes to allow your body to adjust before ascending to higher elevations. This process helps your body regulate fluid balance more effectively.

6.2 Listen to Your Body

  • Adjust as Needed: Be prepared to adjust your fluid intake based on how your body responds to altitude. Individual needs can vary significantly.

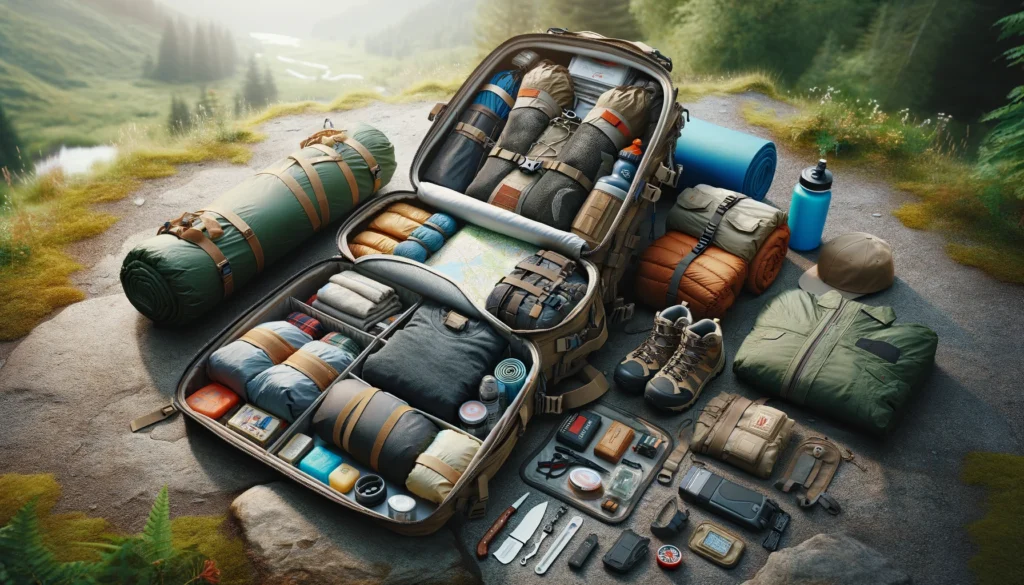
7. Utilizing Hydration Gear

7.1 Hydration Packs

  • Convenient Access: Consider using a hydration pack with a sip tube for easy access to water without having to stop or reach for a bottle. This can encourage more frequent sipping and help maintain hydration levels.

7.2 Insulated Water Containers

  • Temperature Regulation: In extremely cold environments, water can freeze, making it inaccessible. Use insulated bottles or thermal covers for hydration bladders to prevent freezing.

8. Adjusting for Weather Conditions

8.1 Hot Weather Hydration

  • Increased Needs: High temperatures can exacerbate dehydration. In hot conditions, increase your water intake and take breaks in shaded areas to prevent overheating.

8.2 Cold Weather Considerations

  • Deceptive Dehydration: Cold weather can suppress thirst signals, making dehydration less noticeable. Make a conscious effort to drink regularly, even if you’re not feeling thirsty.

9. Dietary Considerations

9.1 Water-Rich Foods

  • Hydration Through Diet: Incorporate water-rich foods into your diet, such as fruits and vegetables. These can provide additional hydration and essential nutrients.

9.2 Avoiding Diuretics

  • Minimizing Dehydration Risks: Limit the intake of diuretic substances such as caffeine and alcohol, especially before and during your high-country adventures, as they can increase fluid loss.

10. Educating Fellow Adventurers

10.1 Sharing Knowledge

  • Group Hydration Strategies: If you’re traveling in a group, share these hydration tips with your companions. Group awareness can enhance safety for everyone involved.

10.2 Recognizing Signs in Others

  • Looking Out for Each Other: Be able to recognize signs of dehydration or hyponatremia in others. Early detection and response can prevent serious health issues.

11. Planning for Emergencies

11.1 Emergency Water Supplies

  • Backup Plans: Always carry more water than you think you’ll need and know how to source and purify water from the environment in case of emergencies.

11.2 Hydration in Survival Situations

  • Prioritizing Hydration: In survival situations, finding and purifying water should be a top priority. Understand basic survival techniques for obtaining water in the wilderness.

Conclusion

Hydration in the high country is a delicate balance that requires preparation, awareness, and regular monitoring. By understanding the unique challenges of high-altitude environments and adopting these hydration strategies, you can enhance your performance, safety, and enjoyment of mountain adventures. Remember, water is as vital to your mountain trek as your gear—plan accordingly, and respect the demands of the high country.


Frequently Asked Questions (FAQs)

How much water should I drink at high altitude?

  • While needs can vary, aim for about 3 to 4 liters per day for active days in the mountains. Adjust based on activity level, weather, and your body’s response.

Can I drink directly from mountain streams?

  • While mountain water may look clean, it can contain pathogens. Always treat water using a filter, purification tablets, or boiling before drinking.

How can I tell if I’m drinking enough water?

  • In addition to monitoring your urine color, pay attention to other signs of dehydration, and ensure you’re drinking regularly throughout the day. If you’re rarely feeling the need to urinate, increase your fluid intake.

Should I adjust my electrolyte intake at high altitude?

  • Yes, increased sweating and the diuretic effect of altitude mean you might lose more salts than usual. Balance your water intake with electrolytes to prevent imbalances.

Can hydration affect acclimatization to high altitude?

  • Proper hydration is crucial for acclimatization. Dehydration can worsen the symptoms of altitude sickness. Maintaining fluid and electrolyte balance helps your body adjust to lower oxygen levels more effectively.

You can also visit : Cold Weather Hunting: Gearing Up for Winter Expeditions

Bear Baiting Essentials: Tips for Successful Bear Hunting

Introduction

Bear baiting, where legal, is a method used by hunters to attract bears to a specific area. It requires understanding bear behavior, patience, and responsible management to ensure ethical practices. This guide provides tips for effective bear baiting, emphasizing safety, ethics, and sustainability.


1. Understanding Bear Behavior

1.1 Study Local Bear Habits

  • Seasonal Preferences: Learn about the feeding patterns, movement routes, and hibernation periods of bears in your hunting area.
  • Food Sources: Identify natural food sources; this knowledge can help you choose the most appealing bait.

2. Choosing the Right Bait

2.1 Diverse Menu

  • Variety: Bears have a varied diet. Offer a mixture of baits, including meats, sweets, and fruits, to appeal to their omnivorous nature.
  • Scent and Visibility: Use strong-smelling baits to attract bears from a distance. Positioning bait so it’s visible can also be effective.

2.2 Sustainable Practices

  • Non-Wasteful Baiting: Use food items that are consumable and won’t harm the bear or the environment.

3. Bait Site Selection

3.1 Strategic Location

  • Access and Wind Direction: Choose a site that’s easy for you to access but not too close to human settlements. Consider wind direction to keep your scent away from the bait site.

3.2 Safety Measures

  • Bear Activity Monitoring: Set up trail cameras to monitor bear activity. This also helps in identifying the size and behavior of visiting bears.

4. Consistency and Timing

4.1 Regular Re-baiting

  • Habituation: Keep your bait site stocked regularly to habituate bears to the location. Consistency is key to maintaining interest.

4.2 Prime Feeding Times

  • Schedule: Focus on baiting in the early morning and late evening, aligning with bears’ natural feeding times.

5. Ethical Considerations

  • Regulations: Always follow local laws and regulations regarding bear baiting and hunting. Obtain necessary permits and understand restricted practices.

5.2 Respect for Wildlife

  • Minimize Impact: Practice baiting and hunting methods that minimize stress and impact on bears and other wildlife. Avoid habituating bears to human presence beyond the hunting season.

6. Safety and Preparedness

6.1 Personal Safety

  • Bear Encounter Knowledge: Be prepared for bear encounters. Carry bear spray, know how to store food and bait safely, and have an emergency plan.

6.2 Hunting Ethics

  • Fair Chase Principles: Engage in bear baiting and hunting practices that honor the principles of fair chase. Respect the animal and the sport by ensuring a quick and humane harvest.

7. Effective Bait Placement Techniques

7.1 Elevate Your Bait

  • Accessibility: Consider elevating your bait to make it more challenging for bears to access quickly. This can prolong the bear’s stay at the bait site, offering better opportunities for observation and ethical shots.

7.2 Secure Bait Containers

  • Prevent Easy Takeaways: Use barrels or heavy containers that bears can’t easily carry off or destroy. Securing your bait in this manner encourages bears to return to the site, as they can’t remove the food source in one visit.

8. Minimizing Non-Target Visitors

8.1 Target-Specific Bait Choices

  • Selective Attraction: Choose baits that are more appealing to bears and less so to non-target species such as raccoons or birds. For example, larger, heavier food items that smaller animals can’t easily access or carry away.

8.2 Site Maintenance

  • Cleanliness: Regularly clean up spilled bait and debris around the site to avoid attracting non-target wildlife. This practice also helps in minimizing environmental impact.

9. Utilizing Natural Cover

9.1 Concealment for Hunters

  • Strategic Positioning: When setting up your bait site, consider natural cover and camouflage for your hunting spot. Ensure you have a clear line of sight to the bait, while remaining concealed from the approaching bears.

9.2 Using Natural Features

  • Enhance Bait Site Appeal: Incorporate natural features such as logs, stumps, or boulders into your bait site setup. These can make the site more visually appealing to bears and provide natural anchors for securing bait containers.

10. Record Keeping and Observation

10.1 Maintain a Logbook

  • Tracking Visits: Keep detailed records of bear activity at your bait sites, including times of day, bear sizes, and behaviors. This information can be invaluable for planning your hunting strategy and understanding bear movements.

10.2 Use of Trail Cameras

  • Monitoring Wildlife: Trail cameras are essential tools for monitoring your bait site. They provide insights into the bear population in the area and help identify the prime time for hunting. Ensure cameras are positioned to capture clear images without spooking wildlife.

11. Community Engagement and Responsibility

11.1 Sharing Insights

  • Collaboration with Local Hunters: Engage with the local hunting community to share insights and tips about bear baiting and hunting. This collaboration can lead to more successful hunting strategies and enhance communal knowledge about bear behavior.

11.2 Promoting Ethical Practices

  • Advocacy for Responsible Hunting: Be an advocate for ethical bear baiting and hunting practices within your community. Encourage discussions on sustainable and respectful approaches to wildlife management and conservation.

Conclusion

Bear baiting can be an effective method for attracting bears, but it requires thorough preparation, a deep understanding of bear behavior, and a commitment to ethical hunting practices. By choosing the right bait, selecting an appropriate site, maintaining consistency, and prioritizing safety and legality, hunters can increase their chances of a successful bear hunt while respecting wildlife and the environment.


Frequently Asked Questions (FAQs)

How often should I check my bait site?

  • Regularly, every 2-3 days, to ensure the site is active and to replenish bait as needed. Adjust based on bear activity and consumption rates.

Can bear baiting affect bear behavior long-term?

  • Yes, bear baiting can lead to bears becoming accustomed to human-provided food sources, which can alter natural foraging behaviors. It’s crucial to manage bait sites responsibly to mitigate these effects.

Archery Essentials: Setting Up Your Bow for Optimal Performance

Introduction

Setting up your bow correctly is crucial for achieving precision, consistency, and safety in archery. Whether you’re a beginner or an experienced archer, fine-tuning your equipment to suit your needs can significantly enhance your shooting experience. This guide will walk you through the essential steps to setting up your bow, focusing on recurve and compound bows, the two most popular types among archers.


1. Choosing the Right Bow

1.1 Determine Your Dominant Eye

  • Eye Dominance: Before selecting a bow, determine your dominant eye, as this will influence whether you should use a right or left-handed bow.

1.2 Bow Type and Size

  • Fit for Purpose: Choose between a recurve or compound bow based on your archery activities. Ensure the bow size and draw weight are appropriate for your strength and stature.

2. Assembling Your Bow

2.1 Attaching the Limbs (Recurve)

  • Securely Fasten: For recurve bows, attach the limbs to the riser ensuring they are tightly secured and aligned correctly.

2.2 Installing the Bow String

  • Proper Stringing: Use a bow stringer for recurve bows to avoid twisting the limbs. Compound bows should come pre-strung but check for proper tension and alignment.

3. Setting the Nocking Point

3.1 Finding the Sweet Spot

  • Vertical Alignment: The nocking point is where the arrow clips onto the bowstring. It should be set so the arrow sits at a 90-degree angle to the string, with a slight tilt upwards for recurve bows.

3.2 Using a Bow Square

  • Precision Measurement: Use a T-shaped bow square to accurately measure and set the nocking point on the bowstring.

4. Tuning the Brace Height

4.1 Importance of Brace Height

  • Optimal Performance: The brace height, or the distance from the deepest part of the bow grip to the string, affects the bow’s performance and the shooter’s comfort.

4.2 Adjusting for Best Results

  • Manufacturer’s Recommendations: Refer to the manufacturer’s recommendations for the ideal brace height for your bow and adjust accordingly using the bowstring.

5. Aligning the Sight

5.1 Sight Installation

  • Mounting the Sight: Attach the sight to the bow, ensuring it is firmly fixed and properly aligned with the center of the bow.

5.2 Calibration

  • Adjustments: Calibrate the sight for accuracy at different distances, starting at a shorter range and gradually increasing.

6. Choosing and Installing Accessories

6.1 Arrow Rest

  • Stable Platform: Install an arrow rest that provides a stable platform for the arrow, reducing friction during release.

6.2 Stabilizers and Dampeners

  • Balance and Noise Reduction: Attach stabilizers to reduce bow movement upon release, and dampeners to minimize vibration and noise.

7. Customizing Your Grip

7.1 Grip Comfort and Consistency

  • Personal Preference: The way you grip your bow can significantly impact your shooting accuracy. Some archers prefer to customize their grip for a more comfortable and consistent hold. Experiment with different grip styles and materials to find what works best for you.

7.2 Avoiding Torque

  • Steady Hold: A proper grip helps in minimizing hand torque, which can twist the bow upon release and affect arrow flight. Practicing a relaxed grip with minimal pressure can enhance stability and accuracy.

8. Peep Sight Adjustment (Compound Bows)

8.1 Peep Sight Alignment

  • Clear Line of Sight: The peep sight on a compound bow helps in aiming by offering a clear line of sight when the bow is at full draw. Adjust the peep sight so that it aligns perfectly with your eye and the bow sight at full draw.

8.2 Size and Position

  • Optimal Visibility: Choose a peep sight size that offers a balance between ample light intake and a focused view of the sight pins. Position the peep sight at a height that feels natural when you’re in your shooting stance.

9. Arrow Selection

9.1 Matching Arrows to Bow

  • Compatibility: The right arrows can make a significant difference in your shooting performance. Ensure your arrows are compatible with your bow in terms of length, spine (stiffness), and weight.

9.2 Fletching and Nock

  • Flight Stability: Pay attention to the fletching type and orientation, as this affects the arrow’s flight. Likewise, ensure the nock fits snugly on the bowstring without being too tight or loose.

10. Practice and Patience

10.1 Regular Practice

  • Skill Improvement: Consistent practice is key to becoming proficient with your bow. Dedicate time to practice not only shooting but also your setup and tuning adjustments.

10.2 Learning Curve

  • Patience is Virtue: Remember, mastering archery and understanding how to set up and adjust your bow is a process. Be patient with yourself as you learn and improve.

11. Safety Checks

11.1 Pre-Shooting Inspection

  • Equipment Safety: Always perform a pre-shooting inspection of your bow and accessories. Check for any signs of wear or damage to prevent equipment failure and ensure safety.

11.2 String and Limb Integrity

  • Maintenance: Regularly inspect the bowstring and limbs for fraying, cracks, or other damage. Replace parts as necessary to maintain your bow in safe, working condition.

Conclusion

Setting up your bow correctly is a foundational step in archery that can significantly impact your accuracy and overall shooting experience. By carefully selecting your equipment, properly assembling your bow, and making precise adjustments, you can ensure your setup is tailored to your shooting style and preferences. Remember, periodic maintenance and adjustments are key to maintaining optimal performance as you grow and evolve as an archer.


Frequently Asked Questions (FAQs)

How often should I check and adjust my bow setup?

  • It’s advisable to check your bow setup before every shooting session and make adjustments as needed. Periodic comprehensive checks are also recommended, especially after extensive use or if any part of the bow has been altered.

Can I set up my bow on my own, or do I need professional help?

  • While many archers learn to set up and adjust their bows independently, beginners may benefit from professional assistance initially. This can ensure the setup is done correctly and safely. Over time, gaining knowledge and experience will allow you to make adjustments on your own.

The Backpacker’s Guide: How to Organize Your Backpack for Efficiency and Comfort

Introduction

Whether you’re setting out for a day hike or a multi-day backpacking adventure, how you pack your backpack can significantly impact your comfort, mobility, and accessibility to essential items. An efficiently packed backpack not only makes carrying a load easier but also ensures that you can access what you need without having to unpack everything. Here’s a step-by-step guide to organizing your backpack for maximum efficiency and comfort.


1. Choose the Right Backpack

  • Capacity and Fit: Start with selecting a backpack that suits the length of your trip and fits your body well. Backpacks are measured in liters, indicating their carrying capacity. Ensure that the backpack has an adjustable harness system to fit your torso length and a hip belt to distribute weight evenly.

2. Categorize Your Gear

  • Essentials, Non-essentials, and Luxuries: Categorize your items into essentials (navigation, shelter, water, food, clothes), non-essentials (tools, repair kits, health and hygiene items), and luxuries (camera, book). This helps in prioritizing what needs to be most accessible.

3. Use the Three-Zone Packing Strategy

Bottom Zone (Low Priority)

  • Sleeping Gear: Place lightweight, non-essential items like your sleeping bag and sleeping pad at the bottom. These are typically needed last at camp.

Core Zone (Medium Priority)

  • Heavier Items: Pack your heaviest items, such as food stash (bear canister if required), cooking gear, and water reservoir, in the middle close to your back. This centralizes weight and maintains balance.

Top Zone (High Priority)

  • Frequently Used Items: Place items you’ll need access to throughout the day, like rain gear, first aid kit, snacks, and a headlamp, at the top or in external pockets.

4. Utilize Side Pockets and Attachment Points

  • Quick Access Needs: Use side pockets for water bottles, maps, trekking poles, or an umbrella. Attachment points can be used for items like sleeping pads or tent poles that don’t fit inside the pack.

5. Balance the Weight

  • Even Distribution: Ensure the pack’s weight is evenly distributed to avoid strain. Adjust items so that the pack doesn’t lean to one side, which could cause discomfort or imbalance.

6. Compression and Accessibility

  • Compression Sacks and Bags: Use compression sacks for clothing and sleeping bags to minimize volume. Pack items in the order of use, ensuring the first things you’ll need are the easiest to access.

7. Practice and Adjust

  • Trial Runs: After packing, wear your backpack around the house or on a short walk to see how it feels. Adjust straps as necessary and repack if certain items cause discomfort.

8. Waterproofing Your Gear

8.1 Protecting Sensitive Items

  • Dry Bags and Liners: Utilize dry bags or a backpack liner (even a heavy-duty garbage bag can suffice) to keep sensitive items like clothes, electronics, and sleeping gear dry. This is crucial in unpredictable weather or wet environments.

8.2 External Rain Cover

  • Extra Layer of Protection: An external rain cover provides an additional layer of defense against rain and mud, helping to keep your pack and its contents dry.

9. Food and Hydration Management

9.1 Organizing Food Supplies

  • Day-wise Packing: Organize your food supplies by day, using separate bags or containers. This method simplifies meal planning and ensures you consume the heaviest items first, lightening your load as days pass.

9.2 Hydration Systems

  • Ease of Access: If your backpack has a built-in hydration reservoir, make use of it for easy access to water. Alternatively, ensure water bottles are in side pockets where they can be easily reached without removing the pack.

10. Personalizing Your Packing List

10.1 Tailoring to the Trip

  • Specific Needs: Adjust your packing list based on the specific conditions and requirements of your trip. Consider factors such as the duration, the remoteness of the location, and the weather forecast.

10.2 Checklists

  • Avoiding Overpacking: Create a checklist tailored to your adventure to ensure you pack only what you need. This helps in avoiding unnecessary weight and maintaining pack organization.

11. Maintenance and Care of Your Backpack

11.1 Post-Trip Care

  • Cleaning and Storage: Properly clean and dry your backpack after each trip to maintain its condition. Store it in a dry place out of direct sunlight to prevent fabric degradation.

11.2 Regular Checks

  • Wear and Tear: Periodically check your backpack for signs of wear and tear, such as fraying straps or loose stitching. Early detection and repair can extend the life of your pack.

12. Learning from Experience

12.1 Reflecting on Each Trip

  • Continuous Improvement: After each trip, take time to reflect on what worked well and what didn’t in terms of packing and organization. Use these insights to refine your approach for next time.

12.2 Sharing Tips with Fellow Backpackers

  • Community Learning: Share packing tips and learn from the experiences of fellow backpackers. The backpacking community is a great resource for discovering new and innovative packing strategies.

Conclusion

Efficiently organizing your backpack is key to a comfortable and enjoyable adventure. By following these guidelines, you can ensure that your load is balanced, your essentials are easily accessible, and you’re prepared for whatever the trail throws your way.


Frequently Asked Questions (FAQs)

How do I know if my backpack is too heavy?

  • A general rule is that your loaded backpack should not weigh more than 20% of your body weight for hiking. For intense treks, aim to carry less.

Can I attach items to the outside of my backpack?

  • While attaching items to the outside can save space, it can also lead to snagging or imbalance. Limit this to lightweight items and secure them well.

How should I pack for a trip with variable weather?

  • Layer your clothing and pack versatile items that can handle different conditions. Waterproof bags can keep electronics and important documents safe.

Practicing for Success: The Key to Mastery in Any Field

Introduction

Success in any discipline, whether it be sports, music, academics, or a professional field, is not just a result of talent but also of dedicated practice. Mastery is achieved through the consistent application of effort, strategic planning, and an understanding of how to practice effectively. This guide explores the principles of practicing for success, offering insights on how to maximize the impact of your efforts.


1. Setting Clear Goals

1.1 Specific and Measurable Objectives

  • Goal Clarity: Define what success looks like in clear, achievable terms. Setting specific and measurable goals helps in tracking progress and maintaining motivation.

1.2 Short-term and Long-term Goals

  • Balanced Focus: While long-term goals provide a vision, short-term goals act as milestones that keep you on track and provide a sense of achievement along the journey.

2. Deliberate Practice

2.1 Focused Effort

  • Quality over Quantity: Deliberate practice involves focused efforts on areas that need improvement, rather than mindless repetition. It’s about challenging yourself just beyond your current abilities.

2.2 Immediate Feedback

  • Learning from Mistakes: Incorporate mechanisms for immediate feedback into your practice routines. Understanding what you’re doing wrong is crucial for making corrections and improving.

3. Consistency and Routine

3.1 Regular Practice Schedule

  • Discipline: Consistency beats intensity when it comes to practice. Establishing a routine ensures regular engagement with the material or skill you’re trying to master.

3.2 Rest and Recovery

  • Balancing Act: While regular practice is essential, so is rest. Adequate recovery prevents burnout and allows for mental and physical rejuvenation.

4. Cross-Training and Diversification

4.1 Complementary Skills

  • Broadening Horizons: Engaging in activities or learning skills outside of your primary area of focus can provide fresh perspectives and stimulate creativity.

4.2 Adaptability

  • Versatility: Diversifying your skill set makes you more adaptable and can uncover unique approaches to challenges in your main area of expertise.

5. Mindset and Mental Preparation

5.1 Growth Mindset

  • Embrace Challenges: Cultivate a growth mindset that views challenges as opportunities to learn and grow rather than obstacles to success.

5.2 Visualization and Mental Rehearsal

  • Mental Practice: Visualization techniques can complement physical practice, allowing you to mentally rehearse and refine skills.

6. Seeking Guidance and Collaboration

6.1 Mentors and Coaches

  • Expert Insights: Learning from someone who has already achieved success in your field can accelerate your growth and help avoid common pitfalls.

6.2 Peer Support

  • Collective Wisdom: Collaborating with peers provides moral support, facilitates knowledge exchange, and can inspire new ideas.

7. Embracing Technology and Innovation

7.1 Leveraging Digital Tools

  • Tech-Assisted Learning: Utilize software, apps, and online platforms designed to enhance practice and learning. Technology can offer personalized feedback, virtual simulations, and access to a global community of peers and mentors.

7.2 Staying Updated

  • Continuous Learning: In a rapidly evolving world, staying abreast of the latest developments, techniques, and innovations in your field is crucial. This ensures your practice is both current and relevant.

8. Reflective Practice and Journaling

8.1 Self-Reflection

  • Insightful Review: Regularly reflect on your practice sessions. What worked? What didn’t? Reflection helps in identifying areas for improvement and adjusting strategies accordingly.

8.2 Keeping a Practice Journal

  • Documenting Progress: A detailed journal can track progress, patterns, setbacks, and breakthroughs, serving as a valuable tool for motivation and future planning.

9. Integrating Mindfulness and Well-being

9.1 Mindful Practice

  • Focused Attention: Incorporate mindfulness into your practice routine to enhance concentration, reduce stress, and increase the quality of your practice sessions.

9.2 Physical and Mental Health

  • Holistic Approach: A healthy body supports a healthy mind. Incorporate physical activities, proper nutrition, and adequate sleep into your lifestyle to support your practice goals.

10. Experimentation and Creative Thinking

10.1 Trying New Techniques

  • Innovative Approaches: Don’t be afraid to experiment with new methods or techniques in your practice. Innovation often comes from the willingness to take risks and try something different.

10.2 Creative Problem-Solving

  • Thinking Outside the Box: Use practice sessions not just for repetition but for creative problem-solving. Apply your skills in new, unconventional ways to foster a deeper understanding and versatility.

11. Building Resilience and Overcoming Setbacks

11.1 Developing Grit

  • Perseverance: Mastery requires resilience. Develop the grit to push through challenges, failures, and plateaus in your progress.

11.2 Learning from Failure

  • Valuable Lessons: View setbacks not as discouragements but as learning opportunities. Every failure has a lesson that can pave the way for future success.

Conclusion

Practicing for success is more than just putting in the hours; it’s about how intelligently and efficiently you use that time. By setting clear goals, engaging in deliberate practice, maintaining consistency, embracing cross-training, preparing mentally, and seeking guidance, you can significantly enhance your journey towards mastery in any field. Remember, the path to success is a marathon, not a sprint, and it’s the quality of your practice that will ultimately determine how far you go.


Frequently Asked Questions (FAQs)

How long should I practice each day?

  • There’s no one-size-fits-all answer, as it depends on your field, goals, and personal capacity. However, focus on the quality and effectiveness of your practice sessions rather than just duration.

Can I achieve mastery without natural talent?

  • Yes, while talent can give you a head start, dedicated practice and the right strategies are far more critical in achieving mastery and long-term success.

How do I stay motivated during periods of slow progress?

  • Revisit your goals, celebrate small victories, and remember why you started. Sometimes, taking a short break can also help rejuvenate your motivation.

Understanding the Maximum Effective Range: Essentials for Hunters and Marksmen

Introduction

The concept of maximum effective range is crucial for hunters and marksmen, defining the furthest distance at which a shooter can reasonably expect to hit a target accurately and deliver sufficient power for a humane kill. This range varies significantly based on the weapon, ammunition, environmental conditions, and the shooter’s skill.


Factors Influencing Maximum Effective Range

1. Weapon Type and Specifications

  • Firearms: Characteristics such as barrel length, caliber, and action type affect velocity and accuracy, thus influencing the effective range.
  • Bows and Crossbows: The draw weight, arrow type, and bow design play critical roles in determining how far and accurately an arrow can be shot.

2. Ammunition and Projectiles

  • Ballistics: The design and weight of bullets or arrowheads, along with the powder load (in firearms), impact the trajectory, stability, and energy retention over distance.
  • Aerodynamics: The aerodynamic efficiency of a projectile influences how it will perform against air resistance, affecting its effective range.

3. Environmental Conditions

  • Wind and Weather: Wind speed and direction can alter a projectile’s path, while extreme temperatures and humidity can affect projectile velocity and flight stability.
  • Altitude: Higher altitudes, with thinner air, can extend the effective range by reducing air resistance.

4. Shooter’s Skill and Experience

  • Accuracy and Precision: A shooter’s ability to aim and control their breathing and trigger pull significantly affects the maximum effective range.
  • Judgment: Experience and skill in judging distances, wind speed, and elevation changes are critical for estimating the effective range in varied terrains.

Calculating and Testing Maximum Effective Range

Ballistic Calculators and Software

  • Utilize ballistic calculators and software to input specific data about your weapon, ammunition, and environmental conditions to estimate effective range.

Range Practice and Field Testing

  • Practice at a range to test the limits of your equipment and skills in controlled conditions.
  • Field testing in conditions similar to your hunting or shooting environment provides real-world insights into your effective range.

Ethical Considerations in Determining Effective Range

Responsible Shooting

  • Understanding the maximum effective range is essential for ethical hunting practices, ensuring humane kills without causing unnecessary suffering to the animal.

Safety

  • Knowledge of your weapon’s effective range is also a safety consideration, helping prevent accidental harm to unintended targets beyond the anticipated point of impact.

Expanding on the complexities of understanding and optimizing the maximum effective range in hunting and shooting, let’s delve deeper into additional strategies and considerations that can enhance a shooter’s or hunter’s proficiency and ethical engagement with their sport.


5. Optics and Sighting Systems

5.1 Importance of Quality Optics

  • Enhanced Accuracy: High-quality scopes and sighting systems can significantly improve accuracy over long distances, helping shooters make more informed and precise shots within their effective range.

5.2 Calibration and Maintenance

  • Regular Check-ups: Regularly calibrating your optics and maintaining them in pristine condition ensures that they perform optimally when you need them most.

6. Understanding Animal Anatomy

6.1 Vital Zone Knowledge

  • Ethical Harvesting: For hunters, knowledge of an animal’s anatomy and vital zones is paramount to ensure that shots at the edge of the effective range still have the potential for a humane kill.

6.2 Practice and Simulation

  • Target Practice: Using 3D animal targets or simulations can help hunters practice shot placement, adjusting for different distances and angles to mimic real hunting scenarios.

7. Mental Preparation and Decision Making

7.1 Situational Awareness

  • Quick Thinking: Being mentally prepared to assess the viability of a shot quickly, considering the maximum effective range and current conditions, is crucial for ethical decision-making.

7.2 Stress Management

  • Under Pressure: Learning to manage the adrenaline and stress of a hunting or shooting scenario can help maintain clarity and judgment, ensuring decisions fall within the bounds of safe and effective range practices.

8. Continuous Education and Training

8.1 Advanced Courses and Certifications

  • Lifelong Learning: Engaging in advanced hunting and shooting courses, as well as obtaining relevant certifications, can provide deeper insights into extending and accurately determining your effective range.

8.2 Learning from Experts

  • Mentorship: Seeking advice and learning from experienced hunters and marksmen can offer practical tips and strategies that textbooks and courses may not cover.

9. Legal and Ethical Responsibilities

9.1 Staying Informed on Laws and Regulations

  • Compliance: Keeping abreast of local, state, and federal regulations regarding hunting and shooting distances ensures that practices remain within legal parameters.

9.2 Advocacy for Ethical Practices

  • Community Engagement: Being an advocate for responsible and ethical hunting and shooting within the community promotes a culture of respect and care for wildlife and public safety.

Conclusion

The maximum effective range is a dynamic concept influenced by multiple factors, requiring ongoing assessment and understanding. Hunters and marksmen should continuously strive to know their capabilities and limitations, aiming to make ethical, accurate, and safe shots in every scenario.


Frequently Asked Questions (FAQs)

How can I improve my effective range?

  • Regular practice, advanced training, and using quality equipment can help extend your effective range. Additionally, studying ballistics and environmental effects will enhance your understanding and capabilities.

Does the effective range differ for moving targets?

  • Yes, moving targets require anticipation and adjustment in aiming, reducing the effective range due to the increased difficulty in making a precise shot.

Can technological advancements significantly extend a weapon’s effective range?

  • Innovations in firearm and ammunition technology, as well as in archery equipment, continue to push the boundaries of effective range, offering improved accuracy and power at longer distances.

The Archer’s Craft: DIY Bowstring Installation Guide

Introduction

Installing a bowstring is a vital skill for any archer, allowing for customization, maintenance, and the satisfaction of tuning your equipment. This guide will walk you through the process of DIY bowstring installation on a recurve or compound bow, ensuring you’re ready to hit the target with confidence.


Tools and Materials Needed

  • New Bowstring: Ensure it’s the correct length and type for your bow.
  • Bow Stringer (for recurve bows): Essential for safely stringing a recurve bow.
  • Bow Press (for compound bows): Necessary to compress the limbs and relieve tension for string installation.
  • Nocking Points: For positioning the arrow consistently.
  • String Wax: To maintain string longevity and performance.
  • Small Tools: Including pliers, scissors, and a lighter for adjustments and finishing touches.

Step-by-Step Guide

For Recurve Bows

1. Inspecting the New String

  • Check the new bowstring for any damage or flaws to ensure it’s in perfect condition before installation.

2. Applying String Wax

  • Lightly wax the new string, focusing on areas that will experience the most wear. This extends the life of the string and reduces friction.

3. Using the Bow Stringer

  • Attach the larger loop of the bowstring to the top limb’s string groove and the smaller loop to the bottom limb’s groove.
  • Secure the bow stringer’s pockets/saddles onto each limb’s tip.
  • Step on the bow stringer cord and pull the bow’s riser upwards to bend the limbs, allowing you to slide the bowstring into its final position on the limb tips.

4. Removing the Bow Stringer

  • Carefully release the tension to transfer the bow’s bend from the stringer to the bowstring. Remove the bow stringer and ensure the bowstring is seated correctly in the limb grooves.

For Compound Bows

1. Using the Bow Press

  • Place your compound bow into the bow press according to the manufacturer’s instructions. Carefully compress the limbs to relax the tension on the existing bowstring.

2. Removing the Old String

  • Once the tension is relieved, remove the old bowstring. Pay close attention to how it was installed, as you’ll be mirroring this with the new string.

3. Installing the New String

  • Install the new string by following the path of the old one, ensuring it’s properly seated in the cam grooves and around any idler wheels or teardrops.

4. Releasing the Bow Press

  • Slowly release the bow press, allowing the limbs to return to their original tension. Ensure the string is correctly seated and the bow is returning to its proper shape.

Finishing Touches

  • Installing Nocking Points: Use nocking points to mark where the arrow will sit on the string. This ensures consistency in arrow placement for every shot.
  • Final Inspection: Give your bow and new string a thorough inspection to ensure everything is secure and properly aligned.

Ensuring Proper String Length

Measuring and Verification

  • Accuracy in Measurement: Before purchasing a new string, verify the correct length needed for your bow. An incorrect length can affect the bow’s performance and safety.

Manufacturer Specifications

  • Consult Documentation: Always refer to your bow’s manufacturer specifications for the recommended string length. Using a string that’s too short or too long can damage your bow or lead to poor shooting accuracy.

Tuning for Optimal Performance

Brace Height Adjustment

  • Fine-Tuning: After installing a new string, check and adjust the brace height (the distance from the deepest part of the bow grip to the string) according to your bow’s specifications for optimal performance.

Peep Sight Alignment

  • Visibility and Accuracy: For compound bows with peep sights, ensure the peep sight aligns correctly when at full draw. You may need to adjust the position of the peep sight on the string after installation.

Maintenance and Care

Regular String Inspection

  • Preventative Checks: Regularly inspect your bowstring for signs of wear, such as fraying or stretching. Early detection of issues can prevent equipment failure and accidents.

Consistent Waxing

  • Routine Maintenance: Apply bowstring wax regularly to maintain the string’s integrity and moisture resistance. This is crucial for preserving the life of the string and ensuring consistent performance.

Safety Considerations

Working with Tension

  • Respect the Bow’s Power: Always use appropriate tools like a bow stringer or bow press to manage the tension safely. Attempting to string or unstring a bow without proper equipment can lead to injury or damage to the bow.

Professional Assistance

  • When in Doubt: If at any point during the string installation process you’re unsure or uncomfortable, don’t hesitate to seek assistance from a professional bow technician. It’s better to ensure the job is done safely and correctly.

Customization and Personalization

Choosing the Right String Material

  • Material Matters: Modern bowstrings are made from various materials, each offering different benefits in terms of speed, durability, and stretch. Research and choose a material that best suits your archery style and bow type.

Color and Style

  • A Personal Touch: Custom bowstrings are available in a wide range of colors, allowing archers to personalize their setup. While aesthetics won’t affect performance, they can add to the enjoyment and pride of ownership.

Conclusion

DIY bowstring installation is a rewarding process that enhances your understanding and connection to your equipment. Whether you’re a seasoned archer or a beginner, taking the time to learn this skill ensures you’re always ready for the field or range. Remember, safety is paramount, so take your time and consult with a professional if you’re unsure about any steps in the process.


Frequently Asked Questions (FAQs)

How often should I replace my bowstring?

  • Generally, it’s recommended to replace your bowstring every 2-3 years or sooner if you notice significant wear, fraying, or damage.

Can I use any wax on my bowstring?

  • It’s best to use wax specifically designed for bowstrings, as it’s formulated to penetrate the fibers and reduce friction without damaging the string.

What if my bow doesn’t fit in the bow press?

  • If your bow doesn’t fit in a standard bow press, consult the manufacturer for recommended solutions or take it to a professional bow technician to ensure safe handling

The Call of the Wild: Accepting the Challenge of Western Hunting

Introduction

Western hunting offers an unparalleled adventure that tests the limits of hunters, inviting them into vast landscapes teeming with game ranging from mule deer to Rocky Mountain elk. This journey is not just about the pursuit of game but about embracing the challenges and learning from the rugged environment itself. Let’s explore what it takes to rise to the occasion and make the most of western hunting.


1. Understanding the Terrain

1.1 Vast Open Spaces

  • Navigational Skills: Western hunting grounds are known for their expansive territories. Mastering navigational skills using both GPS and traditional compass and map is crucial to avoid getting lost in the wilderness.

1.2 Elevation Changes

  • Physical Preparedness: The dramatic elevation changes require hunters to be in top physical condition to traverse steep mountainsides and high-altitude environments.

2. Adapting to the Weather

2.1 Unpredictable Conditions

  • Layered Clothing: Weather in the West can change swiftly from scorching heat to freezing temperatures. Dressing in layers allows for quick adaptation to changing conditions.

2.2 Hydration and Protection

  • Staying Hydrated: The dry climate and higher elevations increase dehydration risks. Carrying sufficient water and knowing how to find water sources are vital.

3. Mastering Long-Range Shooting

3.1 Skill Development

  • Practice Makes Perfect: The open terrain often necessitates long-range shots. Proficiency with high-caliber rifles and understanding ballistics for long distances are essential.

3.2 Equipment Optimization

  • Choosing the Right Optics: Investing in high-quality optics can make a significant difference in successfully spotting and stalking game at long distances.

4. Wildlife Knowledge and Conservation

4.1 Species-Specific Strategies

  • Habitat and Behavior: Understanding the specific habits and habitats of target species, from elk to antelope, enhances your chances of a successful hunt.

4.2 Ethical Hunting Practices

  • Conservation Efforts: Participating in conservation and management efforts is a responsibility that comes with the privilege of hunting in these pristine areas.

5. Preparing for Self-Sufficiency

5.1 Survival Skills

  • Backcountry Readiness: Basic survival skills, including fire-making, shelter-building, and emergency signaling, are critical for safety in remote hunting areas.

5.2 Pack Essentials

  • Packing Smart: Besides hunting gear, your pack should include first aid supplies, a water purification method, emergency food rations, and navigation tools.

6. Embracing the Hunting Community

6.1 Learning from Others

  • Shared Knowledge: The hunting community is a valuable resource. Engaging with experienced western hunters can provide insights and tips that are not found in books or online.

6.2 Respect and Camaraderie

  • Building Relationships: Respecting fellow hunters and the local communities near hunting areas fosters camaraderie and ensures the continued welcome for hunters in these regions.

7. Efficient Backcountry Camping

7.1 Lightweight and Functional Gear

  • Strategic Selection: Opting for lightweight, multi-functional gear can significantly reduce your load while ensuring you have the essentials for overnight stays in the backcountry.

7.2 Leave No Trace Principles

  • Environmental Stewardship: Embracing Leave No Trace principles during camping and hunting activities is critical to preserving the natural beauty and ecological balance of western wilderness areas.

8. Advanced Scouting Techniques

8.1 Utilizing Technology

  • Digital Scouting: Beyond traditional scouting methods, the use of satellite imagery and trail cameras can offer a competitive edge in understanding animal movements and terrain features before setting foot in the area.

8.2 In-Person Scouting

  • Seasonal Preparation: Visiting your intended hunting area during the off-season can provide valuable insights into animal behavior, potential campsites, and water sources, setting the stage for a successful hunt.

9. Navigating Legalities and Regulations

9.1 Staying Informed

  • Regulatory Compliance: Western states have specific regulations that can change annually. Staying informed about licensing, tag draw systems, and area-specific rules is crucial for legal and ethical hunting practices.

9.2 Respect for Game Laws

  • Ethical Consideration: Adhering to game laws not only ensures the sustainability of wildlife populations but also honors the tradition of hunting by fostering respect among the public and conservation communities.

10. Mental and Emotional Preparedness

10.1 Embracing Solitude

  • Solace in Solitude: Western hunting often involves long periods of solitude. Embracing these moments can offer a profound connection to nature and personal reflection that enriches the hunting experience.

10.2 Coping with Challenges

  • Resilience Building: The inevitable challenges and occasional failures encountered in western hunting are opportunities for growth. Developing a resilient mindset is key to overcoming obstacles and learning from each experience.

11. Commitment to Conservation and Community

11.1 Contributing to Conservation Efforts

  • Active Engagement: Participate in local and state conservation programs and initiatives. Your involvement can contribute to habitat restoration, wildlife research, and the future of hunting.

11.2 Fostering Hunting Heritage

  • Mentorship and Education: Share your knowledge and passion for western hunting with newcomers. Mentoring aspiring hunters can help preserve the hunting heritage and ensure its ethical continuation.

Conclusion

Accepting the challenge of western hunting is about more than testing your skills against the elements and the game; it’s a journey of personal growth, learning, and contributing to the preservation of some of the most breathtaking landscapes on Earth. By preparing thoroughly, respecting the environment and wildlife, and engaging with the hunting community, you can ensure that your western hunting adventure is an unforgettable and rewarding experience.


Frequently Asked Questions (FAQs)

How do I choose a western hunting guide or outfitter?

  • Research thoroughly, read reviews, and ask for references. Ensure they are licensed, experienced in the specific game and area you’re interested in, and share your values regarding conservation and ethical hunting.

What’s the most important piece of gear for western hunting?

  • While all gear is important, high-quality footwear designed for rugged terrain might be the most crucial. Comfortable, durable boots can make a significant difference in your ability to navigate challenging landscapes.

Can I hunt in western states without prior mountain hunting experience?

  • Yes, but preparation is key. Consider hiring a guide for your first few hunts, and invest time in physical conditioning, skills development, and learning about the specific challenges of mountainous terrain.

What are the common mistakes new western hunters make?

  • Underestimating the physical demands, overpacking or underpacking essential gear, neglecting the importance of navigation skills, and overlooking the need for advanced shooting practice are common pitfalls.

The Physical Demands of Hunting: Preparing for the Challenge

Introduction

Hunting is not just a test of skill and patience; it’s also a physically demanding activity that requires hunters to be in good physical condition. The terrain, the weather, and the sheer endurance needed for stalking or tracking game can challenge even the most experienced hunters. Understanding and preparing for these physical demands is crucial for a successful and enjoyable hunt.


1. Endurance and Stamina

1.1 Cardiovascular Fitness

  • Long Treks: Hunters often cover long distances on foot, sometimes in challenging terrain. Cardiovascular fitness is essential for maintaining energy levels throughout the hunt.

1.2 Training Tips

  • Regular Cardio: Incorporate running, hiking, cycling, or swimming into your regular fitness routine to build up your endurance.

2. Strength and Stability

2.1 Muscle Strength

  • Carrying Gear: The weight of your gear, including firearms, ammunition, and survival supplies, can be significant. Upper and lower body strength ensures you can carry this load comfortably.

2.2 Core Stability

  • Maintaining Balance: Navigating uneven terrain requires a strong core to maintain balance and prevent falls.

2.3 Training Tips

  • Weight Training: Focus on functional fitness exercises that mimic hunting activities, such as squats, lunges, deadlifts, and core strengthening routines.

3. Flexibility and Mobility

3.1 Range of Motion

  • Avoiding Injury: Flexibility helps in avoiding injuries by allowing your body to move freely and adapt to the terrain.

3.2 Training Tips

  • Stretching Routine: Incorporate dynamic stretching into your daily routine to improve flexibility and static stretching post-exercise to aid recovery.

4. Mental Resilience

4.1 Mental Endurance

  • Focus and Concentration: The mental stamina to stay alert and focused during long periods of inactivity is crucial for spotting game and making ethical shots.

4.2 Stress Management

  • Coping with Adversity: Hunting can be unpredictable. The ability to manage stress and remain calm under pressure is vital.

4.3 Training Tips

  • Mindfulness and Visualization: Practice mindfulness techniques and visualize successful hunts to build mental resilience.

5. Nutrition and Hydration

5.1 Fueling the Body

  • Energy and Recovery: Proper nutrition before and during the hunt supports energy levels and recovery. Focus on a balanced diet rich in proteins, carbohydrates, and healthy fats.

5.2 Staying Hydrated

  • Water Intake: Dehydration can quickly sap your strength and focus. Carry enough water and drink regularly, even in cold weather.

6. Altitude Acclimatization

6.1 High-Altitude Hunting

  • Reduced Oxygen Levels: Hunting in high-altitude environments can be physically taxing due to reduced oxygen levels. Acclimatization days and gradual ascents are recommended.

6.2 Training Tips

  • Preparation: If possible, train in higher altitudes prior to your hunt or use altitude training masks to simulate conditions.

Expanding on the comprehensive approach to preparing for the physical demands of hunting, let’s delve into additional strategies and insights to ensure hunters are optimally prepared for the rigors of the hunt.


7. Weather Preparedness

7.1 Adapting to Extreme Conditions

  • Resilience to Weather: Whether braving the cold, heat, rain, or snow, hunters must be prepared for all weather conditions. This requires not only physical but mental readiness to endure discomfort.

7.2 Training Tips

  • Environmental Training: Whenever possible, train under similar weather conditions to those expected during your hunt. This acclimatization can help your body adjust to extreme temperatures and improve your overall resilience.

8. Tactical Movement and Stealth

8.1 Quiet Movement

  • Stealth Techniques: Moving silently through various terrains without startling game is a skill that demands both physical agility and mindfulness. Practice moving quietly and with purpose in your training.

8.2 Training Tips

  • Balance and Coordination Exercises: Incorporate balance beams, agility ladders, and stealth walks into your routine to enhance your ability to move quietly and efficiently.

9. Recovery and Injury Prevention

9.1 Importance of Rest

  • Adequate Recovery: Ensuring proper rest between training sessions and during the hunt itself is crucial to prevent overuse injuries and maintain peak performance.

9.2 Training Tips

  • Active Recovery: Incorporate light activities such as walking or yoga on rest days to promote muscle recovery and maintain flexibility.

10. Gear Weight Management

10.1 Optimizing Gear Load

  • Efficient Packing: Carefully select and test your gear to ensure you’re carrying only what is necessary. An optimized load reduces physical strain and increases mobility and endurance.

10.2 Training Tips

  • Pack Training: Regularly hike with a loaded pack that simulates your hunting gear’s weight to build strength and condition your body for the load you’ll carry during the hunt.

11. Nutrition and Energy Management

11.1 On-the-Go Nutrition

11.2 Hydration Strategies

  • Electrolyte Balance: In addition to water, consider electrolyte supplements to prevent dehydration and maintain energy levels, especially during hunts in extreme heat or at high altitudes.

Conclusion

The physical demands of hunting are as diverse as the hunting experiences themselves. By preparing your body and mind through targeted training, nutrition, and acclimatization, you can enhance your hunting performance, ensure your safety, and enjoy the wilderness to its fullest. Remember, the key to overcoming the physical challenges of hunting lies in preparation, perseverance, and a deep respect for the natural world.


Frequently Asked Questions (FAQs)

How long before a hunt should I start training?

  • Ideally, begin your physical preparation 3 to 6 months in advance, allowing your body to gradually build strength, endurance, and flexibility.

Can yoga or pilates help in hunting preparation?

  • Yes, yoga and pilates are excellent for improving flexibility, core strength, and mental focus—all beneficial for hunting.

What’s the best way to carry heavy gear without getting tired?

  • Use a well-fitted backpack with waist and chest straps to distribute weight evenly. Train with weighted packs to build strength and endurance.

How do I deal with muscle soreness during a hunt?

  • Stay hydrated, consume protein-rich foods for recovery, and use foam rollers or stretching exercises to alleviate muscle soreness.

Elevating Your Game: The Path to Becoming a Better Hunter

Introduction

The journey to becoming a better hunter is as much about personal growth as it is about skill enhancement. It involves a commitment to learning, ethical hunting practices, and a deep respect for the natural world. This guide outlines key areas where you can focus your efforts to not only improve your hunting skills but also enrich your overall hunting experience.


1. Continuous Learning and Skill Development

1.1 Master Your Equipment

  • Practice Regularly: Spend time familiarizing yourself with your hunting gear. Regular practice with your chosen weapon, be it a rifle, bow, or another, ensures proficiency and confidence in the field.

1.2 Stay Informed

  • Educate Yourself: Keep up to date with the latest hunting techniques, regulations, and conservation news. Attend workshops, seminars, and hunter education courses to expand your knowledge.

2. Understanding Your Quarry

2.1 Study Animal Behavior

  • Learn Patterns: A deep understanding of the animals you hunt, including their habits, feeding patterns, and seasonal movements, can dramatically increase your success rates.

2.2 Track and Sign Reading

  • Sharpen Your Tracking Skills: Learn to identify and interpret animal tracks, trails, and signs. Tracking skills not only help in locating game but also in understanding animal behavior.

3. Ethical Hunting Practices

3.1 Know and Respect the Laws

  • Follow Regulations: Adherence to hunting laws and regulations is fundamental. They are in place to ensure sustainable wildlife populations and ethical hunting practices.

3.2 Aim for a Quick, Humane Harvest

  • Ethical Shot Placement: Strive for clean, ethical shots that ensure a quick and humane harvest. This respects the animal and minimizes suffering.

4. Environmental Stewardship

4.1 Practice Leave No Trace

  • Minimize Impact: Take all necessary steps to minimize your impact on the natural environment. This includes packing out what you bring in and leaving habitats undisturbed.

4.2 Participate in Conservation

  • Give Back: Engage in wildlife and habitat conservation efforts. This can range from participating in habitat restoration projects to supporting wildlife management initiatives.

5. Physical and Mental Preparation

5.1 Stay in Good Physical Shape

  • Physical Fitness: Hunting often requires stamina and strength. Regular exercise and conditioning can prepare your body for the physical demands of hunting.

5.2 Mental Resilience

  • Cultivate Patience and Persistence: Mental toughness is as crucial as physical readiness. Hunting can test your patience and resilience, qualities that are essential for success.

6. Networking and Mentorship

6.1 Learn from Experienced Hunters

  • Seek Guidance: Don’t hesitate to seek advice from more experienced hunters. Mentorship can be a valuable source of practical knowledge and insights.

6.2 Share Your Experiences

  • Contribute to the Community: Sharing your experiences, successes, and failures can help others learn while strengthening your understanding and appreciation of hunting.

7. Advanced Scouting Techniques

7.1 Utilize Technology Wisely

7.2 Field Scouting

  • Boots on the Ground: There’s no substitute for physically scouting your hunting area. Time spent in the field not only helps you understand the terrain but also connects you deeply with the natural environment you’re operating in.

8. Embracing Silence and Stillness

8.1 The Art of Being Unseen

  • Camouflage Beyond Clothing: True camouflage involves managing noise levels and minimizing movements. Practice moving silently and remaining motionless for extended periods to blend into your surroundings.

8.2 Mindfulness in the Wild

  • Presence and Awareness: Develop mindfulness practices that enhance your awareness and presence in the natural world. This can improve your ability to detect wildlife and make ethical decisions in the moment.

9. Nurturing a Conservationist’s Mindset

9.1 Educate Yourself on Local Ecosystems

  • Beyond the Hunt: Gain a broad understanding of the ecosystems where you hunt. Knowledge of native plant species, wildlife habitats, and ecological challenges enriches your experience and fosters a deeper respect for nature.

9.2 Active Participation in Conservation

  • Volunteer and Advocate: Actively participate in conservation efforts, whether through volunteer work with local wildlife agencies or advocacy for policies that support sustainable hunting and biodiversity.

10. Enhancing Mental Toughness and Patience

10.1 Building Resilience

  • Embrace Challenges: View difficult hunting experiences as opportunities for growth. Building resilience comes from facing and overcoming the challenges inherent in hunting.

10.2 Cultivating Patience

  • A Hunter’s Virtue: Patience is a critical skill in hunting. Develop practices that enhance your ability to wait, observe, and act judiciously, recognizing that some of the best hunting outcomes come from waiting for the right moment.

11. Commitment to Continuous Improvement

11.1 Self-Reflection and Learning

  • Journaling and Review: Keep a hunting journal to reflect on each hunting trip. Note what worked, what didn’t, and how you can improve. This self-reflection is invaluable for continuous growth.

11.2 Seeking Feedback and Education

  • Lifelong Learning: Remain open to feedback from peers and mentors. Attend advanced hunting courses, seminars, and workshops to stay updated on best practices and innovations in hunting techniques and conservation.

Conclusion

Becoming a better hunter is a lifelong journey of improvement, respect, and stewardship. By dedicating yourself to learning, ethical practices, and contributing positively to the environment and hunting community, you enhance not only your own hunting experience but also the broader tradition of hunting. Embrace the process, and let each hunting adventure teach you something new.


Frequently Asked Questions (FAQs)

How can I improve my accuracy for hunting?

  • Regular, focused practice under varied conditions can improve accuracy. Also, consider professional coaching to refine your technique.

What’s the best way to learn animal behavior?

  • Spend time in the field observing wildlife. Reading scientific literature on animal behavior and watching documentaries can also provide valuable insights.

How important is camouflage in hunting?

  • Camouflage can be crucial in not being detected by game. It’s important to choose patterns that match the environment you’ll be hunting in.

Can technology make me a better hunter?

  • Technology, when used appropriately, can enhance your hunting experience. GPS devices, ballistic calculators, and trail cameras can provide useful information and improve your chances of success. However, technology should complement, not replace, fundamental hunting skills and knowledge.
Exit mobile version