Saddle hunting can be useful for mobile deer hunters, but it is not automatically safer, cheaper, or better than a ladder stand, hang-on stand, or ground setup. The right question is whether you can use the saddle, tether, lineman’s belt, platform, climbing method, and weapon safely every time you leave the ground.
This guide helps you decide if saddle hunting fits your body, terrain, budget, and safety habits. It is not a product roundup, medical advice, legal advice, or a replacement for hands-on training and the manuals for your saddle, platform, climbing sticks, ropes, and fall-arrest gear.
Table of contents
Should You Be Saddle Hunting? Quick Answer
You should consider saddle hunting if you need a mobile elevated setup, are willing to practice low and slow, can inspect ropes and hardware, and can stay attached to the tree during climbing, hunting, and descending. You should wait if you dislike heights, skip safety steps, have balance or mobility limits, or cannot practice before the season.
Do not treat a saddle as a shortcut
A saddle can reduce bulk, but it adds rope work, climbing choices, platform setup, tether management, and shooting-angle practice. Those steps need training and repetition.
Safety is the first decision
Tree stand and elevated hunting injuries are serious. Hunter education guidance on tree stand safety is a good baseline even if you use a saddle instead of a traditional stand.
Keep it support-only
This article explains fit and safety. It does not recommend a specific saddle brand, platform, rope, or climbing stick because those choices need current product data and manual verification.
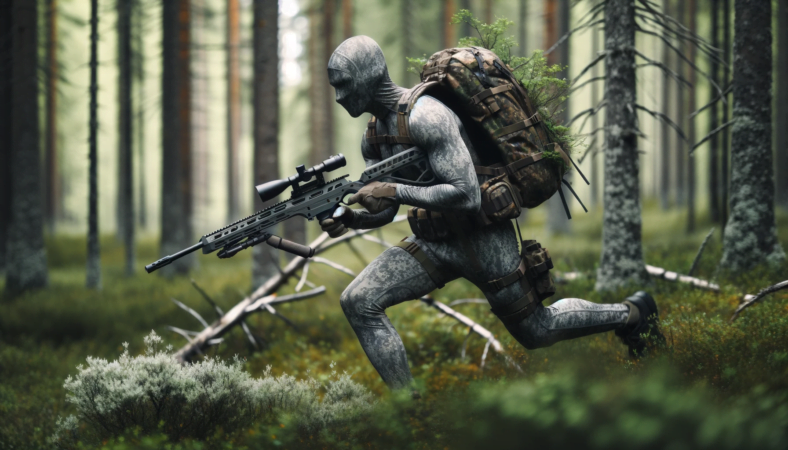
What Saddle Hunting Is
Saddle hunting uses a wearable saddle, tether, bridge, lineman’s belt, platform or steps, and a climbing method to hunt from an elevated position. The hunter usually leans or sits against the saddle while connected to the tree.
How it differs from a stand
A hang-on or ladder stand gives you a larger platform. A saddle often packs smaller and lets you move around the tree, but it depends more on rope position, body angle, and a small foot platform.
Why hunters like it
Hunters often choose saddle setups for public land mobility, smaller pack weight, flexible tree choice, and the ability to hide behind the tree trunk.
Why some hunters dislike it
Some hunters find saddles uncomfortable, slow to learn, expensive after accessories, or awkward for certain shot angles. It is normal to prefer a ground blind, ladder stand, or hang-on stand.
Fall-Safety Checks
The safety question is not whether saddle hunting is safer in theory. The question is whether your exact setup keeps you connected, controlled, and within manufacturer instructions from the ground up and back down.
Stay connected during climbing
Use the climbing method and lineman’s belt as directed by the manufacturer. Do not climb above your connection or unclip casually to move faster.
Inspect ropes and hardware
Before each hunt, inspect the tether, bridge, lineman’s belt, carabiners, prusik or mechanical adjusters, stitching, knots, platform, steps, and climbing sticks. Retire damaged gear instead of trying to stretch one more hunt from it.
Use rated equipment only
Do not mix random hardware-store rope, unknown carabiners, or homemade parts into a life-support system. Use equipment rated and intended for the job, and follow the manufacturer instructions.
Who Saddle Hunting Fits
Saddle hunting usually fits hunters who value mobility and are comfortable learning a methodical setup routine.
Mobile public-land hunters
If you move often, scout fresh sign, and avoid leaving stands in the woods, a saddle can reduce bulk compared with some fixed stand setups.
Hunters with many tree options
A saddle can work in more tree shapes than some stands, but it still needs a safe trunk, legal access, and enough room for climbing and shooting.
Patient gear testers
Careful saddle users usually test bridge length, tether height, platform angle, knee pads, pack layout, and weapon handling long before opening day.
Who Should Wait
Not every hunter should rush into saddle hunting. Waiting is a good choice when safety, comfort, or practice time is not ready.
New hunters without elevated experience
If you are still learning basic hunting and weapon safety, start with the simplest legal setup that lets you stay safe and focused. Add elevated methods after you have help and practice.
Hunters with height or balance concerns
If heights, vertigo, joint pain, back pain, or limited mobility make climbing difficult, talk with a qualified professional and choose a safer setup for your situation.
Hunters who cannot practice
Do not learn a saddle in the dark on opening morning. If you cannot practice close to the ground before the season, wait.
Core Gear
A saddle setup is a system. Changing one part can affect comfort and safety, so confirm compatibility before mixing gear.
Saddle and bridge
The saddle supports your body and the bridge connects to the tether. Fit, bridge adjustment, and pressure points matter more than marketing claims.
Tether and lineman’s belt
The tether supports your hunting position, while the lineman’s belt helps during climbing and setup. Both should be inspected and used exactly as directed.
Platform or steps
A platform gives your feet a place to stand and pivot. Steps can work too, but the choice changes comfort, shot angles, pack weight, and setup time.
Practice Plan
Practice should start low enough that a mistake does not become a fall. Build routine before height.
Start at ground level
Practice putting on the saddle, setting the tether, adjusting bridge pressure, stepping onto the platform, and getting down without rushing.
Add weapon handling later
Only add bow, crossbow, or firearm handling after the saddle routine is controlled. Use unloaded equipment during dry practice and keep the muzzle or broadhead direction safe.
Practice the weak-side shot
Some saddle shots feel natural, while others require foot movement or body rotation. Practice both sides and set personal limits for angles that feel unstable.
Field Use
In the field, saddle hunting rewards a quiet routine and honest tree selection. Do not force a tree just because the sign looks good.
Choose the tree carefully
A safe tree should be alive, sturdy, legal to use, and suitable for your climbing method. Avoid dead trees, slick bark, loose bark, weak limbs, and trees that do not allow safe attachment.
Plan the shot before the deer arrives
Set your platform and tether so your likely shooting lanes are realistic. If a lane requires twisting, leaning too far, or stepping awkwardly, treat it as a no-shot lane.
Descend with the same discipline
Many mistakes happen at the end of a hunt. Stay connected, move slowly, lower gear safely, and do not rush because you are cold, tired, or excited.
Common Mistakes
The common saddle mistakes are not glamorous. They are usually skipped practice, poor tree choice, and casual gear inspection.
Buying before trying
Borrowing, taking a class, or trying a setup at ground level can prevent wasted money and unsafe frustration.
Ignoring the manual
Every saddle, rope, platform, and stick can have different limits and instructions. Read them before combining parts.
Assuming lighter means better
Lighter gear is helpful only if it is safe, comfortable, quiet, and compatible with your hunting style.
Related Guides
For broader field safety, read our hunting safety tips. For beginner planning, see the first-time hunting guide. If you are comparing elevated setups, also review advanced hunting gear checks.
FAQ
Is saddle hunting safer than a tree stand?
Not automatically. A saddle can keep you connected when used correctly, but safety depends on rated gear, correct setup, inspection, practice, and staying attached during climbing and descent.
Is saddle hunting good for beginners?
It can be too complex for some beginners. New hunters should learn basic hunting safety first and try saddle practice close to the ground with experienced help.
Can you saddle hunt from any tree?
No. The tree must be legal, alive, sturdy, and suitable for your climbing method, tether height, platform, and shooting lanes.
What should I practice before hunting from a saddle?
Practice putting on the saddle, climbing, staying connected, setting the tether, standing on the platform, rotating for shots, lowering gear, and descending safely.
Is saddle hunting worth the cost?
It can be worth it for mobile hunters who will practice and use the system often. It may not be worth it if you hunt fixed locations, dislike heights, or prefer simpler ground setups.