The 5 Best Antelope Cartridges: A Hunter’s Guide

Hunting antelope presents a unique set of challenges and rewards. Known for their keen eyesight and fleet-footedness, antelope can make for an exhilarating hunting experience.

An essential component to a successful hunt is selecting the right cartridge. This guide explores the top 5 cartridges for antelope hunting, offering insights into their ballistic capabilities, optimal uses, and why they stand out in the field.

What to Look for in an Antelope Cartridge

Ballistics for Antelope Hunting

The key to choosing an effective antelope cartridge lies in understanding the necessary ballistics. Ideal cartridges should offer a flat trajectory, high velocity, and sufficient energy to ensure a humane kill at distances typical in antelope hunting, which can vary significantly.The bullet must be capable of accurate, clean shots to handle the open terrains where antelope are often found.

Bullet Performance

When hunting antelope, bullet performance is crucial. A bullet that offers consistent expansion and deep penetration ensures that the animal is dispatched quickly and humanely.

Furthermore, since antelope are relatively light compared to other game like elk or bear, the bullet should not over-penetrate, which can spoil the meat.

Recoil Management

Recoil can affect shot accuracy and follow-up shot speed. Cartridges with manageable recoil are preferable, especially for hunters who may spend extended periods in the field or those sensitive to heavier kickbacks.

Top 5 Cartridges for Hunting Antelope

1.The Lee Precision 90235 .243 Winchester

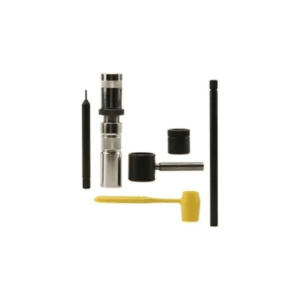
The Lee Precision 90235 .243 Winchester Classic Loader is an excellent choice for those looking to begin reloading cartridges, particularly in the .243 Winchester caliber. This kit is tailored for hunters or shooters who want a straightforward, budget-friendly option for reloading.

Key Features

  • Complete Reloading Kit: The package comes with everything needed to start the reloading process, except for a rubber mallet. It includes key components such as a Sizing Die, Decapping Chamber, Bullet Seater and Priming Chamber, Priming Rod, Powder Measure, and comprehensive load data and instructions.
  • Ease of Use: Designed with simplicity in mind, this kit is ideal for beginners. The included instructions are clear, making the setup and reloading process manageable for those new to the craft.
  • Materials and Build: The loader parts are made of durable steel, while the powder dipper is crafted from plastic. This combination ensures longevity and reliability.
  • Portability: With item dimensions of 6 x 5 x 2 inches and a lightweight design (0.33 kilograms), this kit is portable, making it easy to take on hunting trips or move around your reloading area.

Specifications

  • Cartridge Compatibility: Specifically designed for .243 Winchester cartridges.
  • Material: Steel for the loader parts and plastic for the powder dipper.
  • Package Dimensions: 5.9 x 3.8 x 1.2 inches; weighs 15.2 ounces.
  • Model Year: 2012.

Considerations

  • Neck Sizes Only: It’s important to note that the Classic Lee Loader neck sizes only. This might not be suitable for semi-automatic, pump, and lever action guns, as these firearms often require full-length resizing for reliable cycling of reloaded ammunition.
  • Manual Operation: The reloading process with this kit is manual, requiring physical handling and measurement, which adds to the hands-on experience but might not be suited for those looking for quick or bulk reloading solutions.

The Lee Precision 90235 .243 Winchester Classic Loader is an affordable, efficient solution for individuals starting out in reloading. It offers a practical introduction to the reloading process with easy-to-follow instructions and a complete set of tools.

This loader is especially suitable for single-stage reloading and is a great way to understand the basics of cartridge reloading. Whether for hunting or target shooting, this kit provides an excellent starting point for .243 Winchester enthusiasts.

You can find this product on Amazon by searching for “Lee Precision 90235 .243 Winchester Classic Loader” to view current pricing and availability details.

2.The Lee Precision 90240 .270 Winchester Classic Loader

The Lee Precision 90240 .270 Winchester Classic Loader offers a comprehensive solution for hunters and shooters interested in reloading their own .270 Winchester cartridges. This kit is particularly designed for those who want a straightforward and cost-effective entry into the world of ammunition reloading.

Key Features

  • Complete Reloading Kit: This package provides all the necessary tools to start reloading the .270 Winchester, except a rubber mallet. The kit includes a Sizing Die, Decapping Chamber, Bullet Seater and Priming Chamber, Priming Rod, Powder Measure, as well as load data and a plastic case for storage.
  • User-Friendly: Aimed at beginners, the kit is accompanied by complete instructions that make the reloading process understandable and manageable. This is ideal for those who are new to reloading and need clear guidance.
  • Durability: Constructed with steel loader parts and a plastic powder dipper, the kit is built to last, ensuring many reloading sessions.
  • Compact and Portable: With dimensions of 6 x 4 x 2 inches and weighing only 0.4 kilograms, the loader is easy to transport and store, making it a practical choice for reloaders who might need to work in different settings.

Specifications

  • Cartridge Compatibility: Specifically designed for reloading .270 Winchester cartridges.
  • Material: Steel loader parts and plastic for the powder dipper.
  • Package Dimensions: 5.71 x 3.82 x 1.1 inches; weight of 0.5 kilograms.
  • Model Year: 2012.

Considerations

  • Neck Sizing Only: The kit is designed to neck size the brass only, which may not be suitable for use in semi-automatic, pump, and lever action guns. These firearms generally require full-length resized brass for optimal performance and reliability.
  • Manual Operation: As with other classic loaders, the operation is entirely manual, which enhances the hands-on experience but might not be ideal for those looking to quickly reload large batches of ammunition.

The Lee Precision 90240 .270 Winchester Classic Loader is an excellent starter kit for those venturing into the realm of reloading. It provides a hands-on approach to learning the reloading process with a simple and effective toolkit.

Designed for durability and ease of use, this kit is a great investment for hunters and shooters who want to personalize their ammunition loadouts without breaking the bank.

For purchase, you can search for “Lee Precision 90240 .270 Winchester Classic Loader” on Amazon or visit other firearm equipment retailers to check for availability and pricing.

3.The 6.5 Creedmoor

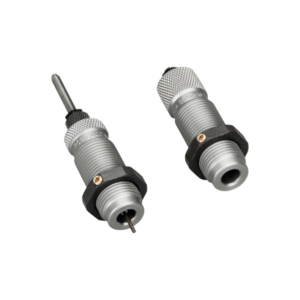
The RCBS Full-Length Die Set for the 6.5 Creedmoor cartridge is a comprehensive tool for reloaders who aim to produce high-quality, precise ammunition. Designed with precision and durability in mind, this die set is suited for both novice and experienced reloaders focusing on long-range or competition shooting.

Key Features

  • Full-Length Sizing Die: This die adjusts the entire case to SAAMI minimum cartridge dimensions. It sizes the case exterior, de-primes, and expands the neck to accept a new bullet, making it ready for reloading.
  • Bullet Seating Die: Accompanied by a built-in roll crimper, this die not only seats the bullet but also ensures it is crimped correctly, which is crucial for the consistency and performance of the ammunition.
  • Quality and Durability: Made from high-quality steel, the dies are built to last and withstand the rigors of frequent reloading sessions. This durability ensures long-term reliability and consistency in ammunition production.
  • Compatibility: These dies are compatible with most single-stage and progressive reloading presses, making them a versatile addition to any reloader’s toolkit.
  • Precision Engineered: RCBS is known for its high standards in manufacturing reloading equipment, and this die set is no exception. It includes features like vents to prevent case damage and tightly controlled headspace to maintain the integrity of the case dimensions.

Specifications

  • Material: High-quality steel construction.
  • Included Components: Full-Length Sizer Die with Expander-Decapping Unit, Seater Die with Bullet Seater Plug, shell holder, powder dipper, decapping pin, and retaining pin.
  • Package Dimensions: 5.91 x 4.45 x 1.69 inches.
  • Weight: 0.54 kilograms.
  • Model: Full-Length Die Set – Group A – Popular Rifle Cartridges.
  • Warranty: Limited Lifetime on materials and workmanship.

Considerations

  • Die Maintenance: Regular cleaning and proper maintenance of the dies are necessary to keep them in optimal condition and to ensure the quality of the reloaded rounds.
  • Learning Curve: While designed for ease of use, beginners might need some time to familiarize themselves with the full capabilities of the set.

The RCBS 6.5 Creedmoor Full-Length Die Set is an excellent choice for those looking to reload precise and reliable rounds for hunting or competitive shooting. With its robust construction and thoughtful design, it offers everything needed to start or enhance your reloading experience. Whether you are a seasoned reloader or just beginning, this set provides the tools necessary for producing top-quality ammunition in the popular 6.5 Creedmoor caliber.

To find this product, search for “RCBS 6.5 Creedmoor Full-Length Die Set” on retailers like Amazon or directly through hunting and shooting supply stores for pricing and availability.

4.The Lyman 7833024 Single Caliber Ammo Checker for .308 Winchester

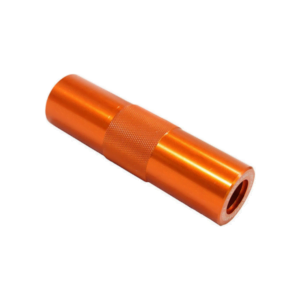
The Lyman 7833024 Single Caliber Ammo Checker is an essential tool for shooters and reloaders who want to ensure the accuracy and safety of their .308 Winchester ammunition. This simple yet effective gauge helps verify that both factory-loaded and reloaded cartridges conform to SAAMI specifications, providing peace of mind before heading to the range.

Key Features

  • Quality Assurance: The ammo checker allows you to quickly confirm the quality and consistency of .308 Winchester ammunition by verifying that each round fits within SAAMI minimum chamber tolerances.
  • Ease of Use: To use, simply drop a cartridge into the gauge. If the cartridge fits without force, it’s assured to chamber smoothly in your firearm. This immediate feedback can be critical for avoiding malfunctions due to improperly sized ammo.
  • Durable Construction: Machined from solid 6061 T6 aircraft-grade aluminum, the Lyman Ammo Checker is built to withstand regular use without suffering from wear and tear. Its robust construction ensures long-term reliability.
  • High Visibility: Anodized in bright orange, the checker is easily visible on a cluttered reloading bench, reducing the risk of it being misplaced or overlooked.

Specifications

  • Caliber: Specifically designed for .308 Winchester cartridges.
  • Material: 6061 T6 Aircraft-grade aluminum.
  • Weight: Approximately 0.5 pounds.
  • Dimensions: The checker measures 8 x 2 x 2 inches, while the package dimensions are 6.77 x 1.69 x 1.34 inches, with a total package weight of 0.11 kilograms.

Considerations

  • Single Caliber Limitation: As a single caliber tool, this checker is only suitable for .308 Winchester. If you work with multiple calibers, additional checkers will be necessary.
  • No Moving Parts: The simplicity of the tool means no batteries or moving parts, minimizing anything that could break or fail, but also lacking the functionality of more complex measuring instruments.

The Lyman 7833024 Single Caliber Ammo Checker for .308 Winchester is a practical and valuable tool for any shooter or reloader. It combines straightforward functionality with durable construction to provide a reliable means of ensuring ammunition safety and performance.

5.TACFUN 7MM Remington Mag. Cartridge Red Laser Bore Sighter

The TACFUN 7MM Remington Mag. Cartridge Red Laser Bore Sighter is a specialized tool designed for hunters and shooters to quickly and accurately align the sights or scope of their rifle with the firearm’s barrel. This device is particularly useful for those who use the 7MM Remington Magnum, a popular choice for hunting big game.
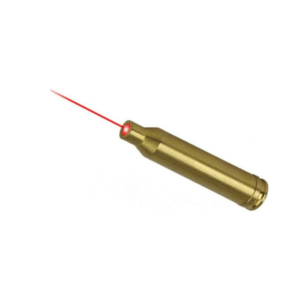
Key Features

  • Precision Alignment: The bore sighter emits a red laser beam from the muzzle, providing a straightforward method for sighting in your rifle without the need to fire ammunition. This can significantly save on time and costs associated with live firing.
  • Material and Build: Crafted from durable brass, the bore sighter is designed to withstand the typical wear and tear of use in the field or at the range.
  • Compatibility: Despite an unusual description of compatibility with devices like iPads and iPods, this feature seems to be a mislisting. Typically, laser bore sighters do not interact with such devices and are solely used for firearm alignment.
  • Mounting: Designed to fit in the rifle chamber, not needing external mounts, but the product listing mentions a Picatinny mount type, which could indicate compatibility with additional tools or accessories for sighting purposes.
  • Portable and Easy to Use: With compact dimensions of 3 x 1 x 1 inches and a lightweight design (package weight of 0.05 kilograms), it is easy to transport and use anywhere.

Specifications

  • Objective Lens Diameter: 7 millimeters.
  • Sport Type: Hunting and Airsoft, indicating its utility in both real firearm practice and training scenarios in simulated environments.
  • Night Vision: Does not include night vision capabilities, focusing solely on daylight or well-lit use.
  • Package Dimensions: 5.35 x 3.15 x 0.63 inches.

Considerations

  • Battery Usage: Like most laser devices, it likely requires batteries, though this is not specified. Users should be prepared for additional maintenance like battery replacement.
  • Accuracy: While bore sighters provide a good initial alignment, fine adjustments should always be made with live firing to ensure precision under actual conditions.

The TACFUN 7MM Remington Mag. Cartridge Red Laser Bore Sighter is an efficient and practical tool for hunters and shooters looking to set up their rifles for accuracy.

Its easy-to-use design and durable construction make it a handy accessory for routine sighting checks and initial scope setups. This tool is invaluable for ensuring your firearm is accurately aligned, saving time and ammunition.

Choosing the Right Cartridge for You

Selecting the right cartridge involves considering your personal hunting style, the typical distance at which you’ll be shooting, and your comfort with recoil. Each hunter has unique preferences, and experimenting with different cartridges can help determine the best fit for your specific needs.

Conclusion

choosing the right cartridge for antelope hunting is not just about power; it’s about precision, effective range, and suitability to the terrain and typical engagement distances.

The 6.5 Creedmoor, .270 Winchester, .300 Winchester Magnum, .308 Winchester, and the 7mm Remington Magnum each offer unique advantages that cater to various hunting styles and preferences.

Whether you prioritize flat trajectory, minimal recoil, or stopping power, one of these cartridges is likely to meet your needs. Ultimately, the best cartridge is one that aligns with your personal hunting approach and ensures a humane, clean harvest of the animal.

With the right preparation and understanding of these top choices, you’re set for a successful and enjoyable antelope hunting experience.

Essential Primitive Survival Skills for the Modern Adventurer

Introduction

In a world dominated by technology, the art of primitive survival skills remains a vital discipline for outdoor enthusiasts and anyone interested in reconnecting with nature. These skills, which have been used by humans for millennia, not only prepare you for unexpected situations but also deepen your understanding of the natural world. Here’s a guide to some fundamental primitive survival skills that everyone should know.

1. Building a Shelter

1.1 Importance of Shelter

  • Protection from Elements: A well-built shelter can protect you from wind, rain, and extreme temperatures, which is crucial for survival.

1.2 Types of Shelters

  • Lean-to Shelter: Easy to construct with branches and foliage; it provides good protection against wind and rain.
  • Debris Hut: Made from leaves, branches, and other natural debris; excellent insulation and waterproofing.

2. Creating Fire

2.1 Methods for Starting Fire

  • Friction-based Fire Making: Using tools like the bow drill or hand drill to generate heat through friction, igniting tinder.
  • Flint and Steel: Striking flint against steel to create sparks that ignite a tinder bundle.

2.2 Fire Maintenance

  • Sustaining Fire: Once ignited, gradually add larger pieces of wood to maintain and control the fire. The fire provides warmth, a means to cook food, purify water, and signal for help.

3. Finding and Purifying Water

3.1 Locating Water Sources

  • Natural Collection: Look for streams, rivers, or collect dew and rainwater. In arid areas, understanding the landscape can lead to hidden sources of water.

3.2 Water Purification

  • Boiling: The most reliable method to purify water. Use fire to boil water for at least one minute to kill harmful pathogens.
  • Natural Filters: Use sand, charcoal, and stones to create a makeshift filter to remove debris before boiling.

4. Foraging for Food

4.1 Edible Plants

  • Safe Foraging: Learn to identify edible plants and berries. Avoid plants with milky sap, thorns, or fine hairs, which are often indicators of toxicity.

4.2 Hunting and Trapping

  • Primitive Techniques: Construct simple snares or traps to catch small animals. Understanding animal tracks and behavior is crucial for successful trapping.

5. Navigation Skills

5.1 Using Natural Indicators

  • Sun and Stars: The sun rises in the east and sets in the west, which can guide your direction during the day. Stars, especially the North Star, are useful at night.

5.2 Making Improvised Compasses

  • Shadow Stick Method: Place a stick in the ground and mark the end of its shadow with a stone; this will give you a rough east-west line.

6. Tool Crafting

6.1 Making Tools from Nature

  • Stone Tools: Flintknapping to create cutting tools or weapons.
  • Wood Tools: Carving wood to make spears or digging tools.

7. Signaling for Help

7.1 Visual Signals

  • Smoke by Day: Create a signal fire using green vegetation to produce smoke.
  • Light at Night: Use reflections or make a fire to signal your location.

7.2 Audio Signals

  • Sound: Use whistles, bang rocks together, or use branches against trees to create noise that can attract rescuers.

8. Knot Tying

8.1 Essential Knots

  • Versatile Knots for Survival: Master basic knots like the bowline (for creating a loop that won’t tighten), the square knot (for joining two ropes), and the taut-line hitch (adjustable knot for securing shelters).

8.2 Practical Applications

  • Use in Shelter Building and More: Use your knot skills to construct sturdy shelters, set up traps, or secure gear. Effective knot tying increases the functionality and reliability of your handmade tools and structures.

9. First Aid Skills

9.1 Natural Remedies

  • Using Local Resources: Learn about medicinal plants that can help treat minor wounds, soothe irritations, or relieve pain. Common examples include willow bark for pain relief (natural aspirin) and aloe vera for burns.

9.2 Emergency Treatments

  • Handling Injuries: Know basic first aid techniques such as how to treat sprains, fractures, cuts, and burns. Understanding how to stabilize injuries can prevent complications until professional medical help can be reached.

10. Building Insulating Bedding

10.1 Creating a Warm Bed

  • Using Natural Materials: Collect leaves, grass, or pine needles to make a thick, insulated bedding that keeps you off the cold ground. Layering these materials properly can significantly increase warmth and comfort during the night.

10.2 Importance of Bedding

  • Prevention of Hypothermia: Staying warm is crucial in a survival situation, especially at night when temperatures drop. Proper bedding is essential to conserve body heat.

11. Mental Resilience

11.1 Staying Positive

  • Psychological Survival: The ability to stay calm and maintain a positive outlook is crucial in survival situations. Mental stress can impact physical stamina and decision-making.

11.2 Stress Management Techniques

  • Meditation and Mindfulness: Simple techniques such as deep breathing, meditation, or setting small, manageable goals can help maintain mental clarity and reduce panic.

12. Leaving No Trace

12.1 Environmental Consideration

  • Minimizing Impact: Practice the principles of Leave No Trace to ensure your survival activities do not harm the natural environment. This includes properly disposing of waste, minimizing fire impact, and disturbing the ground as little as possible.

12.2 Sustainability Practices

  • Resource Conservation: Use resources sparingly. Overusing resources like firewood or edible plants can lead to ecological imbalance. Always consider the sustainability of your actions.

Conclusion

Mastering these primitive survival skills can significantly increase your self-reliance and safety in the wilderness. They encourage a deeper connection with nature, enhancing your outdoor experiences and preparing you for unforeseen challenges. Remember, practice is key to proficiency, so regularly hone these skills during your outdoor adventures.

Frequently Asked Questions (FAQs)

How do I practice these skills safely?

  • Start in a controlled environment, possibly with an experienced guide. Gradually increase the complexity of your survival scenarios as you gain confidence.

What are the first skills I should learn?

  • Focus on fire making and shelter building as these will have the most immediate impacts on your survival in most situations.
  • Check local regulations. Some activities, like foraging and setting traps, may be restricted in certain areas to protect the ecosystem or due to safety concerns.

How do I practice these skills safely?

  • Start in a controlled environment, possibly with an experienced guide. Gradually increase the complexity of your survival scenarios as you gain confidence.

What are the first skills I should learn?

  • Focus on fire making and shelter building as these will have the most immediate impacts on your survival in most situations.

Are these skills legal to practice in all wilderness areas?

  • Check local regulations. Some activities, like foraging and setting traps, may be restricted in certain areas to protect the ecosystem or due to safety concerns.

How to Sharpen a Knife With a Stone: A Safe Step-by-Step Guide

To sharpen a knife with a stone, soak or wet the stone if its instructions require it, hold the knife at a steady angle, make controlled strokes from heel to tip, raise a light burr on one side, repeat on the other side, then refine the edge with a finer grit and test it safely. The goal is not speed. The goal is a consistent angle, light pressure, and a clean edge you can maintain without grinding away more steel than needed.

Table of contents

Quick Sharpening Overview

A basic sharpening session has four parts: prepare the stone, keep the knife angle steady, sharpen until you can feel a burr, and refine the edge. Most outdoor, kitchen, and field knives can be maintained well with a medium stone and a finer finishing stone. Very dull or damaged knives may need a coarse stone first, but everyday touch-ups usually do not.

Knife sharpening is a skill, so expect the first few sessions to feel slow. Work carefully and keep your fingers clear of the edge. For general background on sharpening stones and abrasive types, the sharpening stone overview is a useful neutral reference.

Choose the Right Stone and Grit

Sharpening stones remove metal with abrasive particles. Coarser stones remove steel faster and repair dull edges. Medium stones rebuild a working edge. Fine stones polish and refine that edge. You do not need every grit to start; a medium/fine combination stone is enough for most beginners.

Coarse stone

Use a coarse stone only when the knife is very dull, chipped, rolled, or needs a new bevel. Coarse stones remove steel quickly, so use light pressure and check your progress often.

Medium stone

A medium stone is the main workhorse for restoring a practical edge. It is usually the best starting point for a knife that cuts poorly but is not damaged.

Fine stone

A fine stone refines scratch marks and makes the edge feel smoother. It is useful after the medium stone has already formed a clean edge. Do not expect a fine stone to fix a badly dull knife quickly.

Set Up Safely Before Sharpening

Place the stone on a stable surface where it cannot slide. A stone holder, damp towel, rubber mat, or non-slip base helps. Keep the work area clear, dry your hands when needed, and turn the knife away from your body during each stroke. If you are sharpening hunting or camping knives after a trip, clean dirt and grit from the blade first so you are not dragging debris across the stone.

Follow the stone maker’s instructions for water, oil, or dry use. Some water stones need soaking. Some splash-and-go stones need only surface water. Oil stones use honing oil. Diamond plates are often used with water or dry depending on the maker. Mixing the wrong lubricant with the wrong stone can clog the surface or make cleanup harder.

Find and Hold the Sharpening Angle

The sharpening angle is the angle between the blade and the stone. Many general-purpose knives fall somewhere around a moderate angle rather than extremely thin or extremely thick. The exact number matters less than consistency. If you keep changing the angle, the edge becomes rounded and dull instead of clean and sharp.

Use the existing bevel as your guide

Look closely at the current edge bevel. Try to match that angle unless you intentionally want to reprofile the knife. A marker trick can help: color the bevel with a permanent marker, make a few light passes, and see where the stone removes the ink. If ink remains at the shoulder or edge, adjust the angle slightly.

Keep pressure light

Heavy pressure is one of the easiest ways to damage the edge or lose control. Use enough pressure to make contact with the stone, then lighten up as the edge improves. Let the abrasive do the work.

Sharpen One Side, Then the Other

Start with the heel of the blade near one end of the stone. Move the knife across the stone so the contact point travels from heel to tip. The motion can be edge-leading or edge-trailing depending on your habit and stone type, but it should be controlled and repeatable. Keep the angle steady through the curve near the tip.

Do several strokes on one side, then check your progress. Repeat until you raise a small burr along the opposite side of the edge. Then sharpen the other side until the burr flips. Some sharpeners alternate sides more often, and that can work too. The important part is even work on both sides.

Use the Burr as Feedback

A burr is a tiny fold of metal that forms when you have sharpened all the way to the edge. It can feel like a slight rough wire when you gently check from the spine toward the edge. Do not run your finger along the edge. Check carefully and slowly.

The burr tells you the stone has reached the edge. If you never raise a burr, you may be holding the angle too low, using too fine a stone for the damage, or not sharpening long enough. Once you have a burr on both sides, move to lighter pressure and finer refinement.

Refine, Deburr, and Test the Edge

After the main sharpening work, use lighter strokes to reduce the burr. Move to a finer stone if you have one, then alternate sides with gentle pressure. A leather strop can help remove the last trace of burr, but stropping is not a substitute for proper sharpening on the stone.

Test the edge safely. Slice paper, shave a thin curl from a scrap of wood, or cut food prep material if it is a kitchen knife. Avoid dramatic tests that put fingers near the edge. For field knives, a clean controlled cut is more useful than a mirror polish. If you use knives around camp or hunting gear, pair sharpening with broader field-care habits like the ones in our bushcraft skills guide.

Common Mistakes to Avoid

  • Using a fine stone when the knife needs a medium or coarse stone.
  • Changing the angle every few strokes.
  • Pressing too hard and grinding away more steel than needed.
  • Skipping the burr check and guessing whether the edge is formed.
  • Letting the stone slide around on the table.
  • Testing sharpness with unsafe finger movements.
  • Putting a wet or dirty stone away without cleaning and drying it properly.

Knife sharpening is also different from general tool maintenance. If you are preparing for a hunting or camping trip, sharpen at home first instead of learning under poor light at camp. That leaves more time for other preparation, like checking gear and reviewing your hunting trip kit.

Clean and Store the Stone

After sharpening, rinse or wipe the stone according to its instructions and remove metal swarf from the surface. Let water stones dry fully before storage so they do not develop problems in a sealed container. Keep oil stones from collecting grit and dust. Flatten water stones when they dish out, because a hollow stone makes it harder to hold a clean angle.

Clean the knife too. Dry the blade, wipe away abrasive residue, and protect carbon steel from rust if needed. A sharp knife stored carelessly can still become dull or unsafe.

Frequently Asked Questions

Do I need to soak every sharpening stone?

No. Some water stones need soaking, some need only a splash of water, oil stones use oil, and diamond plates often have their own instructions. Follow the stone maker’s directions.

What grit should a beginner use?

A medium/fine combination stone is the easiest starting point for most beginners. Use the medium side to build the edge and the fine side to refine it. Add a coarse stone later if you repair very dull or damaged blades.

How do I know when the knife is sharp enough?

The knife should cut cleanly with controlled pressure. Paper slicing, light wood shaving, or normal food prep tests are safer and more useful than touching the edge directly.

Can I ruin a knife on a sharpening stone?

You can remove too much steel, round the edge, scratch the blade, or create an uneven bevel if you use too much pressure or an inconsistent angle. Work slowly, use light pressure, and practice on a less expensive knife first.

Final Takeaway

Sharpening a knife with a stone is mostly about consistency. Choose a suitable grit, stabilize the stone, match the existing bevel, use light controlled strokes, form a burr, refine the edge, and test it safely. Once you learn the feel, a sharpening stone becomes one of the most reliable ways to maintain hunting, camping, kitchen, and utility knives without depending on powered sharpeners or guesswork.

The Art of Knife Throwing: A Beginner’s Guide

Introduction

Knife throwing is a skill that combines precision, control, and a bit of flair. Often seen in circuses and action movies, it’s also a popular hobby for those interested in traditional weaponry and target sports. This guide will introduce the basics of knife throwing, helping beginners understand the fundamentals and safety precautions needed to start practicing this unique art form.


1. Choosing the Right Knife

1.1 Types of Throwing Knives

  • Weight and Balance: A good throwing knife should be heavy enough to ensure a stable flight and balanced for consistent performance. Avoid knives with sharp handles; they should be dull to prevent injury when gripped.

1.2 Length and Material

  • Optimal Size: Throwing knives typically range from 8 to 14 inches. A longer knife rotates more slowly, making it easier to control. Stainless steel is a common choice for its durability and weight.

2. Basic Grips

2.1 Hammer Grip

  • Simple and Stable: Hold the knife’s handle as you would a hammer, with your thumb along the top of the handle and fingers wrapped around it. This grip is straightforward and suitable for beginners.

2.2 Pinch Grip

  • For More Control: Pinch the top of the blade or handle between your thumb and forefinger. This grip allows for more precise throws and is often used with lighter knives.

3. Throwing Techniques

3.1 The Basic Stance

  • Foot Position: Stand with your non-dominant foot forward, about shoulder-width apart. The dominant foot should be back, providing stability and balance as you throw.

3.2 The Throw

  • Motion and Release: Start with the knife at your side or raised above your shoulder, depending on your comfort. Bring the knife forward in a smooth motion. Release the knife when your hand is pointing directly at the target. The key is to release the knife without any wrist flick to maintain the knife’s trajectory and rotation.

3.3 Managing the Rotation

  • Distance and Spin: The distance from the target will dictate how much the knife rotates before hitting. Generally, one full rotation happens for every 12 to 16 feet from the target. Beginners should start close (about 5-6 feet) to practice half or no-spin techniques before moving to longer distances that require full rotation.

4. Setting Up Your Practice Area

4.1 Choosing a Target

  • Safe and Durable: Use a soft wood target such as pine or cork, which helps the knife to stick upon impact and minimizes bounce-back. Avoid hard surfaces that can damage your knives.

4.2 Safety Measures

  • Clear and Secure Area: Ensure that your throwing area is clear of other people and pets. Have a solid backdrop like a wooden fence or a specially designed knife throwing board that will stop missed throws.

5. Training and Consistency

5.1 Regular Practice

  • Develop Skill Over Time: Like any skill, knife throwing requires regular practice. Dedicate time each week to practice your grip, stance, and throw to improve accuracy and precision.

5.2 Learn from Each Throw

  • Analyze and Adjust: Pay attention to how each knife lands. If it sticks handle-first, adjust your distance or throwing force. If it hits tip-first but doesn’t stick, it may be rotating too much or too little.

6. Advanced Techniques

6.1 Multiple Knife Throws

  • Increased Difficulty: As you become more comfortable with basic throws, you can start practicing with multiple knives, learning to handle and throw several knives in quick succession.

6.2 No-Spin Throwing

  • Precision Technique: No-spin techniques, where the knife flies straight without rotating, require precise control and are considered an advanced skill. Mastery of this technique can significantly improve accuracy at various distances.

7. Joining a Community

7.1 Clubs and Competitions

  • Connect with Others: Consider joining a knife throwing club or participating in competitions. This can provide valuable feedback from experienced throwers and help you refine your technique in a supportive environment.

7.2 Online Resources

8. Psychological Aspects of Knife Throwing

8.1 Mental Focus and Concentration

  • Building Concentration: Successful knife throwing requires a high level of mental focus. Practicing mindfulness and concentration exercises can enhance your ability to stay calm and focused during throwing sessions, leading to more accurate throws.

8.2 Handling Pressure

  • Competitive Scenarios: Whether you’re throwing in a competition or as a form of entertainment for others, learning to manage pressure is crucial. Techniques such as visualization, breathing exercises, and routine establishment can help maintain performance under stress.

9. Physical Conditioning for Knife Throwers

9.1 Strengthening Exercises

  • Core and Arm Strength: Develop core and upper body strength through exercises like planks, push-ups, and dumbbell rows. Stronger muscles contribute to more powerful and stable throws.

9.2 Flexibility and Mobility

  • Enhancing Range of Motion: Flexibility in the shoulders, arms, and wrists is vital for knife throwers. Incorporate stretching into your routine to improve your range of motion and prevent injuries related to repetitive motion.

10. Equipment Maintenance and Upgrades

10.1 Regular Knife Maintenance

  • Keeping Knives in Top Condition: Regularly check your knives for signs of wear such as chips or bends. Keep them clean and sharp, as a well-maintained knife performs more reliably.

10.2 Upgrading Equipment

  • When to Upgrade: As you develop your skills, consider upgrading your equipment. Higher quality knives and more sophisticated target setups can provide better feedback and improve practice sessions.

11. Building a Practice Routine

11.1 Structured Practice Sessions

  • Routine Development: Create a structured practice routine that includes a warm-up, focused practice on specific skills, and cool-down. A consistent routine helps develop muscle memory and improve throwing accuracy.

11.2 Tracking Progress

  • Maintaining a Log: Keep a detailed log of your practice sessions, including what you practiced, the outcomes, and any adjustments you made. This log will help you track your progress over time and identify areas that need improvement.

12. Expanding Your Skills

12.1 Exploring Related Disciplines

  • Cross-Training: Engage in related disciplines like archery or axe throwing to enhance your understanding of projectile sports. Cross-training can introduce new techniques and improve your overall throwing skills.

12.2 Creative Throwing Challenges

  • Innovative Practice: Set up creative challenges that push your skills to new levels. This could include throwing at moving targets, participating in outdoor throwing events, or even setting up thematic targets that require precise hitting.

Conclusion

Knife throwing is a rewarding skill that offers both a physical and mental challenge. By understanding the basics of knife selection, grip, stance, and throw, you can begin practicing this impressive art safely and effectively. Remember to practice regularly, stay patient with your progress, and always prioritize safety in your throwing activities.


Frequently Asked Questions (FAQs)

Is knife throwing dangerous?

  • Yes, like any sport involving weapons, knife throwing can be dangerous if not practiced with care and proper precautions. Always ensure safety for yourself and others around your practice area.

Can knife throwing be self-taught?

  • Many throwers learn on their own through trial and error, supplemented by instructional books, videos, and community advice. However, if possible, learning from an experienced thrower can dramatically improve your technique and safety practices.

How do I find a knife throwing coach?

  • Look for local sports clubs or check online for knife throwing communities that offer coaching. Many experienced throwers are also active on social media platforms where they share tips and may offer personalized coaching.

What are some common beginner mistakes in knife throwing?

  • Beginners often make the mistake of throwing too hard, which can disrupt the knife’s balance and rotation. Focus on technique rather than force, and be patient with your learning curve.

How can I make knife throwing a regular part of my routine?

  • Schedule regular practice times, set achievable goals, and make your practice sessions enjoyable by varying routines and challenges. Staying consistent and keeping the practice fun are key to making knife throwing a lasting hobby.

Effective Blister Management: How to Treat Blisters for Outdoor Enthusiasts

Introduction

Blisters are a common nuisance for hikers, runners, and anyone who is frequently on their feet. They are typically caused by friction and can become painful obstacles if not managed properly. Knowing how to treat and prevent blisters is essential for maintaining foot health and comfort during any outdoor activity. This guide provides step-by-step instructions on how to effectively manage blisters.


1. Identifying Blisters

1.1 Recognize Early Signs

  • Appearance and Sensation: Blisters are small pockets of fluid that form under the skin, often clear in appearance. They can feel like a painful swelling or bubble on the skin.

2. Initial Treatment

2.1 Clean and Assess

  • Sanitation: Wash your hands and the blistered area with soap and water or an antiseptic wipe. This prevents infection and prepares the area for further treatment.

2.2 Protect the Blister

  • Avoid Popping: Whenever possible, keep the blister intact to naturally protect against bacteria and aid healing. Cover it with a sterile blister bandage or gauze pad.

3. Advanced Care for Painful or Burst Blisters

3.1 Draining a Large or Painful Blister

  • Sterile Procedure: If a blister is too painful to leave intact or has burst, it may be necessary to drain it. Sterilize a needle with rubbing alcohol, gently pierce the edge of the blister, and press the fluid out. Do not remove the overlying skin, as it protects the raw skin underneath.

3.2 Apply Antibiotic Ointment

  • Infection Prevention: After draining, apply a small amount of antibiotic ointment to reduce the risk of infection. This step is crucial for keeping the area clean.

4. Bandaging Techniques

4.1 Use the Right Dressing

  • Specialized Products: Use a hydrocolloid dressing specifically designed for blisters. These dressings provide a moist environment that promotes healing and protects from friction.

4.2 Secure the Bandage

  • Firm Placement: Ensure the bandage fully covers the blister and extends beyond its edges. Secure it in place with medical tape if necessary.

5. Footwear and Activity Adjustments

5.1 Assess and Adjust Footwear

  • Proper Fit: Ill-fitting shoes often cause blisters. Make sure your footwear is not too tight or too loose. Consider using specialized insoles or adjustments to reduce friction.

5.2 Modify Activities

  • Rest and Recovery: If a blister is particularly bothersome, consider adjusting your activities to give it time to heal. Avoid excessive walking or running on a severe blister.

6. Monitoring and Follow-Up

6.1 Watch for Signs of Infection

  • Alert to Changes: Monitor the blister for signs of infection, which include increased pain, redness, swelling, or pus. If you notice these signs, consult a healthcare professional.

6.2 Change Bandages Regularly

  • Maintain Cleanliness: Change the dressing daily or anytime it becomes wet or dirty. This maintains cleanliness and promotes healing.

7. Reducing Friction

7.1 Use Anti-Friction Products

  • Skin Protection: Products such as anti-friction sticks, creams, or powders can be applied to high-risk areas to reduce rubbing. These are particularly useful for long-distance runners or hikers.

7.2 Wearing the Right Socks

  • Moisture-Wicking and Fit: Choose socks that are well-fitted and made from moisture-wicking materials to keep feet dry and reduce the risk of blister formation. Avoid cotton, which retains moisture and increases friction.

8. Strengthening Skin

8.1 Gradual Conditioning

  • Toughening the Skin: Gradually increase activity levels to help toughen the skin on your feet. This natural process can make the skin less susceptible to blisters over time.

8.2 Hydration and Nutrition

  • Skin Elasticity: Maintain good hydration and a balanced diet rich in vitamins and minerals that promote skin health. Healthy, elastic skin is less prone to blistering.

9. Specialty Footwear Adjustments

9.1 Custom Orthotics

  • Individualized Support: For those with specific foot shape issues that predispose them to blisters, custom orthotics prescribed by a podiatrist can provide better support and reduce pressure points.

9.2 Lace Techniques

  • Optimized Fit: Experiment with different lacing techniques to better secure your footwear and eliminate points of excessive pressure or slippage, which can lead to blisters.

10. Recognizing When to Seek Professional Help

10.1 Persistent or Recurring Blisters

  • Medical Attention: If blisters repeatedly occur in the same spots, or if they don’t heal with standard home care, it may be time to consult with a healthcare provider to explore underlying causes.

10.2 Signs of Complications

  • Seeking Treatment: If you experience signs of infection or if a blister becomes extremely painful and limits your mobility, professional medical treatment is necessary to prevent further complications.

11. Practical Exercises for Foot Health

11.1 Stretching and Strengthening

  • Foot Exercises: Regular foot exercises can improve overall foot health, making your feet less prone to injuries and blisters. Toe curls, stretches, and towel grabs are simple but effective.

11.2 Balanced Foot Movements

  • Varied Terrain Walking: Regularly walking on varied terrains can naturally strengthen the feet and ankles, providing more resilience against blisters and other foot-related issues.

Conclusion

Managing blisters effectively is key to maintaining foot health and comfort during outdoor activities. By understanding how to properly treat and protect blisters, you can prevent complications and continue enjoying your adventures with minimal discomfort. Remember, proactive foot care and appropriate footwear are your best defenses against blisters.


Frequently Asked Questions (FAQs)

Can I use home remedies to treat blisters?

  • Home remedies like aloe vera or tea tree oil can soothe blistered skin, but they should not replace proper cleaning and bandaging techniques. Always prioritize keeping the blister clean and protected.

How long do blisters take to heal?

  • Most blisters heal within one to two weeks if they are managed well and kept from infection. Larger or deeper blisters may take longer and should be monitored carefully.

Should I keep a blister uncovered to let it ‘breathe’?

  • While it might seem beneficial to let a blister air out, keeping it covered with a sterile dressing is generally the best practice. This protects against infection and helps maintain an optimal healing environment.

Is it better to wear thick or thin socks for blister prevention?

  • The choice between thick and thin socks should be based on the fit of your shoes and your personal comfort preferences. Thicker socks can offer more cushioning and protection, while thinner socks may provide a closer fit and better heat management. Always ensure your socks and footwear work well together to prevent unnecessary friction.

Can walking barefoot help prevent blisters?

  • Walking barefoot can help strengthen the skin and muscles of the feet, potentially reducing the risk of blisters when you do wear shoes. However, this should be done gradually and in safe environments to avoid injuries.

You can also visit : Survival Gears for Serious Hunting Endeavors

Ascending Safely: How to Prevent Altitude Sickness

Introduction

Altitude sickness, also known as acute mountain sickness (AMS), can affect anyone ascending to high elevations too quickly. It’s a result of the body struggling to adjust to lower oxygen levels at higher altitudes. Understanding how to prevent and manage altitude sickness is crucial for anyone planning to hike, climb, or travel to elevated destinations. Here’s how you can prepare for and prevent altitude sickness during your high-altitude adventures.


1. Understand the Symptoms

1.1 Recognize Early Signs

  • Common Symptoms: Headache, nausea, dizziness, fatigue, and difficulty sleeping are early indicators of AMS. Recognizing these symptoms early can help you take immediate action to prevent worsening conditions.

2. Gradual Acclimatization

2.1 Ascend Slowly

  • Rate of Ascent: Your body needs time to adjust to the decreased oxygen levels at higher altitudes. Ascend slowly, allowing several days for acclimatization, especially above 8,000 feet (about 2,400 meters).

2.2 “Climb High, Sleep Low”

  • Daily Routine: Spend your days reaching higher altitudes but return to lower elevations to sleep. This practice helps your body adapt more effectively.

3. Stay Hydrated

3.1 Increase Fluid Intake

  • Hydration is Key: Dehydration can exacerbate symptoms of AMS. Drink plenty of water before and during your ascent. Monitor your urine color as a gauge for hydration – aim for a light straw color.

4. Monitor Your Health

4.1 Pay Attention to Your Body

  • Self-Monitoring: Listen to your body’s signals. If symptoms of altitude sickness appear, do not ascend further until they have subsided. Ignoring symptoms can lead to more severe forms of altitude sickness.

5. Medications and Supplements

5.1 Consult with a Healthcare Provider

  • Preventative Medications: Medications like Acetazolamide (Diamox) can help prevent AMS when taken before and during your ascent. Consult with a healthcare provider to discuss whether this is a suitable option for you.

5.2 Consider Supplements

  • Ginkgo Biloba: Some studies suggest that Ginkgo Biloba can help prevent altitude sickness, although evidence is mixed. Always consult with a healthcare provider before taking any supplements.

6. Nutritional Considerations

6.1 Carbohydrate-Rich Diet

  • Energy Sources: Consuming a diet high in carbohydrates can provide energy and help reduce symptoms of altitude sickness. Carbohydrates are easier for the body to metabolize at high altitudes.

7. Physical Preparation

7.1 Pre-Ascent Fitness

  • Conditioning: Being in good physical condition can help your body cope with the stresses of high altitudes. Focus on cardiovascular fitness before your trip.

8. Oxygen Supplementation

8.1 Supplemental Oxygen

  • In Severe Cases: For extreme altitudes, carrying supplemental oxygen can be life-saving. This is more common in high-altitude mountaineering.

9. Know When to Descend

9.1 Safety First

  • Immediate Action: If symptoms of altitude sickness persist or worsen, the best and most effective treatment is to descend to a lower altitude as soon as possible. Delaying descent can lead to serious health risks.

10. Avoid Alcohol and Smoking

10.1 Impact on Altitude Sickness

  • Reducing Risk Factors: Alcohol and tobacco can impair your body’s ability to acclimatize. Alcohol dehydrates the body and can worsen the symptoms of altitude sickness. Smoking affects oxygenation, making acclimatization more challenging. Avoid or limit these substances before and during your ascent to high altitudes.

11. Educate Yourself on High Altitude Pulmonary Edema (HAPE) and High Altitude Cerebral Edema (HACE)

11.1 Recognizing Severe Conditions

  • Knowledge is Power: HAPE and HACE are severe forms of altitude sickness that can be life-threatening. Educate yourself on the symptoms, which include severe shortness of breath, confusion, and inability to walk straight, among others. Recognizing these conditions early can be crucial for survival.

11.2 Immediate Descent

  • Critical Response: If HAPE or HACE symptoms are suspected, immediate descent to a lower altitude is necessary. Delaying descent can have fatal consequences. Seek medical attention as soon as possible.

12. Use of Trekking Poles

12.1 Benefits During Ascent

  • Stability and Support: Trekking poles can provide stability and support during your ascent, which can be particularly beneficial in rough terrain. They help distribute the effort more evenly, reducing fatigue and potentially aiding in your acclimatization process.

13. Sleeping at High Altitudes

13.1 Managing Sleep Disturbances

  • Improving Rest: Sleeping at high altitudes can be difficult due to the decreased oxygen levels. Practice good sleep hygiene by establishing a routine, staying warm, and perhaps using breathing exercises to improve oxygenation and sleep quality.

14. Stay Informed on Weather Conditions

14.1 Weather at High Altitudes

  • Preparation and Adaptation: The weather at high altitudes can change rapidly, presenting additional challenges. Stay informed on the weather forecast for your destination and be prepared to adapt your plans. Severe weather can increase the risk of altitude sickness by forcing rapid ascents or descents.

15. Join a Guided Expedition

15.1 Benefits of Experienced Guides

  • Expertise and Safety: Especially for those new to high-altitude adventures, joining a guided expedition can offer the benefit of experienced guides who are familiar with the terrain, weather, and symptoms of altitude sickness. They can provide invaluable advice on acclimatization strategies and safety precautions.

Conclusion

Preventing altitude sickness is about planning, gradual acclimatization, and listening to your body. By taking the right precautions and preparing adequately, you can enjoy the beauty and challenge of high-altitude environments safely. Remember, the mountain will always be there another day; prioritize your health and safety above summit goals.


Frequently Asked Questions (FAQs)

Can I fly into a high-altitude city and avoid altitude sickness?

  • Flying directly into high-altitude areas can increase the risk of AMS since you have less time to acclimatize. If possible, spend a few days at a moderately high elevation before proceeding higher.

Does fitness level affect susceptibility to altitude sickness?

  • Fitness level does not necessarily correlate with susceptibility to AMS. Even highly fit individuals can experience altitude sickness if they ascend too quickly or fail to acclimatize properly.

How quickly can altitude sickness develop?

  • Symptoms of AMS can develop within 6 to 24 hours of reaching a higher altitude, which is why it’s crucial to ascend slowly and allow time for acclimatization.

Can children be more susceptible to altitude sickness?

  • Children can be just as susceptible to altitude sickness as adults, and they may not always communicate their symptoms effectively. Watch for signs of altitude sickness in young ones and ascend at a pace comfortable for them, ensuring they stay well-hydrated and rested.

Is it possible to acclimatize at home before traveling to high altitudes?

  • While pre-acclimatization options are limited, some individuals use altitude training masks or spend time in simulated altitude environments (altitude training facilities) to prepare their bodies. However, the best acclimatization occurs naturally and gradually at the actual altitude.

Surviving a Bear Attack: Essential Strategies and Precautions

Introduction

Encountering a bear in the wild can be a harrowing experience. While bear attacks are rare, understanding how to react can significantly increase your chances of survival and minimize injury. This guide outlines crucial strategies for surviving a bear encounter, whether you’re hiking, camping, or simply find yourself in bear territory.


1. Prevention and Preparedness

1.1 Awareness of Bear Behavior

  • Study Bear Habits: Knowing the types of bears in the area (grizzly, black, or polar) and understanding their behavior can inform your response in an encounter.

1.2 Make Noise While Hiking

  • Avoid Surprise Encounters: Bears generally avoid humans, so making noise—talking, clapping, or wearing bear bells—can prevent startling a bear.

1.3 Store Food Properly

  • Secure Campsite Practices: Use bear-proof containers and hang food away from your campsite to avoid attracting bears with food odors.

2. Identifying Bear Behavior

2.1 Defensive Behavior

  • Bear Feels Threatened: A defensive bear might make bluff charges, clack its teeth, huff, or lay its ears back. It’s reacting to what it perceives as a threat to itself, its cubs, or its food.

2.2 Predatory Behavior

  • Stalking or Focused Attention: This behavior is less common but more dangerous. The bear sees you as prey and may approach silently and intently.

3. If You Encounter a Bear

3.1 Stay Calm and Assess the Situation

  • Do Not Run: Running can trigger a bear’s chase instinct. Speak calmly and firmly, wave your arms slowly to appear larger, and back away slowly, keeping your eye on the bear without making direct eye contact.

3.2 Defensive Strategies

  • Play Dead: If a grizzly bear attacks and you have no bear spray or means of escape, lie flat on your stomach with your hands clasped behind your neck, spread your legs to make it harder for the bear to turn you over. Remain still until the bear leaves the area.

3.3 Fighting Back

  • Predatory Attack or Black Bear Encounter: If a bear continues to stalk you or attacks and you’re sure it’s predatory or it’s a black bear, fight back vigorously. Aim for the bear’s face and muzzle with anything you have.

4. Using Bear Spray

4.1 Effective Deterrent

  • Carry and Know How to Use: Bear spray has proven to be an effective deterrent in bear encounters. Ensure it’s easily accessible and practice drawing and aiming it.

4.2 Deployment Distance

  • Follow Instructions: Bear spray is most effective when used at the recommended distance (usually 20-30 feet). Spray in a brief burst when the bear is within range.

5. After an Encounter

5.1 Report the Encounter

  • Inform Authorities: Notify park rangers or local wildlife authorities about the encounter, especially if the bear displayed aggressive or predatory behavior.

5.2 Seek Medical Attention

  • Even Minor Injuries: If you’re injured, seek medical attention as soon as possible. Bear saliva can introduce harmful bacteria into wounds.

6. Camping in Bear Country

6.1 Choosing a Safe Campsite

  • Distance from Trails and Water: Set up camp at least 200 yards (183 meters) away from trails and water sources to reduce the likelihood of a bear wandering into your camp.

6.2 Cooking and Eating Practices

  • Separate Areas: Cook and eat in an area downwind and away from your sleeping area. This helps keep food odors away from where you’ll be spending the night.

6.3 Handling Toiletries and Other Scented Items

  • Similar to Food: Store toiletries, lotions, and any other scented items as you would food, using bear-proof containers or hanging them away from your camp.

7. When Bears Enter Camp

7.1 Making Yourself Known

  • Calm Presence: If a bear enters your camp, try to make your presence known by talking in a calm, firm tone. Avoid surprising the bear or making sudden movements.

7.2 Securing Safety

  • Find a Safe Position: If the bear continues to approach, find a safer position, such as getting inside a vehicle if available. Do not corner yourself or the bear.

8. Understanding Bear Enclosures

8.1 Bear Lockers and Canisters

  • Mandatory in Some Areas: In certain parks and wilderness areas, the use of bear lockers or bear-resistant food canisters is mandatory to prevent bears from accessing human food.

8.2 Proper Use and Storage

  • Follow Guidelines: Always use bear lockers and canisters according to the guidelines provided by park authorities or manufacturers. This usually involves sealing food and scented items inside and placing the container a safe distance from your tent.

9. Educating Yourself and Others

9.1 Learning from Experts

  • Wildlife Education: Take advantage of educational programs offered by parks and wildlife organizations to learn more about bears and how to coexist safely with them in the wilderness.

9.2 Sharing Knowledge

  • Community Safety: Share your knowledge about bear safety and behavior with fellow hikers, campers, and anyone planning to spend time in bear country. Community awareness can significantly reduce the number of dangerous encounters.

10. Respecting Wildlife

10.1 Ethical Wildlife Viewing

  • Safe Distances: Always observe bears from a safe distance using binoculars or a zoom lens. Getting too close can stress the animals and lead to aggressive behavior.

10.2 Preserving Natural Behaviors

  • Minimal Impact: Do your best to have as little impact on bears’ natural behaviors as possible. Feeding bears or enticing them with food for photos or viewing is dangerous and unethical.

Conclusion

While the prospect of a bear encounter can be daunting, preparedness and knowledge can significantly improve your safety and outcomes. Remember, every bear encounter is unique; assess the situation carefully and use the appropriate strategy to protect yourself. Prioritizing prevention, understanding bear behaviors, and knowing how to respond are your best tools for surviving a bear encounter.


Frequently Asked Questions (FAQs) About Surviving a Bear Attack

Can I use bear spray against all types of bears?

  • Yes, bear spray is effective on all bear species and is recommended as a non-lethal deterrent to protect both humans and bears.

What should I do if I see a bear from a distance?

  • If you see a bear and it hasn’t noticed you, quietly and slowly back away without drawing attention to yourself. If the bear has seen you, make yourself known and slowly back away as described, avoiding sudden movements.

How can I avoid bear encounters while hiking?

  • Aside from making noise, stay vigilant, hike in groups, and avoid dawn, dusk, or nighttime hikes when bears are more active. Always be aware of your surroundings and watch for signs of bear activity such as tracks, scat, or digging.

Is it safe to sleep in a tent in bear country?

  • Yes, it can be safe if you follow proper camping practices, such as storing food and scented items securely, choosing campsites wisely, and maintaining a clean camp. Using a tent can help mask your scent and reduce curiosity from wildlife.

What’s the most important thing to remember if I encounter a bear?

  • Stay calm and assess the situation. Determine the bear’s behavior (defensive or predatory) and respond accordingly—back away slowly if it’s defensive and prepare to fight back if it’s a predatory encounter. Always carry bear spray and know how to use it.

Igniting Flames: How to Start a Fire Without a Lighter

Introduction

Mastering the skill of starting a fire without a lighter is invaluable for outdoor enthusiasts, survivalists, and anyone keen on traditional methods. Whether you find yourself without modern tools or simply wish to connect with ancient techniques, understanding these methods can enhance your outdoor experience and survival skills. This guide explores various ways to create fire using natural and improvised materials.

1. The Friction Method

1.1 Hand Drill

  • Basics: Utilize a dry, straight stick (spindle) and a flat wooden board (fireboard). Carve a small depression in the fireboard, place the spindle in it, and roll it between your hands, moving them quickly up and down the spindle to generate heat through friction.
  • Tip: Use lightweight, dry wood like cedar or willow for both the spindle and fireboard for optimal results.

1.2 Bow Drill

  • Enhancement: A bow drill adds mechanical advantage to the hand drill technique. A curved stick (bow), with a string attached to both ends, wraps around the spindle. Moving the bow back and forth spins the spindle, reducing manual effort and increasing the heat generated.
  • Material Choice: Flexible wood for the bow and strong, non-elastic material for the string enhance efficiency.

2. Solar Power

2.1 Using a Magnifying Glass

  • Concentration of Sunlight: Direct sunlight through a magnifying glass onto tinder. The focused rays will heat the tinder until it ignites.
  • Alternative Tools: Eyeglasses, binocular lenses, or any transparent material that can focus sunlight work as substitutes.

2.2 Reflective Materials

  • Utilizing Reflective Surfaces: Concave mirrors, the bottom of a soda can polished to a shine, or any reflective surface can concentrate sunlight onto tinder in a similar manner to a magnifying glass.

3. Chemical Reactions

3.1 Potassium Permanganate and Glycerin

  • Reaction: Mixing potassium permanganate with glycerin initiates an exothermic chemical reaction, producing heat and igniting the mixture. A small quantity of each substance is sufficient.
  • Safety Note: Handle with care, as this reaction can be vigorous.

3.2 Battery and Steel Wool

  • Conduction: Touching the terminals of a battery to fine steel wool creates a short circuit, heating the steel wool to ignition. Spread the wool out for better oxygen flow to facilitate burning.
  • Battery Type: Almost any battery works, but 9V batteries are particularly effective due to their terminal configuration.

4. Flint and Steel

4.1 Traditional Flint Striking

  • Sparks from Stones: Striking a piece of flint with steel generates sparks. Direct these sparks onto a pile of tinder.
  • Choosing Materials: True flint works best, but quartz or chert are effective alternatives. The steel can be a knife back, a striker, or any hard steel object.

5. Preparation and Safety

5.1 Tinder, Kindling, and Fuel Wood

  • Layering: Prepare a good base of tinder (easily ignitable materials like dry grass, leaves, or cotton), followed by kindling (small twigs and sticks), and fuel wood (larger pieces of wood) to build your fire progressively.
  • Dry Materials: Ensure all materials are dry to facilitate ignition and sustain the fire.

5.2 Fire Safety

  • Responsible Practices: Always clear the area around your fire site to prevent unintended spread. Keep water or soil nearby to extinguish the fire if necessary. Never leave a fire unattended.

6. Adapting Techniques to Environmental Conditions

6.1 Wet Conditions

  • Finding Dry Materials: Look for dry tinder and kindling inside hollow trees, under dense foliage, or within fallen logs. Carrying waterproof tinder, like waxed jute twine or commercial fire starters, can also ensure ignition in damp environments.
  • Creating a Platform: Build a platform or base from larger branches to elevate your fire from wet ground, enhancing airflow and preventing moisture from extinguishing your flames.

6.2 Windy Conditions

  • Windbreaks: Use natural landscape features, like rocks or logs, to shield your fire area from the wind. Alternatively, dig a small pit to both protect the initial flame and concentrate heat.

7. Maximizing Efficiency with Improvised Tools

7.1 Improvising a Bellows

  • Oxygen Boost: A makeshift bellows, crafted from a hollowed-out branch or an accordion-folded piece of sturdy material, can help introduce more oxygen to your fire, vital for fuel combustion and increasing flame size.

7.2 Reflectors

  • Concentrating Heat: Positioning a flat, reflective surface behind your fire can reflect heat back towards the fire, increasing temperature and aiding in the ignition and sustainability of your flames.

8. Learning from Traditional Practices

8.1 Studying Indigenous Techniques

  • Cultural Wisdom: Indigenous and traditional communities have honed fire-starting methods over millennia, often tailored to specific environments. Researching and respecting these techniques can offer valuable insights and alternative methods for fire ignition.

8.2 Natural Materials as Fire Accelerants

  • Resourceful Selection: Many cultures utilize natural resins, fats, or certain fungi as accelerants to quickly ignite or sustain fires. Identifying and ethically harvesting these materials can enhance your backcountry fire-starting toolkit.

9. Practicing Ethical Fire Management

9.1 Minimizing Impact

  • Leave No Trace: Whenever possible, use existing fire rings or pits to minimize environmental impact. If you must create a new fire site, restore the area to its natural state as much as possible afterward.

9.2 Fire Extinguishing Practices

  • Ensuring Complete Extinguishment: Always thoroughly extinguish your fire by dousing it with water, stirring the ashes, and applying more water. The site should be cool to the touch before leaving.

Conclusion

Starting a fire without a lighter is both a practical skill and a satisfying achievement. It connects us to our ancestors and teaches resourcefulness and patience. Whether using friction, the power of the sun, chemical reactions, or flint and steel, mastering these methods can enhance your self-reliance and enrich your outdoor adventures. Always prioritize safety and practice Leave No Trace principles to protect our natural environments.

Frequently Asked Questions (FAQs)

Which method is the easiest for beginners?

  • The flint and steel method is generally the most accessible and easiest to learn for beginners. It requires less physical effort than friction methods and is more reliable than solar or chemical methods, depending on environmental conditions.

How can I improve my success with these fire-starting methods?

  • Practice is key. Each method has its nuances and requires a feel for the materials and technique. Start practicing in controlled conditions before relying on these methods in survival situations.

Can these methods be used in any weather?

  • Weather conditions significantly impact the feasibility of each method. Wet conditions make fire starting challenging, while the solar method requires direct sunlight. Adapt your method to the current weather and always prepare by carrying appropriate backup fire-starting tools.

How do I store my fire-starting materials while hiking?

  • Keep your materials dry and easily accessible. Waterproof bags or containers are ideal for storing tinder, kindling, and any other fire-starting aids. Label them clearly and pack them near the top of your bag for quick access.

Can I practice these fire-starting methods in my backyard?

  • Yes, practicing in a controlled environment like your backyard is an excellent way to refine your skills. Ensure you follow local regulations regarding open fires, use a fire pit if available, and have extinguishing resources close at hand.

What’s the most environmentally friendly way to start a fire?

  • Using fallen wood and natural materials as tinder and kindling is the most sustainable approach. Avoid breaking branches from living trees and gather wood from the ground. Opt for fire-starting methods that don’t leave behind waste or chemicals, ensuring your outdoor ethics align with conservation principles.

Backcountry Gear Selection: Essential Packing List for Your Wilderness Adventure

Introduction

Venturing into the backcountry requires careful planning and preparation, especially when it comes to selecting the right gear. The wilderness demands respect, and having the appropriate equipment can mean the difference between a successful expedition and a potentially dangerous situation. This guide outlines essential gear for any backcountry adventure, ensuring you’re well-prepared for the challenges and joys of the wilderness.


1. Navigation Tools

1.1 Map and Compass

  • Essential Navigation: Even in the age of GPS, the reliability of a good old-fashioned map and compass cannot be overstated. They don’t require batteries and are crucial for navigating in remote areas.

1.2 GPS Device

  • Advanced Navigation: A GPS device can provide precise location data, routes, and waypoints. Opt for models designed for outdoor use, with long battery life and weather resistance.

2. Shelter and Comfort

2.1 Tent or Hammock

  • Protection from the Elements: Choose a lightweight, durable tent or hammock with a rain fly. Consider the season and the typical weather conditions of your destination.

2.2 Sleeping Bag and Pad

  • Warmth and Comfort: Select a sleeping bag suitable for the lowest temperatures you anticipate, and pair it with an insulated sleeping pad to protect against ground chill.

3. Food and Water

3.1 Portable Stove and Fuel

  • Cooking in the Wilderness: A compact, lightweight stove is essential for preparing hot meals. Remember to pack enough fuel for your trip, considering altitude and temperature which can affect stove efficiency.

3.2 Water Filtration System

  • Safe Drinking Water: Always have a means to purify water, whether it’s a pump filter, UV light purifier, or chemical tablets. Multiple methods are advised for redundancy.

4. Clothing and Personal Items

4.1 Layered Clothing

  • Adaptable Outfits: Pack clothing that can be layered to adjust for changing temperatures. Include moisture-wicking base layers, insulating mid-layers, and a waterproof outer layer.

4.2 Sun Protection

  • Essential Defense: Sunglasses, sunscreen, and a brimmed hat are vital for protecting against sun exposure, even in cold environments where the sun’s reflection off snow can be intense.

5. Emergency and First Aid

5.1 First Aid Kit

  • Medical Preparedness: Customize your first aid kit based on the group size, trip duration, and personal medical needs. Include items for wound care, blister prevention, and any prescribed medications.

5.2 Emergency Tools

  • Survival Essentials: Pack a multi-tool, a whistle, a waterproof fire-starting kit, and an emergency blanket. These items can be lifesavers in unexpected situations.

6. Miscellaneous Essentials

6.1 Headlamp and Batteries

  • Lighting: A reliable headlamp is indispensable for nighttime navigation and camp tasks. Carry extra batteries or a solar charger.

6.2 Trash Bags

  • Leave No Trace: Pack out what you pack in. Durable trash bags are essential for carrying out waste, including food scraps and used toilet paper.

7. Communication Devices

7.1 Satellite Phone

  • Remote Connectivity: For areas well beyond cell service, a satellite phone can be a critical link to the outside world, providing a means to call for help in emergencies.

7.2 Personal Locator Beacon (PLB)

  • Emergency Alert: A PLB can be a lifesaver, sending an SOS with your location to rescue services at the push of a button. It’s compact and requires no subscription.

8. Repair Kits and Tools

8.1 Multi-Tool

  • Versatility in Your Pocket: A good multi-tool can address a multitude of needs, from repairs to first aid. Ensure it includes knives, pliers, screwdrivers, and scissors.

8.2 Duct Tape

  • Quick Fixes: Never underestimate the utility of duct tape. It can temporarily repair gear, seal leaks, and even support sprains in a pinch.

9. Trail Nutrition

9.1 High-Energy Snacks

  • Fuel on the Go: Pack calorie-dense foods like nuts, dried fruits, energy bars, and jerky. These provide quick energy and are easy to eat while on the move.

9.2 Cook-Free Options

  • Simplicity and Efficiency: For shorter trips or as a backup, consider meals that don’t require cooking. Pre-packaged, ready-to-eat foods can save time and fuel.

10. Pack Organization

10.1 Compartmentalization

  • Ease of Access: Use packing cubes, compression sacks, or zip-lock bags to organize items within your backpack. This helps keep gear accessible and dry.

10.2 Weight Distribution

  • Balanced Carrying: Place heavier items close to your back and centered in the pack. Distribute weight evenly to maintain balance and reduce strain.

11. Environmental Considerations

11.1 Wildlife Protection

  • Safe Food Storage: In bear country, use bear canisters or bags to store food and scented items safely away from your campsite to protect both you and the wildlife.

11.2 Minimal Impact Camping

  • Eco-friendly Practices: Choose established campsites, use biodegradable soap, and avoid introducing non-native species. Respect wildlife and keep a safe distance.

Conclusion

Careful selection of backcountry gear is essential for a safe and enjoyable wilderness experience. While this list covers the basics, the specifics of what to pack can vary based on the length of your trip, the terrain, the weather, and personal preferences. Always prepare for the unexpected and practice Leave No Trace principles to preserve the natural beauty of the backcountry for future adventurers.


Frequently Asked Questions (FAQs)

How much should my pack weigh?

  • A general guideline is that your loaded backpack should not exceed 20% of your body weight. However, this can vary based on your strength, endurance, and the specifics of your trip.

Can I bring electronic devices into the backcountry?

  • Yes, but prepare for limited access to charging facilities. Solar chargers or power banks can keep devices charged, and waterproof cases will protect them from the elements.

What’s the best way to reduce pack weight?

  • Focus on multi-use items and opt for lightweight, compact gear. Carefully consider each item’s necessity and look for areas where you can trim excess without compromising safety or comfort.

How do I choose a backpack for backcountry trips?

  • Look for a backpack with an internal frame, adjustable straps, and sufficient capacity for your trip length. Comfort, fit, and durability are key considerations.

Is it worth investing in ultralight gear?

  • Ultralight gear can significantly reduce pack weight, making your trip more comfortable. However, assess each item’s durability and functionality. In some cases, slightly heavier gear might offer better performance or reliability.

Can I use regular clothes for backcountry trips?

  • While regular clothes can be used, performance fabrics designed for outdoor activities offer benefits like moisture-wicking, quick-drying, and thermal insulation. Proper outdoor apparel can greatly enhance comfort and safety.

High Country Hydration: Essential Tips for Staying Hydrated in the Mountains

Introduction

Venturing into high-altitude environments presents unique challenges, not least of which is staying properly hydrated. The thin air, lower oxygen levels, and physical exertion required for mountain trekking can quickly lead to dehydration if not carefully managed. This guide offers vital tips for maintaining hydration in the high country, ensuring that your mountain adventures are both enjoyable and safe.


1. Understanding the Risks

1.1 Increased Dehydration Rate

  • High Altitude Effects: At higher elevations, the body loses water through respiration at an accelerated rate. The cool, dry air also increases evaporation of sweat, often without you realizing how much fluid you’re losing.

1.2 Recognizing Dehydration Symptoms

  • Early Detection: Symptoms can include thirst, dry mouth, fatigue, dizziness, and headache. Recognizing these early signs is crucial to preventing more severe dehydration effects.

2. Pre-Hydration Strategies

2.1 Begin Well-Hydrated

  • Advance Preparation: Start increasing your fluid intake several days before your high-country excursion. Arriving well-hydrated can give you a significant advantage.

2.2 Electrolyte Balance

  • Essential Minerals: High-altitude activity can deplete your body’s electrolytes. Consider adding an electrolyte supplement to your water to help maintain balance.

3. Hydration During the Hike

3.1 Consistent Water Intake

  • Regular Sips: Drink small amounts of water at regular intervals, regardless of whether you feel thirsty. Thirst is an unreliable indicator of dehydration at altitude.

3.2 Access to Safe Water

  • Planning Ahead: Know the locations of water sources on your route and carry a portable water filter or purification tablets to ensure the water is safe to drink.

4. Monitoring Fluid Loss

4.1 Keep Track of Intake

  • Use Marked Bottles: Use water bottles with measurements or mark your hydration bladder to keep track of how much you’re drinking throughout the day.

4.2 Assessing Hydration Status

  • Physical Checks: Monitor the color of your urine as a quick hydration status check; light yellow indicates good hydration, while darker colors suggest you need to drink more water.

5. Avoiding Over-Hydration

5.1 Recognize Hyponatremia

  • Balancing Act: Drinking excessive amounts of water can lead to hyponatremia, a condition where blood sodium levels become dangerously low. Balance your water intake with electrolyte replenishment.

6. Adaptation to Altitude

6.1 Acclimatization

  • Gradual Exposure: Spend time at moderate altitudes to allow your body to adjust before ascending to higher elevations. This process helps your body regulate fluid balance more effectively.

6.2 Listen to Your Body

  • Adjust as Needed: Be prepared to adjust your fluid intake based on how your body responds to altitude. Individual needs can vary significantly.

7. Utilizing Hydration Gear

7.1 Hydration Packs

  • Convenient Access: Consider using a hydration pack with a sip tube for easy access to water without having to stop or reach for a bottle. This can encourage more frequent sipping and help maintain hydration levels.

7.2 Insulated Water Containers

  • Temperature Regulation: In extremely cold environments, water can freeze, making it inaccessible. Use insulated bottles or thermal covers for hydration bladders to prevent freezing.

8. Adjusting for Weather Conditions

8.1 Hot Weather Hydration

  • Increased Needs: High temperatures can exacerbate dehydration. In hot conditions, increase your water intake and take breaks in shaded areas to prevent overheating.

8.2 Cold Weather Considerations

  • Deceptive Dehydration: Cold weather can suppress thirst signals, making dehydration less noticeable. Make a conscious effort to drink regularly, even if you’re not feeling thirsty.

9. Dietary Considerations

9.1 Water-Rich Foods

  • Hydration Through Diet: Incorporate water-rich foods into your diet, such as fruits and vegetables. These can provide additional hydration and essential nutrients.

9.2 Avoiding Diuretics

  • Minimizing Dehydration Risks: Limit the intake of diuretic substances such as caffeine and alcohol, especially before and during your high-country adventures, as they can increase fluid loss.

10. Educating Fellow Adventurers

10.1 Sharing Knowledge

  • Group Hydration Strategies: If you’re traveling in a group, share these hydration tips with your companions. Group awareness can enhance safety for everyone involved.

10.2 Recognizing Signs in Others

  • Looking Out for Each Other: Be able to recognize signs of dehydration or hyponatremia in others. Early detection and response can prevent serious health issues.

11. Planning for Emergencies

11.1 Emergency Water Supplies

  • Backup Plans: Always carry more water than you think you’ll need and know how to source and purify water from the environment in case of emergencies.

11.2 Hydration in Survival Situations

  • Prioritizing Hydration: In survival situations, finding and purifying water should be a top priority. Understand basic survival techniques for obtaining water in the wilderness.

Conclusion

Hydration in the high country is a delicate balance that requires preparation, awareness, and regular monitoring. By understanding the unique challenges of high-altitude environments and adopting these hydration strategies, you can enhance your performance, safety, and enjoyment of mountain adventures. Remember, water is as vital to your mountain trek as your gear—plan accordingly, and respect the demands of the high country.


Frequently Asked Questions (FAQs)

How much water should I drink at high altitude?

  • While needs can vary, aim for about 3 to 4 liters per day for active days in the mountains. Adjust based on activity level, weather, and your body’s response.

Can I drink directly from mountain streams?

  • While mountain water may look clean, it can contain pathogens. Always treat water using a filter, purification tablets, or boiling before drinking.

How can I tell if I’m drinking enough water?

  • In addition to monitoring your urine color, pay attention to other signs of dehydration, and ensure you’re drinking regularly throughout the day. If you’re rarely feeling the need to urinate, increase your fluid intake.

Should I adjust my electrolyte intake at high altitude?

  • Yes, increased sweating and the diuretic effect of altitude mean you might lose more salts than usual. Balance your water intake with electrolytes to prevent imbalances.

Can hydration affect acclimatization to high altitude?

  • Proper hydration is crucial for acclimatization. Dehydration can worsen the symptoms of altitude sickness. Maintaining fluid and electrolyte balance helps your body adjust to lower oxygen levels more effectively.

You can also visit : Cold Weather Hunting: Gearing Up for Winter Expeditions

Exit mobile version