Should You Be Saddle Hunting? Evaluating the Modern Approach to Tree Stand Hunting

Introduction

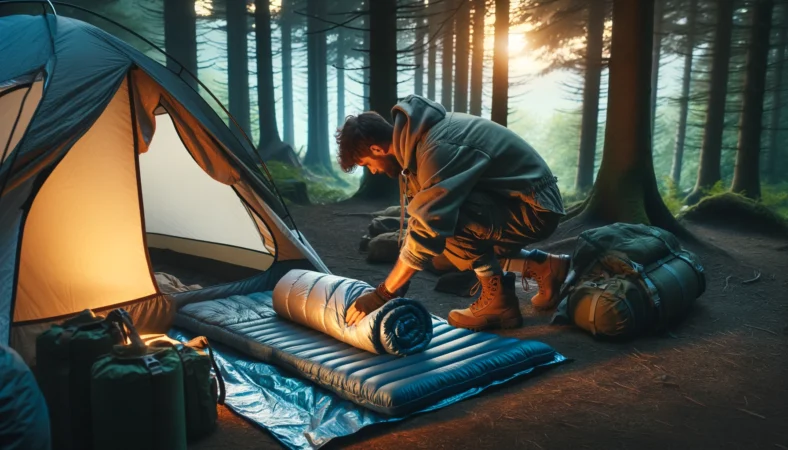
Saddle hunting is gaining popularity among hunters looking for a more versatile and mobile approach to tree stand hunting. This method involves using a tree saddle, which is a type of harness that allows hunters to sit securely and comfortably against a tree trunk at elevated positions. This guide explores the pros and cons of saddle hunting to help you decide if it’s the right method for you.


1. What is Saddle Hunting?

1.1 Definition and Equipment

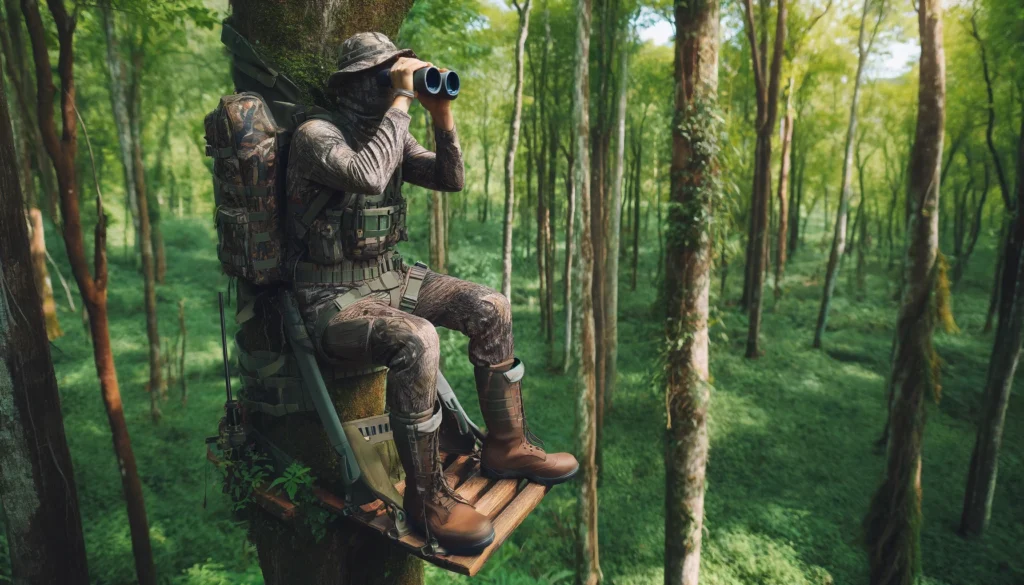
  • Saddle: A specialized harness that allows hunters to sit or lean against a tree comfortably.
  • Setup: Includes the saddle, a platform for standing, and climbing sticks or steps for ascending the tree.

1.2 Historical Context

  • Origins: Saddle hunting has been around for decades but has seen a resurgence due to advances in lightweight materials and design.

2. Advantages of Saddle Hunting

2.1 Mobility

  • Ease of Movement: Saddle setups are generally lighter than traditional tree stands, making them easier to carry over long distances.
  • Quick Setup and Takedown: Allows for fast, quiet setup and takedown, which is ideal for public land hunters who need to move frequently.

2.2 Comfort and Safety

  • Ergonomic Design: Many hunters find tree saddles more comfortable for long sits than traditional tree stands.
  • Increased Safety: The design of a hunting saddle can offer increased safety, as the hunter is secured to the tree at all times while off the ground.

3. Disadvantages of Saddle Hunting

3.1 Learning Curve

  • Skill Development: There is a learning curve associated with using a saddle efficiently. Proper technique for climbing, descending, and shooting from a saddle can take time to master.

3.2 Physical Demands

  • Endurance and Strength: Saddle hunting can be physically demanding, requiring good core strength to maintain balance and comfort.

4. Who Should Consider Saddle Hunting?

4.1 Ideal Candidates

  • Mobile Hunters: Those who prefer to hunt multiple locations in a single day or across a season.
  • Minimalists: Hunters who appreciate the minimalist approach and the challenge of using less gear.

4.2 Less Suitable Candidates

  • Physical Limitations: Individuals with certain physical limitations may find the physical demands of saddle hunting challenging.

5. Comparing Saddle Hunting to Traditional Tree Stand Hunting

5.1 Versatility vs. Comfort

  • Versatility: Saddle hunting offers greater versatility in tree selection and mobility.
  • Comfort: Traditional tree stands generally provide more room and comfort for longer sits.

5.2 Cost Implications

  • Initial Investment: The initial cost of a high-quality saddle setup can be comparable to or higher than some traditional tree stands.

6. Getting Started with Saddle Hunting

6.1 Education and Training

  • Courses and Online Resources: Many resources are available for new saddle hunters, including online tutorials, forums, and in-person courses.

6.2 Trial and Error

  • Practice: It’s important to practice in a controlled environment before taking your saddle into the field.

7. Integrating Saddle Hunting into Your Strategy

7.1 Combining Methods

  • Hybrid Approaches: Saddle hunting doesn’t have to replace traditional tree stands entirely. Many hunters use both methods depending on the specific situation, terrain, and hunting goals.

7.2 Seasonal Considerations

  • Adapting to Seasons: Saddle hunting can be particularly advantageous during the early season when foliage is denser and mobility can significantly impact success. In late seasons, the added stealth and quick setup can be crucial for tracking late-season bucks.

8. Customization and Gear Optimization

8.1 Personalizing Your Setup

  • Gear Selection: Choose accessories that complement your hunting style, including customizable platforms, specialized climbing sticks, and adjustable straps for maximum comfort and efficiency.

8.2 Gear Innovations

  • Staying Updated: The market for saddle hunting gear is rapidly evolving. Staying informed about new innovations and testing different setups can help optimize your hunting experience.

9. Community and Support

9.1 Learning from Others

  • Saddle Hunting Community: Engage with the saddle hunting community through online forums, social media groups, and local clubs. These platforms offer valuable insights, support, and shared experiences.

9.2 Mentorship Opportunities

  • Finding a Mentor: If possible, find a mentor who is experienced in saddle hunting. Learning one-on-one can significantly shorten the learning curve and improve your safety and technique.

10. Conservation and Ethical Practices

10.1 Promoting Sustainable Hunting

  • Conservation Efforts: Saddle hunters often advocate for and practice sustainable hunting methods that minimize ecological impact. Embracing these principles reinforces the role of hunters as stewards of the environment.

10.2 Ethical Pursuit

  • Responsible Hunting: Adhering to ethical hunting practices, including following all local regulations and pursuing fair chase principles, is essential. Saddle hunting, with its stealth and precision, supports ethical engagement with wildlife.

11. Evaluating Success

11.1 Defining Objectives

  • Personal Goals: Success in saddle hunting can vary widely among individuals. Define what success looks like for you, whether it’s increasing your proximity to wildlife, enhancing your mobility, or simply enjoying nature more intimately.

11.2 Reflecting on Experiences

  • Continuous Learning: After each hunting trip, take the time to reflect on what worked well and what could be improved. This reflective practice helps refine your techniques and strategies over time.

Conclusion

Saddle hunting offers a unique set of advantages for those seeking a more active, mobile hunting experience. It’s suitable for hunters who are willing to invest time in learning new skills and who value stealth and flexibility in their hunting strategy. However, it’s important to consider the physical demands and potential cost before making the switch. Like any hunting method, personal preference, and hunting style play significant roles in determining whether saddle hunting is right for you.


Frequently Asked Questions (FAQs)

Can you use a hunting saddle in any type of tree?

  • Tree Requirements: Saddle hunting is versatile, but not every tree is ideal. Suitable trees should have few lower branches and must be sturdy enough to support your weight safely.

Is saddle hunting ethical?

  • Ethical Considerations: Yes, when practiced responsibly, saddle hunting is as ethical as any other form of hunting, with the added benefit of minimal environmental impact due to its lightweight and leave-no-trace nature.

How safe is saddle hunting compared to traditional tree stands?

  • Safety Comparison: Saddle hunting, when done correctly, can be safer than traditional tree stands due to the continuous attachment to the tree from the ground up. However, it requires proper use of safety gear and adherence to recommended practices.

What is the best way to practice saddle hunting before the season starts?

  • Pre-Season Practice: Set up your saddle in various trees and environments during the off-season. Practice climbing, descending, and shooting from different angles and positions to build confidence and skill.

A Hunter’s First Experience: Embracing the Call of the Wild

Introduction

Embarking on your first hunting trip can be both exhilarating and daunting. This narrative delves into the essential preparation and emotional journey of a novice hunter stepping into the wilderness for the first time. From the anticipation and preparation to the actual experience in the great outdoors, each moment offers valuable lessons and unforgettable memories.


1. Preparation: The Foundation of Success

1.1 Learning the Ropes

  • Educational Courses: Before venturing out, the novice hunter completed a mandatory hunter education course, gaining knowledge about safety, wildlife laws, and ethical hunting practices.

1.2 Gear and Equipment

  • Essential Gear: Understanding the importance of the right equipment, the hunter meticulously gathered a reliable rifle, appropriate ammunition, a sturdy hunting knife, and weather-appropriate clothing.

1.3 Mental and Physical Readiness

  • Conditioning: Preparing physically through regular exercise and mentally by setting realistic expectations and objectives for the hunt.

2. The First Day in the Field

2.1 The Early Morning Start

  • Awakening to Nature: The day began before dawn, with the novice hunter experiencing the serene beauty of the forest waking up, a profound moment that connected them deeply with nature.

2.2 Initial Challenges

  • Navigating the Terrain: The physical challenge of navigating through dense and unfamiliar terrain tested their stamina and determination.

3. The Hunt

3.1 Tracking and Patience

  • Skills in Practice: Hours of silently tracking game, learning to read animal signs, and understanding wind direction were crucial in getting closer to wildlife.

3.2 The Moment of Truth

  • Ethical Consideration: Faced with the opportunity, the hunter experienced the weight of the responsibility to make a clean and ethical shot, reflecting deeply on the significance of taking an animal’s life.

4. The Harvest

4.1 Processing the Game

  • Respect for the Kill: The hunter learned to field dress the game, an essential skill that honors the animal by utilizing as much of it as possible.

4.2 Reflections on Sustainability

  • Conservation Awareness: Understanding the role of hunters in wildlife management and conservation, the novice felt a renewed respect for nature and the importance of sustainable practices.

5. Returning Home

5.1 Lessons Learned

  • Growth and Insight: The hunter returned with not just physical reminders of the hunt but also with a greater appreciation for the patience, skill, and respect required to hunt ethically.

5.2 Sharing the Story

  • Inspiring Others: Sharing their experiences with friends and family, the novice hunter inspired others with tales of challenge, success, and the raw beauty of nature.

6. Integration into the Hunting Community

6.1 Joining Local Clubs and Groups

  • Community Engagement: After their first hunt, the novice hunter sought out local hunting clubs and online forums to connect with more experienced hunters, enhancing their learning through shared experiences and tips.

6.2 Participating in Events

  • Learning Through Doing: Attending hunting workshops, conservation activities, and social events further solidified their understanding of the hunting culture and conservation ethics.

7. Advancing Skills and Techniques

7.1 Advanced Training

  • Continuous Improvement: To refine their skills, the novice hunter enrolled in advanced hunting courses focusing on specific techniques like bow hunting, tracking, and survival skills.

7.2 Specialty Hunts

  • Diversifying Experience: As confidence grew, exploring different types of hunting such as waterfowl, big game, and upland bird hunting provided new challenges and learning opportunities.

8. Contributing to Conservation

8.1 Volunteering for Wildlife Management

  • Giving Back: Engaging in local wildlife habitat restoration projects and participating in population control hunts to help maintain healthy wildlife ecosystems.

8.2 Advocacy and Education

  • Spreading Awareness: Becoming an advocate for ethical hunting and conservation, the novice hunter began to educate others on the importance of sustainable practices and responsible wildlife management.

9. Personal Reflections and Growth

9.1 Journaling and Documenting

  • Recording the Journey: Keeping a hunting journal helped the novice hunter reflect on personal growth, experiences, and the lessons learned from each outing.

9.2 Mentorship Role

  • Passing on Knowledge: As skills developed, the novice hunter took on a mentorship role, helping guide other new hunters through their first experiences, sharing insights and fostering a supportive community.

10. Future Aspirations

10.1 Long-Term Goals

  • Setting Higher Goals: With foundational experience established, setting goals for more challenging hunts and perhaps competing in hunting competitions.

10.2 Integrating Technology

  • Utilizing Tools: Exploring the use of new technologies like GPS for hunting, trail cameras for wildlife monitoring, and modern gear to enhance efficiency and effectiveness in the field.

Conclusion

A hunter’s first experience is more than just a pursuit of game; it’s a profound journey that tests one’s skills, ethics, and connection to the natural world. It’s about entering the wilderness with respect and coming back with a deeper understanding of what it means to be part of the ecosystem. For many, it is the beginning of a lifelong passion and respect for hunting and conservation.


Frequently Asked Questions (FAQs)

What should I do if I don’t make a catch on my first hunt?

  • Perspective on Success: Understand that success in hunting is not only measured by the harvest but by the overall experience and the skills gained.

How can I ensure I’m practicing ethical hunting?

  • Continuous Education: Stay informed about ethical practices, participate in conservation efforts, and always adhere to regulations designed to sustain wildlife populations.

How can I balance hunting with wildlife conservation?

  • Ethical Balancing: Practice selective hunting, adhere to bag limits, and engage in conservation efforts that support habitat preservation and species sustainability.

What are some ways to stay updated with hunting technologies and techniques?

  • Staying Informed: Regularly read hunting publications, join online forums, and participate in industry expos to learn about the latest advancements and methodologies in hunting.

How to Obtain a Hunting License: A Step-by-Step Guide

Introduction

Obtaining a hunting license is a necessary step for anyone looking to hunt legally and ethically. This guide provides a comprehensive overview of the process to help ensure you meet all legal requirements and are prepared for a responsible hunting experience.


1. Understand the Requirements

1.1 Local Regulations

  • Jurisdiction Specifics: Hunting regulations can vary significantly by state, province, or country. It’s essential to familiarize yourself with the regulations that apply to the area where you plan to hunt.

1.2 Age and Residency

  • Minimum Age: Most regions have a minimum age requirement for obtaining a hunting license.
  • Residency: Licenses are typically categorized into resident and non-resident types, each with different fees and requirements.

2. Complete a Hunter Education Course

2.1 Course Requirement

  • Mandatory Training: Most states and countries require completion of a hunter education course before issuing a hunting license. The course covers safety, wildlife conservation, and local hunting laws.

2.2 Availability

  • Online and In-Person Options: Many places offer hunter education courses online, but some may require in-person attendance for practical examinations or field days.

3. Obtain the Application

3.1 Where to Apply

  • Wildlife Agency: Applications can usually be obtained from the local wildlife or natural resources agency.
  • Online Platforms: Many regions offer the convenience of online applications.

3.2 Documentation Needed

  • Identification and Proof of Course Completion: You will likely need to provide identification and proof that you have completed the required hunter education course.

4. Decide on the Type of License

4.1 Types of Licenses

  • Species-Specific Licenses: Some licenses are specific to certain types of game, such as deer, turkey, or waterfowl.
  • General Hunting Licenses: These allow the hunting of multiple species but may still have restrictions.

4.2 Consider Additional Tags or Permits

  • Big Game Tags: For hunting larger game like deer or elk, additional tags are often required and may be distributed through a lottery system.

5. Pay the Licensing Fee

5.1 Fee Structure

  • Variable Costs: Fees can vary based on the type of license, residency status, and whether additional tags or permits are needed.

5.2 Payment Methods

  • Online or In-Person: Most agencies accept multiple forms of payment, including credit cards, checks, and cash at physical locations.

6. Receive and Store Your License

6.1 Receiving Your License

  • Electronic or Physical Copy: Depending on the jurisdiction, you might receive a physical license card or an electronic version that you can print at home.

6.2 License Validity

  • Expiration Date: Be aware of the expiration date and any seasonal restrictions that may apply to your license.

7.1 Updates and Changes

  • Stay Updated: Hunting regulations can change. It’s important to stay informed about any changes to local laws or conditions that might affect your hunting activities.

7.2 Continuing Education

  • Advanced Courses: Consider taking advanced hunting courses or workshops that can provide deeper insights into specific types of hunting or game.

8. Ethics and Conservation Education

8.1 Importance of Ethical Hunting

  • Conservation Awareness: Ethical hunting practices contribute to wildlife conservation efforts and ensure sustainable use of natural resources. Understand the ethical guidelines set forth by wildlife agencies and conservation groups.

8.2 Community Engagement

  • Support Local Initiatives: Participate in local conservation programs and volunteer for wildlife habitat improvement projects. Engaging with the community helps promote a culture of responsible hunting.

9. Preparing for Your Hunting Trip

9.1 Equipment and Supplies

  • Essential Gear: Ensure you have all necessary equipment for a safe and legal hunting experience, including proper clothing, weapons, ammunition, and safety gear.

9.2 Planning and Research

  • Location Scouting: Research the areas you plan to hunt, including the types of game available and their population status. Understanding the terrain and animal behavior will improve your hunting success and safety.

10. Understanding Wildlife Management

10.1 Role of Hunters in Wildlife Management

  • Population Control: Hunters play a critical role in managing wildlife populations at healthy levels to prevent overpopulation and ensure ecological balance.

10.2 Impact on Ecosystems

  • Biodiversity Preservation: Responsible hunting helps maintain biodiversity by ensuring that no single species dominates the ecosystem, which can lead to detrimental effects on the environment.

11. Reporting and Compliance

11.1 Harvest Reporting

  • Mandatory Reporting: Some jurisdictions require hunters to report their game harvests, which helps wildlife agencies monitor population levels and make informed management decisions.

11.2 Legal Compliance

  • Adherence to Regulations: Always comply with local hunting laws and regulations. This includes respecting hunting season dates, bag limits, and weapon restrictions.

12. Recertification and License Renewal

12.1 Periodic Renewal

  • License Expiry: Be aware of when your hunting license expires and the process for renewal. Keeping your license current is essential for legal hunting.

12.2 Continuing Education

  • Ongoing Learning: Engage in continuous learning about hunting techniques, safety, and wildlife conservation. Many states offer refresher courses or advanced certifications that can enhance your skills and knowledge.

Conclusion

Obtaining a hunting license is just the first step in becoming a responsible hunter. By understanding and following local laws, completing the required education, and choosing the right type of license, you set the foundation for a respectful and ethical hunting practice. Always remember that hunting is a privilege that comes with significant responsibilities to wildlife and the environment.


Frequently Asked Questions (FAQs)

Can I use one state’s hunting license in another state?

  • License Reciprocity: Most states do not allow you to use a hunting license issued by another state. Non-residents usually need to obtain a separate license.

What if I lose my hunting license?

  • Replacement Process: Contact the issuing agency for a replacement. There may be a fee involved, and you might need to provide proof of the original license.

How can I find more information about local hunting courses?

  • Resources for Learning: Check with your state’s wildlife agency or visit their website for information about hunter education courses. Local hunting clubs and conservation groups are also good sources for course recommendations.

Are there age limits for hunting alone?

  • Supervised Hunting Requirements: Many states have age requirements for unsupervised hunting. Typically, young hunters must be accompanied by a licensed adult until they reach a certain age. Check local regulations for specifics.

Essential Survival Knife Skills: Techniques for the Outdoors

Introduction

A survival knife is one of the most versatile tools you can have in your outdoor gear arsenal. Whether you are camping, hiking, or in a survival situation, knowing how to effectively use a survival knife can greatly increase your ability to cope with various challenges. This guide will cover the essential skills and techniques for using a survival knife safely and efficiently.


1. Choosing the Right Knife

1.1 Knife Types

  • Fixed Blade vs. Folding Knife: A fixed blade is generally more durable and suitable for heavy-duty tasks, while a folding knife offers convenience and portability.

1.2 Blade Material and Design

  • Material: High-carbon steel is typically preferred for its strength and ease of sharpening.
  • Design: A full tang (the metal of the blade extends through the handle) adds strength and durability.

2. Basic Knife Handling Safety

2.1 Grip Techniques

  • Secure Grip: Hold the knife firmly with your thumb and fingers wrapped around the handle. Ensure your grip is stable but not overly tight to maintain control without fatigue.

2.2 Cutting Safely

  • Direction of Cut: Always cut away from your body. Ensure that no body parts are in the path of the blade.

3. Essential Knife Skills

3.1 Making a Feather Stick

  • Technique: Use the knife to shave thin curls from a piece of wood. These curls help in starting fires as they catch flame easily.

3.2 Batoning

  • Purpose: Splitting wood by batoning involves striking the back of a knife blade with a heavy object to drive the knife through wood. It’s useful for making kindling or processing wood when a hatchet isn’t available.

3.3 Creating Notches

  • Applications: Notches are used in constructing traps, shelters, or tools. Use the tip of the knife for precision in carving tasks.

4. Advanced Techniques

4.1 Constructing Tools and Utensils

  • Carving Skills: Use your survival knife to carve wooden spoons, forks, or makeshift hunting tools like spears.

4.2 Building Shelter

  • Cutting and Shaping Materials: Your knife will be essential in cutting branches and shaping them to create the framework of a shelter.

4.3 Preparing Food

  • Cleaning Game or Fish: A sharp survival knife is crucial for gutting and preparing fish or game for cooking.

5. Maintaining Your Knife

5.1 Regular Sharpening

  • Keeping a Fine Edge: Use a sharpening stone or honing rod to keep your knife sharp; a dull knife is more dangerous as it requires more force to cut.

5.2 Cleaning and Storing

  • Corrosion Prevention: Clean and dry your knife after use, especially if it’s made of carbon steel, to prevent rust. Store in a dry place.

6. Survival Situations

6.1 Signaling for Help

  • Using the Knife’s Reflective Surface: The polished, flat side of a knife can be used to reflect sunlight to signal rescuers.

6.2 First Aid

  • Emergency Tool: In dire situations, a knife can be sterilized and used to cut bandages or, if properly trained, to perform emergency medical procedures.

7. Knot Tying with a Knife

7.1 Technique

  • Using the Knife Handle: Wrap rope or cord around the handle to assist in pulling tight knots. Ensure the knife blade is securely sheathed to avoid injury.

7.2 Applications

  • Securing Gear: Useful for tightening knots when setting up camp or securing gear to your pack.

8. Self-Defense

8.1 Training

  • Proper Use: While a survival knife can be used for self-defense, proper training and caution are essential. Learn defensive techniques from a qualified instructor.

8.2 Legal Considerations

  • Understand the Law: Be aware of the laws regarding carrying and using a knife for self-defense in your area.

9. Fire Making

9.1 Striking a Fire Steel

  • Technique: Use the back of your knife blade to strike a fire steel rod, creating sparks to ignite tinder.

9.2 Preparing Tinder

  • Shaving Wood: Use your knife to create fine wood shavings that catch fire easily.

10. Hunting and Trapping

10.1 Crafting Spears and Other Tools

  • Spear Making: Sharpen a long stick into a point to create a simple spear for fishing or small game hunting.

10.2 Constructing Animal Traps

  • Trap Mechanisms: Use your knife to carve intricate parts needed for trigger mechanisms in animal traps.

11. Navigational Aids

11.1 Marking Trails

  • Safe Navigation: Use your knife to make small marks on trees to help navigate unfamiliar woods without getting lost.

11.2 Direction Finding

  • Sun Compass: Use your knife to create a sun compass by sticking it upright in the ground and marking the shadow’s tip to determine direction.

12. Tool and Gear Repair

12.1 Cutting and Shaping Repair Materials

  • Field Repairs: Use the knife to cut repair patches from available materials or to shape replacement parts for damaged gear.

12.2 Emergency Adjustments

  • Quick Fixes: Modify or adjust gear in the field to meet changing conditions or needs.

13. Culinary Uses

13.1 Preparing Meals

  • Cooking Preparations: Beyond cleaning game or fish, use your knife to chop vegetables, slice meat, and prepare ingredients for cooking.

13.2 Eating Utensil

  • Makeshift Cutlery: In the absence of regular cutlery, your knife can serve as a multipurpose eating tool.

14. Educational and Mentoring Opportunities

14.1 Teaching Others

  • Passing on Skills: Teach knife skills to others, enhancing safety and survival techniques within your community.

14.2 Organizing Workshops

  • Skill-Building Events: Lead workshops or outdoor excursions focused on survival knife skills, promoting safe and effective outdoor practices.

Conclusion

Mastering survival knife skills enhances your readiness for any outdoor adventure or unexpected situations. The versatility of a survival knife makes it indispensable in the wilderness, providing you with the capability to perform crucial tasks that ensure your survival and comfort.


Frequently Asked Questions (FAQs)

What is the best way to practice these skills?

  • Practice Safely: Begin practicing in controlled environments. Start with simple tasks like making feather sticks and progress to more complex skills as you gain confidence and precision.

How can I ensure my survival knife stays in optimal condition?

  • Regular Maintenance: Implement a consistent maintenance routine including cleaning, sharpening, and proper storage. Regular care will extend the life and functionality of your knife.

How do I choose the right size and type of survival knife?

  • Knife Selection: Consider your main activities and choose a knife size and type that best fits those needs. Larger knives are better for chopping and batoning, while smaller knives offer more precision and ease of carry.

Can a survival knife be used for building shelters?

  • Shelter Building: Absolutely, a sturdy survival knife can be instrumental in cutting and shaping materials for shelter construction, from clearing branches to precision cuts for fitting parts together.

Keeping Your Sleeping Bag Warm and Dry: Essential Tips for Outdoor Comfort

Introduction

A warm and dry sleeping bag is crucial for a good night’s sleep in the outdoors. Whether you’re camping, hiking, or embarking on a multi-day backpacking trip, understanding how to maintain the warmth and dryness of your sleeping bag can enhance your outdoor experience significantly. This guide provides practical tips to keep your sleeping bag in optimal condition during your adventures.


1. Choose the Right Sleeping Bag

1.1 Material and Insulation

  • Synthetic vs. Down: Synthetic bags are generally better at insulating when wet and dry quicker, while down bags are lighter and more compressible but require careful handling to maintain their insulating properties.

1.2 Temperature Rating

  • Appropriate Rating: Ensure your sleeping bag is suitable for the climate and conditions of your trip. A bag rated for colder temperatures than you expect can always be vented if too warm.

2. Use a Sleeping Pad

2.1 Importance of a Sleeping Pad

  • Insulation from the Ground: A sleeping pad provides critical insulation by trapping air between you and the ground, which helps maintain the warmth of your sleeping bag.

2.2 Types of Pads

  • Foam vs. Inflatable: Foam pads are durable and insulating even when wet, while inflatable pads offer superior comfort and compactness but can be susceptible to punctures.

3. Keep the Sleeping Bag Dry

3.1 Waterproofing

  • Dry Bag or Liner: Store your sleeping bag in a waterproof bag or liner while hiking to protect it from rain and moisture.

3.2 Avoid Condensation

  • Vent Your Tent: Make sure your tent is well-ventilated to prevent condensation from building up inside, which can dampen your sleeping bag.

4. Wearing Dry Clothes to Bed

4.1 Change Before Sleeping

  • Moisture Management: Change into a clean, dry set of clothes before getting into your sleeping bag. This prevents moisture from your day’s activities from soaking into the insulation.

4.2 Suitable Clothing

  • Fabric Choice: Opt for moisture-wicking materials like merino wool or synthetic fibers, which help keep both you and your sleeping bag dry throughout the night.

5. Use a Sleeping Bag Liner

5.1 Benefits of a Liner

  • Additional Warmth and Cleanliness: A liner can add up to an extra 10 degrees of warmth and also keeps your sleeping bag clean, reducing the need for frequent washes which can degrade its insulating capabilities.

5.2 Types of Liners

  • Material Choices: Fleece and silk liners are popular for their warmth and comfort, while cotton and synthetic liners are more affordable and easier to clean.

6. Manage Sleeping Bag Moisture

6.1 Air Out Daily

  • Drying Out: Whenever possible, air out your sleeping bag during the day to release any moisture it has collected overnight.

6.2 Spot Drying

  • Quick Fixes: If certain areas of your sleeping bag get wet, use body heat or sunlight to dry them out. Avoid direct heat sources like campfires, which can damage the fabric.

7. Proper Storage

7.1 At Home

  • Loose Storage: Store your sleeping bag loosely in a large, breathable bag or hung up. Compressing your sleeping bag for long periods can damage the insulation.

7.2 On the Trail

  • Compression Sacks: Use a compression sack to minimize packing space during your hike but avoid keeping the sleeping bag compressed longer than necessary.

8. Avoid Sleeping Directly on the Ground

8.1 Layer Your Sleep Setup

  • Creating Barriers: Place additional barriers between the ground and your sleeping pad, such as a tarp or an extra blanket, to provide further insulation and moisture protection.

8.2 Material Considerations

  • Insulative Materials: Use materials that do not absorb moisture from the ground. A reflective emergency blanket underneath your sleeping pad can also help retain body heat.

9. Use a Bivy Sack

9.1 Benefits of a Bivy Sack

  • All-in-One Protection: A bivy sack encloses your sleeping bag and pad in a waterproof and breathable cover, offering an added layer of protection against wind, rain, and ground moisture.

9.2 When to Use

  • Ideal for Harsh Conditions: Particularly useful for solo travelers, ultralight backpackers, or situations where setting up a full tent isn’t feasible.

10. Handling Internal Condensation

10.1 Reduce Condensation

  • Breathing Techniques: Be mindful of where you breathe while inside your sleeping bag. Breathing directly into your bag increases internal moisture, so try to direct your breath out of the bag or ventilate the area well.

10.2 Absorbent Materials

  • Managing Wetness: Consider placing a small, absorbent towel inside your sleeping bag at the foot end to absorb any condensation that does occur, ensuring it doesn’t dampen the insulation.

11. Seasonal Adjustments

11.1 Winter Considerations

  • Extra Insulation: In colder conditions, layering up within your sleeping bag with thermal clothing or using an insulated cover over the bag can help retain heat more effectively.

11.2 Summer Strategies

  • Breathability and Ventilation: Opt for a sleeping bag with less insulation and greater breathability, or unzip your bag partially to allow for airflow and prevent overheating.

12. Cleaning and Maintenance

12.1 Regular Cleaning

  • Light Cleaning: For light cleaning, spot clean your sleeping bag with a damp cloth and mild detergent. Focus on areas that are prone to body oils and dirt.

12.2 Deep Cleaning

  • Washing Instructions: Follow the manufacturer’s instructions for washing. Generally, use a front-loading washer on a gentle cycle with a detergent designed for sleeping bags.

13. Educating Yourself and Others

13.1 Learning from Experts

  • Workshops and Outings: Participate in workshops or guided outings where experienced outdoorspeople can provide practical demonstrations and personalized advice on sleeping outdoors comfortably.

13.2 Sharing Knowledge

  • Community Sharing: Share your experiences and tips with the outdoor community through blogs, forums, or local clubs. Learning from each other’s experiences can greatly enhance everyone’s outdoor enjoyment.

Conclusion

Maintaining the warmth and dryness of your sleeping bag is key to ensuring comfort and rest during outdoor adventures. By selecting the right sleeping bag, using protective layers, and managing moisture effectively, you can greatly enhance your sleeping conditions in the wilderness. Remember, the longevity of your sleeping bag and the quality of your outdoor experiences depend significantly on how well you care for your gear.


Frequently Asked Questions (FAQs)

How often should I wash my sleeping bag?

  • Washing too frequently can degrade its materials, so only wash it when necessary, following the manufacturer’s instructions carefully to preserve its life.

Can I repair my sleeping bag if it gets a tear?

  • Yes, most tears can be repaired with a patch kit or by sewing, which can extend the life of your sleeping bag significantly. Always carry a small repair kit with you on trips.

How can I quickly dry my sleeping bag if it gets wet while on the trail?

  • Quick Drying Tips: If possible, spread the sleeping bag in direct sunlight or hang it in a breezy area. If you have access to a dry bag, you can also stuff it with dry clothing to help absorb moisture from the inside out.

Is it safe to use heaters inside a tent to warm up a sleeping bag?

  • Safety First: Never use portable heaters or any open flame devices inside a tent due to the risk of carbon monoxide poisoning and fire. Instead, rely on well-insulated gear and proper layering to keep warm.

Optimizing Your Arrow Weight: A Guide to Arrow Setups for Archery

Introduction

Choosing the right arrow weight is crucial for achieving optimal performance in archery. The weight of an arrow affects its trajectory, speed, and penetration, making it essential to find the right balance for your specific needs, whether you’re a target shooter or a bowhunter. This guide will explore different arrow weight setups and how they can impact your archery performance.


1. Understanding Arrow Weight

1.1 Components of Arrow Weight

  • Grains Per Inch (GPI): Arrow weight is often measured in grains per inch, which indicates the weight of the shaft itself.
  • Overall Weight: Includes the shaft, nock, insert, point, and fletching.

1.2 Importance of Matching Arrow Weight to Bow

  • Bow Specs Compatibility: The weight of your arrow should match the draw weight and length of your bow to ensure maximum efficiency and safety.

2. Types of Arrow Setups

2.1 Light Arrow Setup

  • Weight Range: Typically under 5 grains per pound of draw weight.
  • Characteristics: Faster arrow speed, flatter trajectory.
  • Best For: Target archery where speed and a flat trajectory help achieve tighter groupings.

2.2 Standard Arrow Setup

  • Weight Range: Between 6 to 8 grains per pound of draw weight.
  • Characteristics: Balanced speed and penetration, good for general use in both target shooting and hunting.
  • Best For: Archers looking for a versatile setup that performs well under various conditions.

2.3 Heavy Arrow Setup

  • Weight Range: Over 8 grains per pound of draw weight.
  • Characteristics: Slower speed, higher momentum, and better penetration.
  • Best For: Big game hunting where penetration and impact are critical.

3. Calculating Optimal Arrow Weight

3.1 Formula and Tools

  • Basic Calculation: Total draw weight (in pounds) x Desired grains per pound = Total arrow weight (in grains).
  • Tools: Use online calculators or consult with a professional to fine-tune your setup based on specific shooting conditions and goals.

4. Factors Affecting Arrow Choice

4.1 Bow Type

  • Compound vs. Recurve: Compound bows typically handle heavier arrows better due to their mechanical advantage, while recurve bows might benefit from slightly lighter arrows to optimize performance.

4.2 Shooting Distance and Conditions

  • Environmental Considerations: Windy conditions might require heavier arrows to maintain course, whereas calm conditions allow for more flexibility in arrow weight.

5. Tuning Your Arrows

5.1 Spine Alignment

  • Spine Rating: Ensure the spine stiffness of the arrow is appropriate for the bow’s draw weight to prevent wobbling and improve accuracy.

5.2 Testing Different Setups

  • Field Testing: Experiment with different weights and components to see how they perform in real-world conditions. Adjust based on performance and comfort.

6. Safety and Maintenance

6.1 Regular Inspections

  • Check for Damage: Regularly inspect arrows for any signs of wear or damage, especially after shooting heavy or unusually light arrows.

6.2 Proper Storage

  • Avoid Damage: Store arrows in a dry, cool place and use protective cases to prevent warping and other damage.

7. Adjusting for Personal Preferences and Style

7.1 Personal Comfort and Preference

  • Subjective Choices: Each archer may have personal preferences based on their shooting style, physical strength, and comfort. Some may prefer a lighter arrow for easier handling and faster shooting, while others might opt for a heavier arrow for increased stability and impact.

7.2 Experimentation

  • Trial and Error: It’s important to try different weights and setups to find what feels best for you. This experimentation can help refine your technique and improve your overall performance.

8. Impact of Arrow Weight on Accuracy and Performance

8.1 Accuracy Considerations

  • Stability vs. Speed: Heavier arrows tend to fly more steadily and are less affected by wind, offering potentially greater accuracy at longer distances. Lighter arrows may provide a flatter trajectory, which can be beneficial in certain competitive settings.

8.2 Performance Metrics

  • Energy Transfer: Heavier arrows carry more kinetic energy, which can result in better penetration, especially important in hunting situations. Lighter arrows might speed up the bow’s shooting cycle, which could be advantageous in rapid shooting disciplines.

9. Consulting with Experts

9.1 Role of Archery Coaches and Professionals

  • Expert Guidance: Working with a coach or an experienced archer can provide insights into how different arrow weights might affect your specific equipment and technique. They can also help troubleshoot issues like arrow flight problems and tuning challenges.

9.2 Utilizing Pro Shops

  • Professional Setup and Tuning: Archery shops often offer services to help you choose and customize your arrows. They can also provide professional tuning to ensure your bow and arrows are perfectly matched.

10. Considerations for Competitive Archers

10.1 Regulations and Standards

10.2 Optimizing for Competition

  • Specialized Setups: Depending on the competition, optimizing arrow weight for speed or accuracy can be crucial. Some competitive archers may have different setups for indoor and outdoor competitions.

11. Ethical Considerations in Hunting

11.1 Ethical Hunting Practices

  • Appropriate Equipment: Choosing the right arrow weight is also an ethical consideration in hunting. Ensuring that the arrow has sufficient weight to provide a humane kill is vital.

11.2 Wildlife Conservation

  • Responsible Choices: Hunters should choose arrow weights that ensure efficient use of their equipment, minimizing the chance of wounding animals, which is crucial for ethical wildlife management.

Conclusion

Optimizing your arrow weight is key to enhancing your archery performance. By understanding different setups and how they affect your shooting, you can make informed choices that improve your accuracy, penetration, and overall success in archery. Whether you’re a competitive target shooter or a dedicated hunter, the right arrow setup can make a significant difference in your effectiveness.


Frequently Asked Questions (FAQs)

How often should I reevaluate my arrow setup?

  • Periodic Review: It’s a good idea to reassess your arrow setup annually or whenever you change any major components of your bow or your shooting style.

Can I use the same arrows for both target shooting and hunting?

  • Dual Use: While it’s possible to use the same arrows for both activities, specialized arrows will typically perform better for their intended use due to differences in required penetration and flight characteristics.

Can changes in weather affect my choice in arrow weight?

  • Weather Impact: Yes, changes in humidity, temperature, and wind can affect arrow flight. Heavier arrows might be preferred in windy conditions for better control, while lighter arrows could be beneficial in calm conditions for achieving a flatter trajectory.

How do I know if my arrow is too light for my bow?

  • Safety and Performance Indicators: If an arrow is too light, it may not absorb enough energy from the bow during the shot, which can lead to increased wear on the bow or even damage it. Additionally, an overly light arrow will generally have a very erratic flight path, making accuracy difficult to achieve.

Safest Edible Mushrooms Found in the Forest: A Guide for Foragers

Introduction

Foraging for mushrooms can be a rewarding activity, offering both culinary delights and a deeper connection to nature. However, correct identification is crucial, as many mushrooms can be toxic. This guide highlights some of the safest and most commonly recognized edible mushrooms that foragers might encounter in forested areas.


1. Morel (Morchella spp.)

1.1 Identification

  • Appearance: Distinctive honeycomb-like appearance on the cap. Colors range from tan to dark brown.
  • Season: Spring.

1.2 Foraging Tips

  • Habitat: Often found in wooded areas, particularly under deciduous trees and in areas that have recently burned.

1.3 Culinary Uses

  • Preparation: Excellent when sautéed, these mushrooms are highly prized for their earthy and nutty flavors.

2. Chanterelle (Cantharellus cibarius)

2.1 Identification

  • Appearance: Golden-yellow to orange, with a funnel-shaped cap and wavy margins.
  • Season: Late summer to fall.

2.2 Foraging Tips

  • Habitat: Found in both coniferous and deciduous woods, often near moss and leaf litter.

2.3 Culinary Uses

  • Preparation: Renowned for their delicate flavor and slightly peppery taste, perfect for sauces and sautés.

3. Giant Puffball (Calvatia gigantea)

3.1 Identification

  • Appearance: Large, white, globe-shaped mushrooms that can grow to be very large.
  • Season: Late summer to fall.

3.2 Foraging Tips

  • Habitat: Open grasslands, meadows, and forest edges.

3.3 Culinary Uses

  • Preparation: The flesh should be pure white. When cooked, they have a marshmallow-like texture, ideal for baking or frying.

4. Oyster Mushroom (Pleurotus ostreatus)

4.1 Identification

  • Appearance: Fan-shaped, usually growing in layers on dead or dying trees. Colors vary from white to grey or tan.
  • Season: All year, but primarily in cooler months.

4.2 Foraging Tips

  • Habitat: Common on hardwoods like beech and oak.

4.3 Culinary Uses

  • Preparation: Versatile in cooking, known for their delicate texture and mild flavor, suitable for stir-fries, soups, and baking.

5. Hen of the Woods (Grifola frondosa)

5.1 Identification

  • Appearance: Large, multi-layered mushroom with a central base and branching, leaf-like fronds.
  • Season: Fall.

5.2 Foraging Tips

  • Habitat: At the base of oak trees, sometimes around other hardwoods.

5.3 Culinary Uses

  • Preparation: Has a rich, earthy flavor and can be used in a variety of dishes from grilling to soups.

6. Birch Polypore (Fomitopsis betulina)

6.1 Identification

  • Appearance: Easily recognized by its smooth, brownish or whitish upper surface and its preference for growing on birch trees.
  • Season: Can be found year-round, but fresher specimens are better.

6.2 Foraging Tips

  • Habitat: Exclusively grows on birch trees, often on dead or dying wood.

6.3 Culinary Uses

  • Preparation: While not as commonly eaten due to its tough texture, it can be used to make teas or tinctures reputed for medicinal benefits.

7. Shaggy Mane (Coprinus comatus)

7.1 Identification

  • Appearance: Tall, cylindrical cap that is white with shaggy scales. The cap dissolves into a black ink-like substance as it ages.
  • Season: Spring through fall.

7.2 Foraging Tips

  • Habitat: Commonly found in urban areas, lawns, and along dirt roads.

7.3 Culinary Uses

  • Preparation: Must be cooked shortly after harvesting, before they begin to auto-digest. Excellent when sautéed and known for a delicate flavor.

8. Lions Mane (Hericium erinaceus)

8.1 Identification

  • Appearance: Unique for its long, white, icicle-like spines hanging from a single clump.
  • Season: Late summer to fall.

8.2 Foraging Tips

  • Habitat: Grows on dead or dying hardwood trees, especially beech and oak.

8.3 Culinary Uses

  • Preparation: Has a seafood-like flavor, often compared to lobster or crab, making it excellent for a variety of dishes that mimic seafood recipes.

9. Safety and Ethical Foraging Practices

9.1 Respect Nature

  • Sustainable Harvesting: Only take what you need and leave enough behind to allow the fungus to continue reproducing.

9.2 Avoid Contamination

  • Safe Collection: Use mesh bags when collecting mushrooms to allow spores to disperse as you walk, which helps propagate more mushrooms.

10. Learning and Community Involvement

10.1 Join Local Foraging Groups

  • Community Learning: Enhance your knowledge by joining local mycological societies or foraging groups where experienced foragers can guide you.

10.2 Attend Workshops and Seminars

  • Educational Opportunities: Participate in workshops that offer education on local mushroom species, safety practices, and culinary tips.

Conclusion

While these mushrooms are among the safest to forage, it is crucial to go mushroom hunting with an experienced forager when starting out or consult reliable resources and local experts. Remember, some edible mushrooms have toxic look-alikes. Always be 100% certain of the mushroom’s identity before consuming it.


Frequently Asked Questions (FAQs)

What should I do if I’m unsure about a mushroom’s identity?

  • If in doubt, throw it out. Only consume mushrooms you are absolutely sure are safe to eat.

How should I prepare wild mushrooms?

  • Always cook wild mushrooms thoroughly; do not eat them raw. Cooking helps break down any potential irritants or mild toxins.
  • Check local laws and regulations, as some areas may require permits or have restrictions on foraging, especially in state and national parks.

How can I verify the freshness of wild mushrooms?

  • Fresh mushrooms should be firm, not slimy or overly soft. Avoid mushrooms with obvious spots or an off-putting smell.

Can mushroom foraging impact local ecosystems?

  • Yes, irresponsible foraging can deplete local populations. Always forage responsibly and follow local guidelines to minimize your impact on the ecosystem.

Are there any tools I should bring while foraging for mushrooms?

  • A good knife, a brush for cleaning dirt, a compass or GPS device for navigation, and a basket or breathable bag for storing mushrooms are essential for any foraging trip.

The Art of Canoe Poling: Mastering Traditional River Navigation

Introduction

Canoe poling is a traditional method of propelling and navigating a canoe using a long pole, often in shallow waters where paddling is less effective. This technique not only offers a unique way to explore river environments but also enhances balance and coordination. This guide will delve into the fundamentals of canoe poling, offering insights and tips to help you master this classic skill.


1. Understanding Canoe Poling

1.1 The Basics

  • Definition: Canoe poling involves standing in a canoe and using a long, sturdy pole to push against the riverbed or riverbanks to move and steer the canoe.
  • Historical Significance: Traditionally used by fur traders and explorers to navigate North American rivers, poling is celebrated for its efficiency in shallow and tricky waters.

1.2 Equipment Needed

  • Canoe Pole: Typically 10 to 12 feet long, made from aluminum, wood, or composite materials.
  • Canoe: A flat-bottom canoe is preferable for stability when standing.

2. Choosing the Right Pole

2.1 Material Considerations

  • Wood: Traditional, offers flexibility and good water resistance.
  • Aluminum and Composite: Lightweight and durable, often preferred for their resistance to warping.

2.2 Length and Weight

  • Custom Fit: The pole’s length should be about double the depth of the shallowest waters you plan to navigate, providing sufficient reach while maintaining maneuverability.

3. Basic Techniques

3.1 The Forward Stroke

  • Procedure: Plant the pole close to the canoe at about a 45-degree angle to the direction of travel. Push off the riverbed firmly and glide forward.
  • Tip: Keep your movements smooth to maintain balance and momentum.

3.2 Steering and Turning

  • Pry Stroke: Insert the pole into the water near the stern and pry outward to turn the canoe.
  • Draw Stroke: Place the pole farther from the canoe and pull inward to make sharper turns.

4. Poling Strategies

4.1 Reading the River

  • Current Analysis: Learn to read the water’s current, depth, and surface conditions. Identify the path of least resistance to conserve energy.

4.2 Positioning and Balance

  • Foot Placement: Stand slightly staggered for stability, keeping your knees slightly bent to absorb movements.
  • Weight Distribution: Shift your weight as needed to adapt to the canoe’s response to river conditions.

5. Safety Considerations

5.1 Personal Safety Gear

  • Life Jacket: Always wear a life jacket while poling.
  • Footwear: Wear sturdy, water-appropriate footwear to protect and provide grip.

5.2 Environmental Awareness

  • Obstacle Navigation: Be aware of underwater obstacles and overhanging branches. Use the pole to navigate safely around them.

6. Advanced Techniques

6.1 Poling Against the Current

  • Challenge: Poling upstream requires greater strength and precision. Use short, quick strokes for better control.

6.2 Using the Environment

  • Bank Pushes: When close to riverbanks, use the pole to push off the bank for a quick change of direction or speed boost.

7. Practice and Training

7.1 Regular Practice

  • Consistency is Key: Like any skill, regular practice is crucial in mastering canoe poling. Start in calm, shallow waters and gradually progress to more challenging conditions.

7.2 Training Drills

  • Skill Building Exercises: Practice different strokes and maneuvers in a controlled environment. Set up courses with markers to navigate around to simulate real-world obstacles and currents.

8. Joining a Community

8.1 Local Canoe Clubs

  • Community Engagement: Joining a canoe club or group can provide opportunities for guided practice, tips from experienced polers, and community events.
  • Group Outings: Participate in group poling outings to learn from more experienced polers and to practice your skills in a supportive environment.

8.2 Workshops and Clinics

  • Professional Instruction: Look for workshops and clinics that focus on traditional canoe skills, including poling. These are great for receiving professional instruction and feedback.

9. Competitions and Events

9.1 Participating in Poling Competitions

  • Skill Showcase: Once you have developed proficiency, consider participating in canoe poling competitions. Competitions are excellent for testing your skills and learning from peers.
  • Event Types: Events can range from races in calm waters to technical courses in challenging river conditions.

9.2 Organizing Events

  • Community Leadership: If no local events exist, consider organizing a canoe poling day or race. This can stimulate interest and growth in the local poling community.

10. Environmental Stewardship

10.1 Responsible Poling

  • Minimizing Impact: Practice Leave No Trace principles while poling. Be mindful of the environment and avoid damaging riverbeds with the pole.
  • Wildlife Protection: Be aware of wildlife and their habitats. Use poling to quietly move through their environment without causing stress or harm.

11. Advancing Your Skills

11.1 Combining Poling with Other Techniques

  • Hybrid Navigation: Combine poling with traditional paddling techniques to navigate diverse waterways effectively.
  • Skill Integration: Use poling in conjunction with map reading and GPS navigation for comprehensive wilderness travel skills.

11.2 Mentorship Opportunities

  • Becoming a Mentor: As you advance, consider mentoring newcomers to share your knowledge and help grow the sport.
  • Skill Transmission: Teach others about the intricacies and joys of canoe poling, enhancing both safety and enjoyment for the next generation of paddlers.

Conclusion

Canoe poling is more than just a method of propulsion; it’s a skill that connects you to the history of river navigation and demands a deep engagement with the environment. By mastering the art of canoe poling, you gain a powerful tool for exploring and interacting with riverine landscapes in a profound and personal way.


Frequently Asked Questions (FAQs)

What are the best conditions for canoe poling?

  • Ideal conditions are shallow waters where the depth is consistent and the bottom is firm enough to support the pole push without sinking too deep.

Can I pole in any type of canoe?

  • While you can pole in most canoes, those designed for flat water and stability, such as those with flatter bottoms, tend to perform better for poling.

Is canoe poling difficult to learn?

  • Canoe poling can be challenging at first, especially maintaining balance. However, with practice, most people can become proficient and enjoy the unique advantages it offers in river navigation.

How do I handle strong river currents while poling?

  • In strong currents, maintain a stable, wide stance and use quick, forceful strokes to keep control. Position your canoe at an angle to the current to reduce resistance and enhance maneuverability.

Are there specific safety concerns while poling in cold water conditions?

  • In cold water, the risk of hypothermia is significant if you fall in. Wear appropriate cold-water gear, always canoe with a buddy, and ensure you have a quick way to warm up if you get wet.

How to Purify Water: Essential Methods for Safe Drinking Water in the Wilderness

Introduction

Access to clean drinking water is crucial for survival, especially in the wilderness where water sources can be contaminated with pathogens, chemicals, or particulates. Understanding how to purify water is a vital skill for any outdoor enthusiast. This guide will cover several effective methods to purify water, ensuring it is safe to drink.


1. Boiling

1.1 Procedure

  • Bring Water to a Boil: Collect water and bring it to a rolling boil in a pot or other metal container. Keep it boiling for at least one minute, or three minutes at higher altitudes where water boils at a lower temperature due to decreased air pressure.

1.2 Benefits

  • Effectiveness: Boiling kills bacteria, viruses, and protozoa, making it one of the most reliable methods for water purification.

1.3 Limitations

  • Resource Intensive: Requires a heat source and fuel, which may not always be available.

2. Chemical Treatment

2.1 Types of Chemicals

  • Chlorine Drops or Tablets: Commonly used for emergency water purification. Follow the instructions on the package for proper dosage.
  • Iodine Solution, Tablets, or Crystals: Another effective option, though it has a distinctive taste and is not suitable for pregnant women or those with thyroid issues.

2.2 Procedure

  • Application: Add the chemical to the water and let it sit for at least 30 minutes. The water should be clear; if it’s cloudy, double the dosage and wait a bit longer.

2.3 Benefits

  • Portable and Lightweight: Easy to carry, making them ideal for emergency kits and backpacking.

2.3 Limitations

  • Taste and Allergies: Can alter the taste of water and may not be suitable for everyone.

3. Filtration

3.1 Types of Filters

  • Straw Filters: Allow you to drink directly from a water source.
  • Pump Filters: Require manual pumping to push water through a filter.
  • Gravity Filters: Use gravity to move water through a filter between two containers.

3.2 Benefits

  • Versatility: Filters can remove bacteria, protozoa, and, depending on the filter, some viruses.

3.3 Limitations

  • Maintenance: Filters can clog and must be cleaned or replaced periodically.

4. UV Light Treatment

4.1 Equipment Needed

  • UV Light Devices: Portable devices that use ultraviolet light to sterilize water.

4.2 Procedure

  • Activation: Stir the water with the UV light device for the time specified by the manufacturer, usually about a minute.

4.3 Benefits

  • Effectiveness: Effective at killing bacteria, viruses, and protozoa.

4.4 Limitations

  • Battery Dependent: Requires batteries, which may not be practical for long-term wilderness scenarios.

5. Solar Disinfection (SODIS)

5.1 Procedure

  • Sun Exposure: Fill clear plastic bottles with water and place them in direct sunlight for at least six hours, or two days if the sky is overcast.

5.2 Benefits

  • Simplicity and Cost: No cost involved and very easy to implement.

5.3 Limitations

  • Climate Dependent: Effectiveness depends on the amount of sunlight available.

6. Homemade Water Filters

6.1 Creating a DIY Filter

  • Materials Needed: A plastic bottle or similar container, clean sand, gravel, activated charcoal, and cloth or coffee filter.
  • Procedure:
    1. Cut the bottom off the bottle and turn it upside down (cap side down).
    2. Layer the cloth or coffee filter inside the cap area to prevent the filtration materials from escaping.
    3. Add a layer of activated charcoal, followed by a layer of sand, and then a layer of gravel.
    4. Pour water through the filter. This setup will help remove particulates and improve taste but is not sufficient to remove all pathogens.

6.2 Benefits

  • Accessible Materials: Utilizes materials that can be easily sourced or carried with you.
  • Initial Purification: Good for preliminary water treatment, especially for removing larger sediments and improving clarity.

6.3 Limitations

  • Pathogen Removal: Does not effectively remove all microorganisms. Water should be boiled or chemically treated after filtration to ensure safety.

7. Distillation

7.1 Distillation Process

  • Setup: Boil water and collect the vapor by condensation, which returns it to a liquid form. This process removes impurities and pathogens as they generally do not vaporize.
  • Equipment Needed: A pot with a lid, a smaller pot or bowl, and a heat source.

7.2 Benefits

  • Purity: Provides very high-quality drinking water.
  • Versatility: Effective against all types of contaminants, including salts and heavy metals.

7.3 Limitations

  • Resource Intensive: Requires a significant heat source and is time-consuming.

8. Combining Methods for Best Results

8.1 Layered Approach

  • Method Combination: For optimal safety, combine methods depending on your situation. For example, first filter water through a DIY filter, then boil it or treat it chemically.
  • Scenario Planning: Assess the environment and available resources to determine the most effective strategies for water purification.

9. Safety and Hygiene

9.1 Clean Containers

  • Importance of Sanitation: Always use clean containers for collecting and storing water. Contaminated containers can nullify your purification efforts.
  • Regular Cleaning: Wash and sanitize water containers regularly to prevent microbial growth.

9.2 Handling and Storage

  • Safe Storage: Store purified water in a cool, shaded place and use it within a reasonable time frame to avoid recontamination.

10. Educating Others

10.1 Sharing Knowledge

  • Training and Workshops: Share water purification techniques through community workshops or outdoor training programs. Education is key to preventing waterborne illnesses.
  • Online Resources: Create or contribute to online tutorials or guides that teach effective water purification methods.

Conclusion

Knowing multiple water purification methods is essential for any outdoor adventure. From boiling to using UV light, each method has its pros and cons depending on the situation. Always be prepared with the necessary tools and knowledge to ensure access to safe drinking water.


Frequently Asked Questions (FAQs)

Can I drink rainwater directly?

  • While rainwater is generally cleaner than water from streams or lakes, it can still be contaminated as it falls through the air or runs off structures. It’s safest to purify rainwater before drinking.

How can I tell if water is safe to drink after treatment?

  • There is no visual way to ensure water is safe. The safest approach is to choose a purification method based on the type of contamination you suspect and to follow recommended guidelines for that method.

How long can I store purified water?

  • Storage Guidelines: Purified water can be stored for up to 6 months in clean, sealed containers away from direct sunlight. Check the water periodically for clarity and cleanliness.

Is it safe to purify any water source?

  • Water Source Safety: While most freshwater sources can be purified with effective techniques, avoid water that may be contaminated with harmful chemicals or heavy metals. Such contaminants are not always removable through simple boiling or filtration.

You can also visit : Primitive Survival Shelters That Could Save Your Life

How to Make a Compass: A Guide to Crafting Your Own Directional Tool

Introduction

Being able to make your own compass is a valuable survival skill, particularly if you find yourself without modern navigational tools. This guide will explain how to create a simple yet effective compass using materials you might find in nature or in common everyday items.


1. Materials Needed

1.1 Essential Items

  • Magnet: Any small magnet will work, but a stronger neodymium magnet is best.
  • Steel Needle or Paperclip: This will serve as the compass needle.
  • Small Piece of Cork or Foam: This will be used to float the needle.
  • Water Container: A small bowl, cup, or puddle of still water will suffice.

1.2 Optional Items

  • Leaf or Small Piece of Paper: Can be used if cork or foam is not available to float the needle.

2. Magnetizing the Needle

2.1 Using the Magnet

  • Method: Stroke the needle or paperclip from one end to the other in one direction only, using the magnet. Repeat this process approximately 30-50 times. This aligns the metal’s domains, effectively magnetizing it.

2.2 Testing Magnetization

  • Verification: You can test if the needle is magnetized by seeing if it attracts other small metal objects.

3. Assembling the Compass

3.1 Preparing the Floater

  • Crafting the Floater: Cut a small piece of cork or foam to fit the length of the needle. Make sure it is small enough to float freely in your water container.

3.2 Attaching the Needle

  • Mounting the Needle: Push the needle horizontally through the cork or foam so that it balances and can spin freely.

4. Setting Up Your Compass

4.1 Preparing the Water Container

  • Container Setup: Fill your container with water. Make sure the water is still and the container is level to ensure accurate readings.

4.2 Placing the Compass

  • Launching the Compass: Gently place the cork or foam with the needle on the water’s surface. Ensure that the needle doesn’t touch the edges of the container.

5. Reading Your Compass

5.1 Determining Directions

  • Finding North: Once the needle stabilizes, it should point towards the magnetic north. The end that was stroked towards with the magnet usually points north.

5.2 Calibrating with Known Directions

  • Accuracy Check: If possible, compare the compass’s accuracy with a known directional reference like the sun’s position in the sky (the sun rises in the east and sets in the west).

6. Enhancing Your Homemade Compass

6.1 Improving Visibility

  • Enhanced Visibility: To make the compass easier to read, you can mark the north-pointing end of the needle with a small piece of colored tape or paint. This visual cue helps in quickly determining direction without confusion.

6.2 Stabilizing the Needle

  • Stability Modifications: If the needle wobbles or tilts too much, consider adjusting how it’s attached to the floater. Ensure it is centered and not too heavy on one side. A well-balanced needle improves accuracy and stability.

7. Troubleshooting Common Problems

7.1 Needle Not Pointing North

  • Re-magnetization: If the needle stops pointing north consistently, it may have become demagnetized. Re-stroke the needle with the magnet, ensuring you’re moving in one direction from end to end.

7.2 Floater Interference

  • Adjusting the Floater: If the floater interferes with the needle’s movement, try using a thinner slice of cork or a more buoyant material. The goal is to minimize contact with the water while maintaining buoyancy.

8. Alternative Natural Methods

8.1 Using Shadow Sticks

  • Shadow Method: In the absence of magnetizing materials, you can find direction using the shadow stick method. Place a stick vertically in the ground and mark the shadow tip every few minutes. The shadow moves from west to east, indicating direction.

8.2 Water and Wire Method

  • Static Electricity: You can sometimes use static electricity to lightly magnetize a needle. Rub the needle with a silk or wool cloth for a long time, then float it on water placed in a leaf or on a small paper boat.

9. Educational Opportunities

9.1 Teaching Navigation Skills

  • Skill Building: Use the creation of a homemade compass as a teaching tool for children or students to explain basic earth science, including magnetism and geographic orientation.

9.2 Incorporating Survival Skills

  • Survival Training: Include compass-making in broader survival skill training sessions. It’s a practical skill that complements lessons on shelter building, fire starting, and water sourcing.

10. Preparing for Emergencies

10.1 Creating an Emergency Kit

  • Kit Essentials: Include a pre-made compass, but also pack materials for a DIY compass in your emergency kit. Knowing how to make do with what you have is essential in unpredictable situations.

10.2 Continuous Learning

  • Skill Improvement: Regularly practice using and making your DIY compass, even when not in a survival situation. Familiarity with the tool increases confidence and proficiency under stress.

Conclusion

Creating a DIY compass is a straightforward process that can be extremely useful in survival situations or to teach basic principles of magnetism and navigation. With practice, you can quickly create a reliable compass with just a few simple materials.


Frequently Asked Questions (FAQs)

What can I do if I don’t have a magnet?

  • You can sometimes use silk or wool to magnetize the needle by rubbing it instead of using a magnet, although this method is less reliable and requires a lot of patience and technique.

How accurate is a homemade compass?

  • While not as accurate as professional compasses, a well-made homemade compass can reliably point you towards magnetic north, which is sufficient for general orientation purposes.

Can this compass be used in any part of the world?

  • This simple compass works best in temperate regions closer to the equator. In polar regions, the inclination of the magnetic field can cause inaccuracies.

How can I ensure my homemade compass is environmentally friendly?

  • Opt for natural and biodegradable materials like cork and leaf when possible. Avoid leaving any non-natural materials behind to maintain environmental integrity.

Are there any apps or tools that can help with compass calibration?

  • Several smartphone apps can assist in calibrating your homemade compass against digital compass readings. Use these tools to refine your compass’s accuracy during your initial trials.
Exit mobile version