The Best String Silencers for Compound Bow: A string silencer is a simple attachable tool that usually eliminates the string sound, especially when the arrow is in transit. It dampens the string’s back and forth sounds and absorbs the vibration when the bow’s force is excessive.
Since most arrows are not perfectly balanced, most archers need a silencer to help conceal them from the game. Again, it allows hunters to make their hunting quieter and better.
Moreover, bowstring silencers usually come in a variety of styles. Some are made of natural fur or hide, while others comprise rubber or plastic. As different bows need unique silencers, each variation has an ideal application. But all the silencers serve the same purpose.


Review of the String Silencers
As we have discussed before, today’s market is full of various types of bowstring silencers. Therefore, to help you out, here we have selected the 10 Best String Silencers for Compound Bow, which are very popular among shooters and hunters.
So, before making any decision regarding the bowstring silencer, let’s look at our in-detail review with specifications.
[su_spacer size=”10″]
Quick Answer – Top 10 Best String Silencers for Compound Bow
1. LimbSaver Super Quad Split Limb Dampener
2. LimbSaver Broadband Dampener
3. Mountain Man Beaver Balls String Silencer
4. I-Sport Otter Dampener Bow String Silencer
5. Bowjax 1036 Ultra Bow Jax II Dampener
7. PRO PACK Camo Whisker Bowstring Silencers
8. Traditional Archery Bowstring Silencers
9. Carbon Express 57509 String Silencer
10. Mathews Solo cam Archery Genuine Monkey Tail Silencer
[su_spacer size=”10″]
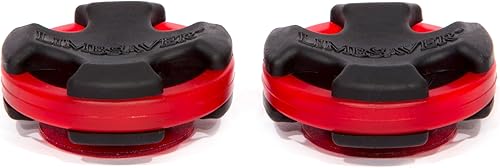
1. LimbSaver Super Quad Split Limb Dampener

This silencer is one of the best alternatives to a fur silencer. It suits best the split limb compound bows and also fits almost 95% of the standard bows.
Therefore, this top-notch camouflage dampener has become an excellent option for compound bow users. Moreover, this LimbSaver string silencer is capable of eliminating 70% vibration and noise.
It is made of NAVCOM material and also comes as a 2-pieces package. Hence, this dampener offers 2-operations options for narrow or wide-spaced limbs.
Key Features
[su_list icon=”icon: check” icon_color=”#45BF55 “]
- NAVCOM material
- Offers 2-operations options
- Eliminates 70% vibration and noises
- Best suited for the youth compound bow users
- Compatible with almost 95% standard bows
[/su_list]
[su_button url=”https://www.amazon.com/dp/B001F0GG1G?tag=shootinggea0f-20&linkCode=osi&th=1&psc=1″ target=”blank” style=”default” background=”#0091cd” size=”8″ center=”yes” radius=”10″ icon=”icon: hand-o-right” rel=”nofollow”]Check Latest Price on Amazon.com![/su_button]
[su_spacer size=”40″]
2. LimbSaver Broadband Dampener

This one is another silencer from LimbSaver that takes place in our 10 best string silencers for compound bow list.
It is a small and easy-to-use bow string dampener that comes in various color variants. Instead of the bowstring, this effective dampener connects the actual limb through an adhesive.
Moreover, this bowstring silencer is very effective in harsh conditions. It can withstand various outdoor conditions such as rain and frozen outdoors. But keep one thing in your mind that, this broadband dampener is only for solid limb compounds rather than split limb bows.
Afterward, like the previous LimbSaver silencer, this silencer is also made of NAVCOM material. Its lightweight design reduces vibration significantly from your limbs. All in all, this one is an excellent string silencer for dampening vibration and silencing bow twang yet.
Key Features
[su_list icon=”icon: check” icon_color=”#45BF55 “]
- Lightweight and small
- Made of NAVCOM material
- Effective for harsh conditions
- Available in various color variants
- Best suited for solid limb compounds
[/su_list]
[su_button url=”https://www.amazon.com/dp/B00AU6C9WQ?tag=shootinggea0f-20&linkCode=osi&th=1&psc=1″ target=”blank” style=”default” background=”#0091cd” size=”8″ center=”yes” radius=”10″ icon=”icon: hand-o-right” rel=”nofollow”]Check Latest Price on Amazon.com![/su_button]
[su_spacer size=”40″]
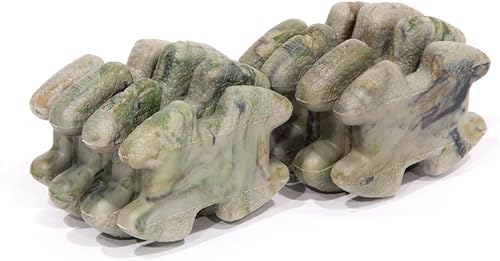
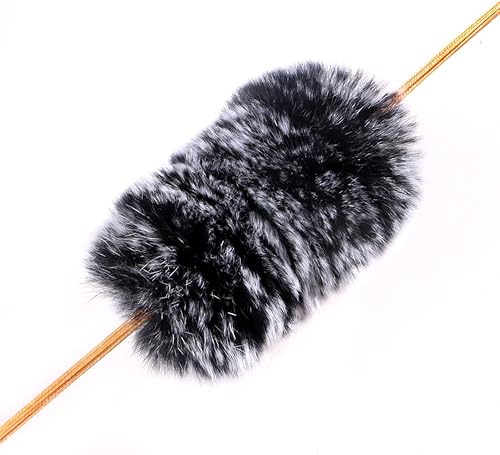
3. Mountain Man Beaver Balls String Silencer

This traditional-looking mountain man beaver balls string silencer is one of the natural bow silencers with a big fan following around the world. It is one such product that combines both efficiency and budget consideration nicely. Thereby, it becomes one the most popular and top-selling bow silencers of the market.
This pleasing aesthetic compound bow silencer with 100 percent beaver leather construction provides an authentic Native American look to the shooters.
It also offers an authentic outdoor look to the game hunters. Its beaver hide is relatively better than other hides, like the otter. Though its synthetics composition makes it a little waterproof, it’s not far better-resisting water and extreme temperatures. Again, it is also suitable for compound bow or recurve bow and longbows.
Moreover, this effective noise reduction bow silencer offers the best fitting without removing the bowstring. Here, its “ball” doesn’t denote the anatomical fact; it speaks of the bow silencer’s shape. Remember, to get a more secure fitting; it is wiser to separate and remove the string twists.
Afterward, this string silencer comes as pair in each pack, and it is pretty heavier than other synthetic string dampeners. But you will love its camo-like look and natural, real beaver fur. Besides, its effects are relatively noticeable in the case of sound reduction yet.
Key Features
[su_list icon=”icon: check” icon_color=”#45BF55 “]
- Budget-friendly
- It comes as pair in each pack
- Effective sound reduction bow silencer
- 100 percent beaver leather construction
- Suitable for compound bow and longbows
[/su_list]
[su_button url=”https://www.amazon.com/dp/B003DQTJMI?tag=shootinggea0f-20&linkCode=osi&th=1&psc=1″ target=”blank” style=”default” background=”#0091cd” size=”8″ center=”yes” radius=”10″ icon=”icon: hand-o-right” rel=”nofollow”]Check Latest Price on Amazon.com![/su_button]
[su_spacer size=”40″]
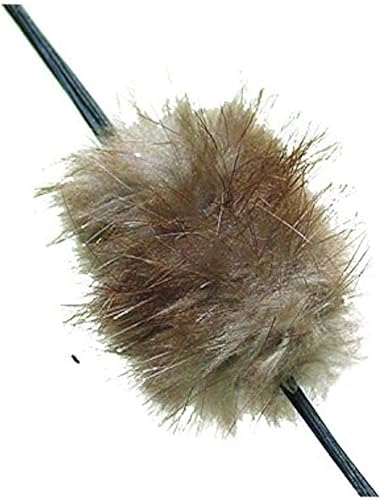
4. I-Sport Otter Dampener Bow String Silencer

This one is another traditional fur silencer that is made of natural otter hide. It is well fitted and one of the most effective sound dampeners available in the market.
Besides, it offers dense texture and a bit of waterproof functionality as well. But its water-repelling capability is not good enough as beaver silencers.
Moreover, this otter silencer can withstand harsh weather conditions, and frequent usage also causes a minimal loss in power. And, this string silencer pack comes in a pair of silencers.
Hence, this one is one of the most well-fitted string silencers for all bows in various weather conditions. It measures only 20 cm in length and weighs only 3g yet. But, you need to remove the bowstring for this silencer installation. It would be best if you separated the strands and tied the silencer in place before restringing.
Key Features
[su_list icon=”icon: check” icon_color=”#45BF55 “]
- It comes in a pair
- 20 cm in length
- It weighs only 3g
- Made of natural otter hide
- You need to remove the bowstring for installation
[/su_list]
[su_button url=”https://www.amazon.com/dp/B016XGLVIY?tag=shootinggea0f-20&linkCode=osi&th=1&psc=1″ target=”blank” style=”default” background=”#0091cd” size=”8″ center=”yes” radius=”10″ icon=”icon: hand-o-right” rel=”nofollow”]Check Latest Price on Amazon.com![/su_button]
[su_spacer size=”40″]
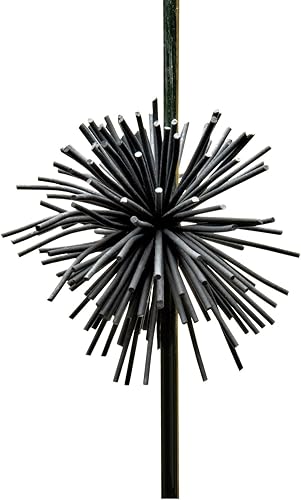
5. Bowjax 1036 Ultra Bow Jax II Dampener

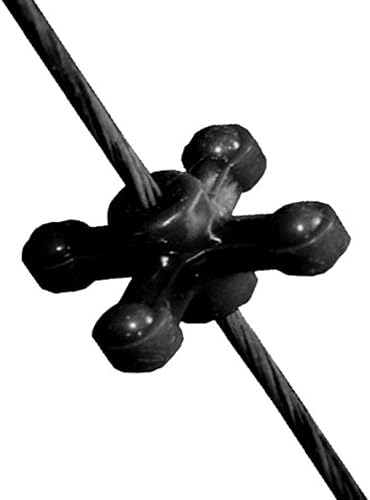
Bowjax Ultrajax II is one of the top-selling dampeners for the last 2- years. Though this string silencer is not looked pretty good as other string silencers, it becomes one of the most popular compound bow silencers among consumers due to its effectiveness.
By attaching this dampener to your cable, you can effectively dampen the oscillation of your compound bow, which usually occurs during taking a shot.
It can flex and absorb vibrations of different frequencies as well. Therefore, people looking for a compound bow dampener with more dampening ability and ease of use can try this bow silencer for sure.
Key Features
[su_list icon=”icon: check” icon_color=”#45BF55 “]
- Black Color
- 4-Piece pack
- More effective
- Noise Silencers
- Vibrations Silencers
[/su_list]
[su_button url=”https://www.amazon.com/dp/B000OBC38M?tag=shootinggea0f-20&linkCode=osi&th=1&psc=1″ target=”blank” style=”default” background=”#0091cd” size=”8″ center=”yes” radius=”10″ icon=”icon: hand-o-right” rel=”nofollow”]Check Latest Price on Amazon.com![/su_button]
[su_spacer size=”40″]
6. Mossy Oak String

This one is a “cat whiskers” style silencer from Mossy Oak. It is a synthetic material made waterproof silencer that works both for compound and recurve bow for beginners. As it doesn’t require separating the string for installation, it is easier to install than a Beaver ball silencer. Besides, its effect on string noise is also noticeable yet.
Moreover, the most appreciating side of this rubber silencer is its waterproof feature. So, you don’t need to worry about the harsh weather condition. Keep in mind, this silencer can be installed on recurve bow, but it is significantly best suited for beginners compound bow users. Hence, this rubber silencer becomes very popular among modern archers.
Key Features
[su_list icon=”icon: check” icon_color=”#45BF55 “]
- Waterproof silencer
- Rubber Construction
- Simpler installation
- Compatible with recurve bow
- Best suited for compound bow
[/su_list]
[su_button url=”https://www.amazon.com/dp/B004VQ62GA?tag=shootinggea0f-20&linkCode=osi&th=1&psc=1″ target=”blank” style=”default” background=”#0091cd” size=”8″ center=”yes” radius=”10″ icon=”icon: hand-o-right” rel=”nofollow”]Check Latest Price on Amazon.com![/su_button]
[su_spacer size=”40″]
7. PRO PACK Camo Whisker Bowstring Silencers

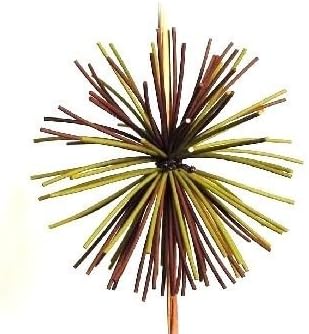
This one from Trad Gear is a 12 pieces rubber silencer’s pro pack. This pro pack provides 2- pairs of rubber silencers of each green, black and brown color. Each of these silencers is lightweight and features a uniquely customized camo pattern of mixed colors.
Due to its super noise dampening capability, this whisker bowstring silencer becomes one of the most popular whisker bowstring dampeners of this time.
Moreover, this silencer is compatible with a compound bow, longbow and recurve bow. Its installation process is relatively easy and simple. It’s a tie-on installation that needs to tie this silencer in an overhand knot and maintain the same distance with the nocking point.
Furthermore, this whisker bowstring silencer is a light, durable and affordable string silencer for hunting usage. It adds an extra layer of stealth to your hunting arsenal.
Again, like fur silencers, this rubber silencer doesn’t get nasty and heavy during rainfall; it performs equally well in all weather conditions. Since this silencer has had a good reputation in the hunting market for several years, its efficiency is proven to all hunters. When using this compound bow silencer, you will feel the difference with your bow.
Key Features
[su_list icon=”icon: check” icon_color=”#45BF55 “]
- Water-resistant
- Tie on installation
- Light and durable
- 12 pieces rubber silencers
- Compatible with compound, long, and recurve bow
[/su_list]
[su_button url=”https://www.amazon.com/dp/B010IC7B3I?tag=shootinggea0f-20&linkCode=osi&th=1&psc=1″ target=”blank” style=”default” background=”#0091cd” size=”8″ center=”yes” radius=”10″ icon=”icon: hand-o-right” rel=”nofollow”]Check Latest Price on Amazon.com![/su_button]
[su_spacer size=”40″]
8. Traditional Archery Bowstring Silencers

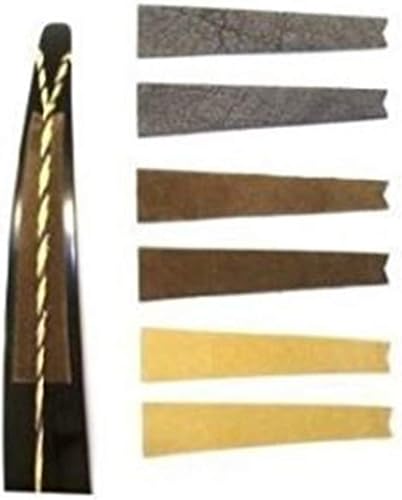
This one is another popular archery compound bow silencer from Trad Gear String Groove Silencers. As the name says, this bowstring silencer is compatible with all the traditional bow setups.
This bowstring groove silencer is specially designed for compound bows. Hence, they are not compatible with the modern crossbow and compound bow.
Moreover, this groove silencer is more than a string silencer. Originally, this groove silencer is a thin leather pad that you can use with string silencers.
Usually, string silencers get attached to the bowstring and dampen the vibration of the bowstring. But this groove silencer usually sticks with the bow and reduces the limb slap against the bow.
This silencer usually sticks with the bow, so the manufacturer offers 3- different color options to match your bow. Besides, this silencer also comes in pairs. However, this silencer is also easy to install. First, remove the bowstring and then stick the silencer with your bow.
Overall, this cushioned adhesive leather silencer is very effective for reducing string slap and dampening spooking noise. Therefore, if you are a traditional bow user, you can try this compound bow silencer for sure.
Key Features
[su_list icon=”icon: check” icon_color=”#45BF55 “]
- Comes in pair
- Easy to install
- Reduces the limb slap
- 3- different color options
- Designed for compound and recurve bow
[/su_list]
[su_button url=”https://www.amazon.com/dp/B007NKFVUY?tag=shootinggea0f-20&linkCode=osi&th=1&psc=1″ target=”blank” style=”default” background=”#0091cd” size=”8″ center=”yes” radius=”10″ icon=”icon: hand-o-right” rel=”nofollow”]Check Latest Price on Amazon.com![/su_button]
[su_spacer size=”40″]
You Should Read: The 10 Best Compound Bow Sights
9. Carbon Express 57509 String Silencer

This one is a rubber-made synthetic string silencer that works like a natural fur silencer. As it comes at an affordable price range, so it is an optimal option to start your hunting journey with this rubber silencer.
Besides, it’s easy to install feature also makes it idle for the archers. There is no need to remove the string for the installation. You need to tie the silencer to the bowstring.
Moreover, this black Carbon express compound bow silencer also comes in pairs. Besides, it is lightweight, waterproof, and capable of reducing noise and vibration up to 40%.
But it does not eliminate power like the fur silencers yet. Therefore, if you want to try an inexpensive silencer, we’d suggest this silencer for sure.
Key Features
[su_list icon=”icon: check” icon_color=”#45BF55 “]
- Easy to install
- Comes in pair
- Inexpensive silencer
- Synthetic string silencer
- Reduce 40% noise and vibration
[/su_list]
[su_button url=”https://www.amazon.com/dp/B003RXU3RW?tag=shootinggea0f-20&linkCode=osi&th=1&psc=1″ target=”blank” style=”default” background=”#0091cd” size=”8″ center=”yes” radius=”10″ icon=”icon: hand-o-right” rel=”nofollow”]Check Latest Price on Amazon.com![/su_button]
[su_spacer size=”40″]
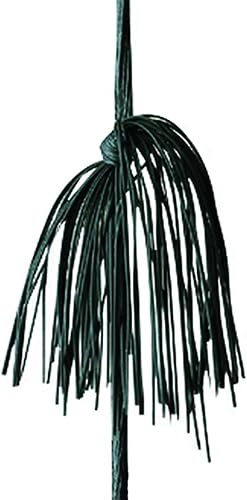
10. Mathews Solo cam Archery Genuine Monkey Tail Silencer


This one is a monkey tail-style silencer from Mathew Solo Cam. It is one of the easy-to-install silencers that you will found ever.
It takes a couple of seconds to slip the tail and set the silencer through the hole. Therefore, this silencer is an ideal choice for newbie hunters, especially those who don’t like to spend more time installing.
Moreover, this good-looking silencer is exceptionally good at reducing noise and vibration. Usually, it is reliable and excellently durable.
Its small solid construction is a little bit heavier than other best string silencers for compound bows. And so, it doesn’t break like a whisker model yet. Besides, it has no issue with any weather conditions as well.
Key Features
Types of String Silencers
The following are the most common silencer types:
Animal Hide
Silencers made of animal hides are a common and safe way to mute bowstrings. it’s usually lightweight and can be segmented for use on a variety of bows.
They are not recommended for use in damp weather but will generally dry after a few rounds. They are easy to clean and have a long lifespan, but they are somewhat bulky. While these versions are somewhat more complicated to mount, they do not require weaving.
Rubber Cat Whisker
This kind of silencer is woven from several long rubber fibers. Their lengths vary, but they can be very compact. Due to the material used, these compound bow silencers are resistant to water and perform well under all weather conditions.
They are, however, vulnerable to breaking apart or disintegrating over time if the material is of poor quality. For new archers, this design does take a significant amount of time and effort to install.
They can be attached to a bowstring through weaving, with which many novice archers struggle but not the experts.
Monkey Tail Silencers
These silencers are made of rubber; they are water-resistant and durable. They are the easiest to mount and are ideal for younger or inexperienced hunters due to their fast setup time.
They are marginally heavier than the other versions but will last longer due to the fiber’s strength. Also, they do not need weaving for installation.
String Silencers for Compound Bow Buying Guide
To get the best string silencers for compound bow, you may need to consider some crucial factors of the string silencers. At this moment, we are now going to discuss some necessary factors of string silencer for your better understanding.
Material
String silencers are made of a variety of materials, which results in varying degrees of durability. Archers should select a silencer material that fits their desired needs and weather conditions.
Again, their effectiveness is very comparable. If you’re interested in the “traditional” look, you might choose natural materials such as furs.
On the other hand, if you’re opposed to animal products, synthetic materials such as rubber or plastic are preferable.
Durability
It makes no difference if you opt for an otter fur silencer or beaver hide or a synthetic silencer. Assure that the materials you use are of the highest quality.
Usually, a hide bowstring silencer is highly durable and will not fall apart as quickly as a rubber model. But it can be challenging to handle in wet conditions.
On the other hand, Rubber silencers are usually safer in the rain, but they are prone to human error and quality problems since they are human-made.
Installation
The design of the silencer affects the effectiveness of the silencer. Some are more complicated than others, involving weaving or twisting for installation. In contrast, many of the newer rubber versions have a hook-like appearance.
Again, some best string silencers for compound bows need the bowstring to be removed before installation.
The choice of silencer design mostly depends on your personal preferences. If you wish to mount the bow silencer yourself but are uneasy about cutting the string, select one that can be installed while the bowstring remains attached.
If you’re not comfortable doing so, take your bow to a specialist. Usually, a professional archer doesn’t feel any difficulty installing silencers even if the silencer is more complex, whereas novice hunters may face difficulty to an extent.
Waterproof
A waterproof silencer would be of no interest to fair-weather shooters or indoor archers. However, if you’re going to be in the great outdoors for an extended time, investing in a waterproof silencer can be highly beneficial. Thus, bowhunters should consider the waterproof feature.
Noise
If you’re a hunter of games, noise reduction should be at the top of your list, not the other way around. It is especially true for hunters if they do not want to give away the game.
In this case, vibration reduction is just a minor factor. That is likely something you should consider as a target archer.
Frequently asked questions
Q: What is a string silencer for a compound bow?
A: A string silencer is a device that is attached to the string of a compound bow to reduce the noise and vibration produced when the bow is fired.
Q: Why do I need a string silencer for my compound bow?
A: A string silencer can help to reduce the noise and vibration produced when the bow is fired, which can be beneficial for hunting and target shooting.
Q: What are the different types of string silencers for a compound bow?
A: The most common types of string silencers are rubber-based silencers, wool-based silencers, and bowstring dampeners.
Q: What should I look for in a string silencer for my compound bow?
A: Look for features like durability, ease of installation, and effectiveness at reducing noise and vibration.
Q: Can a string silencer affect the accuracy of my compound bow?
A: A string silencer can affect the accuracy of your compound bow if it is not properly installed or if it is of low quality. However, most high-quality string silencers do not affect accuracy.
Q: How many string silencers do I need for my compound bow?
A: The number of string silencers needed for a compound bow depends on the type and length of the bowstring. In general, most compound bows require between 2 and 4 string silencers.
Q: How often should I replace my string silencers?
A: String silencers should be replaced when they show signs of wear and tear or when they are no longer effective at reducing noise and vibration.
Q: Can I install string silencers on my compound bow myself?
A: Yes, most string silencers can be installed on a compound bow with basic tools and some knowledge of the bow’s components.
Q: Are string silencers legal for hunting?
A: Yes, string silencers are legal for hunting in most states, but it’s important to check local hunting regulations before using them.
Final Verdict
Bowstring silencer is one of the necessary equipment that enhances the possibility of getting success in hunting and archer gaming.
Thereby, whether you are an expert archer or newbie hunter, you must be required bowstring silencer to enhance your performance.
In this article, we have reviewed the 10 best string silencers for compound bows of various types and brands. All of these silencers are good in quality and also reasonable in price.
So, if you need a bowstring silencer for your bowstring, you can give it a try to any of our selected string silencers for sure.